Streamline Testing with CircleCI Pipeline and Selenium Grid
Praveen Mishra
Posted On: July 2, 2021
![]() 570921 Views
570921 Views
![]() 16 Min Read
16 Min Read
In this digital era, Continuous Integration and Continuous Deployment is closely aligned with software development and agile methodologies. Organizations deploy latest versions of software products every minute to ensure maximum competitive edge.
You would agree that faster the products are out for the end users, the greater the competitive advantage! However, complexity comes in when the product delivery has to be done bug-free so that user experience is not dwindled. This is where Automation Testing plays a major role and when it is combined with deployment pipelines, the whole quality assurance process becomes fool-proof and seamless.
There are various tools like Jenkins, Travis CI, TeamCity, etc. used to contribute towards these CI/CD processes. However, CircleCI integrates well with popular version control systems like Github, Gitlab, etc. It also provides an easy-to-use interface and supports multiple libraries, thereby making it easier to adopt. You can also read our detailed comparison of CircleCI with other prominent CI/CD tools on Top CI/CD Tools Comparison.
I finally had some time today to dive deep into wiring up AWS ECR, ECS and Lambda with CI/CD through @CircleCI. I have to say that they have done a really good job of making it super simple, flexible and intuitive through their "Orb" modules.
Highly recommend CircleCI 👍
— Jeff Whelpley (@jeffwhelpley) December 23, 2020
CircleCI automates the build, tests, and deployment of applications thus making the process faster and enabling frictionless collaboration between teams. This lets the developers rapidly release the source code with confidence for the automation of the whole CI/CD process. CircleCI is a modern CI cloud server that is best-suited for agile development environments. This also is making us aware of making strategic choices, staying responsive, and coming up with sustainable decisions that help developers and engineers work smarter.
In this article, you will learn more about CircleCI, how to build a CircleCI pipeline, and how to perform automated testing with CI/CD pipeline on Cloud Selenium Grid.
TABLE OF CONTENT
Basic Features of CircleCI
CircleCI can connect to Github or Bitbucket and then you can automate the whole CI/CD process from there, right from builds to deployments including the tests. Here are the major features of CircleCI:
- You can Sign Up on the CircleCI portal, via Github or Bitbucket. This automatically integrates with your Github/Bitbucket Account and let’s you choose one of the repositories to set up a CircleCI pipeline project. No unnecessary imports are required.
- After the Repository is added as a project to the CircleCI Enterprise, every new code added or a new commit triggers a new build.
- On every new build, a notification about the success (or failure) of the build is sent. This is done through webhooks with integrations for Slack and IRC notifications.
- You can also use CircleCI to deploy code in various environments like AWS S3, AWS EC2 Container Service (ECS), Heroku, Microsoft Azure, etc.
- CircleCI also provides code coverage results, which are easily available on the details page for any project for which a reporting library is added.
- Cloud service deployments can be attempted by connecting through an SSH connection with CircleCI.
- CircleCI also provides you with an API service to integrate with different job configurations.
- You can also seamlessly migrate from Jenkins, AWS, Microsoft Azure etc. to CircleCI.
Read – CircleCI vs Jenkins: Choosing The Right CI CD Tool
Advantages of CircleCI over other CI/CD tools
Shortlisting the best CI/CD tool is always a quest for developers,engineers, testers, and QA experts. CircleCI crosses this quest and provides you with faster performance and optimized builds. It makes the engineering teams more productive and time-efficient through intelligent automation. Here are the major advantages of CircleCI over other popular CI/CD tools:
- CircleCI manages about one million tasks for 30,000 organizations in a day. Therefore, CircleCI is used as the go-to CI/CD tool by a number of SMEs and enterprises.
- CircleCI can be used to operate very complicated pipelines effectively with docker layer caching, advanced caching etc. It has a resource class to operate on faster computers.
- CircleCI supports a performance-based pricing option which is more convenient for a lot of organizations.
- CircleCI provides faster performance and developers can cherish this performance by using SSH in order to debug any issue in the build.
- Parallel builds and different environment customizations are also provided for faster execution of multiple processes through CircleCI.
- After the application repository is approved and submitted on CircleCI as a project, any new code update or commit executes automatic checks in the new VM or container. This is not provided by most of the CI/CD tools available in the market.
- CircleCI is light-weight, making it ideal for faster deployment jobs on scalable and robust cloud servers.
Read – Top CI/CD Tools Comparisons
How to setup a CircleCI Account
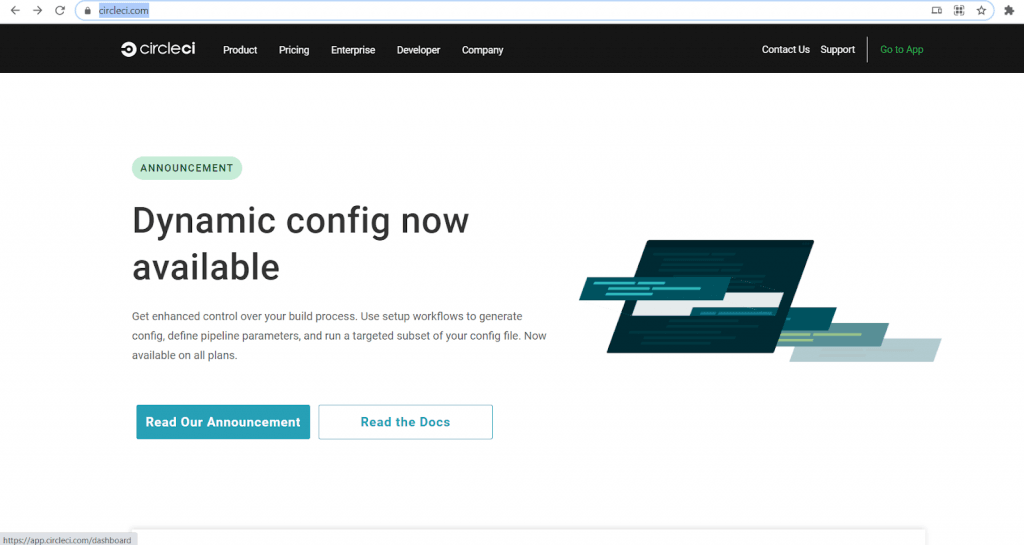
To get started with CircleCI, all you need is a CircleCI account. You can easily sign up through the official CircleCI website.
- This is the CircleCI homepage
- Click on ‘Go to App’ located on the upper rightmost side of the page. You will be redirected to a new Sign Up page.
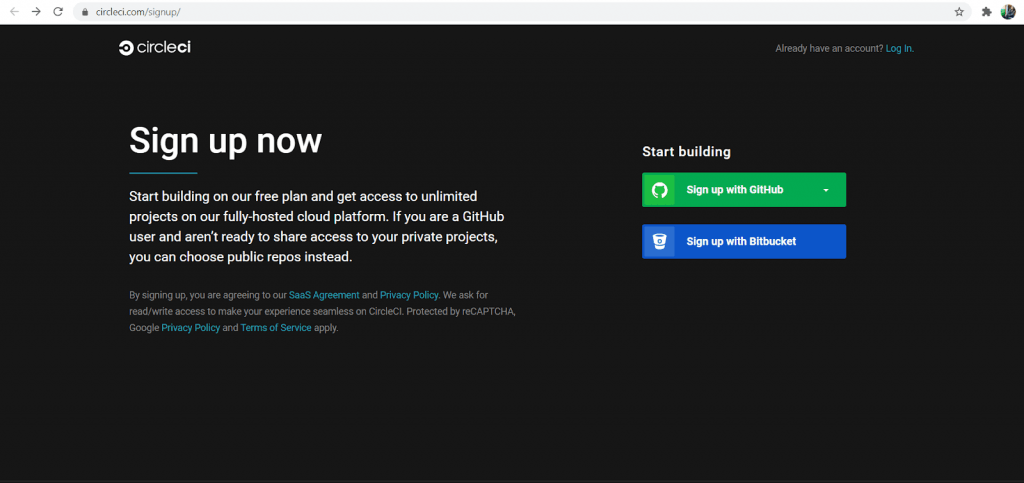
- Github is the most widely used version control system. Hence, I am selecting the ‘Sign Up with Github’ option.
- After selecting the ‘Sign Up with Github’ option, a new page appears asking for authorization via Username and Password. Click on the Sign In button after entering your credentials
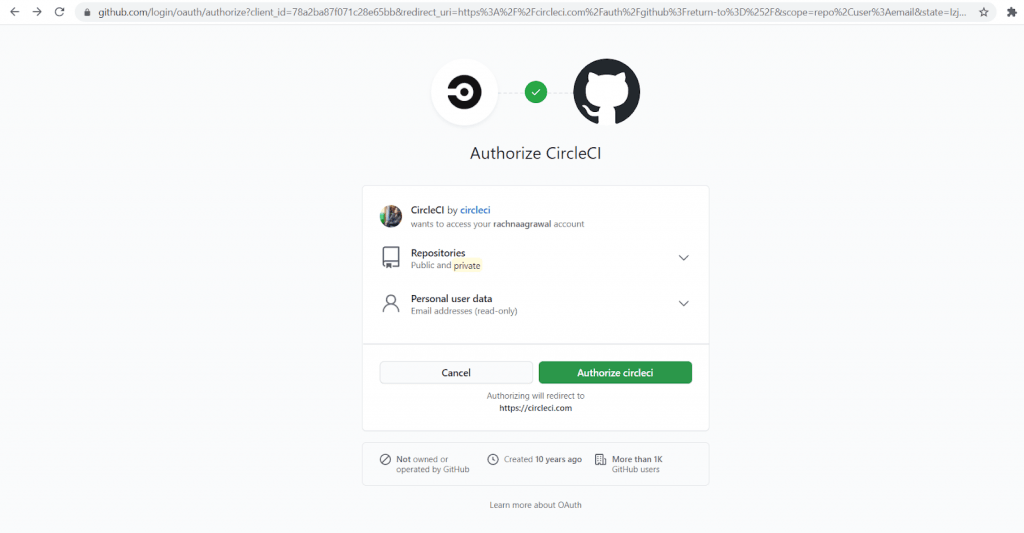
- After the Sign In process, CircleCI will ask for authorization and permissions like viewing repositories, etc. Go ahead, click on the green button and authorize CircleCI.
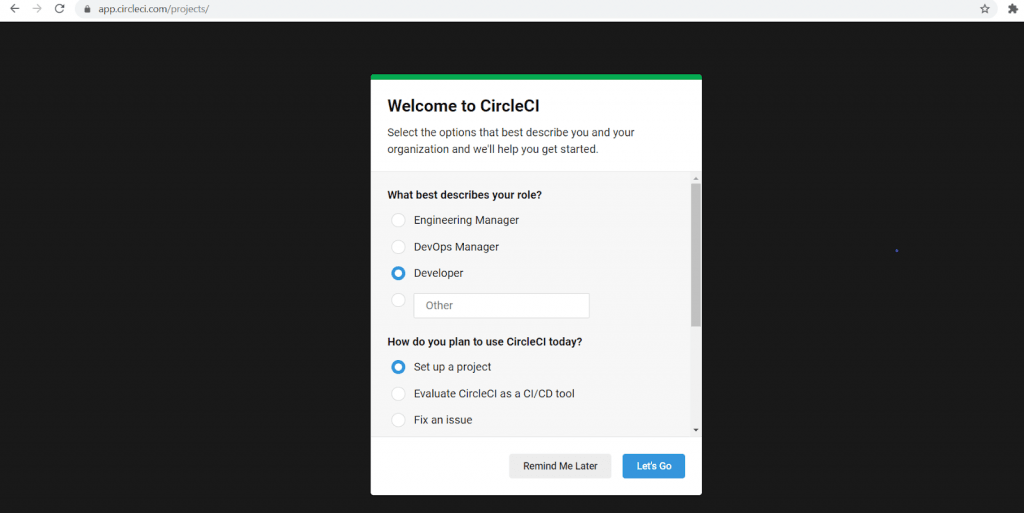
- After authentication and authorization, we will get to the welcome screen of CircleCI. Just select the answers to the questions asked on the page and click on Let’s Go.
- The next selection is of your organization. If there is more than one account associated with your organization, then all the accounts will be listed here. Select the ones you want to use as your official account.
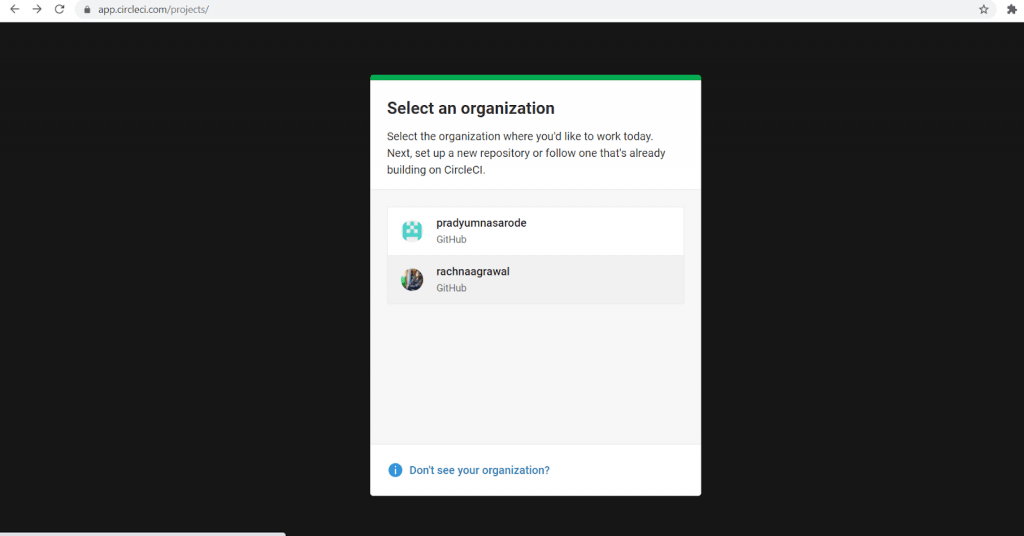
- You can change the organization, whenever needed, from the Settings of your account. After selecting the organization, you will have access to the CircleCI Dashboard.
- With this, you have created your CircleCI Account successfully.

This CircleCI Tutorial for beginners and professionals will help you learn how to use CircleCI, one of the most popular CI/CD tools used in DevOps.
Orbs & Integrations in CircleCI
In spite of easy Account creation methodology, CircleCI offers more convenient ways to integrate with other technologies. CI/CD is also made easy by CircleCI through Orbs. Let us dive deep into what are the CircleCI orbs and Integrations.
Orbs in CircleCI
CircleCI orb is a reusable package in the YAML format that condenses repeated pieces of config into a single package.. Orbs are open-source, shareable packages of parameterizable configuration elements, including jobs, commands and executors. Apart from automation of repetitive processes, here are some of the major advantages of CircleCI Orbs:
- Seamless integration with third-party tools.
- Time savings in project configurations
- Reduction in configuration complexity
- Increase in organizational efficiency at developer and the enterprise levels
There are pre-built apps available in the registry of CircleCI but new orbs can be created according to your requirements. It also provides an orb development kit that aids in creating new orbs with ease.
Popular Orbs are : Slack, AWS(Amazon Web Services), Microsoft etc.

To ease the project configuration, you can also use the Orb Use Cases. These help in easy project configuration and setting up third-party integrations in a smooth manner.
Benefits of using CircleCI Orbs
CircleCI Orbs can greatly simplify the configuration. These Orbs cut down the number of lines of code to a high extent. To illustrate this let’s take an example:
Typical Example Configuration: Here, we are defining a testing configuration of a Node.js application. Defining the job with the required steps for testing the application v/s using the test job provided by the circleci/node orb. With orbs, you can write a parameterized configuration for once and deploy it across multiple projects.
Code with CircleCI Orb
|
1 2 3 4 5 6 7 8 9 10 |
version: 2.1 orbs: node: circleci/node@x.y #orb version workflows: test_my_app: jobs: - node/test: version: <node-version> |
Code without CircleCI Orb
|
1 2 3 4 5 6 7 8 9 10 11 12 13 14 15 16 17 18 19 20 21 22 23 24 25 26 27 28 29 |
version: 2.1 jobs: test: docker: - image: cimg/node:<node-version> auth: username: mydockerhub-user password: $DOCKERHUB_PASSWORD # context / project UI env-var reference steps: - checkout - restore_cache: keys: - node-deps-v1-{{ .Branch }}-{{checksum "package-lock.json"}} - run: name: install packages command: npm ci - save_cache: key: node-deps-v1-{{ .Branch }}-{{checksum "package-lock.json"}} paths: - ~/.npm - run: name: Run Tests command: npm run test workflows: test_my_app: jobs: - test |
So, you can see the difference between lines of code! You can find more CircleCI Orbs in the Orb Registry.
Got 8 Mins? Watch our video on how to get started with CircleCI
Creating CI/CD pipeline with CircleCI
Pre-requisites:
Admin-level access and valid credentials for GitHub and CircleCI accounts.
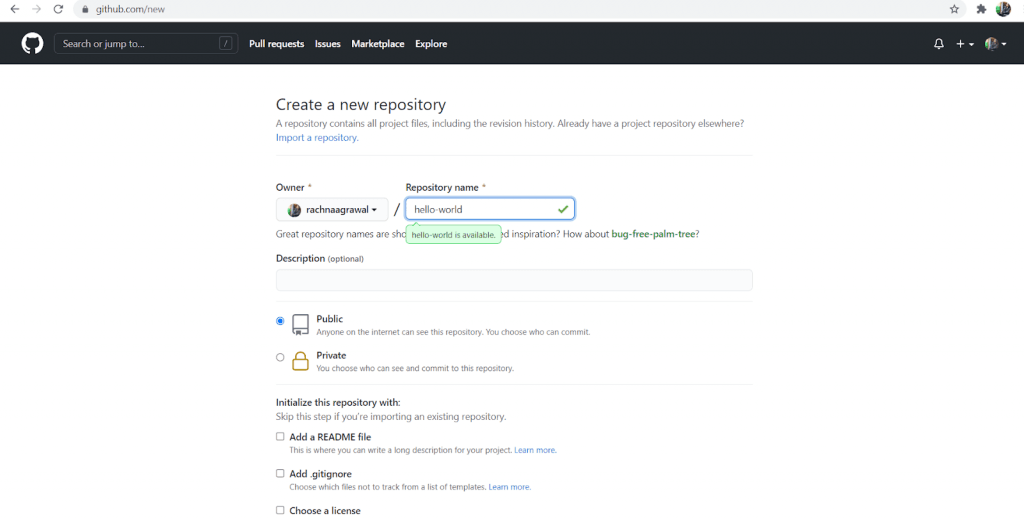
Creating a new Repository
- Navigate to Github and login to your Github account.
- Create a new repository, by giving the name of your repository as hello-world. Click on Initialize this repository with a README. Finally, click on the create repository.
Setting up CircleCI
- Login to your CircleCI Account and navigate to the Project page.
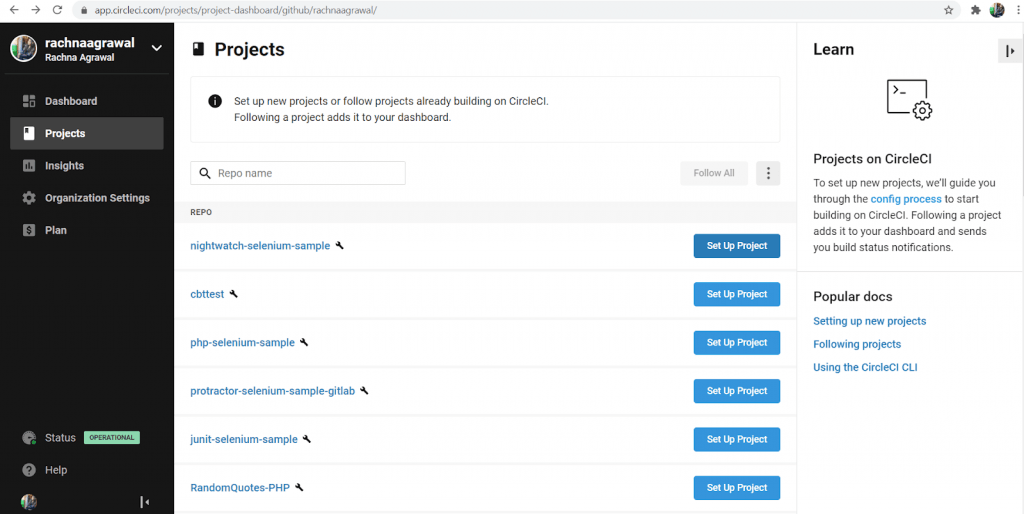
- As you login to your CircleCI account, select the organization in which you have created a new repository, named hello-world.
- Find the project you plan to use and click on the right of it on Set Up Project.
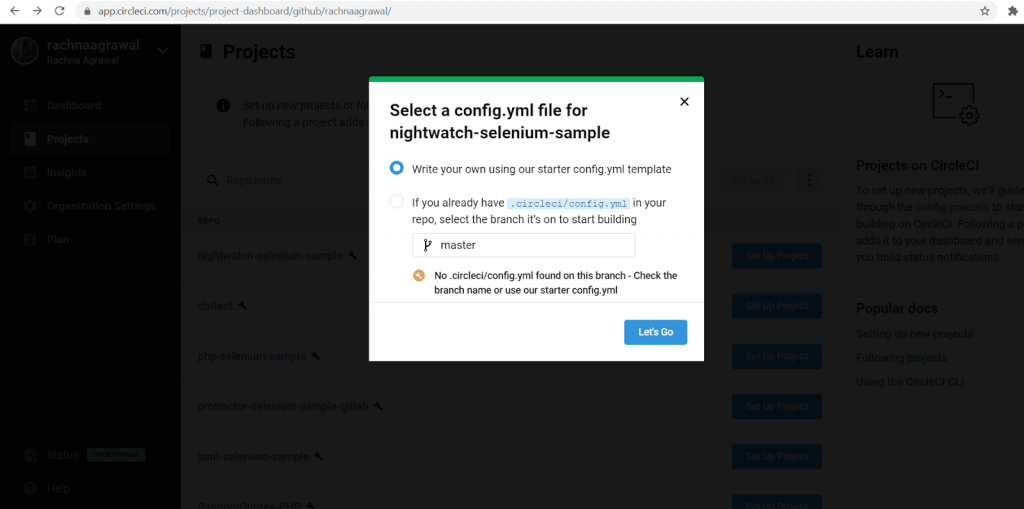
- After selecting Set Up Project, a new dialog box appears, choose Write your own using our starter config.yml template and click on Let’s Go.
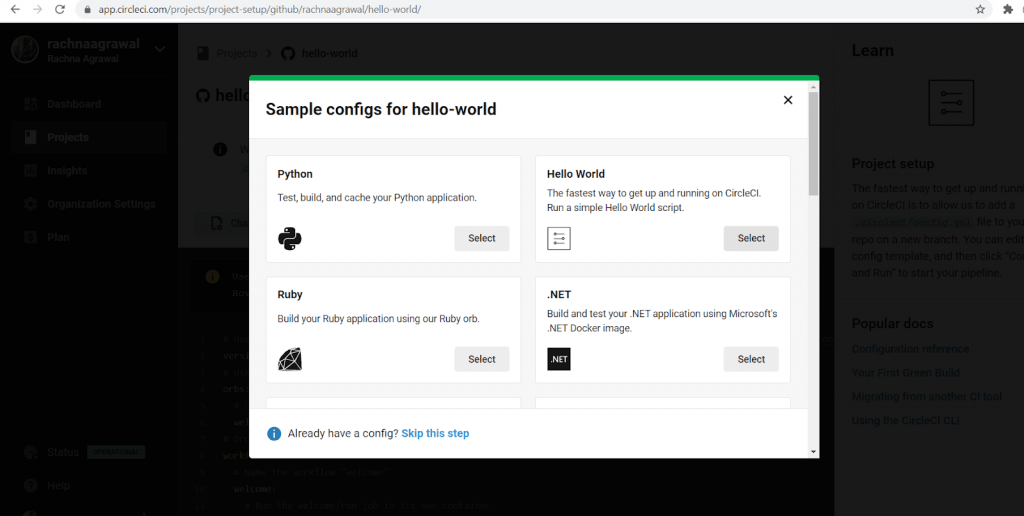
- The dialog box contains sample configs for the project. As our project is an empty repository, choose Hello World config from the dialog box.
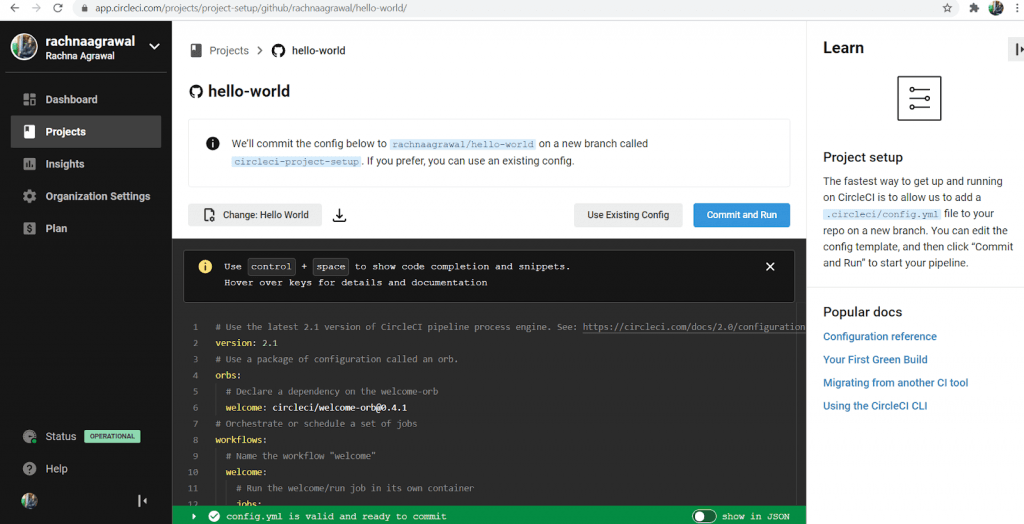
- Based on the chosen language and framework, we can view the config.yml template in the editor. It’s documentation can be viewed in the right side of the editor.
- Now to create your first CircleCI pipeline, click on Commit and Run. This will create .circleci/config.yml in the root directory/repository with a new branch named circle-ci-setup. You can merge this branch with the master branch.
- You would see your hello-world pipeline running automatically.
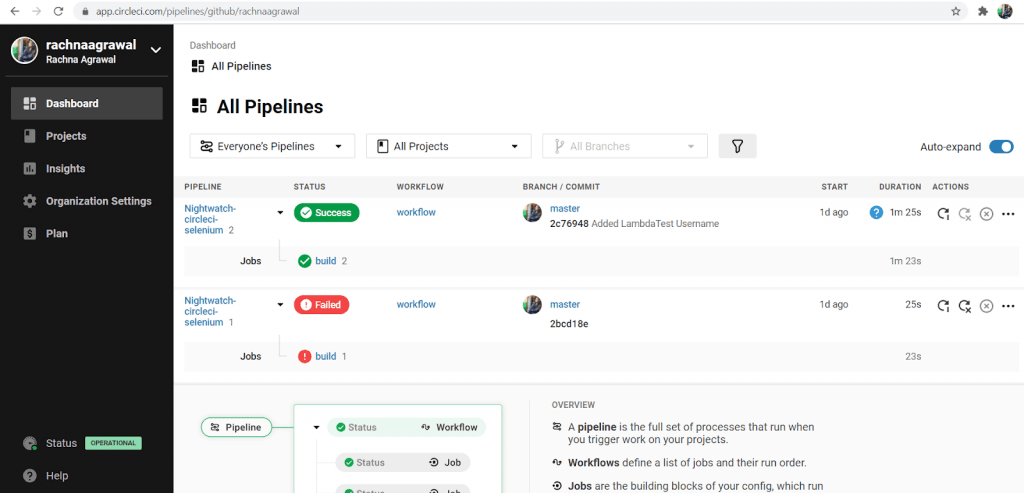
Inspecting the first CircleCI Pipeline
- You would view a new screen appearing with the new pipeline in the “running” stage.
- Next, this running stage will turn into the “success” stage in case of successful execution.
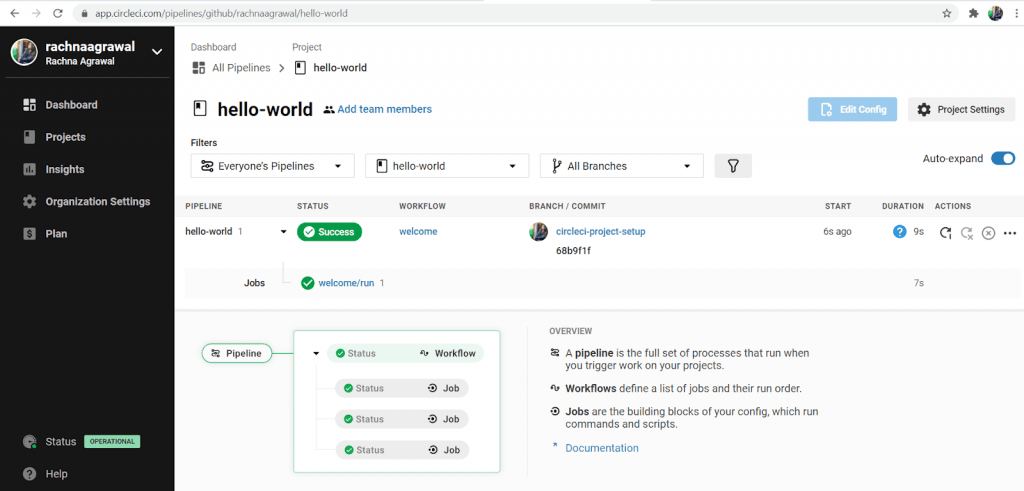
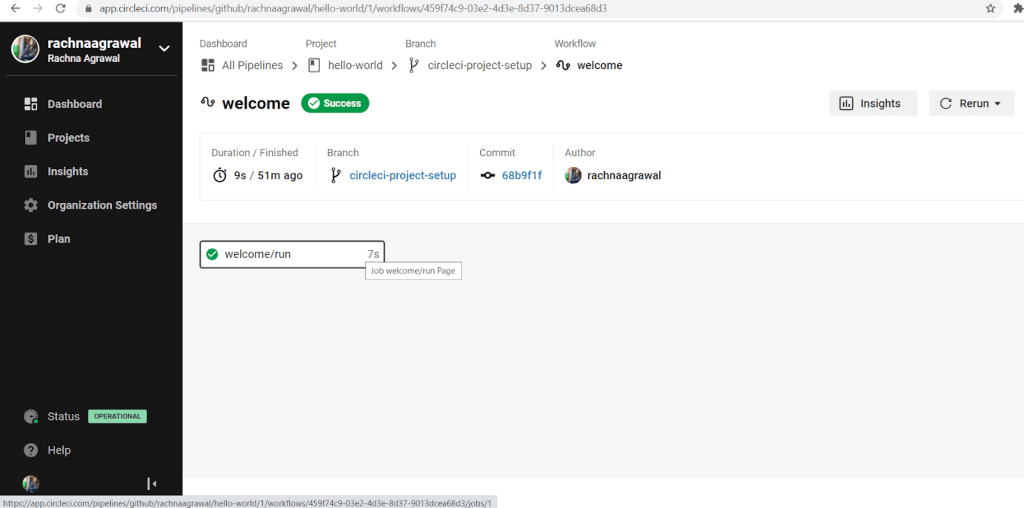
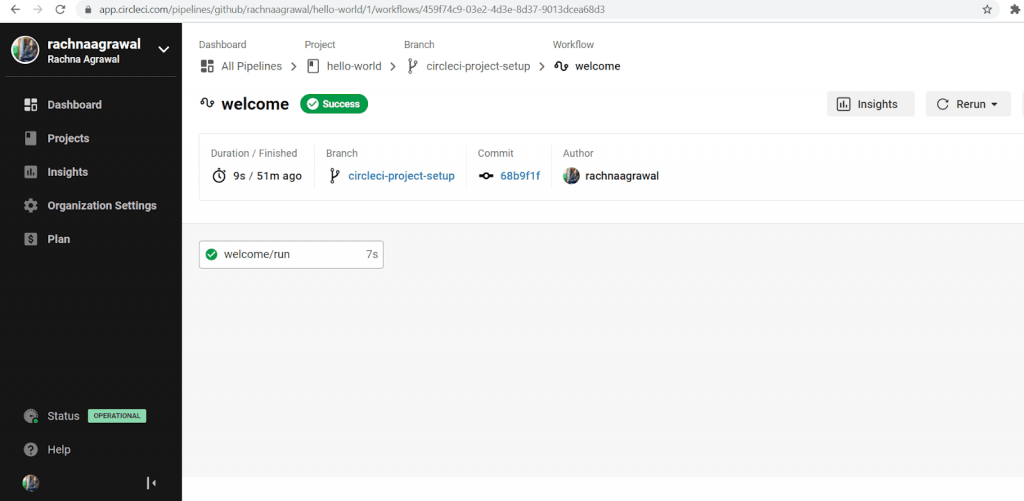
- Click on Success, you will be taken to a new screen where workflows and jobs would be reflected. Here, we have run a single job (i.e.a single workflow) named welcome/run. Click on welcome/run and investigate the steps of the job.
- Here, an orb is used to provide defaults for the project. By using the orb, we have quick access to common configuration. The orb is circleci/welcome-orb@0.4.1. This provides a pre-built workflow that simply greets the user.
- Every CircleCI pipeline is configured with a number of steps. As the circleci/welcome-orb@0.4.1 orb is used, we don’t see the custom steps as they are configured in the orb itself. The steps may be checkout, etc. These are reserved or special commands in CircleCI. The build was successful as the orb executed successfully with exit code 0. At times , there are multiple steps with multiple Docker images and a number of tests. Let’s make a demo of it next.

Read – How To Run Selenium Tests In Docker
Adding more complexity to the Build
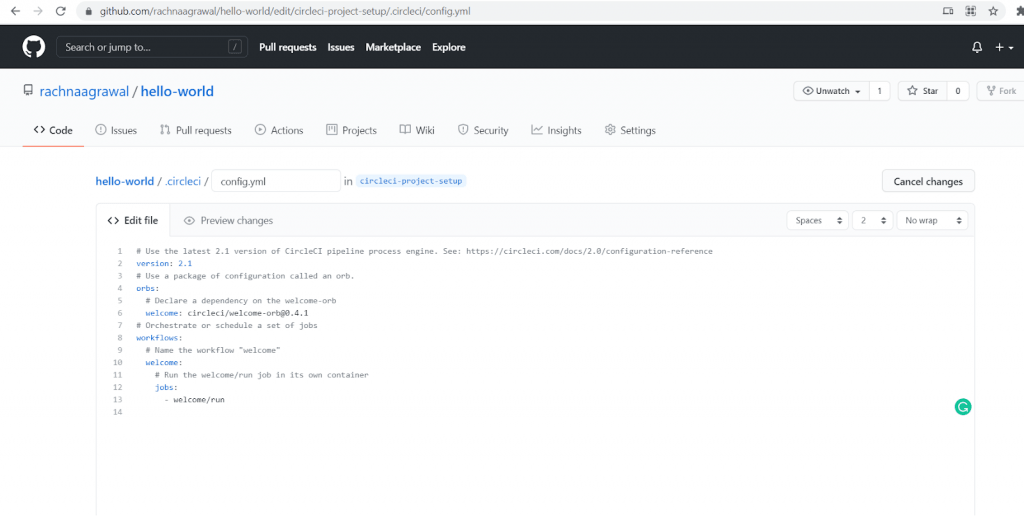
- We will now edit our config.yml on Github.The address to which the config.yml should be saved is https://github.com/{username}/{repo}/edit/circleci-project-setup/.circleci/config.yml.
Substitute the name of the repository and the Username and paste it to the browser. Our URL is here.
- We will be adding new functionalities in the code. Copy and paste the following code into your config.yml through Github and run the pipeline.
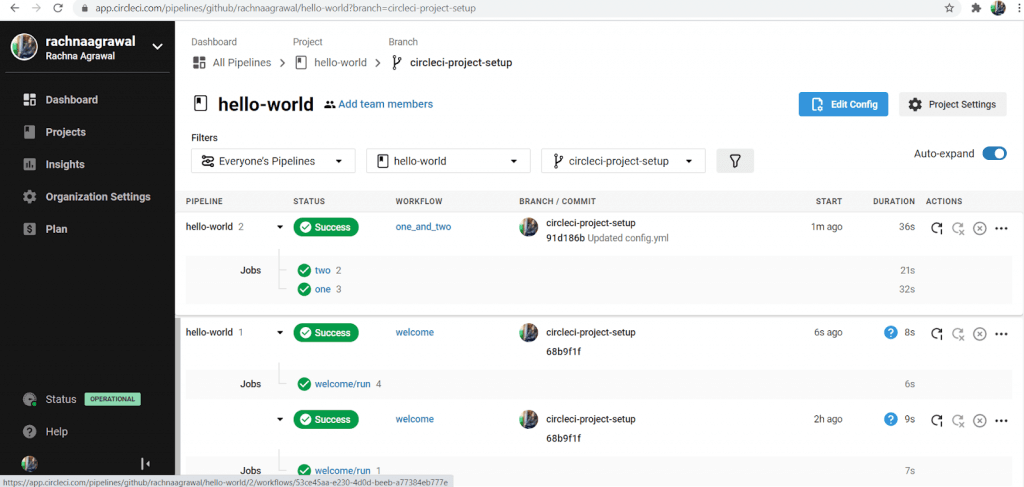
- Commit these changes and traverse back to the CircleCI pipeline page, you will see the new pipeline running.
- Click on the new pipeline’s Success button, you will find two workflows, these jobs; One and two will be running concurrently and successfully.
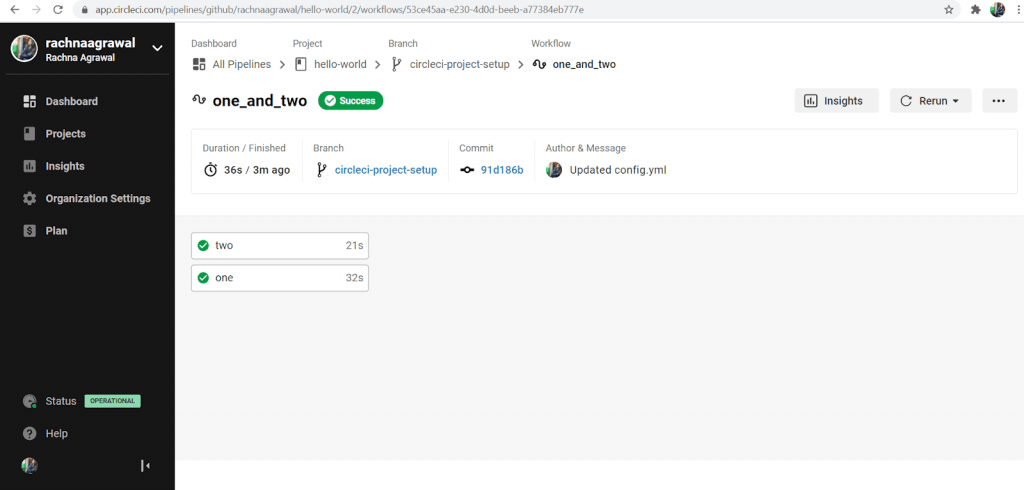
We have run a simple pipeline with two concurrent jobs, you can extend the functionalities of pipelines by adding different orbs and different workflows.
|
1 2 3 4 5 6 7 8 9 10 11 12 13 14 15 16 17 18 19 20 21 22 23 24 25 26 27 28 29 30 |
version: 2 jobs: # we now have TWO jobs, so that a workflow can coordinate them! one: # This is our first job. docker: # it uses the docker executor - image: circleci/ruby:2.4.1 # specifically, a docker image with ruby 2.4.1 auth: username: mydockerhub-user password: $DOCKERHUB_PASSWORD # context / project UI env-var reference # Steps are a list of commands to run inside the docker container above. steps: - checkout # this pulls code down from GitHub - run: echo "A first hello" # This prints "A first hello" to stdout. - run: sleep 25 # a command telling the job to "sleep" for 25 seconds. two: # This is our second job. docker: # it runs inside a docker image, the same as above. - image: circleci/ruby:2.4.1 auth: username: mydockerhub-user password: $DOCKERHUB_PASSWORD # context / project UI env-var reference steps: - checkout - run: echo "A more familiar hi" # We run a similar echo command to above. - run: sleep 15 # and then sleep for 15 seconds. # Under the workflows: map, we can coordinate our two jobs, defined above. workflows: version: 2 one_and_two: # this is the name of our workflow jobs: # and here we list the jobs we are going to run. - one - two |
How To Integrate CircleCI pipeline with Online Selenium Grid
Till now you learnt about setting up the complete CircleCI pipeline but what’s the actual purpose of this setup? Well its for teams to enable automation tests at scale. CI/CD tools enable teams for faster and more efficient feedback loops. Running automated tests with a CI/CD pipeline helps in faster delivery time and teams can fix the bugs faster. As we completed the installation and created the CircleCI pipeline, we can go on to the next step of performing Selenium test automation.
Performing browser automation tests on local infrastructure is not a cost effective and scalable solution. You cannot achieve the optimum level of test coverage, performance and the ability to run rests in parallel by maintaining the local testing infrastructure. These features are much more economical and scalable on cloud based Selenium Grid.
A Cloud-based Selenium Grid allows you to run serial (and parallel) tests across multiple browsers, operating systems, and devices. LambdaTest helps in scaling your cross browser testing efforts by providing a cloud testing infrastructure to run Selenium tests on 3000+ real browsers and browser versions.
Read – What is Parallel Testing and why is it important?
If integrated with the CircleCI pipeline, you can gain a competitive edge by quicker turnaround times and accelerated product delivery. Let’s deep dive on the major steps to perform automated testing with CI/CD pipeline.
Requirements:
- A Git or Github Repository: Here, we are providing you with the repository consisting of some nightwatch tests. The URL of the repository is https://github.com/rachnaagrawal/Nightwatch-circleci-selenium.git.
- Node.js Installation: Download and install node.js and node package manager npm. The command used to install node.js in windows 10 is npm install. If already installed, update it to the latest version.
- LambdaTest Authentication Credentials: You can retrieve your authentication credentials from the LambdaTest Automation Dashboard, In the profile section of your account. Set them up as the environment variables, through the following command:
|
1 2 |
$ export LT_USERNAME=<your lambdatest username> $ export LT_ACCESS_KEY=<your lambdatest access_key> |
Creating the config.yml on Github:
- In order to integrate LambdaTest and CircleCI, you need to make slight changes in .circleci/config.yml – configuration file for your CircleCI Pipeline instance.
- The changes mainly involve adding LambdaTest Username and Access Key to connect the CircleCI pipeline to your LambdaTest Automation Dashboard.
- The Username and the Access key are set as the environment variables that are required to connect LambdaTest Selenium Grid to the CircleCI Pipeline for running the tests.
- The code for config.yml should be as the code given below:
- The above pipeline configuration will use the image of the node. It will create an environment for LambdaTest using the Username and Access Key in the specified directory.. It will then download and unzip the binary tunnel and then run Nightwatch tests on the Online Selenium Grid.
- Integrate CircleCI Pipeline with LambdaTest to do real-time testing and automation testing.
|
1 2 3 4 5 6 7 8 9 10 11 12 13 14 15 16 17 18 19 20 21 22 23 24 25 26 27 28 29 30 31 32 33 34 35 36 37 38 39 40 41 42 43 44 45 46 47 48 49 50 51 52 53 54 55 56 57 58 59 60 61 62 63 64 65 |
# Javascript Node CircleCI 2.0 configuration file # # Check https://circleci.com/docs/2.0/language-javascript/ for more details # version: 2 jobs: build: docker: # specify the version you desire here - image: circleci/node:8.0 # Specify service dependencies here if necessary working_directory: ~/Nightwatch-circleci-selenium steps: - checkout - run: name: "Downloading tunnel binary" command: | wget http://downloads.lambdatest.com/tunnel/linux/64bit/LT_Linux.zip - run: name: "Extracting tunnel binary" command: | sudo apt-get install unzip unzip LT_Linux.zip - run: name: "Executing tunnel binary" background: true command: | ./LT -user <your_lambdatest_username> -key <your_lambdatest_accesskey> sleep 40 - run: name: "Setup custom environment variables" command: | echo 'export LT_USERNAME=<your_lambdatest_username> >> $BASH_ENV - run: name: "Setup custom environment variables" command: | echo 'export LT_ACCESS_KEY=<your_lambdatest_accesskey> >> $BASH_ENV - run: # test what branch we're on. name: "Here is the LT_Username : " command: echo ${LT_USERNAME} # Download and cache dependencies # - restore_cache: # keys: # - v1-dependencies-{{ checksum "package.json" }} # fallback to using the latest cache if no exact match is found - run: npm install # - save_cache: # paths: # - node_modules # key: v1-dependencies-{{ checksum "package.json" }} # run tests! - run: node_modules/.bin/nightwatch -e chrome //executing tests in Bash |
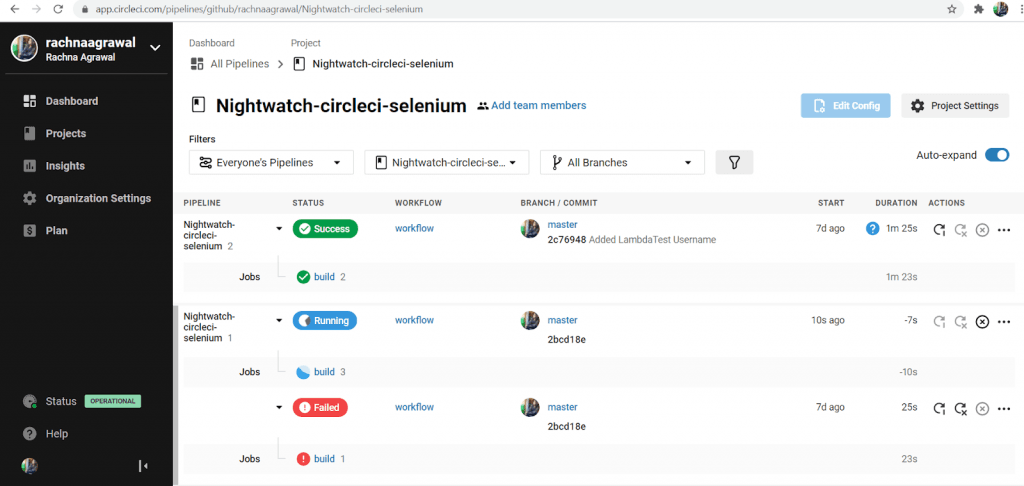
Running the CircleCI and LambdaTest Integration Pipeline
- Login to your CircleCI Account and go to the Projects Page
- On the Projects Page, search for the required github repository. Now, click on the Set Up Project button beside your searched repository
- As you click on the Set Up Project button, A new dialog box will appear.
- Select the option “If you already have .circleci/config.yml in your repo …”. Below this option you will find CircleCI automatically has searched for the config file in your repository. Post this, click on Let’s Go.
- You can see the CircleCI pipeline running in the next window. After a few seconds, you would see the output on the window.

Viewing Tests on LambdaTest Dashboard
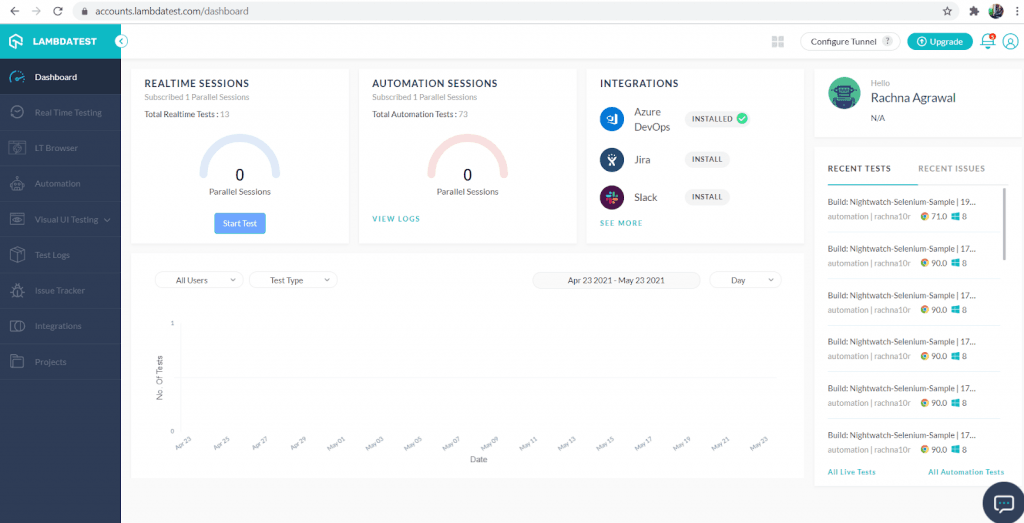
- Login to your LambdaTest Account.
- In the rightmost side you can see Recent Tests, you can definitely find your tests run through the circleCI pipeline in the chrome environment there.
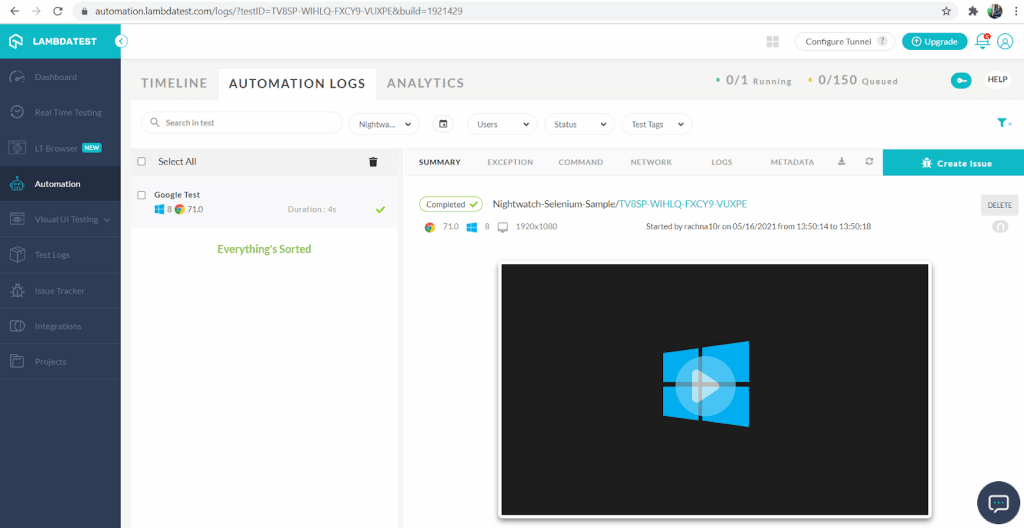
- If you can not find your tests there, simply click on Automation from the Leftmost column.
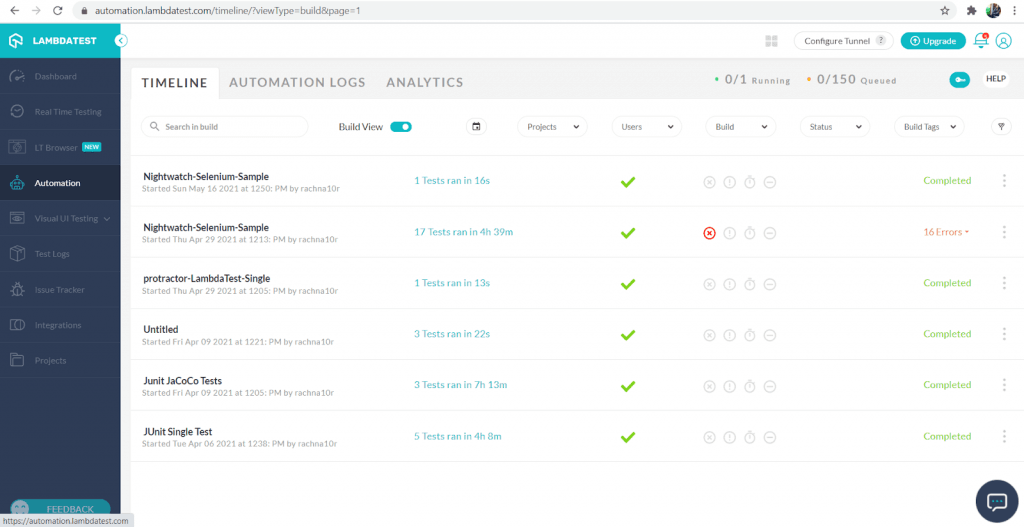
- Under the Timeline Tab, you will find all your nightwatch tests run in the Chrome environment here.
- You can click on them and view the video recordings of the Tests and observe the Test more keenly.
This way you can easily run tests over the LambdaTest platform and observe the application or software product. For faster results you can also try parallel testing on LambdaTest Selenium Grid.
Wrapping up!
CircleCI empowers technology-driven organizations and enterprises to attempt their best work at scale. CircleCI is also amazing, when it comes to integrations with other cloud platforms, code-analysis platforms etc.
As explained in the article, CircleCI seamlessly integrates with Cloud Selenium Grid LambdaTest, enabling organizations to perform Automation Testing at scale. This makes the whole quality assurance process easier, fruitful and time-efficient.
I hope this tutorial on CircleCI pipeline is a valuable resource to you. Feel free to reach out to us for feedback.
Happy Testing!


Author’s Profile
Praveen Mishra
Praveen is a Computer Science Engineer by degree, and a Digital Marketer by heart who works at LambdaTest. A social media maven, who is eager to learn & share about everything new & trendy in the tech domain.
Blogs: 28
Got Questions? Drop them on LambdaTest Community. Visit now