How To Create Jenkins Multibranch Pipeline
Salman Khan
Posted On: October 26, 2021
![]() 328223 Views
328223 Views
![]() 11 Min Read
11 Min Read
This article is a part of our Content Hub. For more in-depth resources, check out our content hub on Jenkins Tutorial.
There were times we used to create Jenkins jobs using UI alone. Later the idea of pipeline as a code was mooted to address the rising complexity with build & deployment jobs. In Jenkins 2.0, Jenkins team introduced Jenkinsfile to achieve pipeline as a code. If you want to create automated pull request based or branch-based Jenkins Continuous Integration & Continuous Delivery pipeline, the Jenkins multibranch pipeline is a way to go.
As Jenkins multi-branch pipeline is fully a git-based pipeline as code, you can build your CI/CD workflows. pipeline as Code (PaaC) makes it easy to bring the advantages of automation and cloud portability to your Selenium. You can use the multi-branch pipeline model to quickly and reliably build, test, deploy, monitor, report on, and manage your Selenium tests, and much more. In this Jenkins tutorial, we take a look at how to create a Jenkins multibranch pipeline and key concepts involved in configuring a Jenkins multibranch pipeline for Selenium automation testing.
Let’s get started.
TABLE OF CONTENTS
What is Jenkins Multibranch pipeline ?
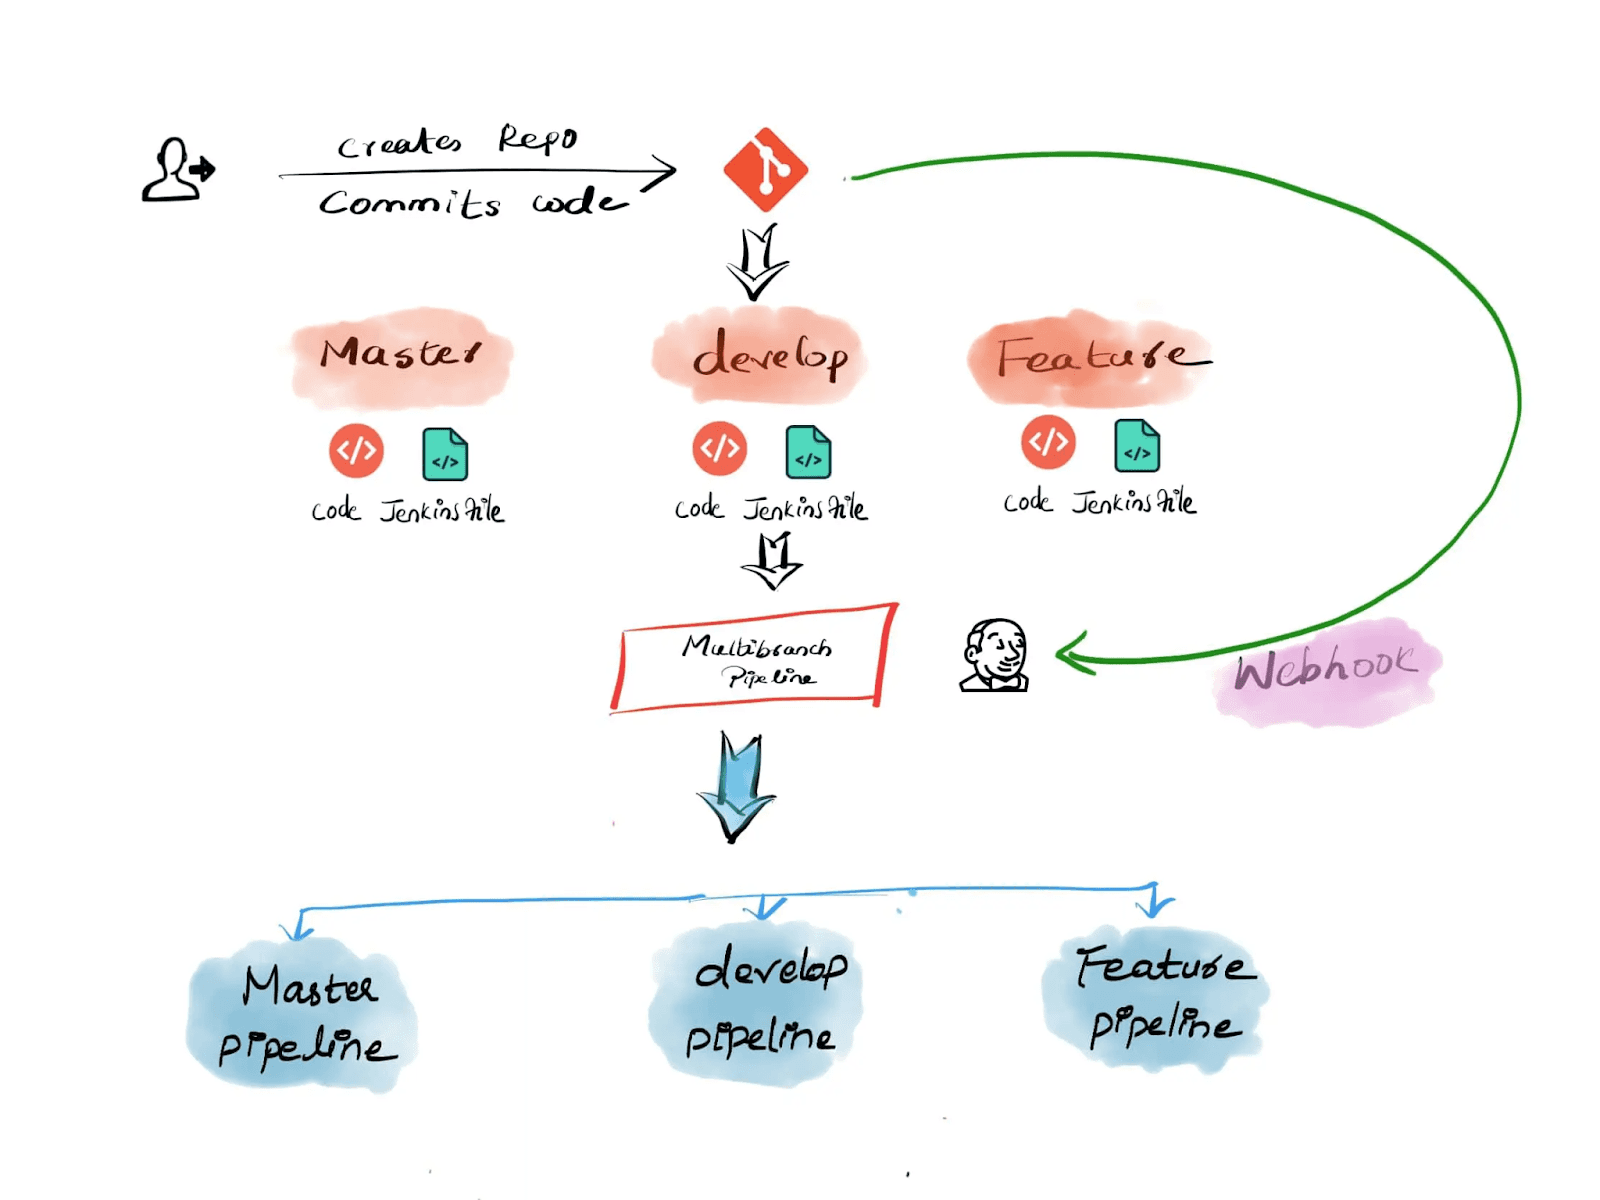
According to official documentation, multibranch pipeline job type lets you define a job where from a single git repository Jenkins will detect multiple branches and create nested jobs when it finds a Jenkinsfile
From the above definition, we can understand, Jenkins can scan Git repo for Jenkinsfile & create jobs automatically. All it needs from us is the Git Repo details. In this article, we are going to use a sample GitHub repository. Our sample GitHub repo contains a sample Spring Boot project which can be deployed to Tomcat.
In the root directory of the project, we have the Jenkinsfile. We used Jenkins Declarative pipeline syntax to create this Jenkinsfile. If you are new to Jenkins Declarative pipeline, please read our detailed article on Comprehensive Guide To Jenkins Declarative pipeline [With Examples]
Sample Jenkinsfile:
|
1 2 3 4 5 6 7 8 9 10 11 12 13 14 15 16 17 18 19 |
pipeline { agent any stages { stage('Build Code') { steps { sh """ echo "Building Artifact" """ } } stage('Deploy Code') { steps { sh """ echo "Deploying Code" """ } } } } |
We created two stages “Build Code” & “Deploy Code” in our Jenkinsfile, each of them configured to print appropriate messages. Now we have the Git repo with Jenkinsfile ready.
Let’s create a Jenkins multibranch pipeline in Jenkins server.

Jenkins Pipeline Vs. Multibranch Pipeline
Jenkins pipeline is the new hotness, but it’s not for everyone. And multibranch pipelines are still awesome. In this section of the Jenkins multibranch pipeline tutorial, let’s understand the ideal use cases for Jenkins pipeline and multibranch pipeline through this Jenkins pipeline Vs multibranch pipeline comparison.
Jenkins pipeline is a job configuration system that allows you to configure a pipeline of jobs which will be executed automatically on your behalf. A Jenkins pipeline can have multiple stages and each stage will be executed by a single agent, all running on a single machine or multiple machines. A pipeline is normally created for a specific branch of source code. When you create a new job, you will see an option for selecting the source code repository and branch. You can also create a fresh pipeline for a new project or a new feature of an existing project.
Jenkins pipeline allows you to have a flexible Jenkinsfile with stages for your build. So you can have an initial stage where you run linting, tests, etc., and then separate stages for building artifacts or deploying them. This is very useful when you want to do multiple things in your pipeline.
But what if you only have one thing to do? Or if all the things you want to do are different depending on some configuration? Does it make sense to use Jenkins pipeline here?
Multibranch pipeline is an alternative approach that might be more suitable in these cases. Multibranch pipeline allows you to split tasks out into branches and merge them together later. This is very similar to the way Git branching works.
A multibranch pipeline is a pipeline that has multiple branches. The main advantage of using a multibranch pipeline is to build and deploy multiple branches from a single repository. Having a multibranch pipeline also allows you to have different environments for different branches. However, it is not recommended to use a multibranch pipeline if you do not have a standard branching and CI/CD strategy.
Now, since you have seen the Jenkins pipeline Vs multibranch pipeline comparison, let’s go through the steps to create a Jenkins multibranch pipeline.
Steps To Create A Jenkins Multibranch Pipeline
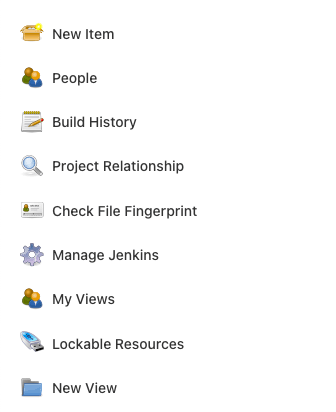
Step 1: Open Jenkins home page (http://localhost:8080 in local) & click on New Item from the left side menu.
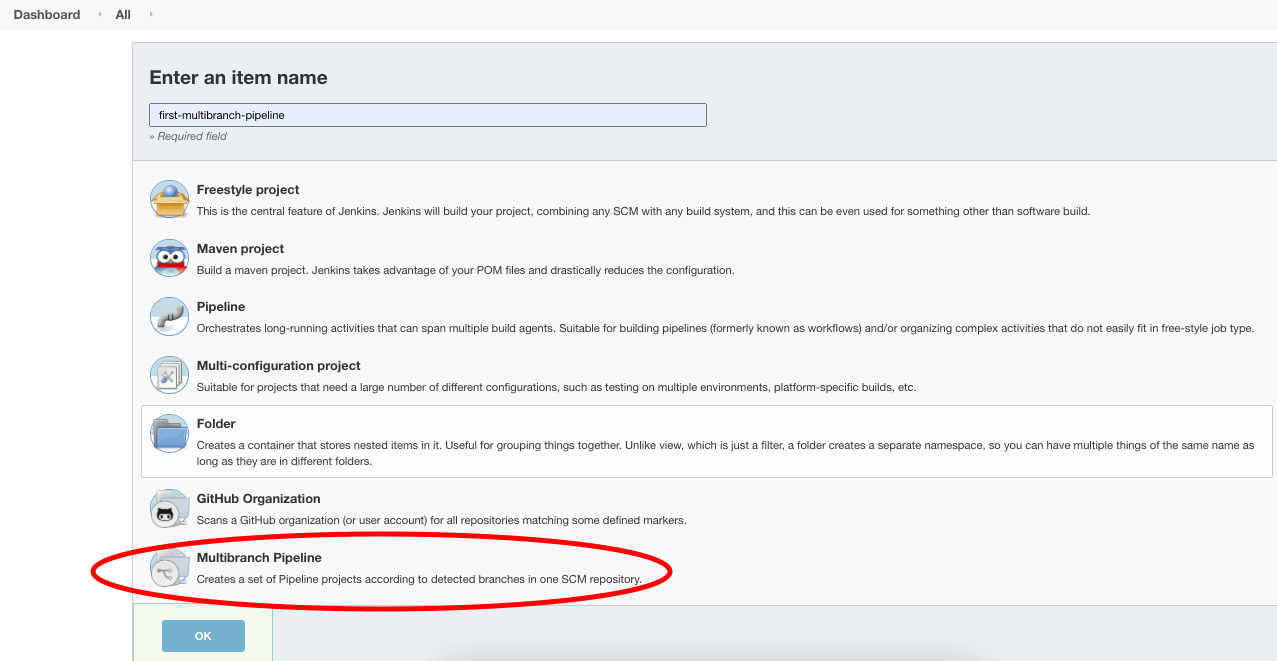
Step 2: Enter Jenkins job name & choose the style as multibranch pipeline and click OK.
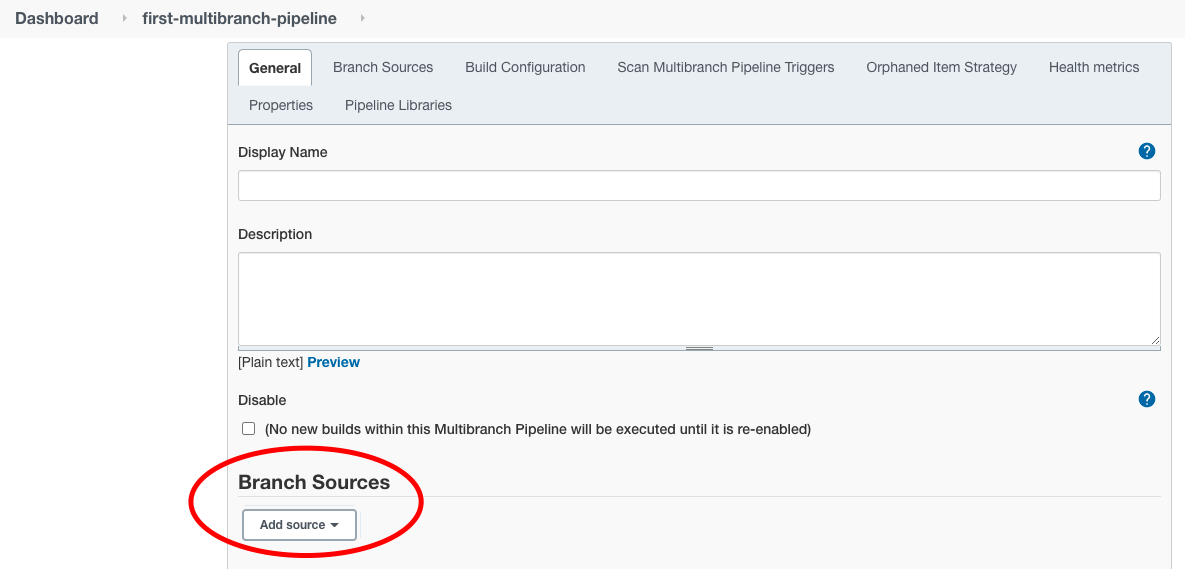
Step 3: In the configure page, we need to configure only one thing – The Git Repo source.
Scroll down to Branch Sources section & click on Add Source dropdown.
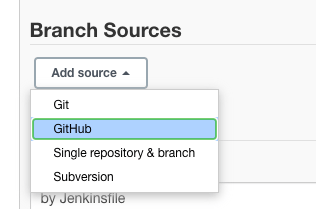
Choose GitHub as Source as our Sample GitHub repo is hosted there.
Step 4: Enter the Repository HTTPS URL as https://github.com/iamvickyav/spring-boot-h2-war-tomcat.git and click on Validate .
Since our GitHub repo is hosted as a public repo, we don’t need to configure credentials to access it. For enterprise/private repos, we may need credentials to access them.
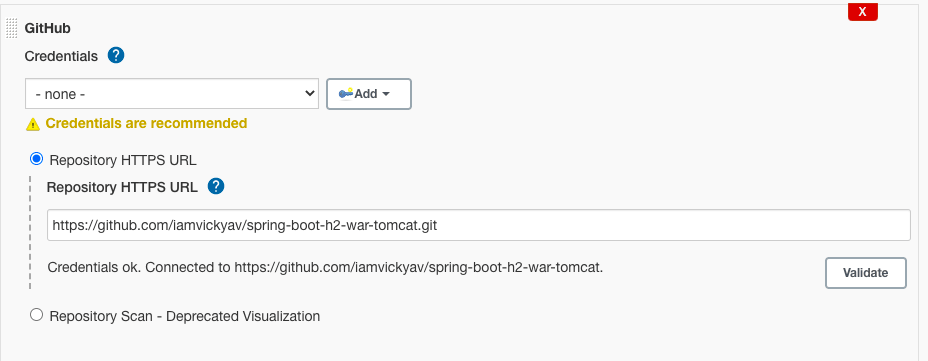
The “Credentials ok” message represents the connection between Jenkins server & the Git repo is successful.
Step 5: Leave the rest of the configuration sections as such for now and click on the Save button at the bottom.
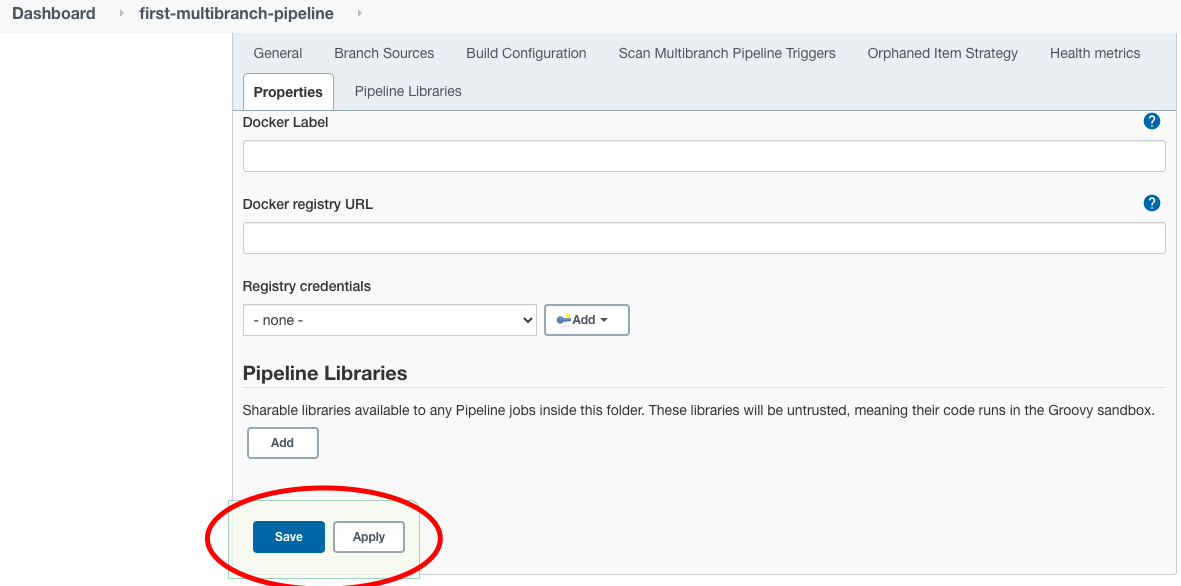
On saving, Jenkins will perform the following steps automatically.
Scan Repository Step
- Scan the Git repo we configured
- Look for the list of branches available in the Git repo
- Select branches which has Jenkinsfile
Running Build Step
- Run build for each of the branches found in previous step with steps mentioned in Jenkinsfile
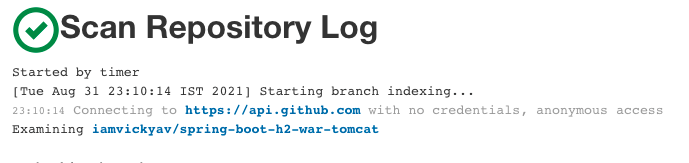
From the Scan Repository Log section, we can understand what happened during the Scan repository step
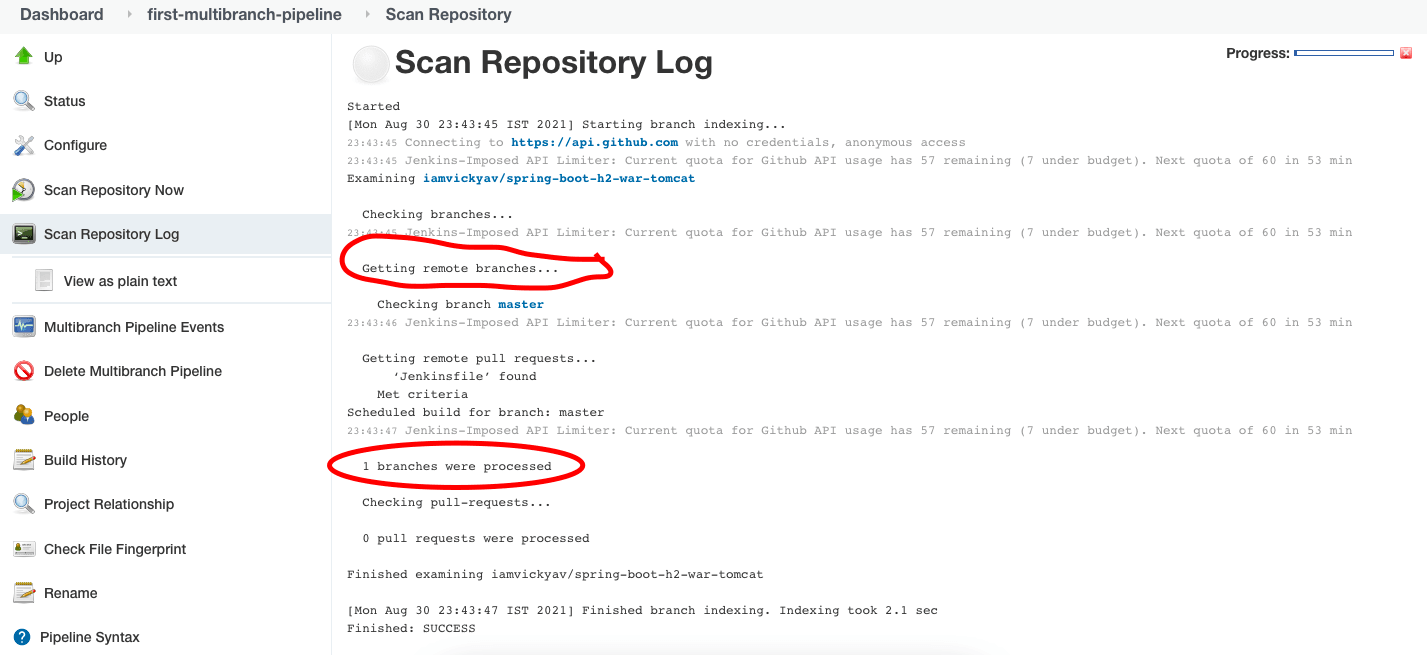
Since we have an only a master branch in our git repo, Scan Repository Log says 1 branches were processed
After the scan is complete, Jenkins will create & run a build job for each processed branch separately.
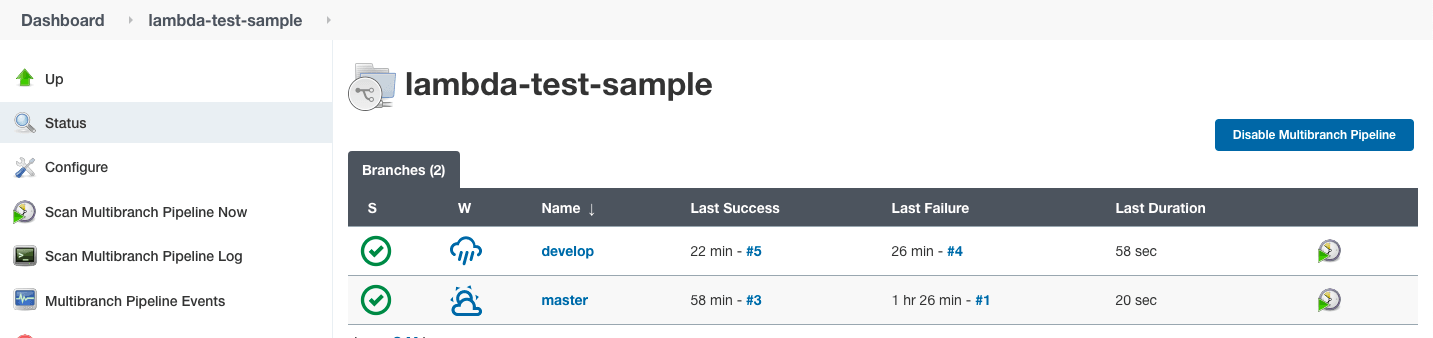
In our case, we had only one branch called master. Hence build will run for master branch alone. We can check the same by clicking on Status in the left side menu.
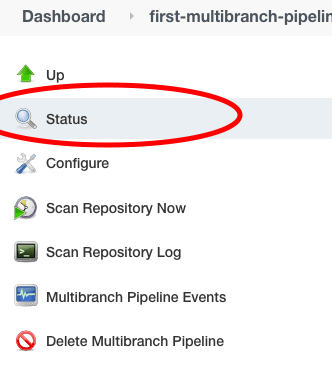
We can see a build job created for the master branch in the status section.
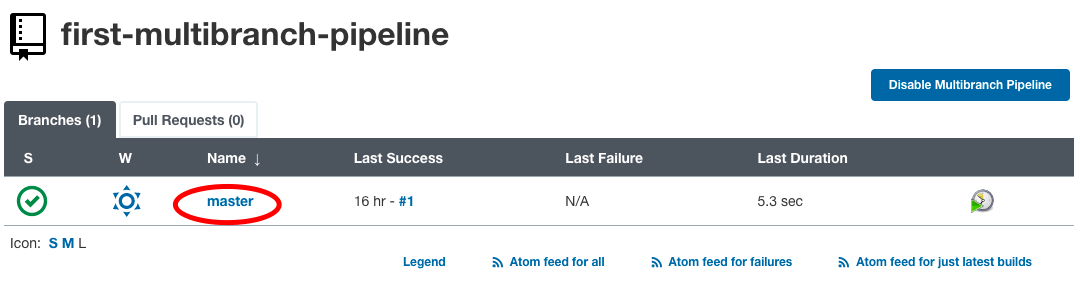
Click on the branch name to see the build job log & status.
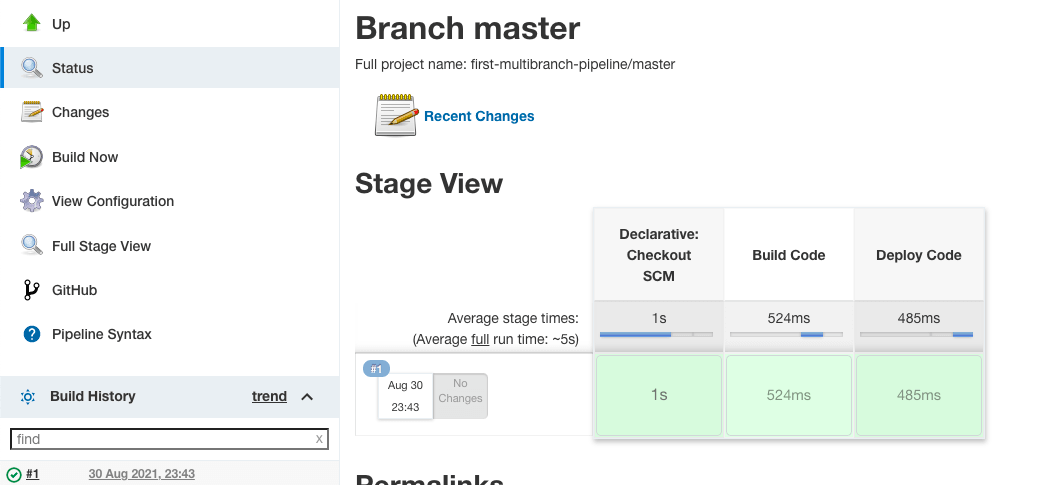
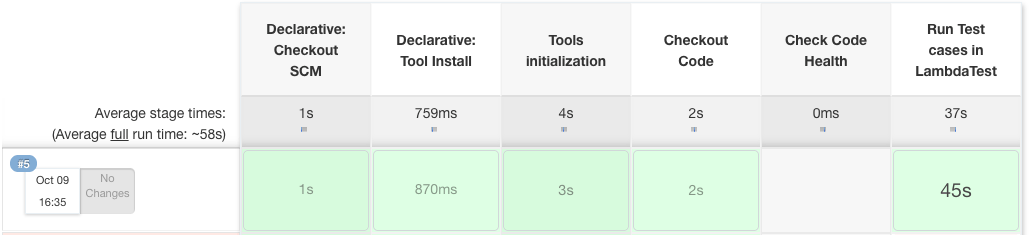
Stage View gives a visual representation on how much time each stage took to execute & status of the build job.
Access Build Job Run Logs
Step 1: Click on the build number under the build history section.
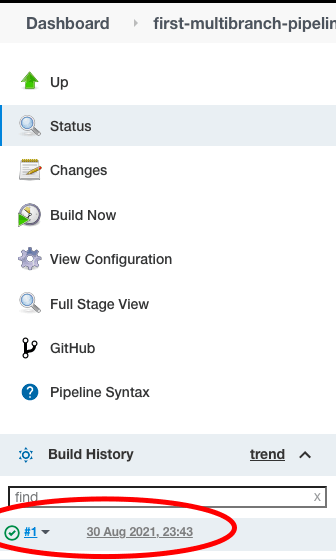
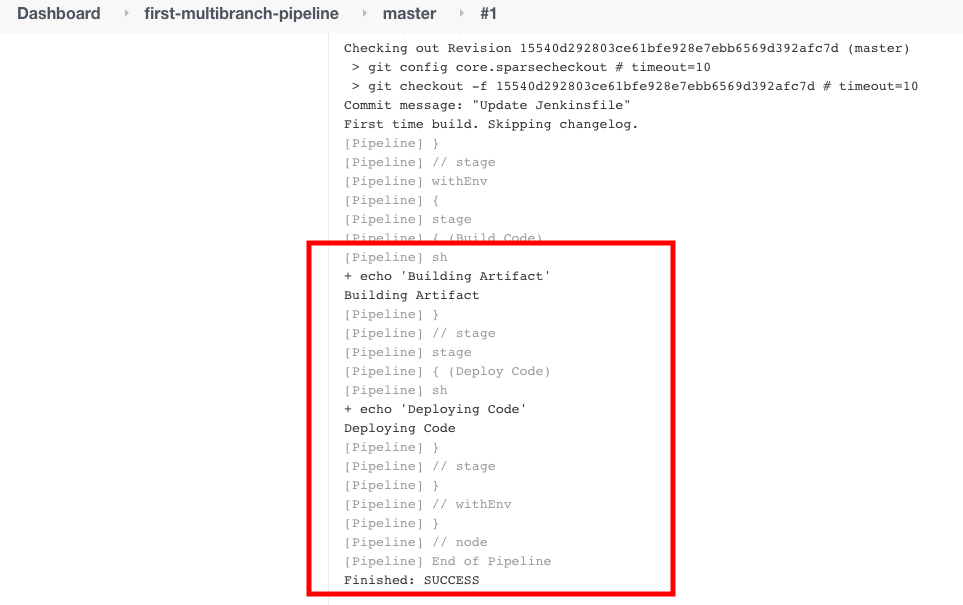
Step 2: Then choose the Console Output from the left side menu to see the logs.

What happens if we have more than one branch in our Git repo? Let’s check that now.
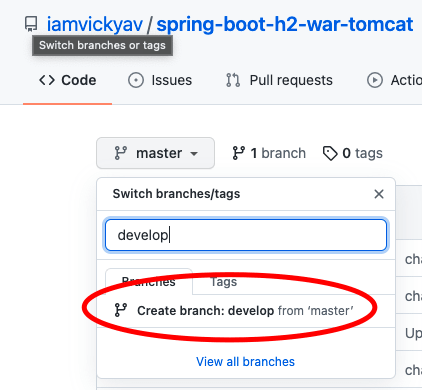
In the Git repo, a new branch called develop is created.
To differentiate develop branch build, we made small changes in echo commands in Jenkinsfile.
Jenkinsfile in master branch:
|
1 2 3 4 5 6 7 8 9 10 11 12 13 14 15 16 17 18 19 |
pipeline { agent any stages { stage('Build Code') { steps { sh """ echo "Building Artifact" """ } } stage('Deploy Code') { steps { sh """ echo "Deploying Code" """ } } } } |
Jenkinsfile in develop branch:
|
1 2 3 4 5 6 7 8 9 10 11 12 13 14 15 16 17 18 19 |
pipeline { agent any stages { stage('Build Code') { steps { sh """ echo "Building Artifact from Develop Branch" """ } } stage('Deploy Code') { steps { sh """ echo "Deploying Code from Develop Branch" """ } } } } |
Now we have two Jenkinsfile in two different branches. Let’s rerun the repository scan in Jenkins to see the behaviour.
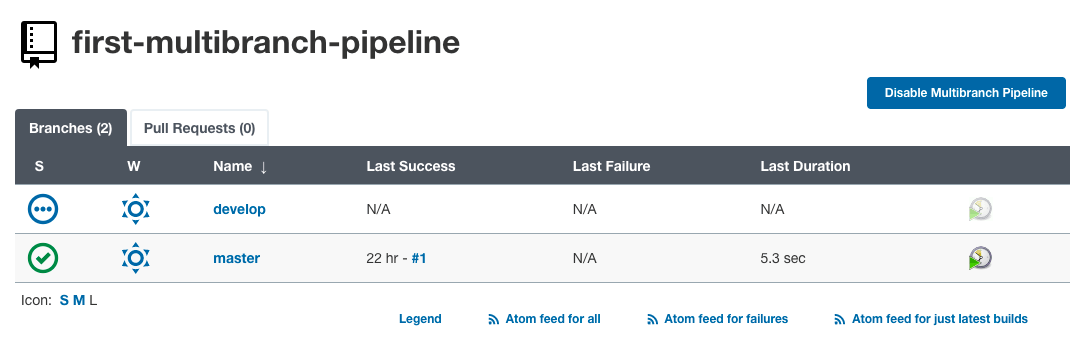
We can see the new branch (develop branch) got detected by Jenkins. Hence a new job was created separately for develop branch.
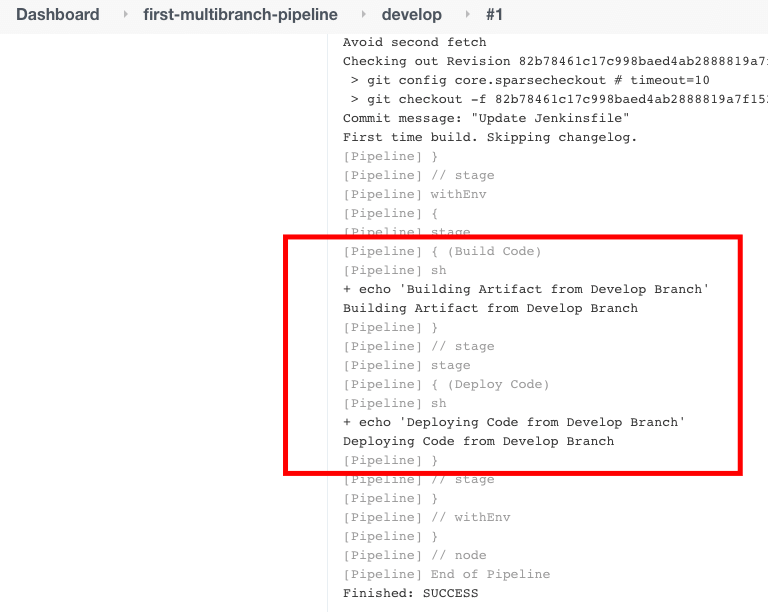
On clicking ‘develop’, we can see the log for the develop branch’s build job.
In the previous example, we kept different contents for Jenkinsfile in master & develop branches. But that’s not how we do it in real world applications. We leverage the when blocks within stage block to check the branch.
Here is an example with combined steps for master & develop branch. This same content will be placed in both master & develop branch Jenkinsfiles.
|
1 2 3 4 5 6 7 8 9 10 11 12 13 14 15 16 17 18 19 20 21 22 23 24 25 26 27 28 29 30 31 32 |
pipeline { agent any stages { stage('Master Branch Deploy Code') { when { branch 'master' } steps { sh """ echo "Building Artifact from Master branch" """ sh """ echo "Deploying Code from Master branch" """ } } stage('Develop Branch Deploy Code') { when { branch 'develop' } steps { sh """ echo "Building Artifact from Develop branch" """ sh """ echo "Deploying Code from Develop branch" """ } } } } |
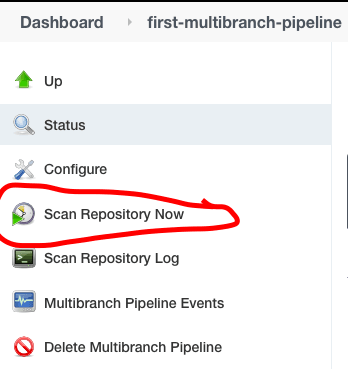
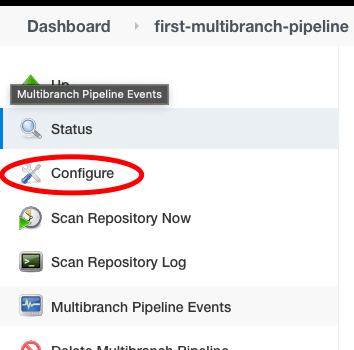
Step 3: Click on Scan Repository from the left side menu for Jenkins to detect the new changes from Git repo.
By this time, you could have noticed, we are using the Scan repository everytime we want Jenkins to detect the changes from repo.
How about automaticating this step?
Periodic trigger for Jenkins Multibranch Pipeline Scan
Step 1: Click configure from the left side menu.
Step 2: Scroll down to the Scan Repository Triggers section & enable Periodically if not otherwise run checkbox & choose the time interval for the scan to run periodically (2 minutes in our example).
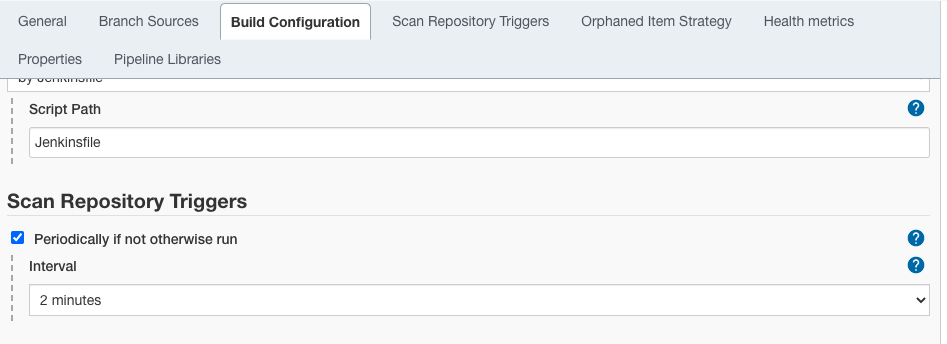
Step 3: Click on Save button.
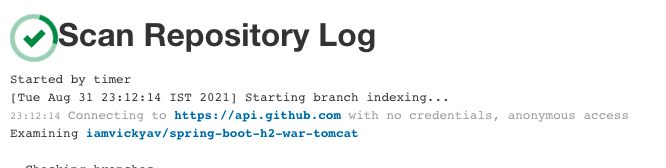
From now on, Jenkins will scan the repo every 2 minutes. If a new commit is found in any branch, Jenkins will run a new build job for that particular branch using Jenkinsfile.
Below is the Scan Repository log which clearly shows the scan triggered every two minutes.
This Jenkins Tutorial for beginners and professionals will help you learn how to use Jenkins, one of the best CI/CD tools used in DevOps.
Real time use cases for Jenkins Multibranch Pipeline
Below are a few scenarios where Jenkins multibranch pipeline can be handy.
- Any new commit in the master branch has to be deployed in the Server automatically.
- If a developer try to raise Pull Request (PR) to develop branch then,
- Code should get built successfully without compilation error.
- Code should have minimum 80% test coverage.
- Code should pass the SONAR code quality test.
- If developers try to push code to a branch other than master or develop, code should compile successfully. If not, send an alert email.
Here is a sample Jenkinsfile covering a few of the above use cases.
|
1 2 3 4 5 6 7 8 9 10 11 12 13 14 15 16 17 18 19 20 21 22 23 24 25 26 27 28 29 30 31 32 33 34 35 36 37 38 39 40 41 42 43 44 45 46 47 48 49 50 51 52 53 54 55 56 57 58 59 60 61 62 63 64 |
pipeline { agent any tools { maven 'MAVEN_PATH' jdk 'jdk8' } stages { stage("Tools initialization") { steps { sh "mvn --version" sh "java -version" } } stage("Checkout Code") { steps { checkout scm } } stage("Check Code Health") { when { not { anyOf { branch 'master'; branch 'develop' } } } steps { sh "mvn clean compile" } } stage("Run Test cases") { when { branch 'develop'; } steps { sh "mvn clean test" } } stage("Check Code coverage") { when { branch 'develop' } steps { jacoco( execPattern: '**/target/**.exec', classPattern: '**/target/classes', sourcePattern: '**/src', inclusionPattern: 'com/iamvickyav/**', changeBuildStatus: true, minimumInstructionCoverage: '30', maximumInstructionCoverage: '80') } } stage("Build & Deploy Code") { when { branch 'master' } steps { sh "mvn tomcat7:deploy" } } } } |
We committed this new Jenkinsfile in the master & develop branch so it can be detected by Jenkins multibranch in the next repository scan.
Selenium Automation Testing With Jenkins Multibranch Pipeline
Let’s consider we are writing automation test cases for a website. Whenever a new test case is committed in a branch, we want to run them & make sure they are executing as expected.
Running automation test cases on every browser and operating system combination is a nightmare for any developer. That’s where LambdaTest’s powerful automation testing infrastructure can prove handy.
Using LambdaTest Selenium grid, you can maximize your browser coverage as it offers a wide array of 3000+ browsers and supports multiple platforms across a plethora of devices. With the LambdaTest online Selenium Grid, you can perform automated browser testing much faster and easier than on the local grid.
Read More: Running Selenium Tests in Jenkins
In this section, we will see how to leverage the powerful testing infrastructure of LambdaTest with the Jenkins multibranch pipeline. To demonstrate, we hosted a sample Todo app here – LambdaTest ToDo App. Automation test cases written with Cucumber are committed in the sample repo.
From Jenkins, we want to run these test cases in LambdaTest platform. Running test cases in LambdaTest needs username & accessToken. Register with LambdaTest platform for free to get your credentials.
Setting up Environment Variable
When the test case runs, they will look for LambdaTest’s username (LT_USERNAME) & password (LT_ACCESS_KEY) in environment variables. So we need to configure them prehand.
To avoid storing them with source code, we configured them as secrets in Jenkins & loaded environment variables from them.
|
1 2 3 4 5 |
environment { LAMBDATEST_CRED = credentials('Lambda-Test-Credentials-For-multibranch') LT_USERNAME = "$LAMBDATEST_CRED_USR" LT_ACCESS_KEY = "$LAMBDATEST_CRED_PSW" } |
Here is our final Jenkinsfile:
|
1 2 3 4 5 6 7 8 9 10 11 12 13 14 15 16 17 18 19 20 21 22 23 24 25 26 27 28 29 30 31 32 33 34 35 36 37 38 39 40 41 42 43 44 45 46 |
pipeline { agent any tools { maven 'MAVEN_PATH' jdk 'jdk8' } stages { stage("Tools initialization") { steps { sh "mvn --version" sh "java -version" } } stage("Checkout Code") { steps { checkout scm } } stage("Check Code Health") { when { not { anyOf { branch 'master'; branch 'develop' } } } steps { sh "mvn clean compile" } } stage("Run Test cases in LambdaTest") { when { branch 'develop'; } environment { LAMBDATEST_CRED = credentials('Lambda-Test-Credentials-For-multibranch') LT_USERNAME = "$LAMBDATEST_CRED_USR" LT_ACCESS_KEY = "$LAMBDATEST_CRED_PSW" } steps { sh "mvn test" } } } } |
Now we will create a new Job in Jenkins as a multibranch pipeline by following steps mentioned in above sections. Lets point to the sample repo.
Verify the status of build run from the StageView.
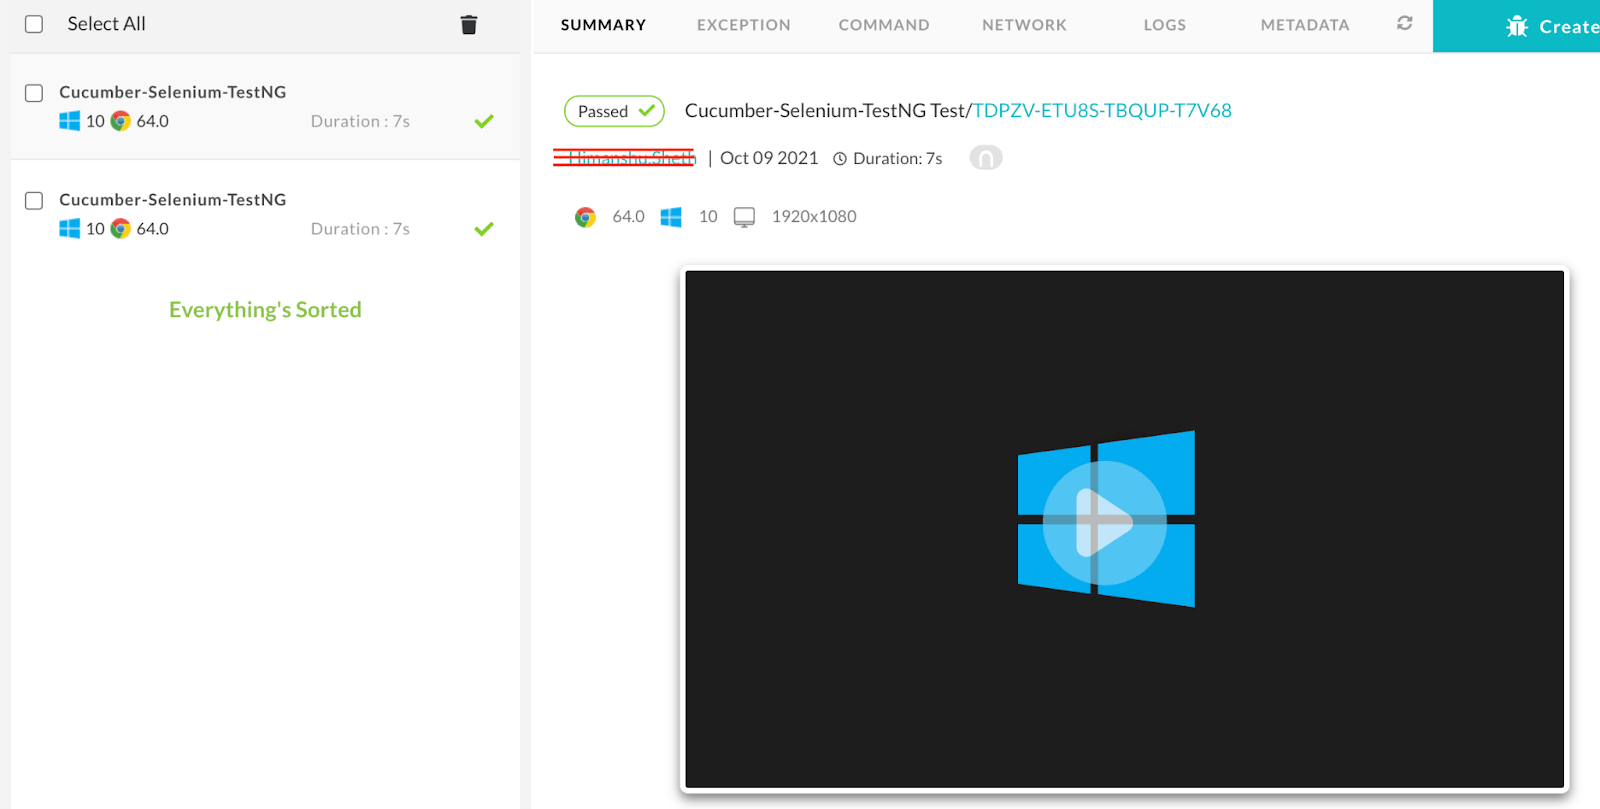
Once the build runs successfully, visit LambdaTest automation dashboard to get the test logs.
Conclusion
With this, we have learnt how to create a Jenkins multibranch pipeline, how to configure git repo in it, different build steps for different branches, using periodic autoscan of repo by Jenkins & leveraging LambdaTest’s powerful automation test infrastructure to automate our CI/CD builds. Hope you found this article useful. Please do share your feedback in the comments section.


Author’s Profile
Salman Khan
Salman works as a Content Manager at LambdaTest. He is a Computer science engineer by degree and an experienced Tech writer who loves to share his thought about the latest tech trends.
Blogs: 79
Got Questions? Drop them on LambdaTest Community. Visit now