Playwright Python Tutorial: Getting Started With Python End To End Testing
Idowu (Paul) Omisola
Posted On: September 6, 2022
![]() 45758 Views
45758 Views
![]() 31 Min Read
31 Min Read
It’s essential to test all components of your website to see if they work as expected. Playwright’s end to end testing capability helps you achieve this easily. However, if you’re comfortable using Python, you can pair it with the Playwright testing framework to run Python end to end testing on your website.
The Playwright testing framework is more straightforward and lightweight than most alternatives, including Cypress and TestCafe, among many others. To give it a boost, it also offers API testing. Hence, it’s an excellent choice for end to end testing.
In this Playwright Python tutorial, you’ll learn how to combine Python’s simplicity with Playwright’s utility for end to end testing. But let’s start by understanding end to end testing and why you want to use Playwright to execute your test. If you are preparing for an interview you can learn more through Playwright interview questions.
TABLE OF CONTENTS
- What is End to End Testing?
- What is Playwright?
- Why use Playwright for Python end to end testing?
- How to setup Playwright for Python end to end testing?
- How does the Playwright Code Generator work?
- Playwright Locators and Selectors
- Implementing Python end to end testing with Playwright
- Implementing parallel testing with Playwright Python
- Frequently Asked Questions (FAQs)
What is End to End Testing?
End to end testing is a method that validates the entire usage flow of an application to ensure that every part of it works as expected. It involves paying attention to every detail and extending the test coverage to discover and fix bugs. Its ultimate goal is to help you build a bug-free site.
Hence, it’s an adopted methodology for testing complex websites. Generally, it involves picking up your website’s user story and simulating your users’ behavior in different integration environments.
During end to end testing, you want to consider operating system and browser variability, among many other factors determining an app’s viability. Therefore, it involves conducting a critically inclusive test—from the back (API testing) to the front end.
With that in mind, automated end to end testing reduces testing costs, improves application integrity, and helps your product ship faster.
What is Playwright?
Playwright, released by Microsoft in 2020, is an open-source, cross-platform automation testing framework. It supports many browsers, including Chromium, Firefox, and Microsoft Edge, as well as WebKit-based applications. So it provides a handy toolkit for testing web and mobile applications.
It also works with most modern programming languages. As of writing, it supports JavaScript, Python, TypeScript, .NET, and Java. This Playwright Python tutorial will look into how to perform end to end tests with Playwright using Python.
If you are preparing for an interview you can learn more through Playwright interview questions.
Why use Playwright for Python end to end testing?
The Playwright framework has many event igniters that let you interact with different client-side features of your website like a real user. And it plays well with both synchronous and asynchronous requests. Thus, you can choose to run your test sequentially or leverage the power of Python’s asyncio package to run test steps concurrently using async/await. The latter is handy for interacting with websites that run tasks asynchronously.
Its API testing capability also helps you validate requests and responses on your app’s endpoints.
Depending on the specified test browser, the Playwright also isolates each test per browser. Thus, each test case in Playwright is a browser context, which defines a browser instance generated rapidly to reduce overhead.
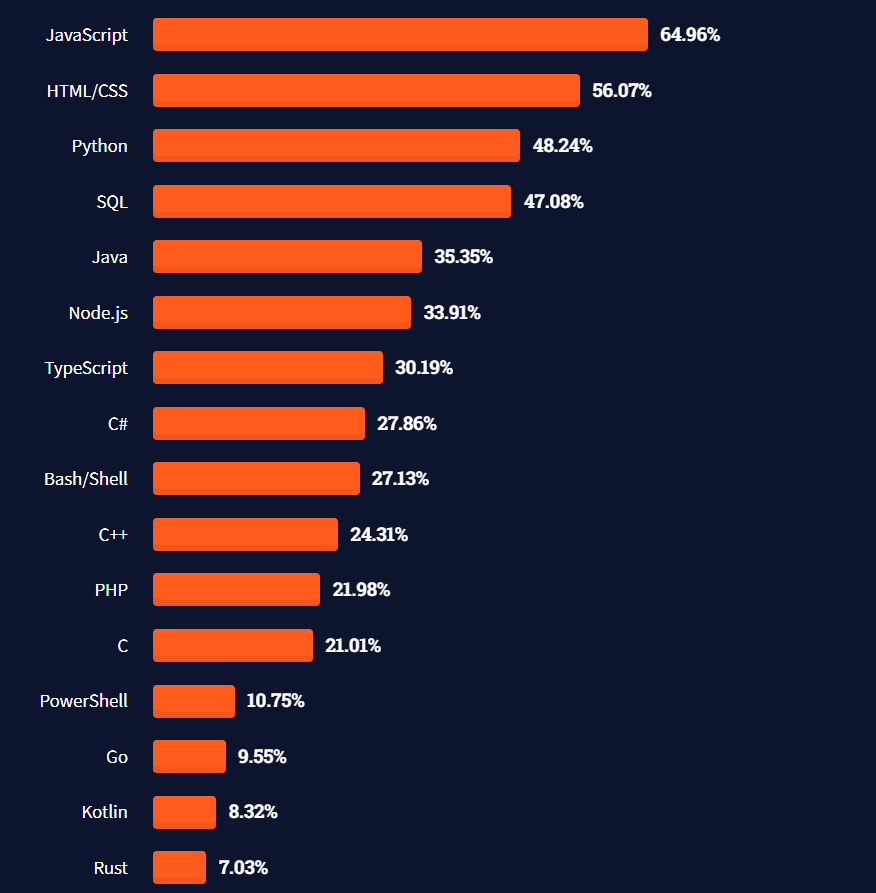
Considering Playwright’s versatile utility and Python’s simplicity and acceptance, combining both to write your test script eases automation testing. Besides, the 2021 Stackoverflow Developer Survey puts Python in third place among the most used programming languages.
The Playwright framework is popular, with over 2,000 forks and over 41,800 stars on GitHub. And what’s more? It also has fair enough mentions on Stack Overflow with a good community. So you can always get help resolving bugs in your tests.
Unlike Selenium, where you might have to define custom timeout intervals to prevent false failure if elements fail to load, Playwright has an auto-wait feature that tentatively pauses for DOM elements to load before executing further steps in the test case. This wait time defaults to 30 seconds before it times out, but you can extend this using Playwright’s built-in wait_for_timeout() function. Hence, you’ll have a lower false failure probability with Playwright.
Playwright also provides an inspector tool, which you can use to generate selectors easily as you write your test. This helps reduce or even eliminate the need to inspect the browser manually.
Its code generator works in a play-and-record fashion. You can use it to spin up your app’s UI and auto-generate test scripts in any language as you interact with the DOM. Although this might be handy if you’re unfamiliar with coding, it’s less customizable. It doesn’t suit complex websites (e.g., e-commerce, banking, fintech, and more), as the code generated is often lengthy and complex.
These features, coupled with its intuitive selector and locator classes, make Playwright an excellent end to end testing framework.
Playwright GitHub trends as of writing this Playwright Python tutorial:
- Stars: 41.8k
- Used by: 14.1k
- Forks: 2k
- Watchers: 360
- Contributors: 274
- Releases: 79
Before we deep dive into this Playwright Python tutorial, let’s see how to install Playwright for Python end to end testing and set up the test project.
Run Automated Playwright Python Tests Online. Try LambdaTest Now!
How to setup Playwright for Python end to end testing?
You have to install and set up your computer to start using Playwright Python for automation testing. However, this Playwright Python tutorial assumes that your machine runs on Python 3.
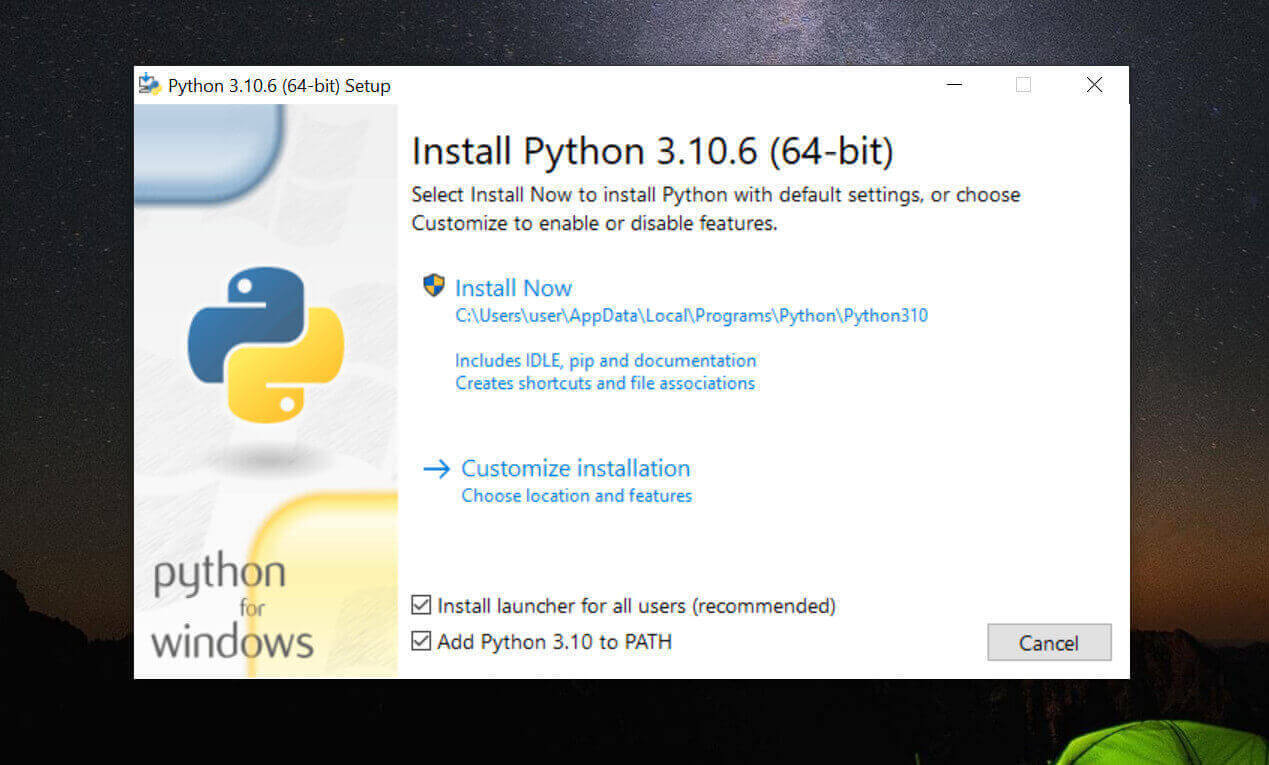
Step 1: Install Python’s latest version.
Go to the official Python website to download and install the latest version of Python on your machine.
The Windows OS doesn’t come with Python by default, so you’ll have to install it explicitly. However, ensure that you allow the installer to add Python to your system variable path during installation. Else you’ll have to do this manually later.
To install Python on Windows OS:
- Open the installation file.
- Click the Add Python to Path checkbox at the installation window’s bottom right. Then click Install Now.
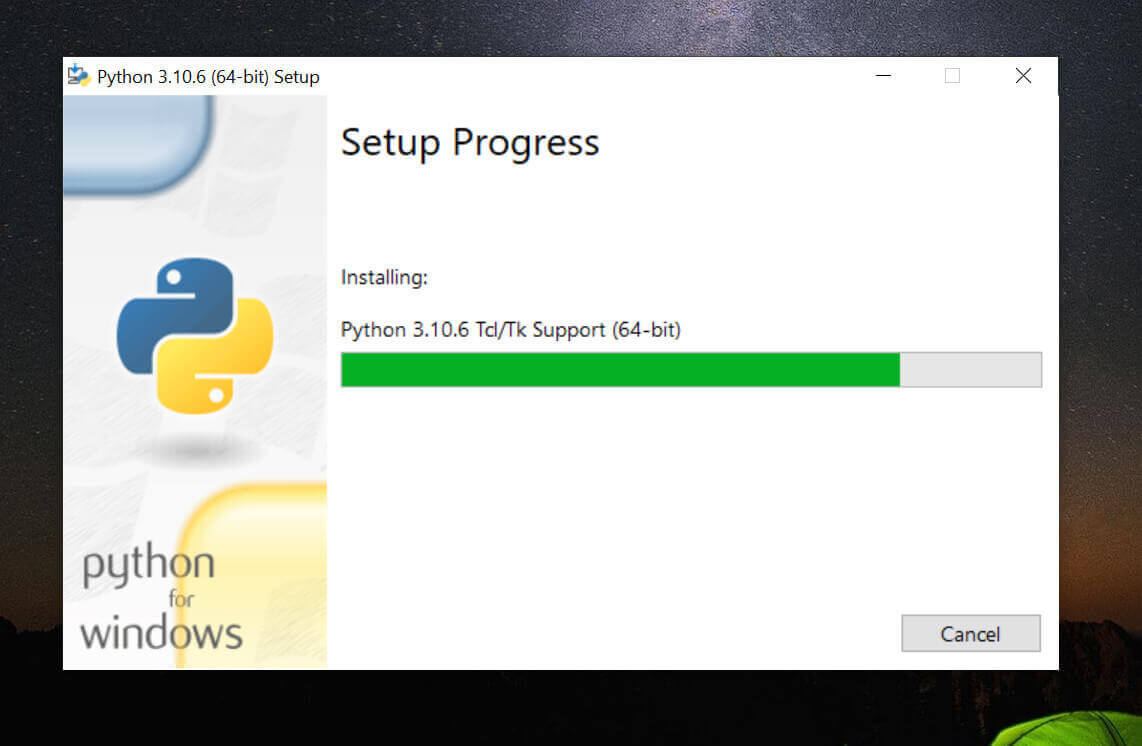
- The installation initializes and starts in the following menu.
While most Linux distributions may have Python pre-installed by default, you might still have to upgrade to a more recent version, as the system version might be obsolete to run Playwright. Playwright, however, works with Python version 3.7 or later.
To install Python on Linux from scratch:
|
1 |
sudo apt-get install python 3 |
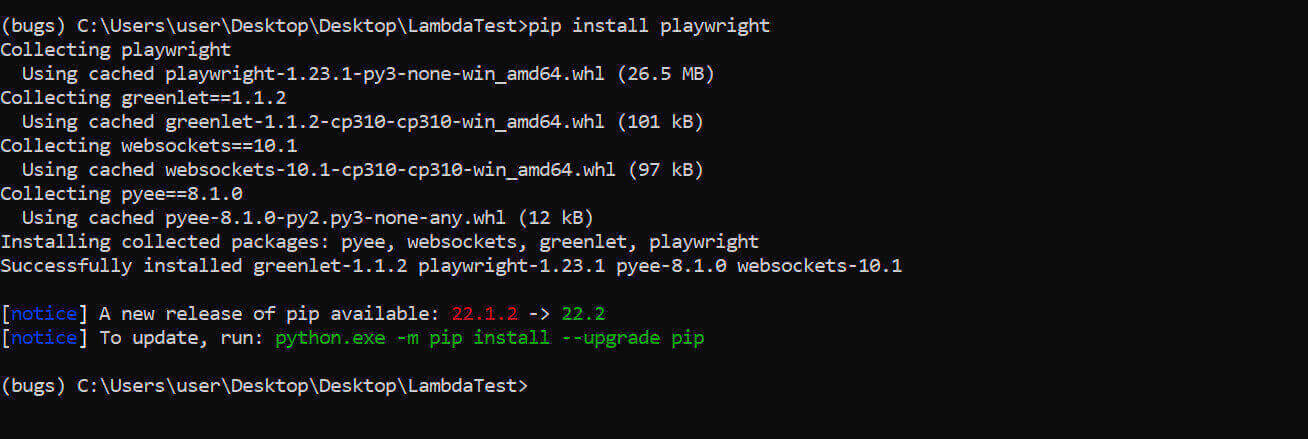
Step 2. Install Playwright and its WebKit.
You can install Playwright using pip:
|
1 |
pip install playwright |
If you’re on Linux or Mac, you can use pip3 instead, which works with Python 3 on these platforms:
|
1 |
pip3 install playwright |
Either of the above commands run the Playwright installer:
And if you’re using conda to manage dependencies:
|
1 |
conda install playwright |
Depending on your choice of Python dependency installer, the above commands install the Playwright framework into your machine or Python virtual environment (if you use one).
And to install the Playwright WebKit:
|
1 |
playwright install |
The above command installs Playwright’s built-in WebKit. You’ll use this to bring up test scenarios for different web browsers.
Step 3. Create Project Folder.
The next step in this Playwright Python tutorial is to create a project folder for your automated testing. You can create one from the command line or your graphic user interface.
We’ll use Visual Studio Code on the Windows platform in this Playwright Python tutorial. But you can use any IDE that works best for you.
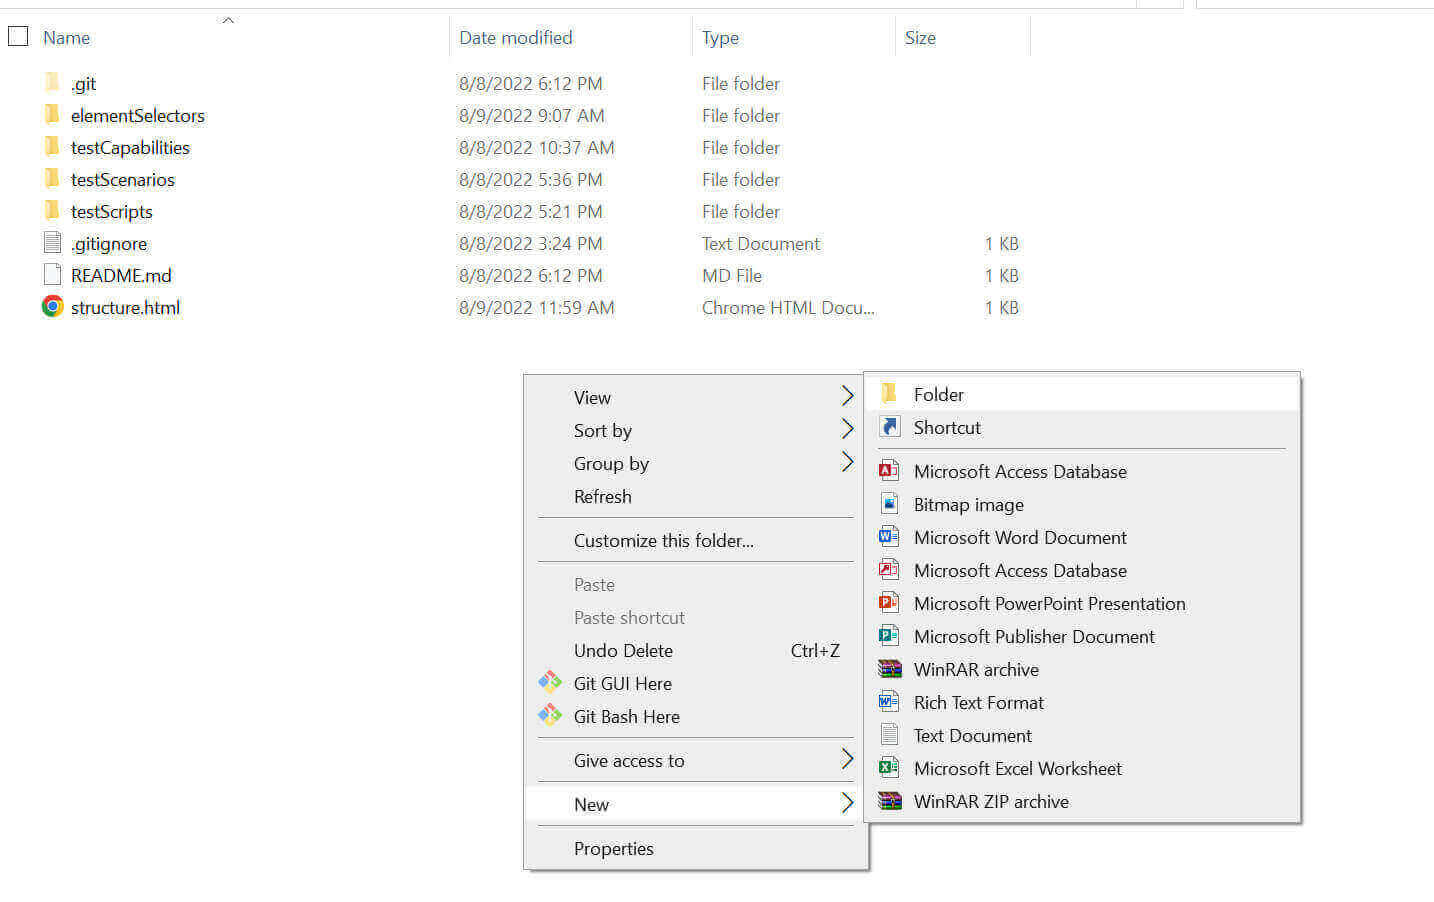
To create a folder on Windows and open it with VS Code:
- Open any folder on your PC and right-click a blank space. Go to New > Folder.
- Name your folder; this can be a descriptive name (for example playwright_test_folder).
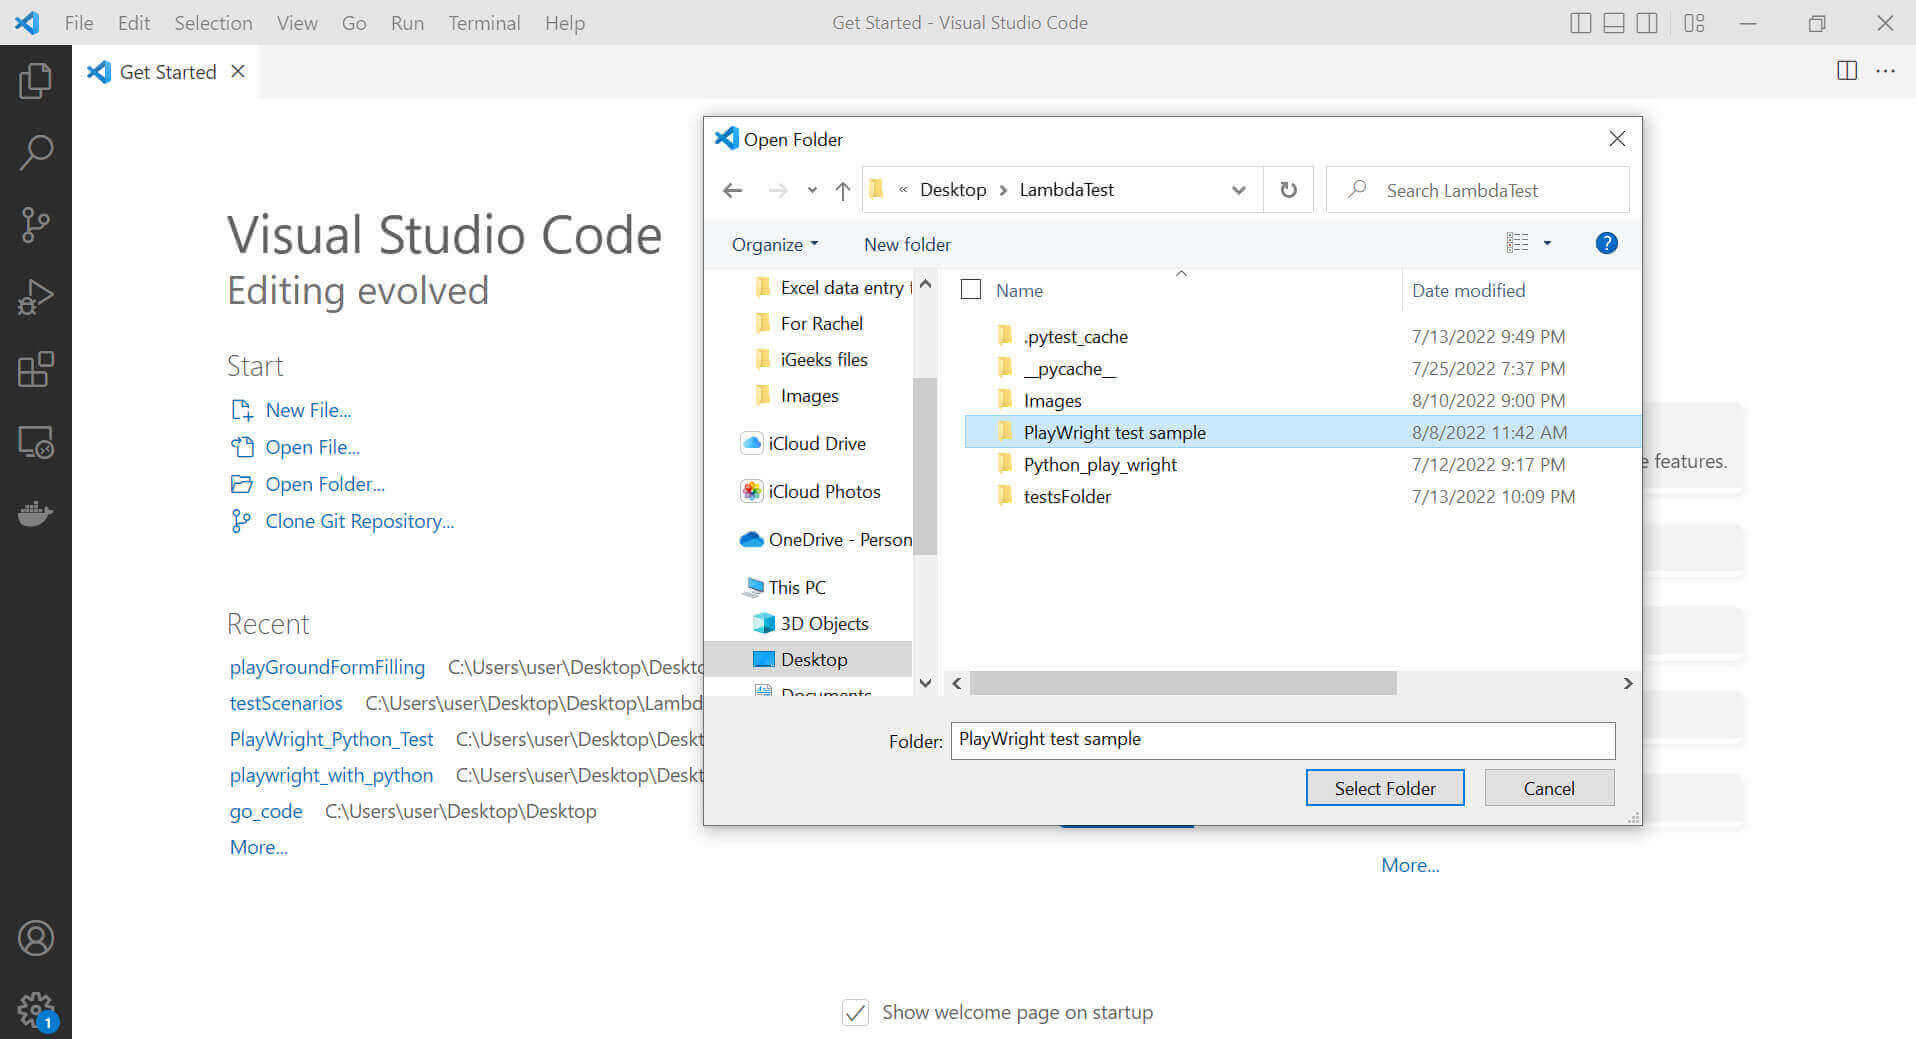
- Now, open VS Code to your project folder. Open VS Code and click Open Folder. Go to the folder you created earlier and select it to open VS Code to that directory.
Now that you’ve seen how to set up a development environment for testing your app in Python using Playwright—let’s dive into the coding aspect. But before that, remember we mentioned that Playwright has a code generator in this Playwright Python tutorial.
You’ll see how this code generator works in the following section of this tutorial on Playwright Python since it shows you how to select elements on your website when writing tests.
Run your Playwright test scripts instantly on 50+ browser and OS combinations. Try LambdaTest Now!
How does the Playwright Code Generator work?
As mentioned in the earlier section of this Playwright Python tutorial, the Playwright code generator makes it easy to scan the DOM without going to the inspection tab of your browser. Although it limits browser selection flexibility and is not as clean as writing custom tests, it’s also a nifty way for no-code lovers to auto-generate test scripts while interacting with the UI.
The code generator works in two ways. You can use it to pick out your website’s selectors. Or you can generate an entire test case script with its record and play functionality.
Open your terminal to your project root folder and use the following command to spin up a selector generator for your app. In my case, I’ll use the LambdaTest e-commerce playground, so remember to replace this with your website’s URL:
|
1 |
playWright codegen https://ecommerce-playground.lambdatest.io/ |
The above command generates the appropriate selectors as you hover on the elements on a web page:

Look at the image above closely. You’ll see that the My account dropdown on that page generates a selector. This helps determine how the Playwright locator finds elements or features during testing.
To generate a test script into a Python file from your interaction with the target website, paste the following command in your terminal, replacing https://ecommerce-playground.lambdatest.io/ with your app’s URL:
|
1 |
playwright codegen --target python -o example2.py https://ecommerce-playground.lambdatest.io/ |
The above command brings up a browser like the first one. But this time, it tells Playwright to write test code into the target file (example2.py) as you interact with the specified website. You don’t need to create the target file explicitly. The Playwright does this automatically.
Now open your text editor to your project folder. You should see the generated Python script (example2.py in my case).
Here’s the website and the code generated from interacting with it below:
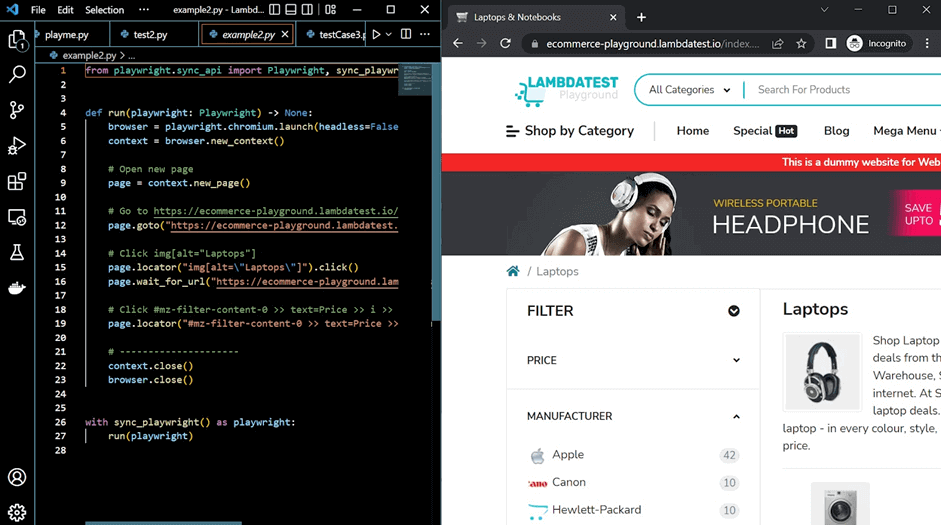
If you place the generated Python script and the website side-by-side, as shown above, you’ll see the code changing dynamically in the Python script as you interact with your app.
Pros of the Playwright Code Generator:
- It auto-generates code, which can be a good starting point if you need to extend the use case further.
- Handy for picking test selectors in custom automated tests.
- You can generate code for any Playwright-supported programming language.
Cons of the Playwright Code Generator:
- Generated code is not scalable and maintainable.
- It’s not suitable for testing complex websites.
- There’s no way to execute parallel tests since it only generates one code file.
- The generated code is hard to read and debug.
- It doesn’t provide room for connecting to a cloud grid.
- The codebase becomes messier as you generate more tests.
- The test cases are repetitive.
Playwright Locators and Selectors
As with most testing frameworks, locators and selectors are some of the core features of Playwright.
Like Selenium locators, you use Playwright selectors to specify the position of an element within the DOM. The locator is a class that points Playwright to the specified DOM elements so it can perform events on them.
The locator holds off an event and triggers auto-wait, which keeps retrying the test but fails after 30 seconds if it can’t find an element. The locator and selector in Playwright work hand-in-hand.
For example, the following locator performs a click event on the selected element:
|
1 |
page.locator('input[name="Search"]').click() |
The selector in the above example is ‘input[name=”search”]’, while the page.locator() function points to the selected element to perform JavaScript events on it (a click event in this case). However, the page, in this case, is a browser context instance.
!['input[name="search"]'](https://www.lambdatest.com/blog/wp-content/uploads/2022/09/image1-6-1-1-1.jpg)
Implementing Python end to end testing with Playwright
Before you start testing, you may want to inspect the website elements to pick the selectors for your test. Place your cursor on a web element > right-click it and go to Inspect (for Chrome or any other web browser of your choice).
Tip: You can use the Playwright code generator to generate the selectors instead. Simply launch it using the playwright codegen Website_URL command. Hover over the elements and reuse the generated selectors in your test code.
As mentioned earlier, Codegen is extremely useful when it comes to generating selectors since selectors are an integral part of any automation test code.
We would run the tests using Playwright Python in series and parallel. And our test scenario will consider a practical user story to demonstrate our end to end test. Read through this Playwright Python tutorial to learn more about parallel testing.
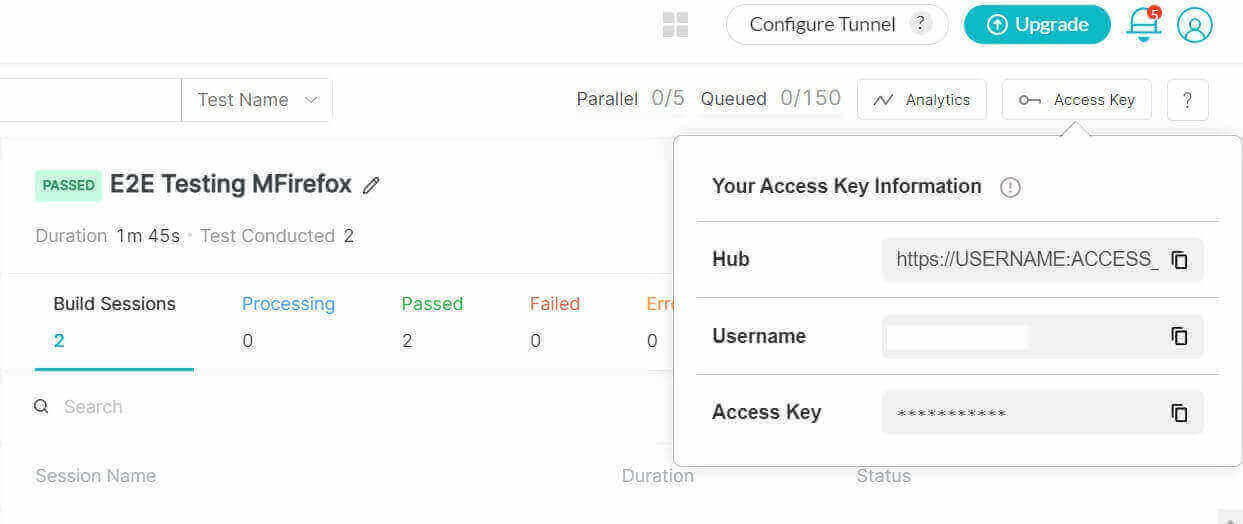
We’ll run our test on the LambdaTest cloud grid. So you’ll need to grab your username and secret key from your LambdaTest Build Dashboard by clicking the Access Key tab at the top-right:
By using a cloud testing platform like LambdaTest, you can dramatically cut down the time taken to run your Playwright Python tests by using a browser farm of 50+ browsers and browser versions of Chrome, Chromium, Microsoft Edge, Mozilla Firefox, and even Webkit.
You can also subscribe to the LambdaTest YouTube Channel and stay updated with the latest tutorial around automated browser testing, Cypress E2E testing, Mobile App Testing, and more.
The tests are demonstrated using the LambdaTest e-commerce playground. The use cases for this Playwright Python tutorial are below:
Test Scenario – 1 (New User Registration)
- The user launches the LambdaTest e-commerce playground registration page.
- Fills out the registration form.
- User submits the registration form.
- Go to their dashboard for the first time.
Test Scenario – 2 (Login and Purchase Item)
- The user logs in another time with the registered account.
- Searches for a product.
- The user selects the product searched for in step.
- Adds the product to the cart.
- The user checks out.
- Perform logout.
Playwright Python Test Structure:
We will adopt the Page Object Model (POM) design pattern to structure the test project. So our code structure, in this case, separates concerns into different files in separate folders for modularization. This helps us scale our code later on and get rid of complexities.
Maintainability and scalability of the source code are some of the biggest plus points of the Page Object Model design pattern.
For instance, you might want to separate parallel test cases from single ones along the line.
Here’s the Playwright Python test structure:
Playwright Python Structure Walkthrough:
The elementSelectors folder contains the selectors for all the test scenarios. All the capabilities required to run all the test suites are inside the testCapabilities directory. This folder has only one file, which defines the capabilities shared by all test cases.
We also place all test actions (event handlers) inside the testScripts folder. Each file in this folder holds the class handling event methods. And finally, the testScenarios directory contains the test runners for each test case. To run any test, you only need to run each file here.
Therefore, we have to place the .env file in this testScenarios folder since all imported modules will pick declared environment variables from it while running the test. Remember that the .env file holds all secret parameters, including your cloud grid key and username.
Here’s the VS Code screenshot of the project directory used for this Playwright Python tutorial:
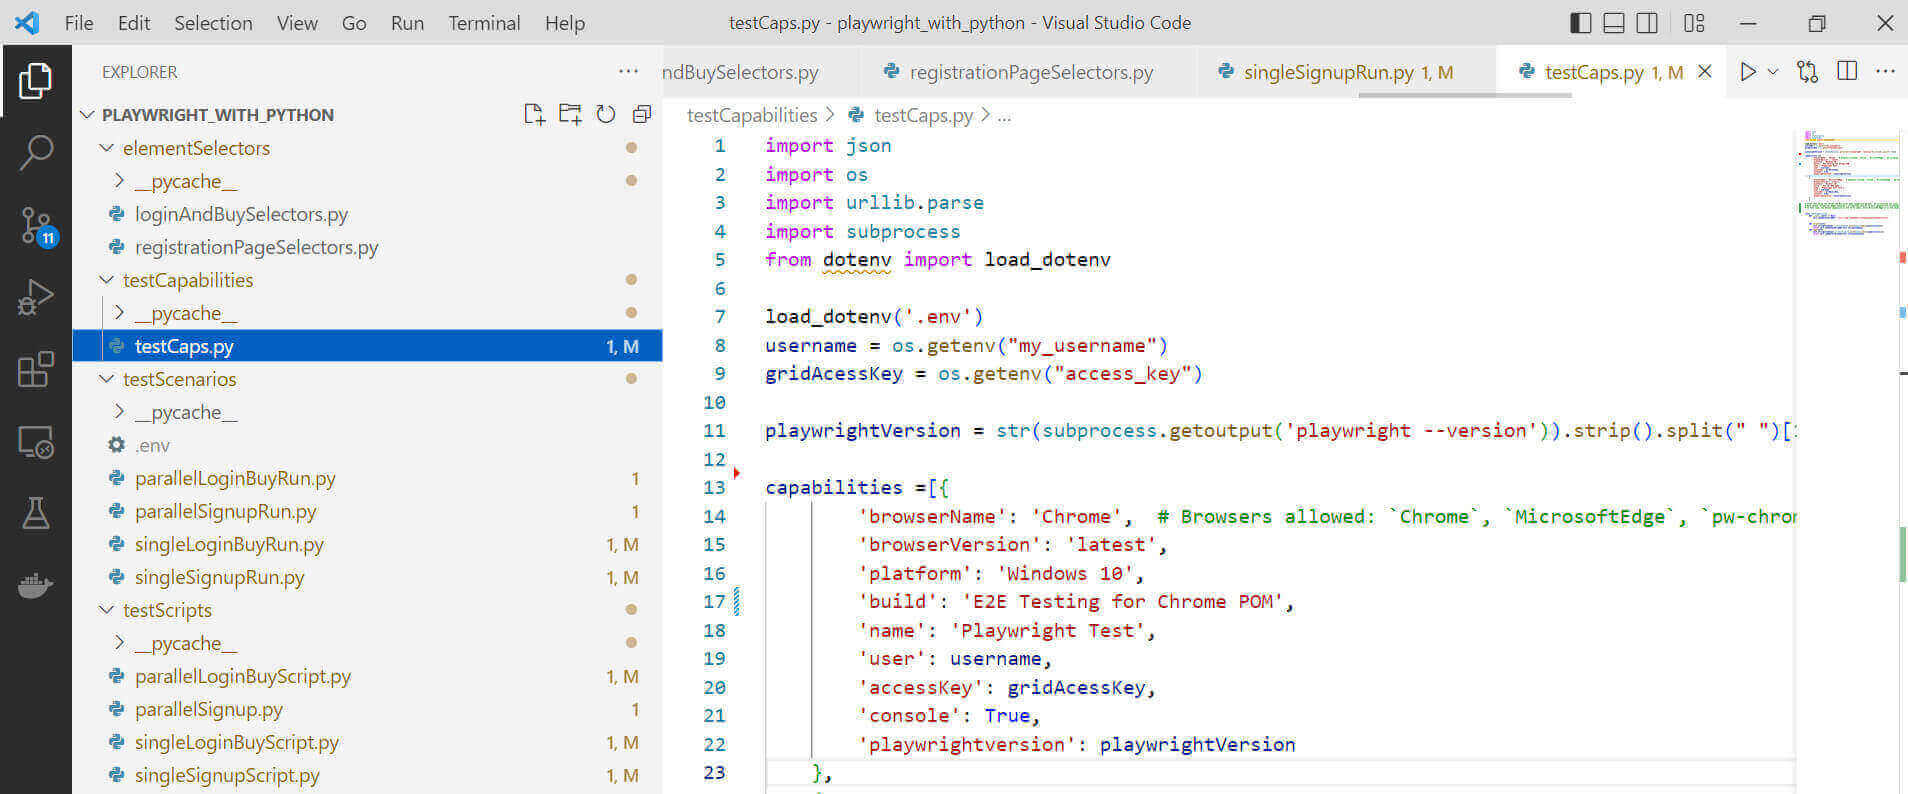
Now, we start by setting up the test capabilities for the entire test suite.
Test Capabilities Implementation:
Playwright Python Code Walkthrough:
The testCaps.py file contains the capabilities module required to run all our test cases, including single and parallel tests. So you don’t have to change it for subsequent test cases while running the Playwright Python test—unless you want to add more capabilities to the array, which involves scaling the methods.
You start by importing all the necessary packages to run this Playwright Python module.
|
1 2 3 4 5 |
import json import os import urllib.parse import subprocess from dotenv import load_dotenv |
Next, load your cloud grid access key and username from the environmental variables using the dotenv package, as you’ll provide them in the capabilities:
|
1 2 3 |
load_dotenv('.env') username = os.getenv("my_username") gridAcessKey = os.getenv("access_key") |
You’ll also provide the Playwright version as a string inside the test capability. In this case, we extract this value using the subprocess module. Then we clean it with Python’s built-in strip and split functions:
|
1 |
playwrightVersion = str(subprocess.getoutput('playwright --version')).strip().split(" ")[1] |
Each capability is a dictionary specifying settings for the test. There are two capabilities in the array—in this case (Chrome and Microsoft Edge). Therefore we can call them individually in separate methods using an array index. And that makes it easy to scale to perform cross browser testing using Playwright Python – even in parallel.
|
1 2 3 4 5 6 7 8 9 10 11 12 13 14 15 16 17 18 19 20 21 22 23 |
capabilities =[{ 'browserName': 'Chrome', # Browsers allowed: `Chrome`, `MicrosoftEdge`, `pw-chromium`, `pw-firefox` and `pw-webkit` 'browserVersion': 'latest', 'platform': 'Windows 10', 'build': 'E2E for Chrome POM', 'name': 'Playwright Test', 'user': username, 'accessKey': gridAcessKey, 'console': True, 'playwrightversion': playwrightVersion }, { 'browserName': 'MicrosoftEdge', # Browsers allowed: `Chrome`, `MicrosoftEdge`, `pw-chromium`, `pw-firefox` and `pw-webkit` 'browserVersion': 'latest', 'platform': 'Windows 10', 'build': 'E2E for POM Egde', 'name': 'Playwright Test Case 2', 'user': username, 'accessKey': gridAcessKey, 'console': True, 'playwrightversion': playwrightVersion } ] |
The testCapabilities class holds the Chrome and Microsoft Edge capability methods. First, you initialize this class with the cloud grid URL:
|
1 2 3 |
class testCapabilities: def __init__(self) -> None: self.lambdatestGridURL = 'wss://cdp.lambdatest.com/playwright?capabilities=' |
The LamdaTest grid URL for Playwright, as indicated above, is self.lambdatestGridURL.
You then extract the capability for each browser method (Chrome and Edge) using its index position. Then concatenate each with the grid URL inherited from the __init__ function.
The Chrome method capability dictionary is at index zero (first item in the array):
|
1 2 |
self.stringifiedCaps = urllib.parse.quote(json.dumps(capabilities[0])) return self.lambdatestGridURL+self.stringifiedCaps |
The Edge() method gets the second dictionary in the array:
|
1 2 |
self.stringifiedCaps1 = urllib.parse.quote(json.dumps(capabilities[1])) return self.lambdatestGridURL+self.stringifiedCaps1 |
Hence, this design helps you run your test singly or in parallel based on the different capabilities.
Implementation of the Registration Test Scenario:
Playwright Python Code Walkthrough:
FileName – elementSelectors / registrationPageSelectors.py:
We insert all the web element selectors, including the test site URL, into a dictionary inside the registrationPageSelectors.py file:
For instance, the Email field selector takes this format in the dictionary:
|
1 |
'E-Mail': 'input[placeholder="E-Mail Address"]' |
The entire element selector dictionary looks like this:
|
1 2 3 4 5 6 7 8 9 10 11 12 13 |
webElements = { 'webpage': "https://ecommerce-playground.lambdatest.io/index.php?route=account/register", 'First_Name': 'input[placeholder="First Name"]', 'Last_Name': 'input[placeholder="Last Name"]', 'E-Mail': 'input[placeholder="E-Mail"]', 'Telephone': 'input[placeholder="Telephone"]', 'Password': 'input[placeholder="Password"]', 'Confirm_Password': 'input[placeholder="Password Confirm"]', 'Subscribe': 'label:has-text("No")', 'Privacy_Policy': 'label:has-text("I have read and agree to the Privacy Policy")', 'Submit': 'input[value="Continue"]', 'Continue': "text=Continue" } |
Next is to turn these into the attributes that initiate the elementSelector class by calling each element by its key:
|
1 2 3 4 5 6 7 8 9 10 11 12 13 |
class elementSelector: def __init__(self) -> None: self.webpage = webElements["webpage"] self.firstname = webElements["First_Name"] self.lastname = webElements["Last_Name"] self.email = webElements["E-Mail"] self.telephone = webElements["Telephone"] self.password = webElements["Password"] self.confirmpassword = webElements["Confirm_Password"] self.subscribe = webElements["Subscribe"] self.privacypolicy = webElements["Privacy_Policy"] self.submit = webElements["Submit"] self.todashboard = webElements["Continue"] |
Then we declare them as methods of the elementSelector class like so:
|
1 2 3 4 5 6 7 8 9 10 11 12 13 14 15 16 17 18 19 20 21 22 |
def webPage(self): return self.webpage def firstName(self): return self.firstname def lastName(self): return self.lastname def eMail(self): return self.email def Telephone(self): return self.telephone def Password(self): return self.password def confirmPassword(self): return self.confirmpassword def Subscribe(self): return self.subscribe def privacyPolicy(self): return self.privacypolicy def Submit(self): return self.submit def goToDashboard(self): return self.todashboard |
FileName – testScripts / singleSignupScript.py:
The singleSignupScript.py file contains the test event methods. We start by importing the built-in modules:
|
1 2 |
from playwright.sync_api import sync_playwright import sys |
The sys package connects the Python files in different folders and makes imported custom modules visible:
|
1 |
sys.path.append(sys.path[0] + "/..") |
The directory path (“/..”) is a file-level declaration, showing that the imported module is two steps away from the root folder. So it might change in your case, depending on your project structure.
After this, we import and instantiate the elementSelector and testCapability classes from their respective modules:
|
1 2 3 4 5 6 |
from elementSelectors.registrationPageSelectors import elementSelector from testCapabilities.testCaps import testCapabilities select = elementSelector() capability = testCapabilities() |
So, for instance, to call the Chrome method from the testCapability class:
|
1 |
capability.Chrome() |
And to get a method, say the webPage from the elementSelector class:
|
1 |
select.webPage() |
To start the Register class, it inherits the Playwright package methods:
|
1 |
def __init__(self, playwright) -> None: |
However, to initiate the Register class, we connected to the Chrome method (which defines the grid URL and the JSONified capabilities). The self.page attribute is an instance of the browser context containing the locator actions.
|
1 2 3 |
self.browser = playwright.chromium.connect(capability.Chrome()) page = self.browser.new_page() self.page = page |
The launchWeb method opens the website using the page instance goto method by calling the website URL with the select.webPage() instance of the elementSelector class:
|
1 2 3 4 |
def launchWeb(self): self.page.goto(select.webPage()) title = self.page.title() print(title) |
Each of the other attributes in the class gets the appropriate method similarly. For readability, each field element accepts a data keyword.
For example, to fill in the first name:
|
1 2 |
def fillFirstName(self, data): self.page.locator(select.firstName()).fill(data) |
The elements that accept a click event doesn’t take any data. To click the Subscribe button, for instance:
|
1 2 |
def subscribe(self): self.page.locator(select.Subscribe()).click() |
The set_test_status function at the top of the script returns test status on the LambdaTest Grid UI. So once a test passes, it returns passed, but you get a failed message for failed tests:
|
1 2 3 |
def set_test_status(page, status, remark): page.evaluate("_ => {}", "lambdatest_action: {\"action\": \"setTestStatus\", \"arguments\": {\"status\":\"" + status + "\", \"remark\": \"" + remark + "\"}}") |
This later becomes a part of the Register class methods:
|
1 2 3 4 5 |
def getSuccessStatus(self): return set_test_status(self.page, "passed", "Success") def getFailedStatus(self): return set_test_status(self.page, "failed", "Test failed") |
FileName – testScenario / singleSignupRun.py:
The singleSignupRun.py file also starts with module imports. But notably, we imported the Register class from the singleSignupScript module. We then created an event loop using the sync class of Playwright and passed this as playwright:
|
1 |
with sync_playwright() as playwright: |
Remember that the Register class inherited the Playwright method earlier. To actualize this, we pass the playwright variable as an instance of the Register class. And it also now bears the inherited Playwright sync class:
|
1 |
playwright = Register(playwright) |
Therefore, the event loop executes the registration test steps in this order:
Step 1: Launch the test website using the launch method:
|
1 |
playwright.launchWeb() |
Step 2: Fill out the registration form. So for form fields, you must call and fill them since they accept a positional data argument:
|
1 2 3 4 5 6 7 8 |
playwright.fillFirstName("Idowu") playwright.fillLastName("Omisola") playwright.fillEmail("anEmailgmai@gmail.com") playwright.fillPhone("08122334433") playwright.fillPassword("mypassword") playwright.confirmPassword("mypassword") playwright.subscribe() playwright.acceptPolicy() |
Step 3: Submit the registration form:
|
1 |
playwright.submit() |
Step 4: Visit your dashboard for the first time:
|
1 |
playwright.continueToDashboard() |
The getSuccessStatus() method returns a passed message on the grid if the code in the try block executes successfully:
|
1 |
playwright.getSuccessStatus() |
Otherwise, it runs the getfailedStatus() method and returns a failed message on the grid:
|
1 2 |
except Exception as err: playwright.getFailedStatus() |
Finally, we close the browser outside the try-except block to prevent an endless loop, which throws an error during execution:
|
1 |
playwright.closeBrowser() |
Playwright Python Execution:
Run the test runner file (singleSignupRun.py):
|
1 |
python singleSignupRun.py |
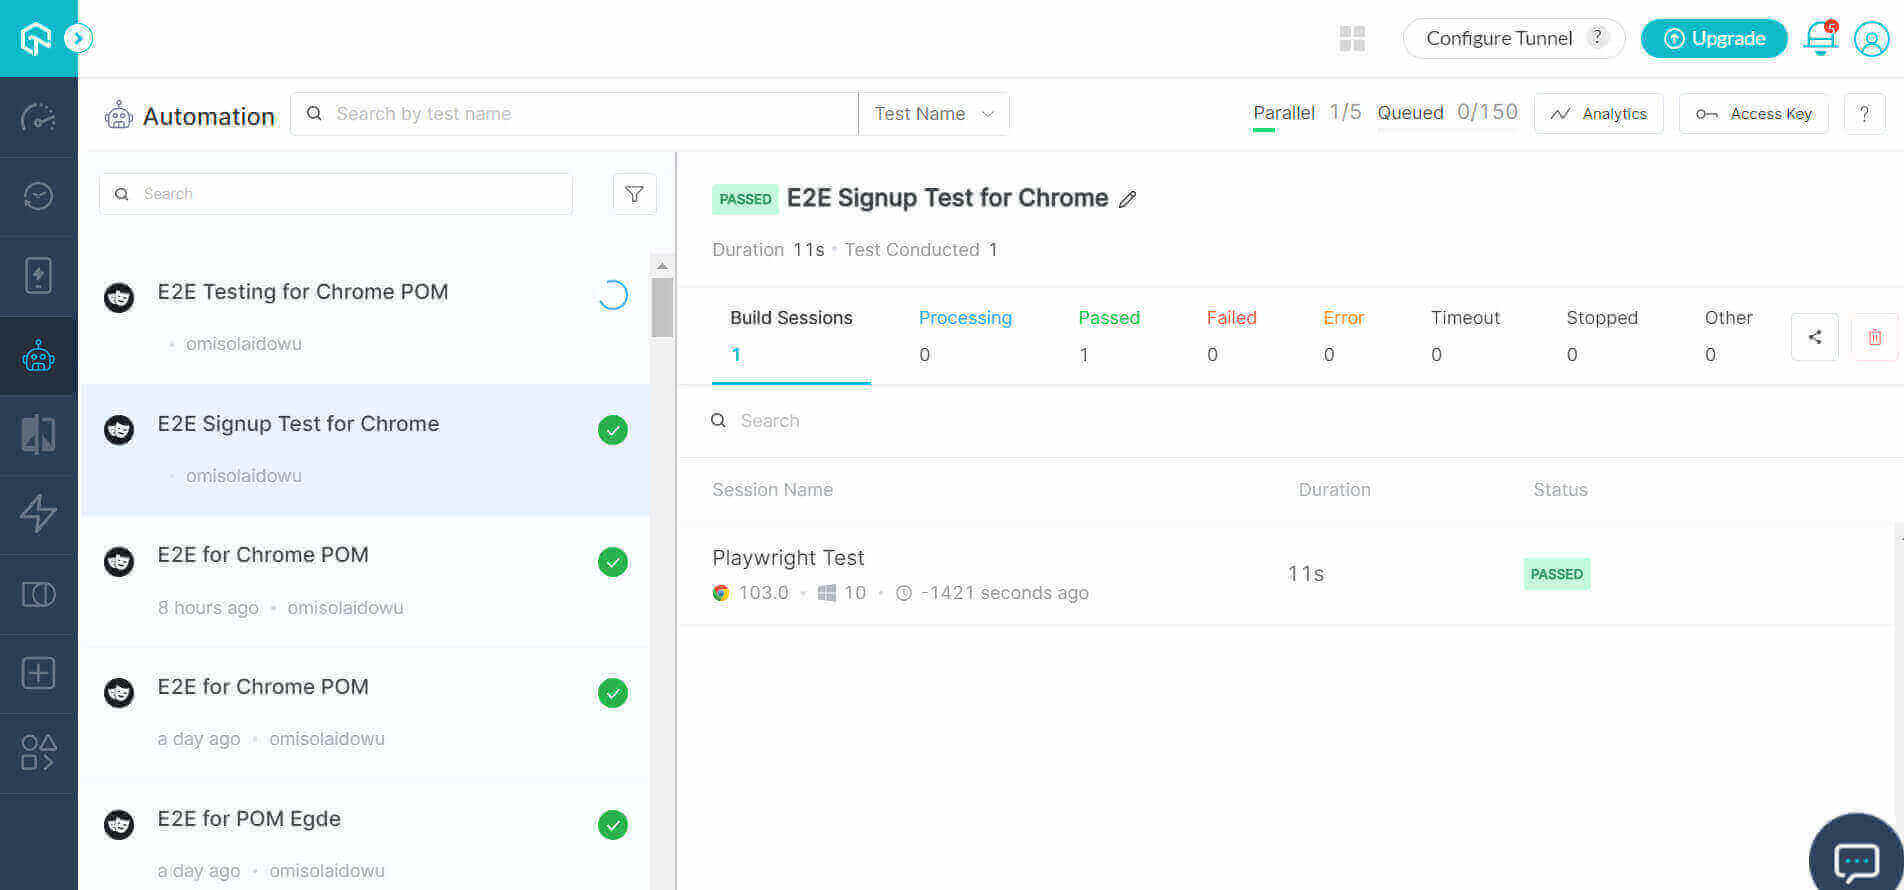
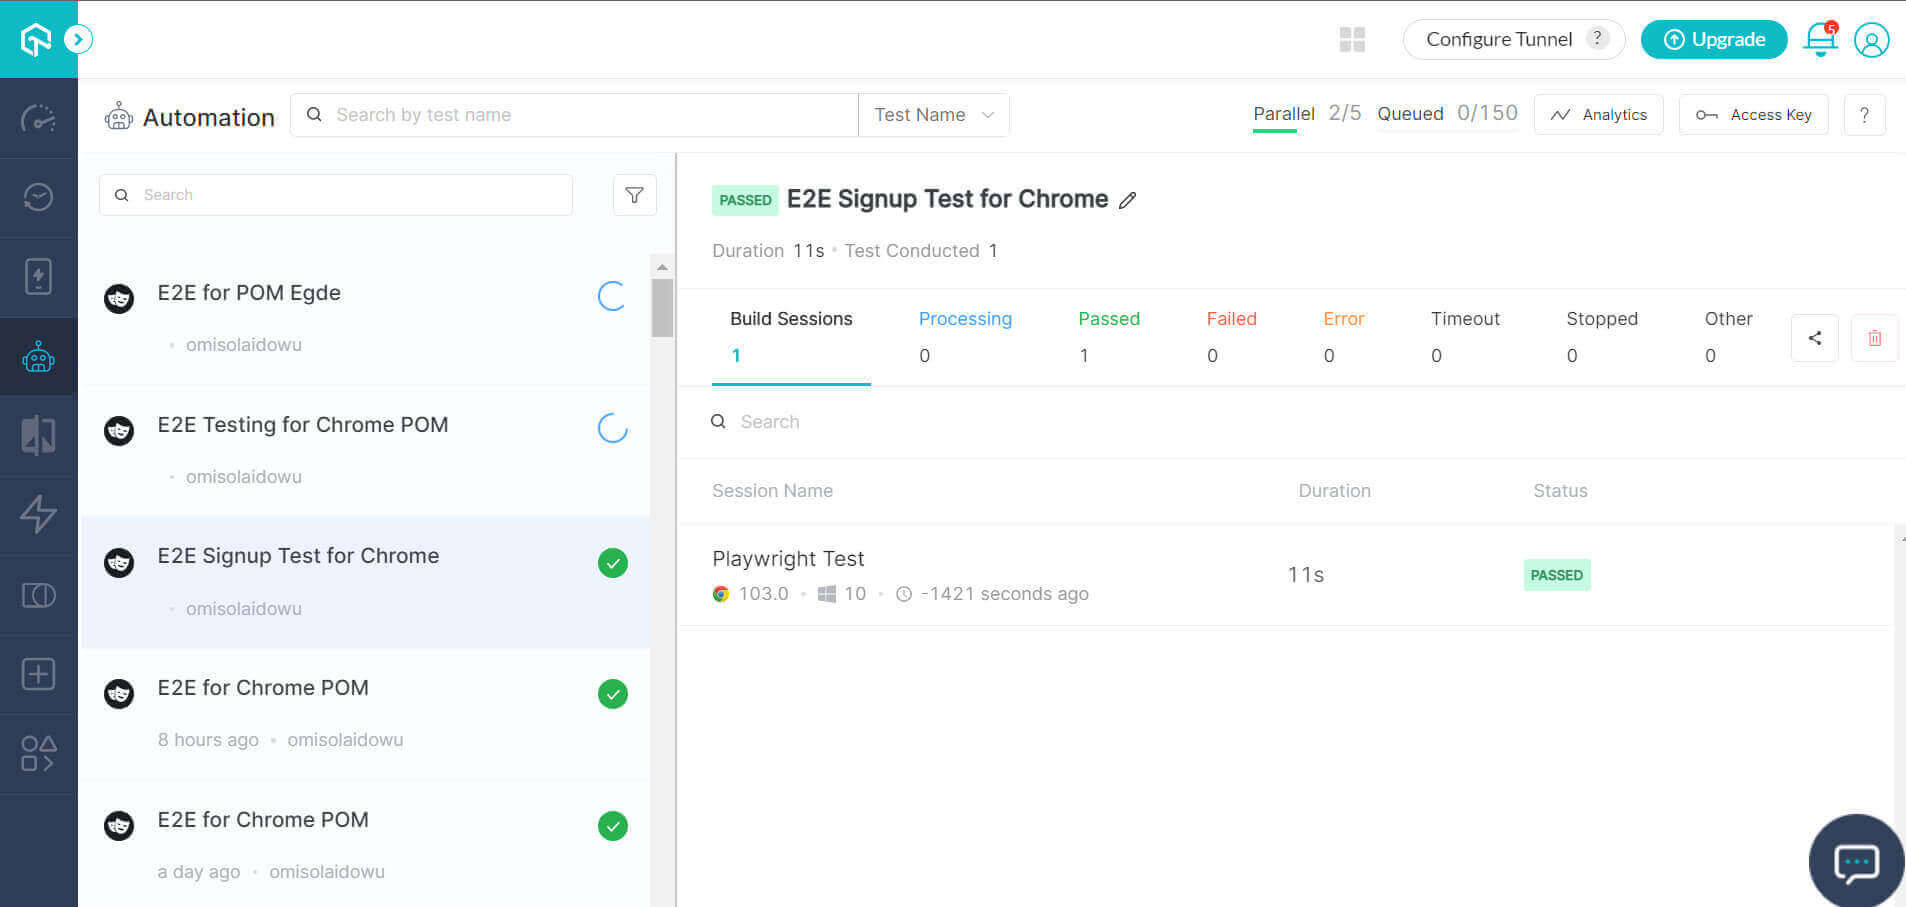
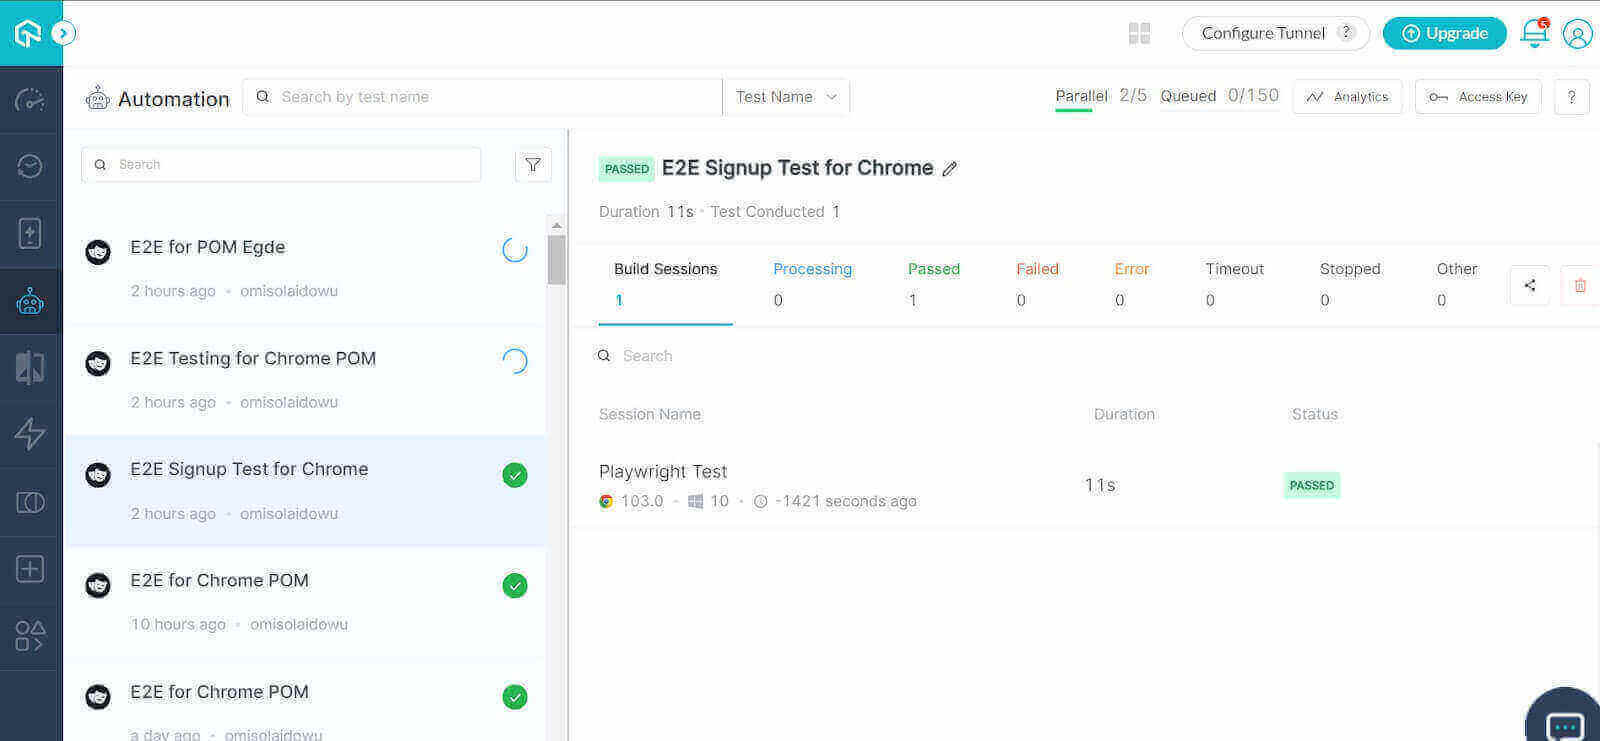
The test executes successfully on the LambdaTest grid as shown below:
Login and Product Purchase Test Case Implementation:
The element selectors for the login test case are inside the loginAndBuySelectors.py file.
Playwright Python Code Walkthrough:
FileName – elementSelectors / loginAndBuySelectors.py:
As with the registration test case, we place all the login page element selectors and the website URL in a dictionary (webElements):
|
1 2 3 4 5 6 7 8 9 10 11 12 13 |
webElements = { 'webpage': "https://ecommerce-playground.lambdatest.io/index.php?route=account/login", 'E-Mail': 'input[placeholder="E-Mail Address"]', 'Password': 'input[placeholder="Password"]', 'Login': 'input:has-text("Login")', 'Search': 'input[name="search"] >> nth = 0', 'searchbutton': 'div[class="search-button"]:has-text("Search")', 'product': 'h4[class="title"]:has-text("Nikon D300") >> nth = 0', 'addcart': 'div[id="entry_216842"]:has-text("Add to Cart")', 'checkoutmodal': 'div[role="alert"]:has-text("Checkout")', 'Hoverable': 'a[role="button"]:has-text("My account")', 'Logout': 'span:has-text("Logout")' } |
The Search and product elements have the >> nth = index because each of these DOM elements has an nth node with similar selectors. So the nth argument helps specify the index position of the children, starting from zero.
For example, to select the first product from a group of similar ones as we did above:
|
1 |
'product': 'h4[class="title"]:has-text("Nikon D300") >> nth = 0' |
We use these elements to initiate the elementSelector class by attaching each to an attribute:
|
1 2 3 4 5 6 7 8 9 10 11 12 13 |
class elementSelector: def __init__(self) -> None: self.webpage = webElements['webpage'] self.email = webElements['E-Mail'] self.password = webElements['Password'] self.login = webElements['Login'] self.hover = webElements['Hoverable'] self.searchproduct = webElements['Search'] self.product = webElements['product'] self.addcart = webElements['addcart'] self.checkout = webElements['checkoutmodal'] self.searchbutton = webElements['searchbutton'] self.logout = webElements['Logout'] |
Next, we create a method that returns each attribute. These methods will handle Playwright locator events in the test script:
|
1 2 3 4 5 6 7 8 9 10 11 12 13 14 15 16 17 18 19 20 21 22 |
def webPage(self): return self.webpage def firstName(self): return self.firstname def lastName(self): return self.lastname def eMail(self): return self.email def Telephone(self): return self.telephone def Password(self): return self.password def confirmPassword(self): return self.confirmpassword def Subscribe(self): return self.subscribe def privacyPolicy(self): return self.privacypolicy def Submit(self): return self.submit def goToDashboard(self): return self.todashboard |
So, the above block attaches each attribute to the elementSelector class method. We can use these easily in another file; you only have to call each from an instance of the elementSelector class. That’s one of the strong points of the Page Object Model (POM).
FileName – testScripts / singleLoginBuyScript.py:
We start the singleLoginButScript.py file by importing the synchronous Playwright and sys packages. Then we use the sys append method to point Python to the system path before importing our custom modules (elementSelector and testCapabilities):
|
1 2 3 4 5 6 |
from playwright.sync_api import sync_playwright import sys sys.path.append(sys.path[0] + "/..") from elementSelectors.loginAndBuySelectors import elementSelector from testCapabilities.testCaps import testCapabilities |
We create an instance of the elementSelector and testCapabilities classes to prevent conflict with the class inheritance:
|
1 2 3 |
select = elementSelector() capability = testCapabilities() |
It’s now easy to call each method from these classes via their object instance. We leverage this to declare our methods in the LoginAndBuy class, starting with initialization with the Chrome browser context. However, the initialization inherits the Playwright class:
|
1 2 3 4 5 6 |
class LoginAndBuy: def __init__(self, playwright) -> None: self.browser = playwright.chromium.connect(capability.Chrome()) page = self.browser.new_page() self.page = page |
In the above snippet, capability.Chrome() picks the Chrome() method from the testCapabilities class. You can change this to Microsoft Edge by replacing Chrome() with the Edge() method:
|
1 |
self.browser = playwright.chromium.connect(capability.Edge()) |
The other methods belong to the elementSelector class. So the test case starts by launching the browser using the inherited browser context. Note how it selects the webPage() method from this class:
|
1 2 |
def launchWeb(self): self.page.goto(select.webPage()) |
The following three methods define the login process. Each form field accepts a data keyword (the Email and password registered earlier):
Below are the login steps:
|
1 2 3 4 5 6 7 8 |
def fillEmail(self, data): self.page.locator(select.eMail()).fill(data) def fillPassword(self, data): self.page.locator(select.Password()).fill(data) def clickLogin(self): self.page.locator(select.loginAccount()).click() |
Next up, we search for a product, select it when found, then add it to the cart and checkout:
|
1 2 3 4 5 6 7 8 9 10 11 12 13 14 |
def fillSearchBox(self, data): self.page.locator(select.searchProduct()).fill(data) def clickSearchButton(self): self.page.locator(select.searchButton()).click() def clickProduct(self): self.page.locator(select.Product()).click() def clickAddToCart(self): self.page.locator(select.addCart()).click() def clickCheckOutModal(self): self.page.locator(select.checkOut()).click() |
The final test step is to log out of the website. The hover() event makes the logout button accessible since it’s in a hoverable dropdown:
|
1 2 3 4 5 |
def hoverMenuBox(self): self.page.locator(select.hoverBox()).hover() def clickLogout(self): self.page.locator(select.logoutUser()).click() |
The set_test_status function at the top of the script helps communicate the test status to the cloud grid’s UI:
|
1 2 3 |
def set_test_status(page, status, remark): page.evaluate("_ => {}", "lambdatest_action: {\"action\": \"setTestStatus\", \"arguments\": {\"status\":\"" + status + "\", \"remark\": \"" + remark + "\"}}") |
This becomes part of the LoginAndBuy class methods:
|
1 2 3 4 5 |
def getSuccessStatus(self): set_test_status(self.page, "passed", "Success") def getFailedStatus(self): set_test_status(self.page, "failed", "Test failed") |
Finally, we close the browser context:
|
1 2 |
def closeBrowser(self): self.browser.close() |
FileName – testScenarios / singleLoginBuyRun.py:
The singleLoginBuyRun.py file runs the login and product purchase test case. First, we import the Playwright sync module and resolve the system path using the sys package:
|
1 2 3 4 |
import sys sys.path.append(sys.path[0] + "/..") from playwright.sync_api import sync_playwright |
We also have to import the LoginAndBuy class:
|
1 |
from testScripts.singleLoginBuyScript import LoginAndBuy |
Next is the class instance declaration inside the Playwright event loop, followed by website launch on the selected browser:
|
1 2 3 4 |
with sync_playwright() as playwright: try: playwright = LoginAndBuy(playwright) playwright.launchWeb() |
The following steps occur within the event loop:
Step 1: Log in another time with the registered account. Below are the login steps declaration within the event loop:
|
1 2 3 |
playwright.fillEmail("anEmailgmai@gmail.com") playwright.fillPassword("mypassword") playwright.clickLogin() |
Step 2: Search for a product and go to the product page:
|
1 2 |
playwright.fillSearchBox("Nikon") playwright.clickSearchButton() |
Step 3: Select the item you searched to go to the product page:
|
1 |
playwright.clickProduct() |
Step 4: Add the selected product to the cart:
|
1 |
playwright.clickAddToCart() |
Step 5: Check out with the purchased product:
|
1 |
playwright.clickCheckOutModal() |
Step 6: The event loop ends with the logout steps. The success status must be within the try clause since it runs only if the series of code in the try block work:
|
1 2 3 |
playwright.hoverMenuBox() playwright.clickLogout() playwright.getSuccessStatus() |
Otherwise, the failed status only runs if there’s an exception:
|
1 2 |
except: playwright.getFailedStatus() |
Finally, we close the browser regardless of what happens in the event loop:
|
1 |
playwright.closeBrowser() |
Execution of the Login and Product Purchase Test on the Cloud Grid:
To execute this test case:
|
1 |
python singleLoginBuyRun.py |
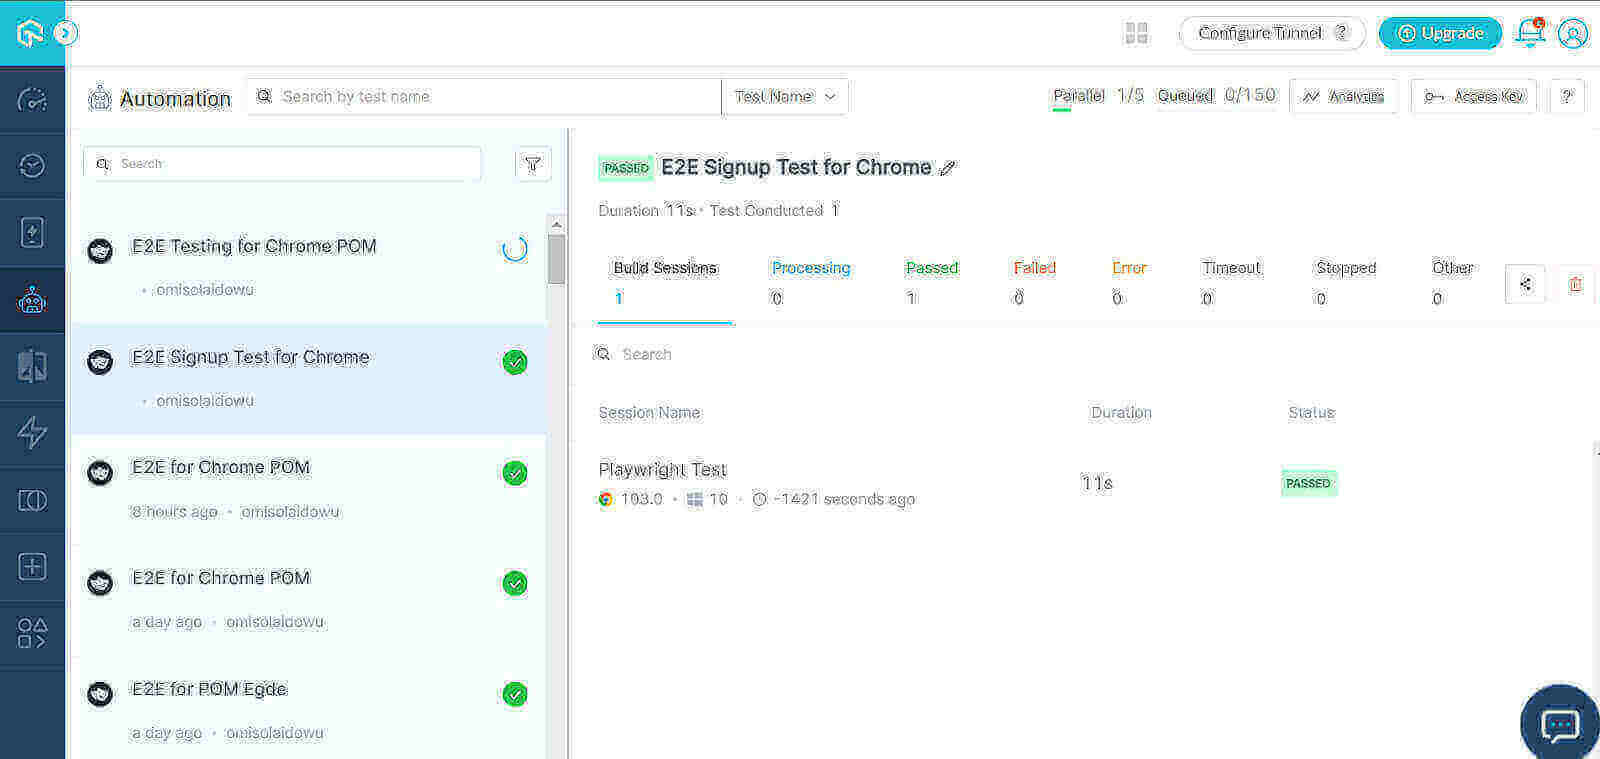
The test runs successfully on the cloud grid as shown:
Implementing parallel testing with Playwright Python
Performing cross-browser regression testing for multiple browsers at once helps find issues faster, allowing you to move on to other work. We will continue to maintain the same browser configurations for the parallel test for testing efficiency purposes.
Running the test cases in parallel on the cloud grid helps you simulate an instance of servers in the cloud where you can run your test cases concurrently on separate cloud host machines. This helps check if your app works as it should in different integration environments.
In this case, the parallel test concept is to iterate the test cases through a capabilities array. So for this section of this Playwright Python tutorial, we’ll run the registration and login tests on two browsing capabilities; Chrome and Microsoft Edge.
Note: The entire test suite shares the testCap.py file, which we’ve shown earlier. However, the selector modules (registrationPageSelectors.py and loginAndBuySelectors.py) also remain the same for the signup and login to purchase parallel test cases.
Registration Parallel Test Implementation:
Playwright Python Code Walkthrough:
FileName – testScripts/parallelSignup.py:
We import the needed modules for the test at the top of the script:
|
1 2 |
from playwright.sync_api import sync_playwright import sys |
The sys module points Python to the root directory path. Then we import the elementSelector and testCapabilities classes:
|
1 2 |
from elementSelectors.registrationPageSelectors import elementSelector from testCapabilities.testCaps import testCapabilities |
Next is the object instance creation. The select variable is the elementSelector class instance, while capability holds the testCapabilities class instance:
|
1 2 3 |
select = elementSelector() capability = testCapabilities() |
We initiate the Register class as we did in the previous single tests. But this time, we insert the capability methods (Chrome() and Edge()) into a list—so we can iterate through each browser instance to spin up a cross-browser parallel test.
So notably within the __init__ function:
|
1 |
self.allCaps = [capability.Edge(), capability.Chrome()] |
Next is an iteration of the browser contexts, ending with the self.pages inheriting the pages list:
|
1 2 3 |
self.browsers = [playwright.chromium.connect(i) for i in self.allCaps] pages = [i.new_page() for i in self.browsers] self.pages = pages |
The launchWeb() method also iterates through the browser contexts to launch the test website in each browser. We then print out the title for each page:
|
1 2 3 4 5 |
def launchWeb(self): for page in self.pages: page.goto(select.webPage()) title = page.title() print(title) |
This iteration continues for every test method under the Register class:
|
1 2 3 4 5 6 7 8 9 10 11 12 13 14 15 16 17 18 19 20 21 22 23 24 25 26 27 28 29 30 |
def fillFirstName(self, data): for page in self.pages: page.locator(select.firstName()).fill(data) def fillLastName(self, data): for page in self.pages: page.locator(select.lastName()).fill(data) def fillEmail(self, data): for page in self.pages: page.locator(select.eMail()).fill(data) def fillPhone(self, data): for page in self.pages: page.locator(select.Telephone()).fill(data) def fillPassword(self, data): for page in self.pages: page.locator(select.Password()).fill(data) def confirmPassword(self, data): for page in self.pages: page.locator(select.confirmPassword()).fill(data) def subscribe(self): for page in self.pages: page.locator(select.Subscribe()).click() def acceptPolicy(self): for page in self.pages: page.locator(select.privacyPolicy()).click() def submit(self): for page in self.pages: page.locator(select.Submit()).click() def continueToDashboard(self): for page in self.pages: page.locator(select.goToDashboard()).click() |
We then defined the status methods to get the appropriate messages in the grid UI:
|
1 2 3 4 5 6 7 |
def getSuccessStatus(self): for page in self.pages: set_test_status(page, "passed", "Success") def getFailedStatus(self): for page in self.pages: set_test_status(page, "failed", "Test failed") |
The script ends by closing the browser context.
|
1 2 3 |
def closeBrowser(self): for browser in self.browsers: browser.close() |
FileName – testScenarios / parallelSignupRun.py:
Nothing much has changed about the test runner file here. We import all the modules and point Python to the root directory, as we did earlier. However, this time, we import the Register class from the parallelSignup module since this is a parallel test:
|
1 2 3 4 5 |
import sys sys.path.append(sys.path[0] + "/..") from testScripts.parallelSignup import Register from playwright.sync_api import sync_playwright |
The methods called under sync_playwright() event loop run the parallel signup test using the Register class instance (playwright):
|
1 2 3 4 |
with sync_playwright() as playwright: try: playwright = Register(playwright) |
The test steps haven’t changed. But this time, they run in parallel:
Step 1: Go to the registration page on both browser contexts in consideration:
|
1 |
playwright.launchWeb() |
Step 2: Filling of the registration form occurs in parallel on both browsers:
|
1 2 3 4 5 6 7 8 |
playwright.fillFirstName("Idowu") playwright.fillLastName("Omisola") playwright.fillEmail("some7gmail@gmail.com") playwright.fillPhone("08122334433") playwright.fillPassword("mypassword") playwright.confirmPassword("mypassword") playwright.subscribe() playwright.acceptPolicy() |
Step 3: Submit the form on both browsers:
|
1 |
playwright.submit() |
Step 4: Go to your dashboard for the first time. Then end the test execution with a status message on the grid UI (passed or failed):
|
1 2 3 4 |
playwright.continueToDashboard() playwright.getSuccessStatus() except Exception as err: playwright.getFailedStatus() |
Finally, call the closeBrowser() method to close all browser instances and end the test:
|
1 |
playwright.closeBrowser() |
Registration Parallel Test Execution:
Run the parallelSignupRun.py file:
|
1 |
python parallelSignupRun.py |
Our parallel cross-browser test cases run simultaneously on the LambdaTest cloud grid as shown:
Implementation (Login and Purchase use case):

Playwright Python Code Walkthrough:
FileName – testScripts / parallelLoginBuyScript.py:
We start by importing all necessary modules for the test case inside the parallelLoginBuyScript.py file:
|
1 2 3 4 5 6 |
from playwright.sync_api import sync_playwright import sys sys.path.append(sys.path[0] + "/..") from elementSelectors.loginAndBuySelectors import elementSelector from testCapabilities.testCaps import testCapabilities |
Next is an instance of the elementSelector and testCapabilities classes:
|
1 2 3 |
select = elementSelector() capability = testCapabilities() |
We then set up the test status function to trigger failed or success messages on the cloud grid UI. Remember, we’ll implement this as a method of the loginAndBuy class:
|
1 2 3 |
def set_test_status(page, status, remark): page.evaluate("_ => {}", "lambdatest_action: {\"action\": \"setTestStatus\", \"arguments\": {\"status\":\"" + status + "\", \"remark\": \"" + remark + "\"}}") |
The loginAndBuy inherits the Playwright class methods. As you can see, the __init__ function accepts an extra playwright argument:
|
1 2 |
class LoginAndBuy: def __init__(self, playwright) -> None: |
We have to iterate through the browser capabilities, then instantiate a browser context for each. Thus, the self.pages attribute inherits the pages list created from the loop:
|
1 2 3 4 5 |
def __init__(self, playwright) -> None: self.allCaps = [capability.Edge(), capability.Chrome()] self.browsers = [playwright.chromium.connect(i) for i in self.allCaps] pages = [i.new_page() for i in self.browsers] self.pages = pages |
Next, we launch the test website on both browser contexts inside a loop:
|
1 2 3 4 5 |
def launchWeb(self): for page in self.pages: page.goto(select.webPage()) title = page.title() print(title) |
The rest of the methods in the class take an event handler, which we’ll run inside another file in an event loop:
|
1 2 3 4 5 6 7 8 9 10 11 12 13 14 15 16 17 18 19 20 21 22 23 24 25 26 27 28 29 30 31 32 33 34 35 36 37 38 39 |
def fillEmail(self, data): for page in self.pages: page.locator(select.eMail()).fill(data) def fillPassword(self, data): for page in self.pages: page.locator(select.Password()).fill(data) def clickLogin(self): for page in self.pages: page.locator(select.loginAccount()).click() def fillSearchBox(self, data): for page in self.pages: page.locator(select.searchProduct()).fill(data) def clickSearchButton(self): for page in self.pages: page.locator(select.searchButton()).click() def clickProduct(self): for page in self.pages: page.locator(select.Product()).click() def clickAddToCart(self): for page in self.pages: page.locator(select.addCart()).click() def clickCheckOutModal(self): for page in self.pages: page.locator(select.checkOut()).click() def hoverMenuBox(self): for page in self.pages: page.locator(select.hoverBox()).hover() def clickLogout(self): for page in self.pages: page.locator(select.logoutUser()).click() |
We also declare the test status functions as methods under the loginAndBuy class:
|
1 2 3 4 5 6 7 |
def getSuccessStatus(self): for page in self.pages: set_test_status(page, "passed", "Success") def getFailed(self): for page in self.pages: set_test_status(page, "failed", "Test failed") |
Finally, we iterate through the browser contexts to close the opened instances:
|
1 2 3 |
def closeBrowser(self): for browser in self.browsers: browser.close() |
FileName – testScenarios / parallelLoginBuyRun.py:
We import all the essential packages in the parallel test runner file. However, the custom class of interest this time is loginAndBuy:
|
1 2 3 4 5 |
import sys sys.path.append(sys.path[0] + "/..") from testScripts.parallelLoginBuyScript import LoginAndBuy from playwright.sync_api import sync_playwright |
The playwright_sync event loop runs the parallel test case, starting with a playwright instance of the loginAndBuy class, followed by website launch on both browser contexts:
|
1 2 3 4 |
with sync_playwright() as playwright: try: playwright = LoginAndBuy(playwright) playwright.launchWeb() |
Step 1: Fill out the login form and sign in on both browser contexts considered for the parallel test:
|
1 2 3 |
playwright.fillEmail("some3gmail@gmail.com") playwright.fillPassword("mypassword") playwright.clickLogin() |
Step 2: Search for a product and click the search button:
|
1 2 |
playwright.fillSearchBox("Nikon") playwright.clickSearchButton() |
Step 3: Go to the product page by clicking it once found:
|
1 |
playwright.clickProduct() |
Step 4: Add the product to the cart by clicking the ADD TO CART button:
|
1 |
playwright.clickAddToCart() |
Step 5: Check out of the product page:
|
1 |
playwright.clickCheckOutModal() |
Step 6: Log out of the website and return a success status on the LambdaTest cloud grid UI:
|
1 2 3 |
playwright.hoverMenuBox() playwright.clickLogout() playwright.getSuccessStatus() |
If the test fails for whatever reason, the getFailed() method within the except block runs and returns a failed message on the grid UI:
|
1 2 |
except: playwright.getFailed() |
It’s also important to close the event loop for each browser context to prevent an endless loop. We do this outside the try-except block to avoid termination conflict:
|
1 |
playwright.closeBrowser() |
Execution of the Login and Purchase Parallel Test:
Run the parallelLoginBuyRun.py file.
|
1 |
python parallelLoginBuyRun.py |
Below is the parallel test execution for the selected browser on the cloud grid:
Conclusion
The Playwright testing framework provides simple methods for end to end testing. In this article, we demonstrated the use of Playwright Python for single and parallel testing. And we wrapped all our test cases inside the POM model for simplicity.
We started by exploring the power of Playwright’s code generator and how it can help us automatically create test case code and selectors. But since that method is complex and unscalable, we further implemented a single custom end to end Playwright test on user registration and product purchase on the LambdaTest e-commerce playground.
This led us to perform a cross-browser parallel test for a similar test scenario. And you’ve also seen how to create class methods that connect your tests to the LambdaTest cloud grid.
Do checkout complete guides on python basics, software testing metrics, webdriverio appium and more. We also have a comprehensive library of software testing questions, where we cover generic questions like what is bdd testing, what is an iframe, and more. We also support legacy browsers and OS, like you can test on internet explorer or you can test on macOS Mountain lion and more. You can also test screen orientation and perform selenium automation testing with gauge framework
Frequently Asked Questions (FAQs)
What is an end to end testing?
End to end testing is a methodology that assesses the working order of a complex product in a start-to-finish process. The end to end method stresses the entire system, ensuring that all components are able to run and perform optimally under real-world scenarios.
Is Playwright better than Selenium?
Selenium is a free and open source web application test framework that enables users to write automated tests to be run against a web application. Playwright lacks some features found in Selenium, such as scheduling automated tests, or providing support for recording tests from outside the application being tested (e.g., recording playback of manual tests).


Author’s Profile
Idowu (Paul) Omisola
Idowu is a self-taught programmer, coding YouTuber, and technical writer with a penchant for teaching. He started his coding career in 2018 but combined it with technical writing a year later and has never looked back. He has worked for a couple of websites over the years, and you'll find some of his coding guides on popular websites like MUO. He loves discussing software structure and coding topics in Python, JavaScript, Golang, and TypeScript. And when it comes to software testing, he's a fan of Playwright and Selenium.
Blogs: 6
Got Questions? Drop them on LambdaTest Community. Visit now