Using React Virtual DOM To Improve Web Application Performance
Bonnie
Posted On: May 15, 2023
![]() 161194 Views
161194 Views
![]() 35 Min Read
35 Min Read
If you don’t know, HTML is the most widely used markup language for creating web pages supported by all major browsers like Google Chrome, Mozilla Firefox, and Safari. HTML elements are represented as a tree data structure on a browser by Document Object Model (DOM). When there is a change in the HTML document, the entire DOM is updated.
However, updating the whole DOM each time a change is made can negatively impact the web application’s performance and cause it to slow down.
This is where a virtual DOM can be leveraged to improve the web application’s performance whenever a change is made to HTML documents.
This blog on React Virtual DOM covers its advantages over the Core DOM and Shadow DOM. It explains how to create a Virtual DOM in JavaScript and how it can improve web application performance with dynamic content. The blog also explores how React uses the Virtual DOM and deep dives into running automated tests on a React Virtual DOM web application using Jasmine and cloud Selenium Grid.
If you’re looking to improve your Selenium interview skills, check out our curated list of Selenium interview questions and answers.
TABLE OF CONTENTS
- What is a Virtual DOM?
- Advantages of using a Virtual DOM in a web application
- Understanding the Document Object Model (DOM)
- Differences between the Core DOM, Virtual DOM, and Shadow DOM
- How to create React Virtual DOM in JavaScript?
- How to use Virtual DOM to improve web application performance?
- How to use React Virtual DOM to improve web application performance?
- Automated Geolocation Testing on a Virtual DOM web application using Jasmine and Cloud Selenium Grid
- Conclusion
- Frequently Asked Questions (FAQs)
What is a Virtual DOM?
In simple terms, Virtual DOM is a lightweight in-memory representation of a web page’s user interface (UI) or Core DOM. Many JavaScript frameworks and libraries, such as React, Angular, and Vue.js, use a virtual DOM.
Since manipulating or updating the Core DOM directly can make a web application slow, especially when there are frequent changes to the user interface, a Virtual DOM is used to improve its performance by avoiding unnecessary updates to the Core DOM.
When the user interface of a web application using a Virtual DOM is rendered for the first time, a version of a Virtual DOM is created as a copy of the Core DOM and stored in memory. Every time a change is made to the user interface, a new version of Virtual DOM is created.
Through a process called diffing, a JavaScript library or framework compares the new version of the Virtual DOM to the previous version and only updates the parts of the Core DOM that have changed.
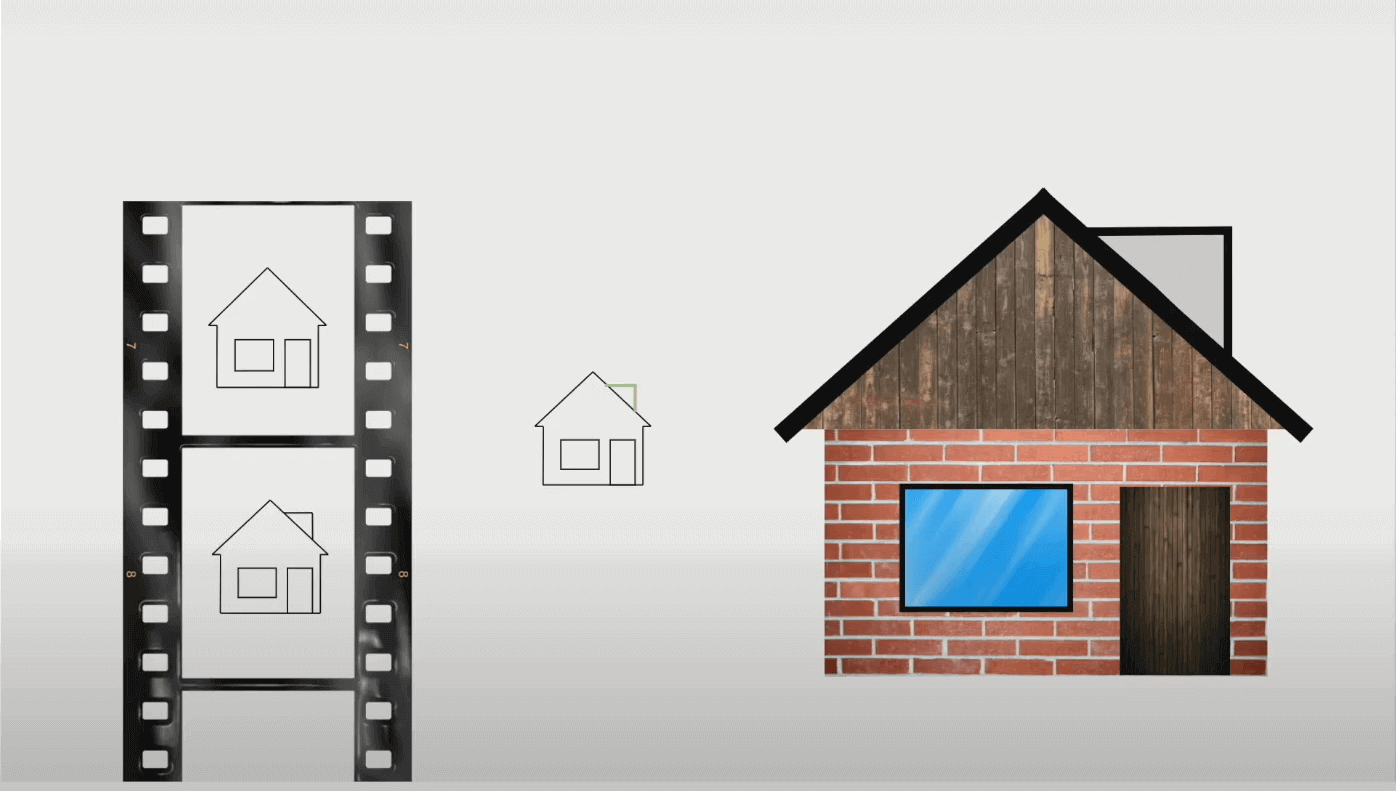
Assume the user interface, or the Core DOM, is a real house. If you want to change the house, like changing the windows, you have to rebuild the house from the ground up. Rebuilding the house from the ground up every time a change needs to be made can be expensive and time-consuming.
Now take the small house on the top left below as the plan of the house. If you want to add new windows or change the house, you can ask an architect to draw a new plan with the new changes. Then you give the builders the new plan of the house, which they compare to the old plan to check the changes that need to be made to the house.
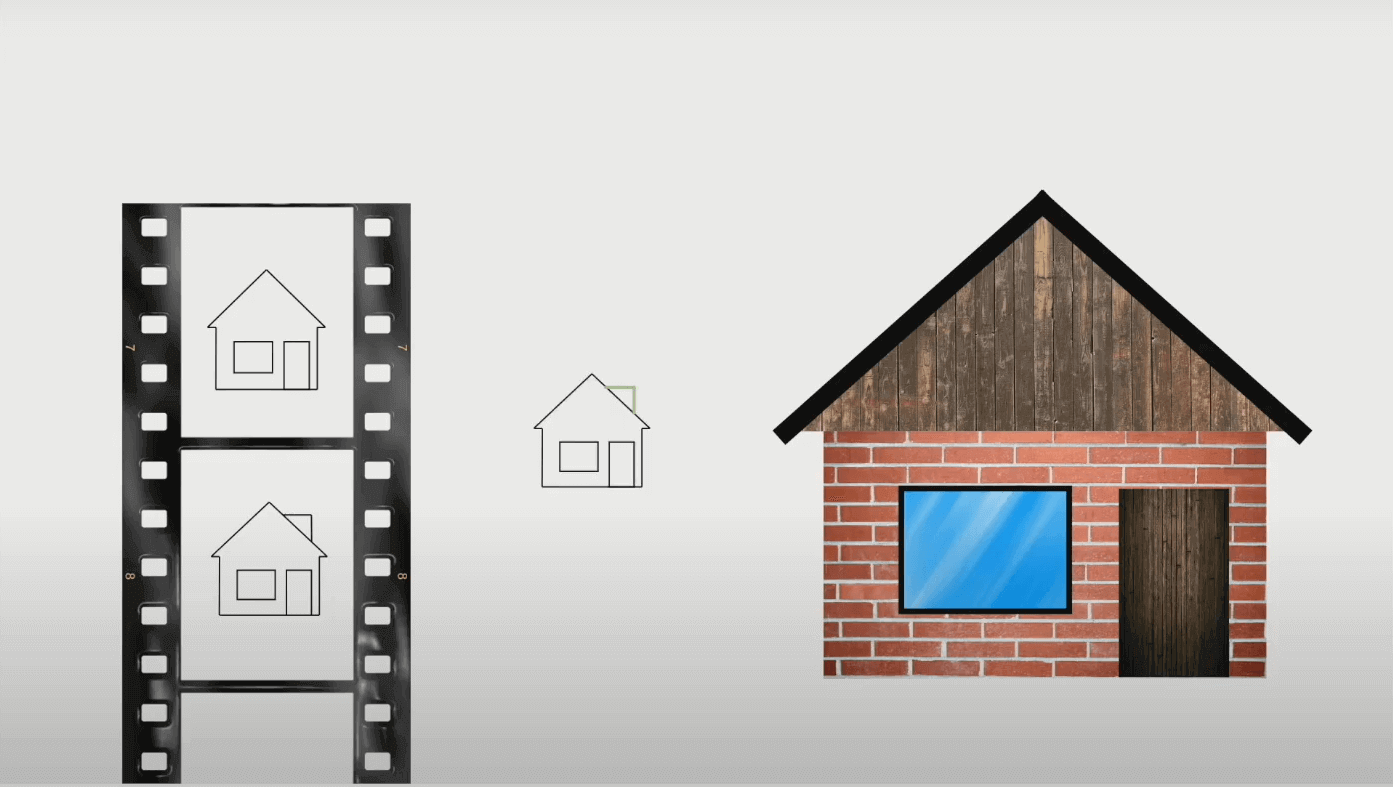
After confirming the new changes, they only make the changes to the house without rebuilding it from the ground up.
 Note
NoteAutomate your JavaScript test cases across 3000+ real browsers and OS.
Advantages of using a Virtual DOM in a web application
Some of the advantages of using a Virtual DOM in a web application are:
- Improved Performance
- Better User Experience
- Better CPU and Memory Consumption
The Virtual DOM avoids unnecessary updates and re-rendering of a web application user interface every time a change is made, hence making the web application fast and more efficient.
The Virtual DOM improves a web application’s user experience by reducing latency. When re-rendering the web application user interface, the Virtual DOM preserves the state of some user interface elements, such as input fields hence the user can add data to the fields smoothly without losing it every time the user interface is re-rendered.
The Virtual DOM reduces a web application’s CPU and memory consumption compared to Core DOM because a Virtual DOM is a lightweight in-memory representation of a web application user interface or Core DOM.
The Virtual DOM minimizes the number of DOM updates when there is a change in a web application user interface. The reduced unnecessary updates lead to reduced CPU time which is the amount of time a CPU uses to process instructions of the web application.
Understanding the Document Object Model (DOM)
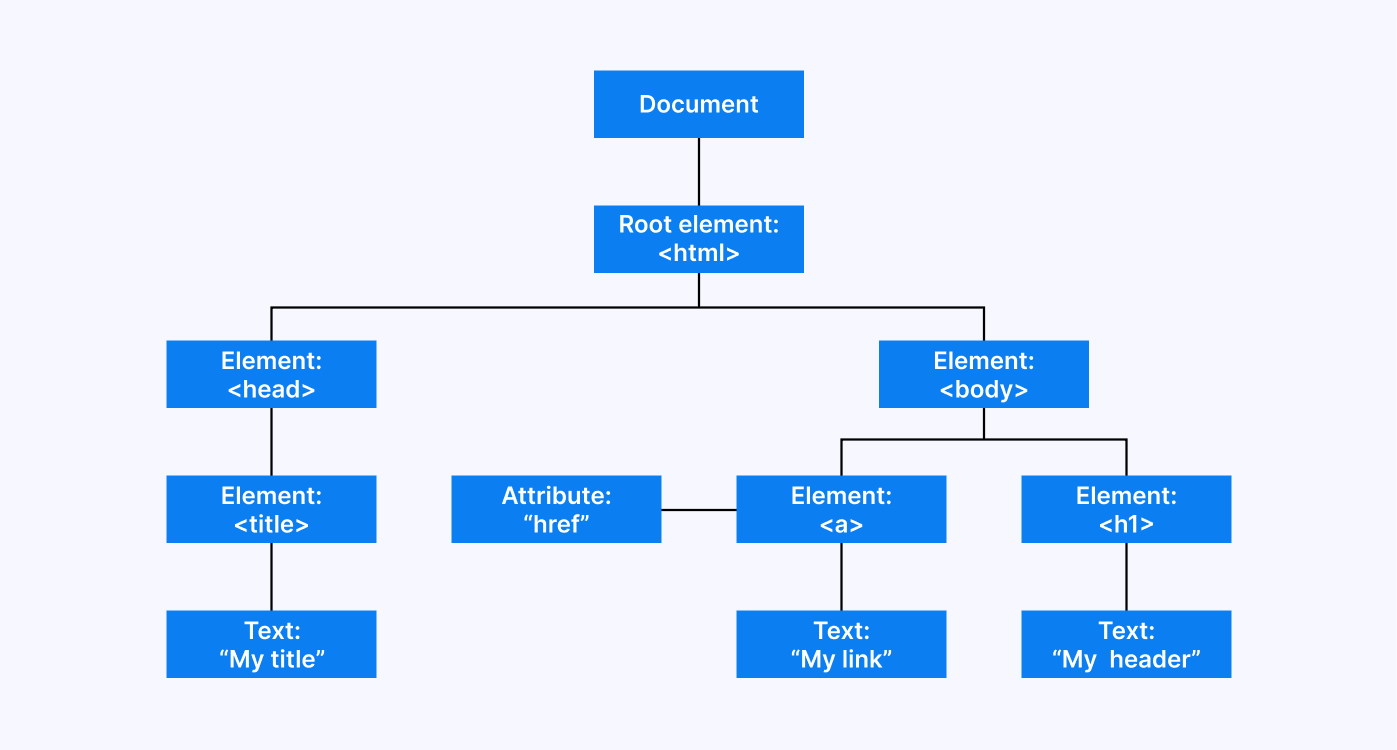
The Document Object Model (DOM) is a programming language-neutral interface the browser creates when a web page is loaded. The DOM allows programs and scripts to dynamically access and update an HTML document’s content, structure, and style.
The DOM defines HTML elements as objects. Also, the DOM defines the properties of all HTML elements and methods to access all HTML elements. Moreover, the DOM defines events for all HTML elements.
Below is how the DOM defines HTML elements as objects.
There are three types of DOM:
- Core DOM
- Virtual DOM
- Shadow DOM
Differences between the Core DOM, Virtual DOM, and Shadow DOM
Below are the key differences between the Core DOM, Virtual DOM, and Shadow DOM, even though they are all related to the DOM.
Core DOM
Core DOM is the real representation of HTML elements in a web page. When a change is made to the HTML document, the browser updates the Core DOM entirely.
When dealing with large and complex web applications, updating the Core DOM completely can make them slow and cause performance issues.
Here is how to view the Core DOM in a web application using inspect tools:
- Open the web application in a browser.
- Right-click on the home page and select Inspect, which will open the DevTools.
- Under the Elements tab, the Core DOM tree of the web application is shown.
Virtual DOM
Virtual DOM is a lightweight version of the Core DOM. Virtual DOM keeps track of the changes made to the HTML documents.
When a change is made to the HTML documents, Virtual DOM checks the difference between the previous and new versions of the HTML document and only updates elements that have changed on the Core DOM
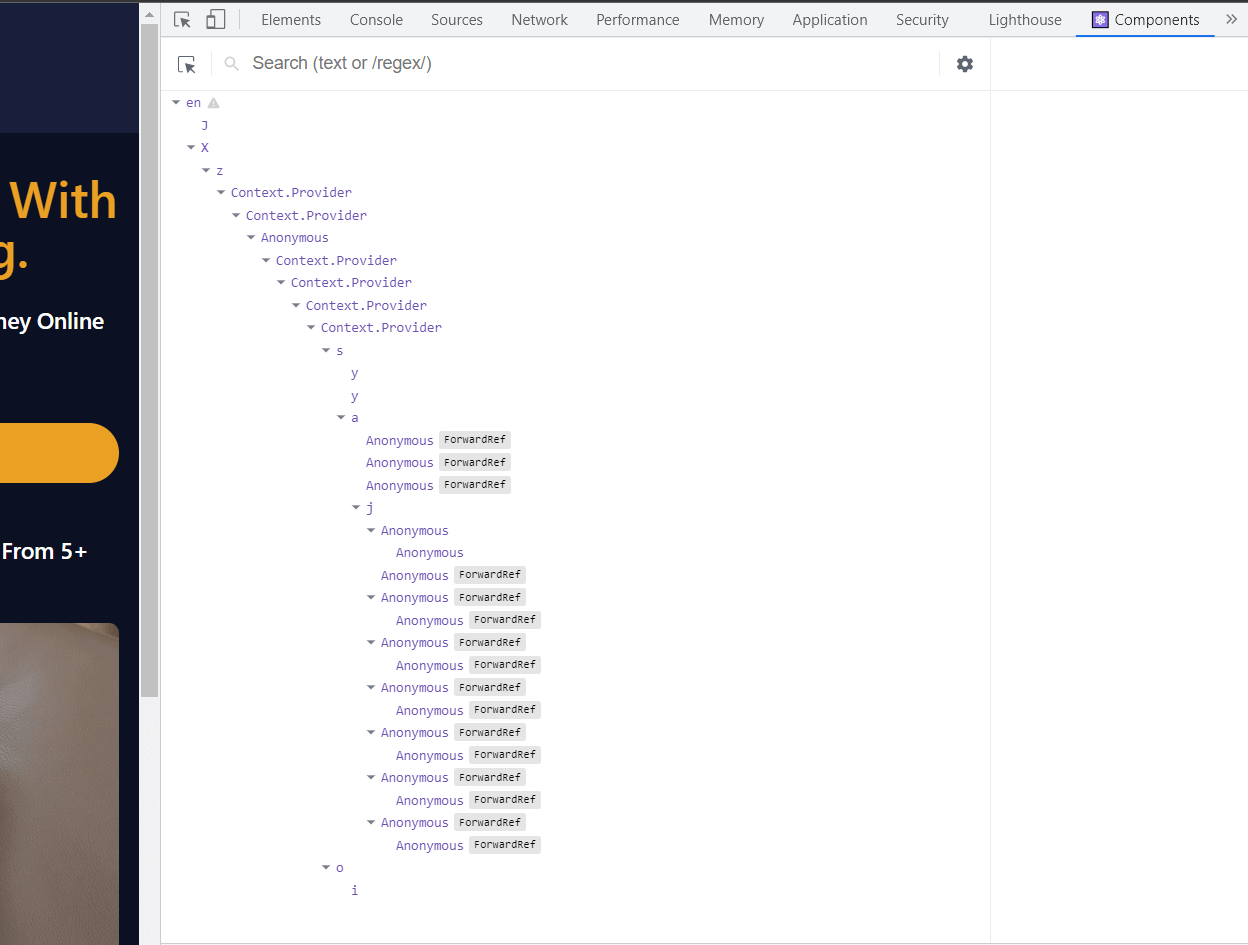
Here is how to view the Virtual DOM in a React web application using inspect tools and React Developer Tools:
- Install the React Developer Tools extension on a browser.
- Open the web application in a browser.
- Right-click on the home page and select Inspect, which will open the DevTools.
- The React Developer Tools extension adds a new tab to DevTools that allows you to view the Virtual DOM or component tree of the React web application.
Shadow DOM
Shadow DOM creates an isolated component by enclosing an HTML element and its CSS styles. It allows you to create a separate DOM for separate HTML elements without interfering with the main DOM.
Shadow DOM is used by HTML elements with their styles and behaviors.
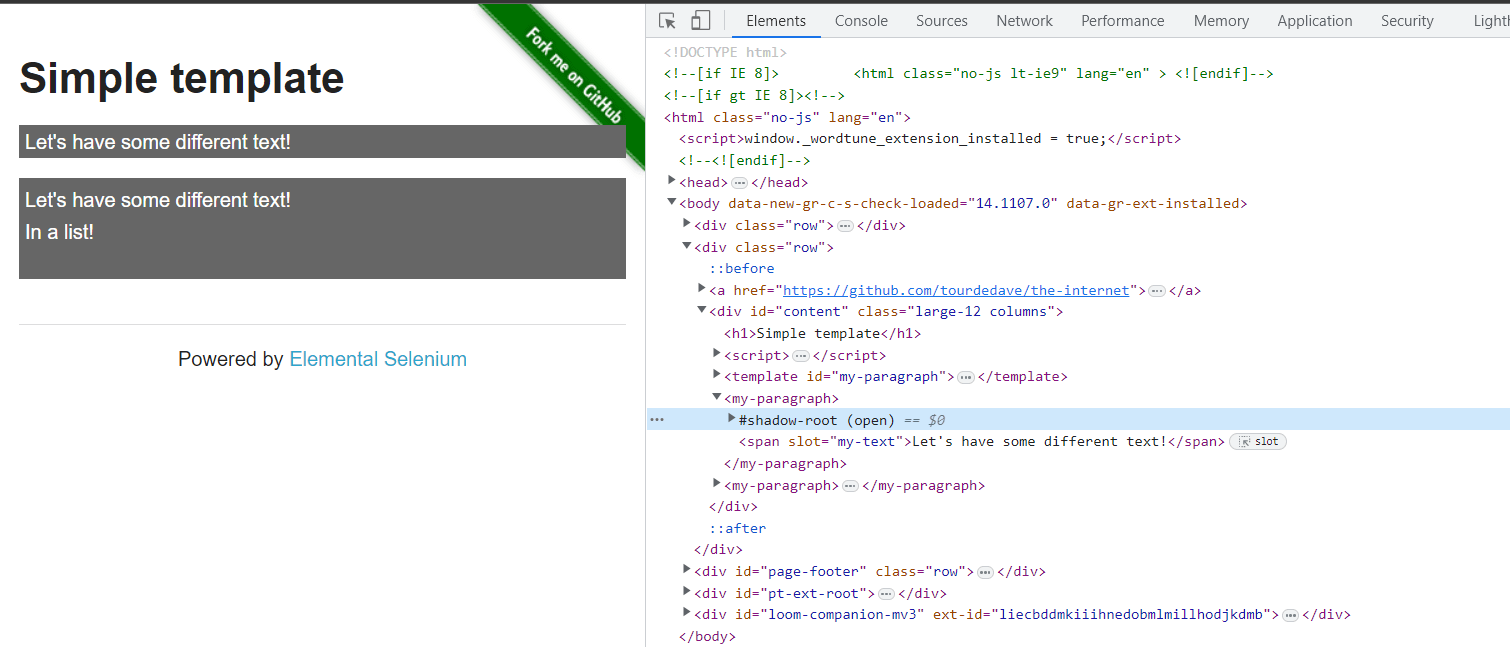
Here is how to view the Shadow DOM in a web application using inspect tools:
- Open the web application in a browser.
- Right-click on the home page and select Inspect, which will open the DevTools.
- Under the Elements tab, the Shadow DOM is shown by a #shadow-root.
Subscribe to the LambdaTest YouTube Channel and stay updated with the latest tutorial around Selenium testing, Cypress testing, and more.
How to create React Virtual DOM in JavaScript?
In this section of this blog on using React Virtual DOM, we dive into how to create a React Virtual DOM and how to use a React Virtual DOM to improve the performance of a web application. To follow through with this section, you need a Text Editor and a Package Manager installed on your computer. In this case, I will use Visual Studio code as a Text Editor and NPM (Node Package Manager) as a Package Manager.
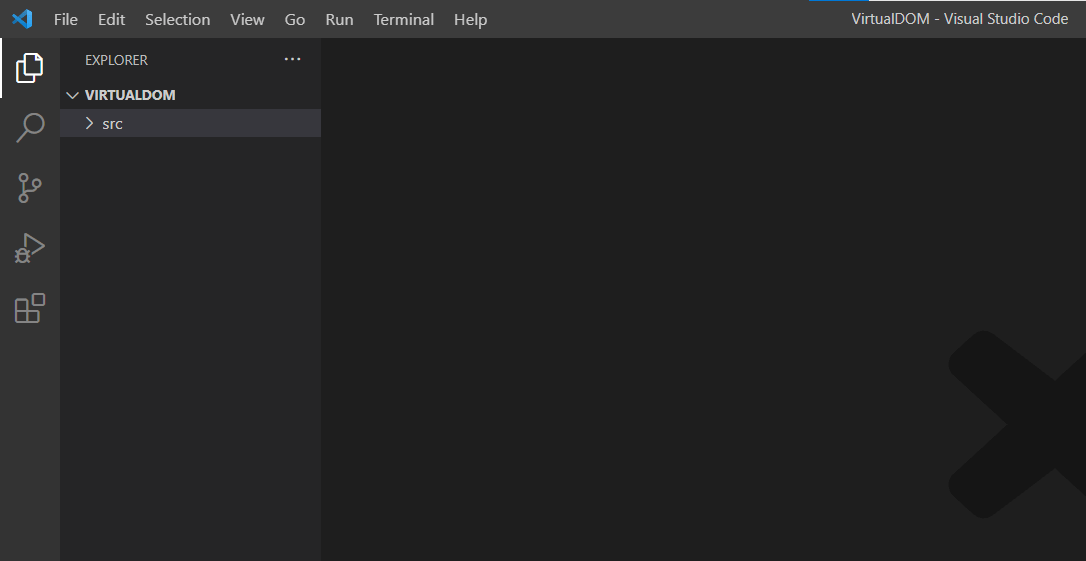
Step 1: Create a project folder called VirtualDOM.
|
1 |
mkdir VirtualDOM |
Step 2: Open the project folder in a text editor and create a folder called src.
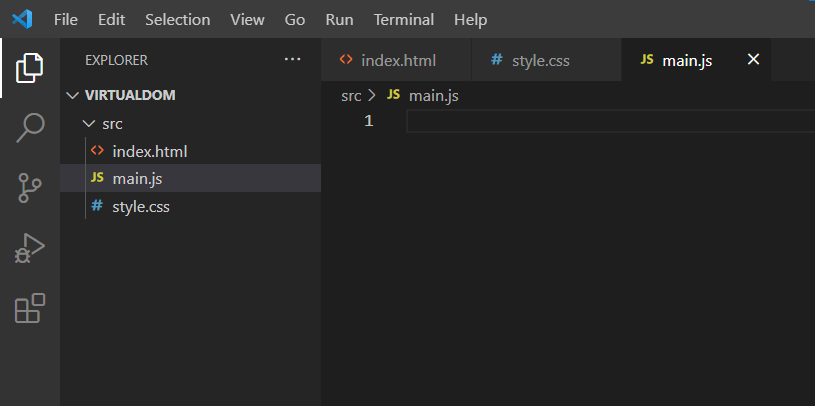
Step 3: Create three files named index.html, style.css, and main.js in the src folder.
Step 4: Link the style.css and main.js files to the index.html file. Then create a root div with #app id.
|
1 2 3 4 5 6 7 8 9 10 11 12 13 14 |
<!DOCTYPE html> <html lang="en"> <head> <meta charset="UTF-8"> <meta http-equiv="X-UA-Compatible" content="IE=edge"> <meta name="viewport" content="width=device-width, initial-scale=1.0"> <link rel="stylesheet" href="style.css"> <title>Document</title> </head> <body> <div id="app"></div> <script type="module" src="main.js"></script> </body> </html> |
Step 5: Install a build tool called Parcel by running the command below on a command line.
|
1 |
npm install parcel |
Step 6: Add the following code block to the package.json file.
|
1 2 3 |
"scripts": { "dev": "parcel src/index.html" }, |
Your package.json file should now look as shown below.
|
1 2 3 4 5 6 7 8 |
{ "scripts": { "dev": "parcel src/index.html" }, "dependencies": { "parcel": "^2.8.3" } } |
In the package.json file above, the scripts block defines a dev script that runs Parcel bundler with src.index.html file as the entry point. The Parcel is a web application bundler that bundles files and serves them on a server.
Step 7: Create a folder called vDom in the src folder.
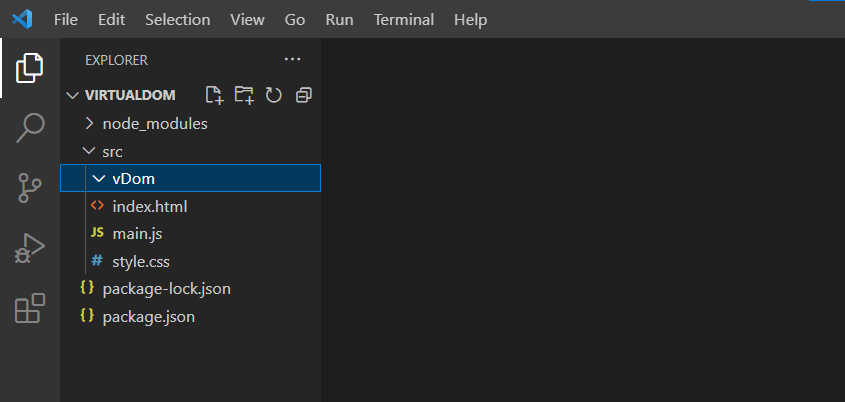
Step 8: Create a file called createElement.js in the vDom folder.
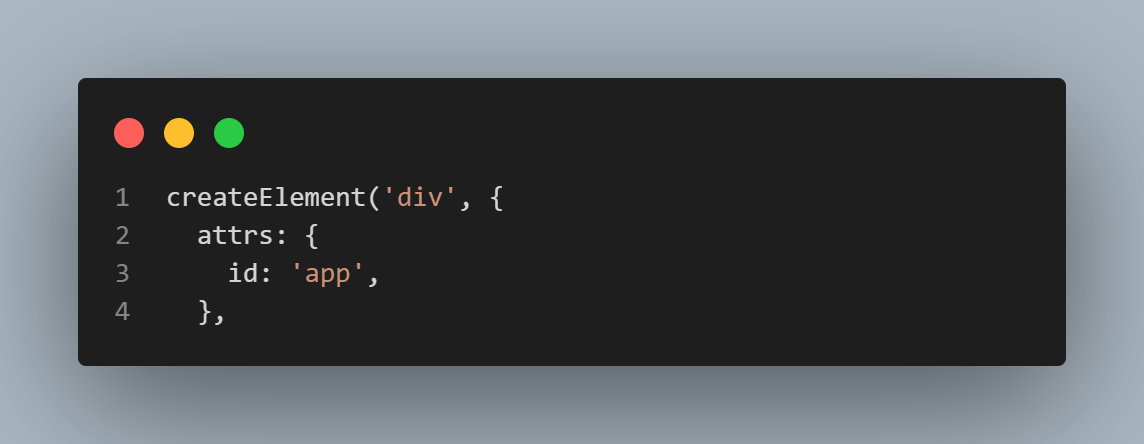
Step 9: A function called createElement is used in Virtual DOM libraries such as React. The function creates a new React Virtual DOM element that can be rendered to the web application UI or Core DOM.
For that reason, add the following code to the createElement.js file.
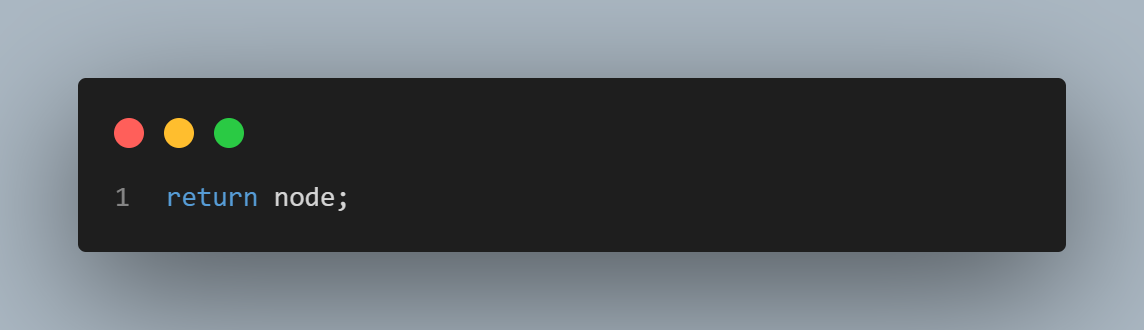
In the code above, the createElement function that creates and returns a React Virtual DOM element object is defined.
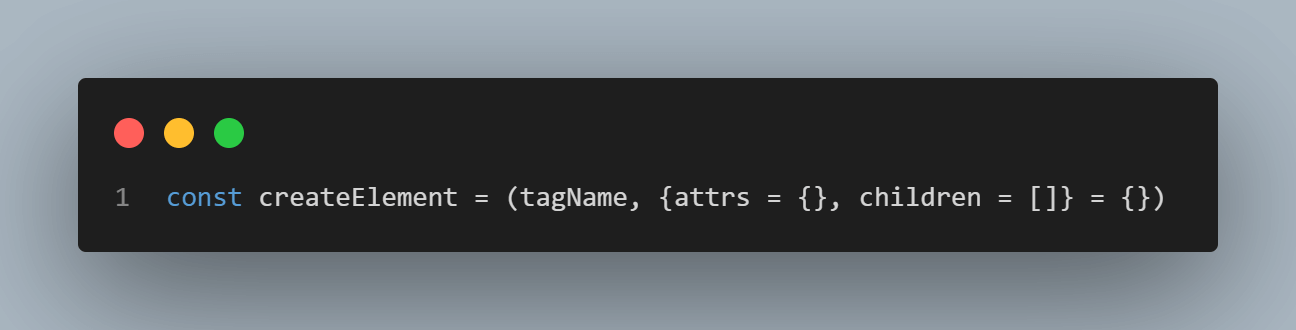
The createElement function takes two arguments. The first argument is called tagName, while the second argument is an object containing two optional properties: attrs and children.
The tagName argument is a string representing the tag name of the React Virtual DOM element to be created, such as a div. The attrs property is an object that represents attributes to be applied to the React Virtual DOM element, such as class or id. The children property is an array of child Virtual DOM elements such as other React Virtual DOM elements.
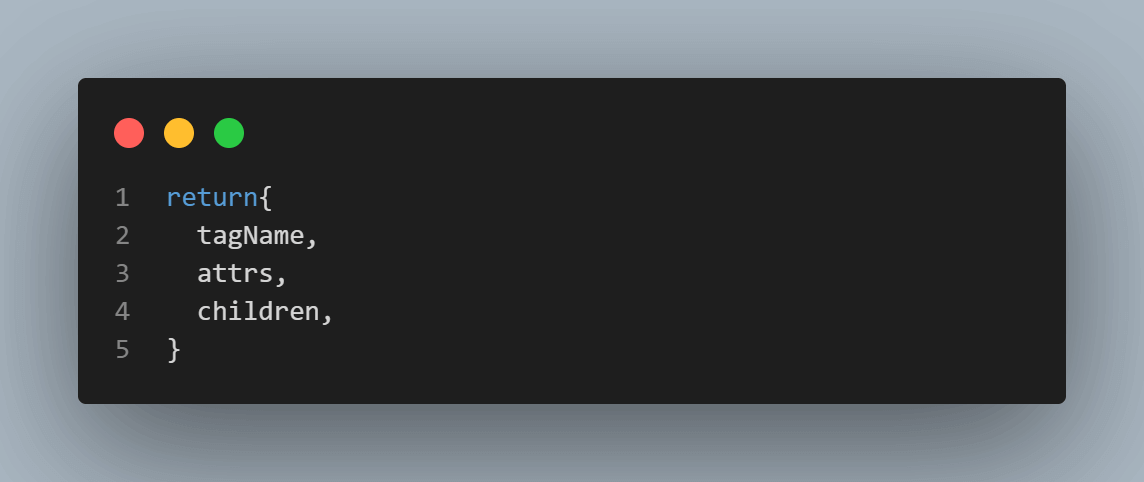
Then the createElement function returns an object that contains tagName, attrs, and children properties.
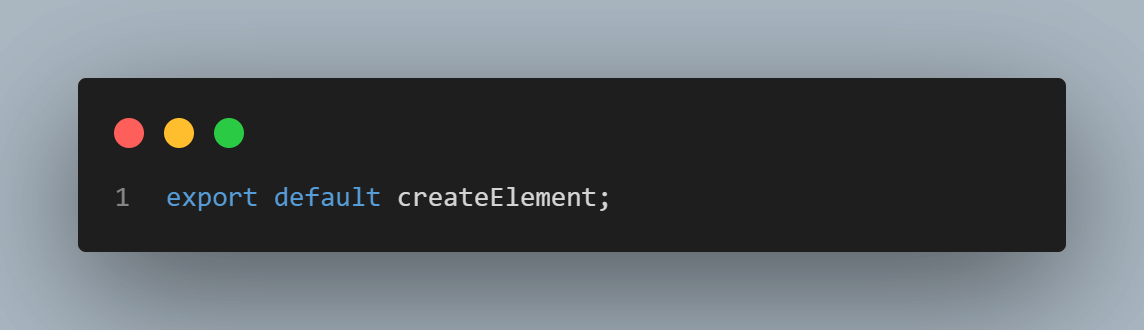
Finally, the createElement function is exported so that it can be used by other files in the application.
Step 10: Add the following code to the main.js file to define the React virtual DOM.
In the code above, a React Virtual DOM tree is created using the createElement function imported from the createElement.js file.
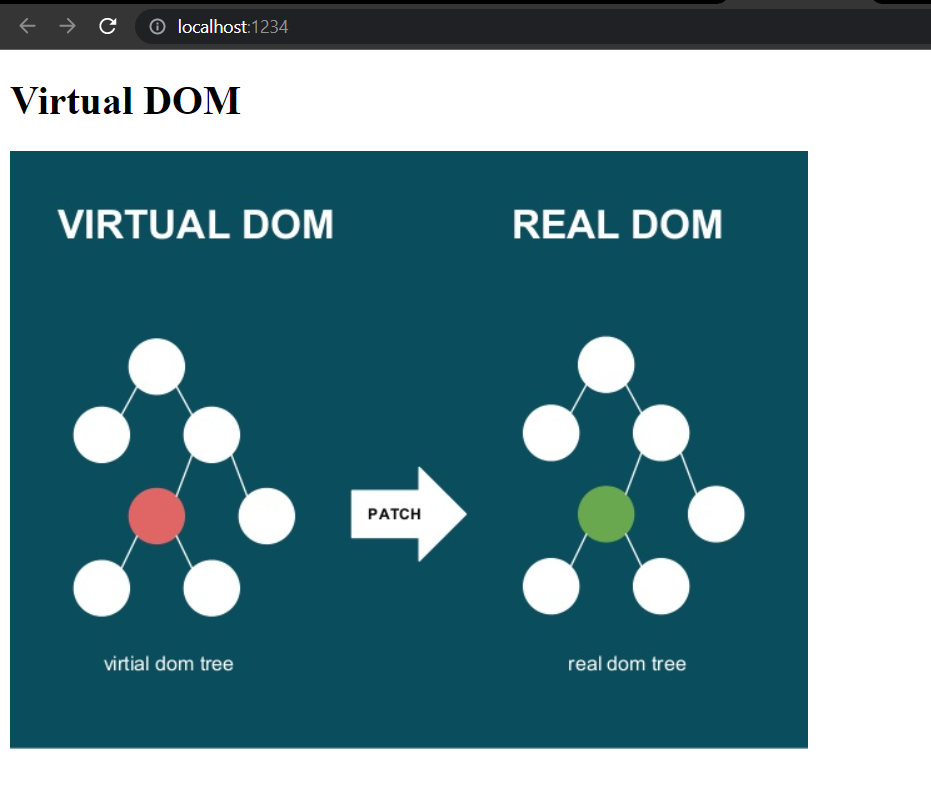
The React Virtual DOM tree represents an HTML structure with a div element as the root node, with an id attribute set to the app.
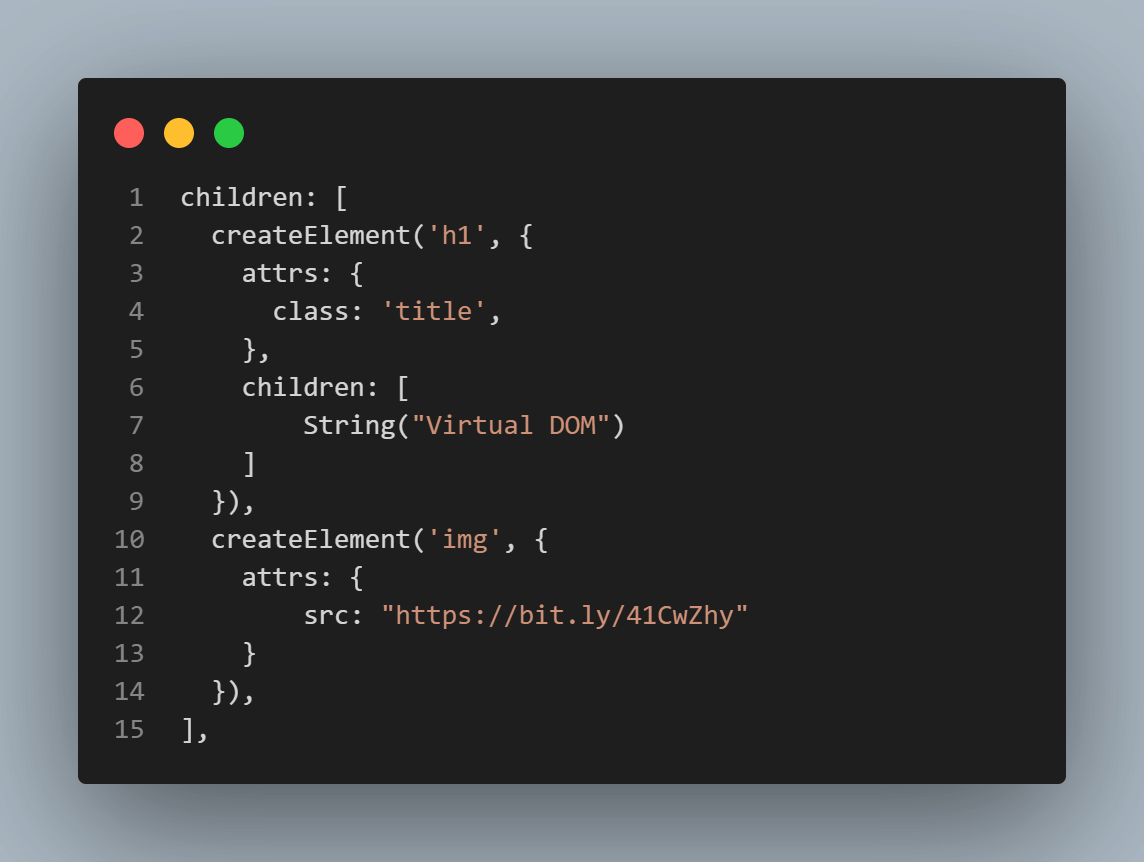
The div has two child elements: an h1 element and an img element. The h1 element has a class attribute set to title and contains the string Virtual DOM as its child node. The img element has an src attribute set to a URL that points to an image file.
Step 11: Let us render the React Virtual DOM created to the Actual DOM. To do that, create a file called render.js in the vDom folder and add the following code to the file.
In the code above, a React Virtual DOM tree is rendered as real DOM elements.

The renderElement function takes an object representing a React Virtual DOM node as an argument, including the node’s tagName, attrs, and children properties.
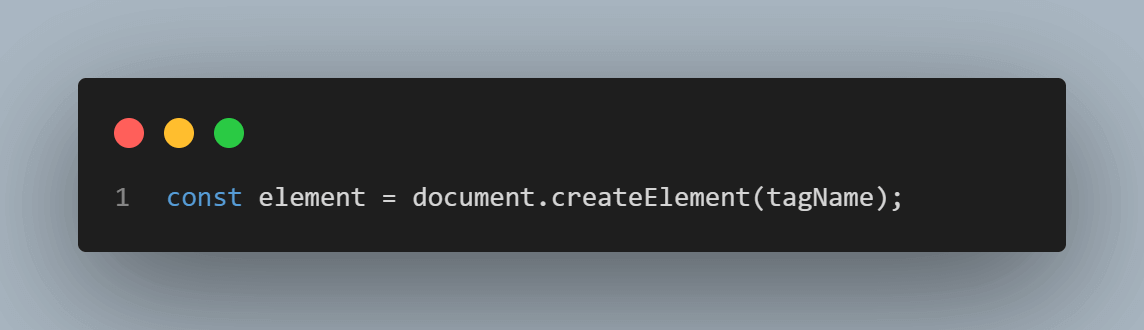
Inside the renderElement function, a new DOM element with the specified tagName is created.

A for-loop is used to iterate over the attrs object to set each attribute on the newly created element using the setAttribute method.
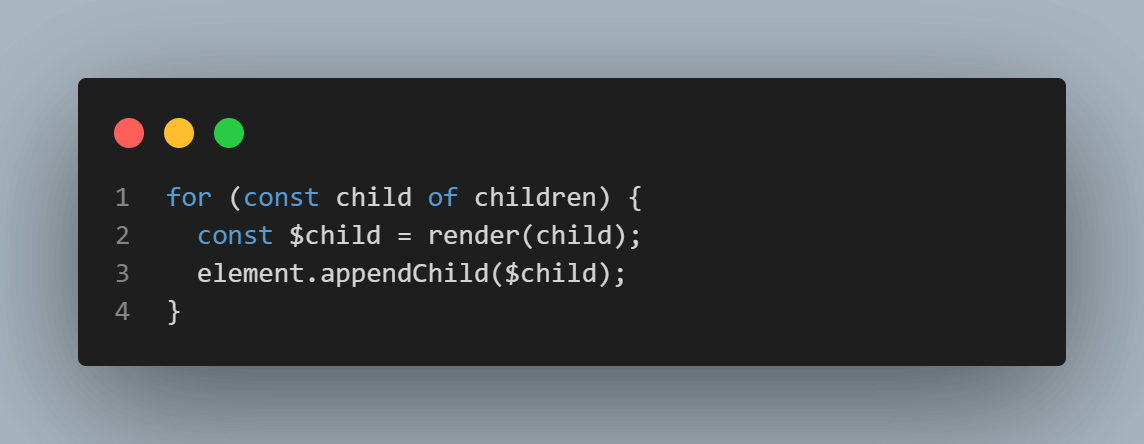
A for-loop is used to iterate over the children array of React Virtual DOM nodes, recursively rendering each child node by calling the render function and appending it to the element using the appendChild method.
Finally, the renderElement function returns the newly created DOM element.
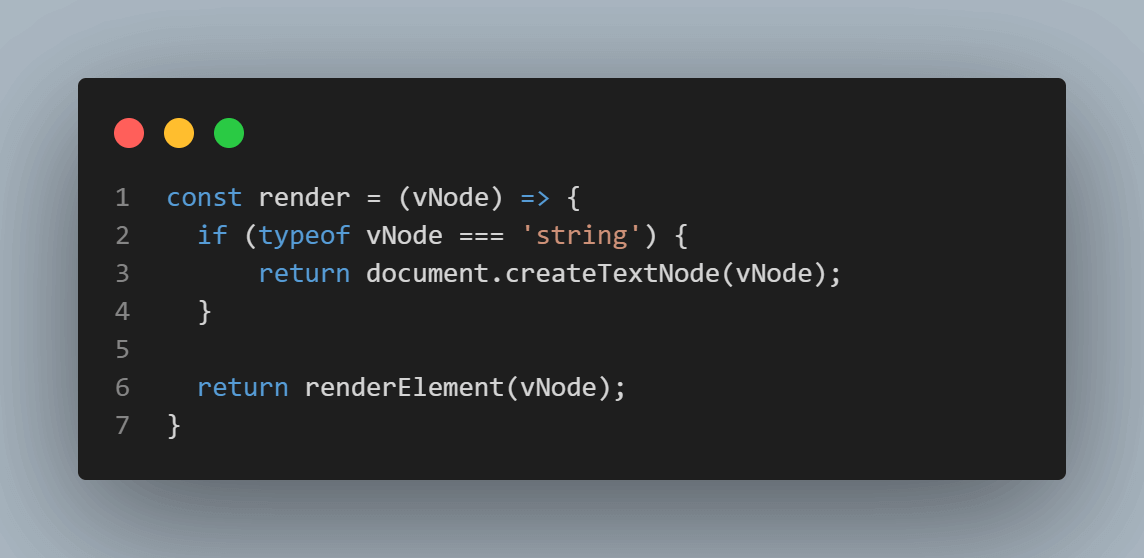
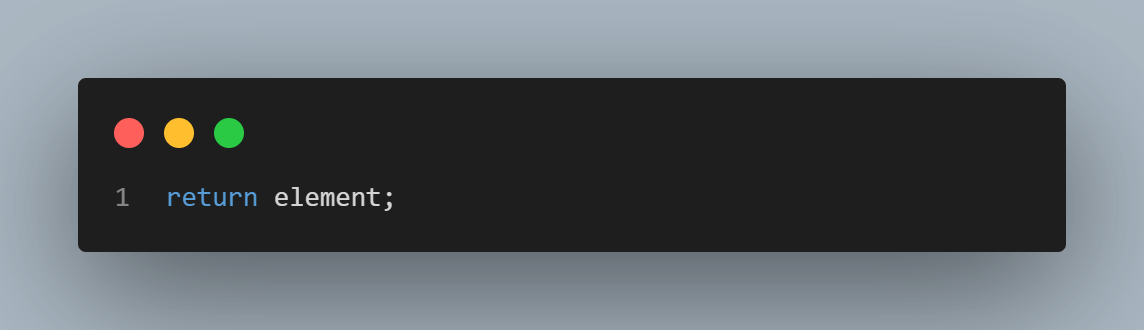
The render function takes a React Virtual DOM node as an argument and checks if it’s a string node or a regular React Virtual DOM node. If the node is a string, the render function returns a text node with the string as its content.
If the node is a regular React Virtual DOM node, render calls the renderElement function to create and return the corresponding DOM element.
Step 12: So far, we have created a React Virtual DOM and rendered it to the Actual DOM. Now we need to display the Actual DOM on a web page. To do that, create a file called mount.js in the vDom folder and add the following code.
In the code above, a React Virtual DOM node is mounted onto an Actual DOM node.
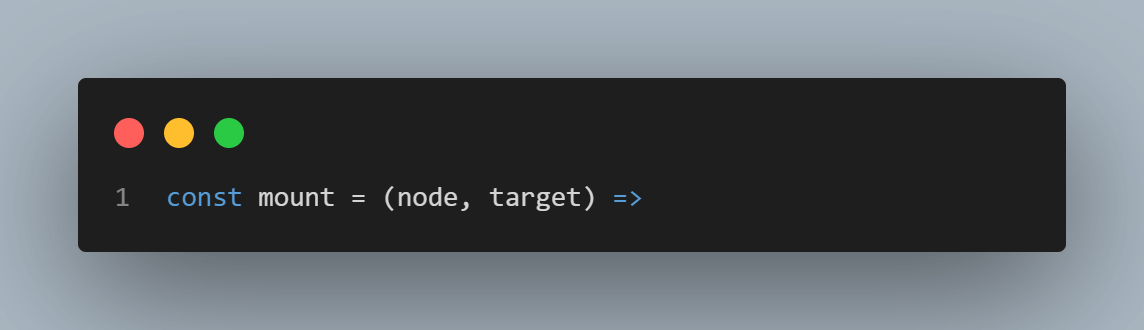
The mount function takes two arguments: node, which is the React Virtual DOM node to be mounted, and target, which is the Actual DOM node onto which the React Virtual DOM node should be mounted.
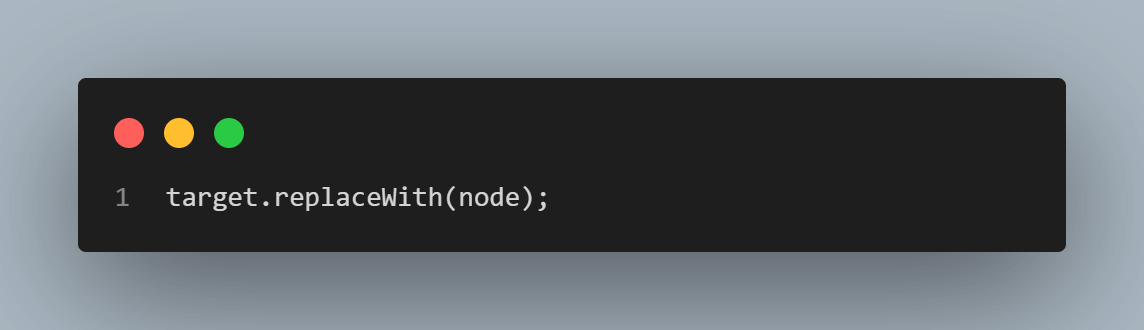
The function replaces the target node with the React Virtual DOM node using the replaceWith method. This effectively removes the original target node from the document and replaces it with the new React Virtual DOM node.
Finally, the function returns the React Virtual DOM node.
Step 13: In the main.js file, import render and mount functions. At the bottom of the main.js file, render and mount the React Virtual DOM.
Step 14: Run the command below on the command line.
|
1 |
npm run dev |
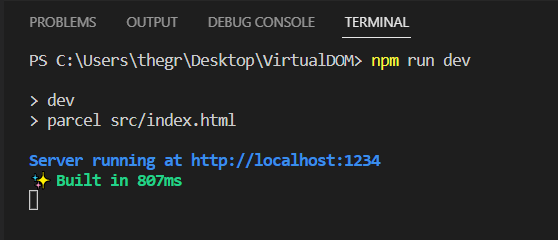
Navigate to http://localhost:1234, and you should see the React Virtual DOM showing on the web page.
How does a Core DOM without a Virtual DOM affect a Web Application Performance?
Assume you are shopping in an online eCommerce store web application, and the items you had added to the cart are lost every three seconds. Other online shoppers get the same user experience and as a result, the online eCommerce store sales go down.
The owner of the online eCommerce store consults a web developer who determines that the online store web application HTML elements are reloading every three seconds because of a timer that shows how long some items on the e-commerce store are on offer.
When a web application’s data changes constantly and triggers an update, the user interface is re-rendered. Re-rendering the whole application every time a change happens can make it slow, perform poorly or give a bad user experience, especially if it is a complex web application such as an online eCommerce store.
In this section of the blog on using React Virtual DOM, you will learn how the real DOM affects a web application’s performance by following the steps below.
Step 1: Create a folder called WebApp, then add two files called index.html and main.js. After that, install the Parcel build tool, as shown in the section earlier.
Step 2: In the index.html file, add the following code.
In the code above, an empty div with a root id is created. Then the main.js file is imported using a script tag.
Step 3: In the main.js file, add the following code.
In the code above, a function called update is created. Inside the function, a variable called the element is declared where it has the value of an h3 heading and a span that displays the current time using the JavaScript Date object.
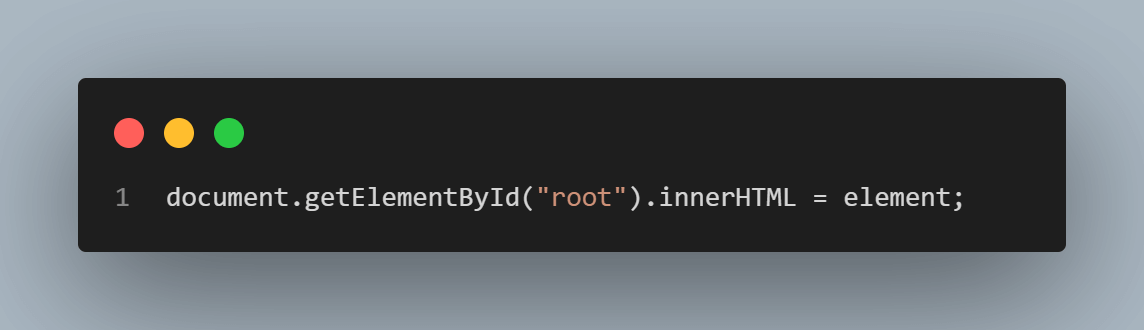
Then the innerHTML property of the empty div in the index.html file is set to the value of the element variable.

Finally, the setInterval method sets up a timer that calls the update function every 3 seconds. As a result, the content of the root id div is updated with the current time every 3 seconds.
Step 4: Run the command below on the command line.
|
1 |
npm run dev |
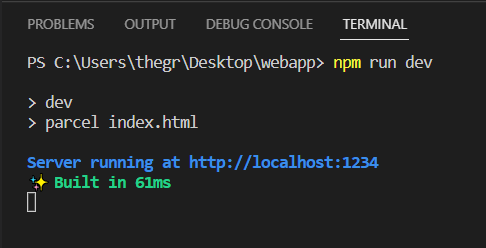
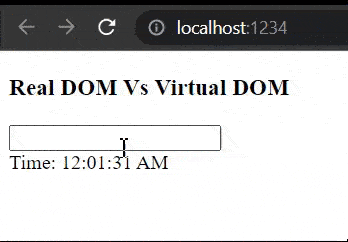
Step 5: Navigate to http://localhost:1234, and you should see the current time updating every 3 seconds, as shown below.

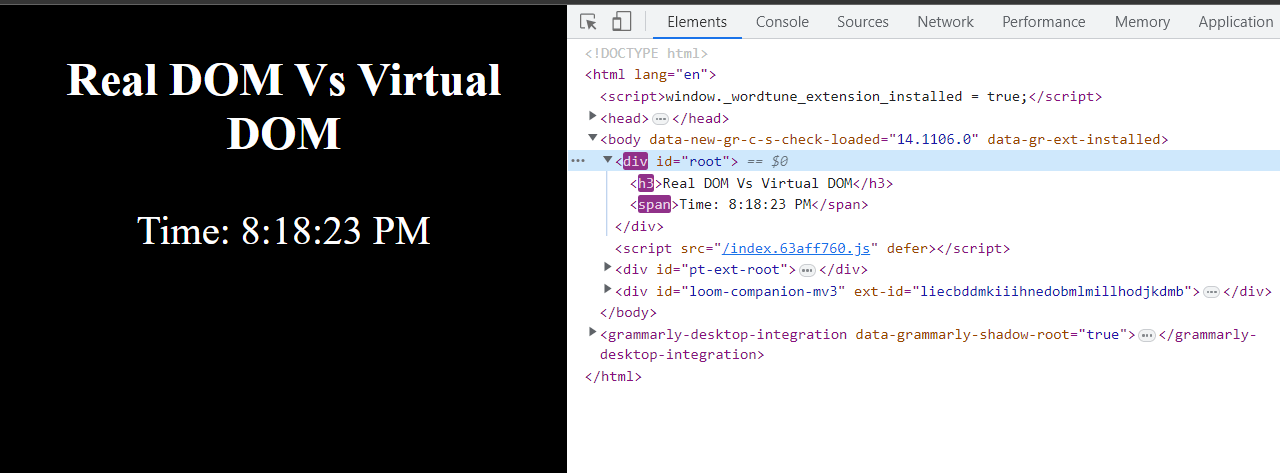
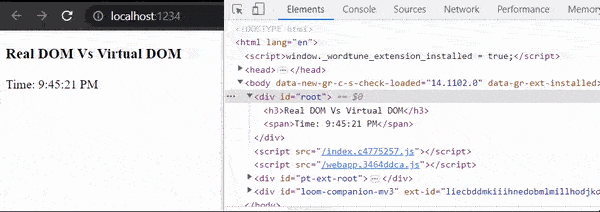
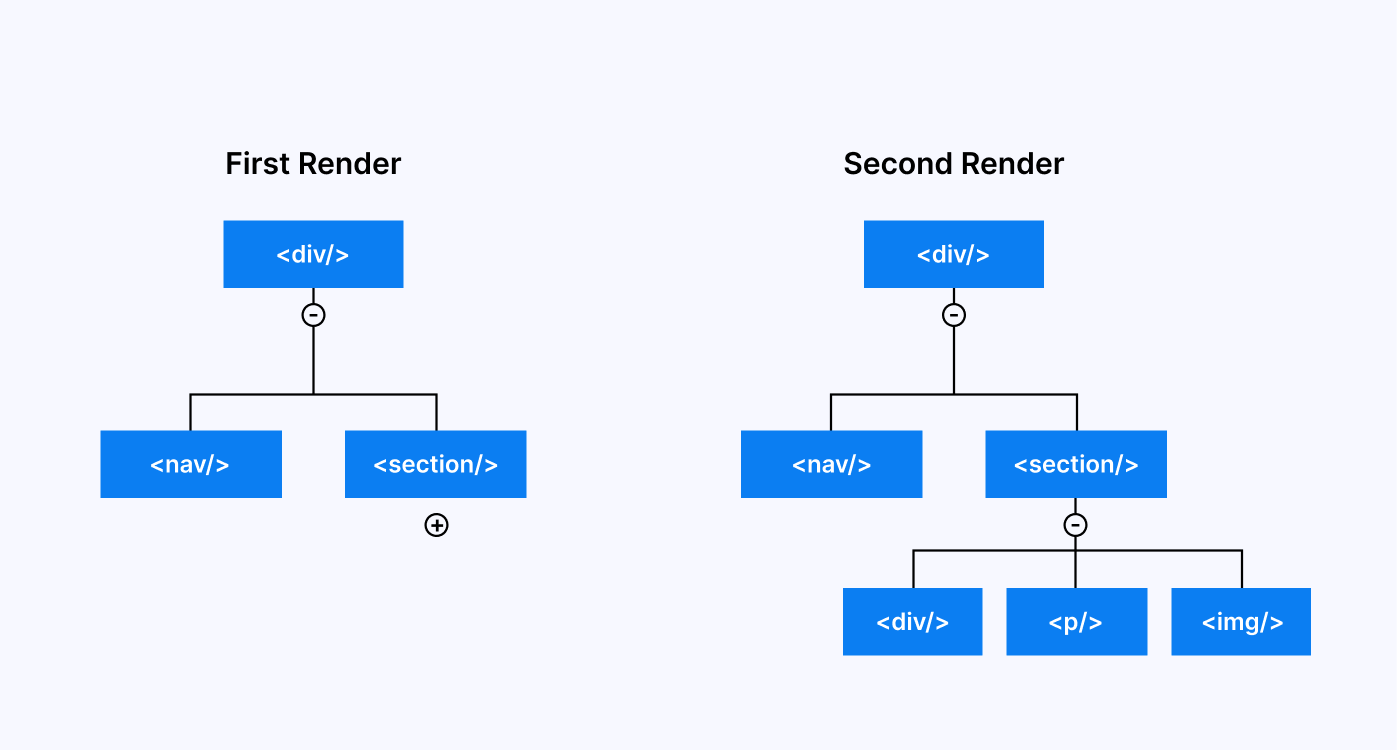
Step 6: When you inspect the HTML elements, you will realize that the root id div element and its child elements representing real DOM are updated or re-rendered from scratch every 3 seconds, as shown below.
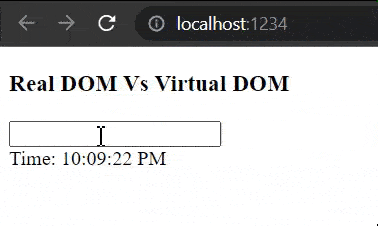
Step 7: To see how updating or re-rendering all the HTML elements every time a change affects a web application’s performance, add a form input in the main.js file, as shown below.
Step 8: As shown below, when you try to type something on the input field, you will realize that the value is lost every time the elements are updated or re-rendered every 3 seconds.
How to use Virtual DOM to improve web application performance?
In this section of the React Virtual DOM blog, let us add a React Virtual DOM to the web application created in the section above to reduce unnecessary updates that affect its performance. The React Virtual DOM will only update or re-render the span element with the timer every three seconds instead of the whole web application element.
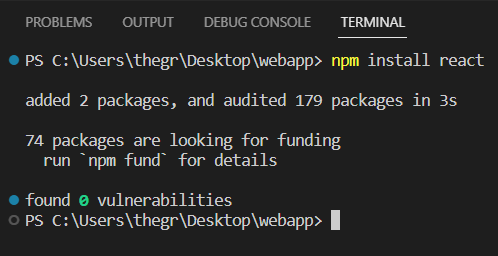
Step 1: In the WebApp folder created in the section above, run the command below on the command line to install ReactJS.
|
1 |
npm install react |
Then run the command below to install ReactJS Virtual DOM.
|
1 |
npm install react react-dom |

Step 2: Replace the code on the main.js file with the code below.

- In the code above, the React library renders a Real DOM and a React Virtual DOM. The import { createRoot } from “react-dom/client” statement imports the createRoot function from the react-dom/client module. This function creates a root-level component in a React application containing all the other components.
- The const rootElement = document.getElementById(“root”) statement assigns the DOM element with the ID of “root” to the rootElement variable. This is where the root-level component created by createRoot will be rendered.
- The const root = createRoot(rootElement) statement creates the root-level component using the createRoot function and assigns it to the root variable.
- The const update = () => { … } statement defines a function called update that will be called every 3 seconds using the setInterval function. This function creates a new element using JSX syntax(<>), a syntax extension of JavaScript that allows you to write HTML-like code in your JavaScript files.
- The root.render(element) statement renders the new element created in the update function to the root-level component created earlier.
Step 3: Run the command below on the command line which enables Parcel to bundle the web application and start a development server that listens on port number 1234 by default.
|
1 |
npm run dev |
Navigate to http://localhost:1234, and inspect the HTML elements.

As you can see, only the span element with the timer updates or re-renders every three seconds instead of all the web application HTML elements.
Step 4: As shown below, when you type something on the input field, the value is not lost every time the timer is updated or re-rendered.
How to use React Virtual DOM to improve web application performance?
In React, the Virtual DOM is kept in memory as a virtual user interface representation. The React Virtual DOM is then synced with the DOM by a library such as ReactDOM in a process called reconciliation.
ReactDOM is a JavaScript library used with React to build a web application user interface that can render React components in the core DOM. When you create a web application user interface components using React, ReactDOM provides the methods needed to render these components to the browser.
These methods provided by ReactDOM include:
- ReactDOM.render()
- ReactDOM.unmountComponentAtNode()
- ReactDOM.findDOMNode()
- ReactDOM.createPortal()
- ReactDOM.hydrate()
The ReactDOM.render() method takes a React component and mounts it into a DOM while ReactDOM.unmountComponentAtNode() method unmounts a React component from the DOM.
The ReactDOM.findDOMNode() method returns the underlying DOM node of a React component while ReactDOM.createPortal() method allows a React component to be rendered outside its parent DOM hierarchy.
The ReactDOM.hydrate() method is used to attach a React component to existing HTML content rendered by the server, known as Server Side Rendering (SSR) of React components.
When a web application is rendered for the first time, React uses the render() function to create a tree of React elements that act as a Virtual DOM. If the state of the web application changes, the render() function creates a new tree of React elements or Virtual DOM.
Then React compares the new Virtual DOM with the old version of the React Virtual DOM to determine which nodes have changed or have been updated. React then efficiently updates the user interface or the real DOM to match the new version of the React Virtual DOM.
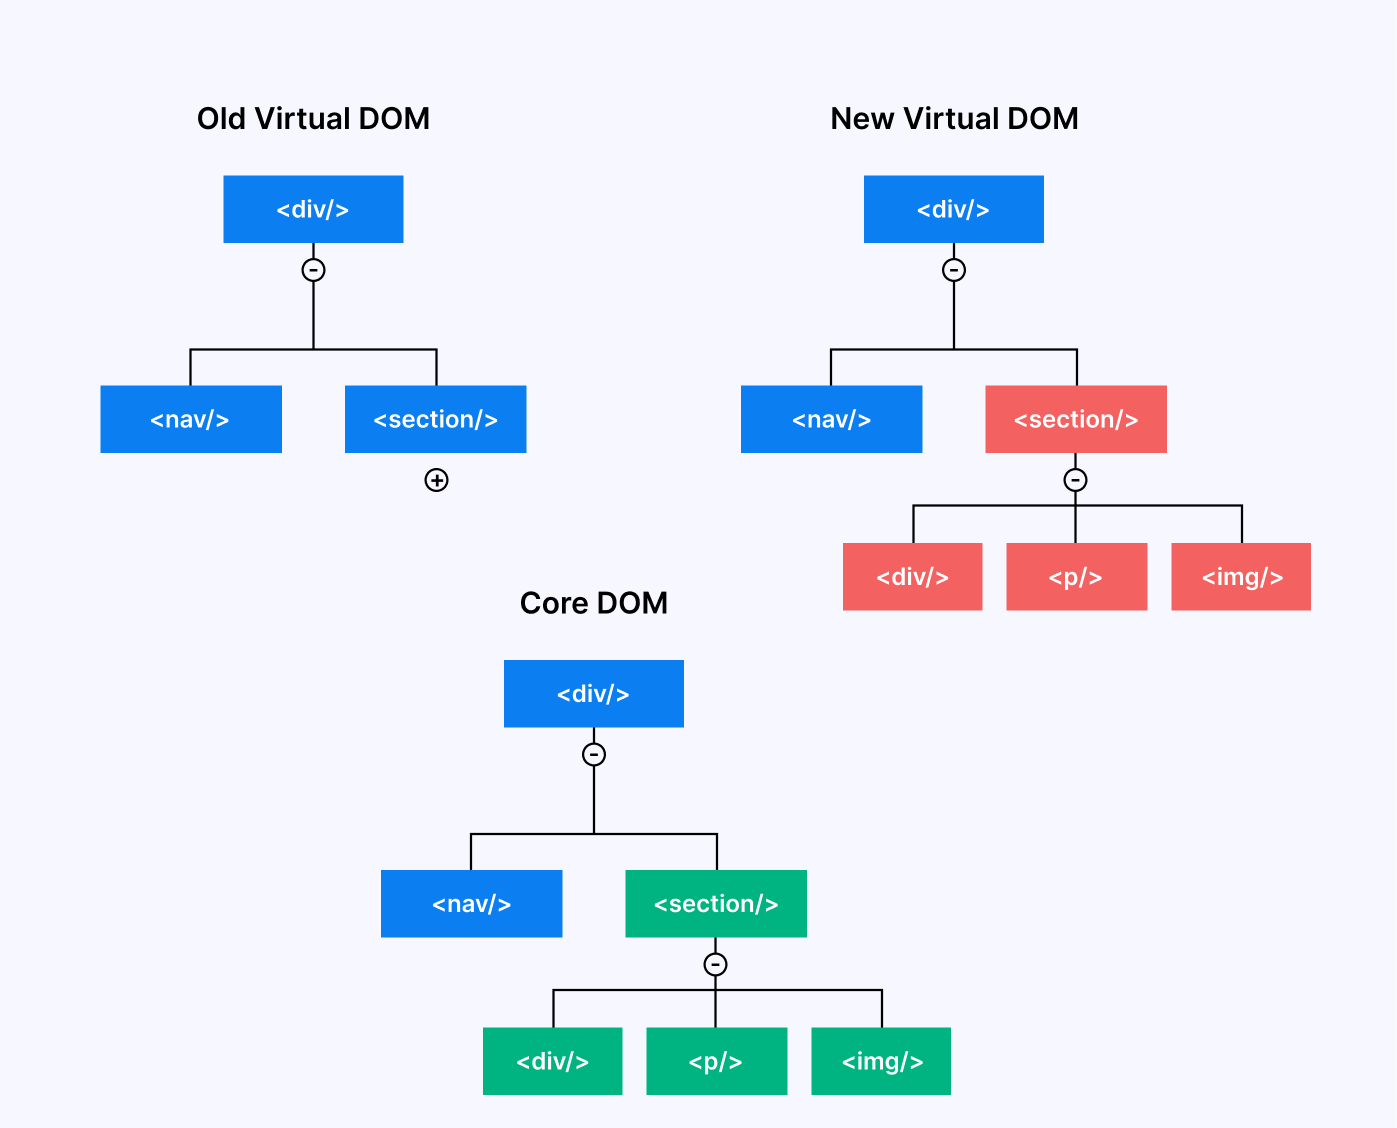
To compare the new version of Virtual DOM with the old version of React Virtual DOM, React uses an algorithm called Diffing. When using the Diffing Algorithm, React first compares the type of the old and new versions of React Virtual DOM root HTML elements.
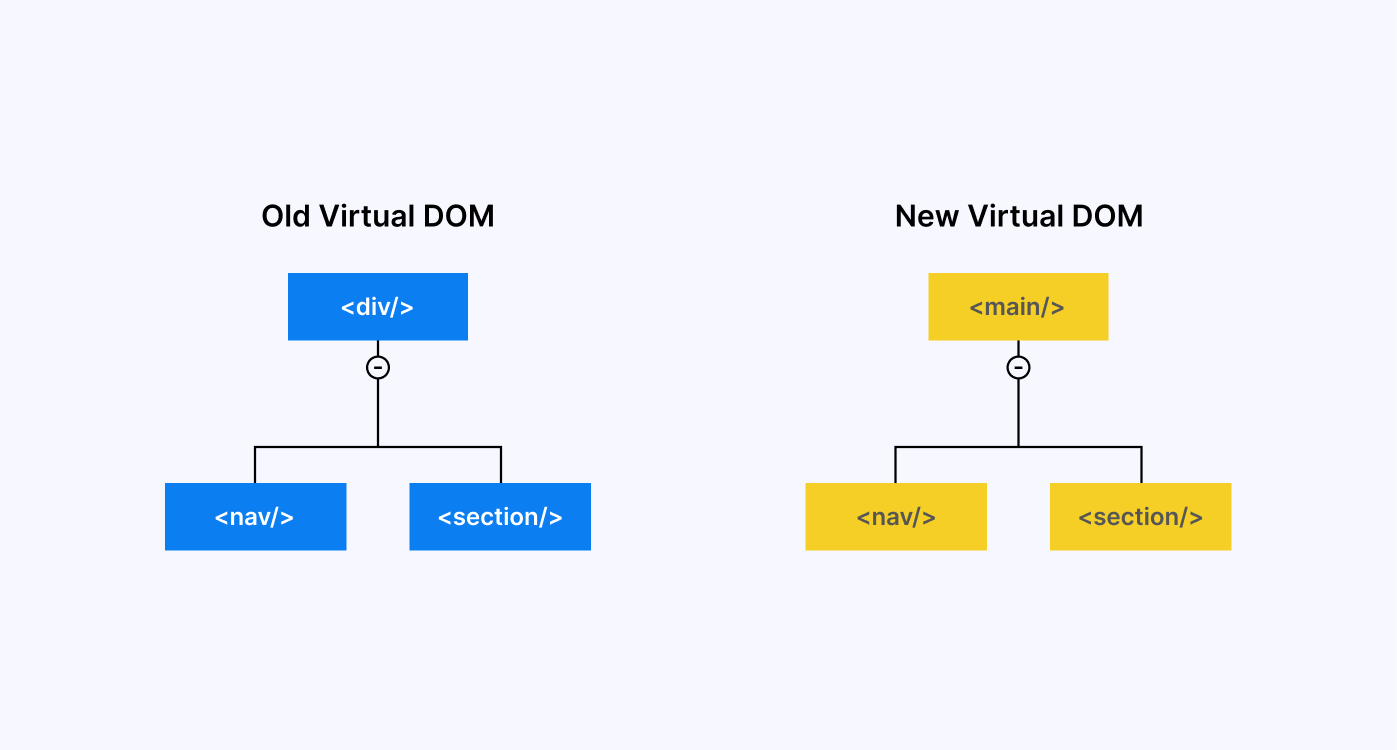
If the root elements are of different types, React will destroy the old version of the React Virtual DOM and build a new Virtual DOM from scratch. For example, if the old version of the React Virtual DOM root HTML element is a < div > and the new version of the Virtual DOM root HTML element is a < main > or < span >, the old version of the React Virtual DOM is destroyed.
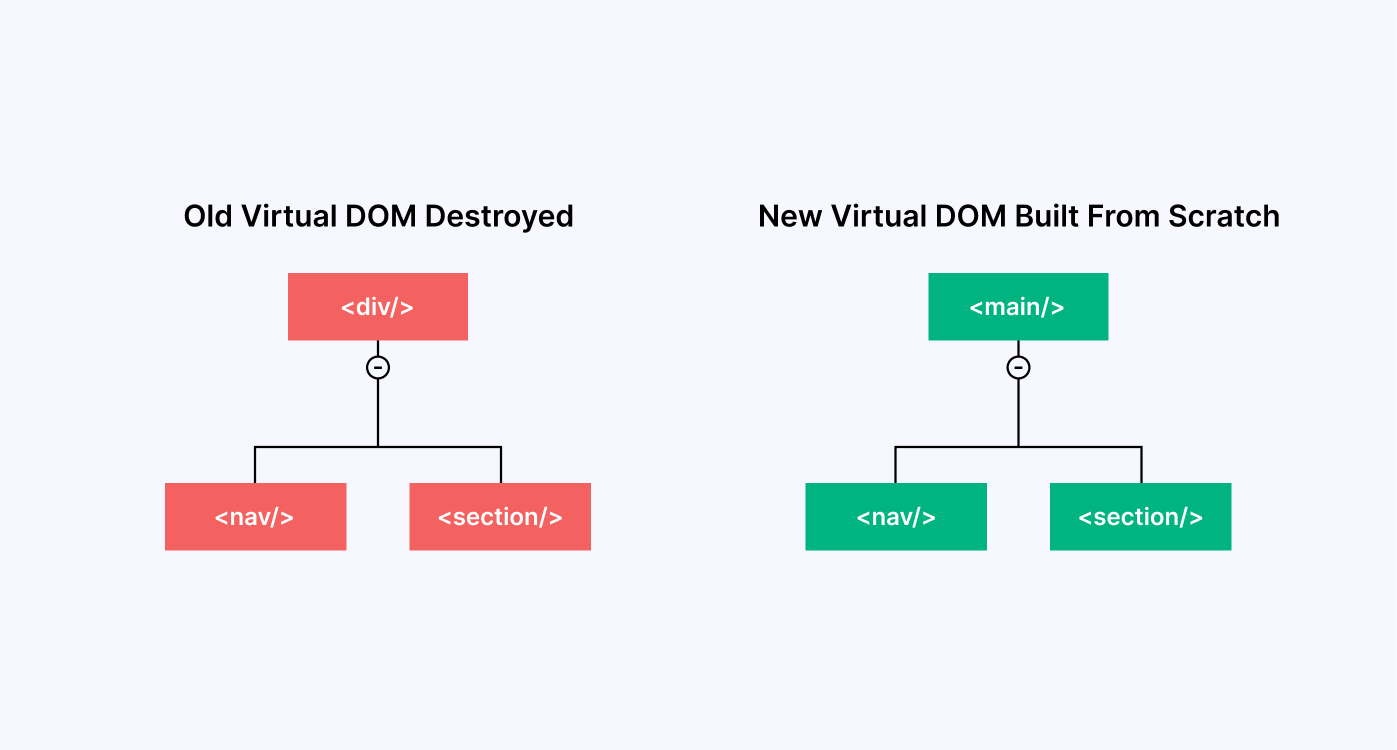
If the root HTML elements of the old and new versions of the Virtual DOM are of the same type, React looks at their attributes, then keeps the old version of the React Virtual DOM and only updates the parts that have changed.
After handling the root HTML elements of the old and new versions of the Virtual DOM, React then recurses through their children’s HTML elements. When recursing through the children of the root HTML elements, React iterates both children’s HTML elements simultaneously and only updates HTML elements that have changed.
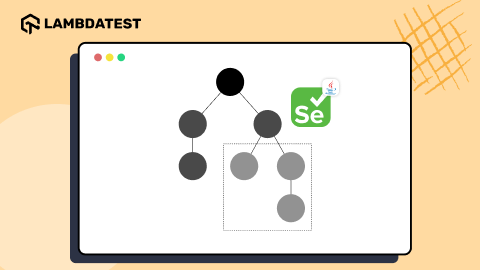
Automated Geolocation Testing on a Virtual DOM web application using Jasmine and Cloud Selenium Grid
Jasmine is one of the most popular JavaScript-based testing frameworks. It is a Behavior-Driven Development (BDD) framework that provides a structure for developers to write tests. Jasmine tests are written in JavaScript and are typically run in a web browser or command line using a JavaScript runtime environment, such as Node.js.
LambdaTest is a digital experience testing platform that lets you perform automation testing with Jasmine and Selenium on a cloud Selenium Grid across 3,000+ different browsers and operating systems.
In this section of the React Virtual DOM tutorial, you will learn how to create and run automated geolocation tests that test whether a user can see their local time on a web application. We will test the geolocation on multiple browser versions and operating system combinations. We can use three browser versions and operating system combinations in this case.
These browser versions and operating system combinations are:
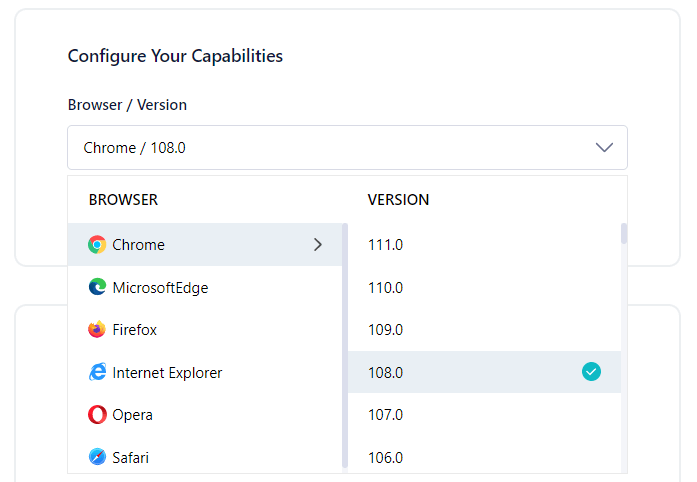
- Chrome 108.0 + Windows 10
- Safari 16.0 + macOS Ventura
- Firefox 106.0 + Windows 11
To define your desired browser and operating system combinations, you can use LambdaTest Capabilities Generator.
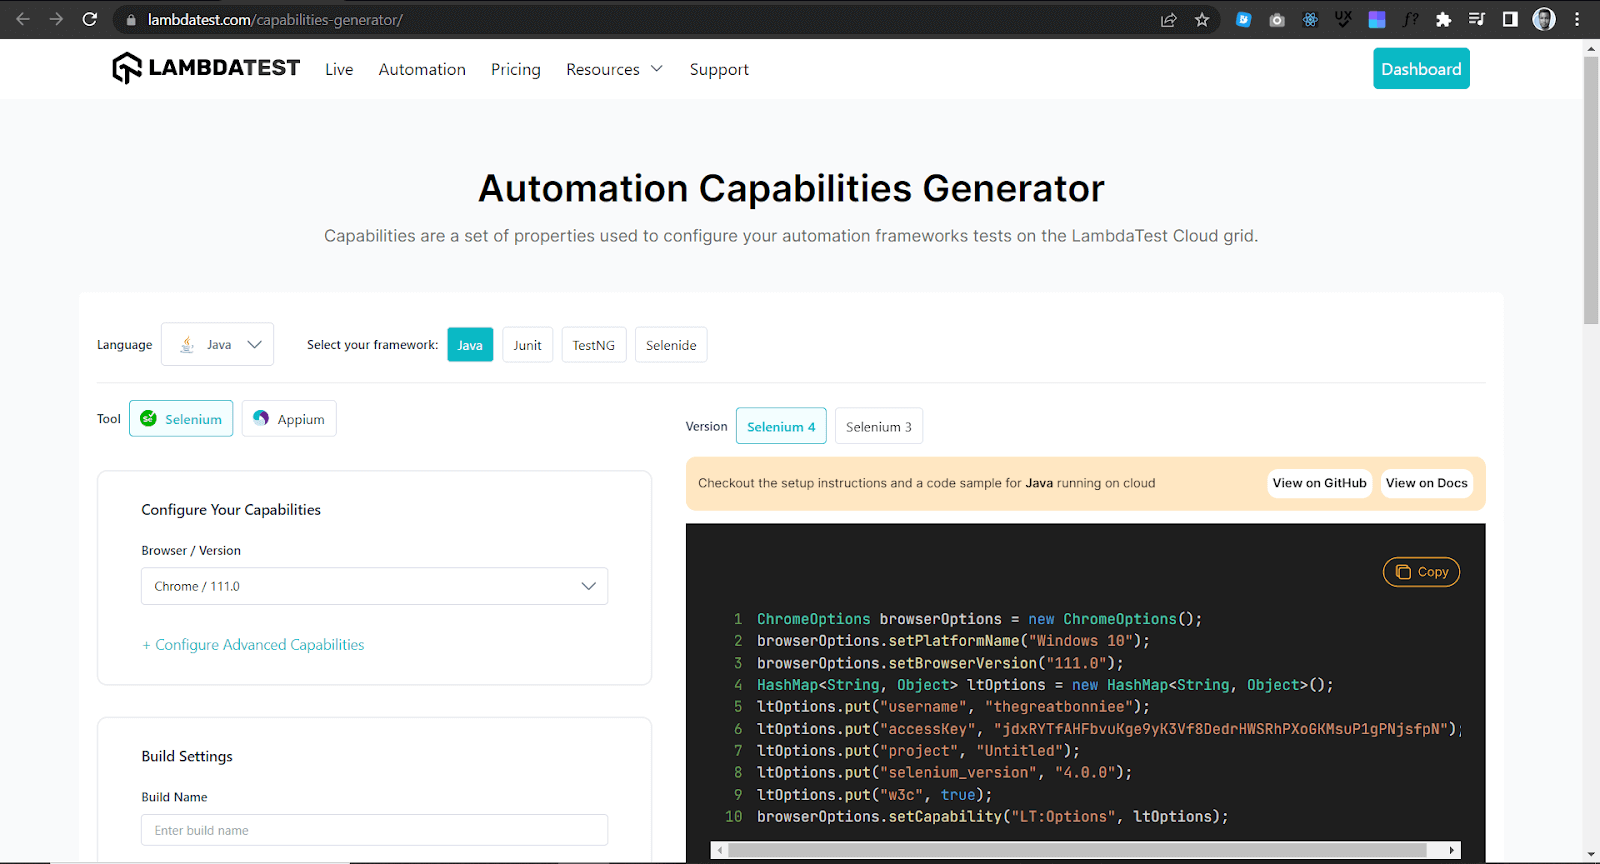
How to generate Browser and Operating System combinations?
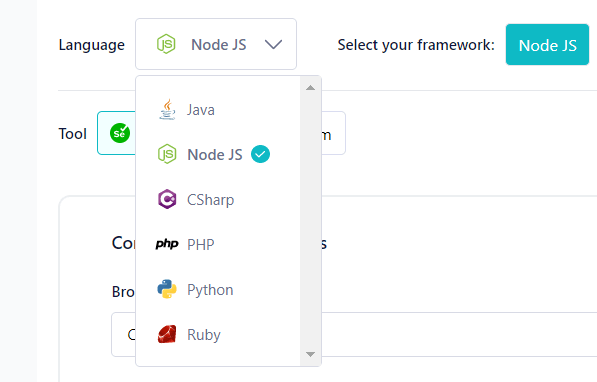
Step 1: On the Capabilities Generator Page, select the programming language you are using to run your tests. In this case, we use JavaScript and can select Node JS, a JavaScript framework.
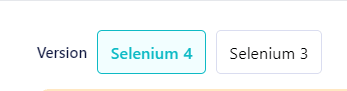
Step 2: Select Selenium.
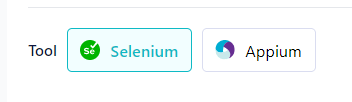
Then select Selenium version 4 on the right.
Step 3: Configure your capabilities by selecting a browser and browser version.
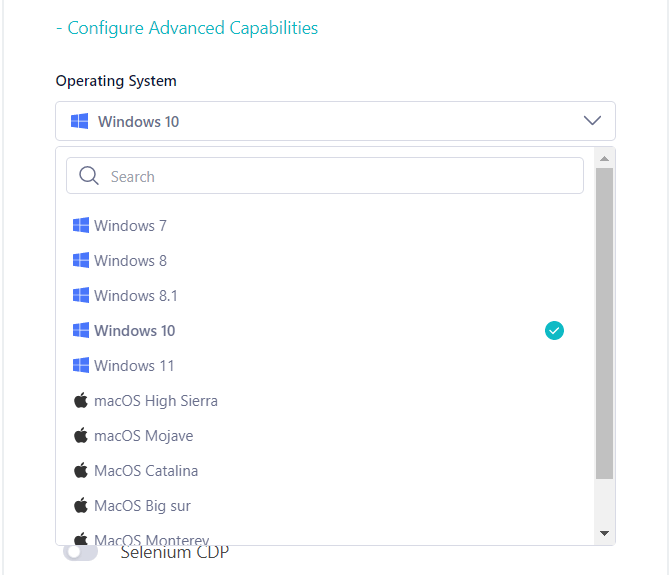
Step 4: Click Configure Advanced Capabilities and select the operating system.
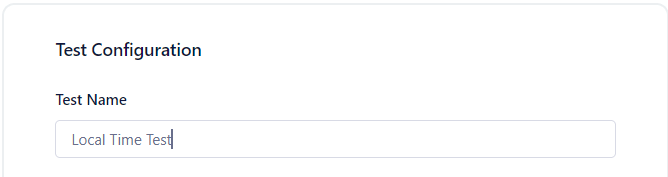
Step 5: Scroll down to the Build Settings section and fill out the input fields as shown below.

Step 6: Scroll down to the test configuration section and fill out the input field as shown below.
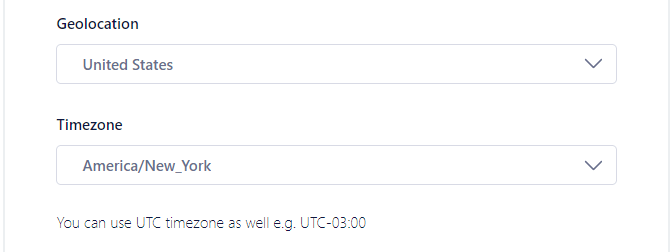
Step 7: Scroll down to the geolocation and timezone section, then select the options as shown below.
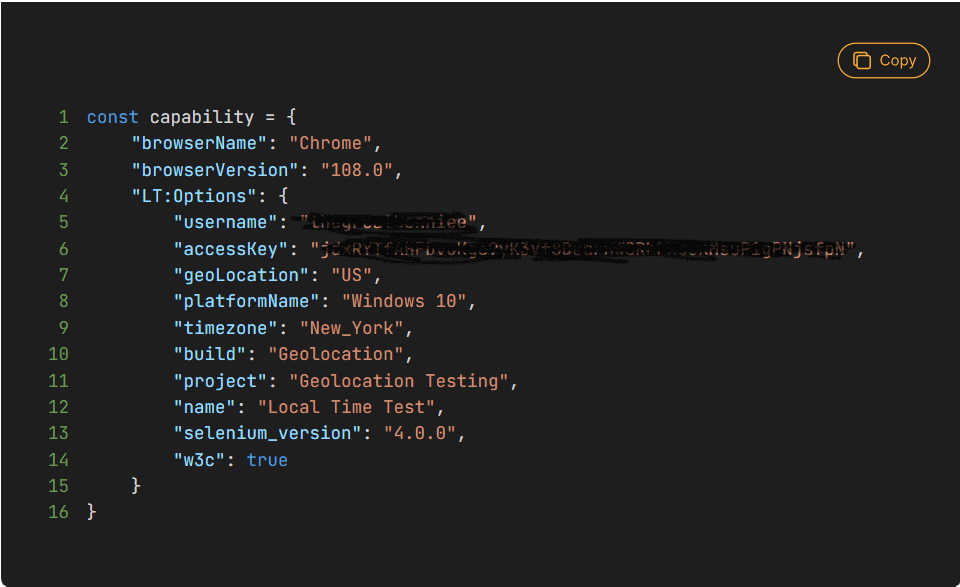
On the right, you can now see the capabilities presented in a code format that you can copy and use in your test script.
Test Case Scenarios
In this case, we will run four geolocation tests. The first test will test if a user in New York, United States can see their local time. Below is the test case scenario.
- Navigate to the collaboration platform.
- Check whether the time shown is the same as New York’s local time.
The second test will test if a user in Berlin, Germany can see their local time. Below is the test case scenario.
- Navigate to the collaboration platform.
- Check whether the time shown is the same as Berlin’s local time.
The third test will test if a user in Nairobi, Kenya can see their local time. Below is the test case scenario.
- Navigate to the collaboration platform.
- Check whether the time shown is the same as Nairobi’s local time.
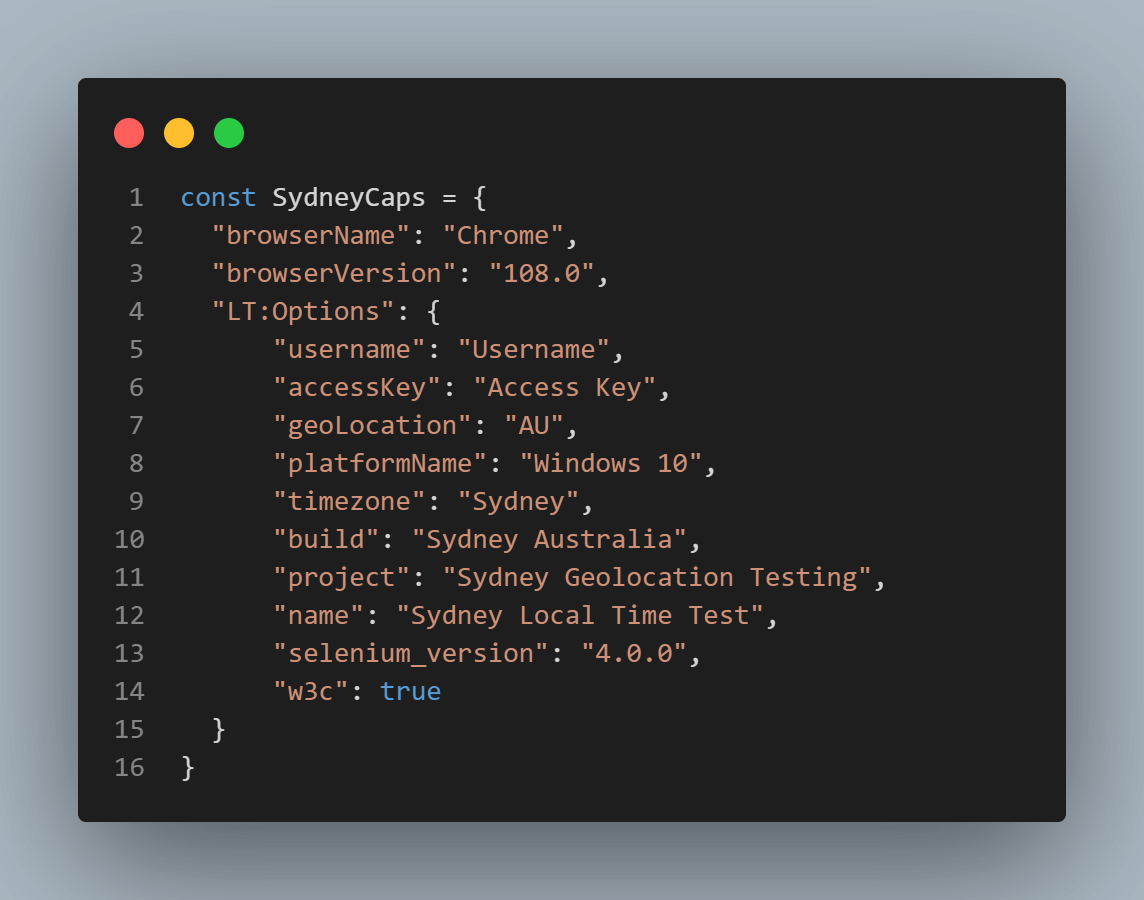
The fourth test will test if a user in Sydney, Australia, can see their local time. Below is the test case scenario.
- Navigate to the collaboration platform.
- Check whether the time shown is the same as Sydney’s local time.
Creating and Running Test Scripts
Due to many test scenarios and updates that might be made to the test code, Page Object Model can be used in test scripts. Page Object Model, also known as POM, is a design pattern used in software testing to create maintainable and readable automated test code.
POM creates an object for each web page in an application, and then page objects interact with the web page to perform actions such as filling out input fields, clicking buttons, or checking some text.
Step 1: Create a project folder called GeolocationTesting using the command below.\
|
1 |
mkdir GeolocationTesting |
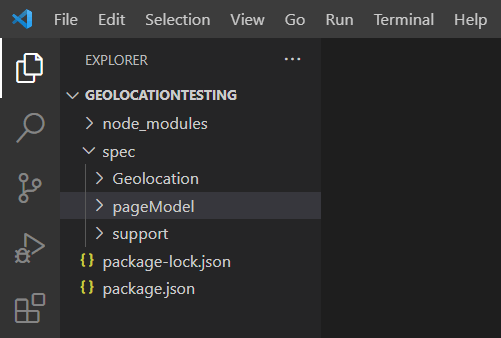
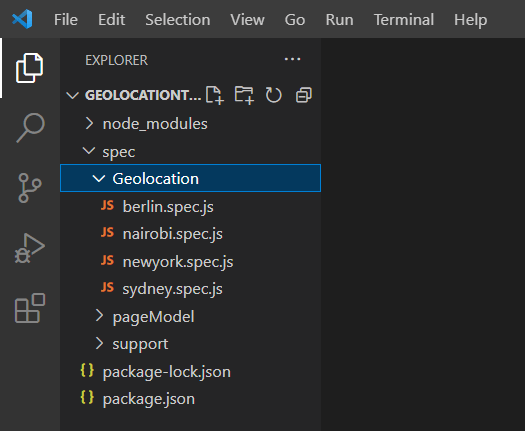
Step 2: Open the project folder in a text editor and create a spec folder.
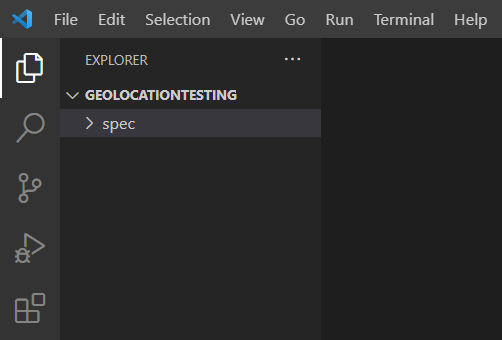
Step 3: Create a pageModel and Geolocation folder in the spec folder, as shown below.
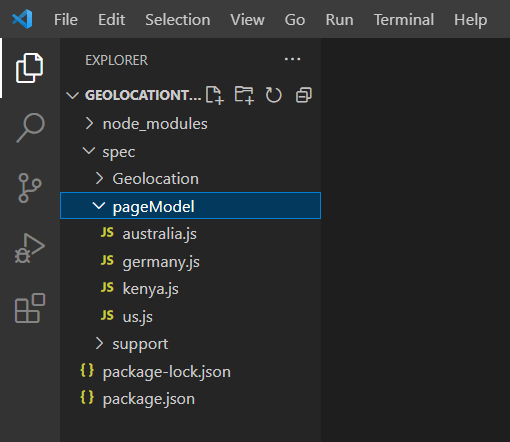
Step 4: Create four files called us.js, germany.js, kenya.js, and australia.js in the pageModel folder.
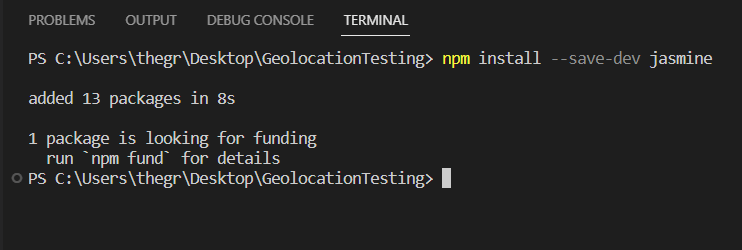
Step 5: Run the command below on the command line to install Jasmine in your project.
|
1 |
npm install --save-dev jasmine |
Adding –save-dev to the command helps save the name and version of Jasmine in the dev-dependency object.
Step 6: Run the command below on the command line to initialize Jasmine in your project.
|
1 |
npx jasmine init |
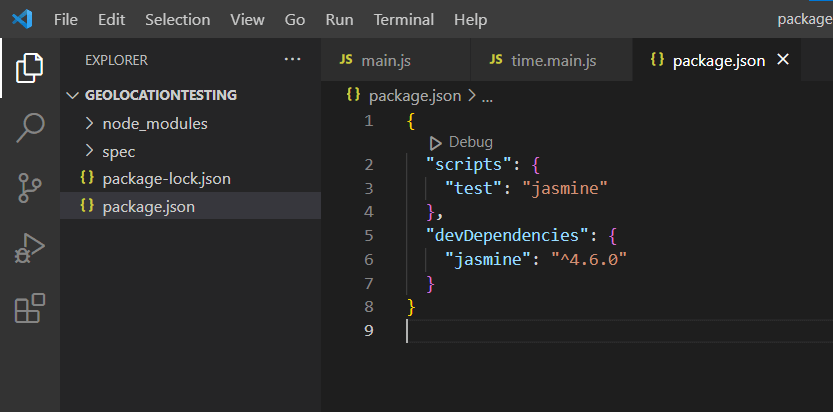
Step 7: Configure the npm test script to run the Jasmine JS tests when the command npm test is executed. To do that, update the package.json file and add a script section, as shown below.
|
1 2 3 |
"scripts": { "test": "jasmine" }, |
The package.json file code should now look as shown below.
|
1 2 3 4 5 6 7 8 |
{ "scripts": { "test": "jasmine" }, "devDependencies": { "jasmine": "^4.6.0" } } |
Step 8: Install the latest version of the Selenium WebDriver in the project folder by running the command below on the command line.
|
1 |
npm install selenium-webdriver |
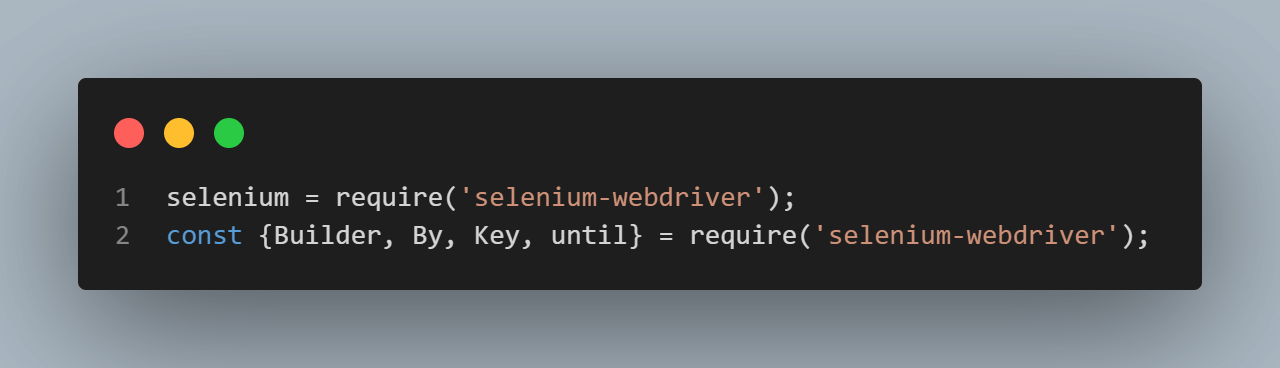
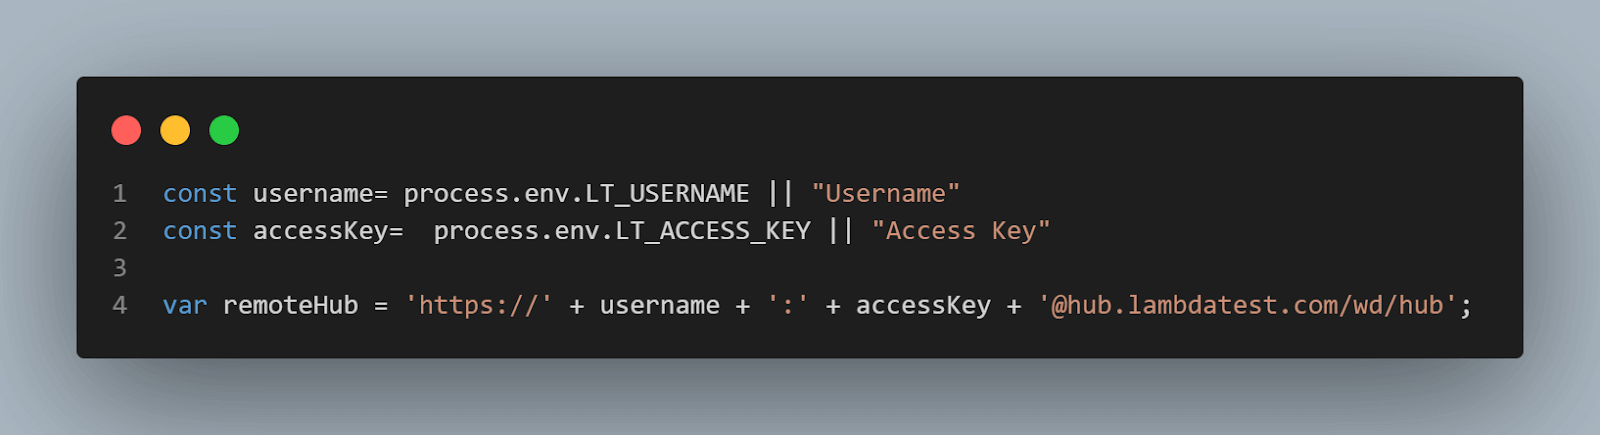
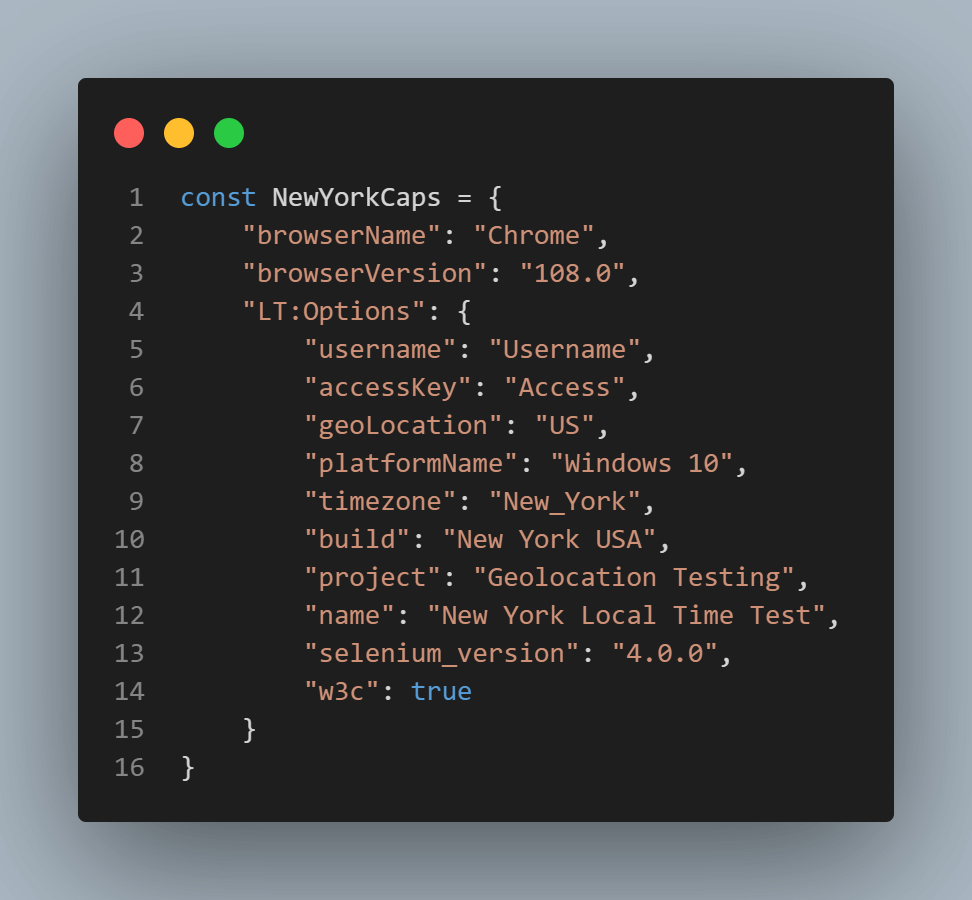
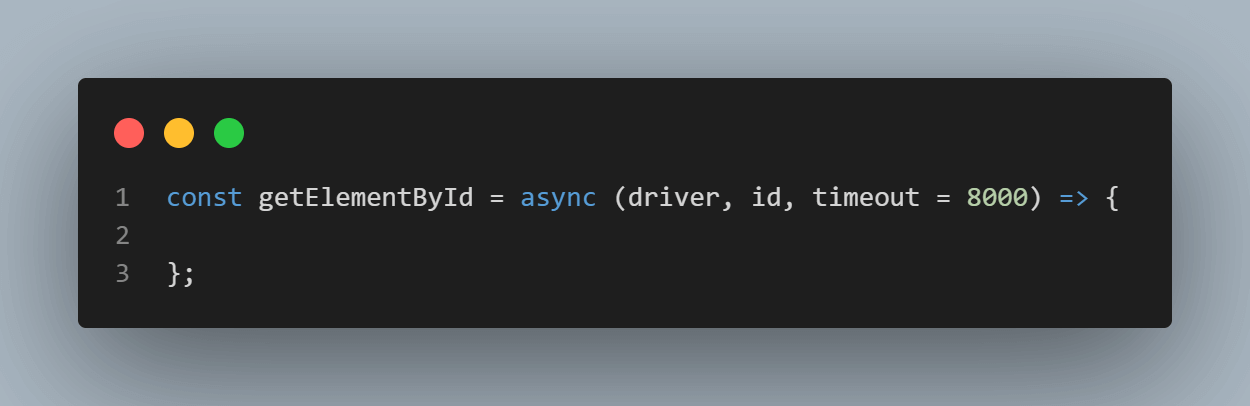
Step 9: In the us.js file, add the following code.
|
1 2 3 4 5 6 7 8 9 10 11 12 13 14 15 16 17 18 19 20 21 22 23 24 25 26 27 28 29 30 31 32 33 34 35 36 37 38 39 40 41 42 43 44 45 46 47 48 49 50 51 52 53 54 55 56 57 58 59 60 61 62 63 64 65 66 67 |
selenium = require('selenium-webdriver'); const {Builder, By, Key, until} = require('selenium-webdriver'); const username= process.env.LT_USERNAME || "Username" const accessKey= process.env.LT_ACCESS_KEY || "Access Key" var remoteHub = 'https://' + username + ':' + accessKey + '@hub.lambdatest.com/wd/hub'; const NewYorkCaps = { "browserName": "Chrome", "browserVersion": "108.0", "LT:Options": { "username": "Username", "accessKey": "Access Key", "geoLocation": "US", "platformName": "Windows 10", "timezone": "New_York", "build": "New York USA", "project": "Geolocation Testing", "name": "New York Local Time Test", "selenium_version": "4.0.0", "w3c": true } } const getElementById = async (driver, id, timeout = 8000) => { const el = await driver.wait(until.elementLocated(By.id(id)), timeout); return await driver.wait(until.elementIsVisible(el), timeout); }; const seleniumDriver = new selenium.Builder(). usingServer(remoteHub). withCapabilities(NewYorkCaps). build(); const timeUrl = 'https://virtualdom.netlify.app/' class Main { constructor() { this.driver = seleniumDriver; this.byId = getElementById; this.url = timeUrl; this.localTime = ('time'); } async visit() { await this.driver.get(this.url); } async time() { const currentTime = await this.byId(this.driver, this.localTime); currentTime.getText().then(function(value) { expect(value).toBe(`Time: ${new Date().toLocaleTimeString()}.`); }); } async before() { this.driver; } async quitB() { await this.driver.quit(); } } module.exports = new Main(); |
Code Walkthrough
- Since we are using Selenium to run the tests, Selenium WebDriver, until, and By are imported using require function as shown below:
- Variables username, accessKey, and remoteHub to be used in the test case are set.
- Test capabilities are configured by passing browser, browser version, and operating system information with LambdaTest Selenium Grid Capabilities through the capabilities object.
- An async function called getElementById with parameters driver, id, and timeout set to 8000 milliseconds is declared.
- A new instance of a Selenium WebDriver is initialized using the Builder design pattern.
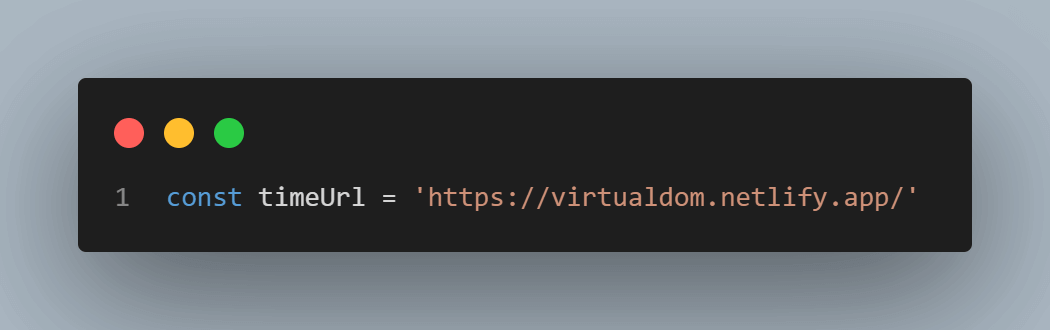
- Variable timeUrl is assigned the URL of the web application to be tested.
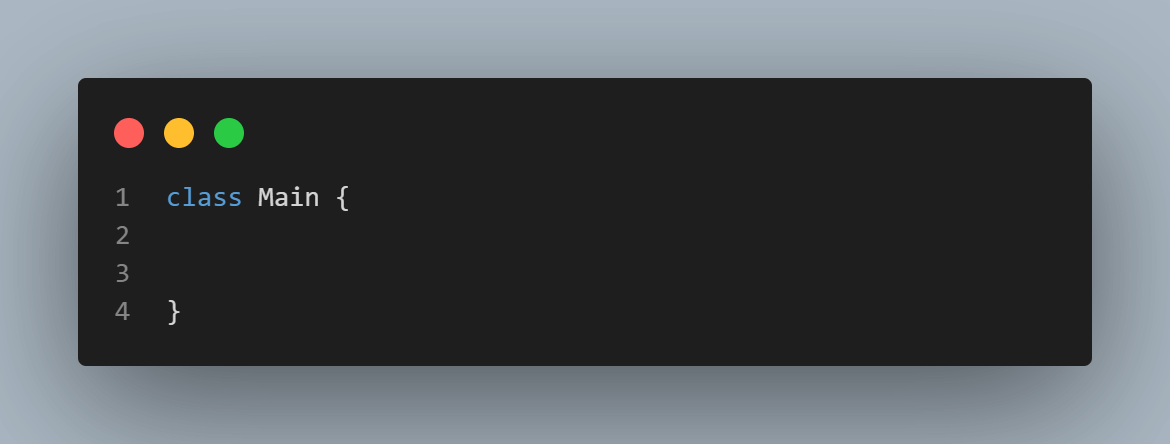
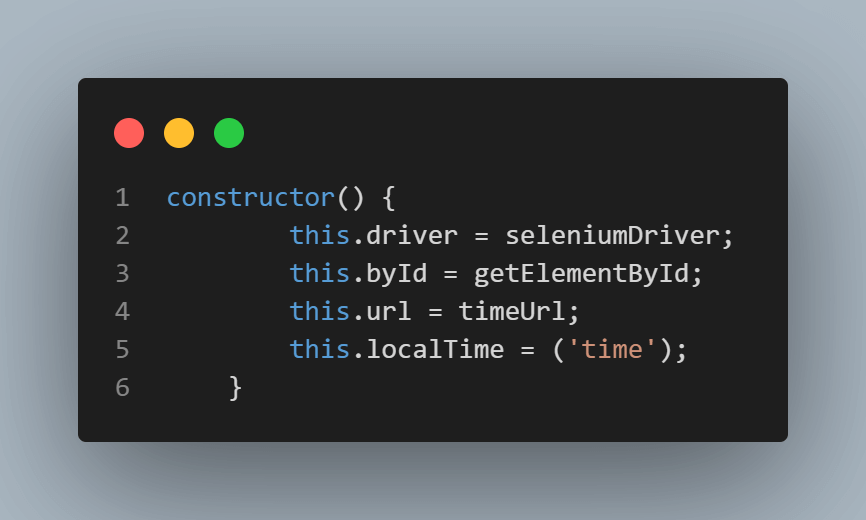
- A JavaScript class called Main is created where the class has a constructor method, a special method called when an object of the class is created. The constructor method initializes the properties of the class.
- A value of seleniumDriver is assigned to this.driver property, a value of getElementById to this.byId property, and a value of timeUrl to this.url property in this constructor method. Property this.localTime is assigned an ID selector value that will be used to find the local time in the web application.
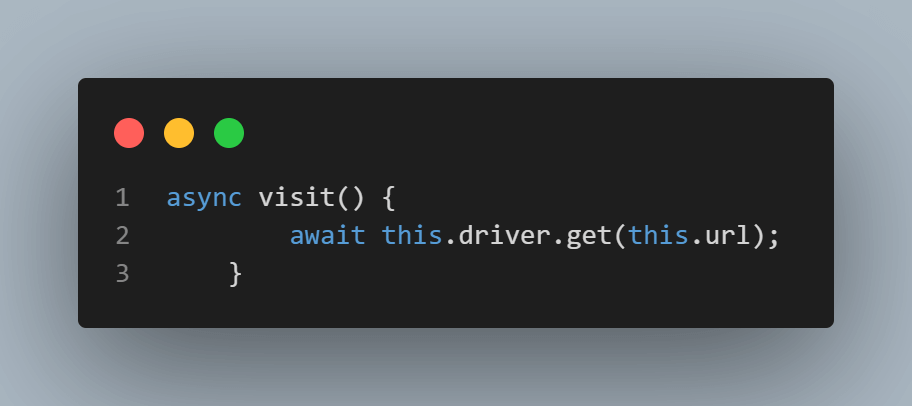
- The Async function visit() is created where the get() method is used to load the URL of the web application.
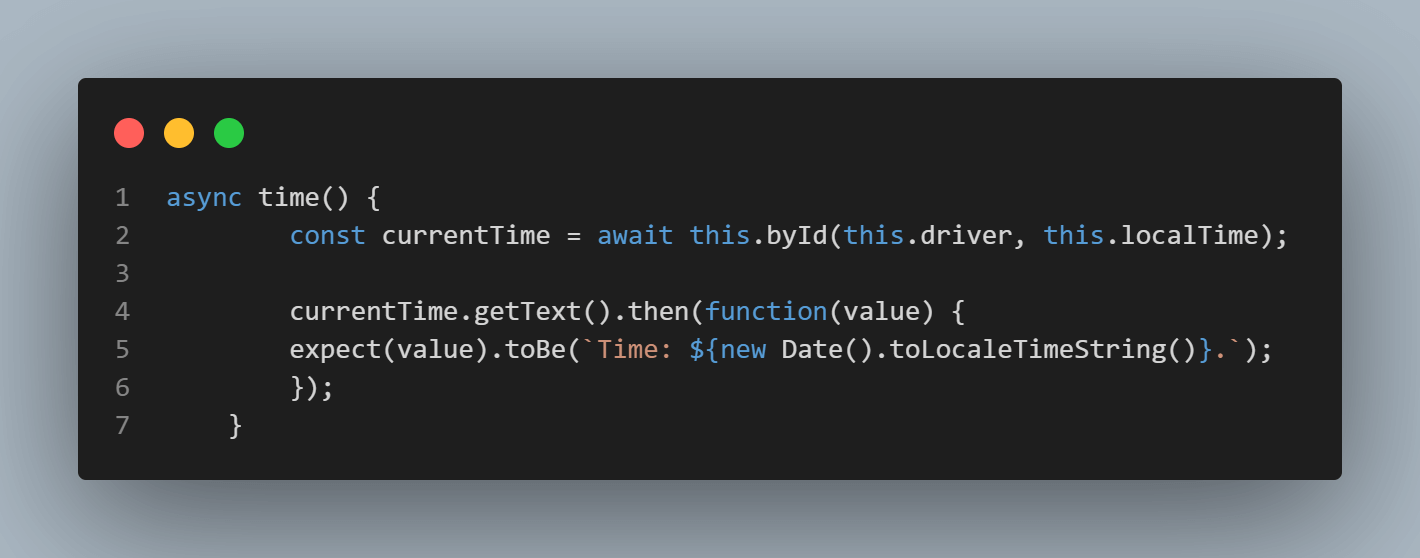
- The Async function time() is created. In the async function, the path for the web element to be tested on the web application is defined in the async function.
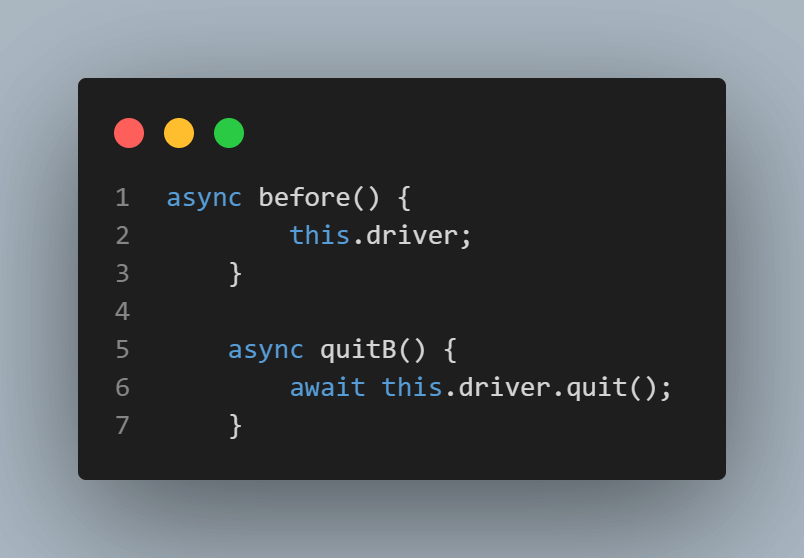
- The Async functions before() and quitB() are created where the async function before() starts a browser session while the async function quitB() ends the browser session.
Inside the async function, declare a variable called el, where the variable value instructs the Selenium Driver to wait until the element with the targeted id is located on the test URL. The elementLocated() method is used here.
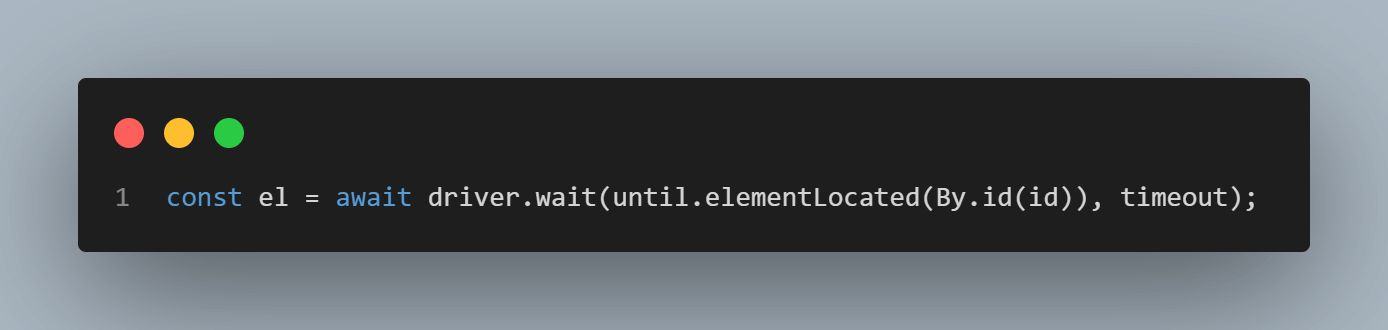
Below is how an element is located by the ID locator.

An object returned by the getElementById async function instructs the Selenium WebDriver to wait until the element we target by id is present on the DOM of the registration page and visible. Visibility means that the element is not only displayed but also has a height and width that is greater than zero. The elementIsVisible() method is used here.

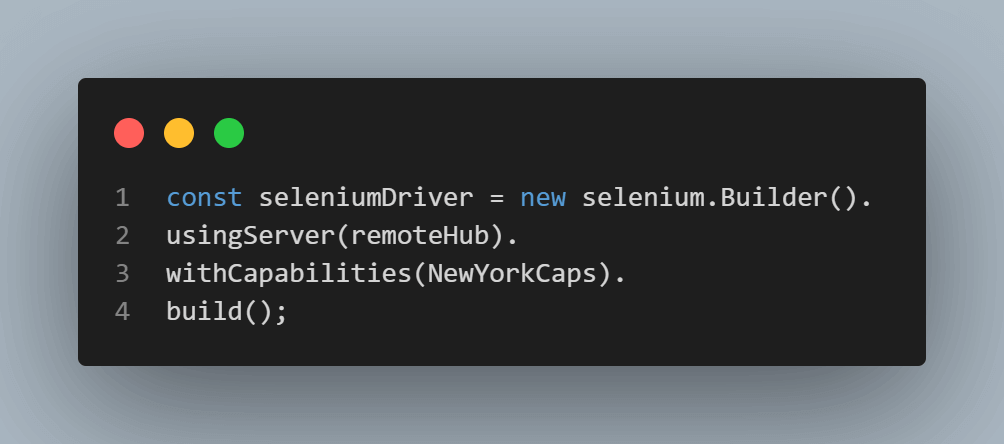
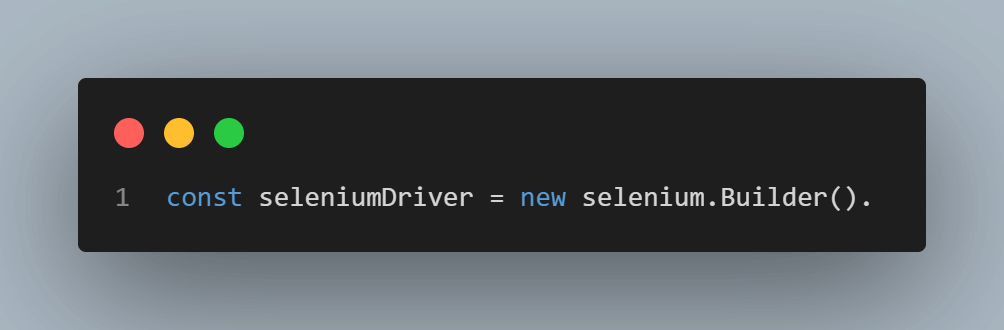
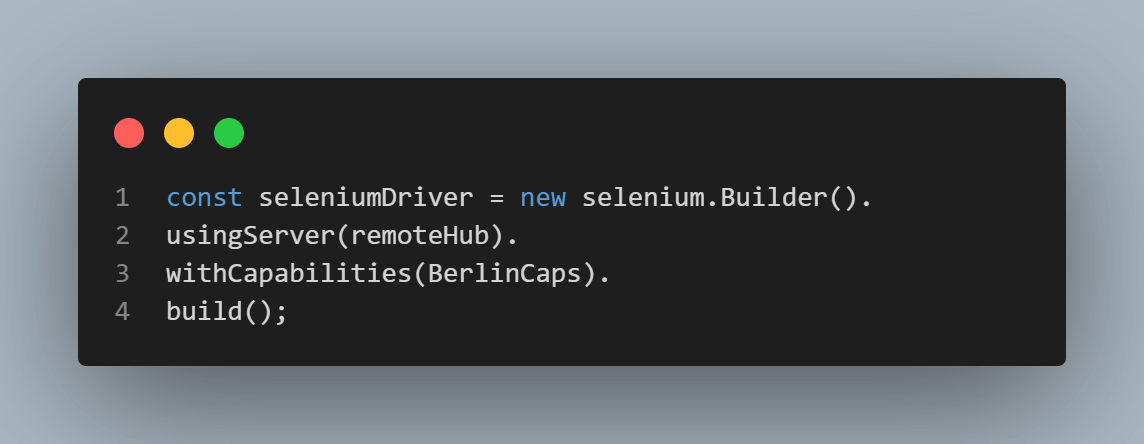
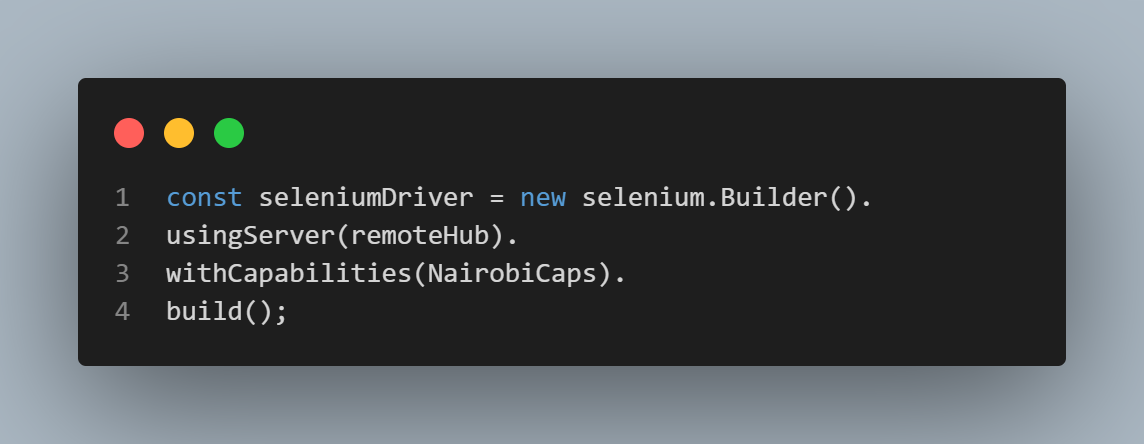
The const declares a constant variable named seleniumDriver, which will hold the created Selenium WebDriver instance. The new selenium.Builder() creates a new instance of the Builder class provided by the Selenium library.
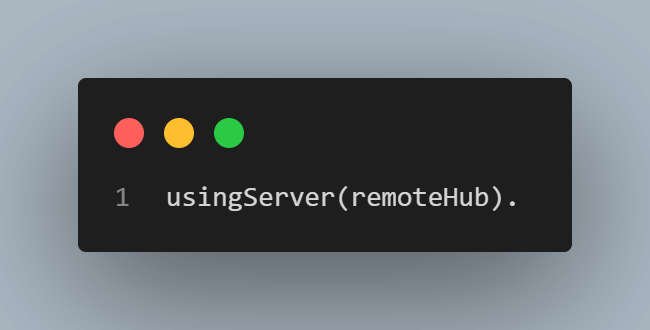
The usingServer(remoteHub) specifies the URL of a Selenium server to use, which is passed as the value of the remoteHub variable. This indicates that the WebDriver instance will be a remote one and not a local one.
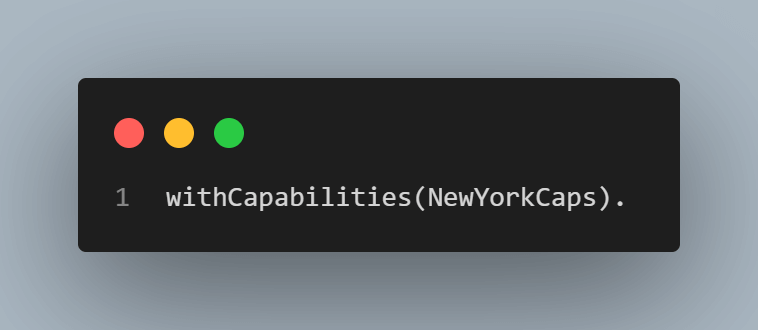
The withCapabilities(NewYorkCaps) sets the capabilities of the WebDriver instance. The NewYorkCaps variable holds an object that defines the desired capabilities for this WebDriver instance. Capabilities are a set of key-value pairs that specify the browser, platform, and other settings that will be used by the WebDriver instance.
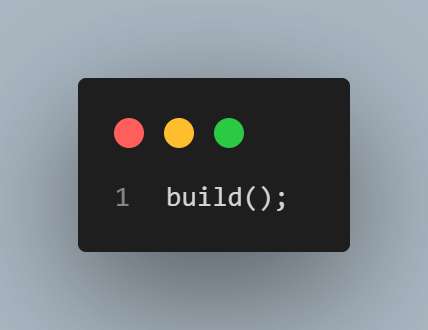
The build() creates and returns a new instance of a Selenium WebDriver, based on the previously set configuration. The new WebDriver instance is then assigned to the seleniumDriver constant variable.
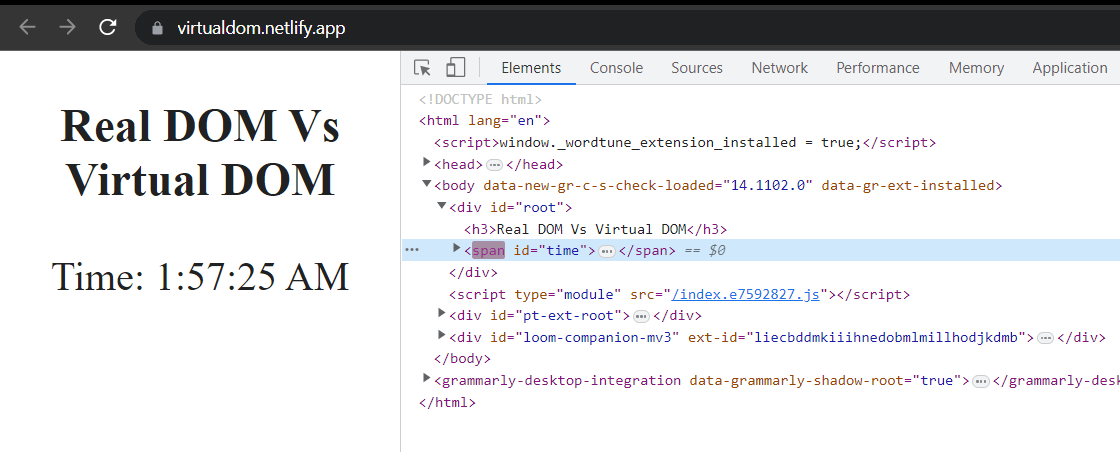
To add the ID selector, navigate to the web application.
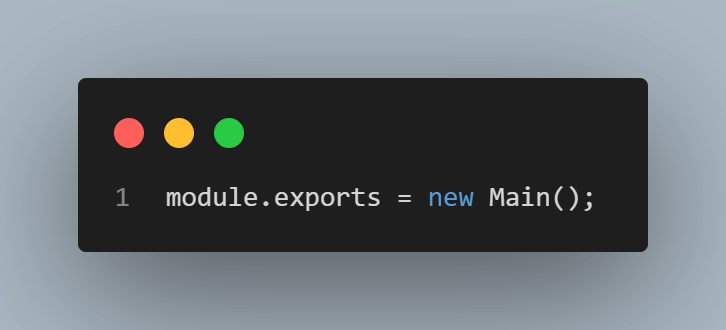
Finally, the Main class is exported to be used in other files.
Step 7: In the germany.js, kenya.js, and australia.js files, add the same code as the us.js file. The only difference is the capabilities variables, as shown below.
Capabilities for germany.js
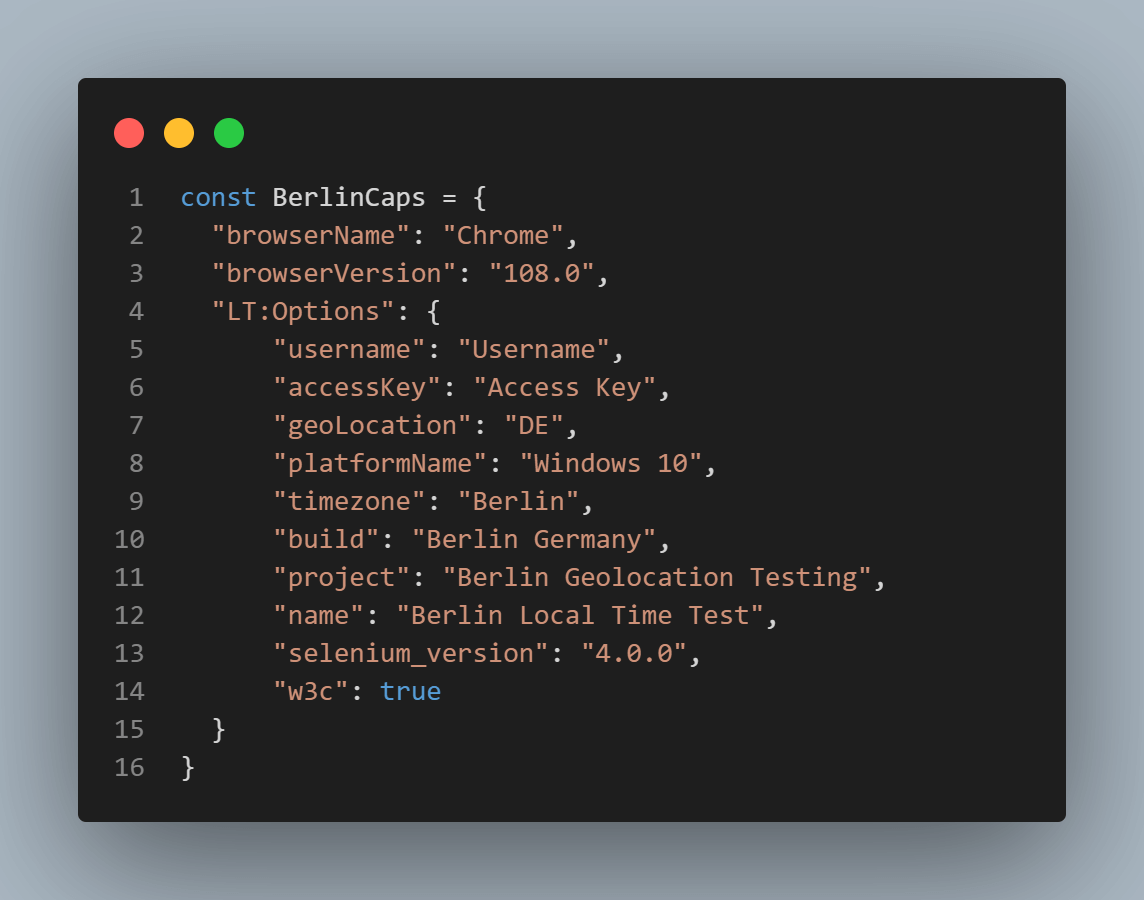
Then add the BerlinCaps variable to the value of the seleniumDriver variable.
Capabilities for kenya.js
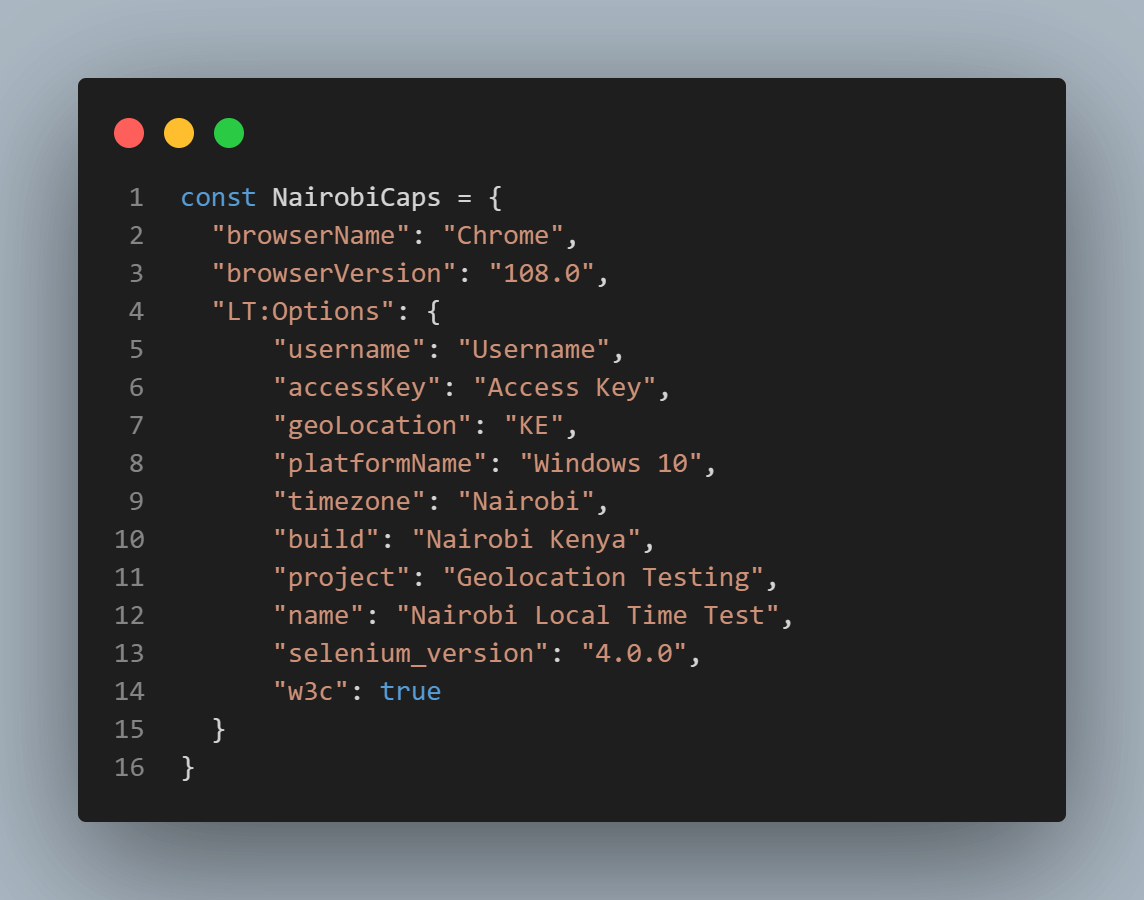
Then add the NairobiCaps variable to the value of the seleniumDriver variable.
Capabilities for australia.js
Then add the SydneyCaps variable to the value of the seleniumDriver variable.

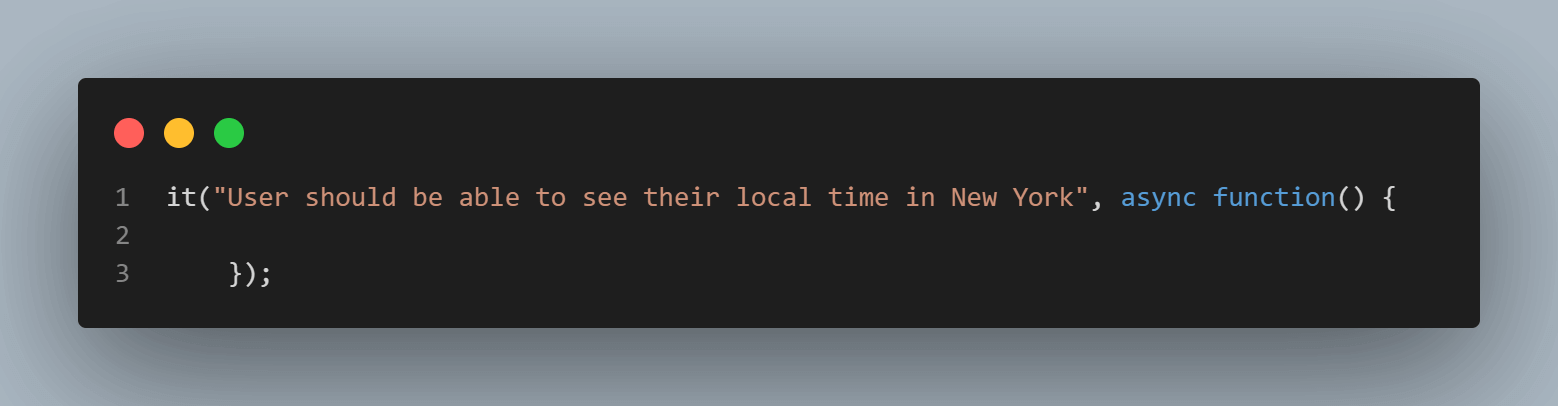
Step 8: In the Geolocation folder, create four files called newyork.spec.js, berlin.spec.js, nairobi.spec.js, and sydney.spec.js, as shown below.
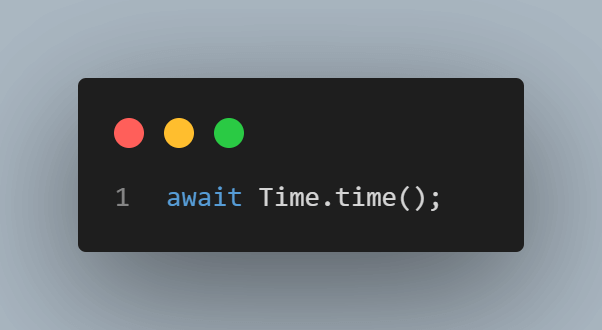
Step 9: In the newyork.spec.js, add the following code.
|
1 2 3 4 5 6 7 8 9 10 |
ach(async () => { Time.quitB(); }); it("User should be able to see their local time in New York", async function() { await Time.visit(); await Time.time(); }); }); |
Code Walkthrough
- Variable Time is assigned the value of the Main class imported from the us.js file.
- The default timeout interval for tests is set.
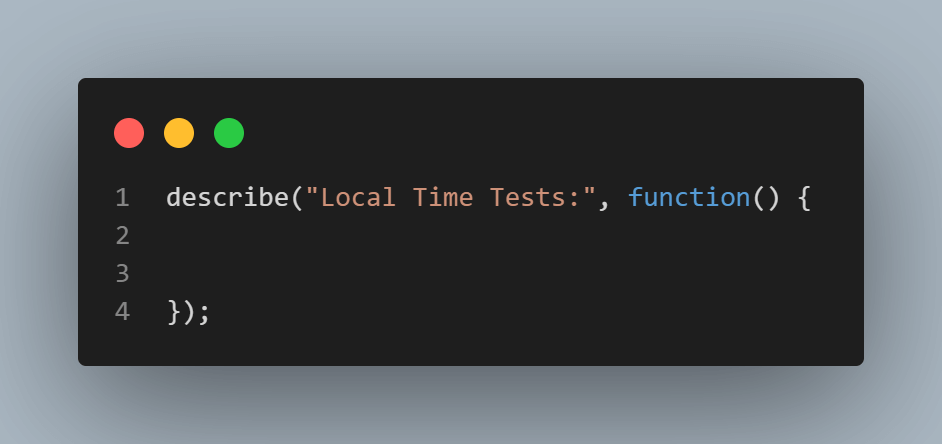
- A describe block function called Local Time Tests, where all the tests for the web application are written.
- Inside the describe block, beforeEach and afterEach functions are created where they call before() and quitB() async functions created in the Main class.
- A test case is defined.
- The visit() async function from the Main class is called on the driver object, which is an instance of the Selenium WebDriver.
- The async function where the path for the web element on the web application defined in the Main class is called.
- In the berlin.spec.js, nairobi.spec.js, and sydney.spec.js files, add the same code. The difference is the file imported to each file.
- Run the commands below on the command line.
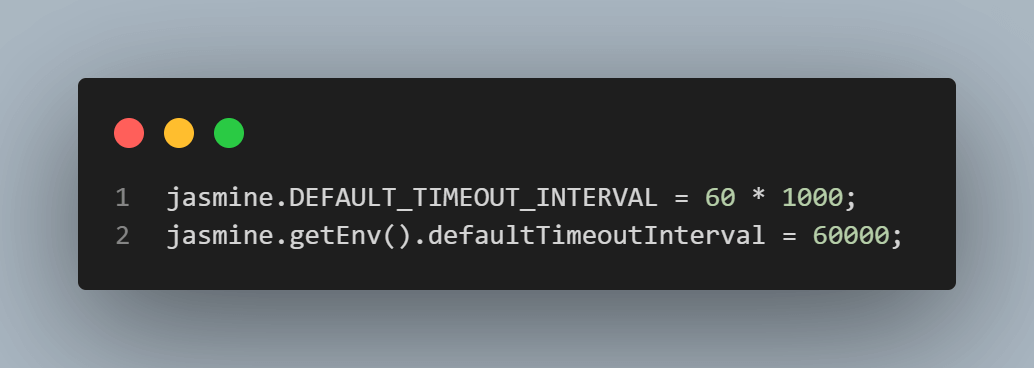
The jasmine.DEFAULT_TIMEOUT_INTERVAL = 80 * 1000; sets the default timeout interval to 80,000 milliseconds or 80 seconds. This means that if a test doesn’t complete within 100 seconds, it will be marked as a failure.
The jasmine.getEnv().defaultTimeoutInterval = 80000; changes the default timeout interval to 60,000 milliseconds, or 60 seconds, after the initial default set in the previous line.
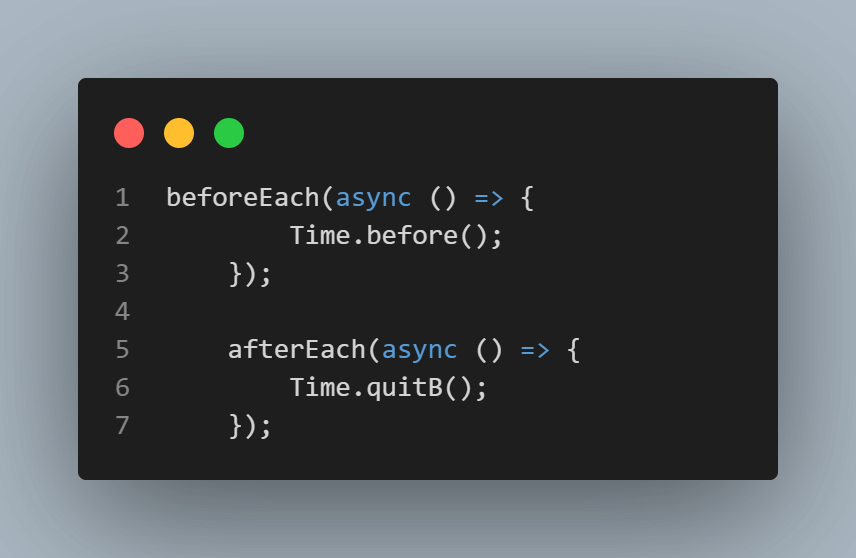
The beforeEach function is called before each test case is run and is used to set up the initial state or environment for the tests. The afterEach function is called after each test case is run, and it is used to clean up or reset the state of the environment after a test case is completed.
The it function is used to define a single test case, and it takes two arguments: the first is a string that describes the test case, and the second is a function that contains the test logic.

File import in berlin.spec.js
|
1 |
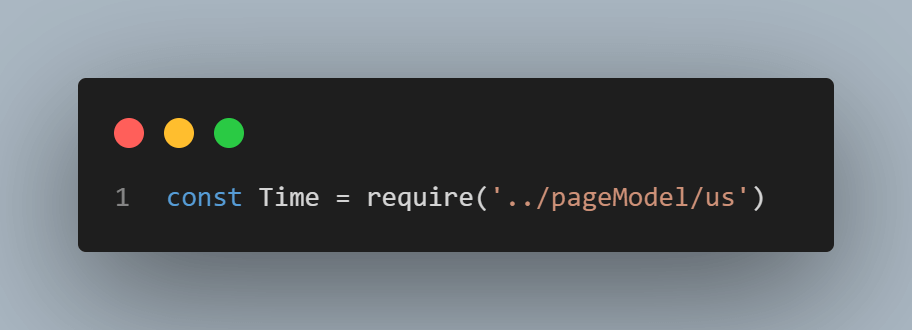
const Time = require('../pageModel/germany') |
File import in nairobi.spec.js
|
1 |
const Time = require('../pageModel/kenya') |
File import in berlin.spec.js
|
1 |
const Time = require('../pageModel/australia') |
|
1 |
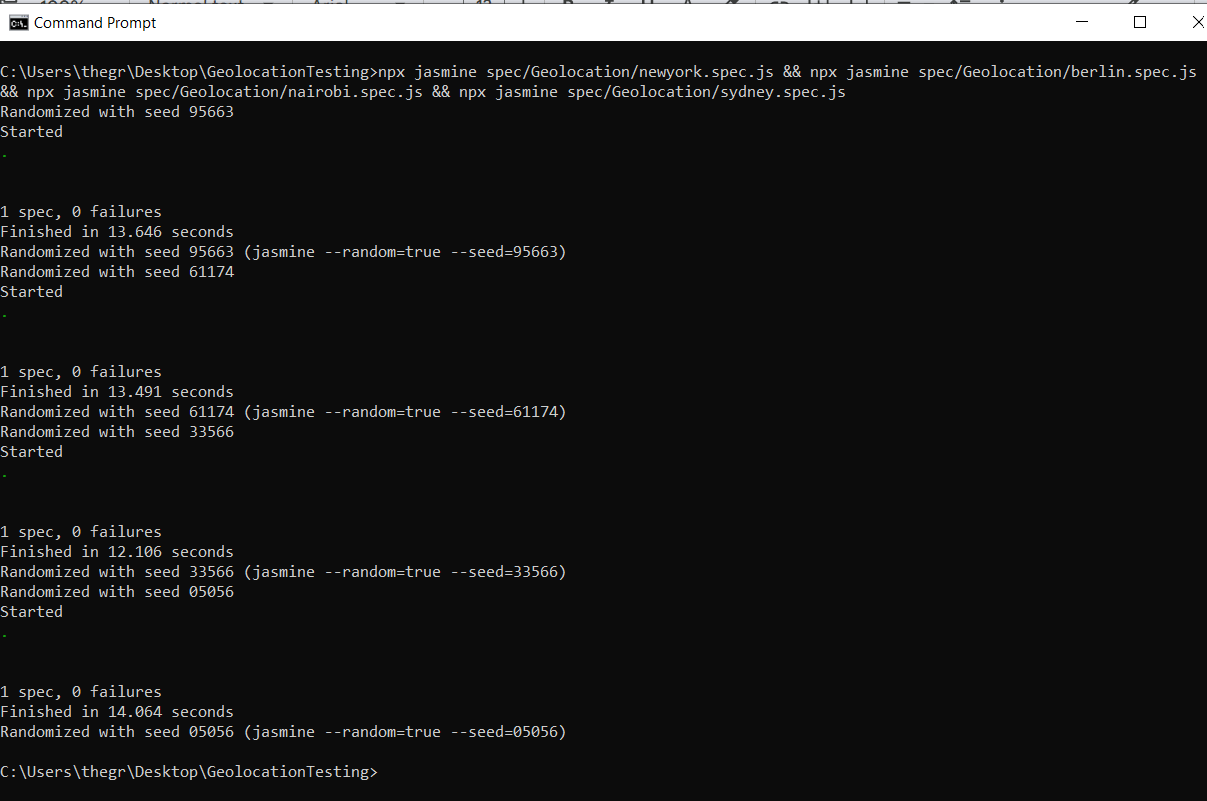
npx jasmine spec/Geolocation/newyork.spec.js && npx jasmine spec/Geolocation/berlin.spec.js && npx jasmine spec/Geolocation/nairobi.spec.js && npx jasmine spec/Geolocation/sydney.spec.js |
Once the commands run, you should see on your command line that the tests have passed successfully.
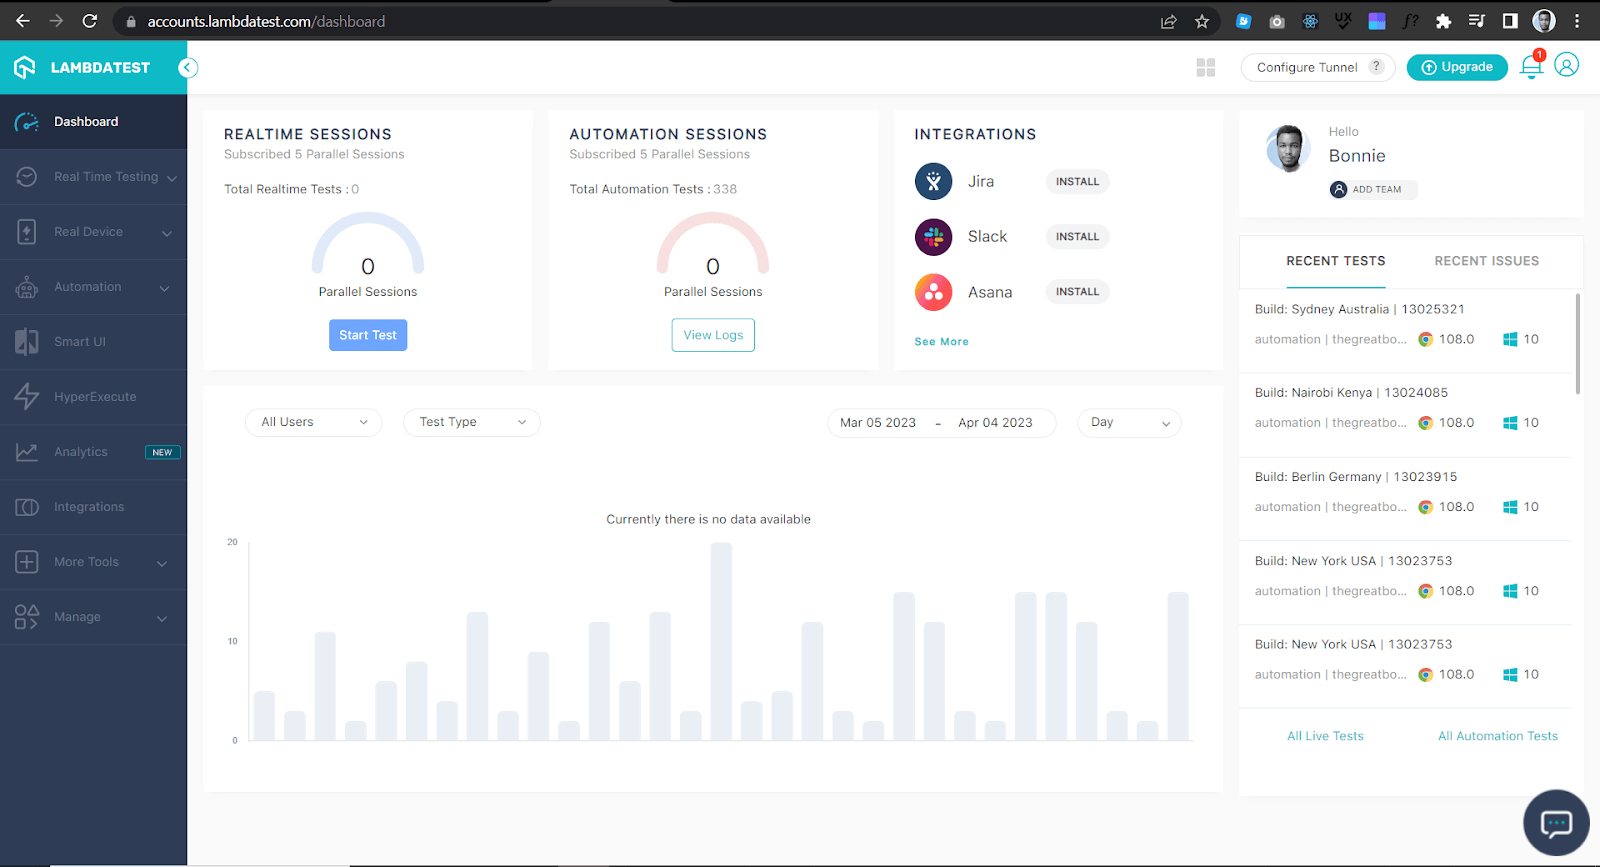
Visit your LambdaTest Dashboard, and on the right side of the screen, you should be able to see your recent tests, as shown below.
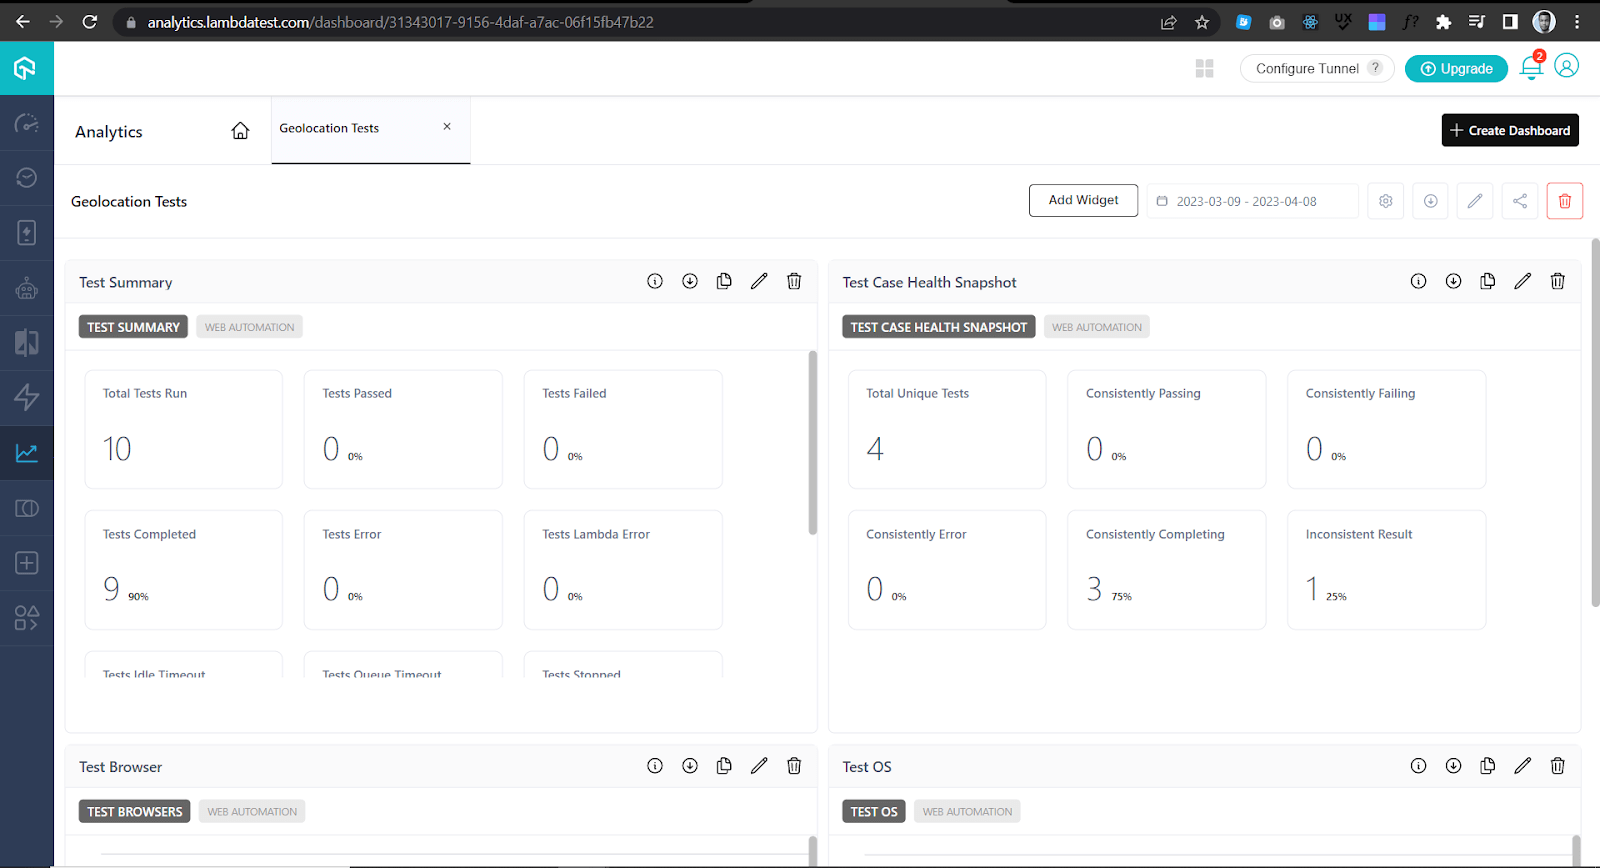
Click on one of the tests, and you will be redirected to the Automation Dashboard, as shown below.
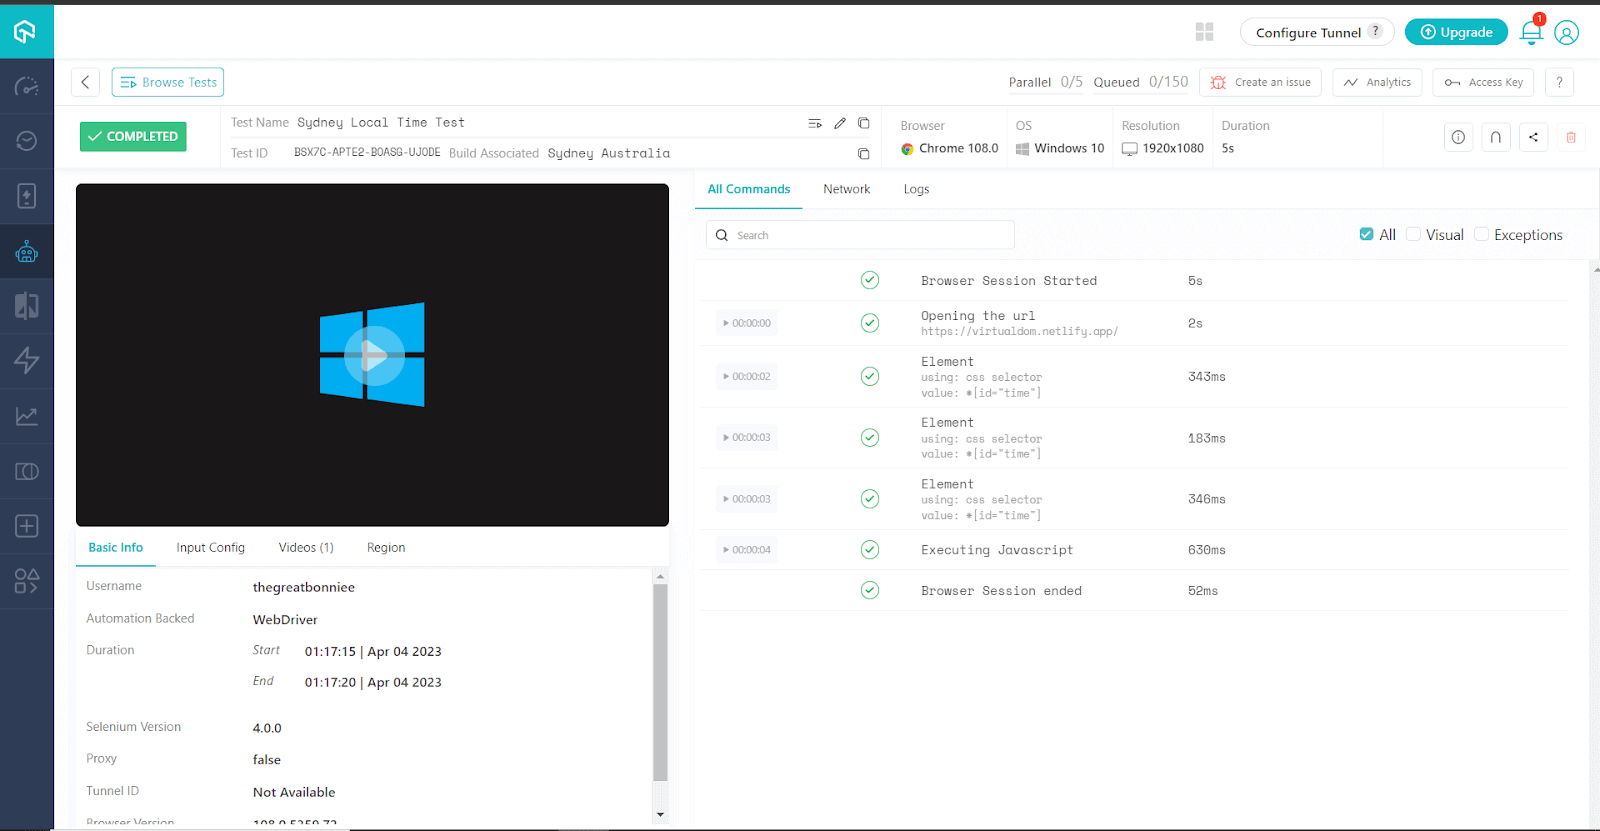
The Automation Dashboard has all the information about the test, including a video and a screenshot showing how the test went. You can also access the report on Analytics Dashboard, which shows all the details and metrics related to your tests.
To see all the details and metrics related to your tests, navigate to the Analytics Dashboard, and you will be prompted to select an analytics template, as shown below.
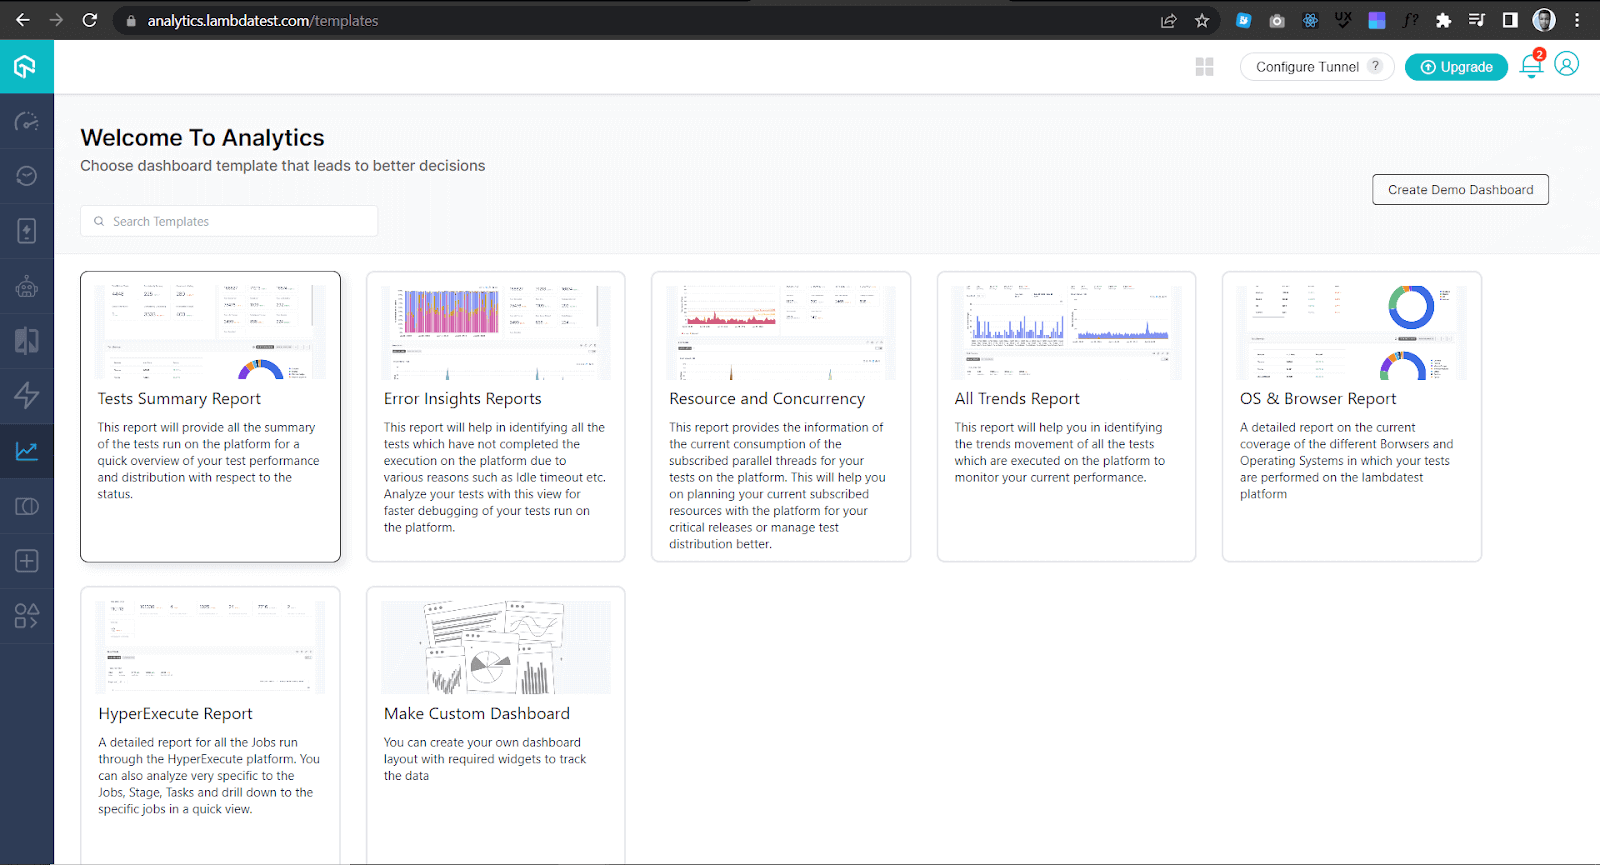
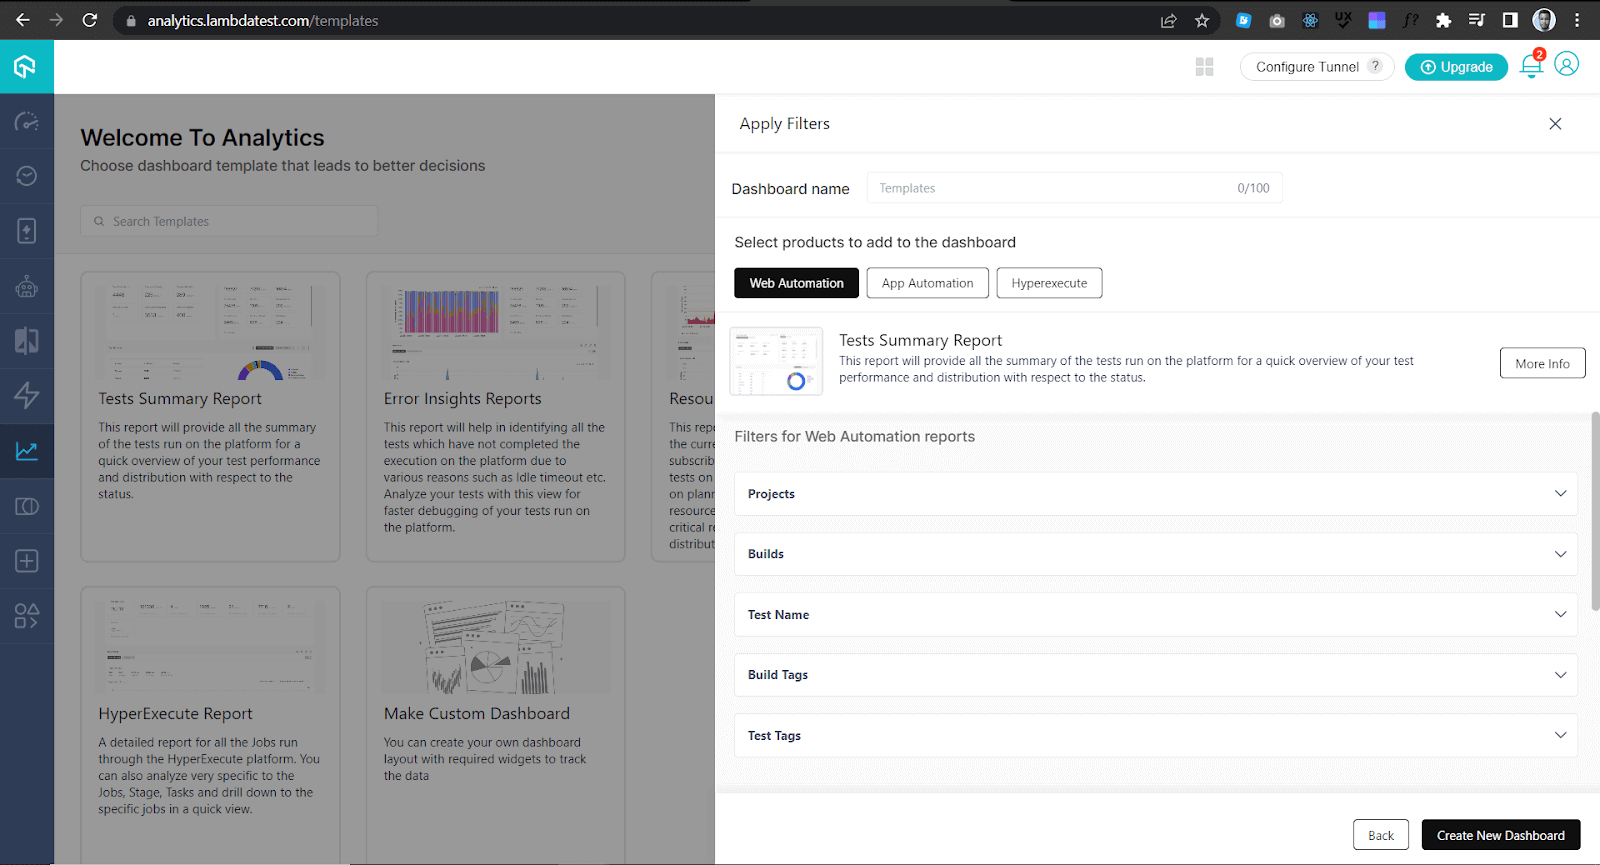
In this case, you can select the Tests Summary Report template that provides all the summaries of the tests run on the LambdaTest Cloud Selenium Grid. On the right side of your page, you are prompted to create a dashboard where the test analytics will be displayed.
The first thing you need to do is give the dashboard a name. In this case, you can name the dashboard Geolocation Tests, as shown below.
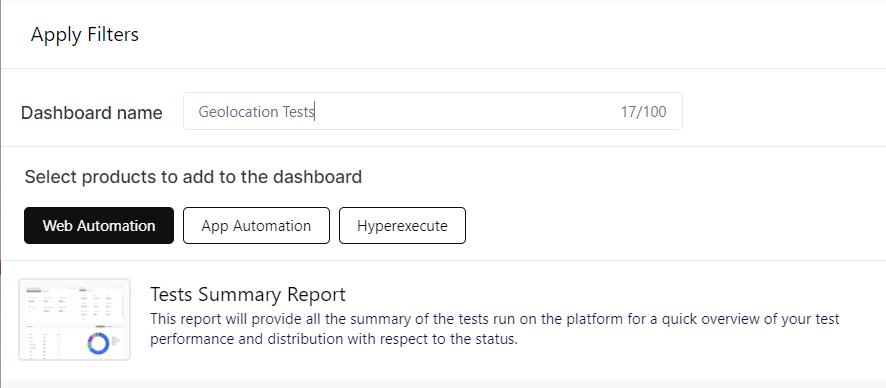
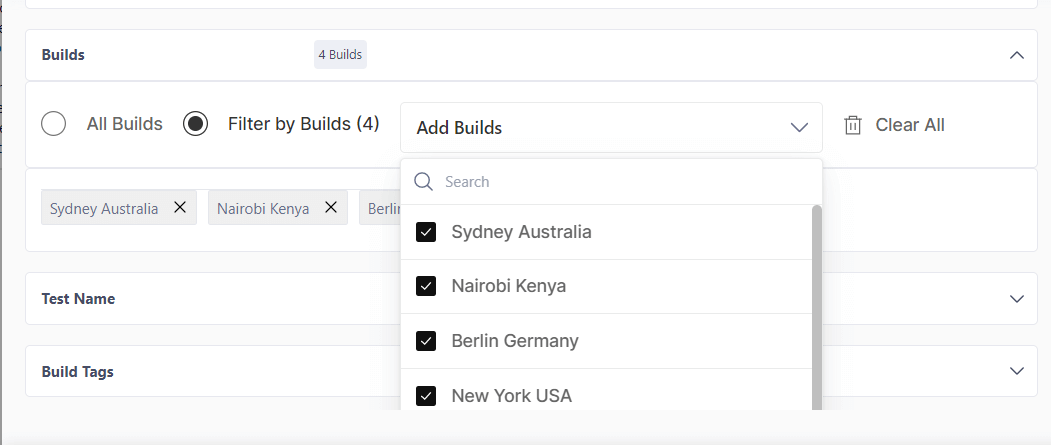
Then filter the web automation reports you want to be displayed on the Geolocation Tests dashboard. In this case, you can filter the reports by builds and then add the builds, as shown below.
Finally, click the Create New Dashboard button at the bottom. You will then be redirected to the tests summary report, as shown below.
Conclusion
In conclusion, building web applications using a React Virtual DOM can improve web application performance and user experience. By using automation testing frameworks like Jasmine and web automated testing platforms like LambdaTest Cloud Selenium Grid, you can ensure a web application performs as expected when accessed by users. Learn to implement react testing with this react end to end testing guide.
Frequently Asked Questions (FAQs)
What is a React virtual DOM?
In React, the Virtual DOM (Document Object Model) is a lightweight copy of the actual DOM representation of a web page. It is a concept and technique used by React to optimize the updating process of web interfaces.
When changes occur in a React component, instead of directly manipulating the real DOM, React creates a virtual representation of the DOM and compares it with the previous version. This allows React to efficiently determine the minimal number of changes needed to update the real DOM.
What is React DOM vs React Virtual DOM?
React DOM and React virtual DOM are two different concepts in React:
React DOM is the package specifically designed for rendering React components into the real DOM. It provides the necessary methods and APIs to interact with the actual DOM, update it, and handle events. React DOM efficiently updates the real DOM based on changes in the virtual DOM.
The Virtual DOM is a lightweight copy of the actual DOM. It is a concept and technique used by React to optimize the updating process of web interfaces. When changes occur in a React component, instead of directly manipulating the real DOM, React creates a virtual representation of the DOM and performs a diffing algorithm to determine the minimal changes needed to update the Real DOM.
Why is React virtual DOM faster?
The React virtual DOM is designed to improve performance in several ways:
- Efficient updates
- Batched updates
- Minimized DOM manipulations
- Virtual DOM operations are faster
- Efficient reconciliation
Overall, the combination of efficient updates, batched operations, minimized DOM manipulations, faster virtual DOM operations, and optimized reconciliation contribute to the improved performance of React’s virtual DOM approach.


Author’s Profile
Bonnie
I am a Web Developer, Technical Writer, and Content Creator. I help developers become better Technical Writers and Make Money Online.
Blogs: 3
Got Questions? Drop them on LambdaTest Community. Visit now