TeamCity Integration With LambdaTest
Developed by JetBrains, TeamCity is Java-based build management to help you with continuous integration and continuous deployment. With TeamCity, you can deploy your automated pipeline quicker, pacing your go-to-market launch.
LambdaTest now integrates with TeamCity to boost your go-to-market delivery. Perform automated cross browser testing with LambdaTest to ensure your development code renders seamlessly through an online Selenium grid providing 3000+ real browsers running through machines, on the cloud. Perform automation testing in parallel with LambdaTest’s Selenium grid to drastically trim down your test cycles.
Prerequisites
TeamCity server along with one TeamCity Agent installed.
Make sure team city Agent has Node and Protractor installed
A GIT repository.
LambdaTest Authentication Credentials Be aware of your LambdaTest authentication credentials i.e. your LambdaTest username, access key and HubURL. You need to set them up as your environment variables. You can retrieve them from your LambdaTest automation dashboard by clicking on the key icon near the help button.
For Linux/Mac:
$ export LT_USERNAME=
{YOUR_LAMBDATEST_USERNAME}$ export LT_ACCESS_KEY=
{YOUR_LAMBDATEST_ACCESS_KEY}For Windows:
$ set LT_USERNAME=
{YOUR_LAMBDATEST_USERNAME}$ set LT_ACCESS_KEY=
{YOUR_LAMBDATEST_ACCESS_KEY}
Integrating LambdaTest with TeamCity
Step 1: Go to your TeamCity server URL.
Step 2: Go to Administration and create a new project manually.

Step 3: After filing details and click on the Create button.
Step 4: Create a new VCS root using the below form. Required inputs are: Git Repo URL into Fetch URL and Authentication method is password where you need to pass your git username/ password.
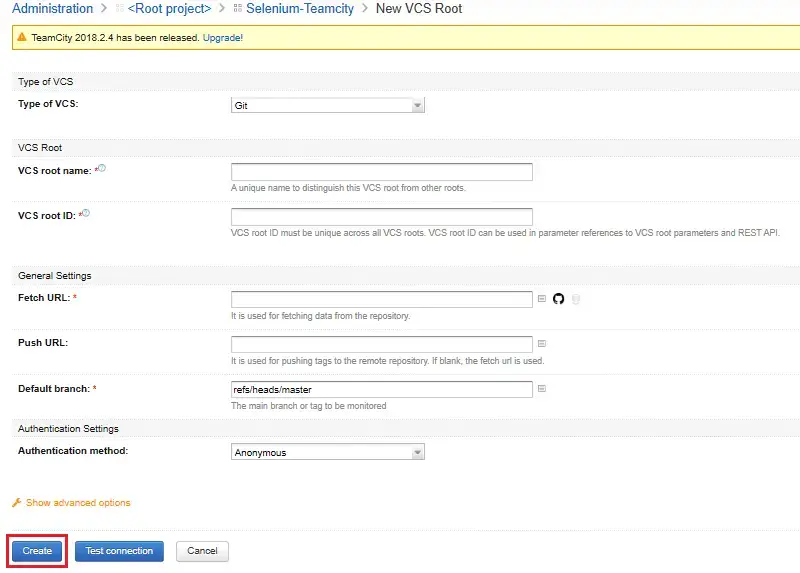
Step 5: Fill details, test connection and click on the Create button.
Step 6: Go to the General Settings screen for the added project. Now, create a build configuration.

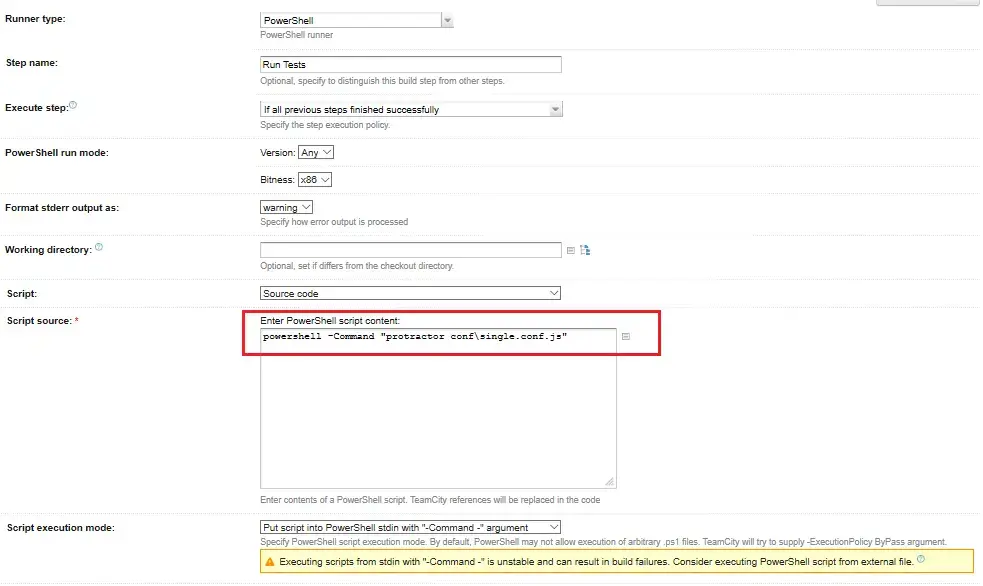
Step 7: Go to Build Step page and add a build step as below.
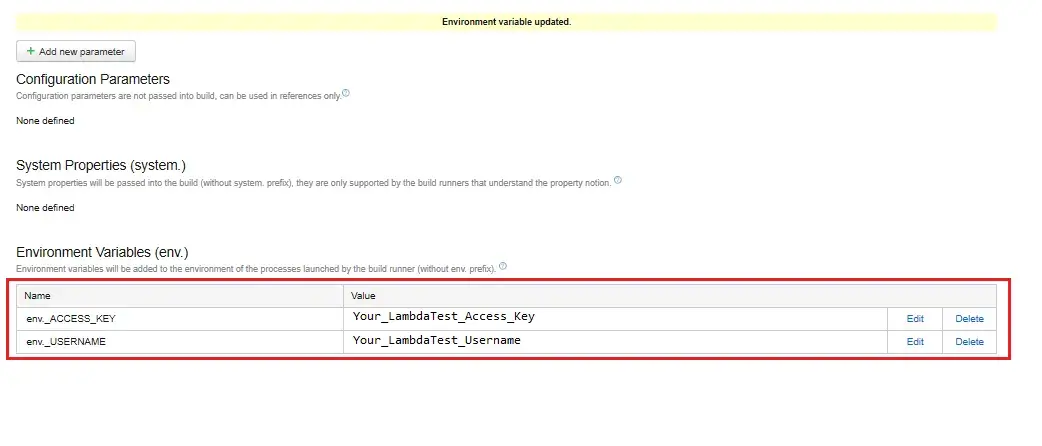
Step 8: Save build step and go to Parameters and create two environment variables as below where LT_USERNAME and LT_ACCESS_KEY will be your authentication credentials for LambdaTest.
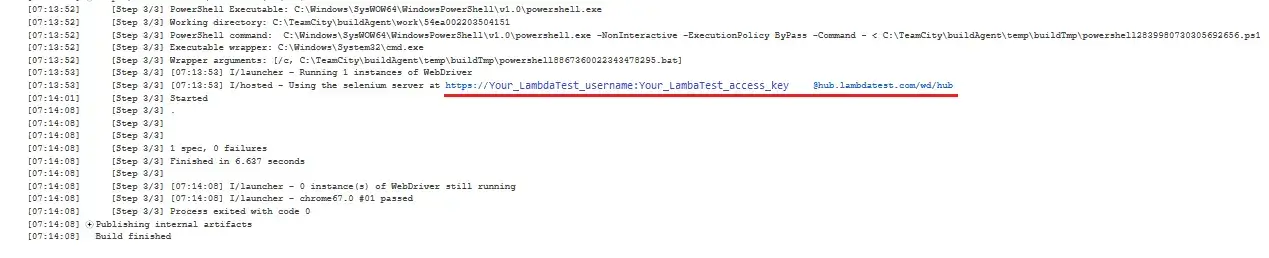
Step 9: Go to Project Dashboard and Run your project. Now, notice the status of test running successfully on LambdaTest Grid with the below log.
Running Test in Parallel
Parallel Testing is one of the most demanding features of LambdaTest Selenium Grid. By parallel testing, you can run more than one test case, simultaneously. This means that Parallel testing would allow you to execute numerous automation test cases altogether. So you execute a single test scenario across different browsers or could run different test scenarios across the same browser but with different browser versions.
Clone our GitHub repository for TeamCity to execute your first parallel test of TeamCity + LambdaTest Integration.
After you clone our GitHub repository, execute the below command in cmd/terminal.
npm run parallel
The above command will trigger the execution of below code for performing parallel testing at LambdaTest Selenium Grid.
//parallel.conf.js file
username= process.env.LT_USERNAME || "<your username>",
accessKey=  process.env.LT_ACCESS_KEY || "<your accessKey>",

exports.config = {
  'specs': [ '../specs/single.js' ],

  seleniumAddress: 'https://'+username+':'+accessKey+'@hub.lambdatest.com/wd/hub',

  'commonCapabilities': {
    'build': 'protractor-selenium-sample',
    'name': 'parallel-test',
    'tunnel': true
  },

  'multiCapabilities': [{
    'browserName': 'Chrome',
    'version':'67.0',
    'platform': 'WIN10'
  },{
    'browserName': 'Safari',
    'version':'11.1',
    'platform': 'macOS 10.12'
  },{
    'browserName': 'Edge',
    'version':'15.0',
    'platform': 'WIN10'
  },{
    'browserName': 'Firefox',
    'version':'62.0',
    'platform': 'WIN10'
  },{
    'browserName': 'Internet explorer',
    'version':'10.0',
    'platform': 'WIN10'
  }],

  onPrepare: () => {

    myReporter = {
        specStarted: function(result) {
          specStr= result.id
          spec_id = parseInt(specStr[specStr.length -1])
          browser.getProcessedConfig().then(function (config) {
            var fullName = config.specs[spec_id];
            //var fileName = fullName.substring(fullName.lastIndexOf('/')+1);
            browser.executeScript("lambda-name="+fullName.split(/(\\|\/)/g).pop())
          });
        }
      };
      jasmine.getEnv().addReporter(myReporter);
  },
  onComplete: () => {
    browser.quit();
  }

};

// Code to support common capabilities
exports.config.multiCapabilities.forEach(function(caps){
  for(var i in exports.config.commonCapabilities) caps[i] = caps[i] || exports.config.commonCapabilities[i];
});
Kudos! Now you can Deploy your code in a reliable manner at scale using TeamCity integration with LambdaTest, and ensure it looks robust across every browser to provide a seamless user experience to all your visitors. Happy Testing! 🙂