Scheduling Options in Web Scanner
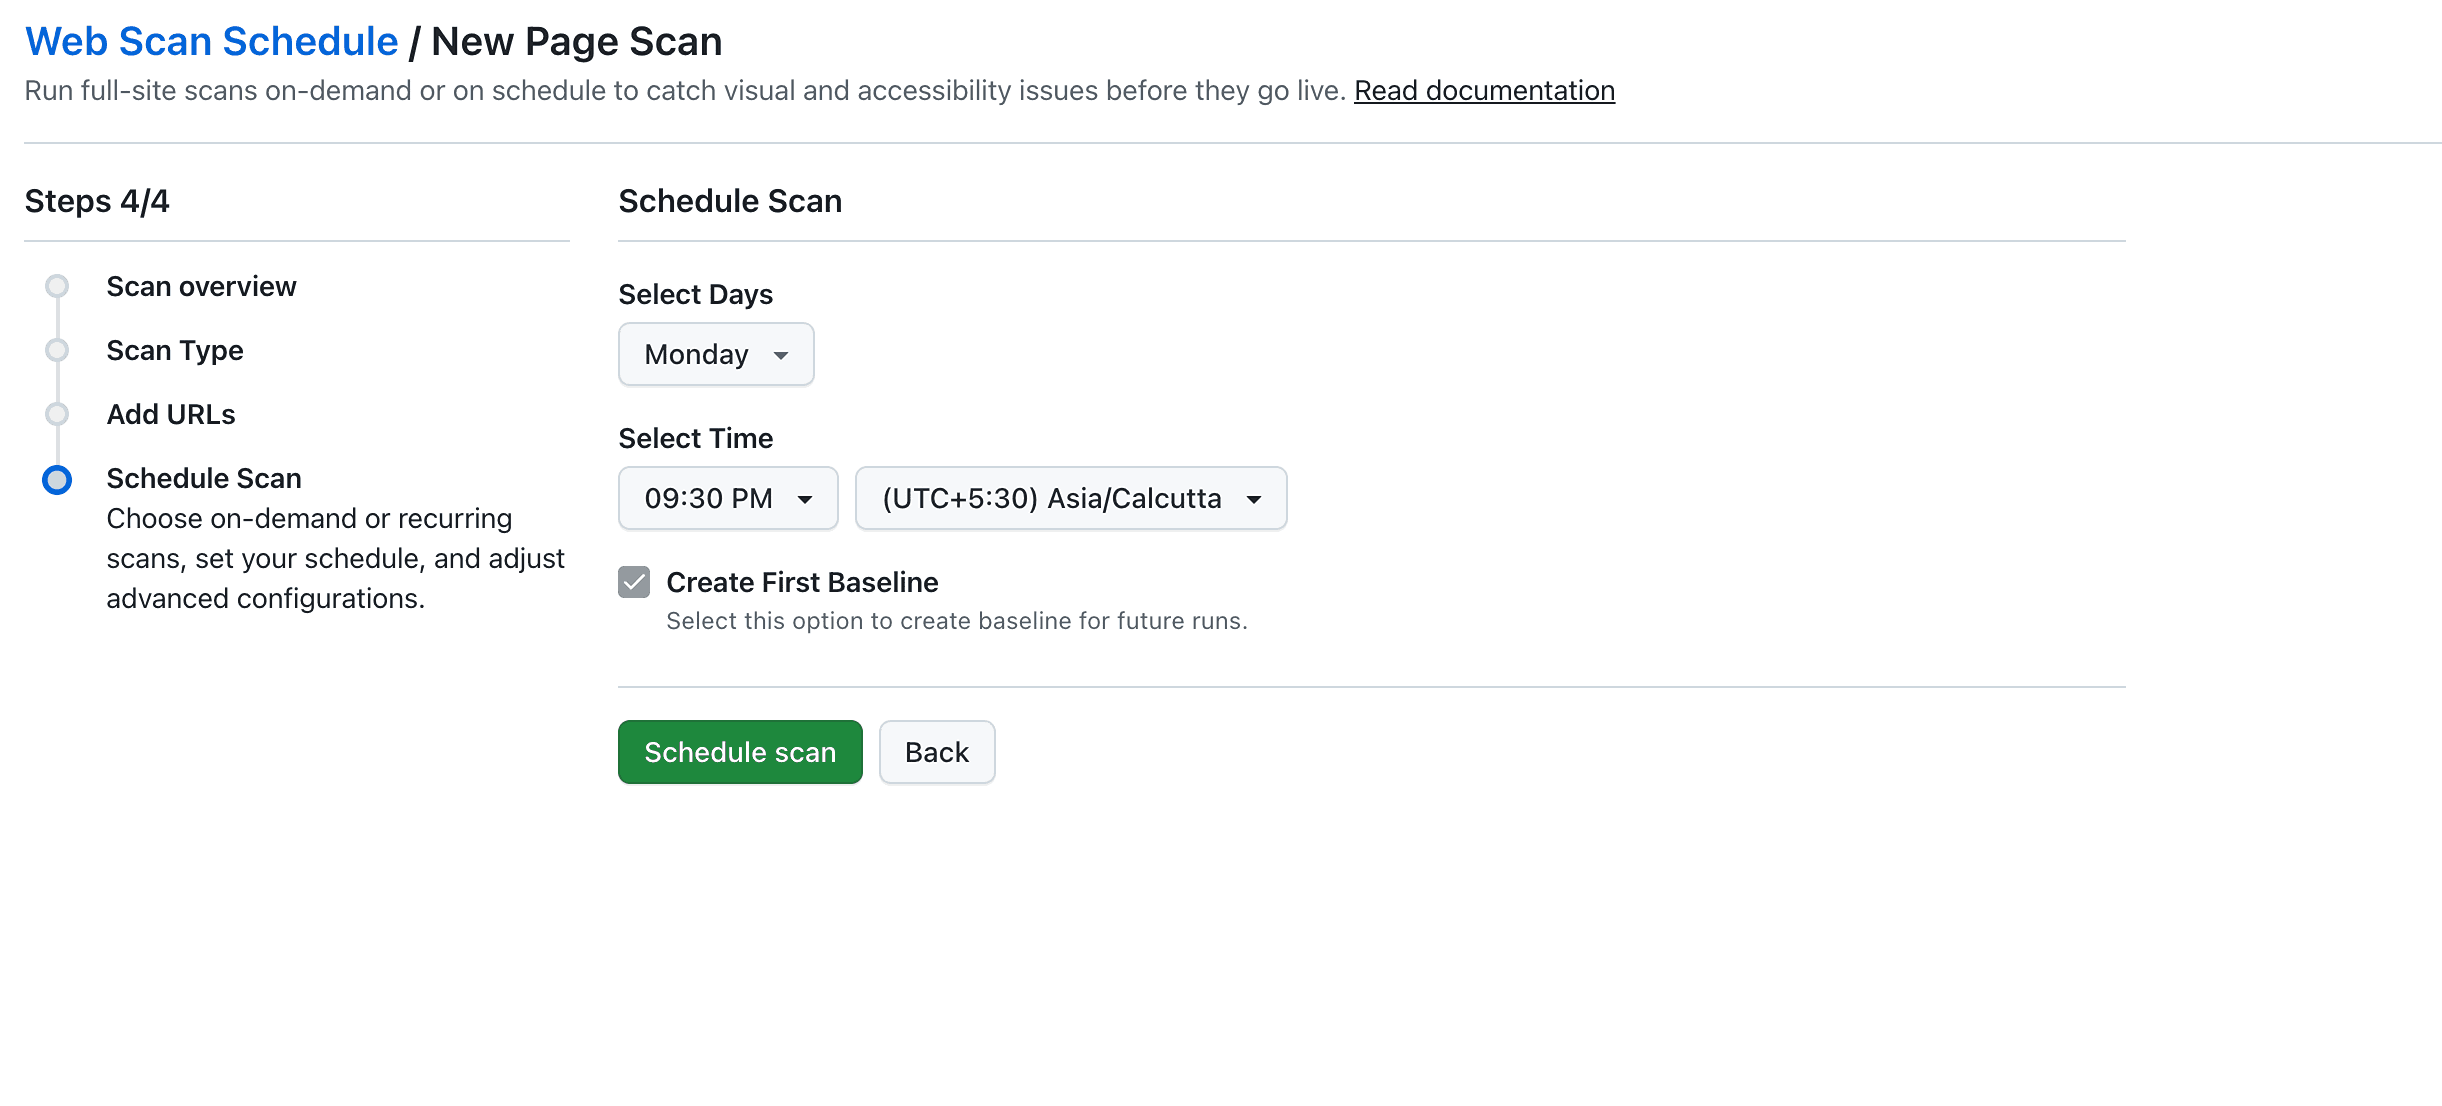
Step 4: Schedule Scan
Once scan configuration and URLs are complete, you’ll be prompted to set your scan frequency and runtime preferences.
Scheduling Modes
Quick Scan (One-Time)
- Executes the scan immediately upon creation.
- No future runs will be scheduled.
- Useful for ad hoc validations, staging checks, or one-off deployments.
Recurring Scan
- Repeats the scan based on chosen days and time.
- Ensures continuous monitoring of regressions or WCAG compliance.
Fields:
- Days: Select one or more days (e.g., Mon, Wed, Fri).
- Time: Choose execution time (in 12-hour or 24-hour format).
- Time Zone: Select the appropriate time zone (e.g., UTC+5:30 Asia/Calcutta).
Run Initial Scan (Visual UI Only)
- Applies only to Visual Scans and is enabled by default.
- Triggers a baseline SmartUI screenshot set right after scheduling.
- This is required for future builds to have a baseline to compare against.
Example Use Case: You're scheduling a scan for every Monday. With "Run Initial Scan" enabled, a baseline will be created immediately. This acts as the visual reference for next Monday’s screenshots.
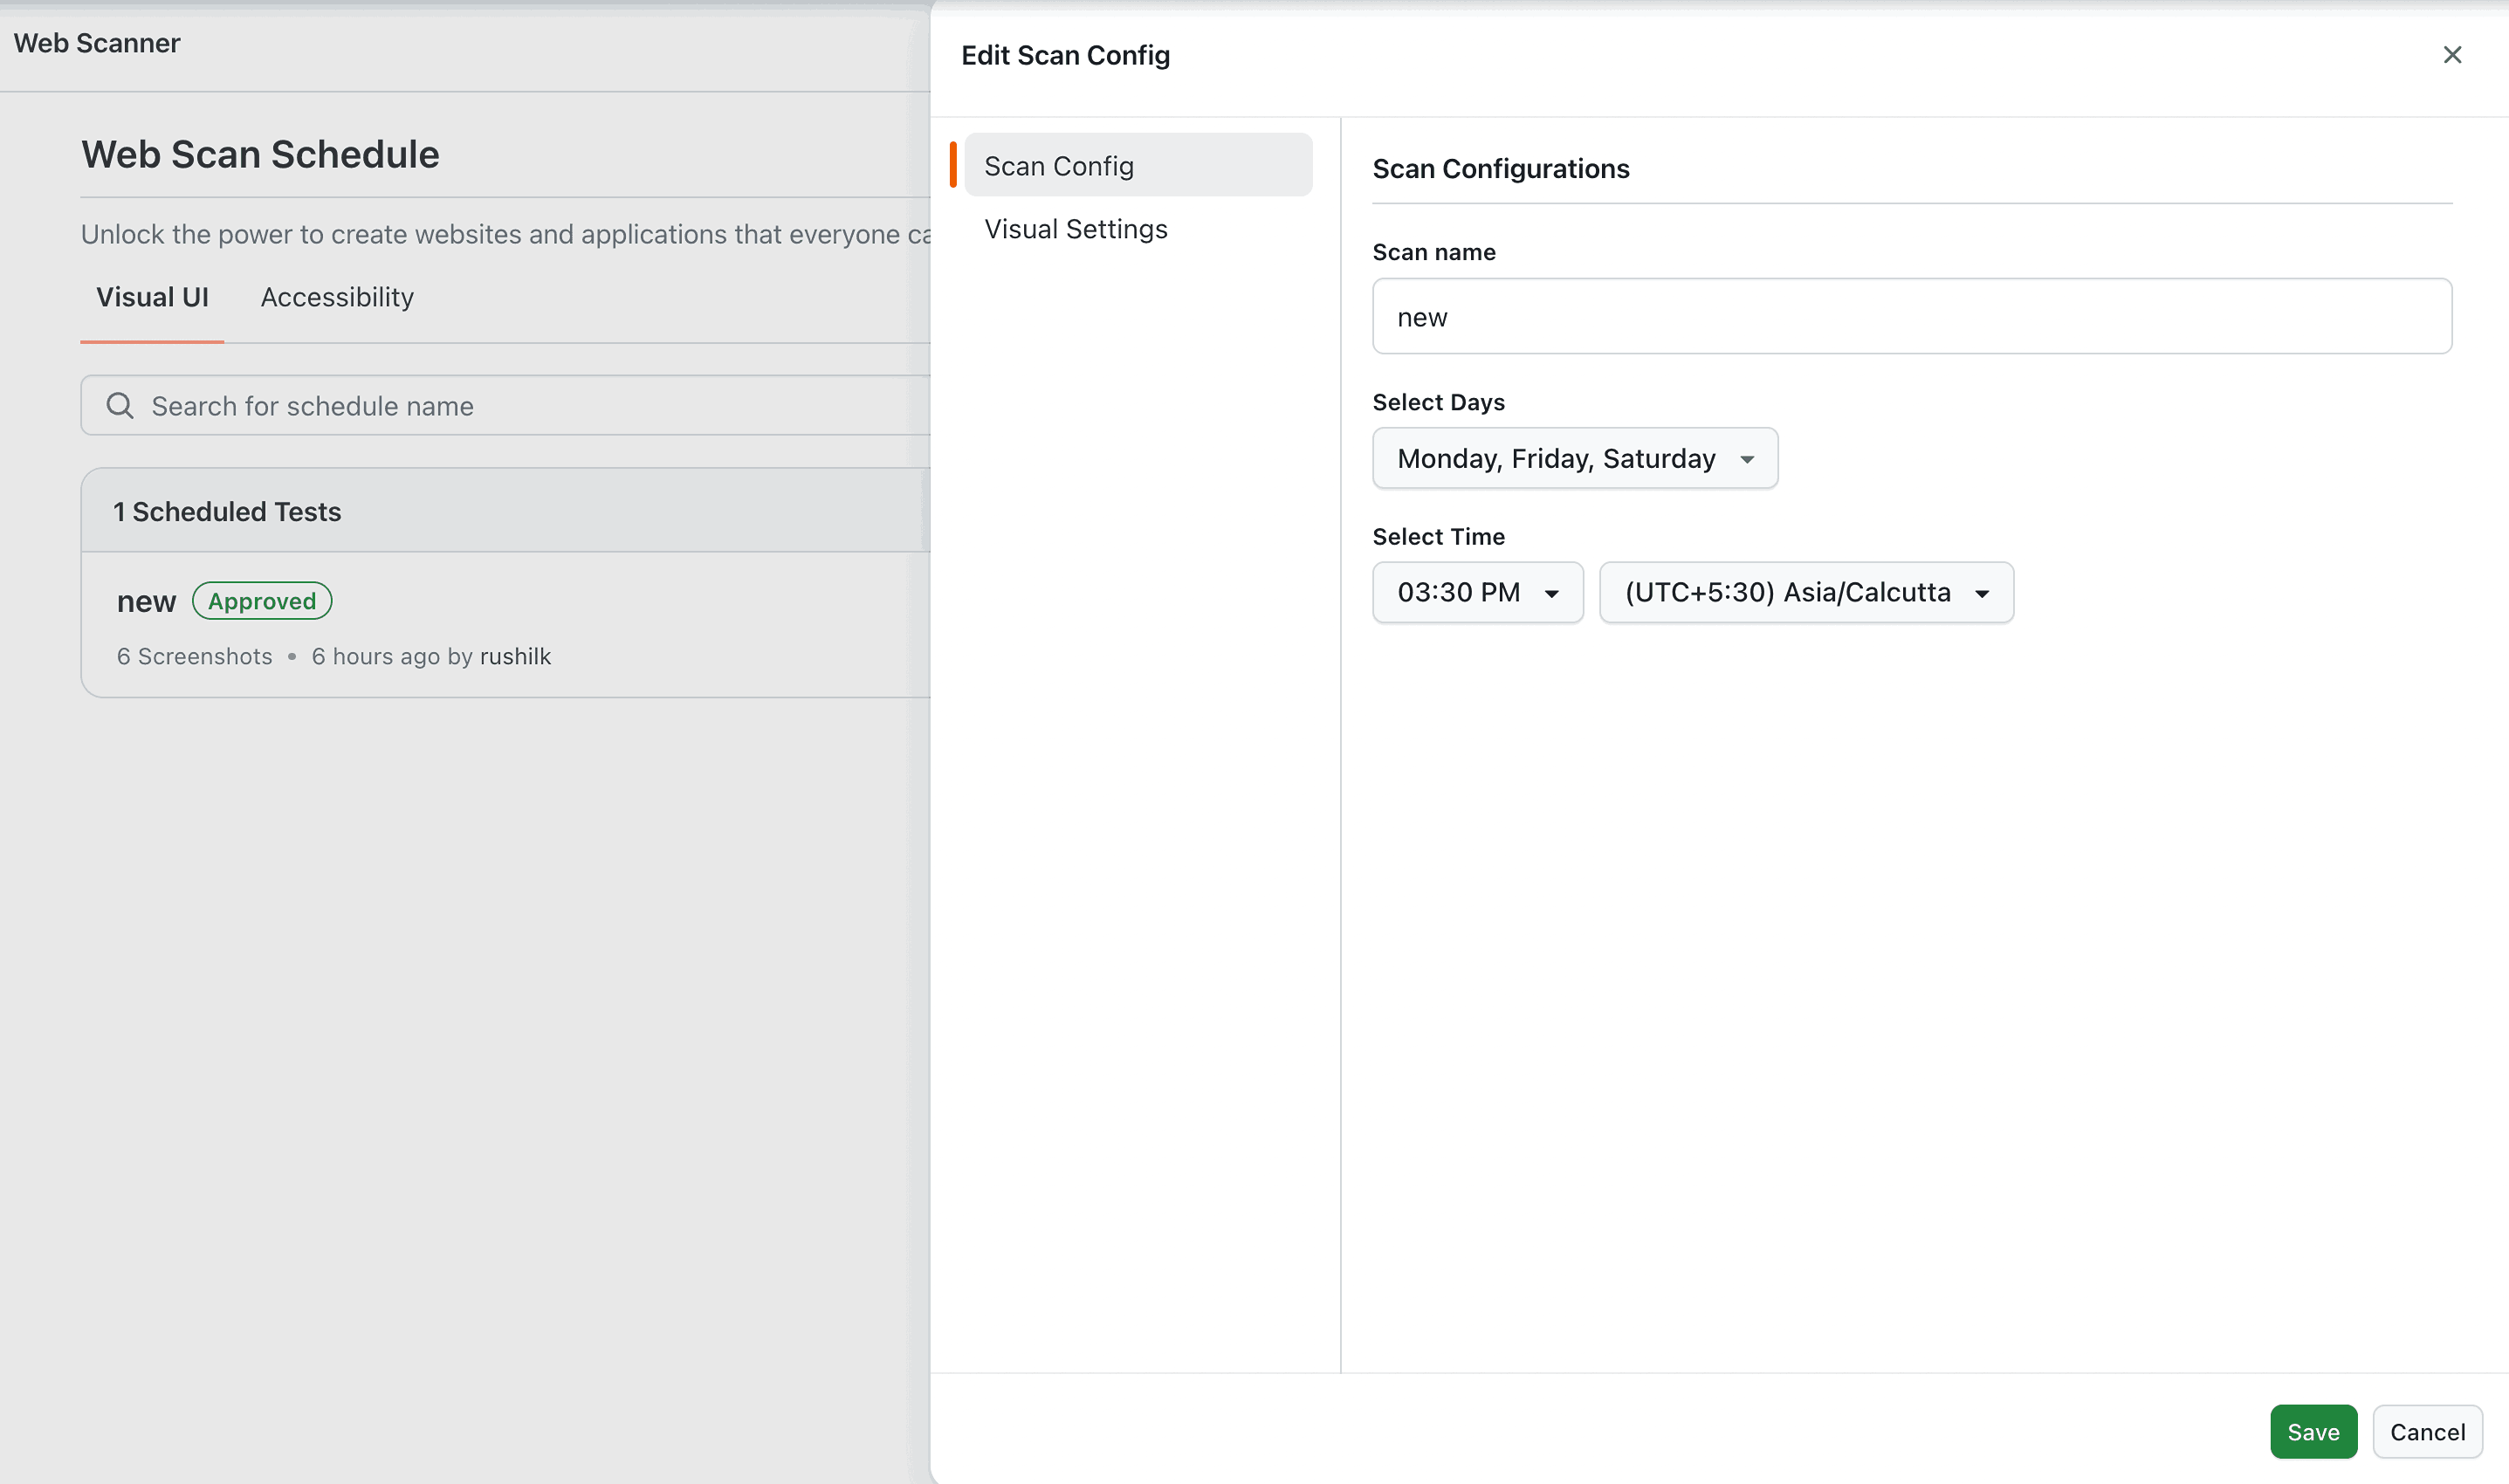
Modify or Cancel Scheduled Scans
Visual Scans:
- Access from the Builds Dashboard.
- Click the 3-dot menu and select Edit.
- Modify the scan name, schedule days, time, and time zone.
- Options: Edit Schedule, Stop Recurring Scan, Delete Scan.
Accessibility Scans:
- Navigate to the Scheduled Accessibility section.
- Options: Rename, Delete.
- For advanced options like issue filtering and exporting, open the report in the Accessibility Dashboard.
