Getting Started with TestMu AI Web Scanner
Accessing the Dashboard
Navigate to: https://webscanner.lambdatest.com/webscan/builds
You will see a unified dashboard with the following primary controls:
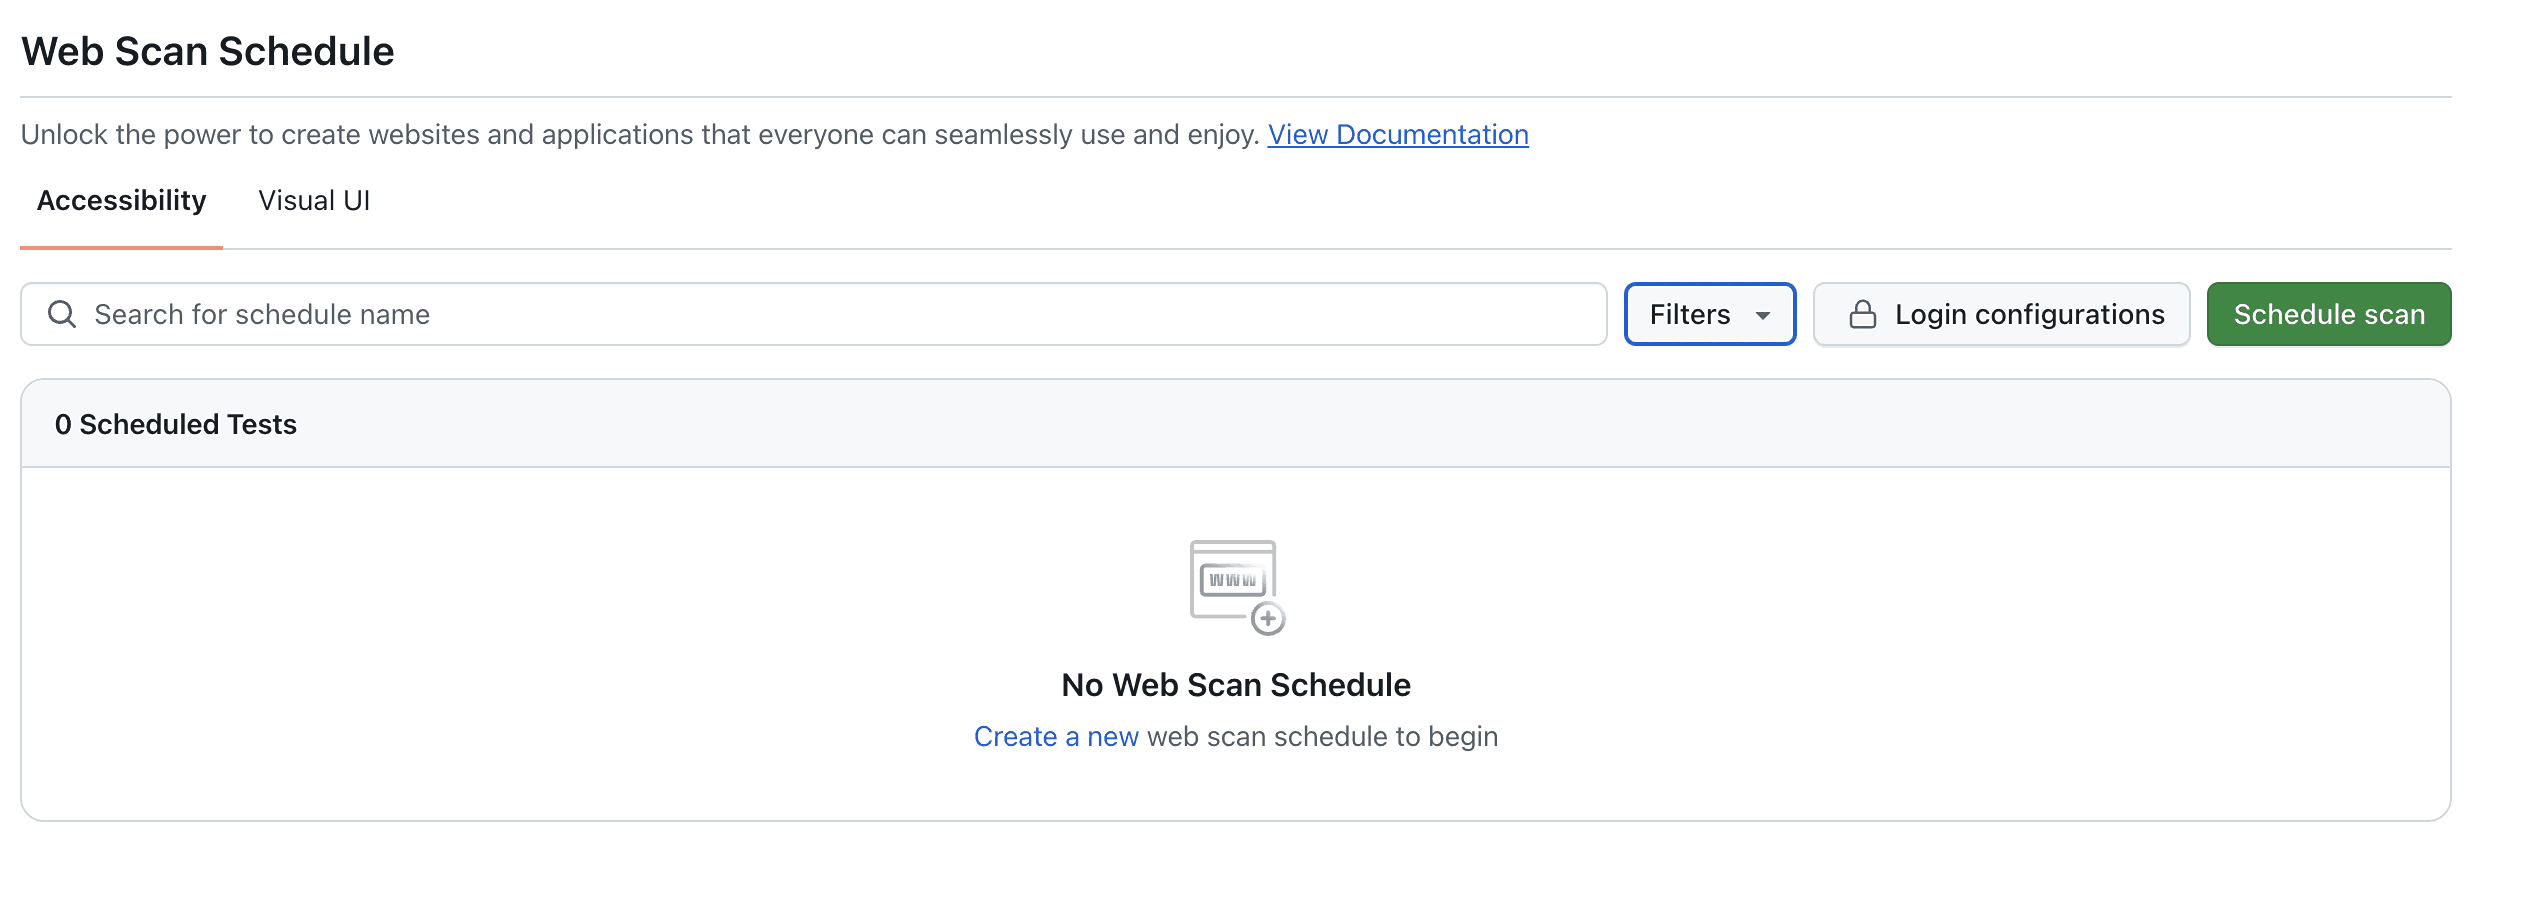
Scan Type Tabs
At the top left, you can switch between:
- Visual UI Scans
- Accessibility Scans
Each tab displays its own scheduled scans, configurations, and build statuses.
Search and Filters
Use the search bar to locate specific scans by name. Filters may be added in future iterations for build status, user, or date.
Login Configurations
For your accessibility scans, login configurations allow users to:
- Add Basic Auth credentials
- Add form authentication (via CSS selectors)
These configurations ensure that login-protected or session-gated URLs can still be scanned.
Schedule Scan Button
The primary CTA on the dashboard, Schedule Scan, triggers the full scan creation wizard.

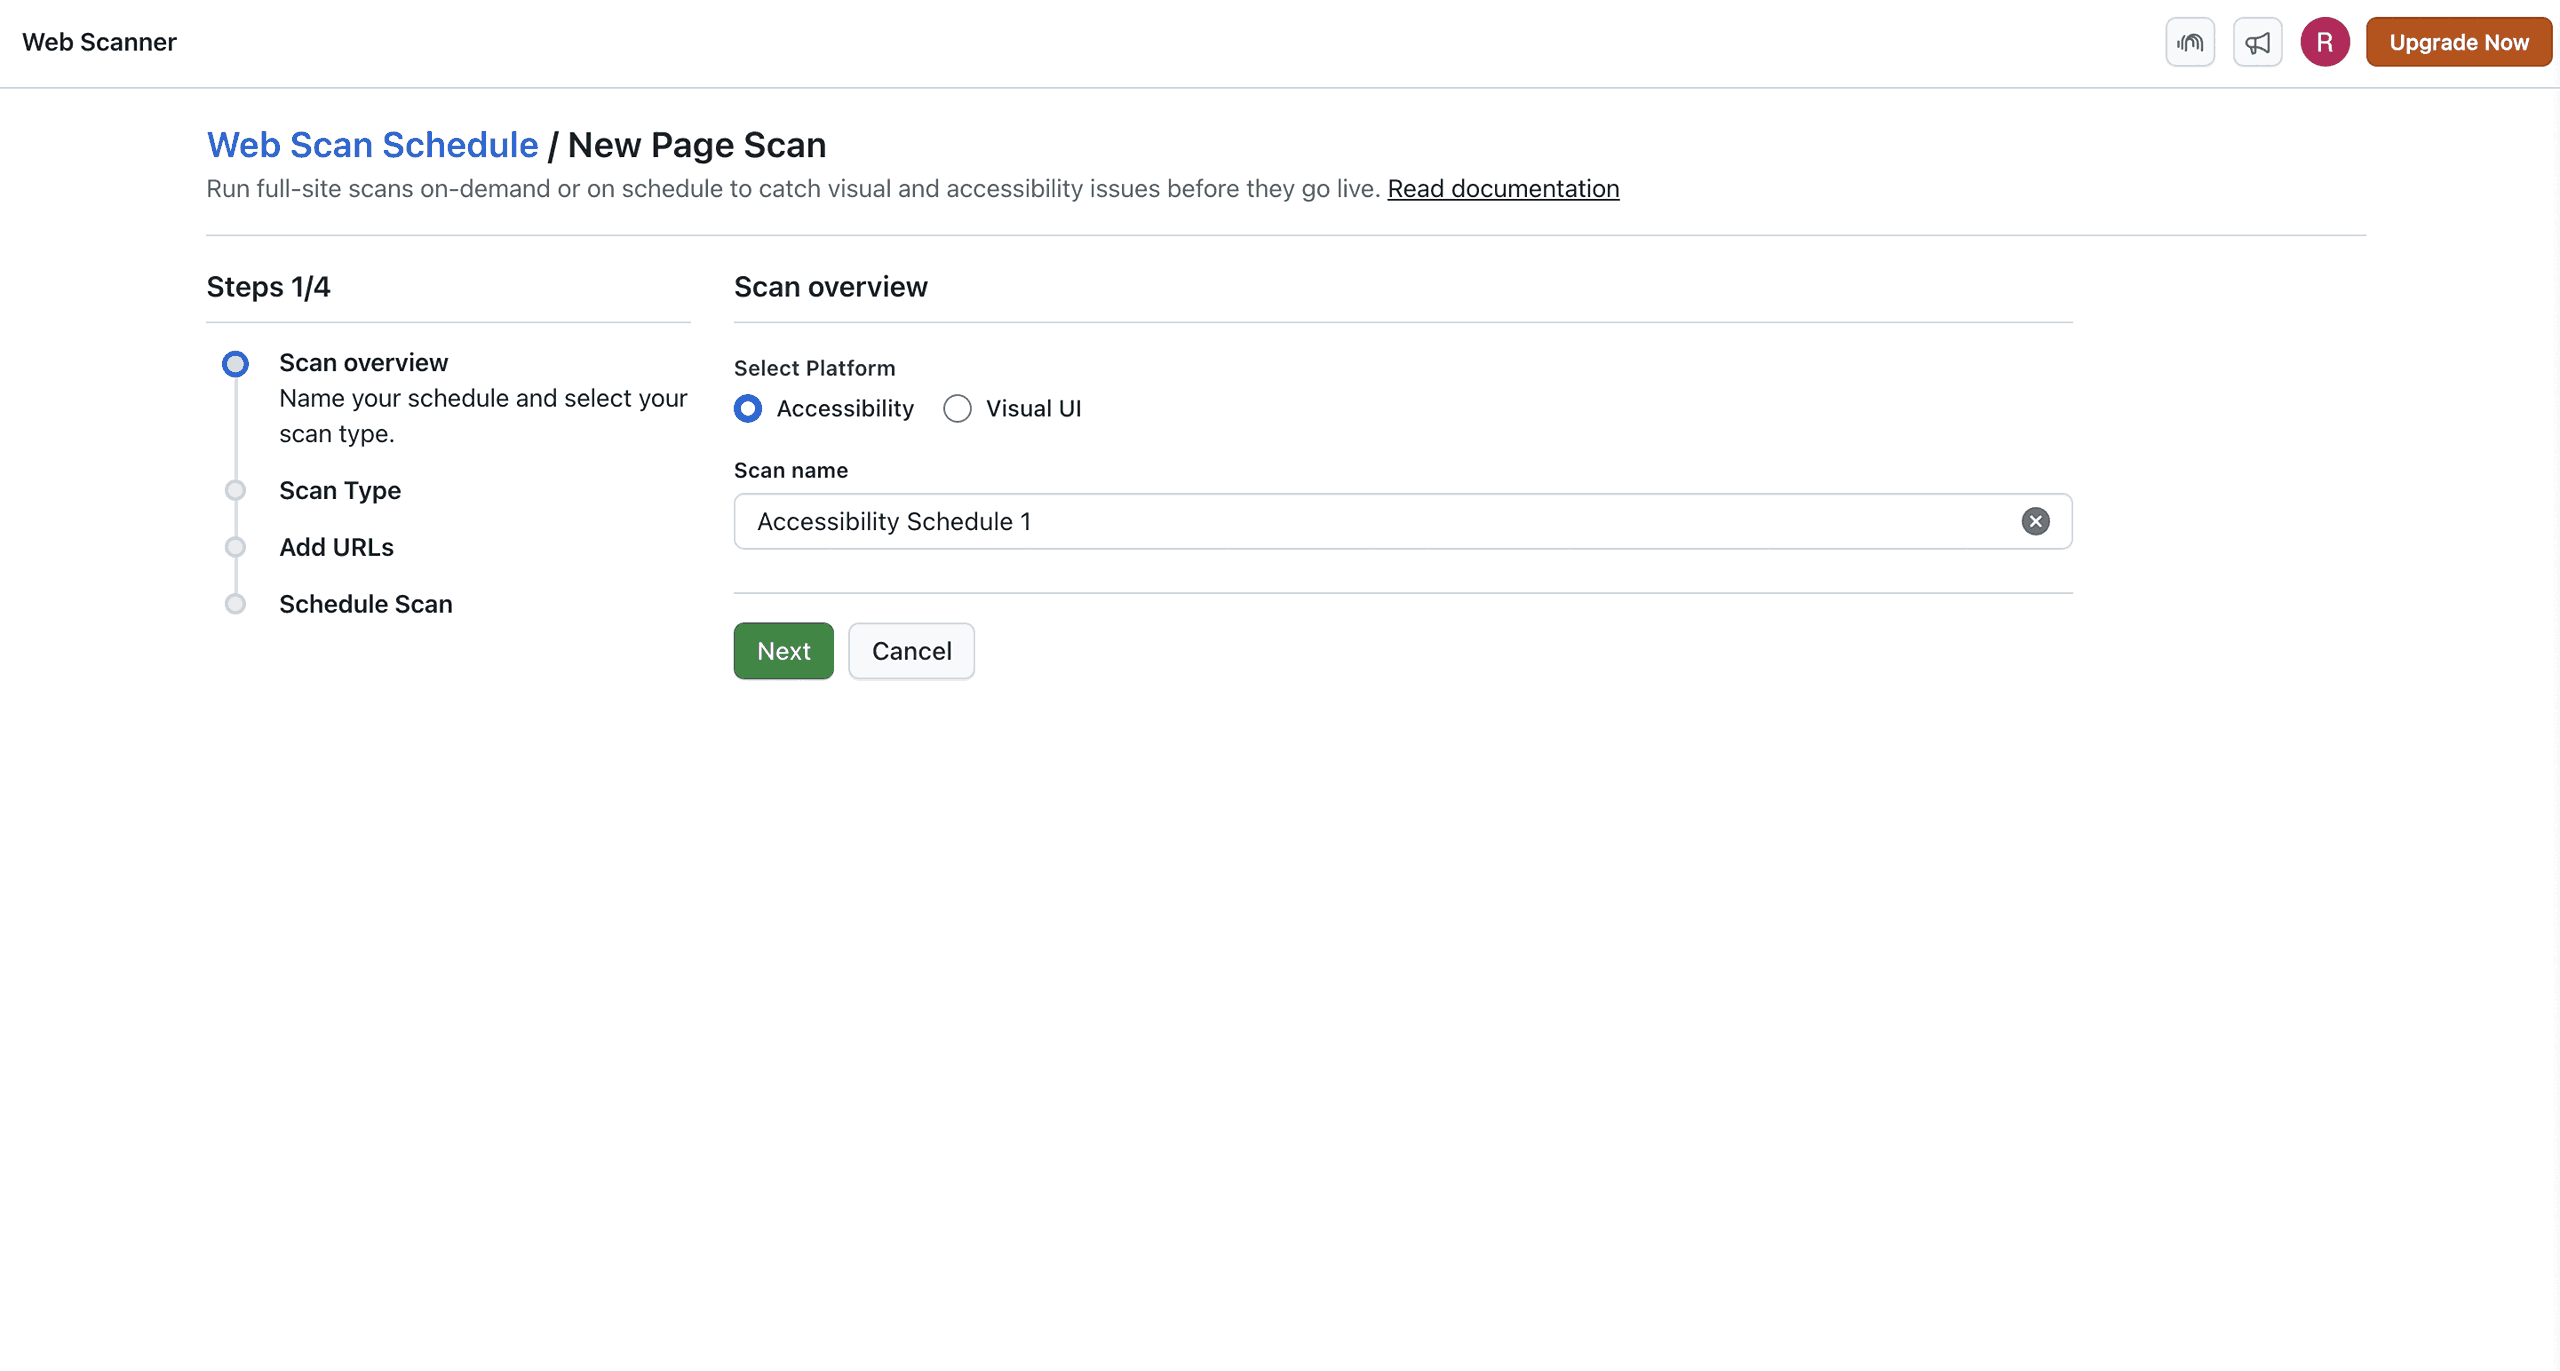
How to Create a New Scan
Click the Schedule Scan button to launch the 4-step wizard. This process applies to both Visual and Accessibility scans. Platform-specific configuration steps appear based on your selection.
Step 1: Scan Overview
- Scan Name: Add an identifiable title
- Platform: Choose between:
- Visual UI
- Accessibility
Step 2: Scan Type Configuration (Dynamic)
Depending on the selected platform, you’ll either see Visual UI configuration or Accessibility configuration. You may use “Default“ settings or for more information follow the details provided:
Step 3: Add URLs
You can populate the scan target using three options:
- Manual Input: Paste multiple URLs
- CSV Upload: Upload a file with 1 URL per line
- Sitemap Import: Paste sitemap XML URL and select from extracted URLs
The maximum limit is 1,000 URLs per scan.
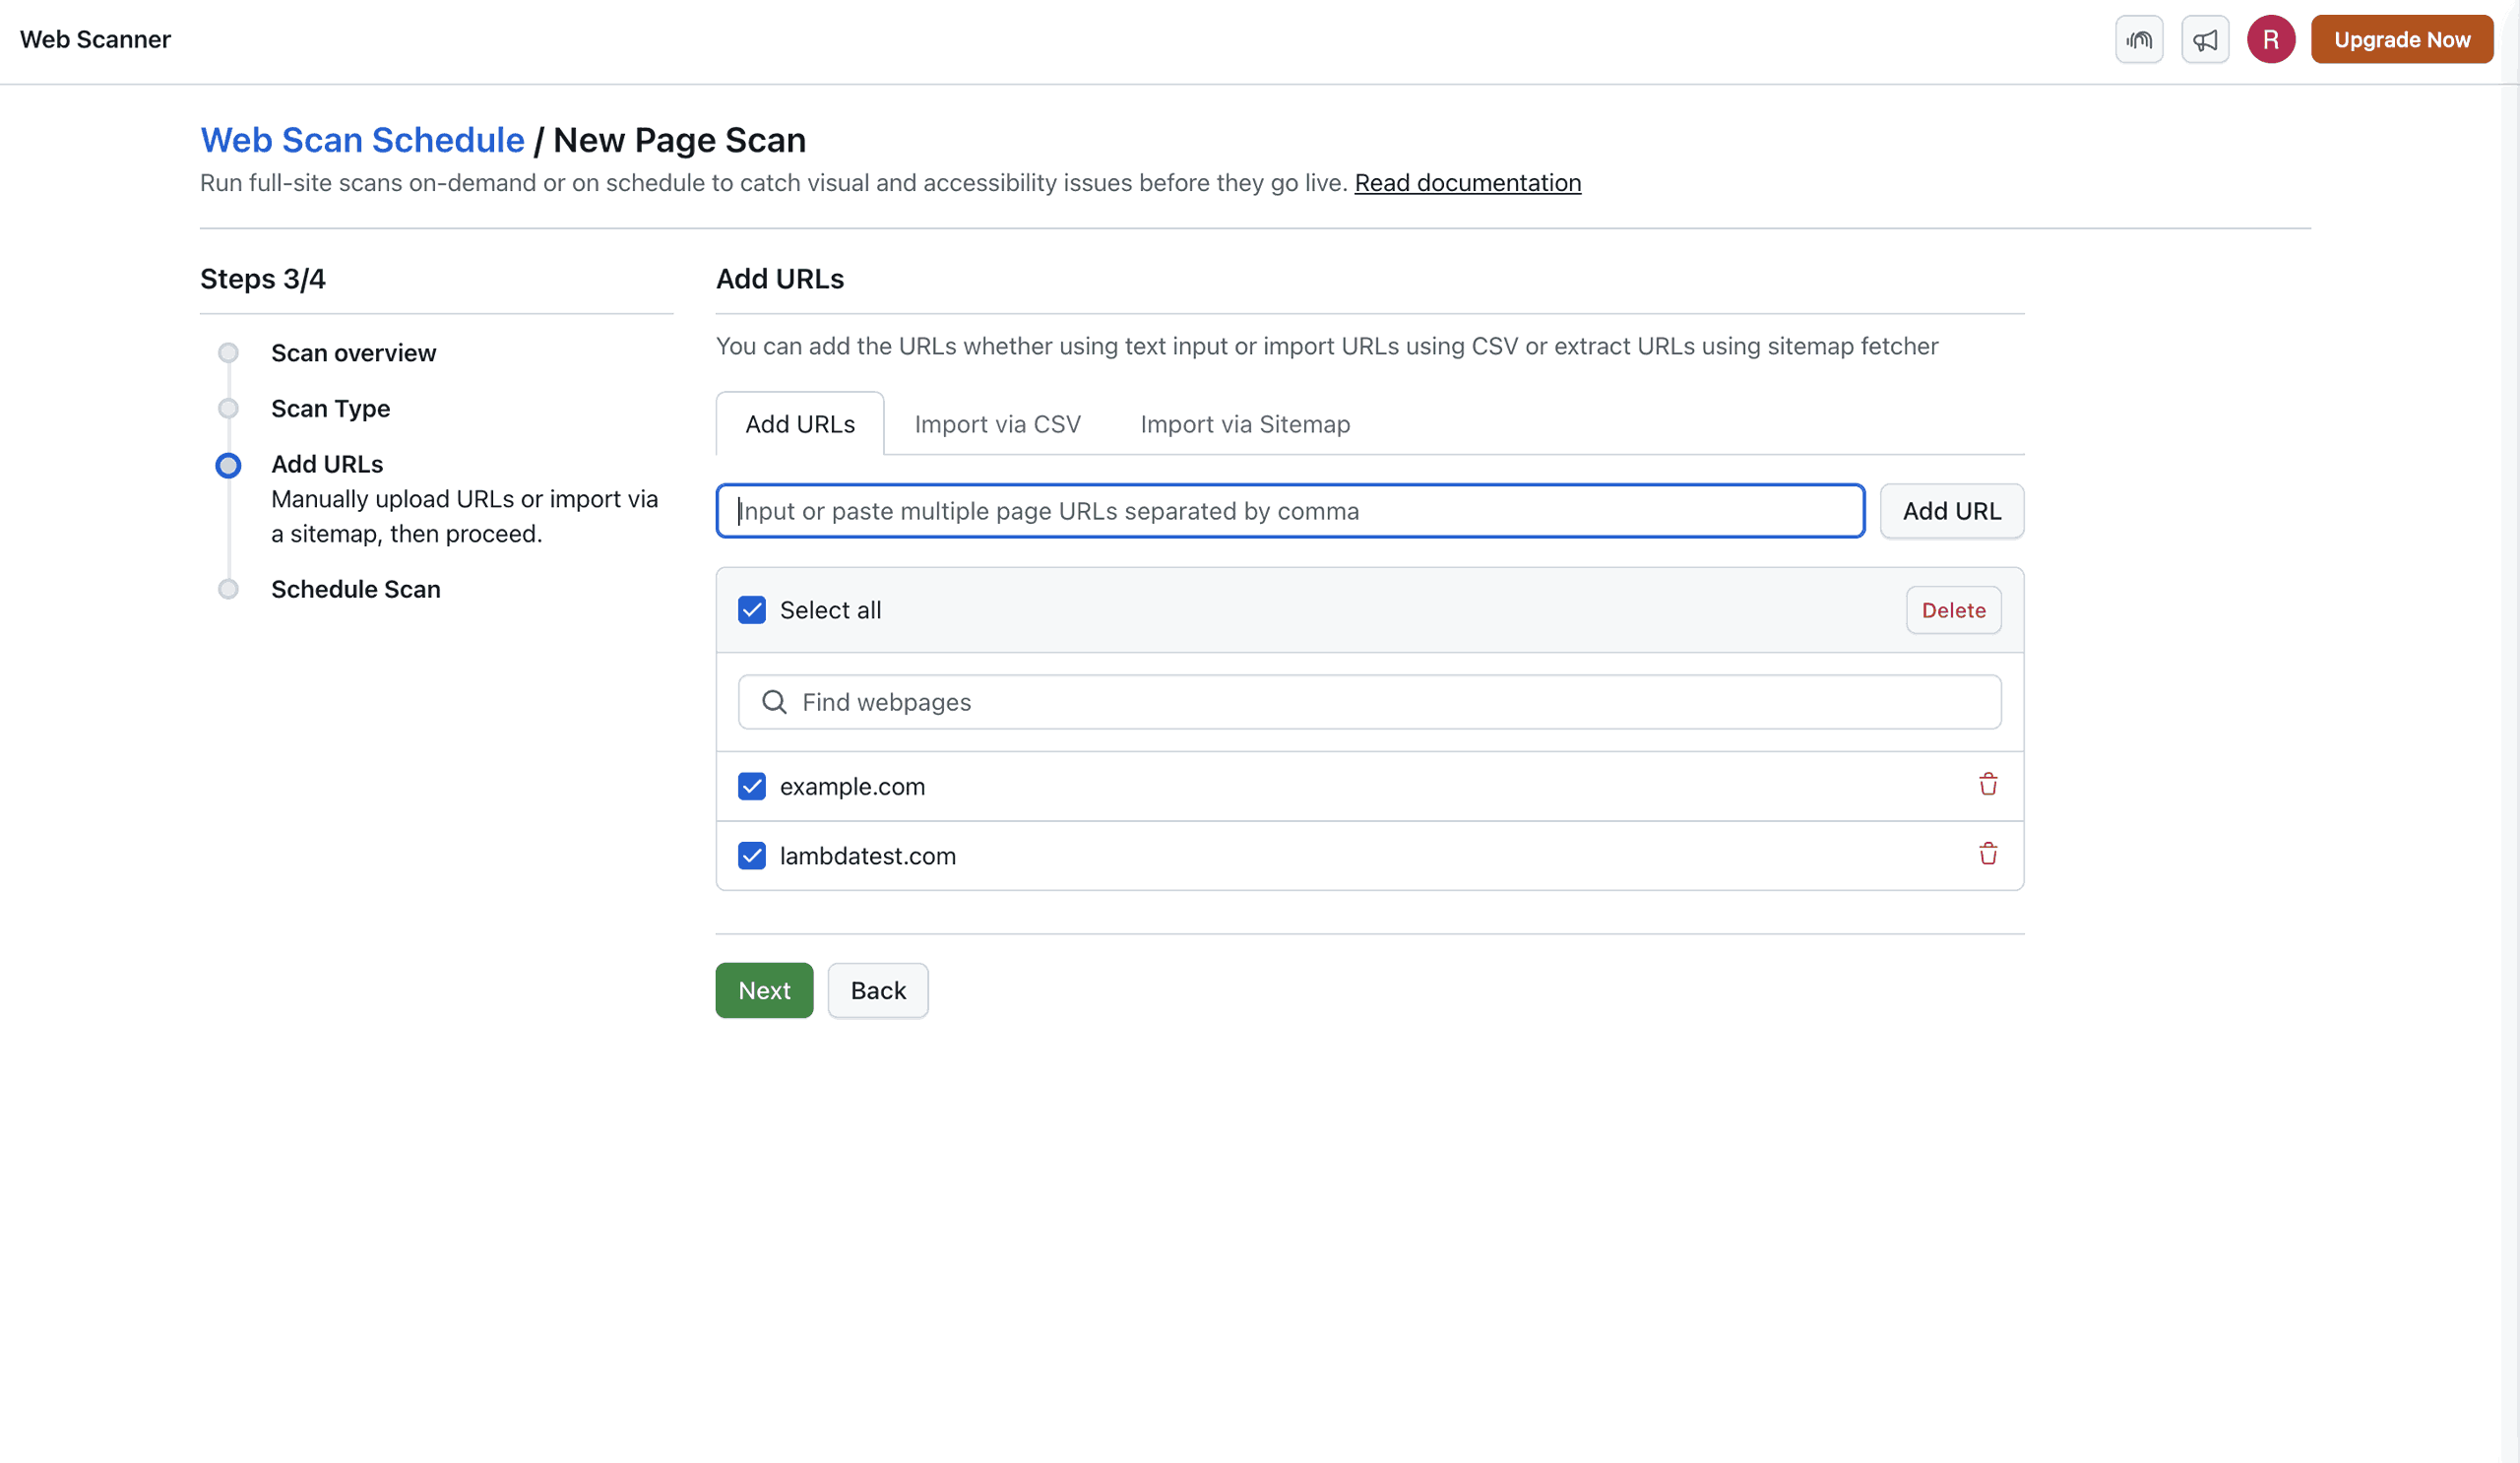
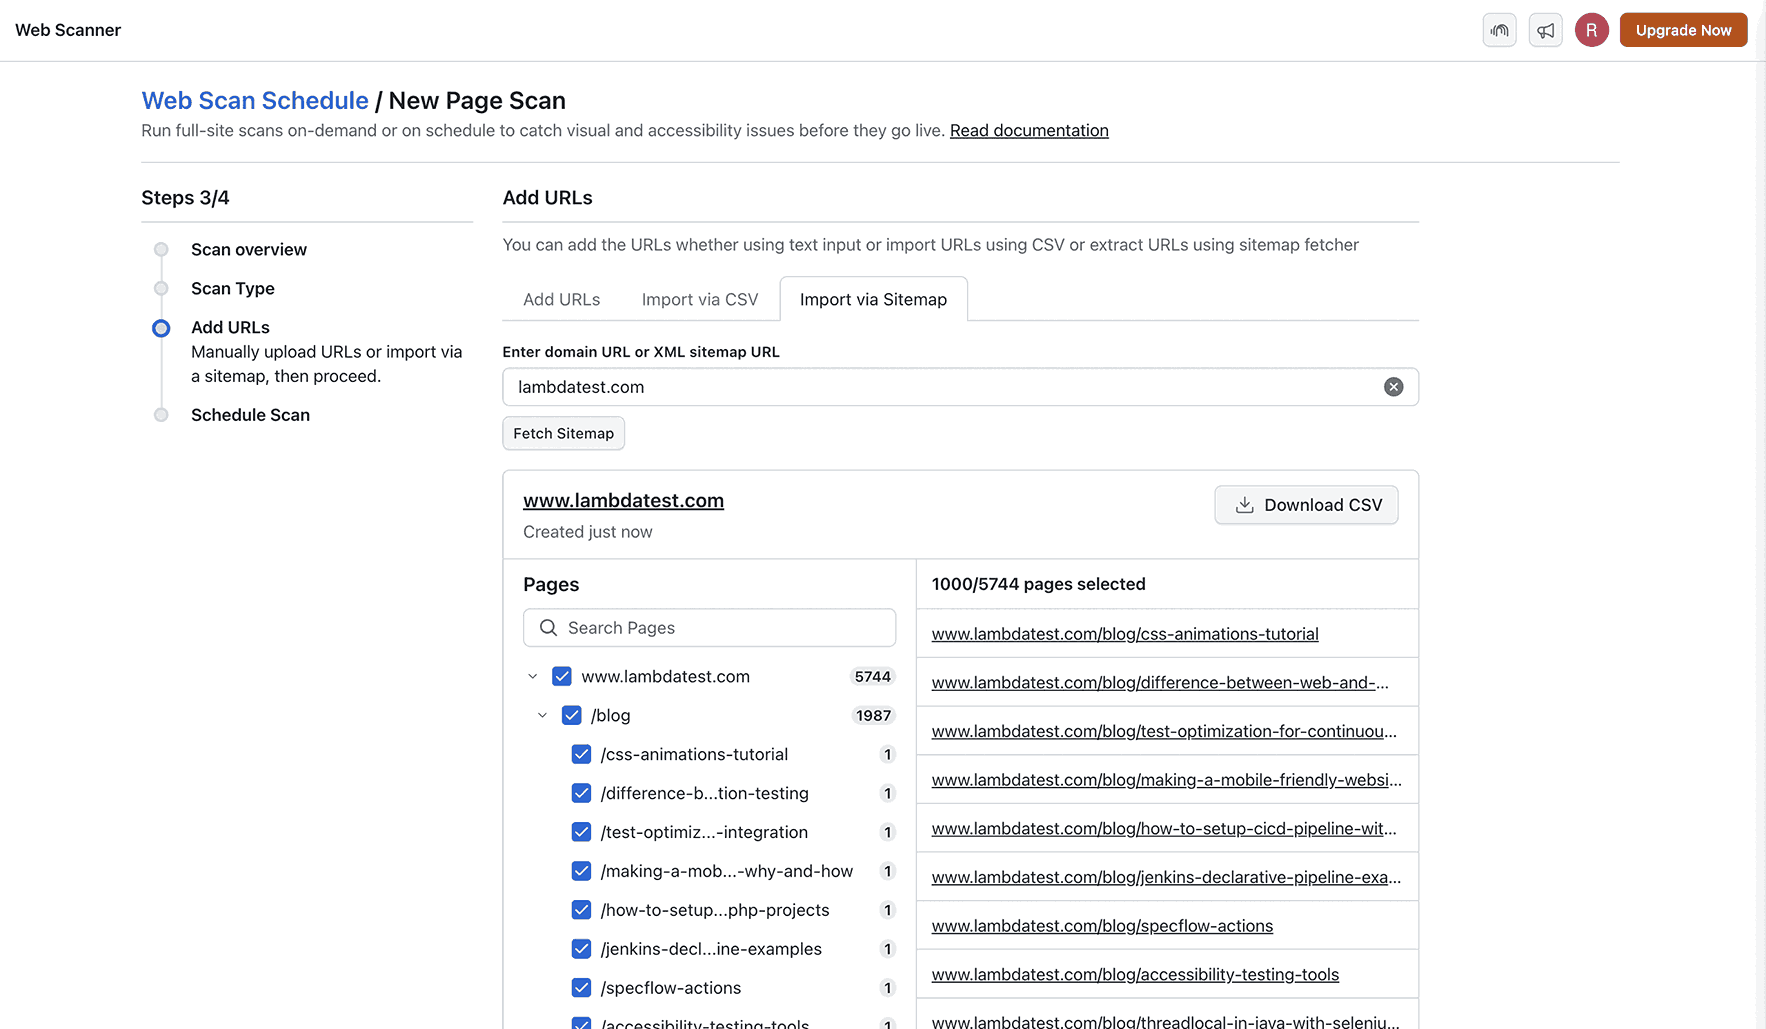
For more details you may refer to our guide on Adding URLs for Web Scanner.
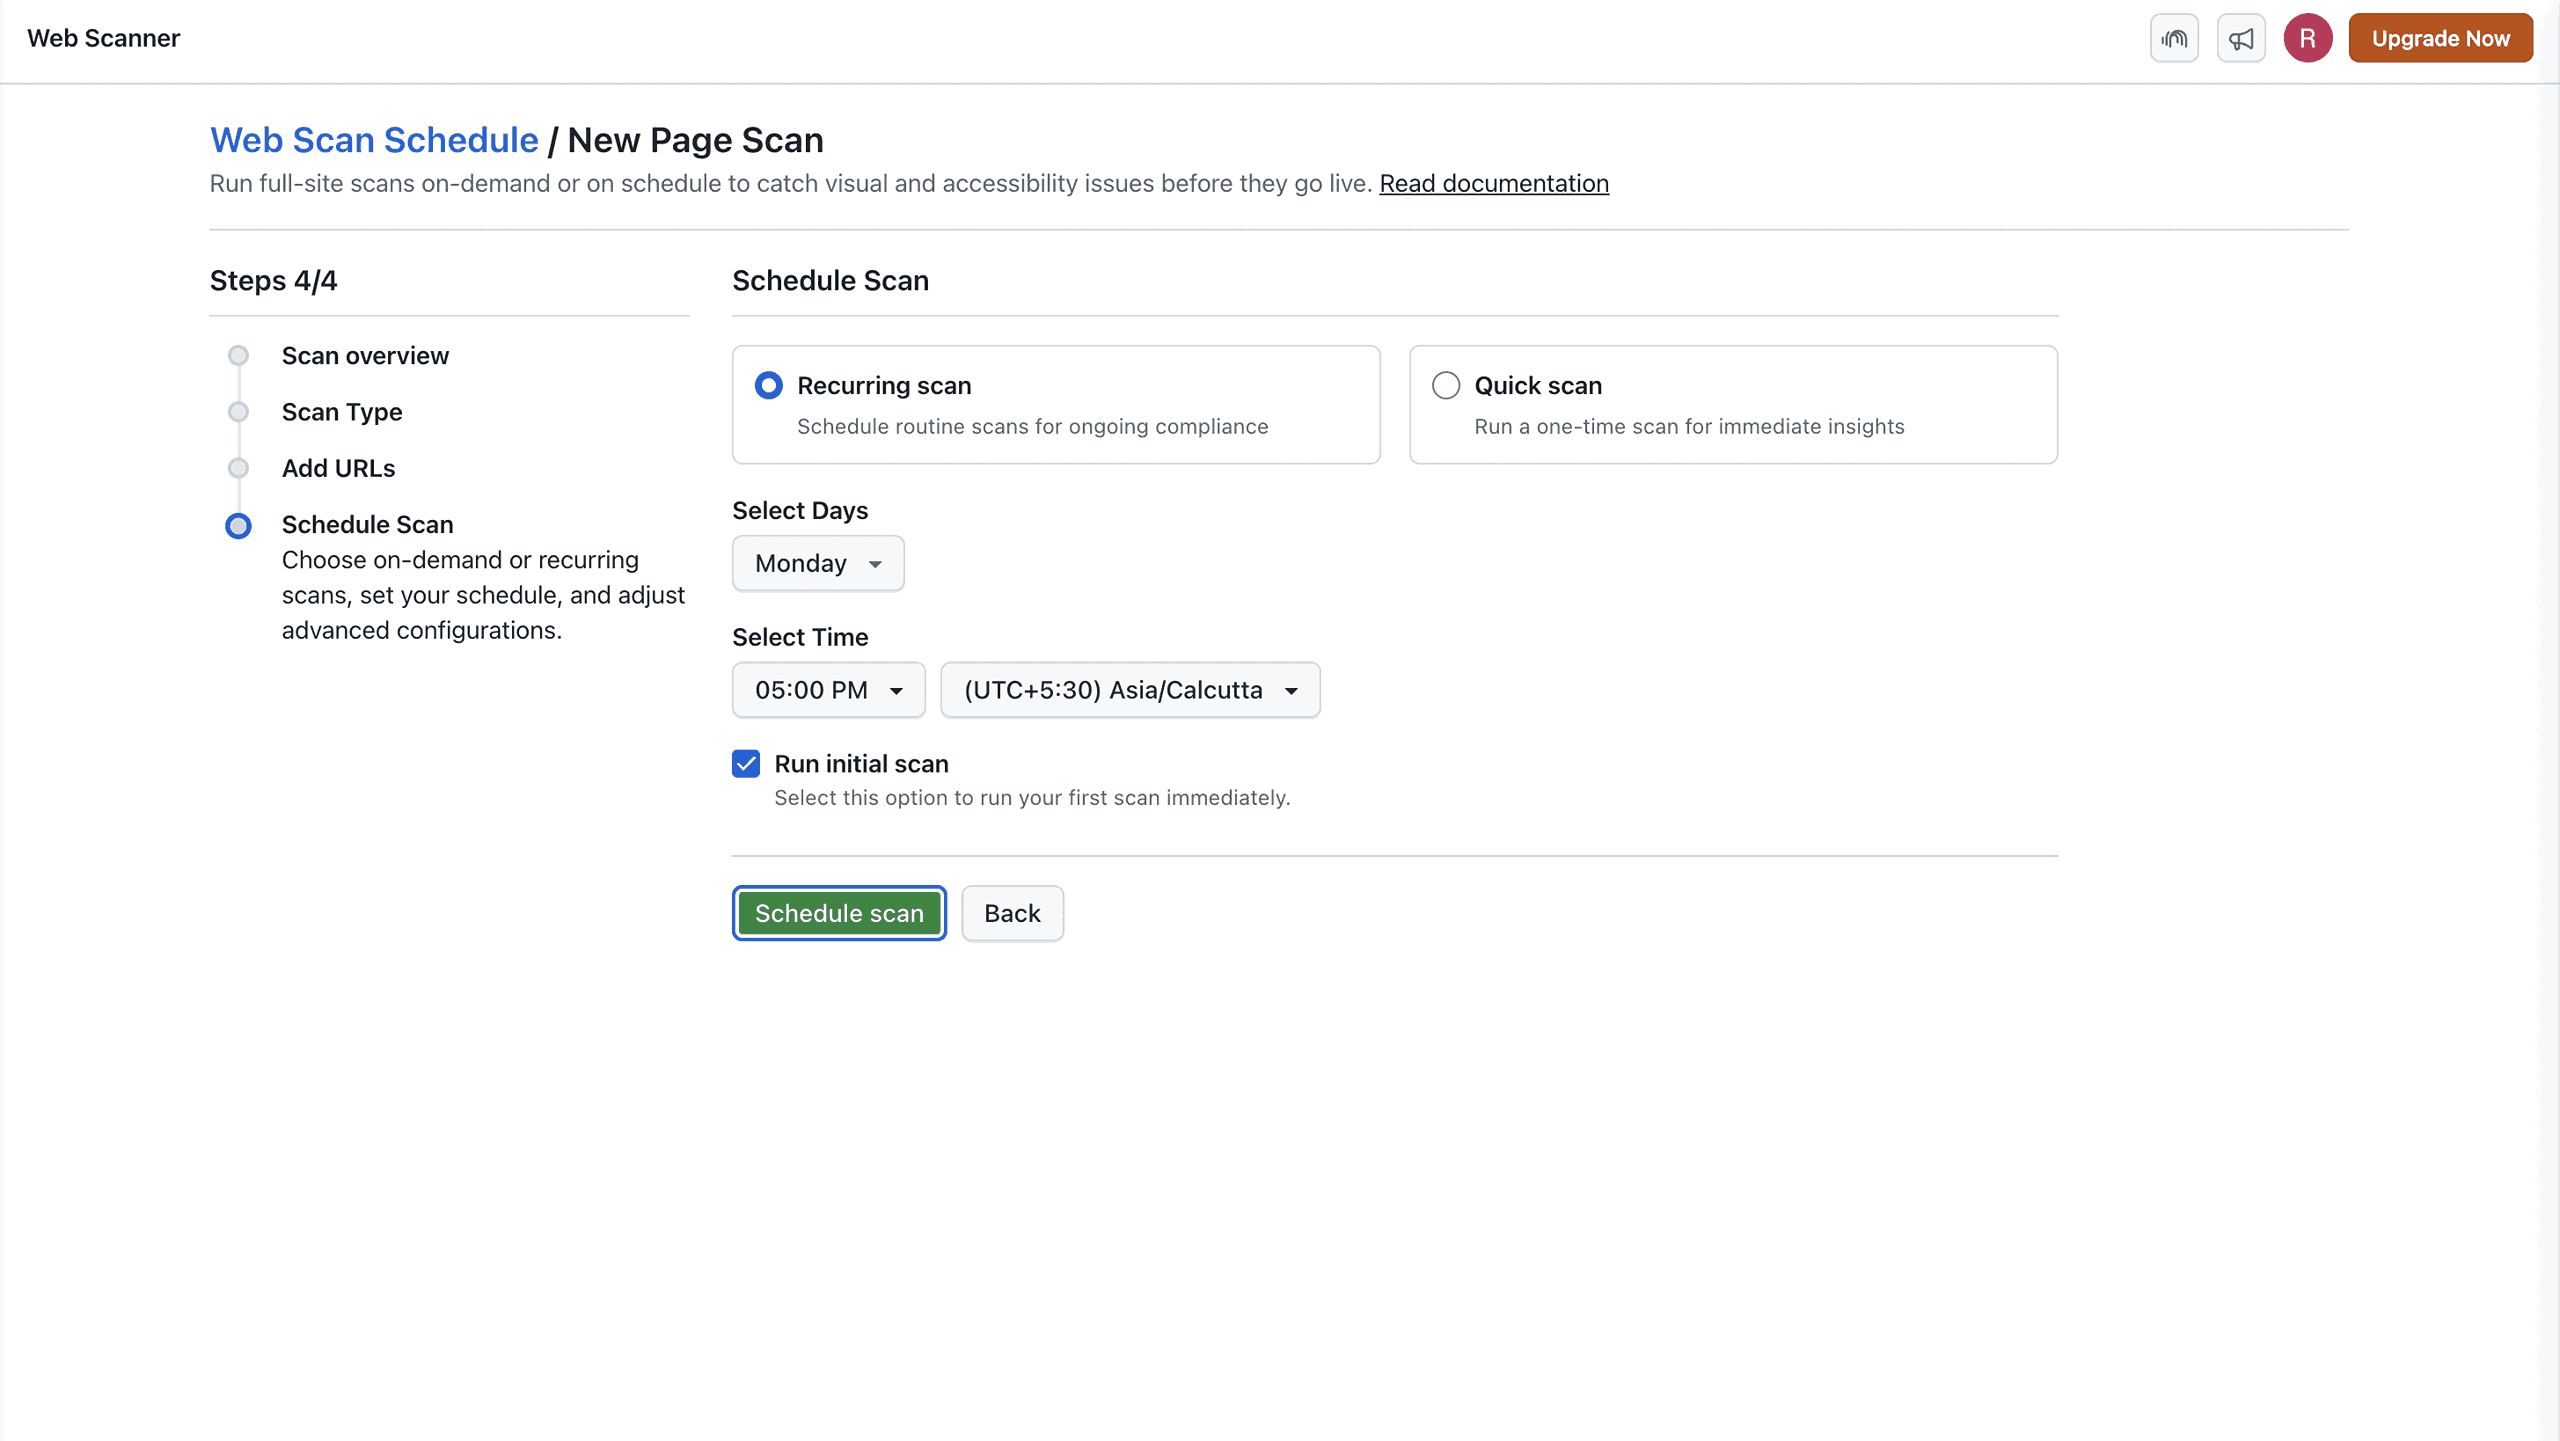
Step 4: Schedule the Scan
Choose the frequency and timing for this scan:
- Quick Scan: One-time run
- Recurring Scan:
- Select days (e.g., Mon, Wed, Fri)
- Select time (e.g., 08:30 PM)
- Select timezone (e.g., UTC+5:30 Asia/Calcutta)
- Enable/disable Run Initial Scan (Visual UI only)
Post-Scan Scheduling
Once scheduled, the scan appears in the appropriate tab of the dashboard.
- Visual UI: Scan redirects to SmartUI comparison build
- Accessibility: Scan redirects to detailed Accessibility report
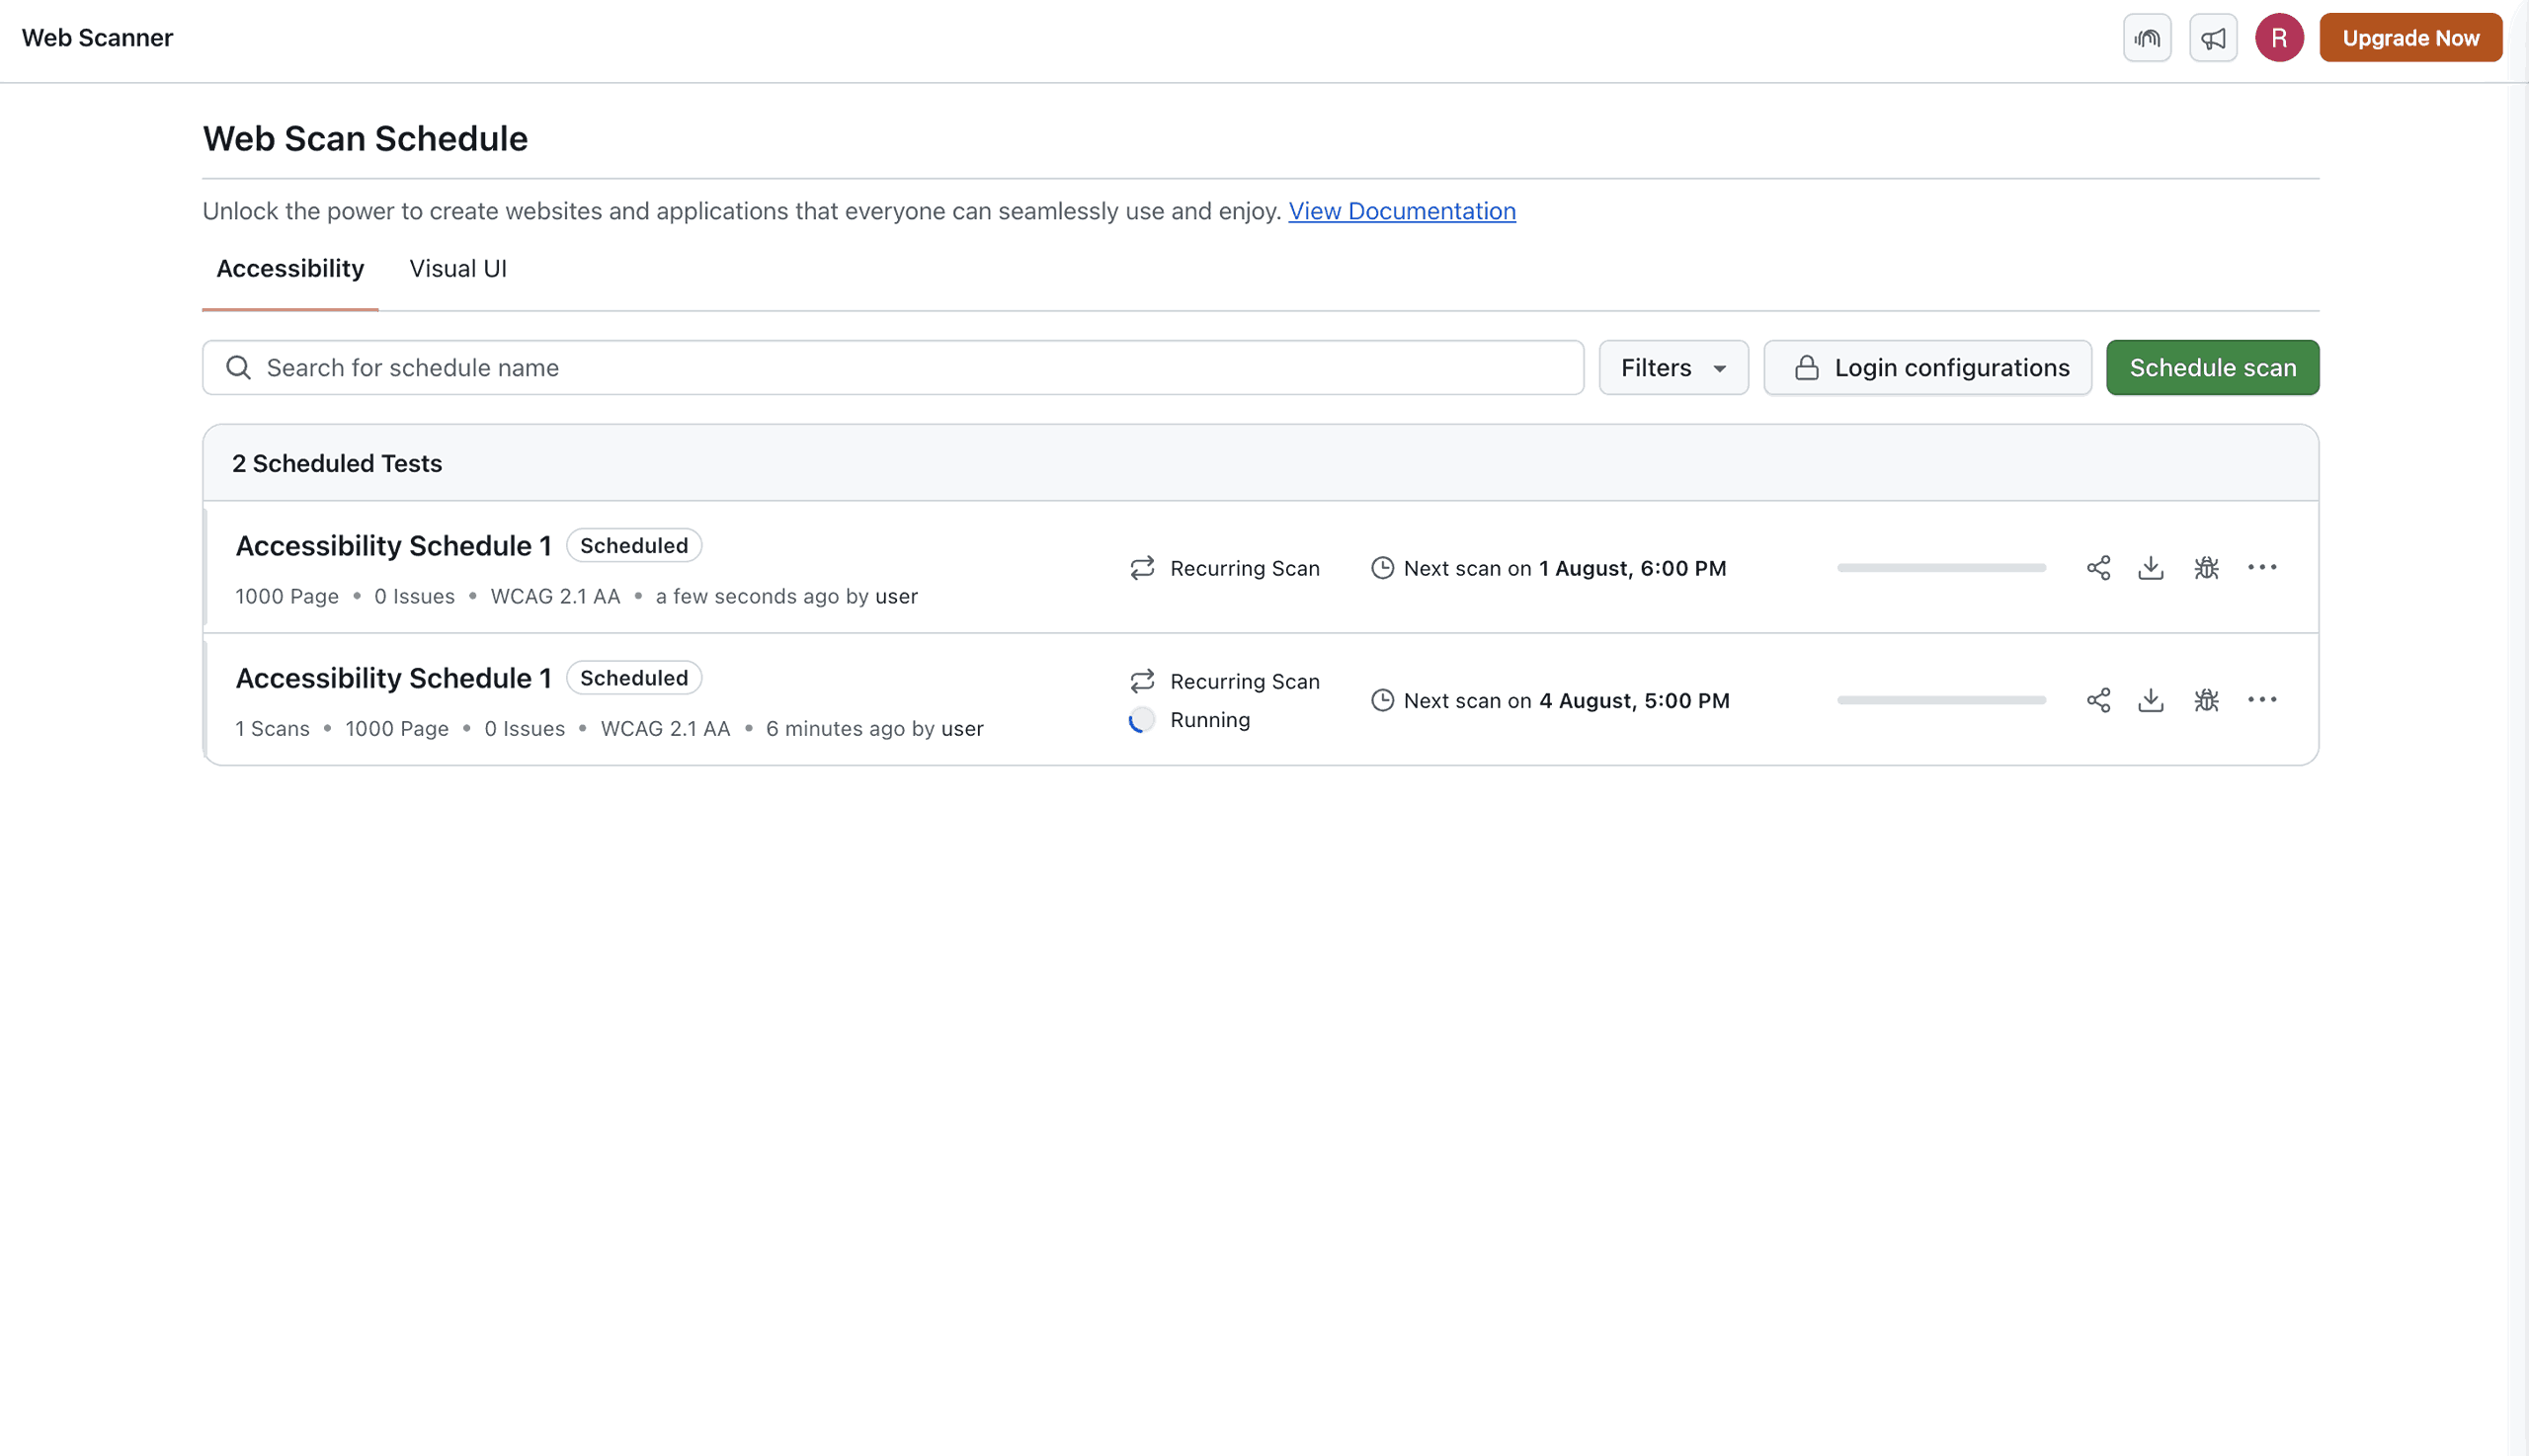
Each scan has an action menu (3-dots icon) with the following options:
Visual UI:
- View History (SmartUI builds)
- Edit Scan Config (recurrence, time)
- Stop Recurring Scan
- Delete Scan
Accessibility:
- Rename Scan
- Delete Scan
Detailed controls are available after redirecting to the Accessibility dashboard.
