Set Custom Date, Time & Hour Format on Real Devices (Browser)
Websites often behave differently depending on the device clock, from AM/PM logic and countdown timers to locale-specific date formats and scheduled banners. While running a real-time browser session on a real device, TestMu AI lets you override the date, time, 12/24-hour format, and the automatic time sync toggle on real iOS (14+) and Android (10+) hardware, so you can reproduce these conditions on demand.
This makes it easy to reproduce time-bound web flows, verify regional formatting, and exercise clock-dependent UI without waiting for the real calendar to move.
Open Date & Time Settings During a Browser Session
Step 1: Sign in to your TestMu AI dashboard, go to Real Time Testing, and open the Browser Testing tab.
Step 2: Pick a supported real device (iOS 14+ or Android 10+) along with the browser and OS version you want to test, then click Start to launch the live session.
Step 3: After the device boots, open the iOS Settings or Android Settings panel from the left sidebar, depending on the platform you launched.
Step 4: Select Set Date and Time to bring up the configuration modal.
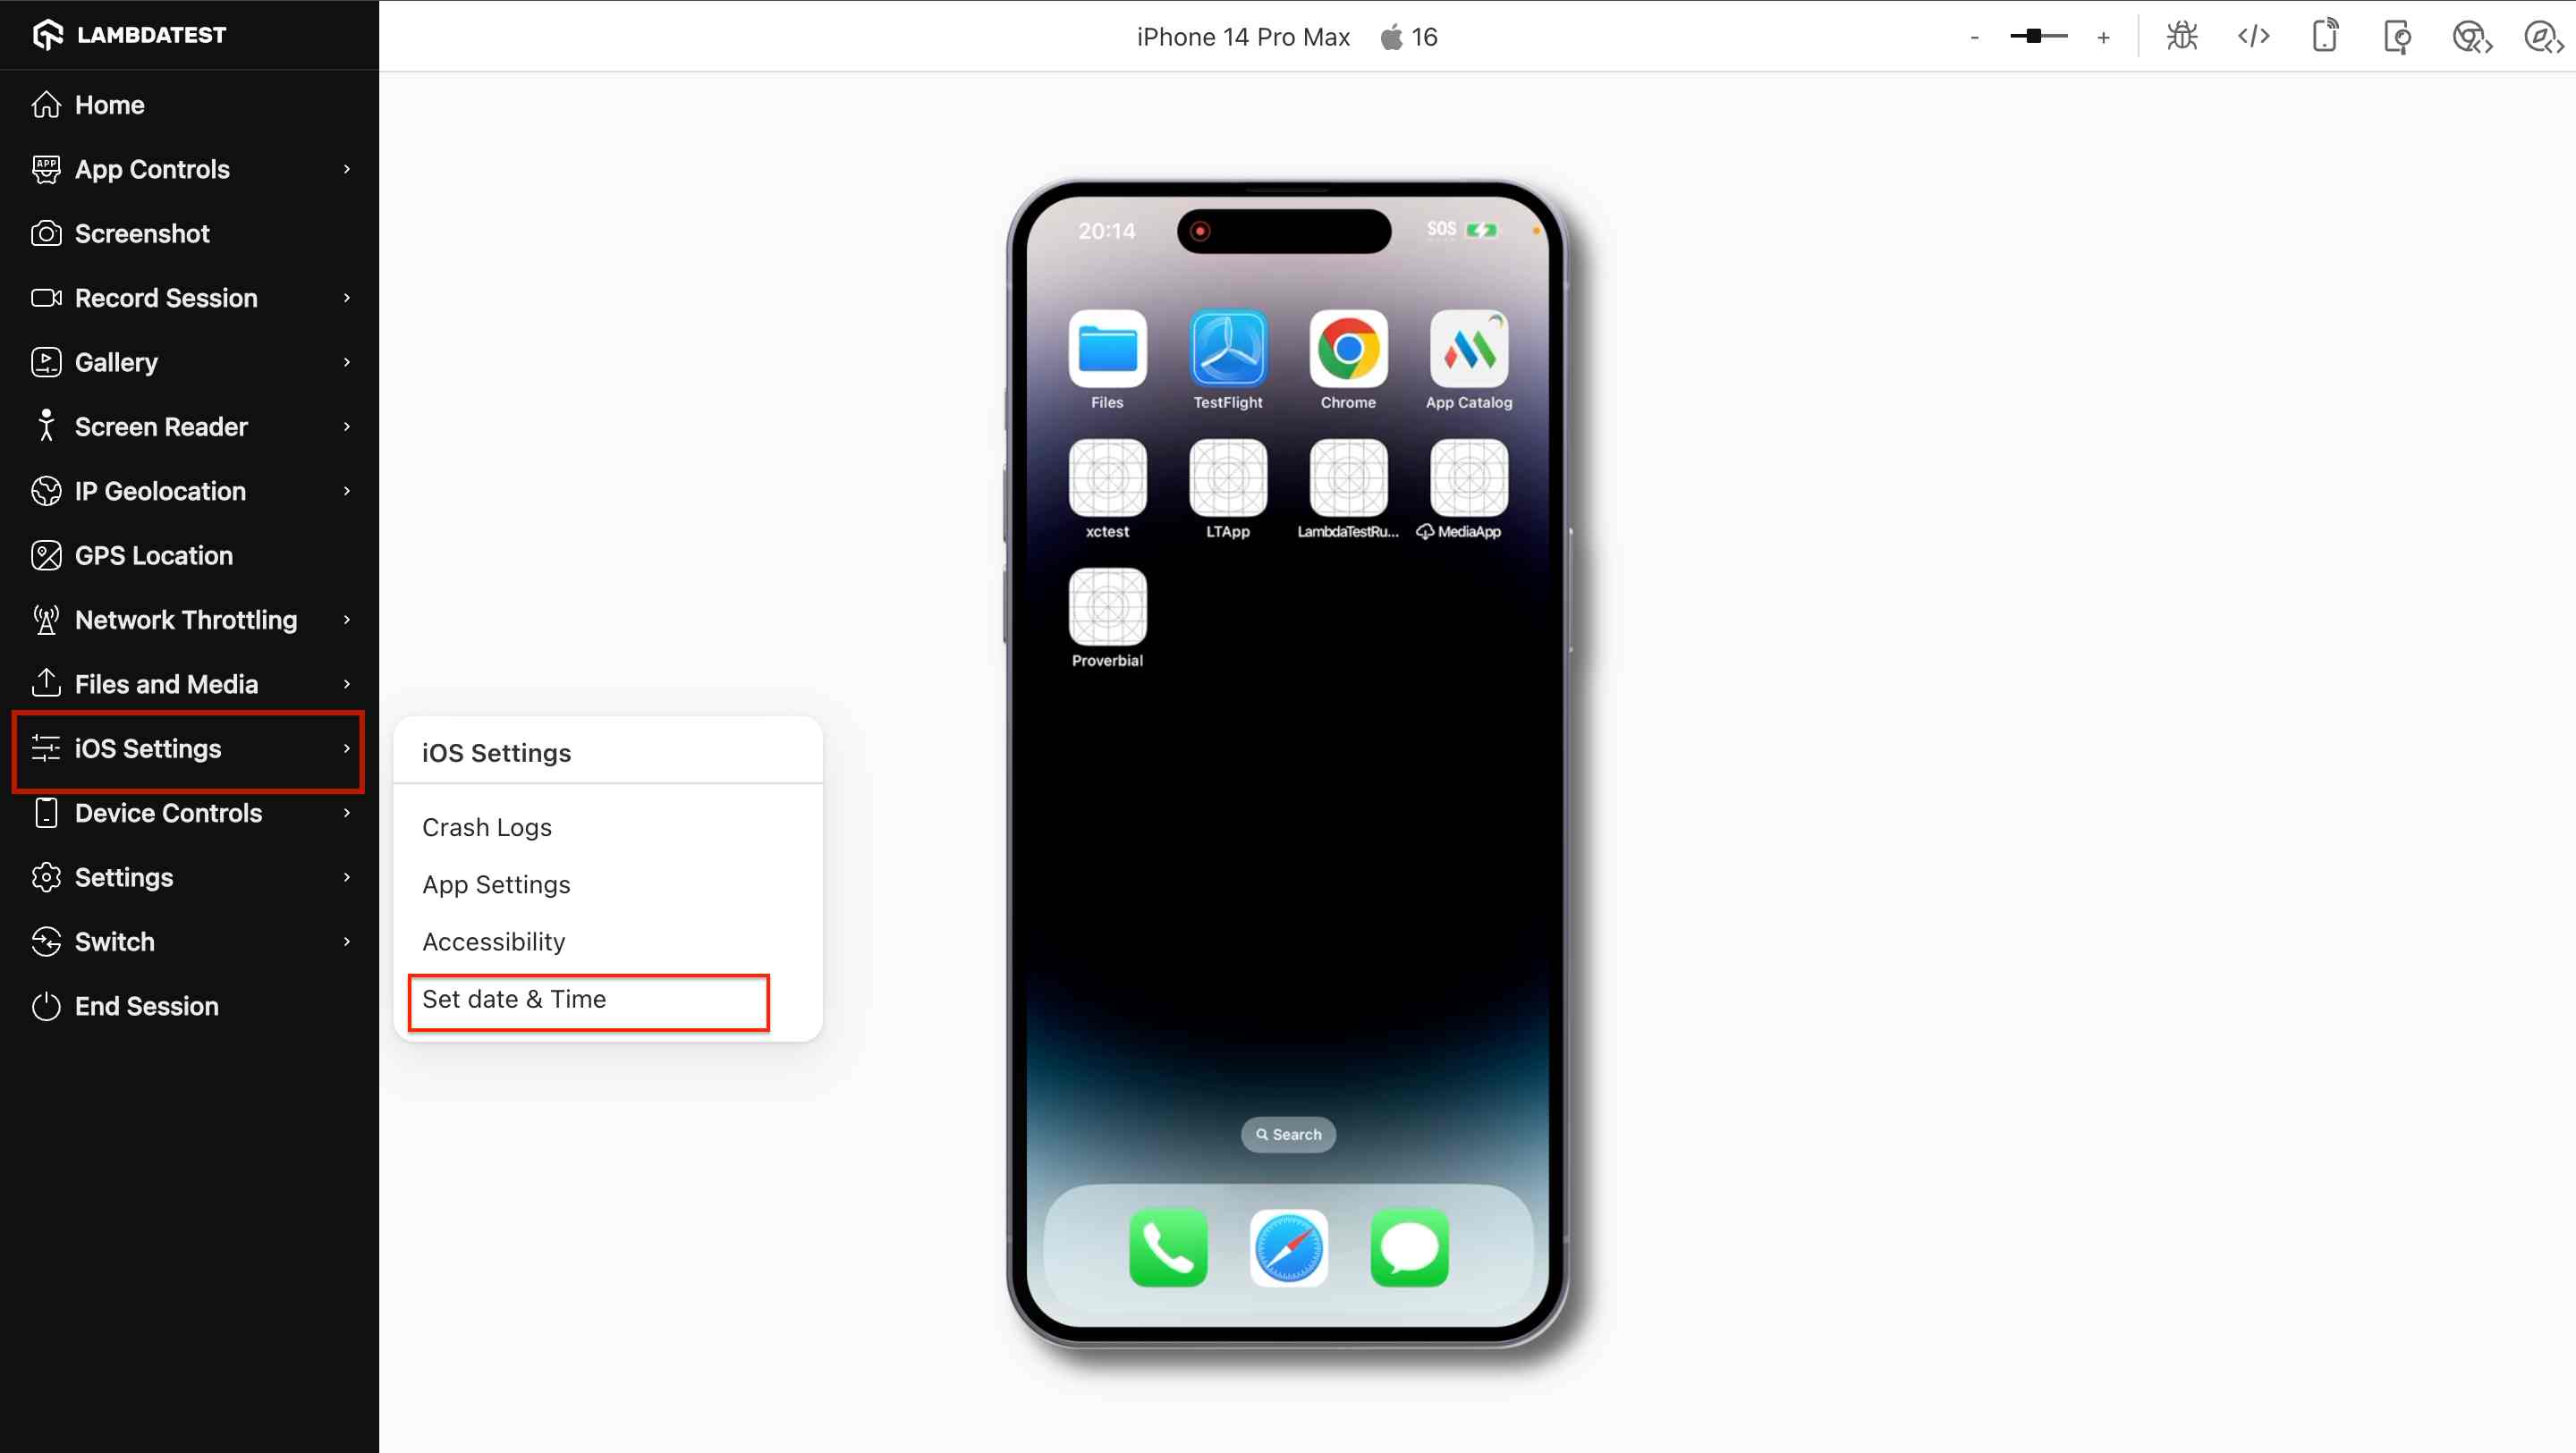
Step 5: Adjust the date, time, and hour format in the modal, then click Update to push the changes to the live device.
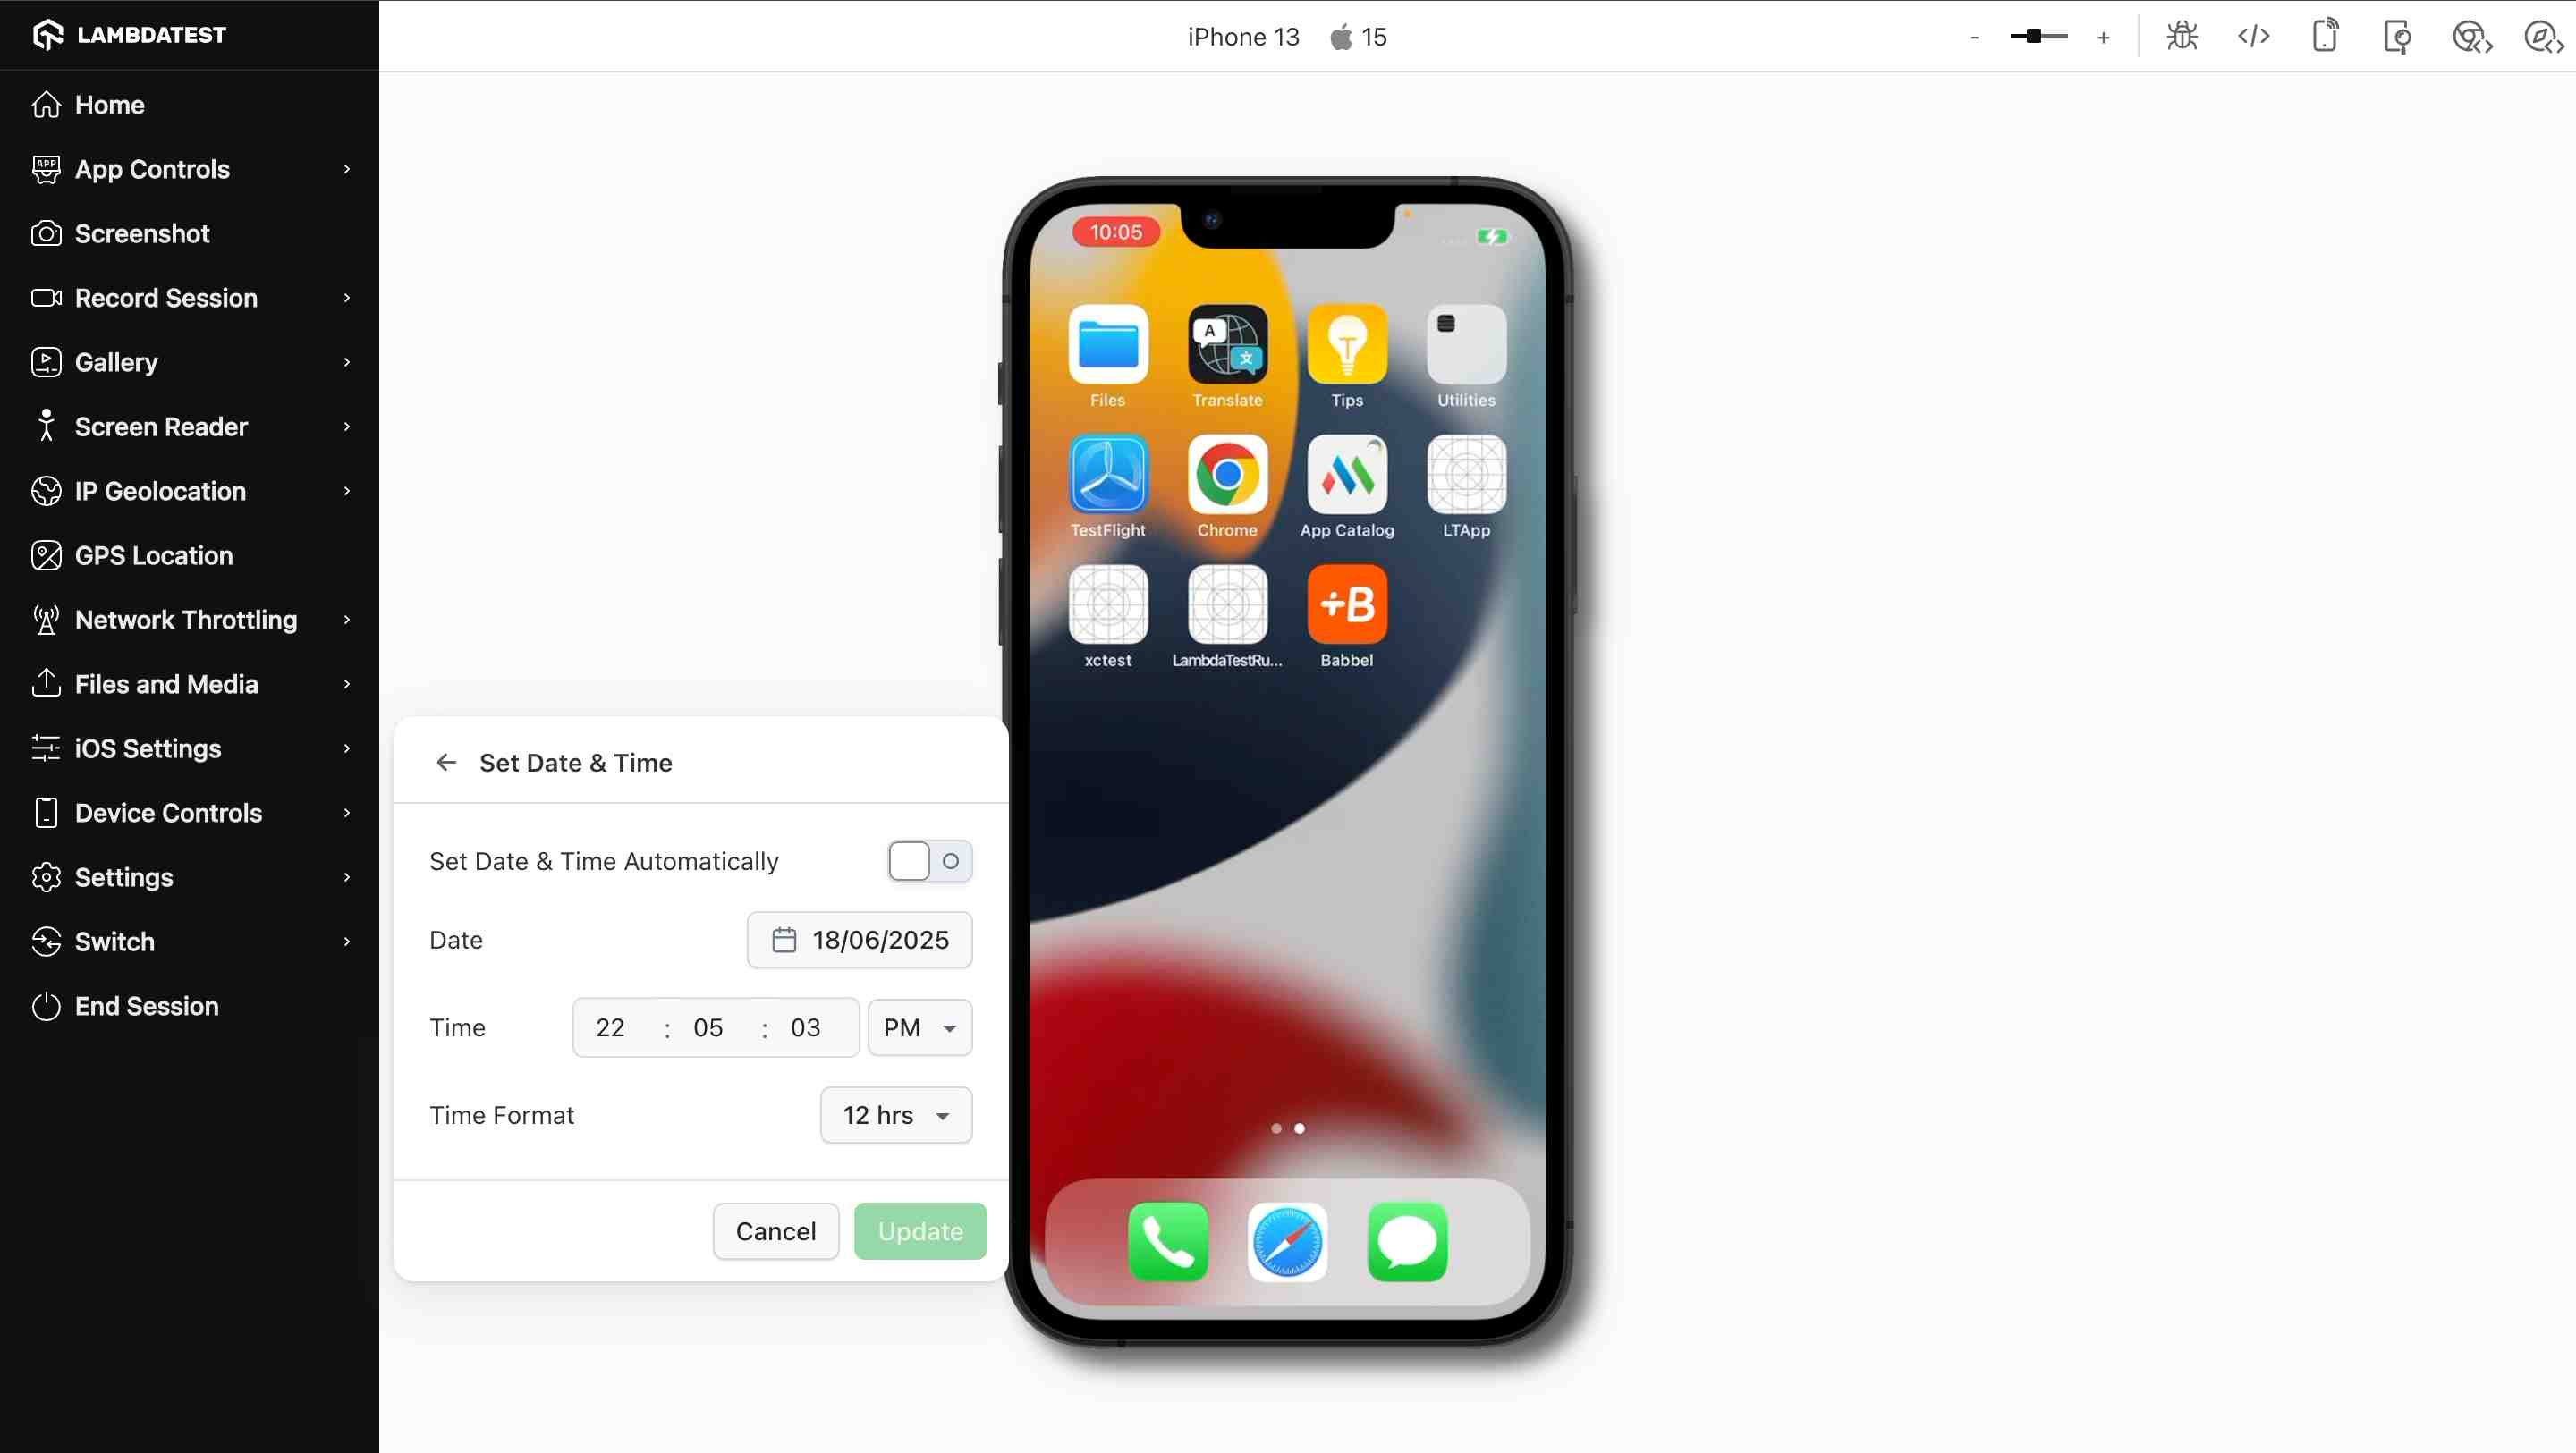
A few Android models, mainly those from Motorola, Xiaomi, Oppo, and other Chinese OEMs, don't allow the clock to be changed. On those devices the modal shows a Not Supported message instead of the editable fields.
What You Can Configure
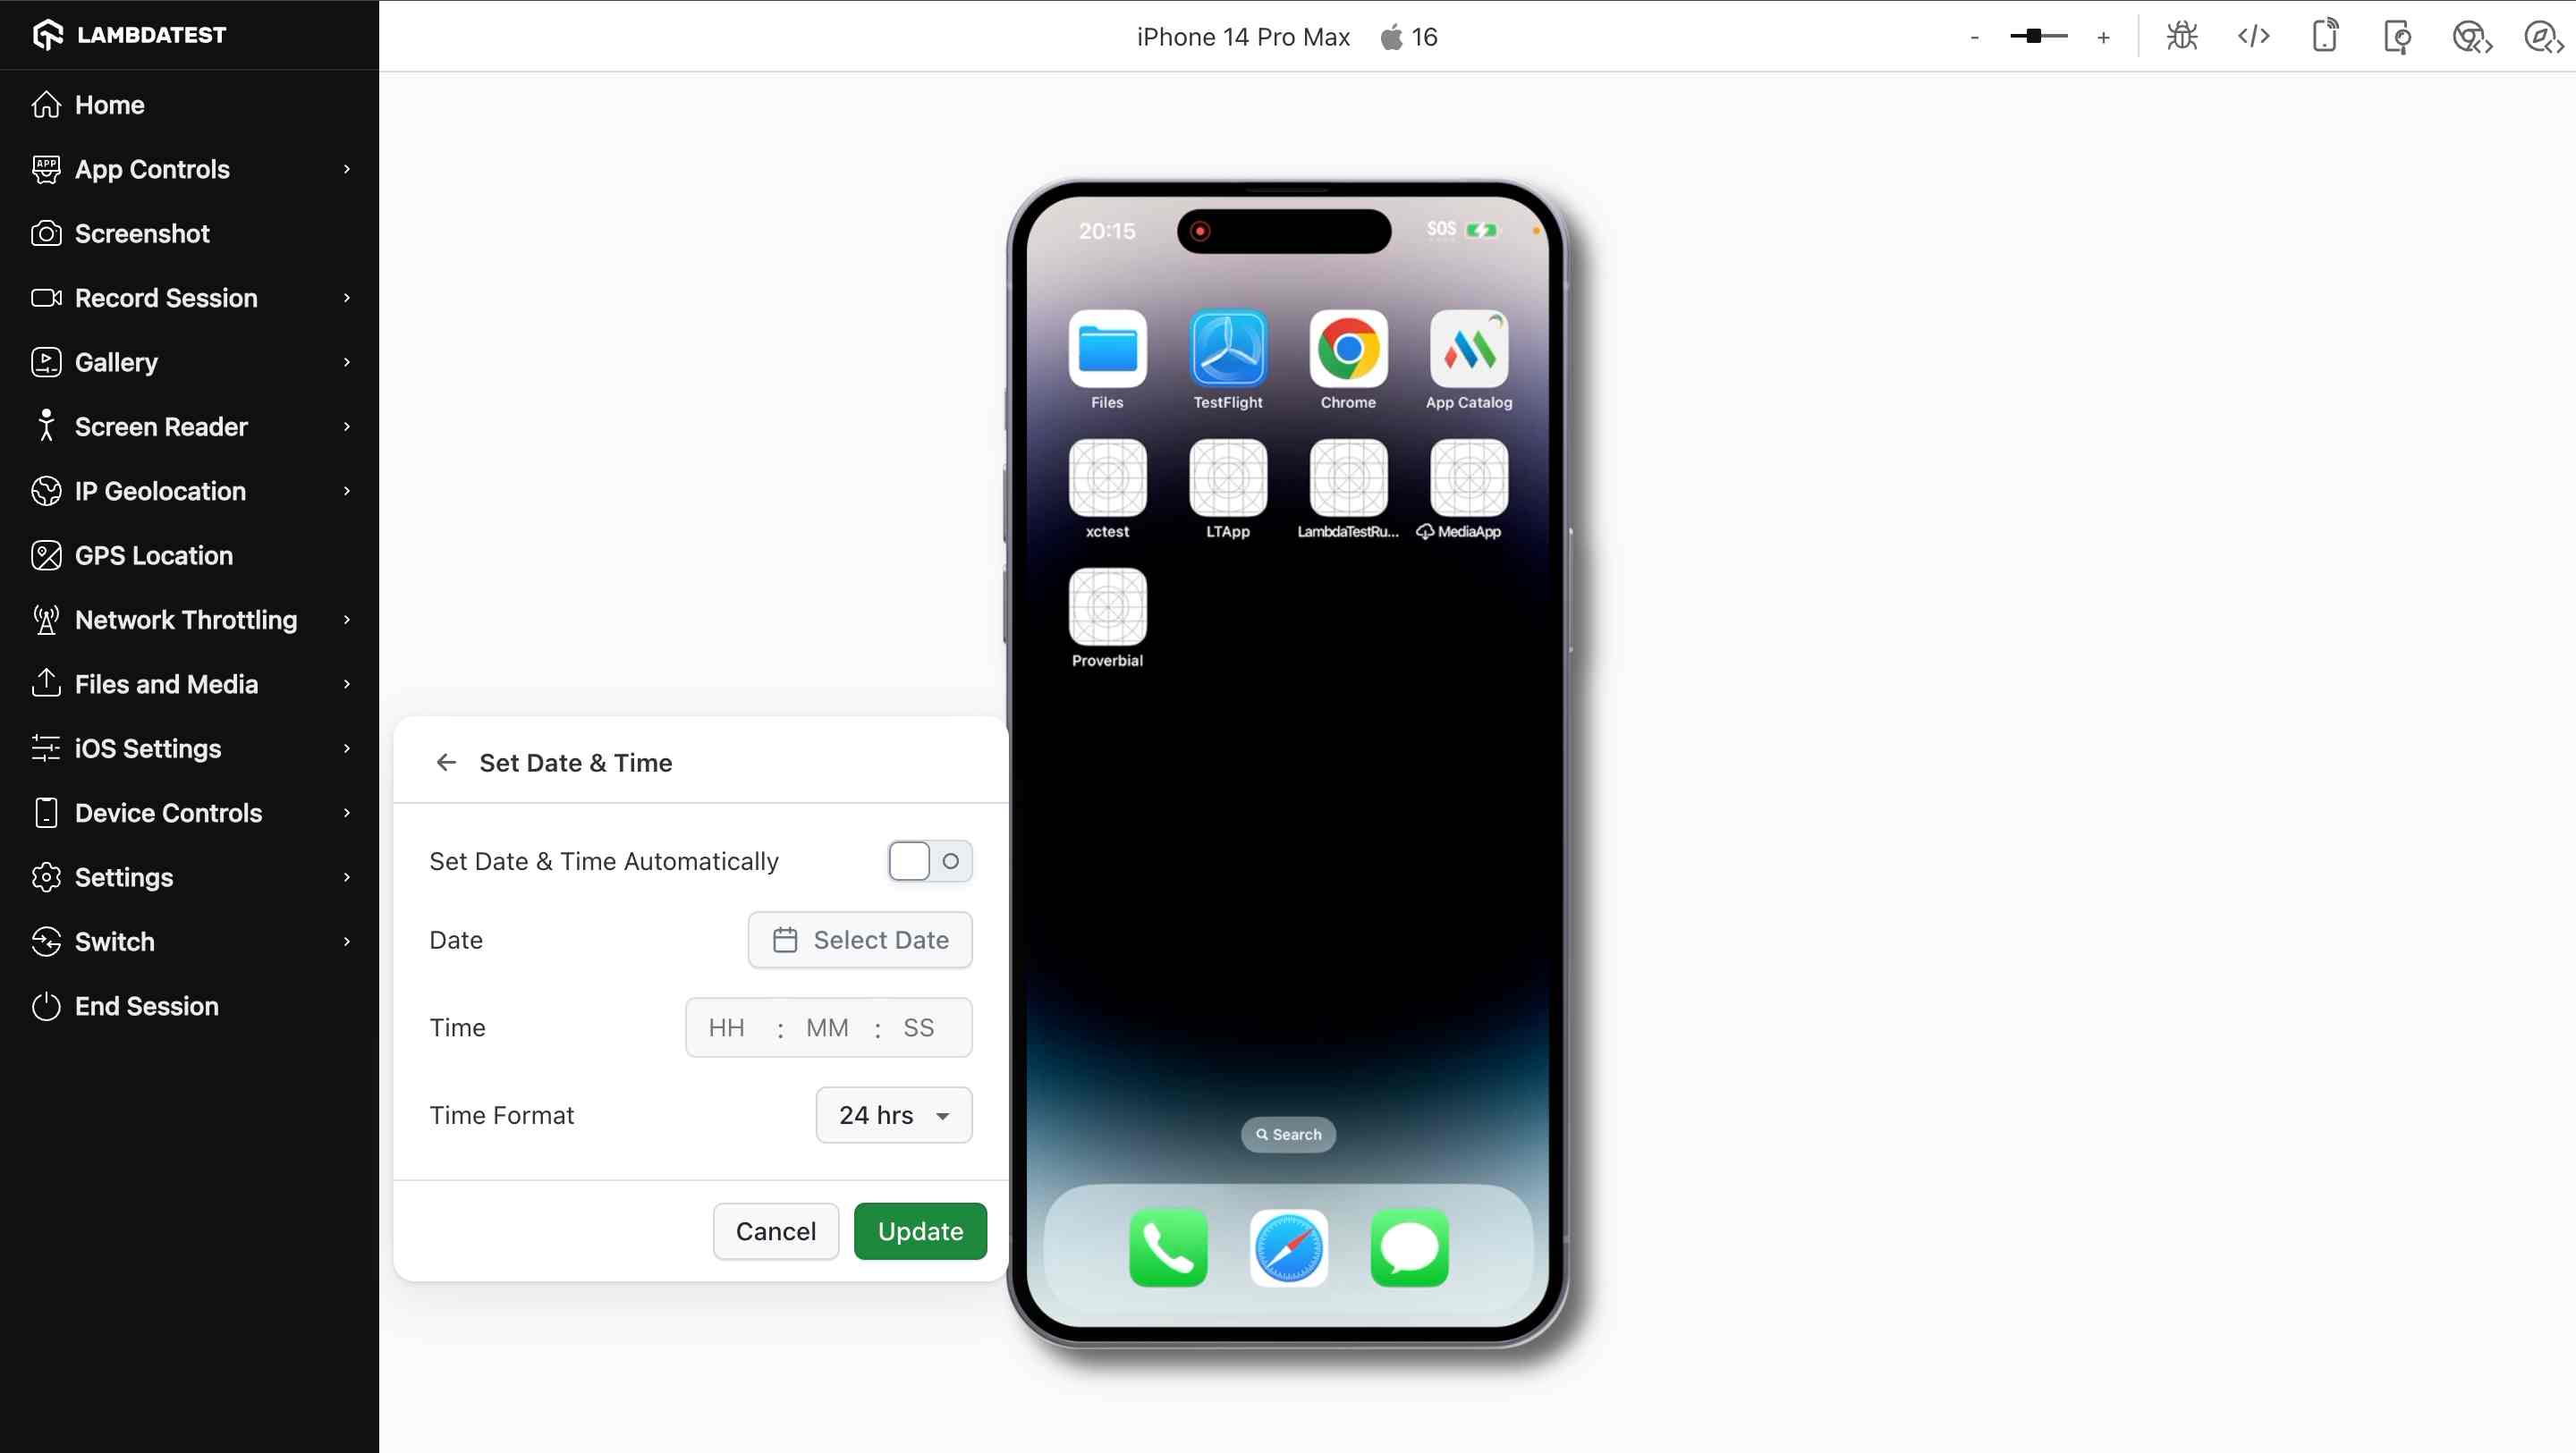
The modal exposes four controls for simulating different date and time scenarios:
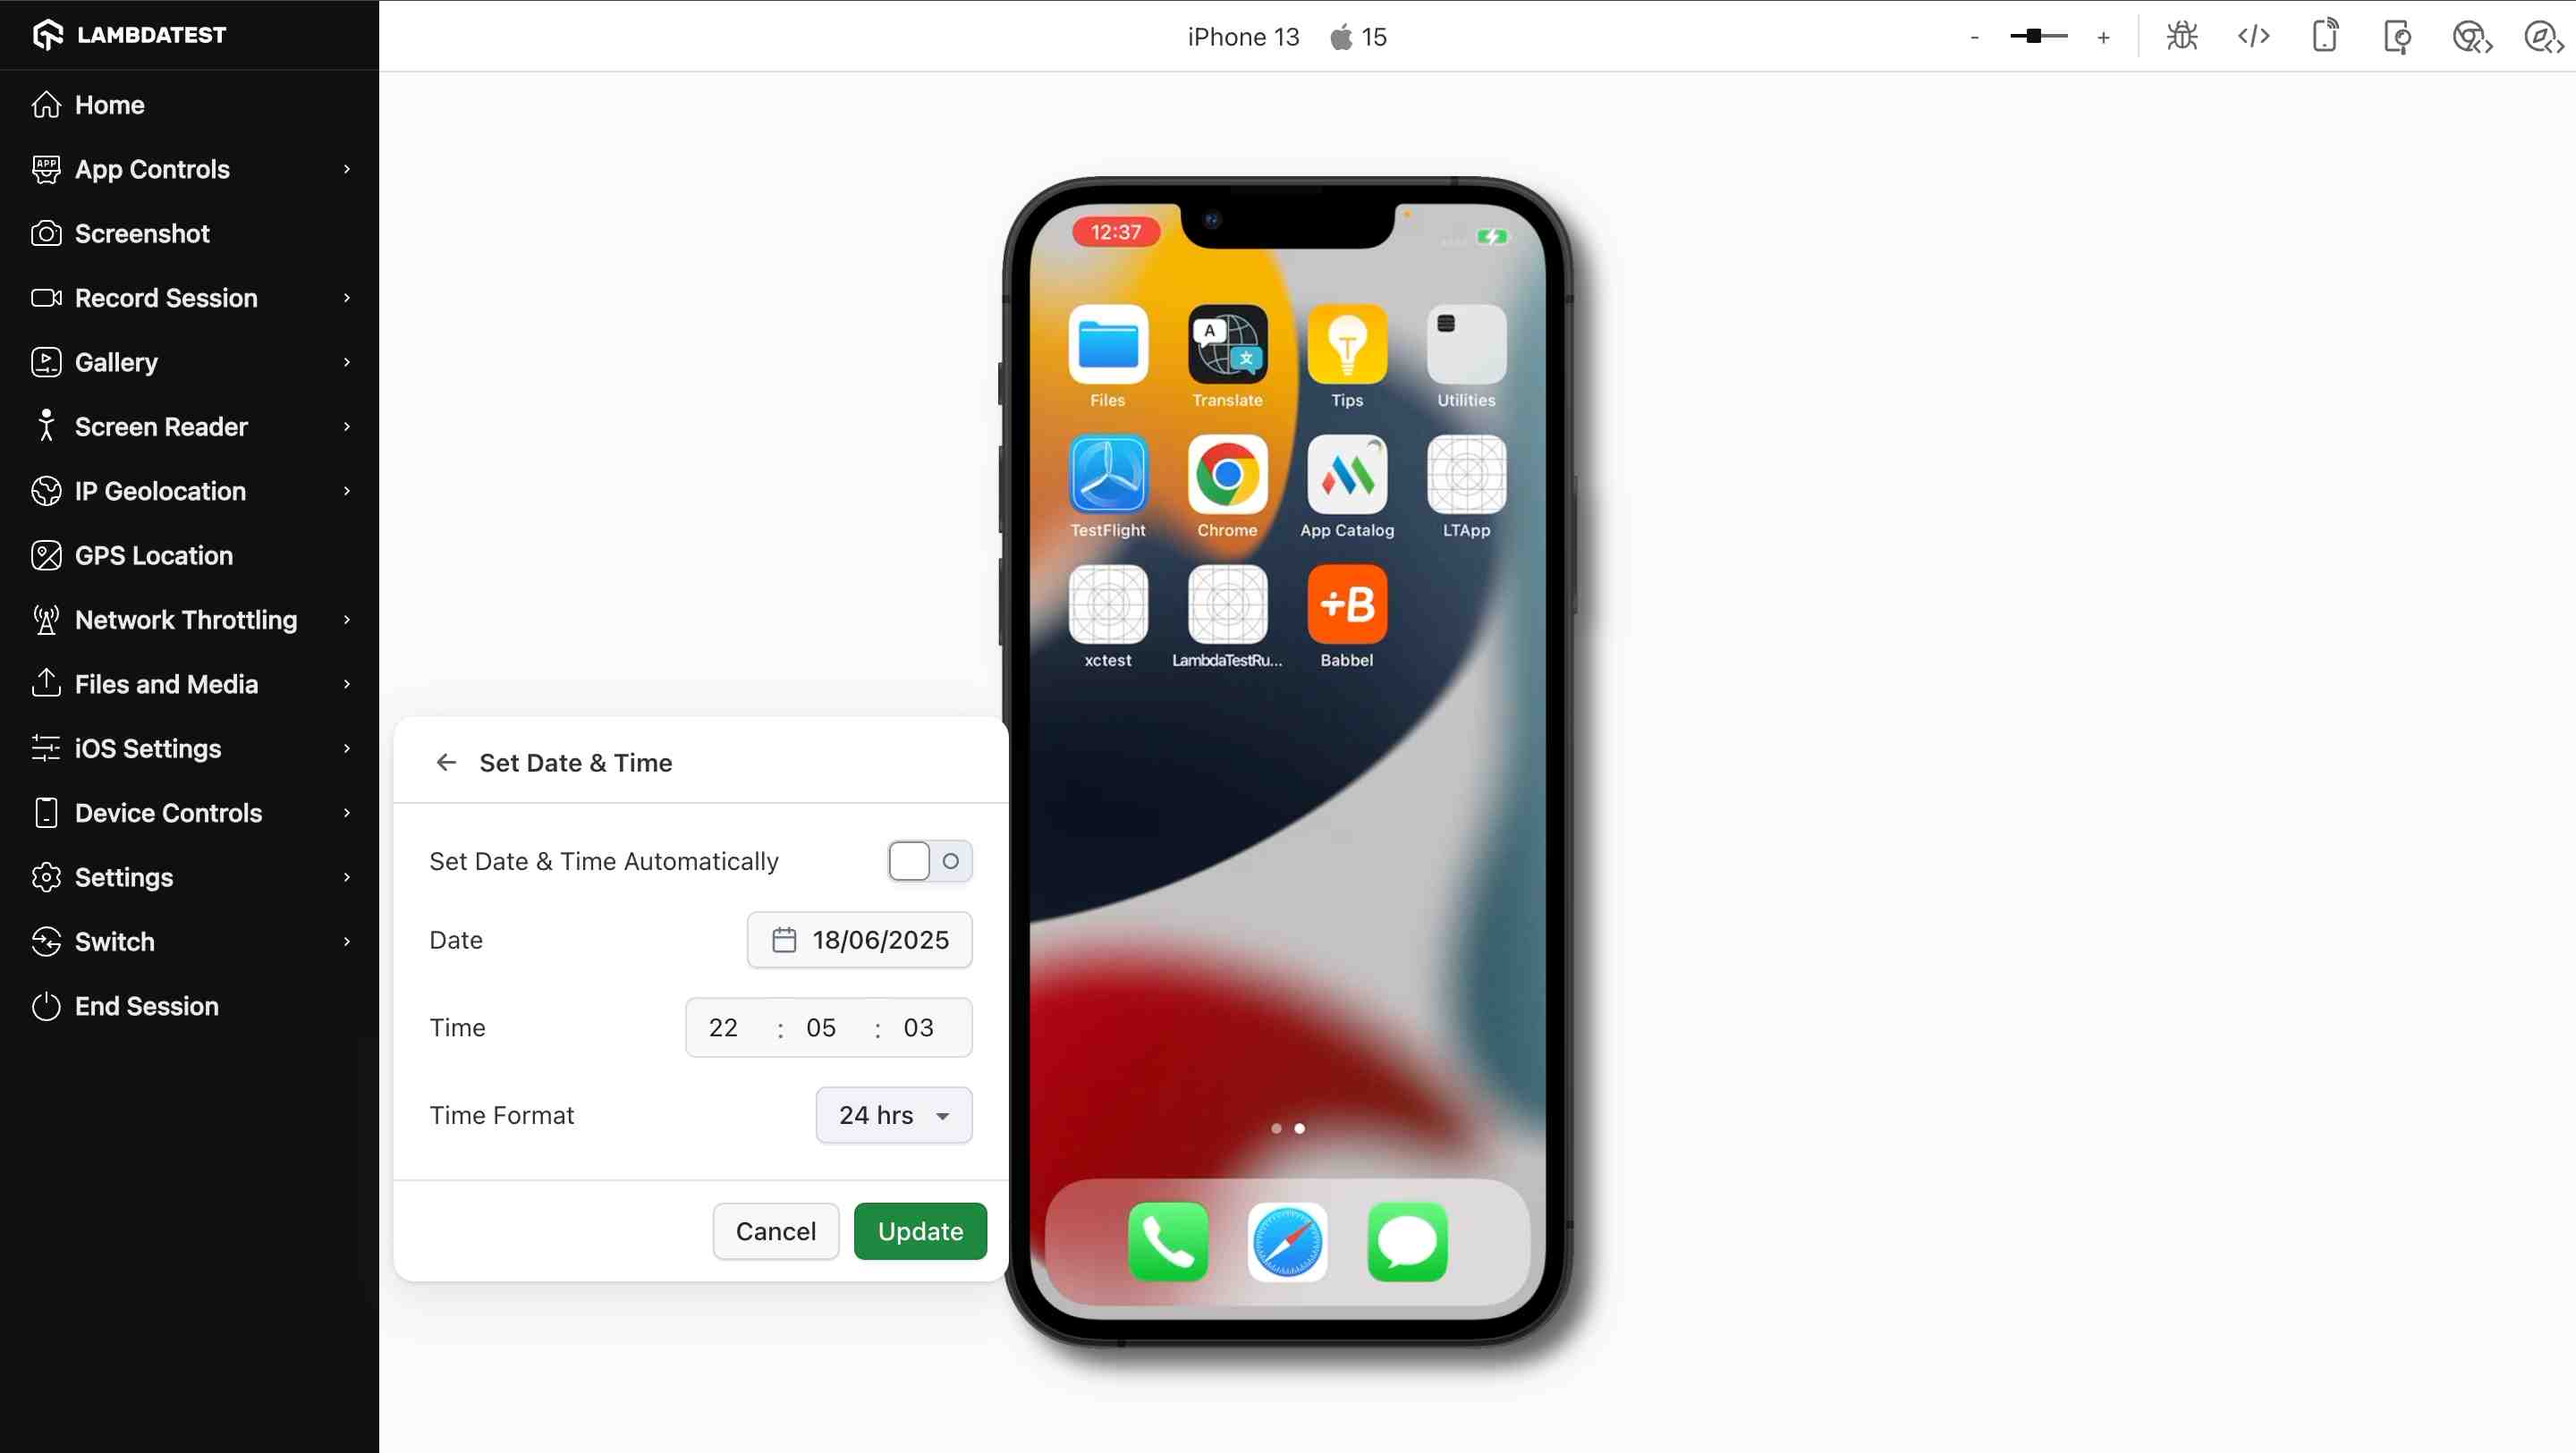
1. Set Date and Time Automatically
- Enabled: the device keeps its clock in sync with network time.
- Disabled: the manual fields unlock so you can enter your own values.
- You must switch this off before editing the date or time by hand.
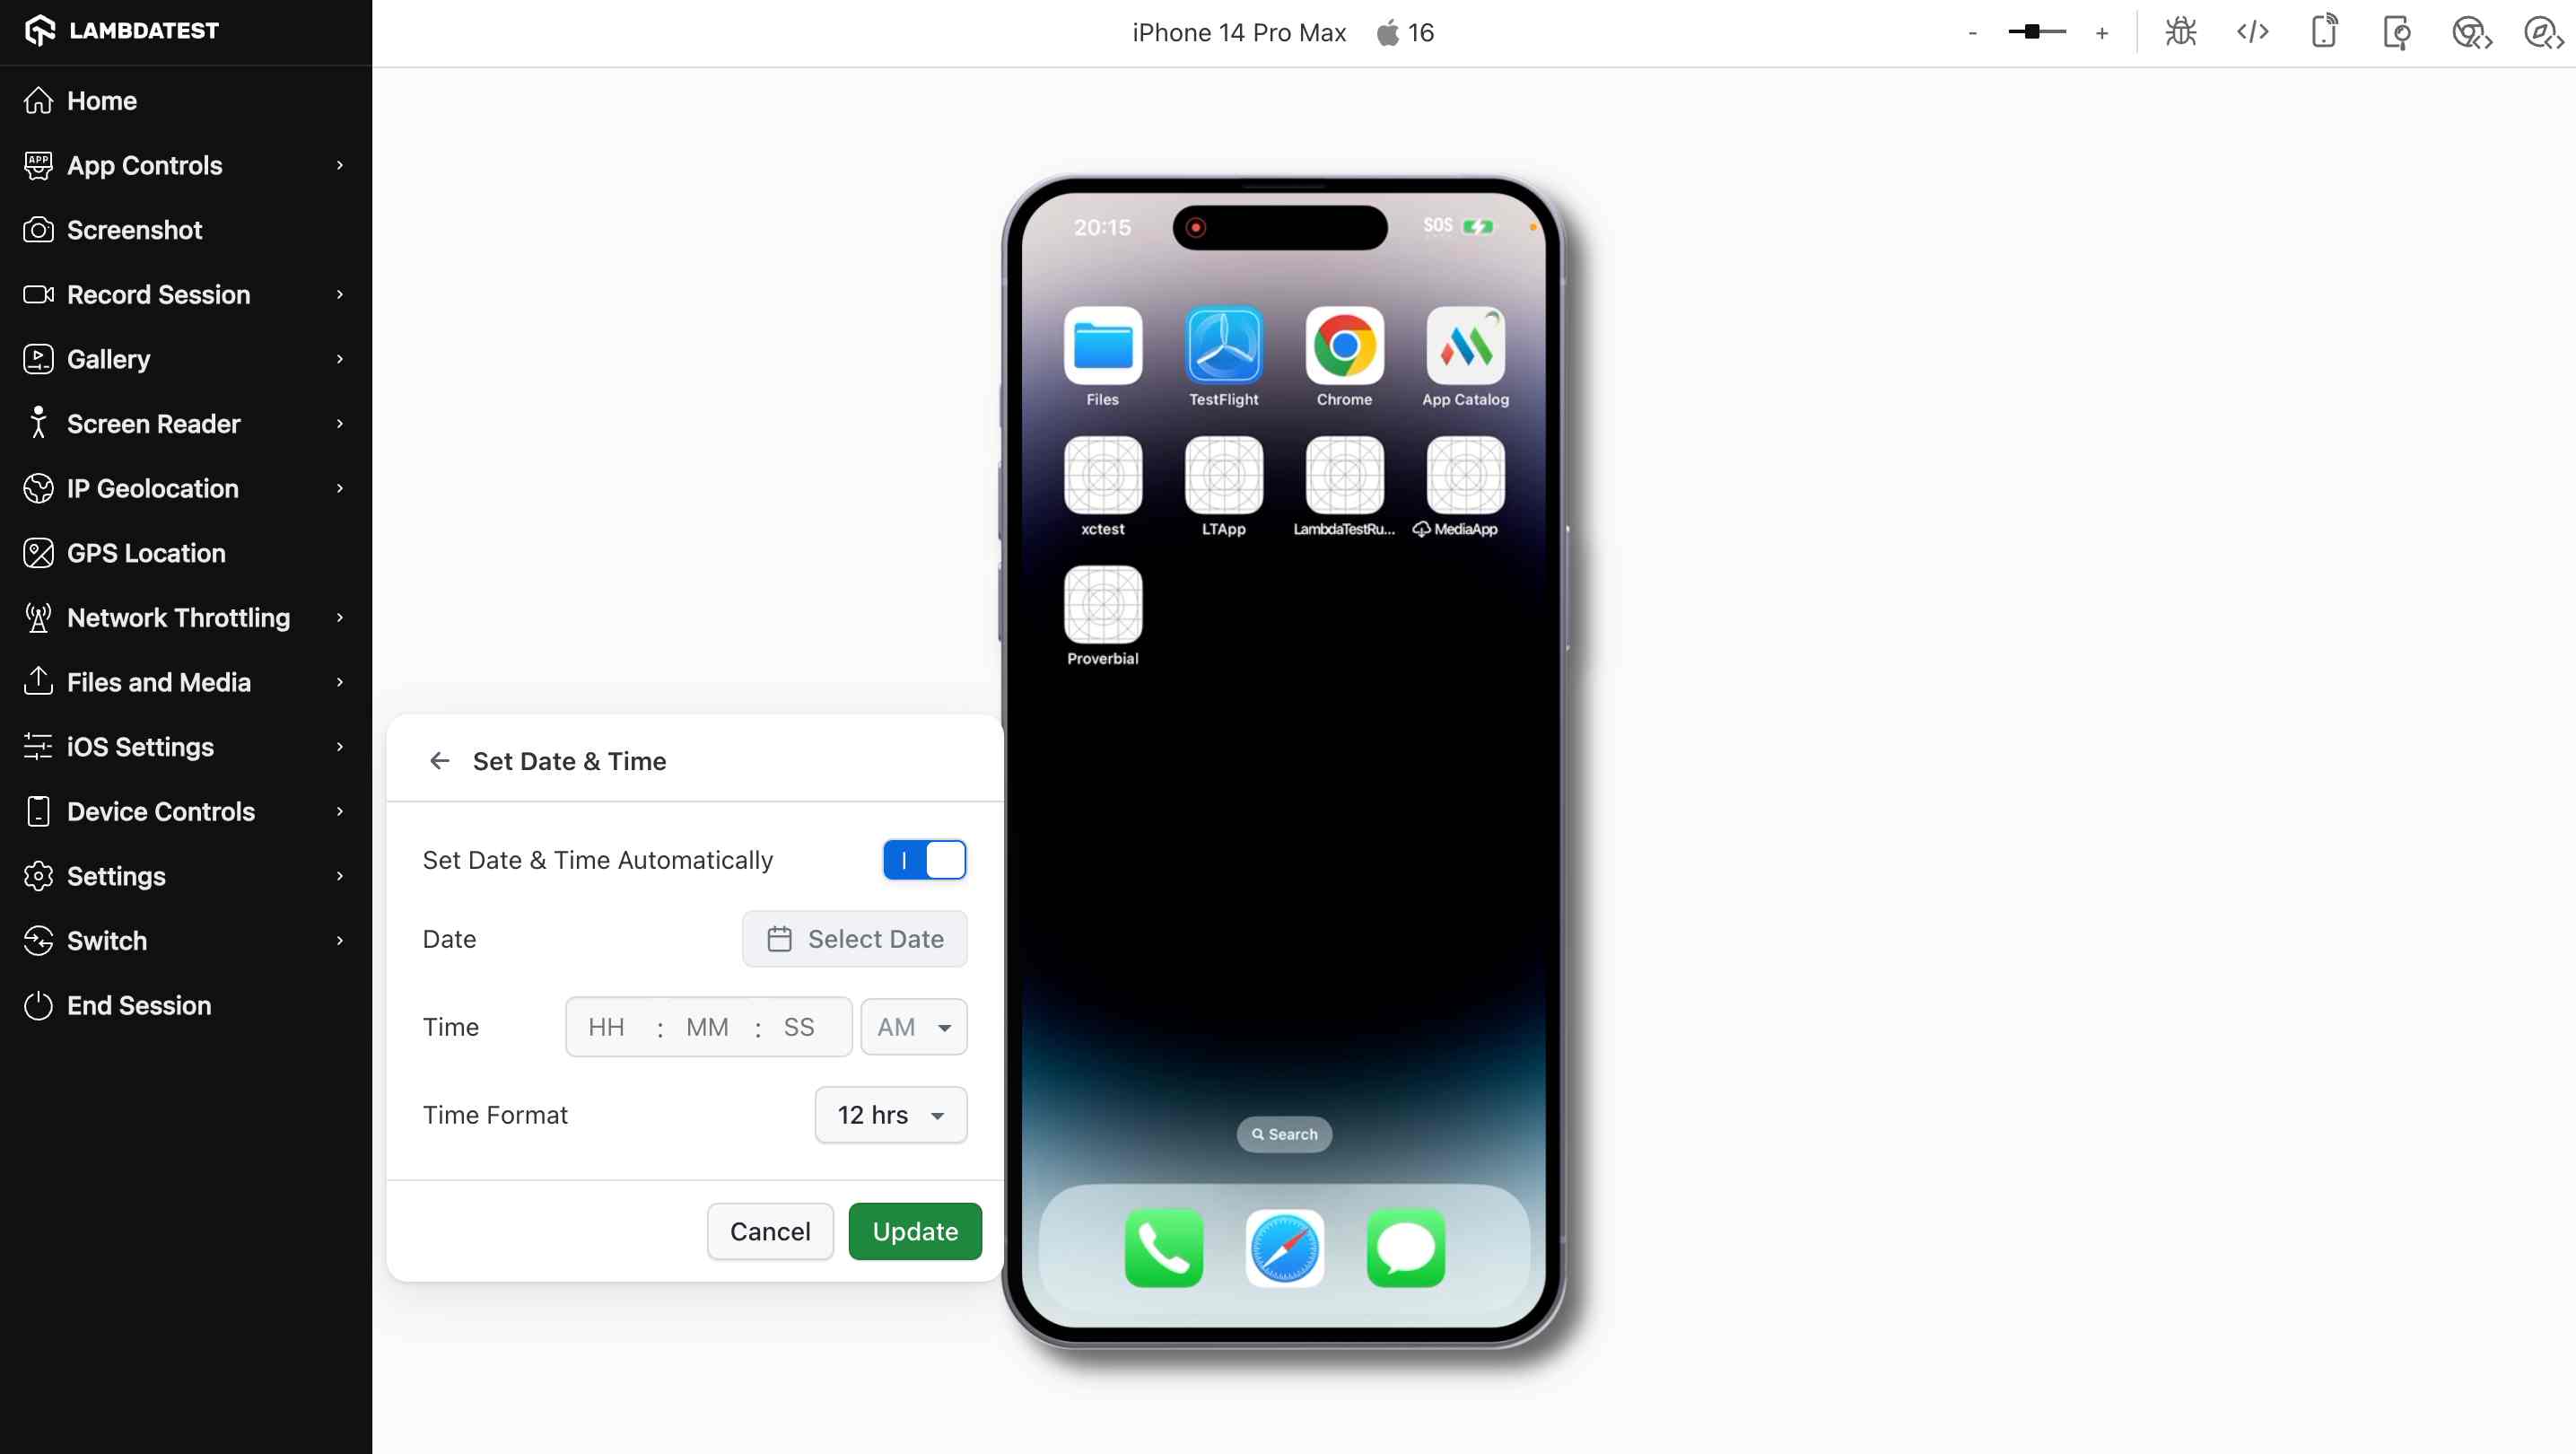
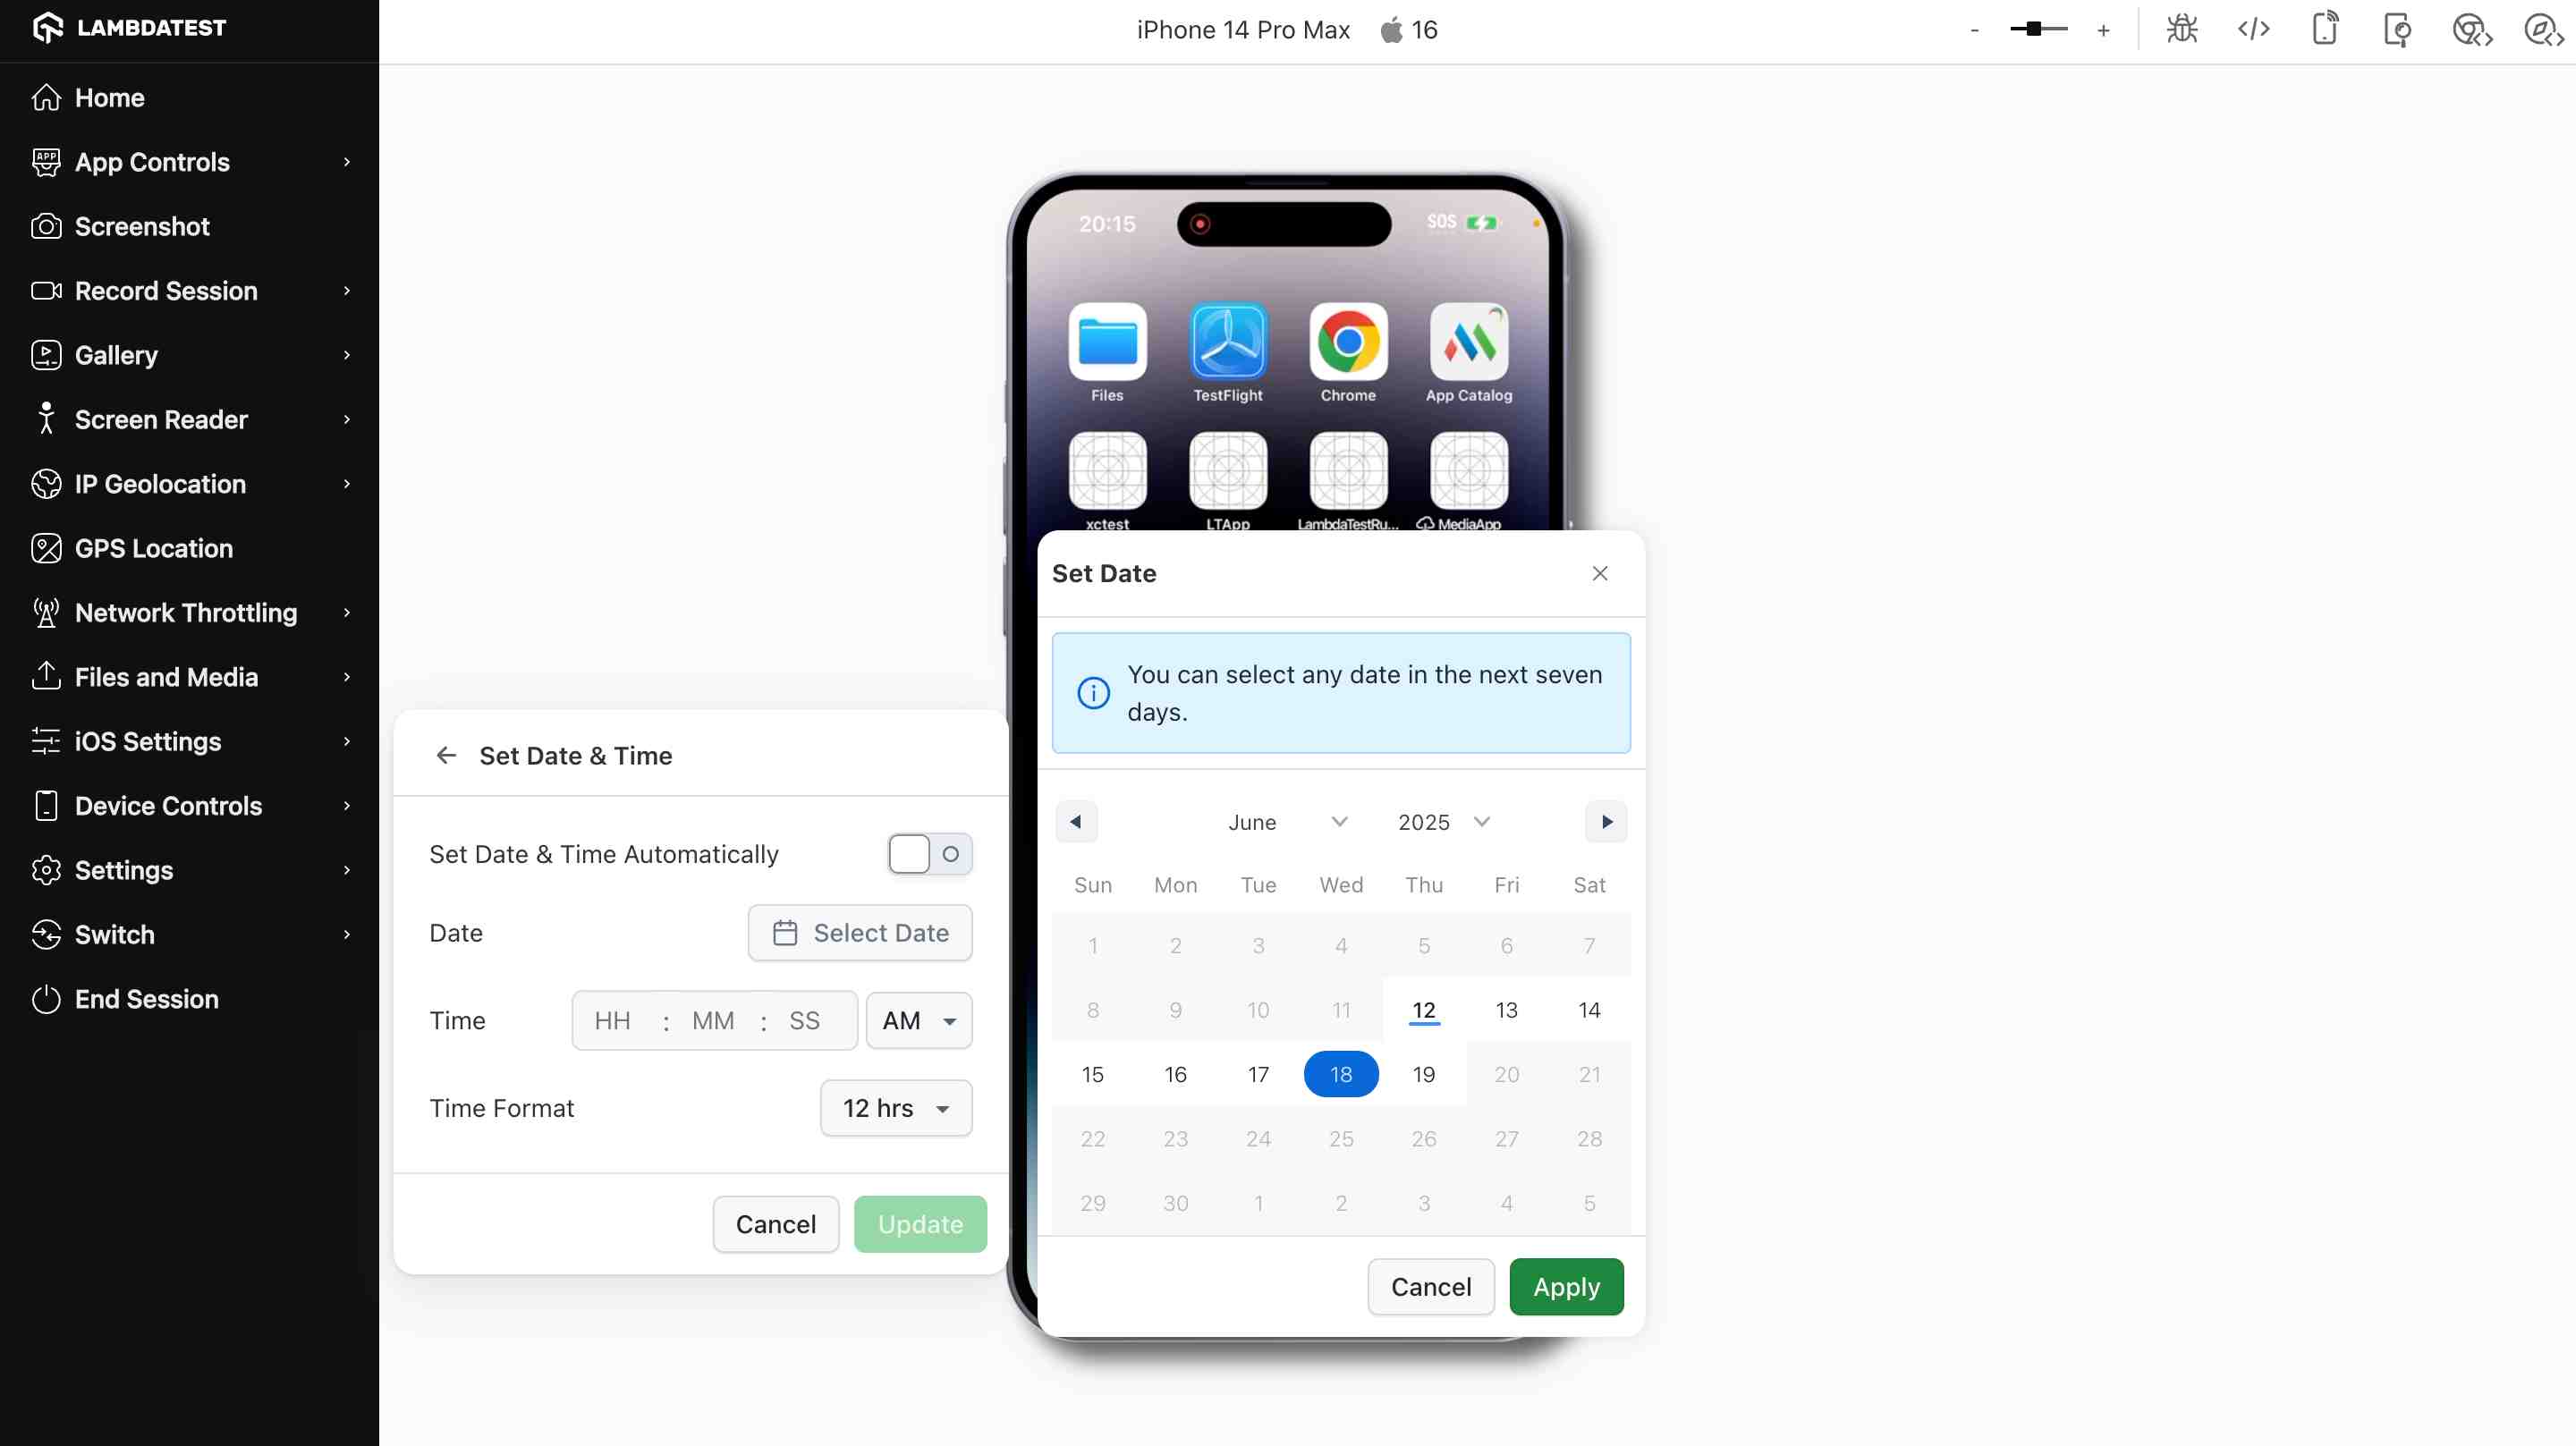
2. Date
- A calendar picker lets you jump to any day within the next 7 days.
- Your choice immediately becomes the device's system date.
- Any day in the past, or more than a week ahead, is greyed out and can't be picked.
- The Apply button activates only once a valid date is chosen.
3. Time
- Enter a precise value in
HH:MM:SSformat. - The picker follows whichever hour format (12- or 24-hour) you've selected.
- You can type the value directly or step through it with the arrow keys.
4. Time Format (12/24 Hour)
- Switch between 12-hour (with AM/PM) and 24-hour display.
- Choosing 12-hour reveals the AM/PM control in the time picker.
- Choosing 24-hour hides the AM/PM control automatically.
Platform Support
| Platform | Availability | OS Versions Supported |
|---|---|---|
| iOS | Real-time browser session | iOS 14 and above |
| Android | Real-time browser session | Android 10 and above |
Custom date and time changes aren't available on certain Android models, particularly those from Motorola, Xiaomi, Oppo, and other Chinese OEMs. On these devices the modal will display a Not Supported message during the session.
When to Use It
- Reproduce scheduled banners, promos, or countdown timers on a website
- Verify time-sensitive web flows such as booking or checkout windows
- Confirm 12- and 24-hour formats render correctly
- Preview how pages look on a future or backdated day
- Debug calendar widgets and time-based components
- Confirm behaviour when auto time sync is toggled on or off
- Cover edge cases like midnight rollover or end-of-month dates


 Chat with Us