Getting started with TestMu AI's SmartUI Figma CLI
Welcome to the TestMu AI SmartUI Figma CLI documentation!
With SmartUI Figma CLI, you can seamlessly perform visual regression testing of your Figma designs on SmartUI using your command line, identifying Visual UI Regression bugs effortlessly. This guide will walk you through the process of running successful Figma Visual tests using SmartUI CLI.
Prerequisites for running SmartUI Figma CLI
- Basic understanding of Command Line Interface is required.
- Basic understanding of Figma file structuring is required.
- Login to TestMu AI SmartUI with your credentials.
The following steps will guide you in running your visual tests for Figma files on TestMu AI platform using SmartUI CLI.
Understanding Figma Tokens
| Token | Where It’s Used | Description |
|---|---|---|
FIGMA_TOKEN | Env Variable | Your Figma Personal Access Token to authenticate with the Figma API |
figma_file_token | designs.json | Figma file ID, extracted from the Figma file URL |
figma_ids | designs.json | List of frame or node IDs you want to compare visually |
Example Figma URL:
https://www.figma.com/file/abc12345/file-name?node-id=2417-58969
figma_file_token:abc12345figma_ids:2417-58969
Create a SmartUI CLI Project
The first step is to create a project with the application in which we will combine all your builds run on the project. To create a SmartUI Project, follow these steps:
- Go to Projects page
- Click on the
new projectbutton - Select the platform as CLI for executing your
CLItests. - Add name of the project, approvers for the changes found, tags for any filter or easy navigation.
- Click on the Submit.
Steps to run your first test
Step 1: Install the Dependencies
Install required NPM modules for TestMu AI SmartUI CLI globally or in your project:
Global Installation (Recommended):
npm install -g @lambdatest/smartui-cli
Local Installation:
npm install @lambdatest/smartui-cli
If you face any problems executing tests with SmartUI-CLI versions >= v4.x.x, upgrade your Node.js version to v20.3 or above.
Step 2: Create the design info file
smartui config:create-figma designs.json
Once, the designs file will be created, you will be seeing the sample pre-filled configuration in the designs.json file:
{
    "depth":2, //Figma Tree depth - (Optional), change the value according to the your file structure
    "figma_config": [
      {
        "figma_file_token": "<Required Figma File token>",
        "figma_ids":[
          "Id-1", "Id-2"
        ]
      },
       {
        "figma_file_token": "<Required Figma File token>",
        "figma_ids":[
          "Id-3", "Id-4"
        ]
      }
    ]
  }
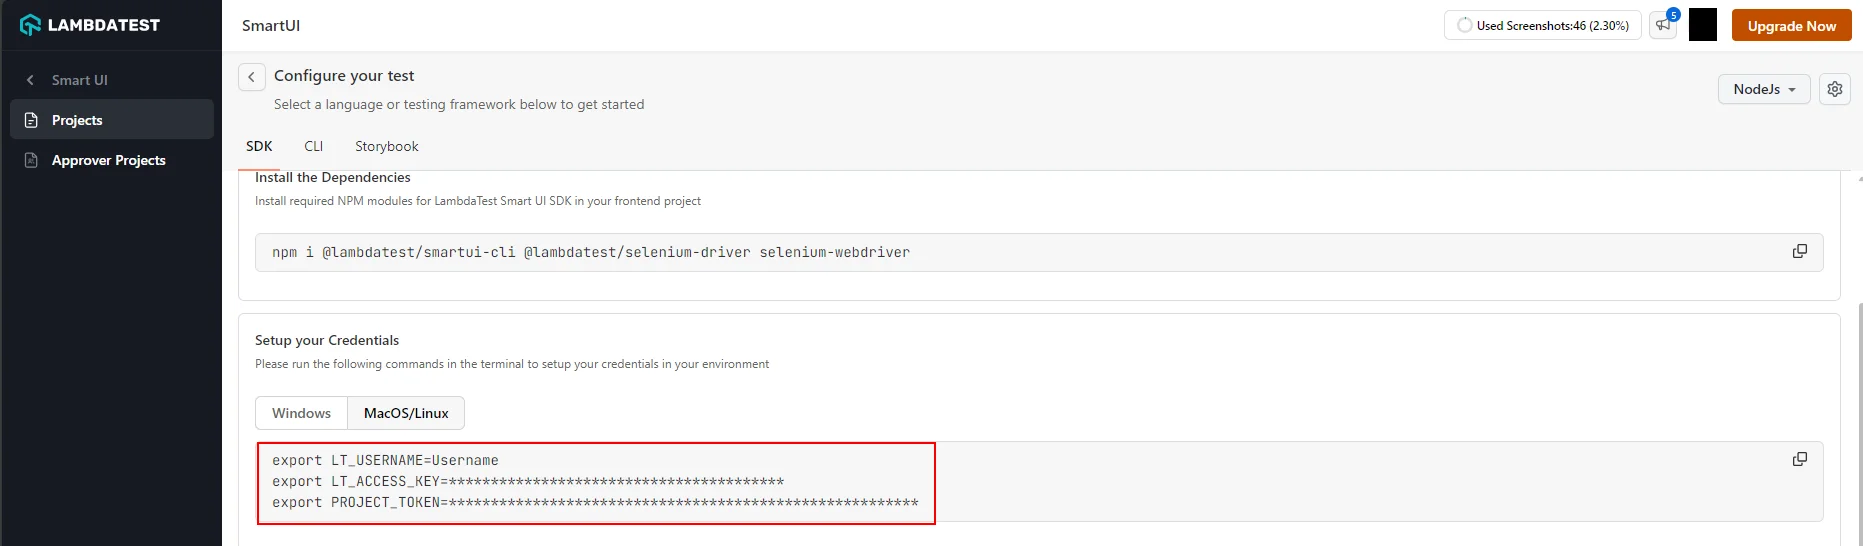
Step 3: Configure your Project Token and Figma Token
- Setup your project token shown in the SmartUI app after creating your project.
- MacOS/Linux
- Windows - CMD
- PowerShell
export PROJECT_TOKEN="123456#1234abcd-****-****-****-************"
set PROJECT_TOKEN="123456#1234abcd-****-****-****-************"
$env:PROJECT_TOKEN="123456#1234abcd-****-****-****-************"
- Setup your personal access token for Figma to authenticate Figma with SmartUI.
- MacOS/Linux
- Windows - CMD
- PowerShell
export FIGMA_TOKEN="123456#1234abcd-****-****-****-************"
set FIGMA_TOKEN="123456#1234abcd-****-****-****-************"
$env:FIGMA_TOKEN="123456#1234abcd-****-****-****-************"
Step 4: Configure your TestMu AI Credentials
- MacOS/Linux
- Windows - CMD
- PowerShell
export LT_USERNAME="YOUR_USERNAME"
set LT_USERNAME="YOUR_USERNAME"
$env:LT_USERNAME="YOUR_USERNAME"
SmartUI CLI Design Config Options
Please read the following table for more information about the configuration file:
| Config Key | Description | Usage |
|---|---|---|
| figma_file_token | File token for your required Figma file. You can use multiple figma files in the same configuration. | Mandatory |
| figma_ids | Comma separated list of nodes that you care about in the document. If specified, only a subset of the document will be returned corresponding to the nodes listed, their children, and everything between the root node and the listed nodes. | Optional |
| depth (int) | Positive integer (>1) representing how deep into the document tree to traverse. For example, setting it to 2 returns Pages and all top level objects on each page. Not setting this parameter returns all nodes | Optional |
Step 5: Uploading the Figma files on SmartUI Cloud using CLI
You can now execute tests for Visual Testing for Figma objects using the following options:.
npx smartui upload-figma designs.json
Advanced options for baseline management
markBaseline- You can mark a specific build as a baseline through the runner command
npx smartui upload-figma designs.json --markBaseline
buildName- You can add your custom build name to a build by running the following command
npx smartui upload-figma designs.json --buildName "<Build_Name>"
npx smartui upload-figma designs.json --buildName "<Build_Name>" --markBaseline
If buildName is not specified, a random build name is generated for every run.
You can add more screenshots in a build by specifying the particular build name in the runner command
Best Practices
- Build Names
- Screenshot Names
Build Names
npx smartui upload-figma designs.json --buildName "v1.0.0"
Screenshot Names
- Good:
homepage-hero,login-form,dashboard-sidebar- Avoid:
test1,screenshot,design-1
- Avoid:
- Branch Names
Branch Names
Screenshot Naming for SDK Comparisons
Important: When comparing Figma designs with live implementations captured via SDKs, add .png extension to your SDK screenshot names.
Figma-uploaded screenshots automatically have .png appended (e.g., homepage.png), so your SDK screenshots must match:
In your SDK code:
// ❌ Wrong - will not match Figma screenshot
smartuiSnapshot(driver, "homepage");

// ✅ Correct - matches Figma screenshot name
smartuiSnapshot(driver, "homepage.png");
Example for different frameworks:
- Selenium
- Playwright
- Cypress
// Java
SmartUISnapshot.smartuiSnapshot(driver, "homepage.png");
// JavaScript
await smartuiSnapshot(page, "homepage.png");
// JavaScript
cy.smartuiSnapshot("homepage.png");
This ensures that Figma screenshots (e.g., homepage.png) match SDK screenshots (e.g., homepage.png) in the same build.
Setup with Continuous Integration (CI)
If you are using the Continuous Integration (CI) pipeline for your application and want to integrate SmartUI Figma CLI execution then the following are the steps needs to be added to your .yaml file:
steps:
  - name: Running SmartUI Figma CLI Tests
    - run: |
       npm install @lambdatest/smartui-cli
       npx playwright install-deps
       npx smartui upload-figma designs.json
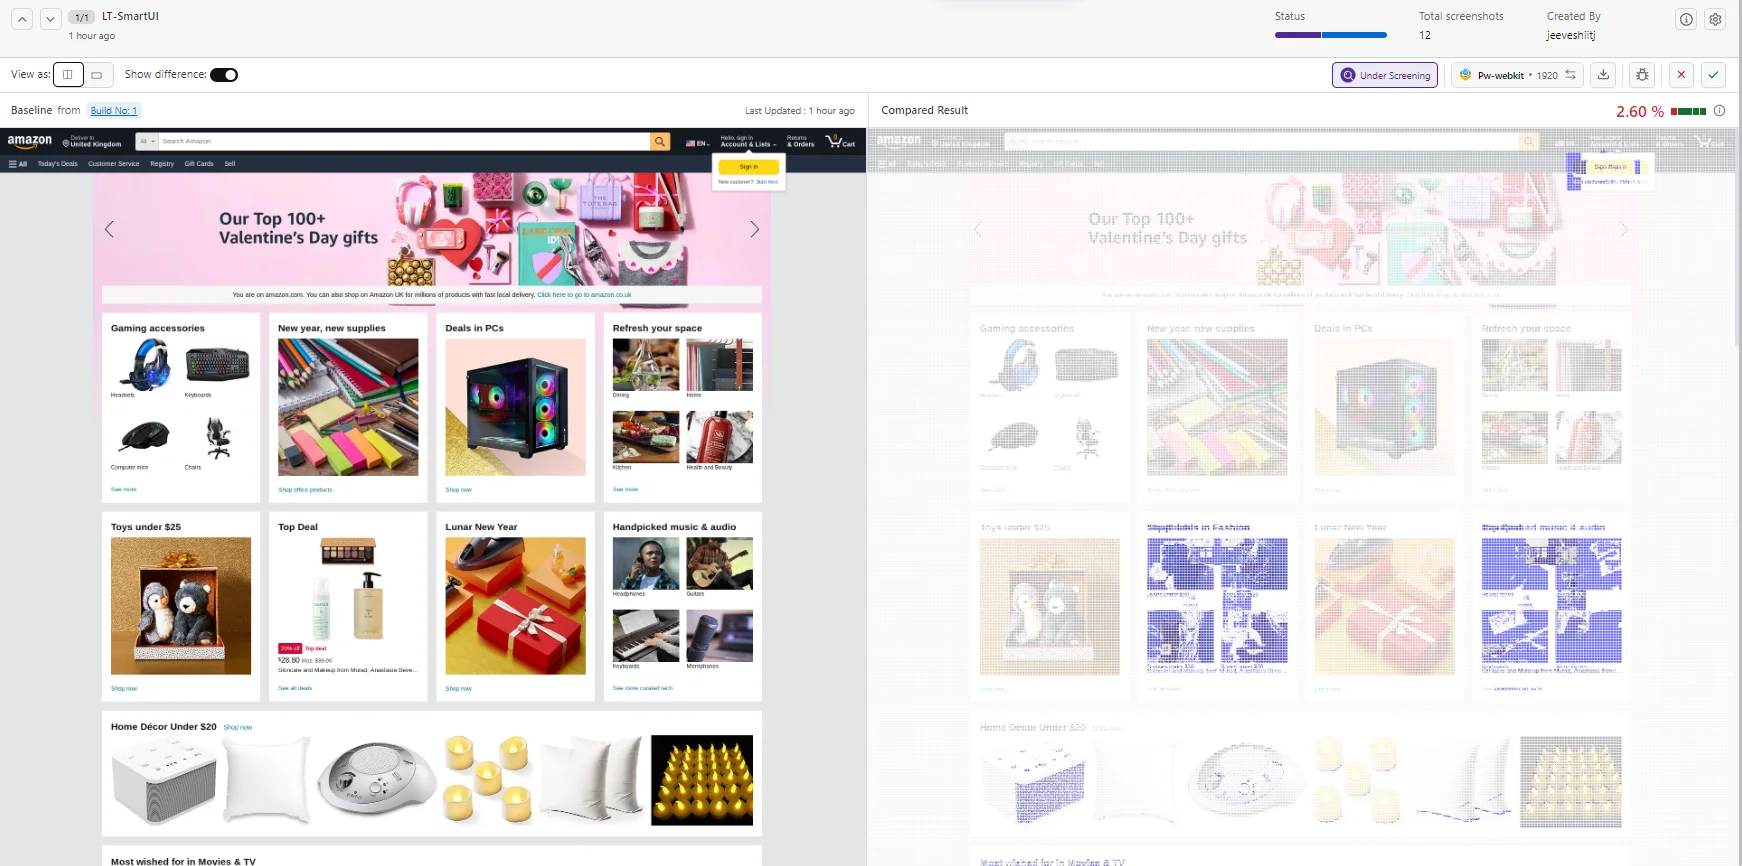
View SmartUI Results
You can see the SmartUI dashboard to view the results. This will help you identify the Mismatches from the existing Baseline build and do the required visual testing.
- Branch Names
Branch Names
Screenshot Naming for SDK Comparisons
Important: When comparing Figma designs with live implementations captured via SDKs, add .png extension to your SDK screenshot names.
Figma-uploaded screenshots automatically have .png appended (e.g., homepage.png), so your SDK screenshots must match:
In your SDK code:
// ❌ Wrong - will not match Figma screenshot
smartuiSnapshot(driver, "homepage");

// ✅ Correct - matches Figma screenshot name
smartuiSnapshot(driver, "homepage.png");
Example for different frameworks:
- Selenium
- Playwright
- Cypress
// Java
SmartUISnapshot.smartuiSnapshot(driver, "homepage.png");
// JavaScript
await smartuiSnapshot(page, "homepage.png");
// JavaScript
cy.smartuiSnapshot("homepage.png");
This ensures that Figma screenshots (e.g., homepage.png) match SDK screenshots (e.g., homepage.png) in the same build.
Setup with Continuous Integration (CI)
If you are using the Continuous Integration (CI) pipeline for your application and want to integrate SmartUI Figma CLI execution then the following are the steps needs to be added to your .yaml file:
steps:
  - name: Running SmartUI Figma CLI Tests
    - run: |
       npm install @lambdatest/smartui-cli
       npx playwright install-deps
       npx smartui upload-figma designs.json
View SmartUI Results
You can see the SmartUI dashboard to view the results. This will help you identify the Mismatches from the existing Baseline build and do the required visual testing.
Troubleshooting
- Verify Figma Token
- Check File Token
- Validate Node IDs
- Check Screenshot Names
- Verify Frame Sizes
- Check Build Names
- Verify Project Token
- Check Project Type
Verify Figma Token
echo $FIGMA_TOKEN
Ensure the token is valid and has not expired. Generate a new token from Figma Settings.
Check File Token
- Verify the
figma_file_tokenin yourdesigns.jsonmatches the file ID from the Figma URL- Ensure you have access to the Figma file
Validate Node IDs
- Confirm
figma_idsin your configuration are valid- Check that the nodes exist in the Figma file Symptoms:
- Figma screenshots don't match SDK screenshots
- Comparison shows mismatches even when designs are identical Solutions:
Check Screenshot Names
- Ensure SDK screenshots include
.pngextension (e.g.,homepage.png)- Verify screenshot names match exactly between Figma and SDK
Verify Frame Sizes
- Ensure frame dimensions are consistent across uploads
- Check that viewport sizes match between Figma frames and SDK captures
Check Build Names
- Ensure both Figma and SDK uploads use the same
--buildName- Verify builds are in the same project Symptoms:
- "Invalid project token" error
- Uploads fail with authentication errors Solutions:
Verify Project Token
echo $PROJECT_TOKEN
Ensure the token is set correctly and matches your SmartUI project.
Check Project Type
- Ensure project is created as CLI type
- Verify project exists in SmartUI dashboard If you encounter issues not covered here:
- Review the Comprehensive Troubleshooting Guide for detailed solutions
- Check Figma-Web CLI Documentation for web comparison workflows
- Visit TestMu AI Support for additional resources
- Contact support at support@testmu.ai or use 24/7 Chat Support
