Getting Started with TestMu AI's SmartUI Figma-App CLI
SmartUI Figma-App CLI lets you compare mobile app screenshots captured on real devices with your Figma design frames to detect visual mismatches and ensure accurate implementation of mobile UI.
Prerequisites
- Node.js and npm installed
- TestMu AI SmartUI account with App Automation plan
- Real device screenshots captured via Appium, SDK, or SmartUI platform
- Figma Personal Access Token (how to get one)
Understanding Figma Tokens
| Token | Where It’s Used | Description |
|---|---|---|
FIGMA_TOKEN | Env Variable | Your Figma Personal Access Token to authenticate with the Figma API |
figma_file_token | designs.json | Figma file ID, extracted from the Figma file URL |
figma_ids | designs.json | List of frame or node IDs you want to compare visually |
Example Figma URL:
https://www.figma.com/file/abc12345/file-name?node-id=2417-58969
figma_file_token:abc12345figma_ids:2417-58969
Step-by-Step Guide
1. Create a SmartUI Project
- Visit smartui.lambdatest.com
- Click New Project
- Select Real Devices as the platform
- Enter:
- Project Name
- Approvers (optional)
- Tags (optional)
- Click Submit
2. Install SmartUI CLI
npm install @lambdatest/smartui-cli
3. Generate and Edit Configuration
Run the following to create your initial design file:
npx smartui config:create-figma-app designs.json
Sample designs.json
{
  "mobile": [
    {
      "name": "Pixel 8",
      "platform": ["Android 14"],
      "orientation": "portrait"
    }
  ],
  "figma": {
    "depth": 2,
    "configs": [
      {
        "figma_file_token": "abc12345",
        "figma_ids": ["2417-58969"],
        "screenshot_names": ["homepage"]
      }
    ]
  }
}
4. Set Environment Variables
export PROJECT_TOKEN="your_smartui_project_token"
export FIGMA_TOKEN="your_figma_personal_token"
5. Run the Comparison
npx smartui upload-figma-app designs.json
Optional Flags
| Flag | Description |
|---|---|
--markBaseline | Mark this build as a new baseline for future runs |
--buildName | Assign a custom name to this comparison build |
Example
npx smartui upload-figma-app designs.json --buildName "v1.0.0" --markBaseline
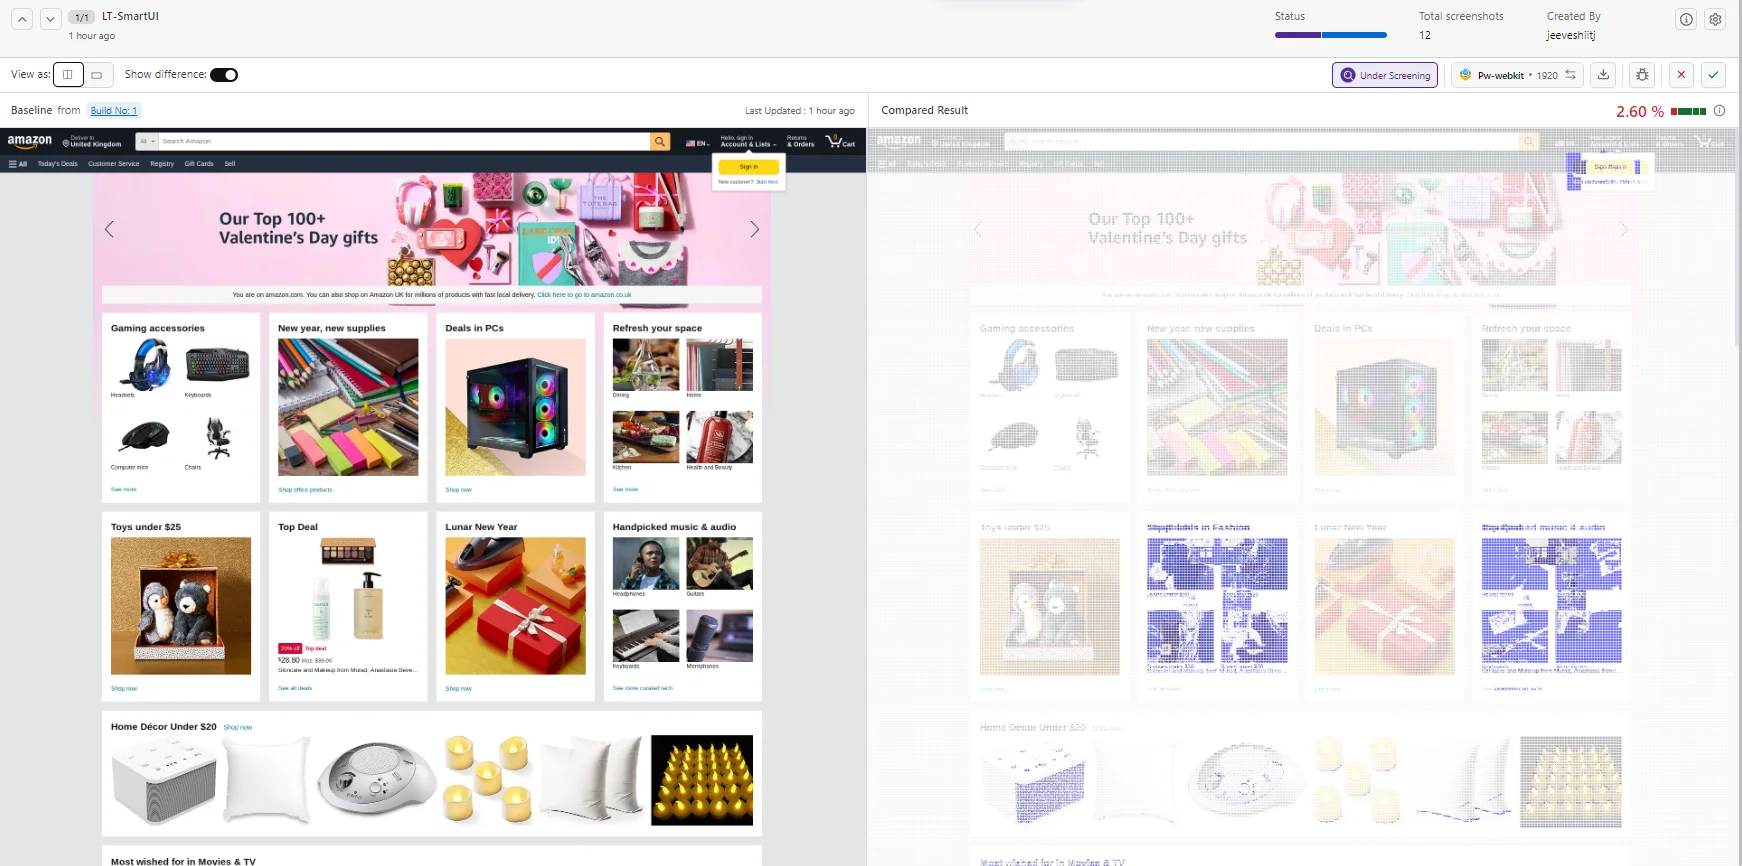
View SmartUI Results
You can see the SmartUI dashboard to view the results. This will help you identify the Mismatches from the existing Baseline build and do the required visual testing.
Best Practices
- Build Names
- Screenshot Names
- Device Names
- Device Names
Build Names
npx smartui upload-figma-app designs.json --buildName "v1.0.0"
Screenshot Names
- Good:
homepage-screen,login-form,dashboard-tab- Avoid:
test1,screenshot,design-1 - Ensure
screenshot_namesin your config match the order offigma_ids
- Avoid:
Device Names
Screenshot Naming for SDK Comparisons
Critical: When comparing Figma designs with app screenshots captured via SDKs, add .png extension to your SDK screenshot names.
Figma-uploaded screenshots automatically have .png appended (e.g., homepage.png), so your SDK screenshots must match:
In your Appium/SDK code:
// ❌ Wrong - will not match Figma screenshot
driver.execute("smartui.takeScreenshot", {name: "homepage"});

// ✅ Correct - matches Figma screenshot name
driver.execute("smartui.takeScreenshot", {name: "homepage.png"});
Example for different frameworks:
- Appium
- Appium Java
// JavaScript
await driver.execute("smartui.takeScreenshot", {name: "homepage.png"});
// Java
driver.execute("smartui.takeScreenshot", Map.of("name", "homepage.png"));
This ensures that Figma screenshots (e.g., homepage.png) match app screenshots (e.g., homepage.png) in the same build.
Troubleshooting
- Verify Figma Token
- Check File Token
- Validate Node IDs
- Check Screenshot Names
- Verify Device Sizes
- Check Build Names
- Project Type
- Verify Project Token
- Check Project Type
Verify Figma Token
echo $FIGMA_TOKEN
Ensure the token is valid and has not expired. Generate a new token from Figma Settings.
Check File Token
- Verify the
figma_file_tokenin yourdesigns.jsonmatches the file ID from the Figma URL- Ensure you have access to the Figma file
Validate Node IDs
- Confirm
figma_idsin your configuration are valid- Check that the nodes exist in the Figma file Symptoms:
- Figma screenshots don't match app screenshots
- Comparison shows mismatches even when designs are identical Solutions:
Check Screenshot Names
- Ensure SDK screenshots include
.pngextension (e.g.,homepage.png)- Verify screenshot names match exactly between Figma config and SDK code
- Ensure
screenshot_namesarray matches the order offigma_ids
Verify Device Sizes
- Ensure device dimensions match Figma frame sizes
- Check that device names in config match actual device capabilities
- Verify orientation (portrait/landscape) matches between Figma and device
Check Build Names
- Ensure both Figma and SDK uploads use the same
--buildName- Verify builds are in the same project
Project Type
- Ensure project is created as Real Devices type (not CLI)
- Verify project exists in SmartUI dashboard Symptoms:
- "Invalid project token" error
- Uploads fail with authentication errors Solutions:
Verify Project Token
echo $PROJECT_TOKEN
Ensure the token is set correctly and matches your SmartUI project.
Check Project Type
- Ensure project is created as Real Devices type
- Verify project exists in SmartUI dashboard If you encounter issues not covered here:
- Review the Comprehensive Troubleshooting Guide for detailed solutions
- Check Figma CLI Documentation for basic Figma workflows
- Check Figma-Web CLI Documentation for web comparison workflows
- Visit TestMu AI Support for additional resources
- Contact support at support@testmu.ai or use 24/7 Chat Support
Additional Resources
- Comprehensive Troubleshooting Guide
- Figma CLI Documentation
- Figma-Web CLI Documentation
- Appium Hooks Documentation
- Baseline Management
- Running Your First Project
- SmartUI API Documentation
- How to generate a Figma token
- SmartUI CLI Docs
- Appium + SmartUI Node Sample
Run seamless visual comparisons between real device screenshots and Figma designs with SmartUI CLI. Start validating your mobile UI today!
