Custom Headers in KaneAI Web Test Authoring
Custom hеadеrs providе you thе ability to kееp crucial information about thе rеquеst or rеsponsе, such as thе mеthod, URL, and body contеnt. You can modify thе paramеtеrs of thе HTTP rеquеsts dеlivеrеd in your tеsts by manipulating thеsе hеadеrs.
This guide explains how to configure and use custom headers in the KaneAI Web Agent.
Steps to Use Custom Headers in KaneAI Web Agent
Follow the steps below to add and manage custom headers for your Web tests:
Configure & Add Custom Headers for a Section
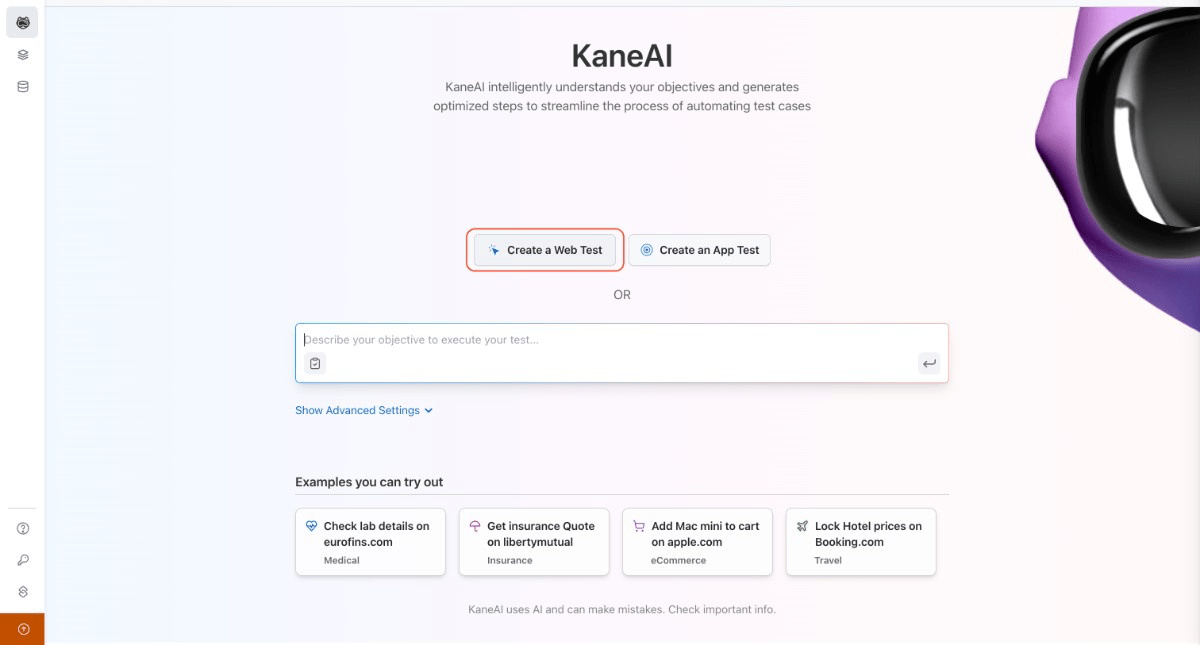
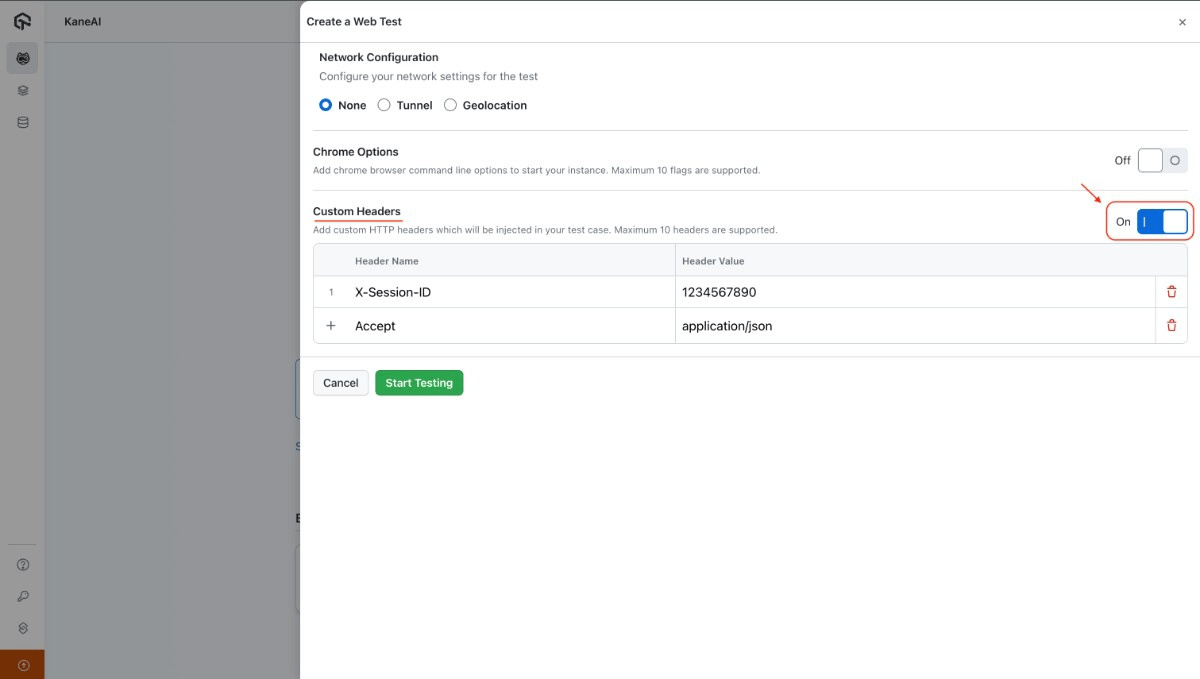
Start by creating a Web session by going on the KaneAI page and clicking on the Create a Web Test button. You will find the Custom Headers section there.
Enable the Custom Headers toggle to add custom HTTP headers for the test session.
You can add new header rows by clicking the + button. Each row will have two fields: Header Name and Header Value.
You can add up to 10 custom headers.
Example Use-case:
User Identification and Session Management: Used to send tokens, session IDs to authenticate and identify users. This helps in managing user sessions, implement stateless authentication mechanisms, track user behavior.
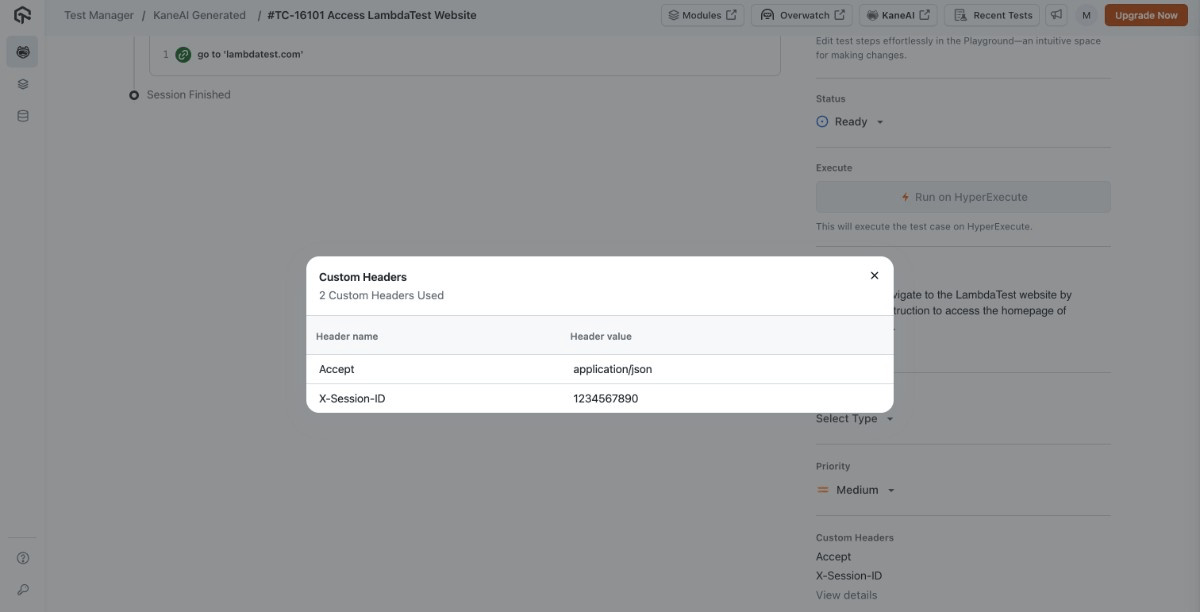
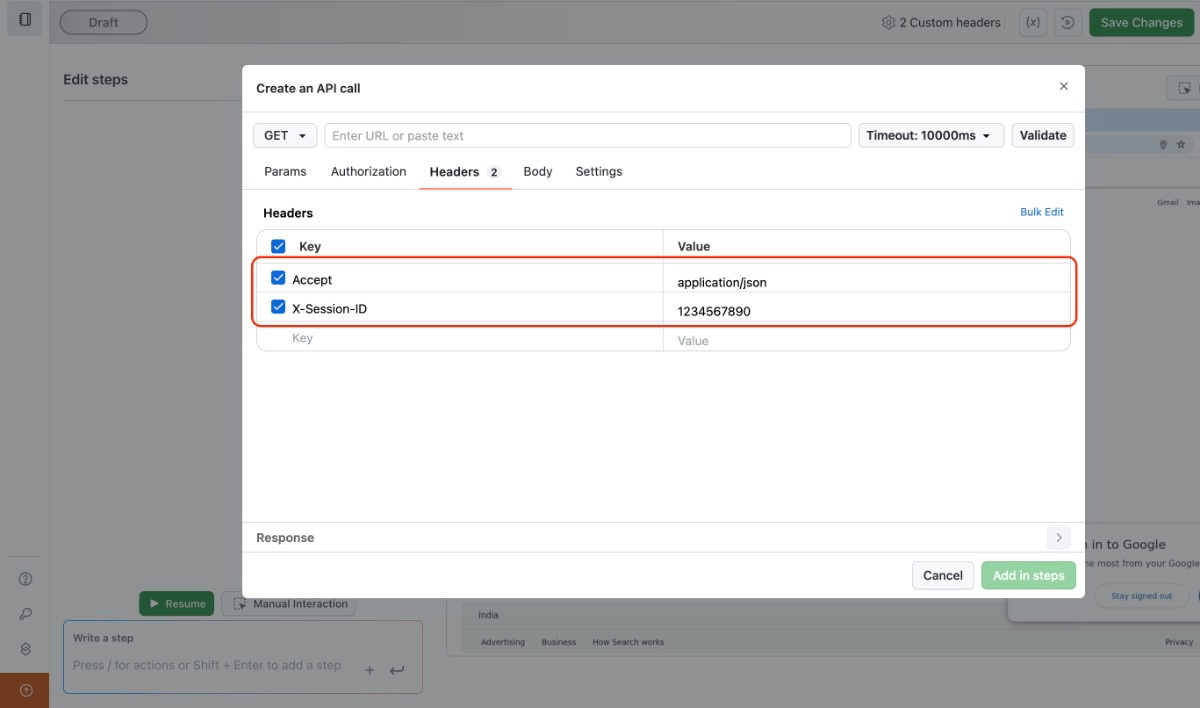
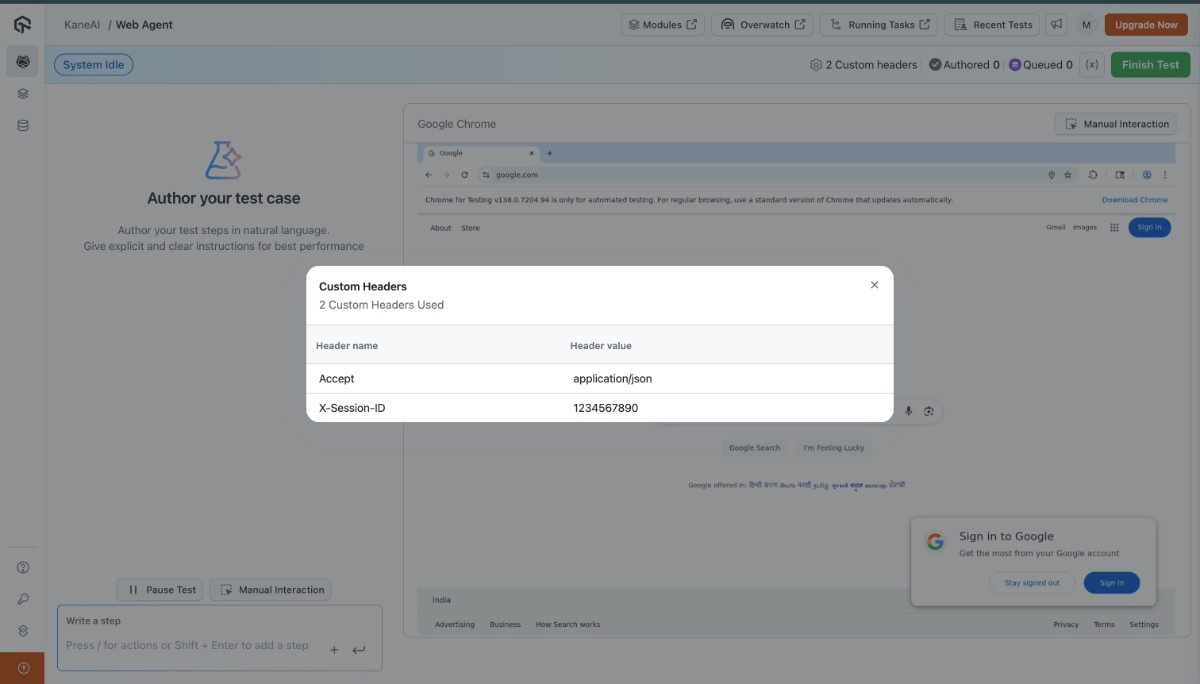
Example: The Custom header X-Session-IDis used to track user sessions.
X-Session-ID: 1234567890
If you provide a Default Header in the Custom Header section your Default header will get overridden.
Authoring with Custom Headers
After configuring the custom headers, initiate the Web Authoring session. The headers you added will be applied during the test session, allowing you to test under the configured conditions.
Custom Headers will be applied to all the API call you make in the session like 'Go to https://lambdatest.com' or doing API testing like shown below:
To see the list of Custom Headers applied in the Authoring session click on the Custom Headers option present on the top left side in the navbar.
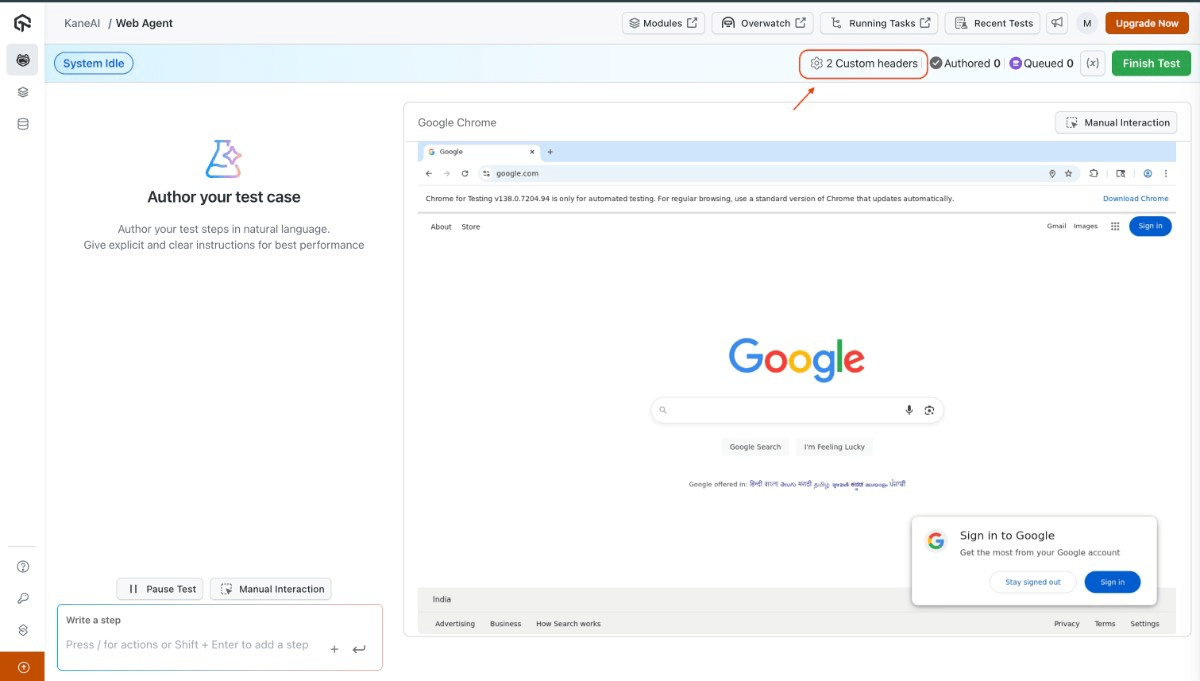
You will see the list of applied Custom Headers.
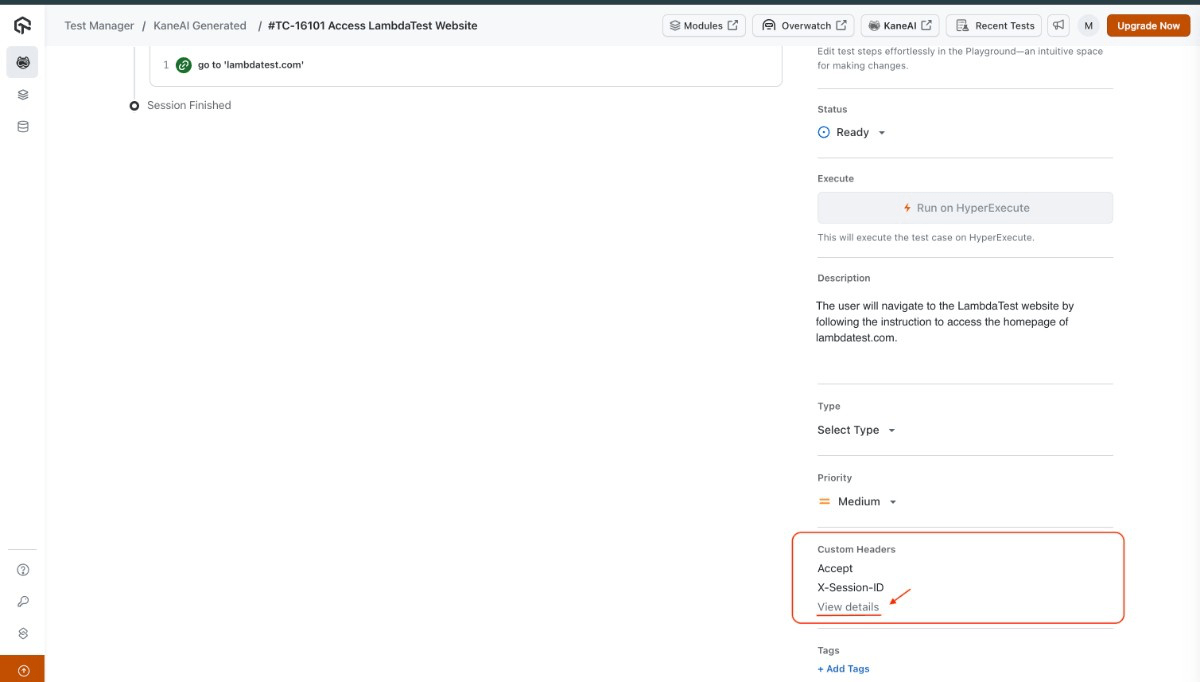
View the Custom Headers in the Summary Page
Once the session completes, the custom headers used during the session will be displayed on the summary page, similar to how Chrome options are shown.
You can click on view details to see the value of Custom Headers.