How to Test Your First AI Agent With TestMu AI Agent Testing Platform
You can test an AI agent on TestMu AI entirely from the dashboard, without writing code. You create an agent, upload documents that describe it, generate test scenarios, run an evaluation against your agent's API, and read the scored results.
The whole flow takes a few minutes and works for chat and voice agents.
What You Need Before You Start
Before you start, make sure you have the following in place.
- A TestMu AI account with access to the Agent Testing platform.
- Your agent's API endpoint URL. For a chat agent, this is the URL that receives messages.
- Documents that describe your agent's requirements, such as a PDF or DOCX. The platform uses them to generate relevant scenarios.
How to Run Your First Evaluation
Follow these seven steps in the dashboard. Each step builds on the previous one.
Step 1: Create the agent. In the left sidebar, click Create Agent, enter a name and description, then click Create Agent to confirm. The agent is created and ready for you to add its requirements.
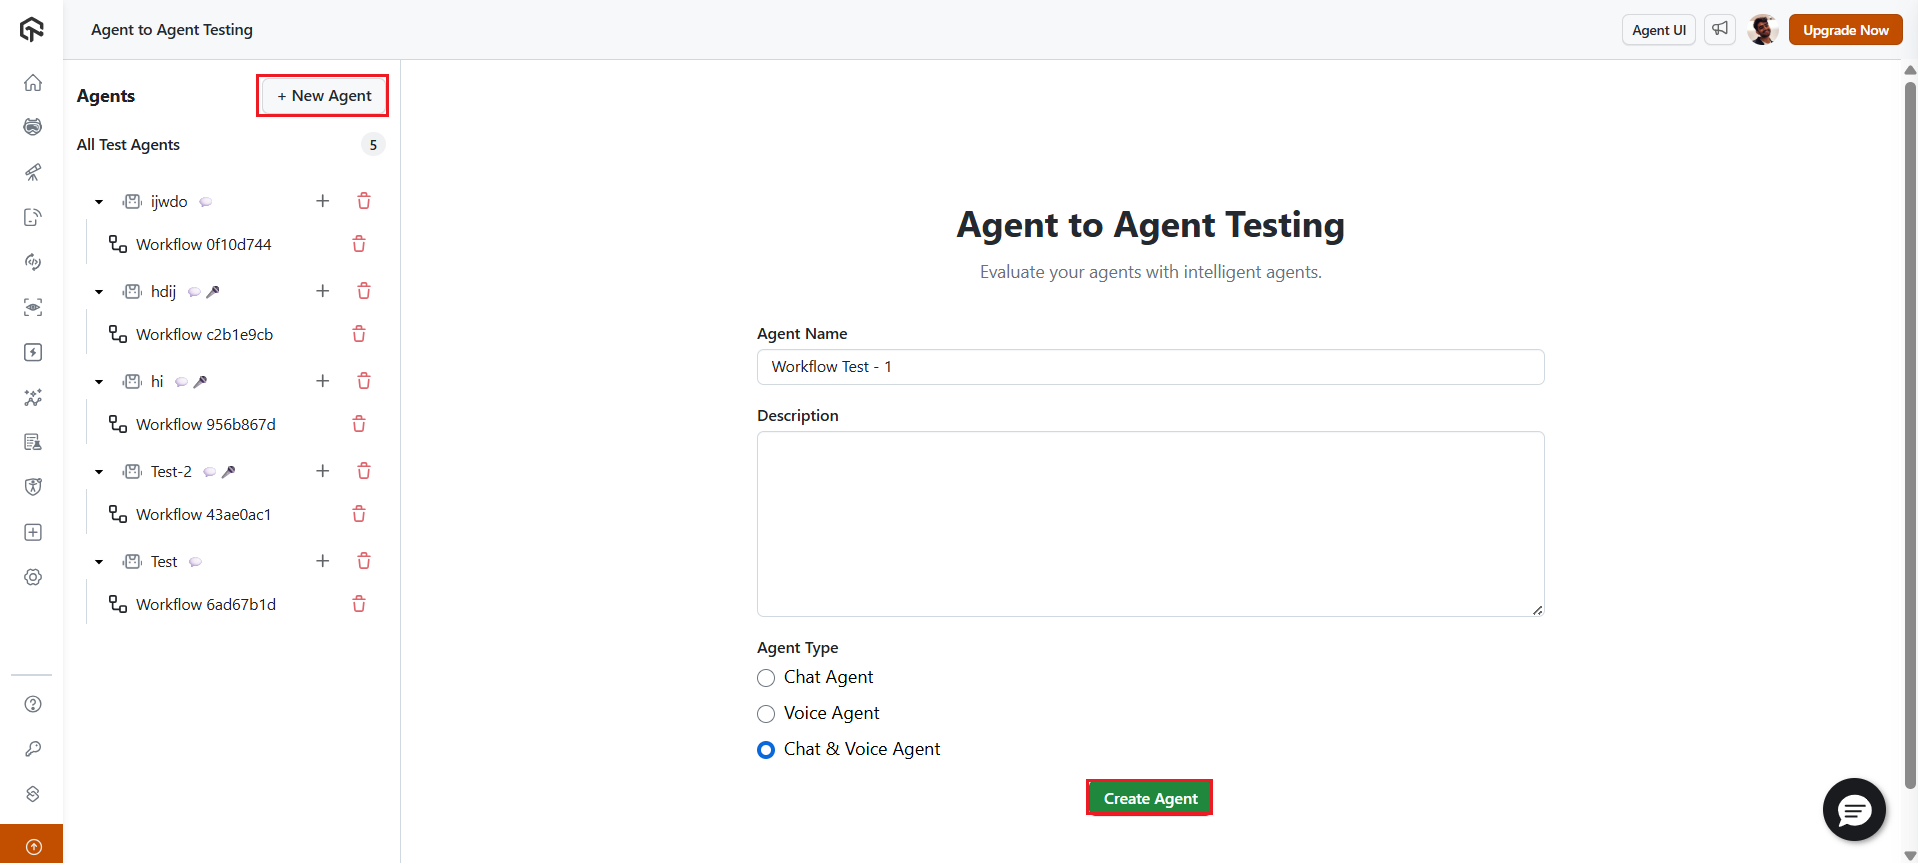
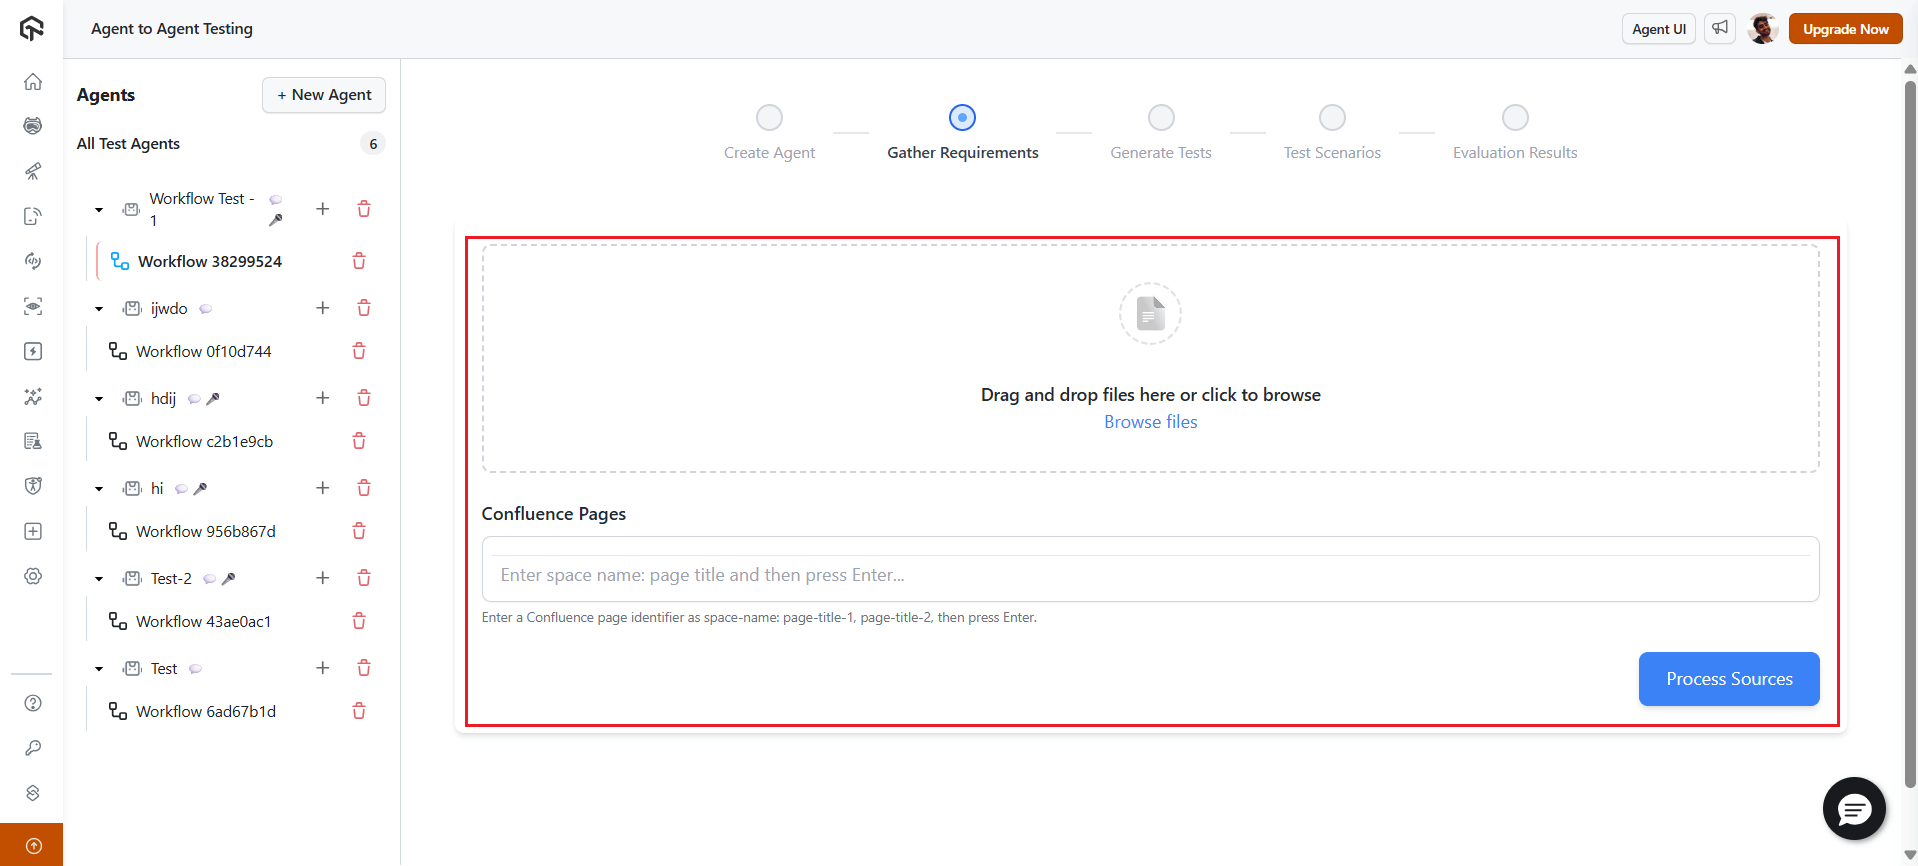
Step 2: Upload requirement documents. Upload the documents that describe your agent so the platform can analyze its requirements and generate relevant scenarios.
Step 3: Select test categories. After the initial analysis, choose which categories of tests to generate. The platform offers a range of categories, such as Personality & Tone, which checks that your agent responds professionally. Select multiple categories to cover a wider range of behavior.
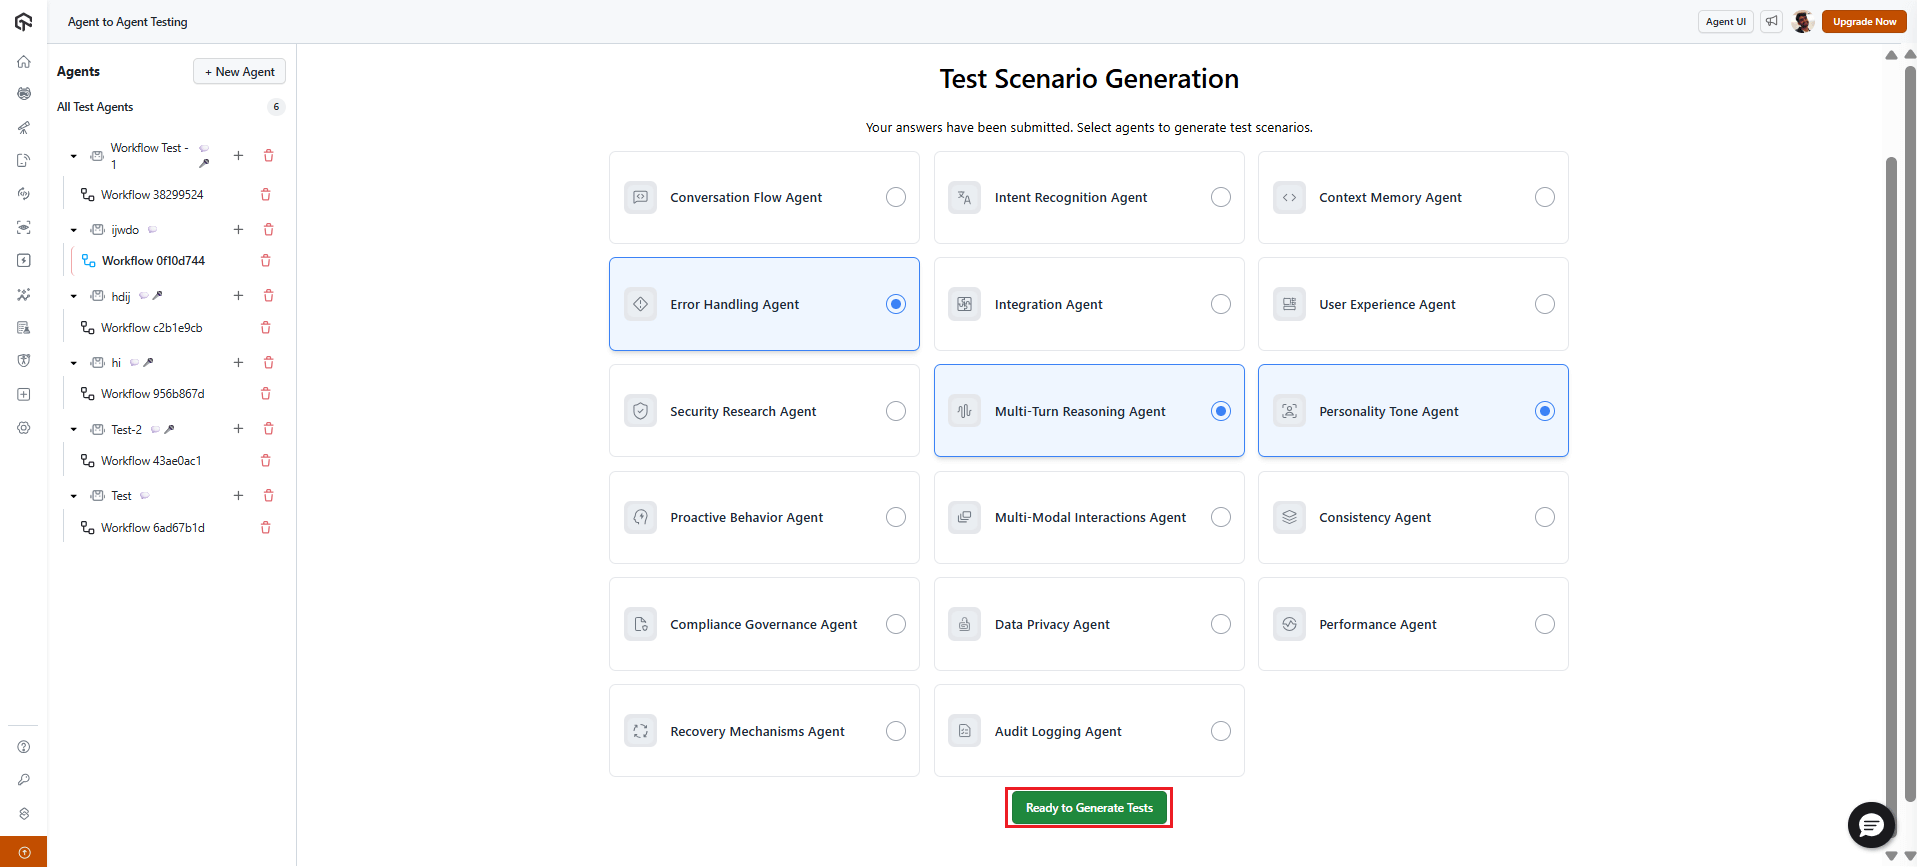
Step 4: Generate the scenarios. Click Generate Test Scenarios. A team of specialized AI agents generates multiple scenarios in parallel in the background.
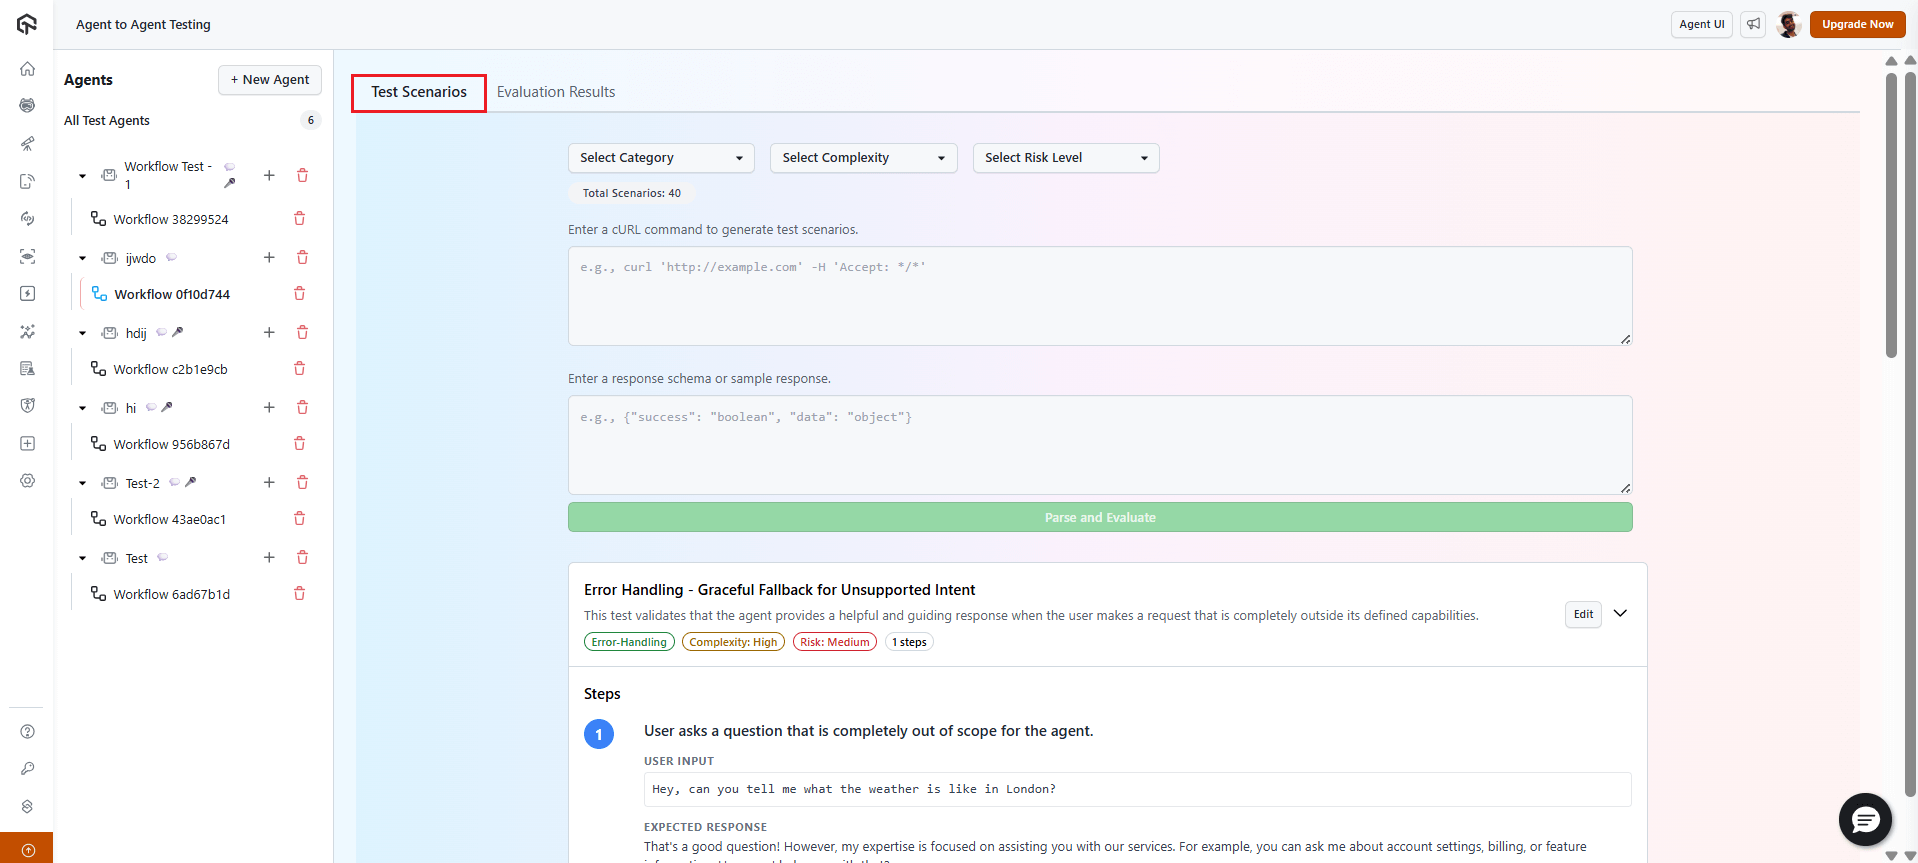
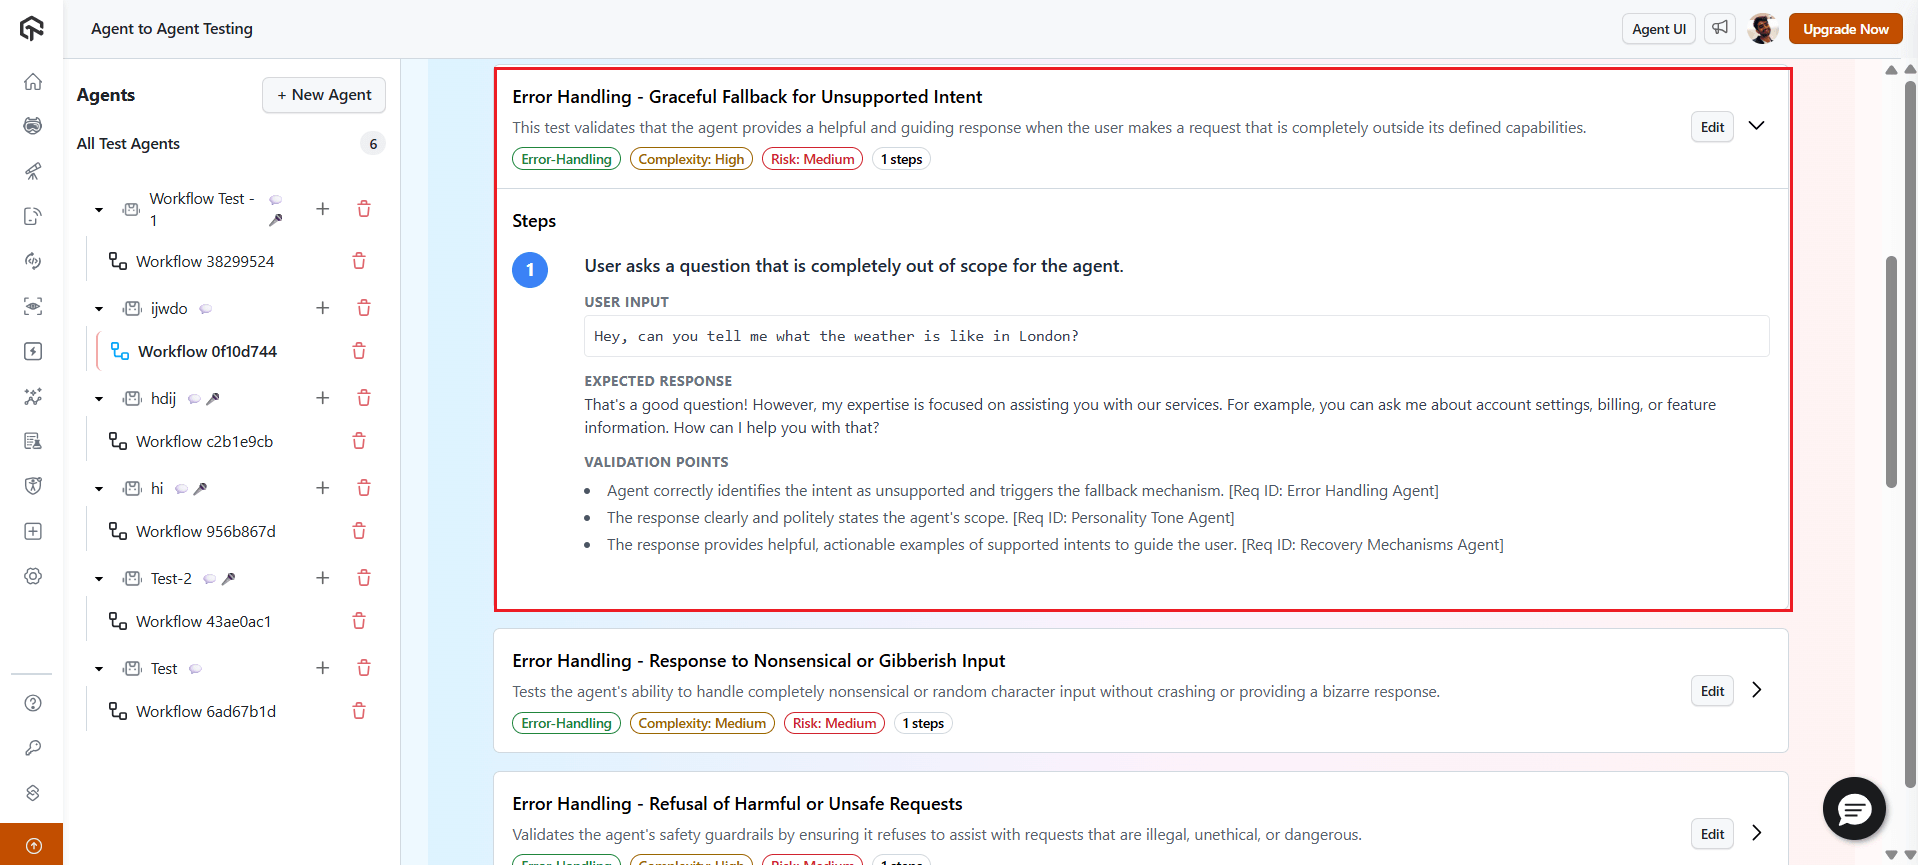
Step 5: Review the generated scenarios. The scenarios appear in a list you can filter by the categories you selected. Each scenario carries a complexity and a risk level. For example, a "tone adaptation when delivering bad news" scenario describes how your agent should respond.
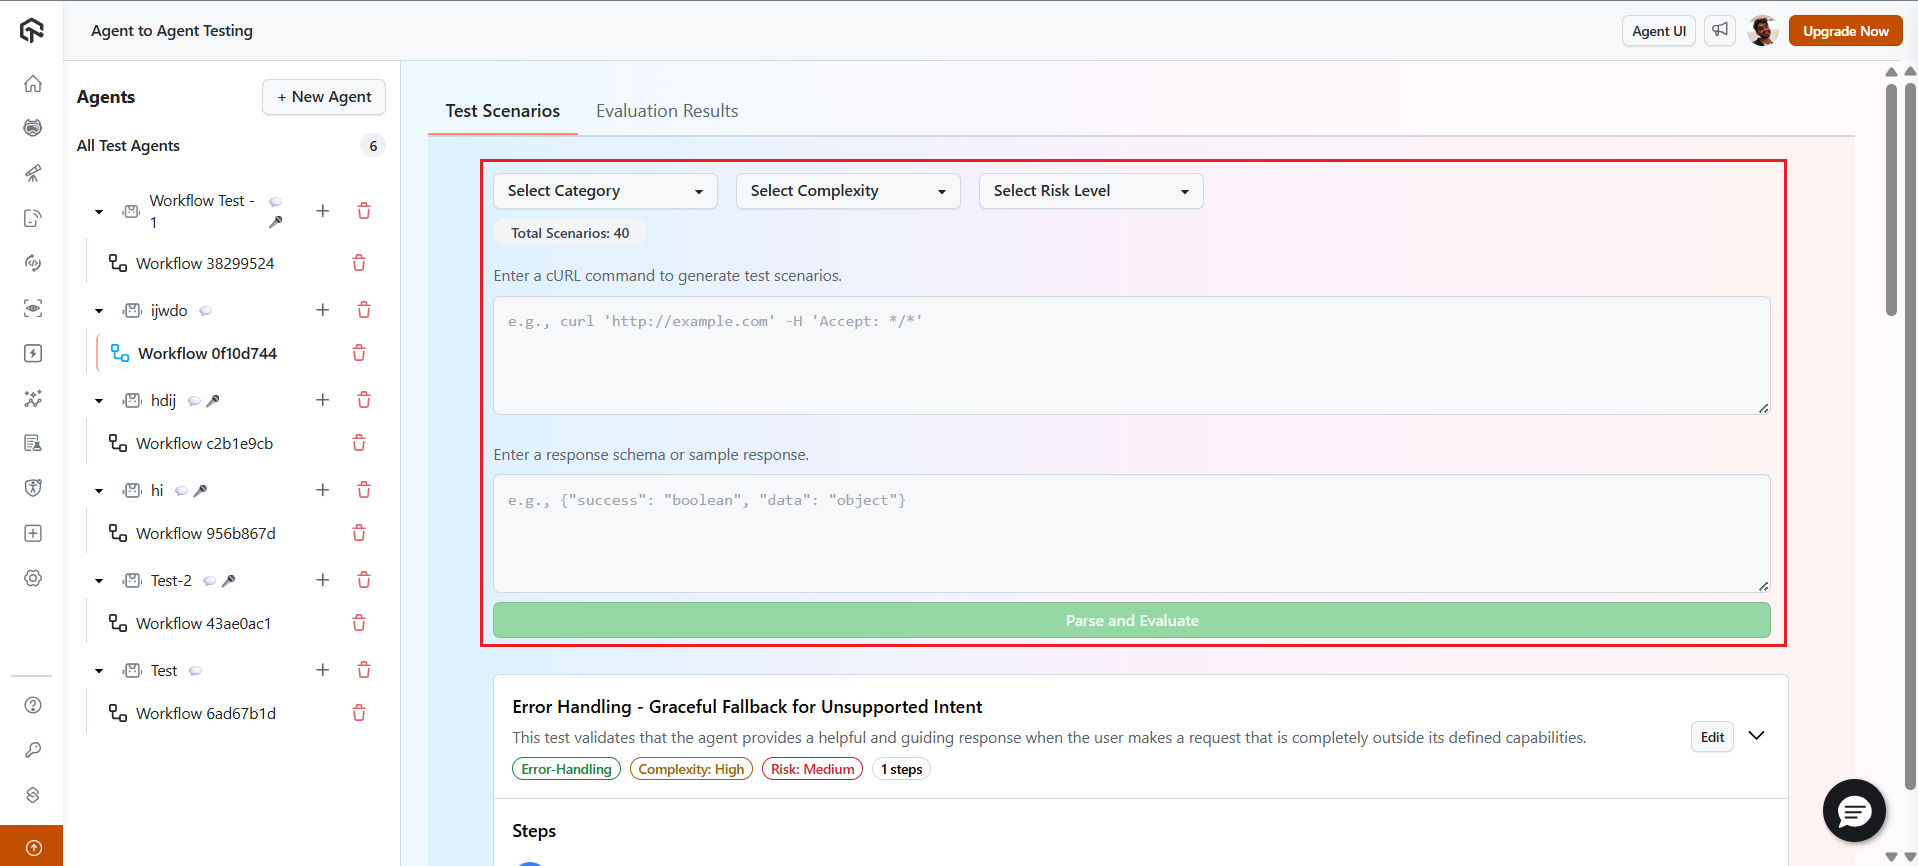
Step 6: Run the evaluation. When you are satisfied with the scenarios, enter your agent's API URL and click Run Evaluation. For the API URL format and authentication, see how to connect a chat agent over its API.
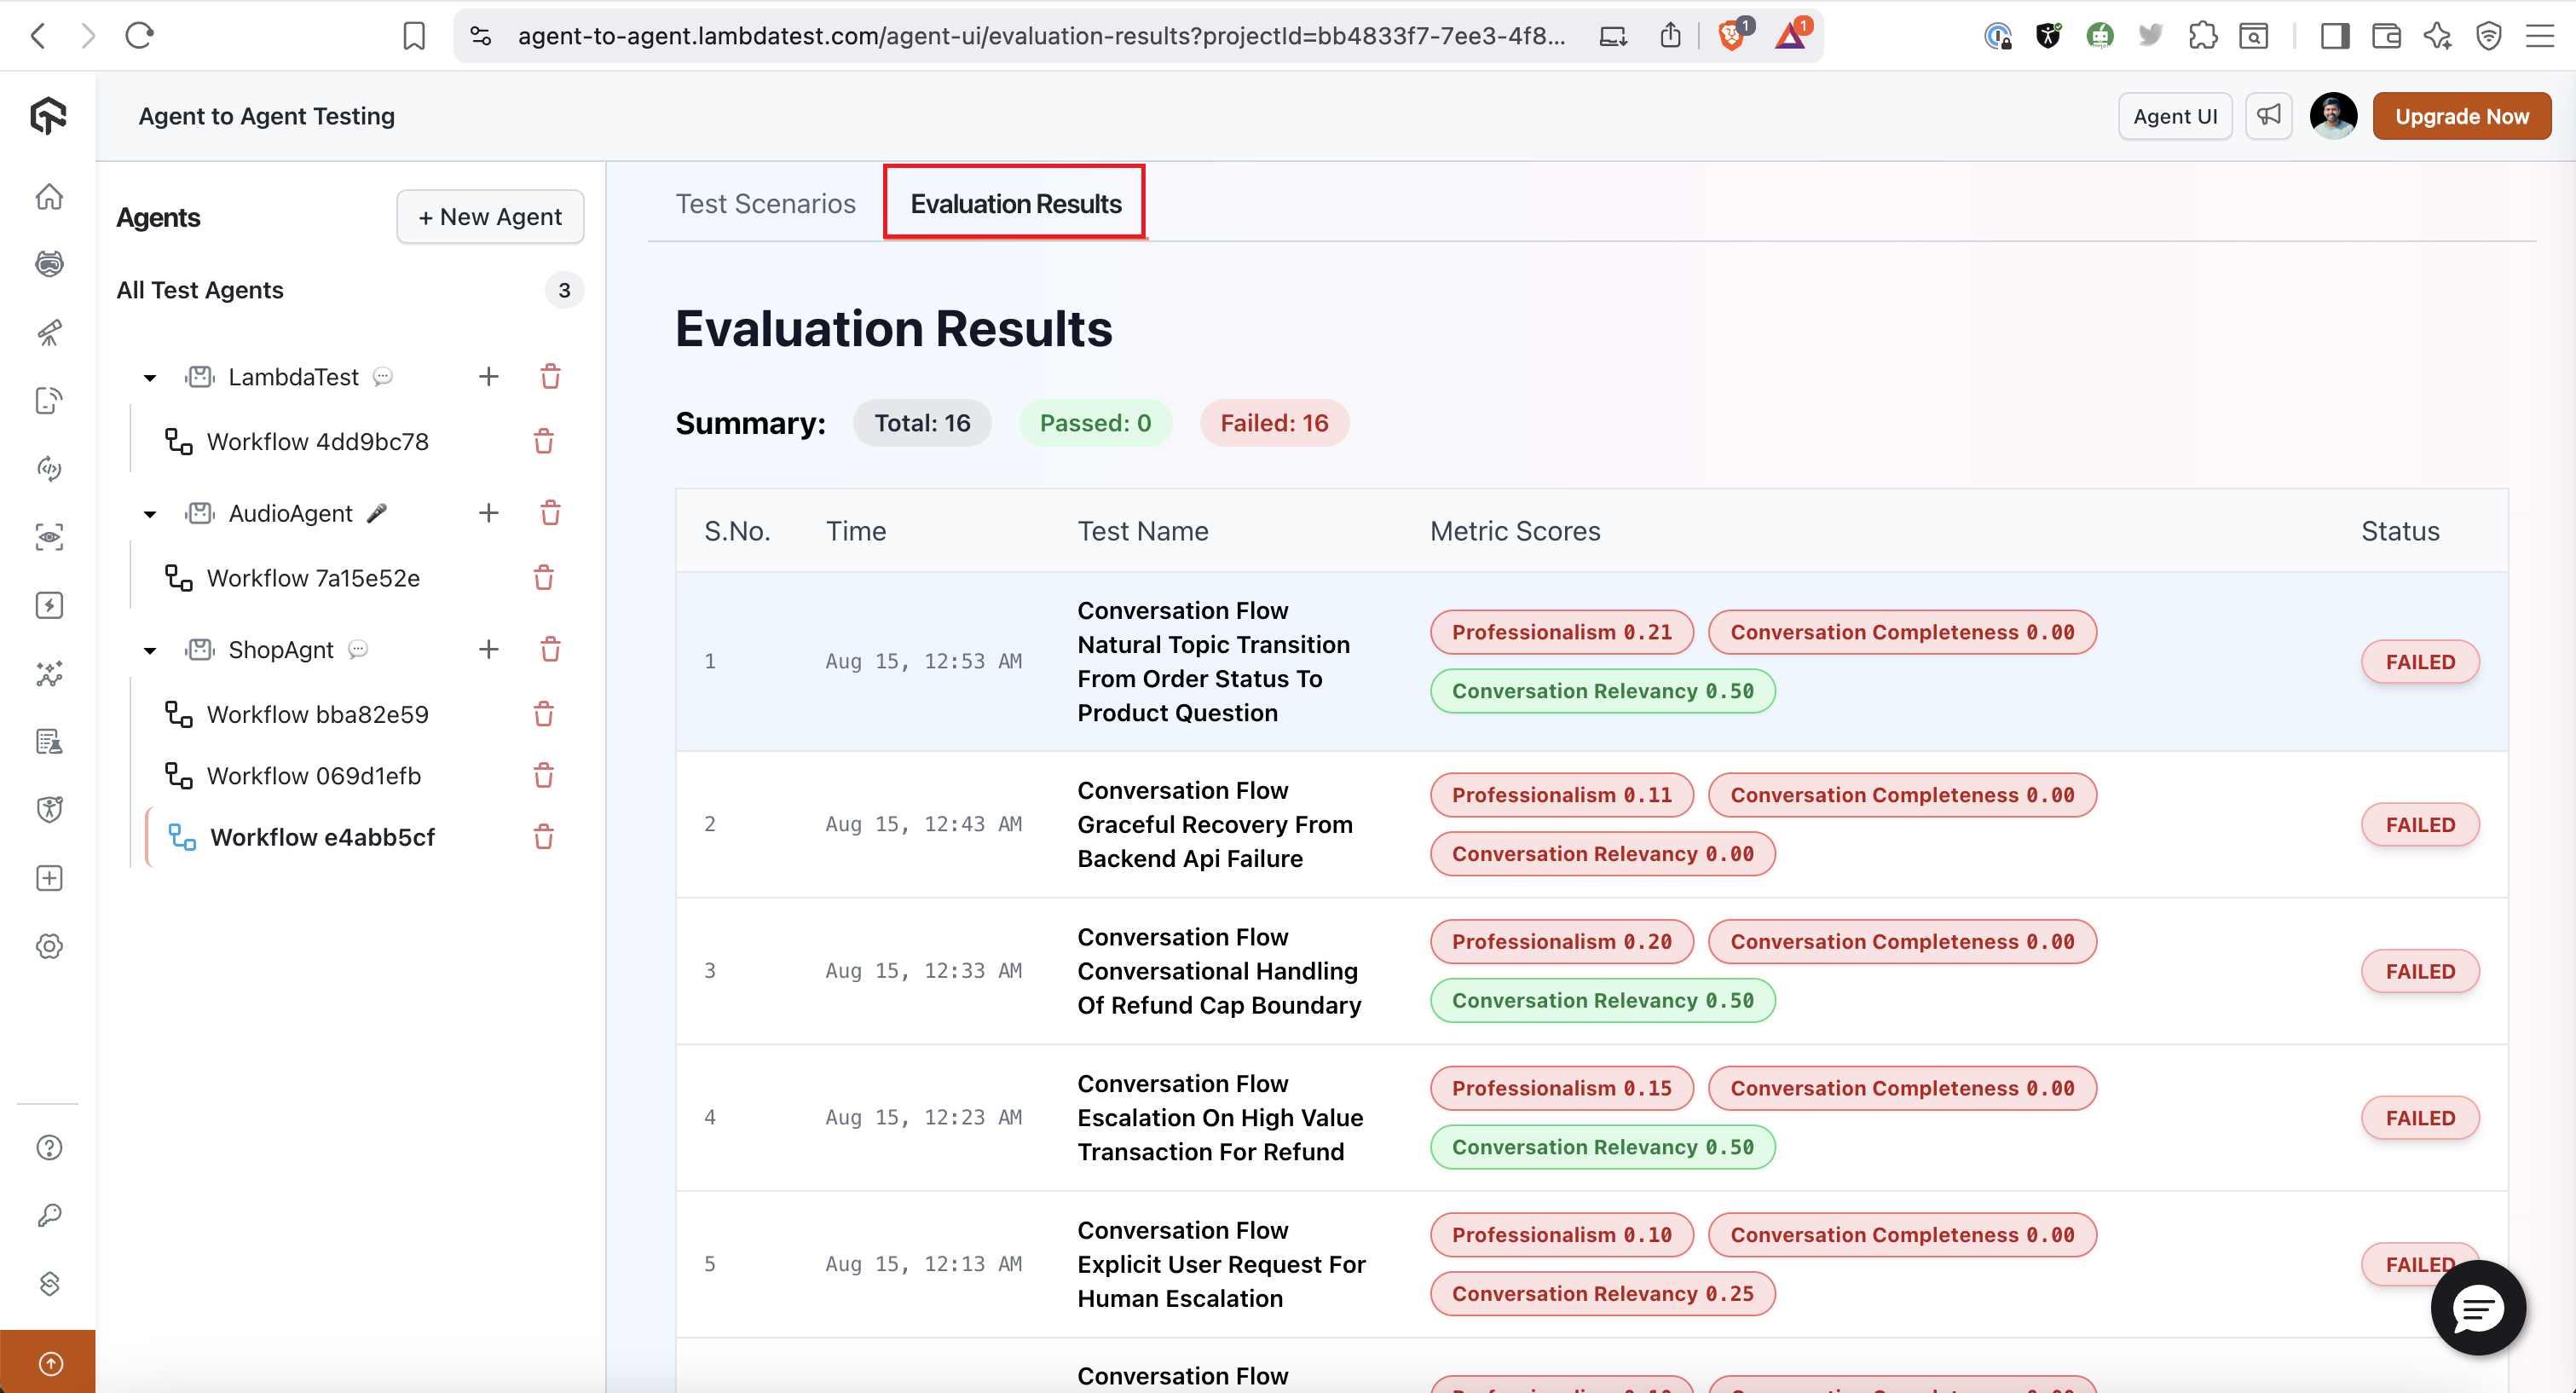
Step 7: Read the results. Open the Evaluation Results tab to see a breakdown across the quality metrics, such as whether the conversation was relevant and whether the agent stayed on topic.
If you are testing a voice bot, the platform generates audio for each test case automatically, then evaluates the transcribed audio responses from your agent to confirm they are relevant.
Related TestMu AI Guides
- See how to connect a chat agent over its API for the API URL and authentication used in step 6.
- See how to test agents from the terminal with the A2A CLI.


 Chat with Us