Author Your First Mobile App Test
In this guide, we'll walk you through how you can author your mobile app tests using KaneAI
Steps to Author Your Mobile App Test
Step 1: From the KaneAI dashboard, click on Author App Test.

Step 2: A modal would appear from the side. Upload the app you want to test.
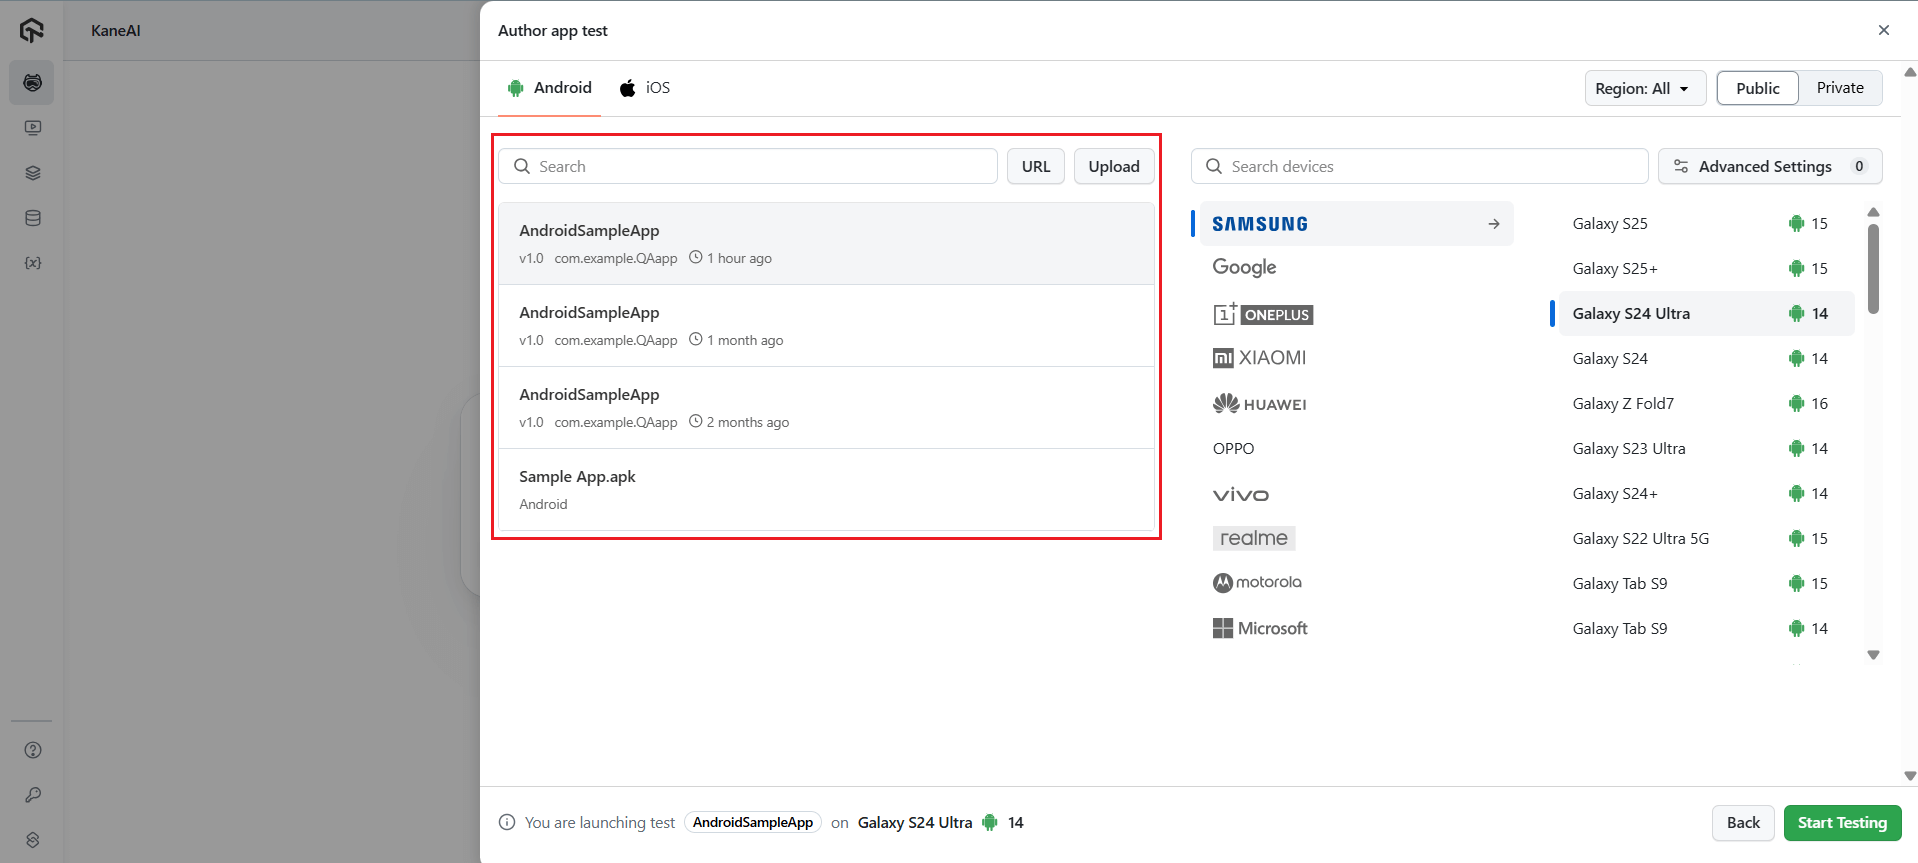
Step 3: Choose your preferred device and the OS version.
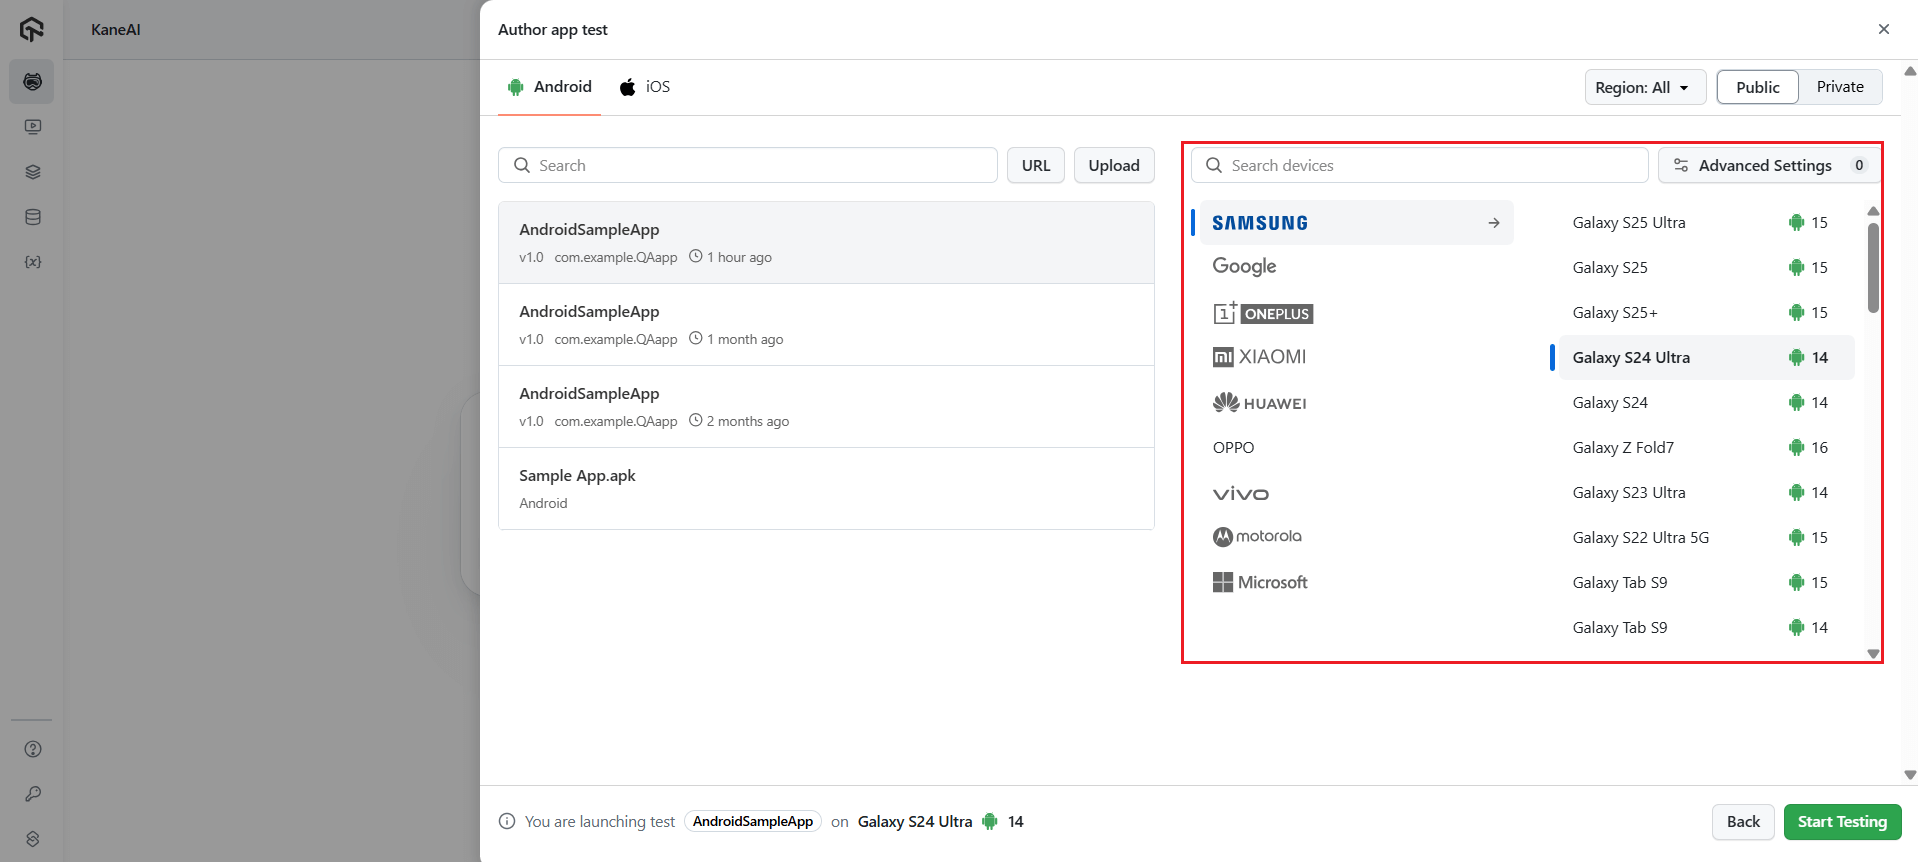
Step 4: You can also select advanced configurations from the Advanced Settings option.
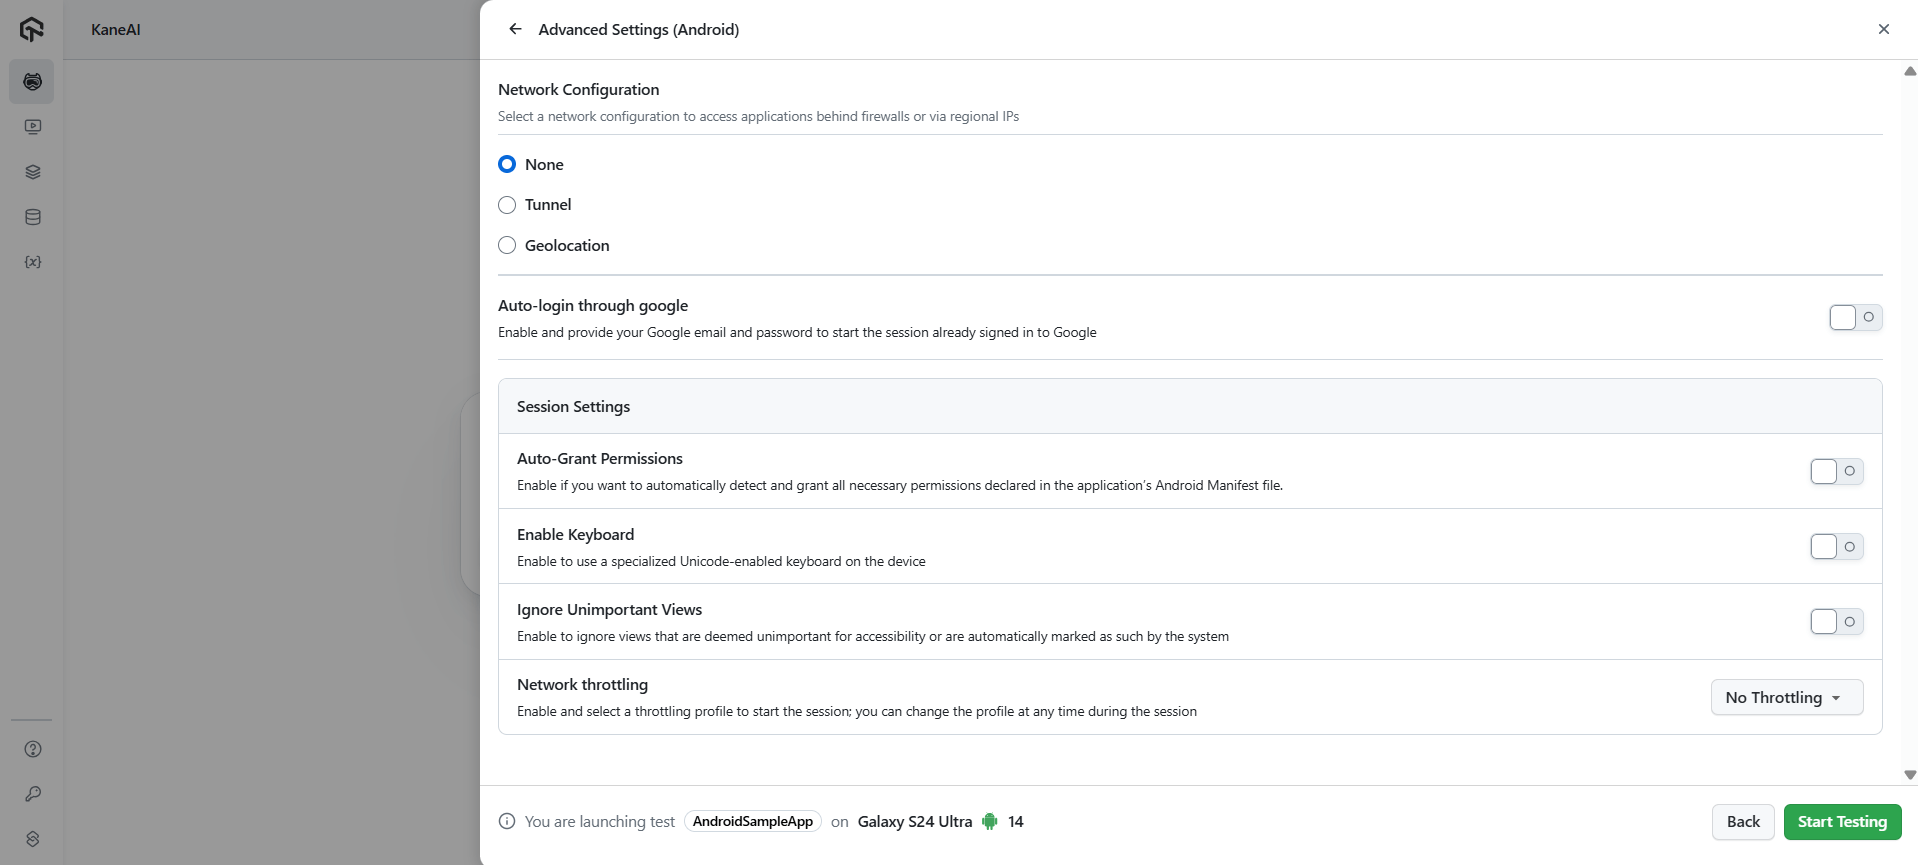
Step 5: Once done, click on Start Testing to get started.

Step 6: Now tell KaneAI what you want to author using natural language without the need for coding or scripting knowledge required. KaneAI translates your instructions into executable test steps automatically.

Step 7: You can also perform a step directly on the device instead of describing it. While your session is in the Authoring Steps state, KaneAI captures the action and creates an automation step for it — there is nothing to switch on. See Manual Interaction.

As you add each instruction, KaneAI queues them in real-time without waiting for completion. This allows you to build comprehensive test flows quickly and efficiently. Once you've outlined all your test steps, click Save in the top-right header to finalize your automated test case.
Your test is saved as Ready when every step has run and passed, which is also when automation code is generated. If some steps were never run, or a step errored, it saves as Unverified or Faulty instead and you can finish it later. See Save states.
Step 8: Now, select your Project and the folder where you want to save your test cases. The Test Name and Description will be generated automatically, but you can also edit them. Select your test's Type and Status, as well as the necessary tags that will allow you to search for it later.
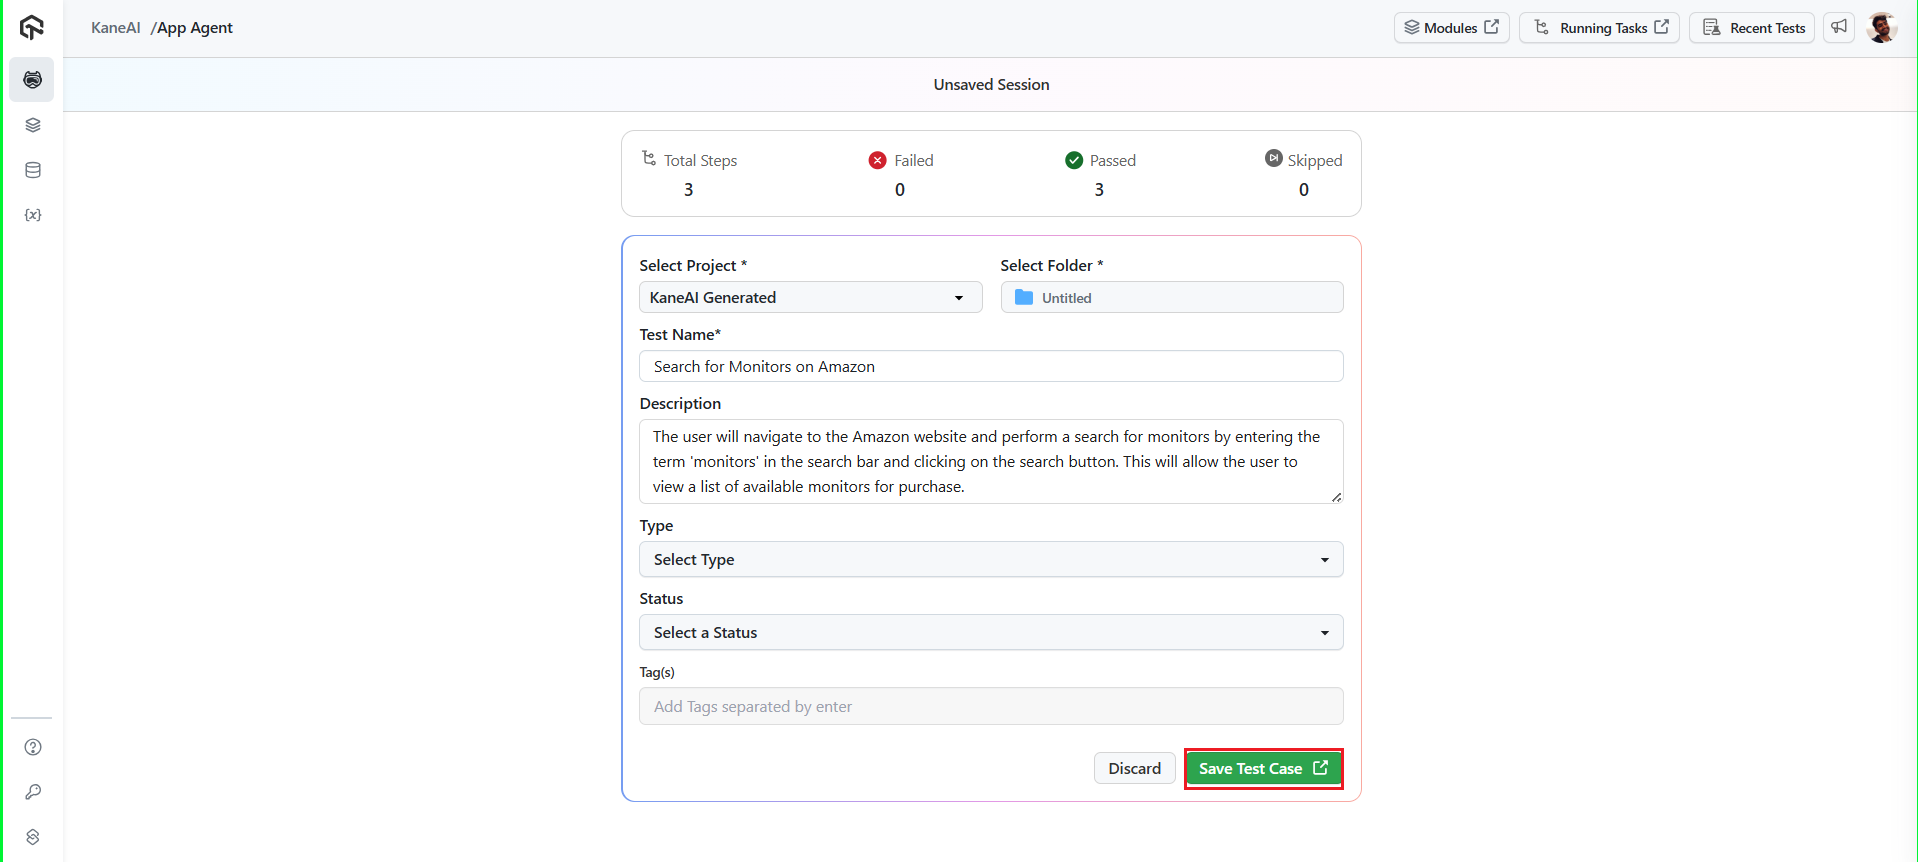
Step 9: To execute your test, click on the Execute test case button and you will be redirected to the HyperExecute dashboard where your tests will be executed.



 Chat with Us