KaneAI - Using Parameters
This guide provides a detailed walkthrough for utilizing parameters in KaneAI to streamline test case management and execute tests with various data inputs. By leveraging data parameters, testers and developers can manage configurations effortlessly. Follow the step-by-step instructions below for successful implementation.
Key Features of Parameters in KaneAI
- Dynamic Data Input : Use parameters to define and input test data dynamically during test execution.
- Multiple Configurations : Simplify the execution of tests with different data sets.
- Seamless Test Management : Centralized management of parameters improves efficiency and reduces redundancy.
Define Parameters in a Web or App Agent Test
- Navigate to the specific web agent test URL and configure the test to accept input parameters.
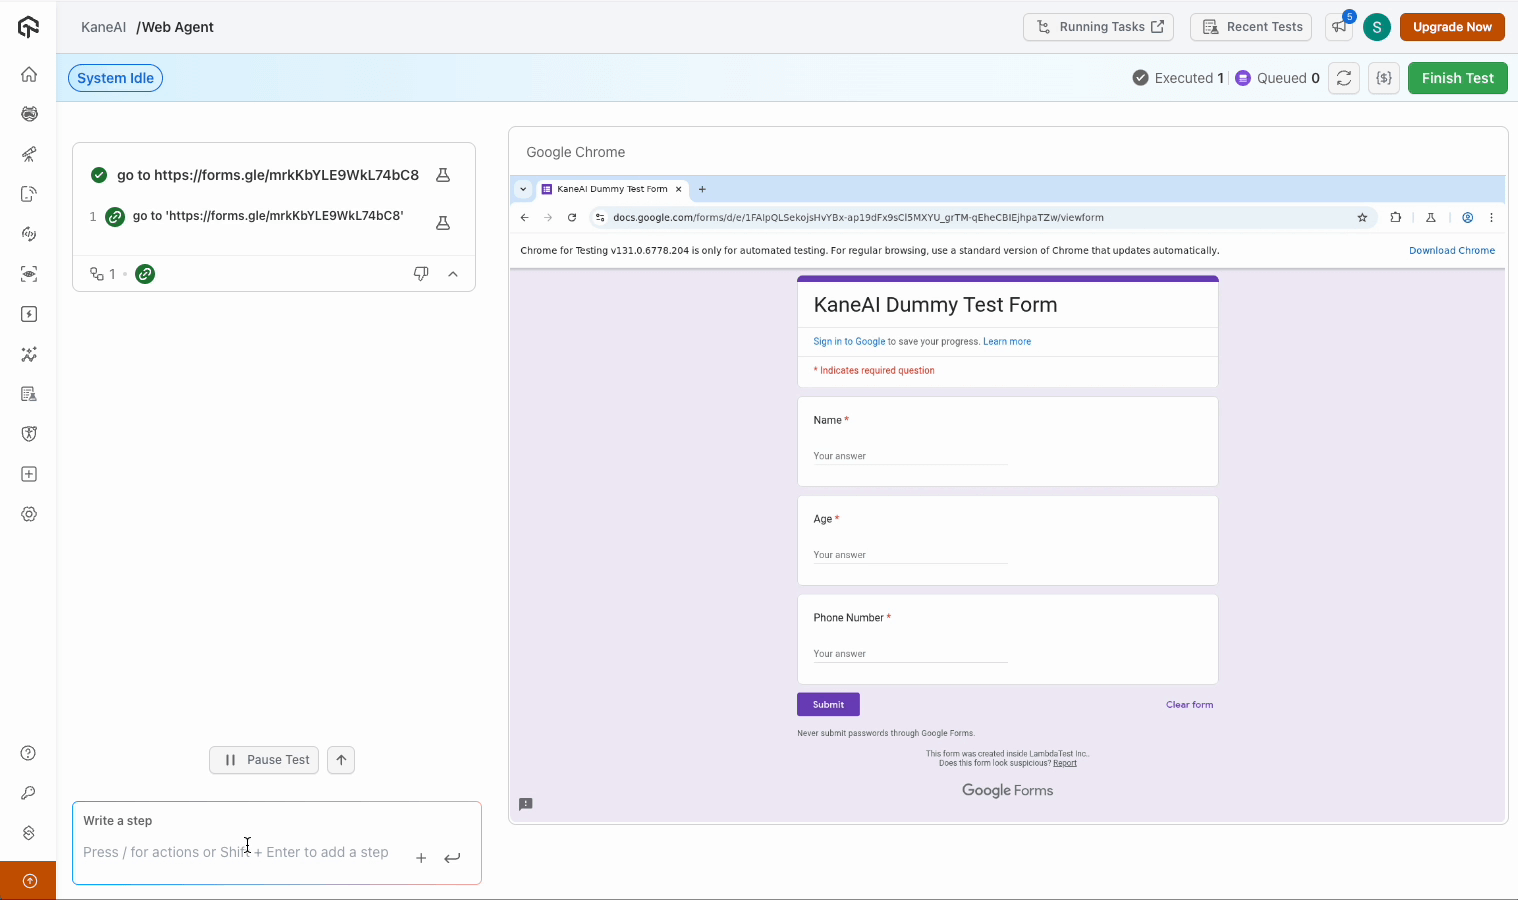
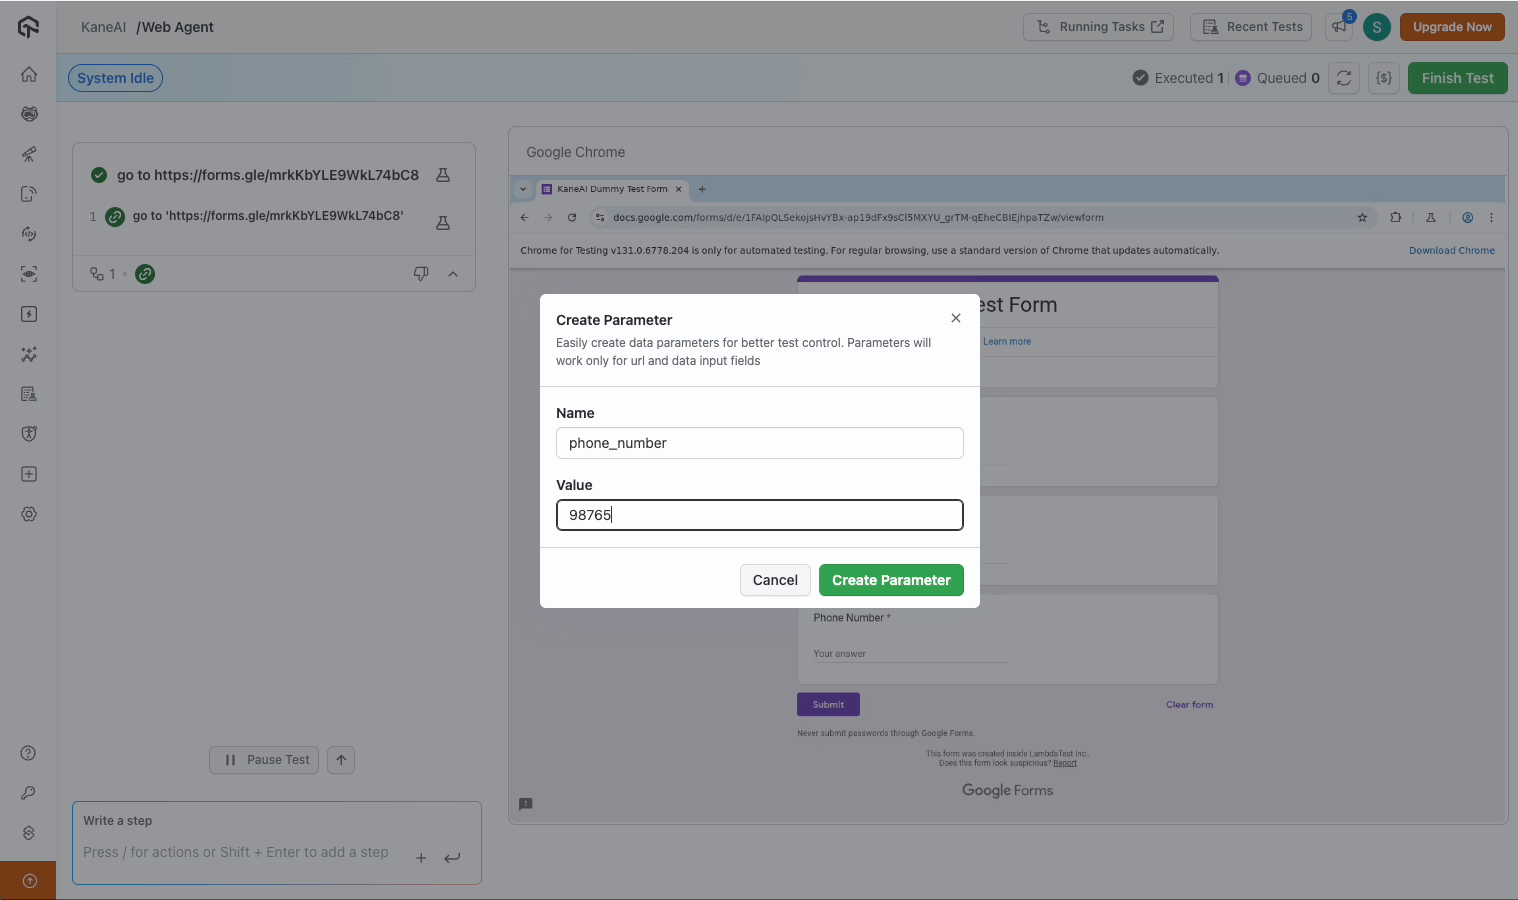
Create a parameter in a test
- Confirm that parameters are already defined in the system. To add a new parameter, use one of the following methods to define the parameter:
- Type a
slash (/)and select the Parameter option. - Click the Plus icon and choose the Parameter icon.
- Type a
Click Create Parameter to save.
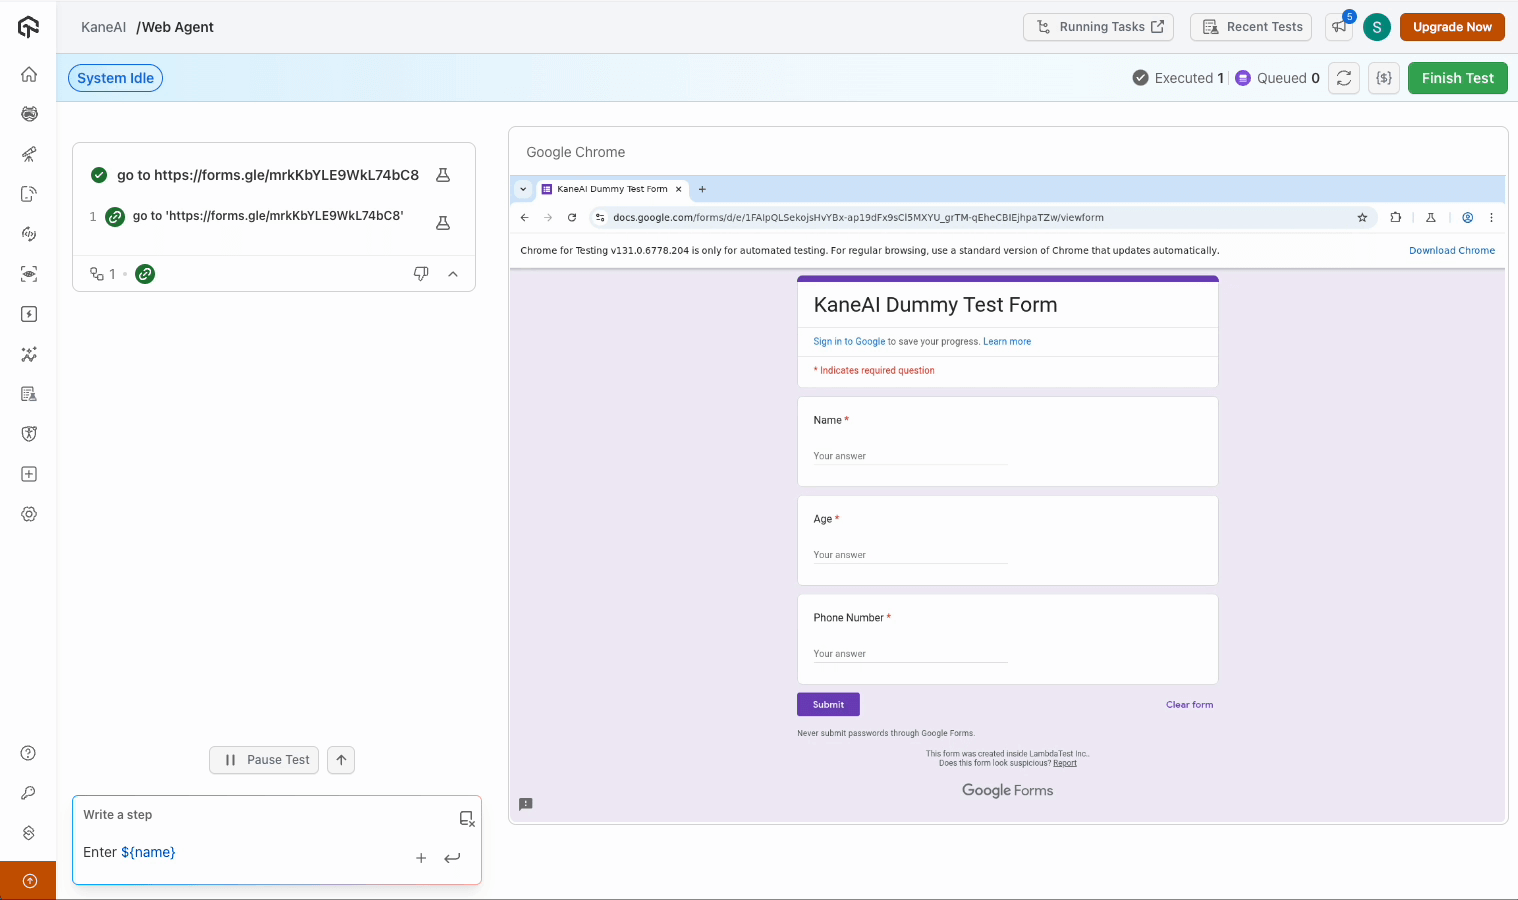
Reference the parameter in test step
Reference any parameter using dollar-curly braces syntax (e.g.,${phone_number}). Enter the name in its designated input field.
From a Manual Interaction step
You can also convert a hard-coded value in a Manual Interaction step into a Parameter directly — without deleting or re-recording the step. This flow is available on both Desktop and Mobile App Manual Interaction sessions.
- Open the recorded Manual Interaction step.
- Select the portion of the instruction text you want to parameterize (for example, highlight
test.com).
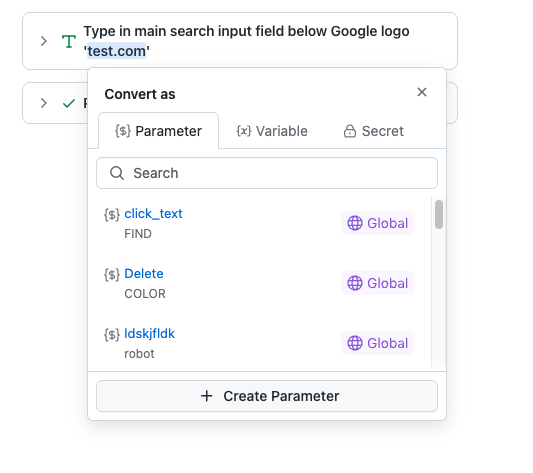
- In the Convert as popover that appears, switch to the
{$}Parameter tab. - Either pick an existing parameter from the searchable list, or click
+Create Parameter to define a new one inline. - The selected text in the step is replaced with the parameter reference (for example,
{{search_query}}). The parameterized step is now ready for data-driven execution.
This flow is only supported for Click and Type commands. For the full Convert as popover behavior across Parameters, Variables, and Secrets, see Creating variables from a Manual Interaction step.
Test Summary Page
Upon completing the test, review the Test Summary Page, where all utilized parameters are clearly displayed, and the corresponding generated code is readily available for seamless integration into future test scenarios.

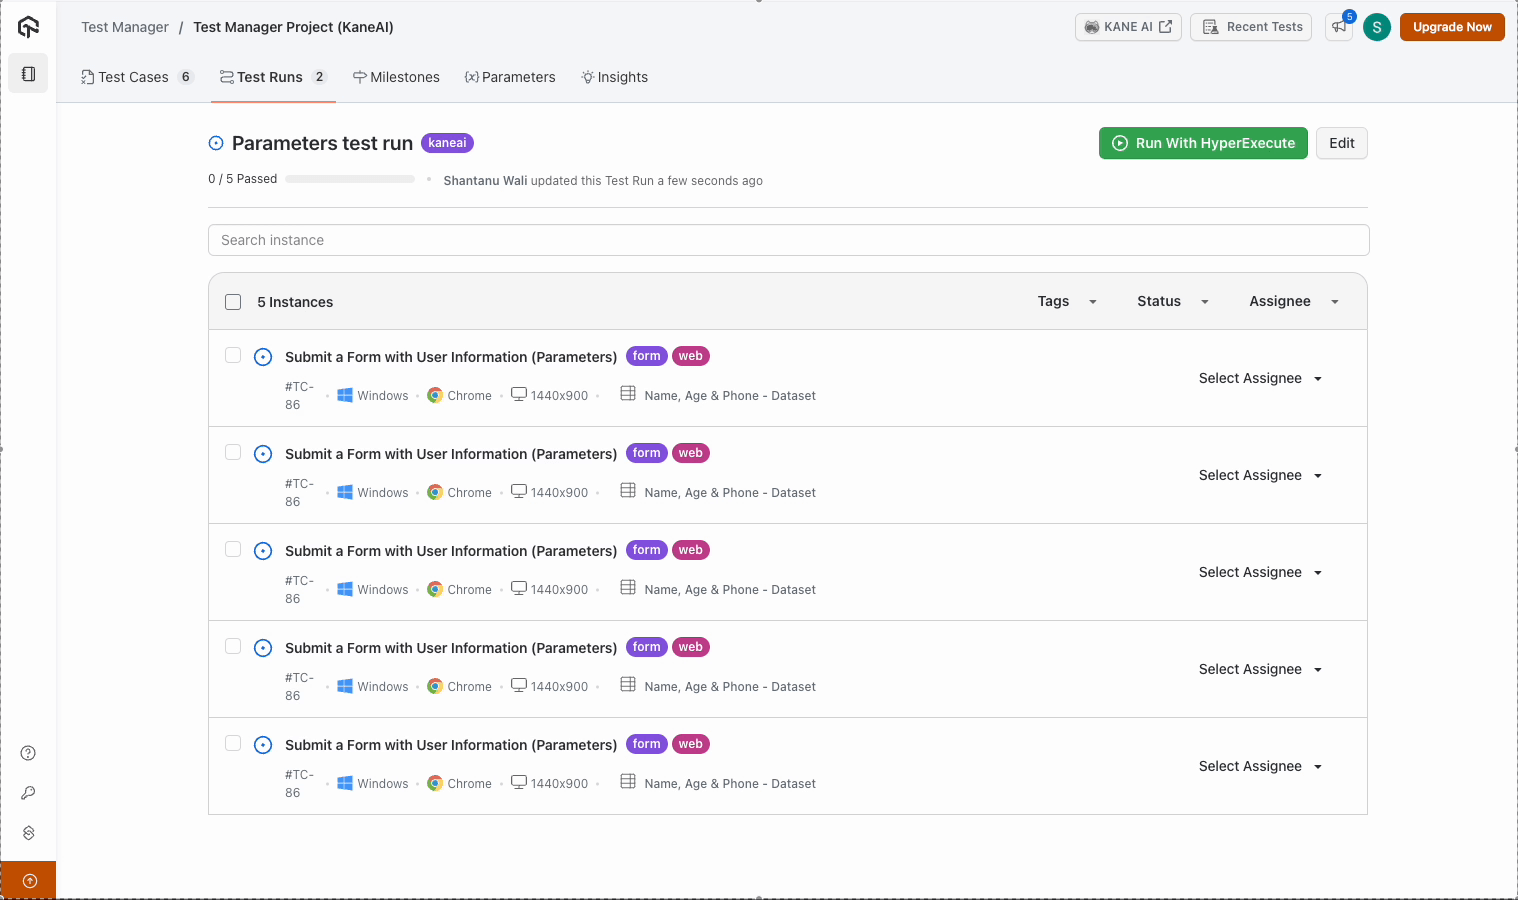
Using parameters for test runs
Step 1: Navigate to Test Project
Open the Test Project dashboard and go to the Test Run section.
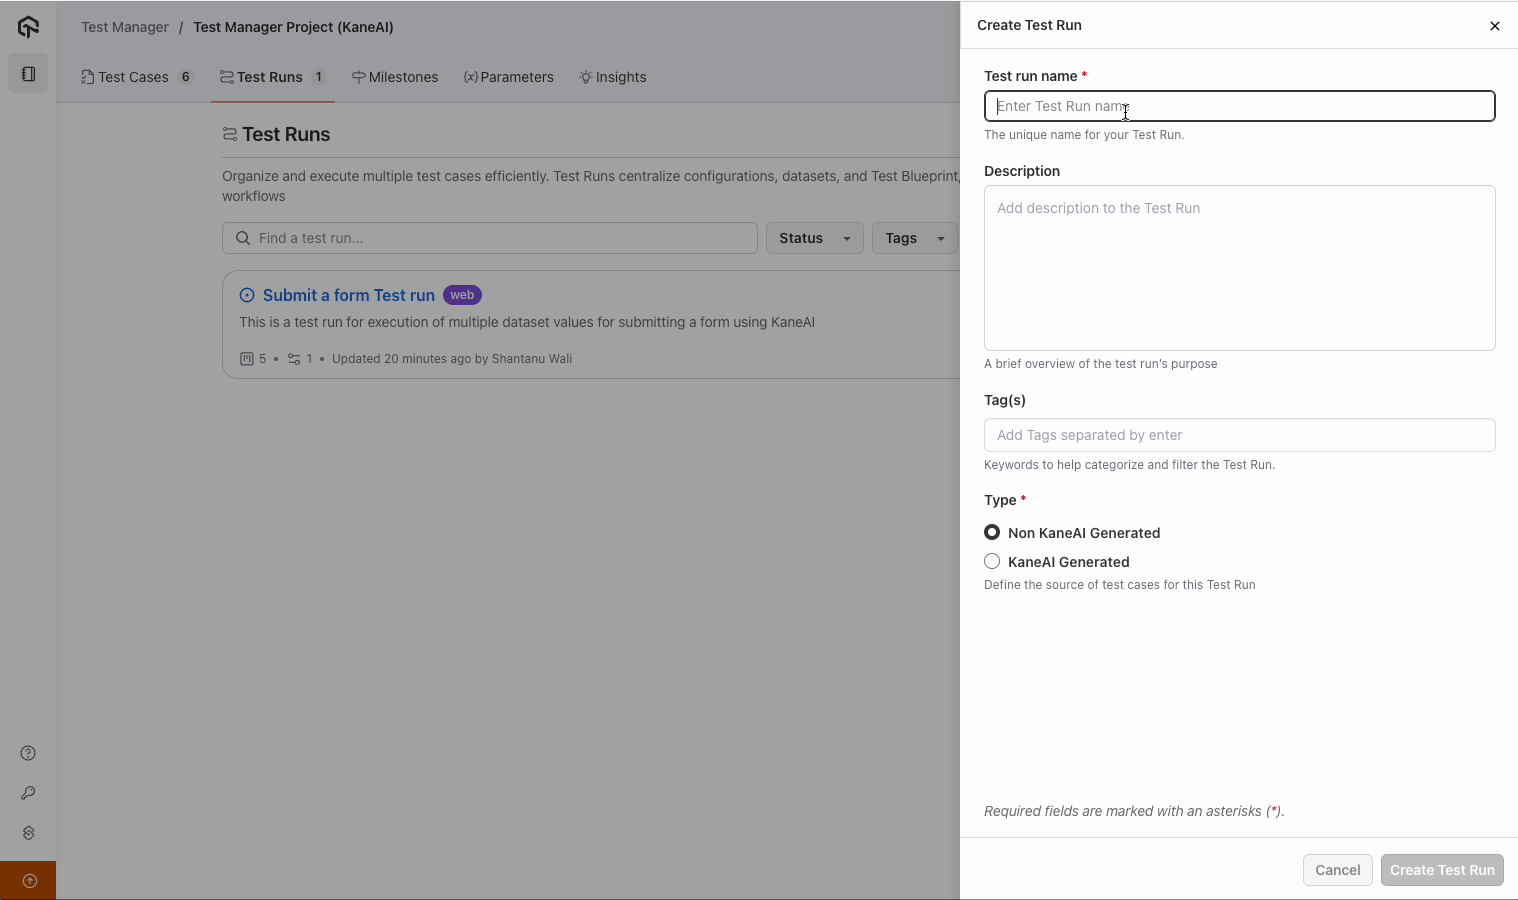
Step 2: Create a New Test Run
- Click Create New Test Run and name it (e.g., parameters test run).
- Select the KaneAI-generated test cases.
- Optionally, add a description or relevant tags.
- Click Create Test Run.
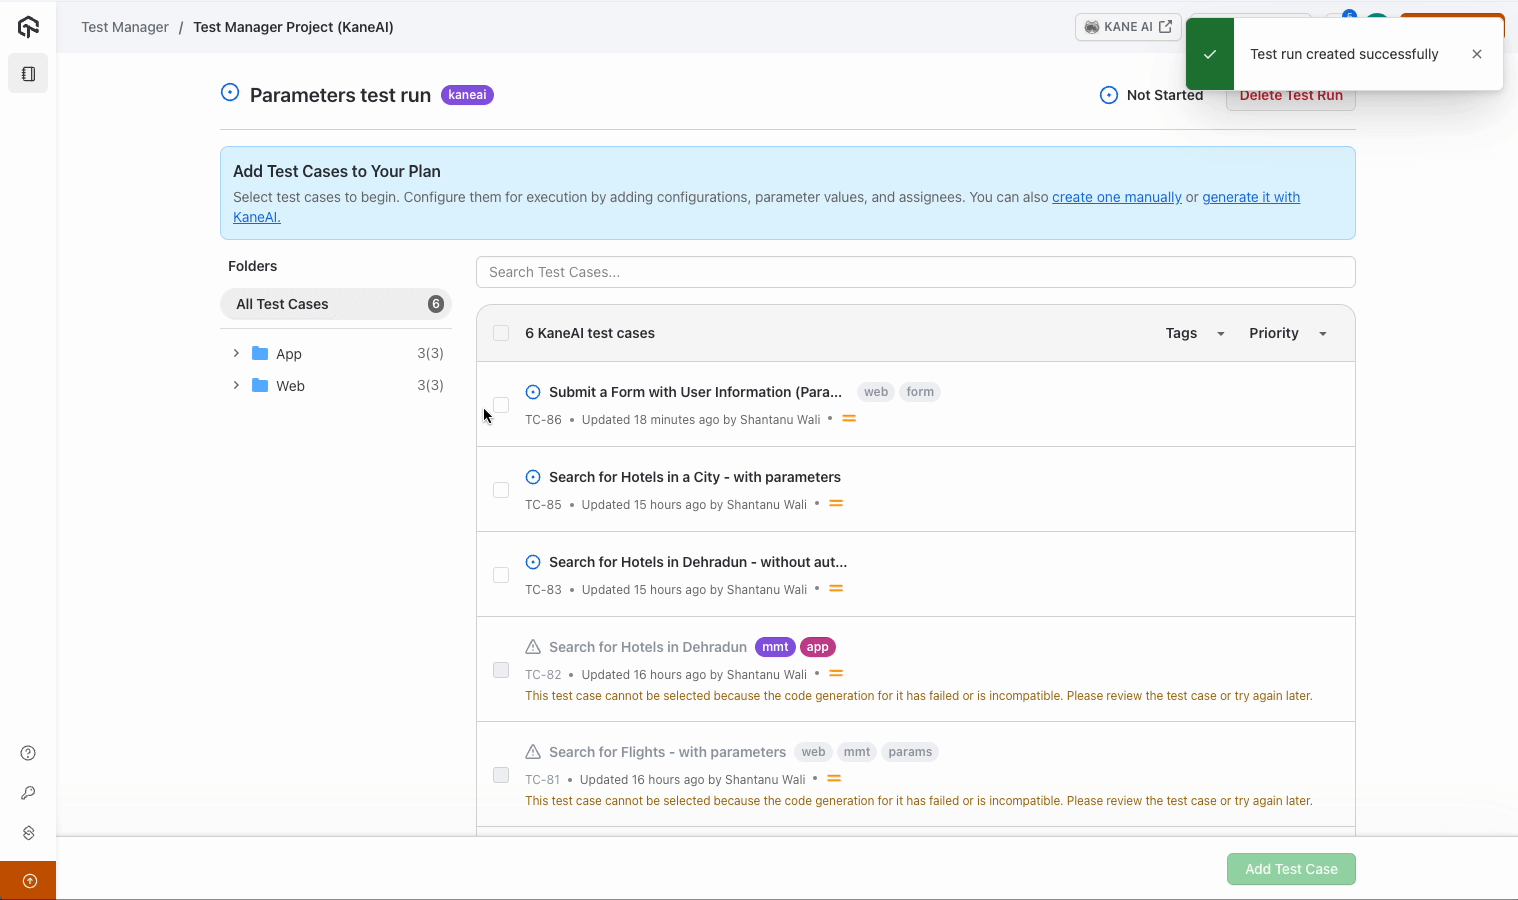
Step 3: Add Test Cases and Data Sets
- Select and add the desired test cases to the run.
- Specify configurations (e.g., Windows 10 Chrome).
- Attach the required data sets for the test run.

Step 4: Apply Data Sets
- Ensure the data sets containing necessary parameters are pre-filtered and accessible.
- Click Apply to confirm the Dataset selection.
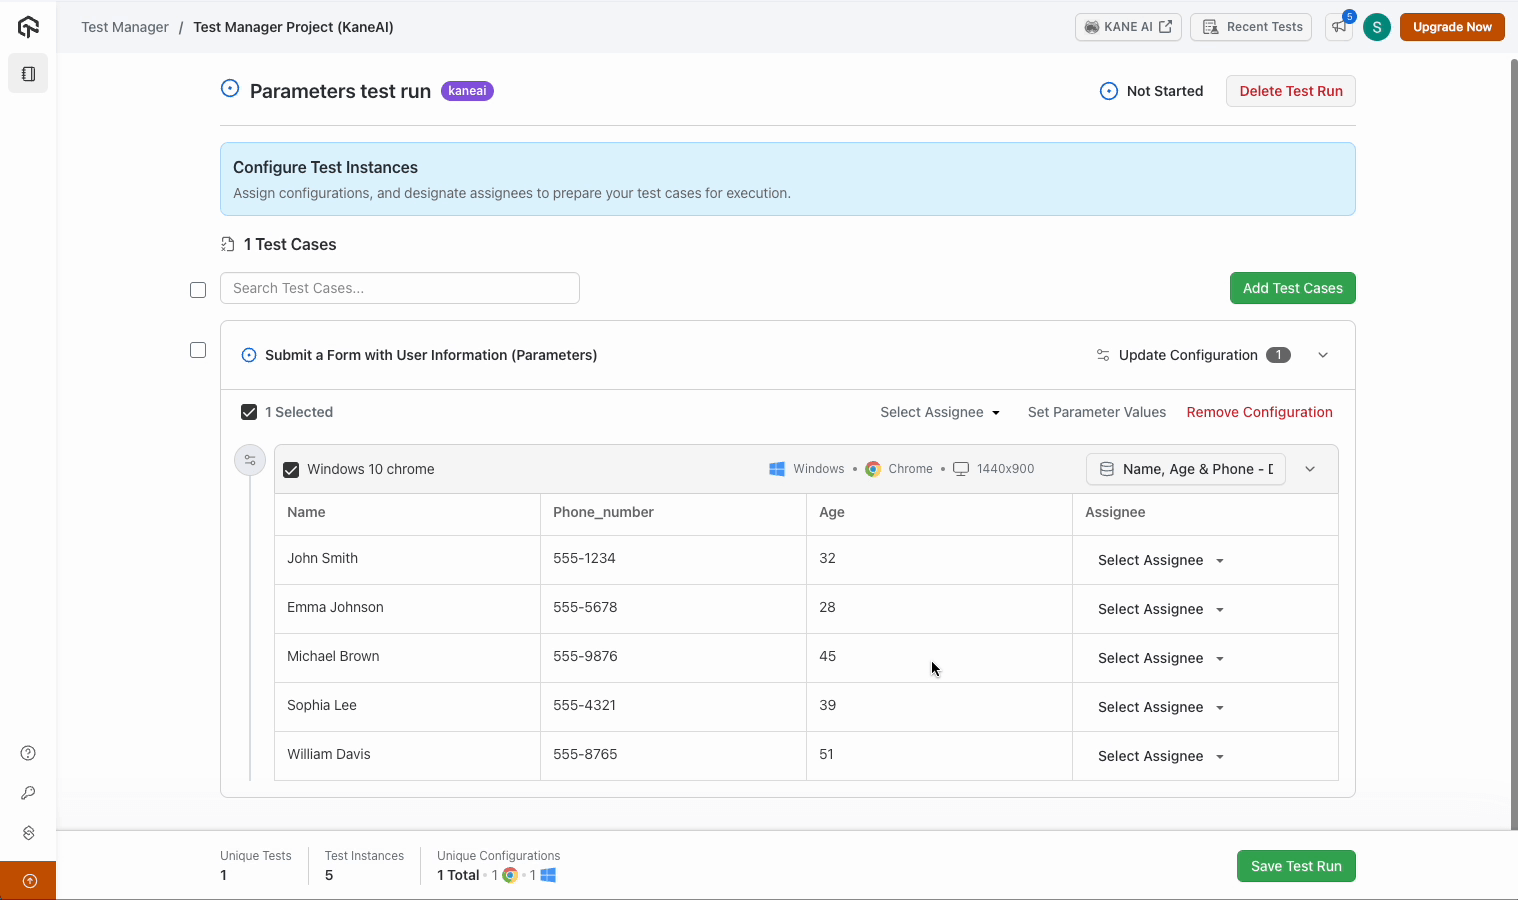
Step 5: Save and Prepare for Execution
- Save the test run with the selected parameters and Datasets. The system will create test instances ready for execution in a hybrid environment.

Step 6: Execute Tests with Parameters
Utilize the parameters to run your test cases with different data sets and inputs. You can manage and monitor execution using the TestMu AI Test Manager interface.