Jenkins Plugin for Integration With TestMu AI
Jenkins is a widely popular Continuous Integration (CI) tool. It is free to use, open-source software written in Java. Jenkins helps to boost your release agility by providing Continuous Integration services. You can trigger these services by a web application server or merely using a command line to hasten the deployment pipeline & release migration activities. Jenkins's popularity offers thousands of plugins to fast track your productivity. One such plugin to help you pace up automated cross browser testing is the TestMu AI Jenkins plugin. With TestMu AI Jenkins plugin, you will easily automate your Selenium test scripts by connecting your Jenkins CI instance to TestMu AI Selenium grid. TestMu AI Selenium grid will offer you a comprehensive library of 3000+ browsers and browser versions so you could achieve a higher test coverage while performing automation testing using the Selenium test suite.
TestMu AI Jenkins plugin will help you to:
- Configure your TestMu AI credentials for your Jenkins jobs.
- Set up and tear down the Lambda Tunnel binary file to perform automated cross browser testing even on your locally hosted web apps
- Embed all the test results such as video logs, network logs, and screenshots of every step performed through TestMu AI with your Jenkins job results.
Prerequisites
- A TestMu AI account
- An existing Jenkins CI server (version 2.138.2+)
- A Jenkins User with root access.
Installing the Jenkins Plugin
Download TestMu AI Jenkins plugin to run your Selenium tests with Jenkins on TestMu AI. You need to be granted administrator-level access before proceeding with Jenkins installation.
Make sure to have no active build jobs in execution or queue before heading forward with the TestMu AI Jenkins plugin installation.
- Click Manage Jenkins, then Manage Plugins.
- Click the Available tab.
- In the Filter box, type TestMu AI.
- You will encounter a list of plugins where you need to select TestMu AI.
- To install TestMu AI Jenkins plugin, you would have to select the checkbox in front of TestMu AI. After successful installation of the plugin, you will be able to find the TestMu AI Jenkins plugin under your installed plugins

Sometimes your recently installed plugins fail to synchronize with your available plugins on Jenkins. If you don't find TestMu AI plugin under your available plugins, you can force Jenkins to refresh the list by simply clicking the Check Now button to fetch the latest plugins from the Jenkins update center.
How To Configure Your TestMu AI Credentials?
After installing the TestMu AI Jenkins plugin to perform automated cross browser testing, you would need to configure the TestMu AI credentials in your Jenkins CI server for integrating your Selenium WebDriver tests with Jenkins. You would need to work with Jenkins UI to proceed with the configuration.
To Configure TestMu AI Credentials Using Jenkins UI
Follow these steps to configure TestMu AI with Jenkins:
- On the Home page of Jenkins, click Credentials.
- Under Credentials click System. System page displays.
- In the System, click Global credentials (Unrestricted) domain. Global credentials page opens.
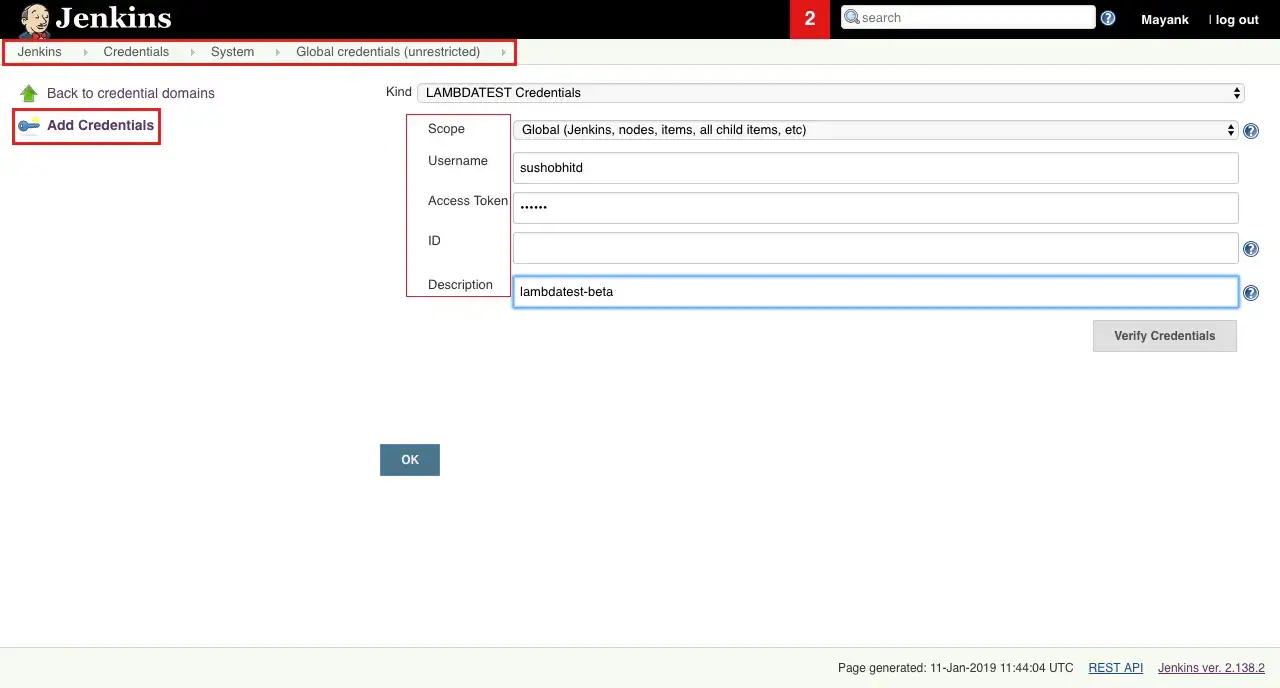
- Click Add Credentials. Add Credentials page opens.
- Enter the relevant data in the fields and click Verify Credentials. After verification, click the OK button. Jenkins will generate the ID, which is visible on the Credential page.
- Save your changes.
Once you successfully add your credentials, then Jenkins will generate an ID. To retrieve this ID for TestMu AI Credentials, you would have to go to Jenkins home page and click on Credentials from the left navigation menu.
From the Jenkins home page, click Credentials from the left menu. You can copy the ID for TestMu AI credentials.
Configuring The Build Environment Through Jenkins UI
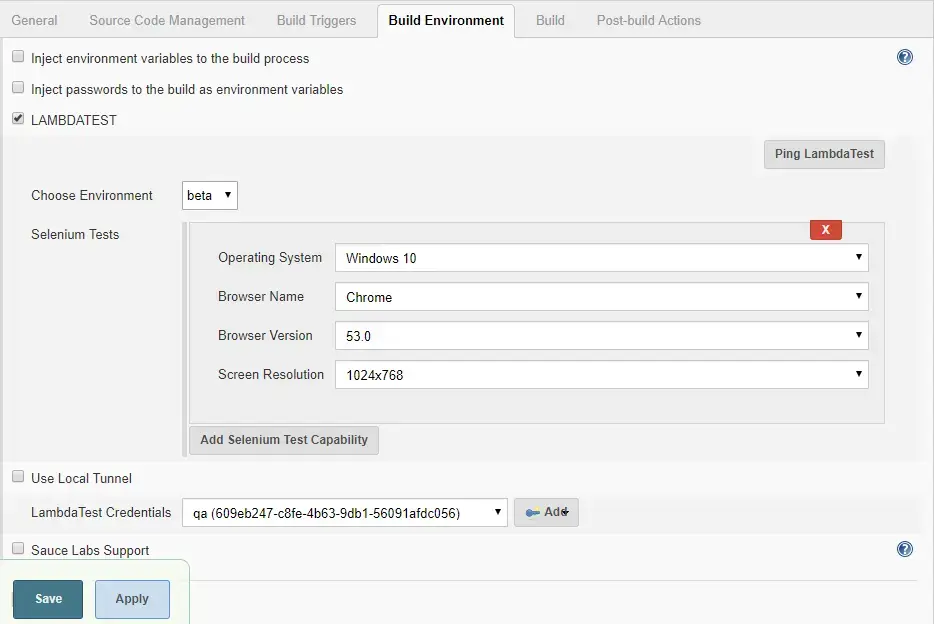
To enable Lambda Tunnel to perform tests on your locally hosted web application or website: Visit the tab for Build Environment and mark the tick on the box left to LAMBDATEST.
That is all you need for performing automated cross browser testing on your locally hosted web pages or web files using the TestMu AI Jenkins plugin with Lambda Tunnel. In the next section, you will learn how to enable the Lambda Tunnel.
Configure TestMu AI Tunnel
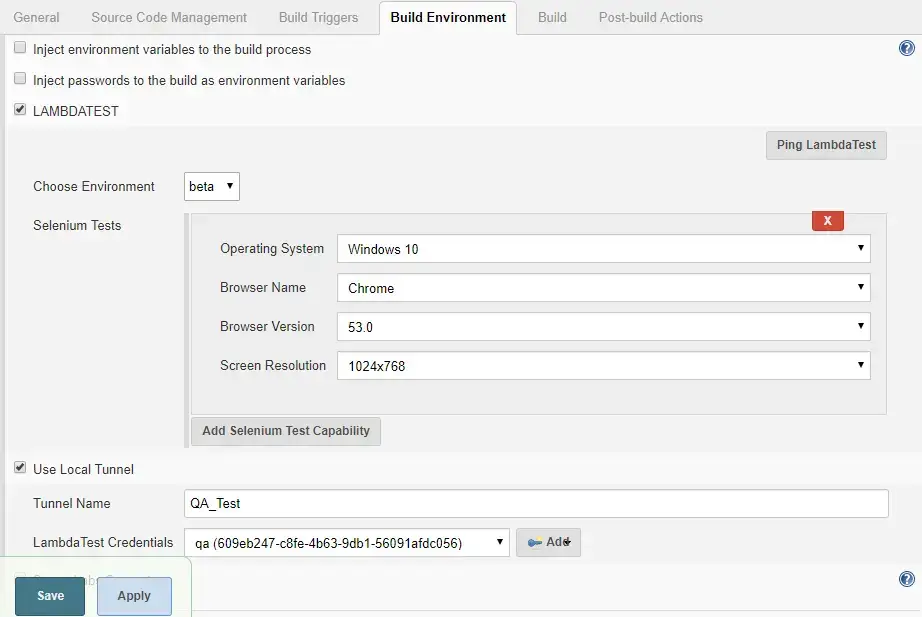
Here we will look at the process of enabling Lambda Tunnel to test your locally hosted web apps. Visit the tab for Build Environment and mark the tick on the box left to LAMBDATEST.
- We would recommend keeping the TestMu AI Local Path empty; that way, the plugin will automatically download the LT binary file. However, if you wish to use a binary by downloading externally, you need to provide the file's location as the 'TestMu AI Local Path.' But if your Jenkins works on the master-slave configuration set up, then it would be best to leave the path empty for allowing the plugin to download the relevant binary file for the operating system of your local machine.
- You can configure additional settings with Lambda Tunnel by using the option to Use Local Tunnel.
Environment Variable For TestMu AI Jenkins Plugin
| Environment Variables | Description |
|---|---|
| $LT_USERNAME | Your TestMu AI username. |
| $LT_ACCESS_KEY | Your TestMu AI Access key. |
| $LT_GRID_URL | Your TestMu AI hub URL |
| $LT_PLATFORM | OS you wish to test your website with. |
| $LT_BROWSER_NAME | Name of the browser on which you wish to test. |
| $LT_BROWSER_VERSION | Particular browser version on which you wish to test. |
| $LT_RESOLUTION | Specify the screen resolution. |
| $LT_BUILD_NAME | Represents a particular build name. |
| $LT_BUILD_NUMBER | Represents a particular build number. |
| $LT_BROWSERS | An array of combinations. |
| $LT_TUNNEL_NAME | Name of your Lambda Tunnel for local testing. |
Using the above variables you will receive an output in the below format.
sample Output $LT_BROWSERS:
[
   {
       "operatingSystem": "win10", //OS you wish to test your website with.
       "browserName": "Chrome",    //Name of the browser on which you wish to test.
       "browserVersion": "71.0",   //Particular browser version on which you wish to test.
       "resolution": "1024x768"    //Specify the screen resolution.
   },
   {
       "operatingSystem": "win8",   //OS you wish to test your website with.
       "browserName": "Firefox",    //Name of the browser on which you wish to test.
       "browserVersion": "63.0",    //Particular browser version on which you wish to test.
       "resolution": "1024x768"     //Specify the screen resolution.
   }
Running Your First Test
To run your first test using Jenkins TestMu AI plugin, you need to set a test build. You can perform that easily through Jenkins UI by clicking on Build Now.
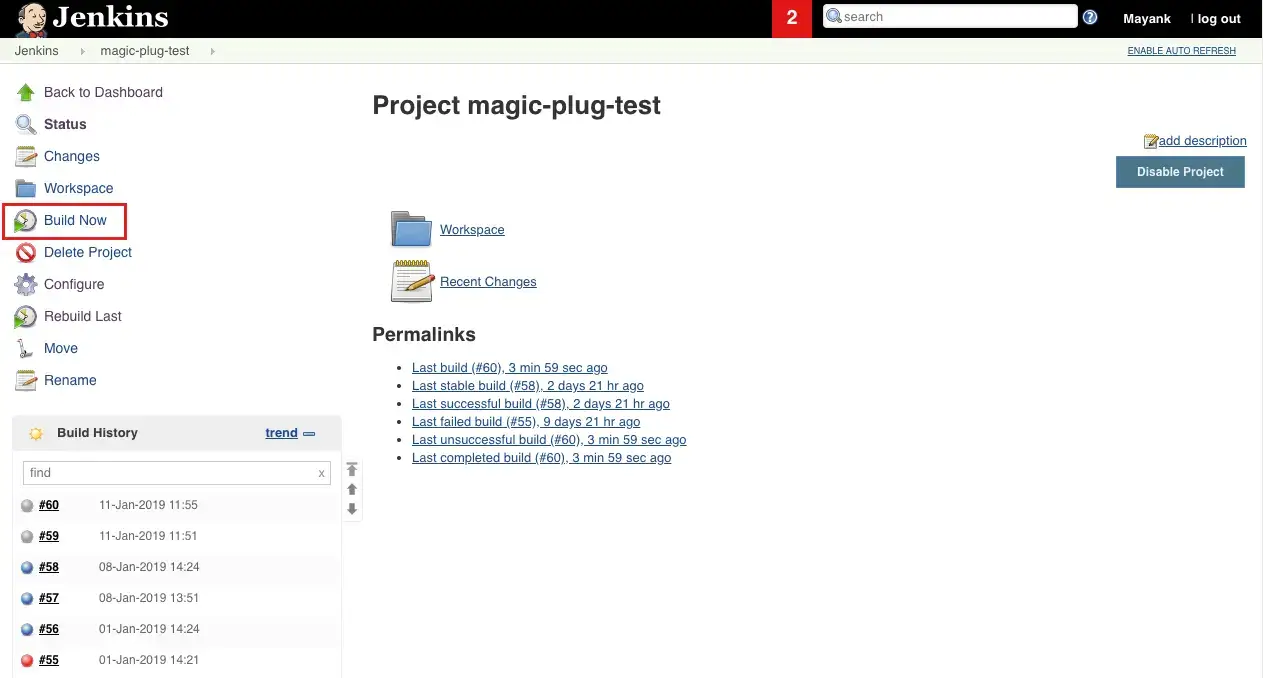
As you click on Build Now, you will find a new build generating under the build history.
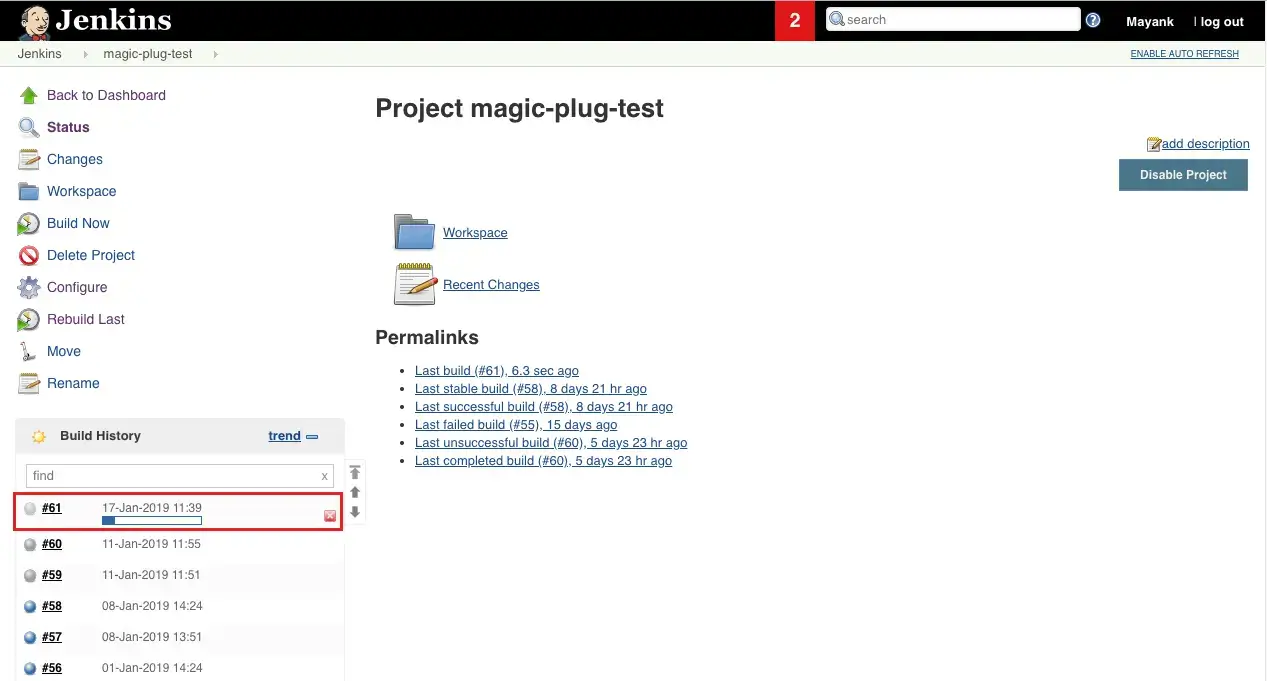
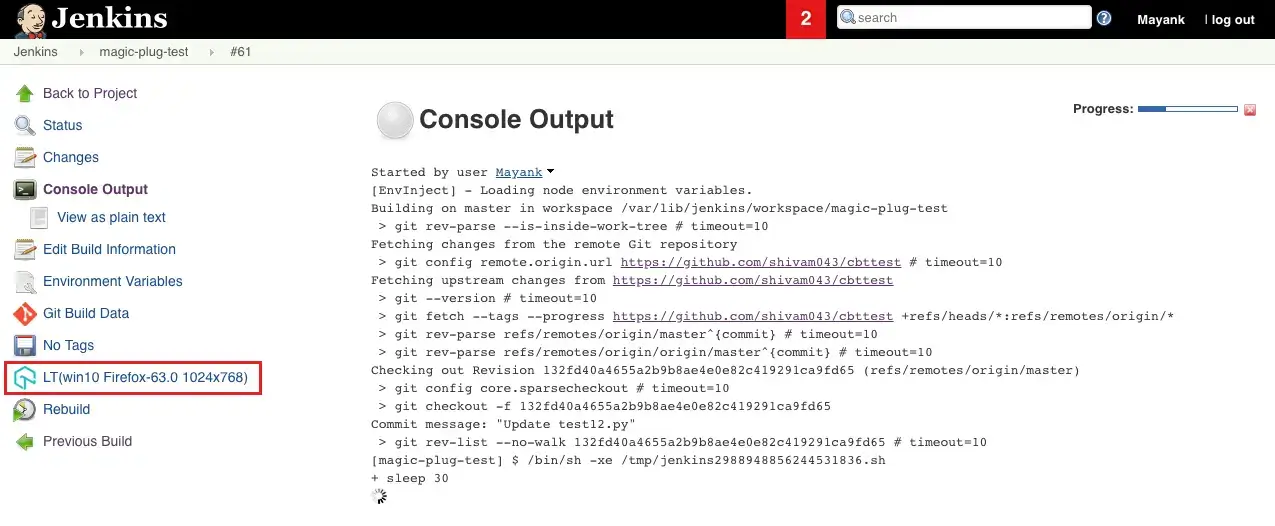
If you click on the build you will find the logs for console output. You will also notice TestMu AI icon on the left which will provide you in-depth details regarding your Selenium test through an i-frame.
When you click on the TestMu AI Report icon from the left side, a report table with details for the Selenium test will load.
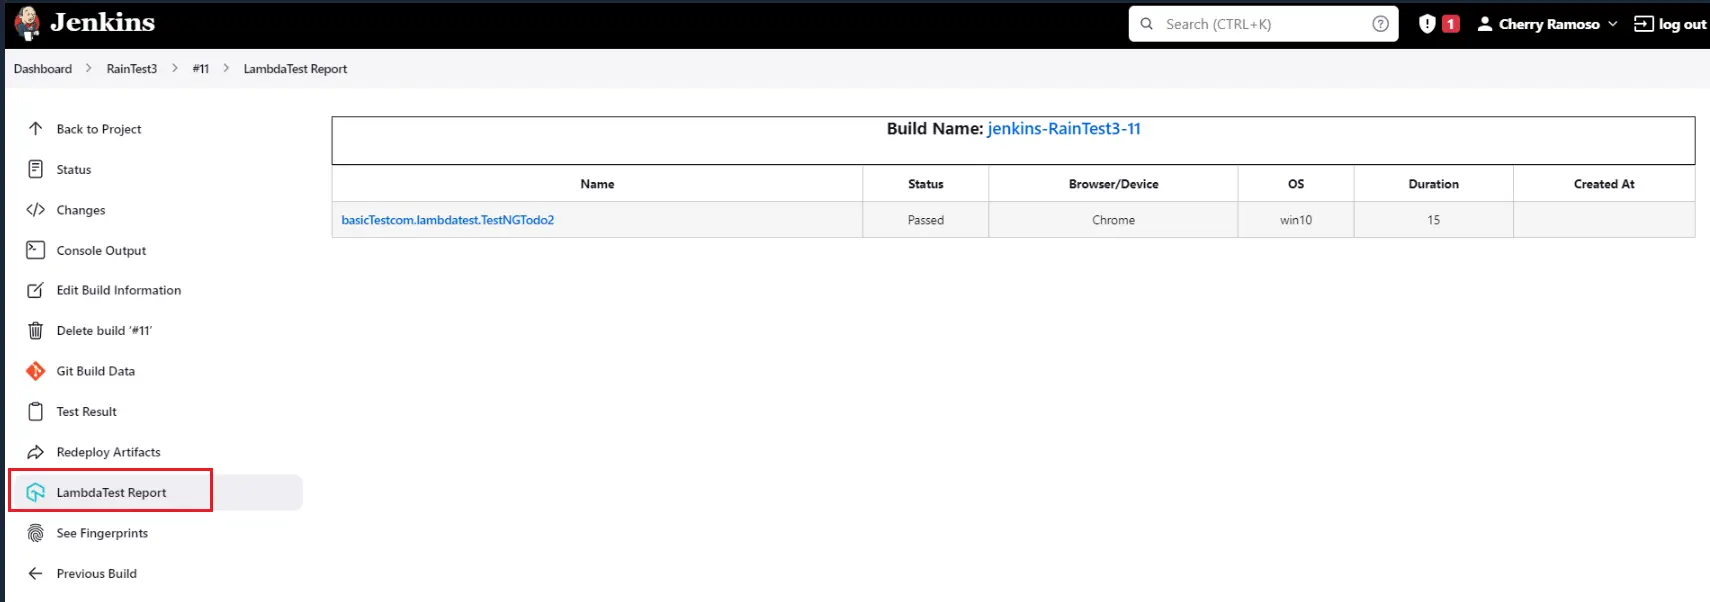
Kudos! You successfully executed your Selenium test suite using Jenkins with TestMu AI plugin.
