Running Appium Tests In Bitrise CI
Bitrise offers a mobile CI/CD platform as a service (PaaS) to accelerate the automation of your software development projects. It provides different mobile-first features like exhaustive mobile stack coverage, store code anywhere in cloud or on-premise, and zero hardware setup that make building, testing, and deploying faster and easier.
Using TestMu AI with Bitrise, you can effortlessly perform Appium testing of your mobile apps on an online device farm of 3000+ real devices and OS versions.
Prerequisites
-
Ensure you have access to TestMu AI real device cloud. If not, please contact sales.
-
A Bitrise account.
-
A GitHub / BitBucket / GitLab or other repository to connect with Bitrise.
Configuring The App Build In Bitrise CI
-
Login to your Bitrise account.
-
From Dashboard, click Add New App on web UI.
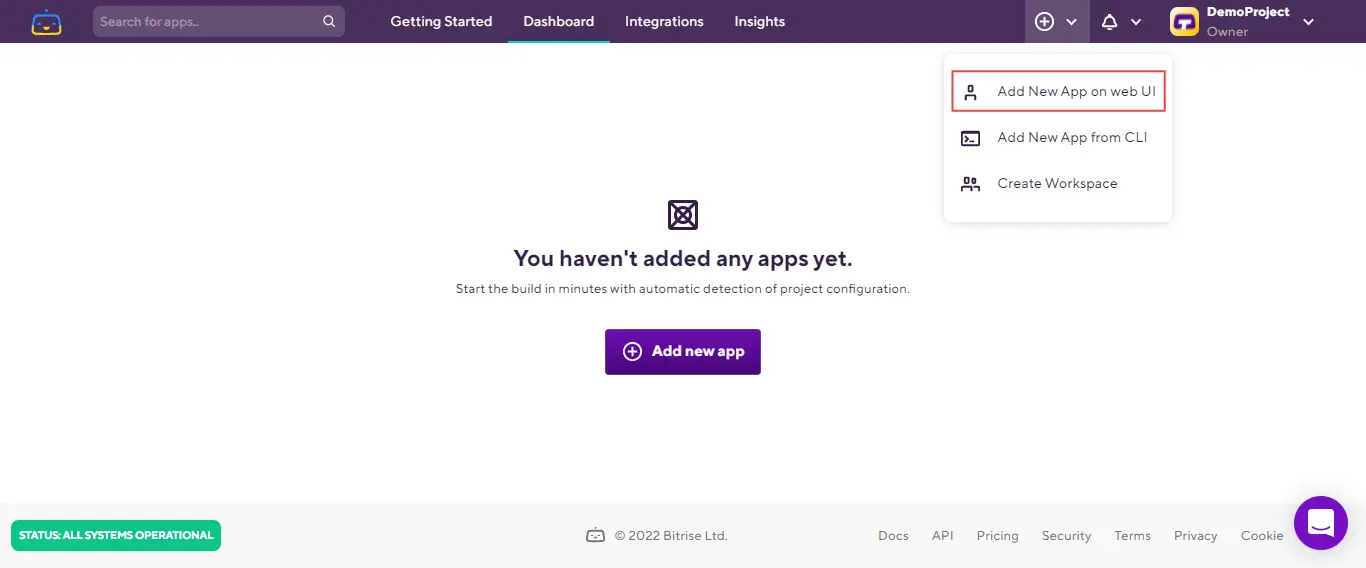
- In the Choose Account section, select the privacy of your app and click Next.
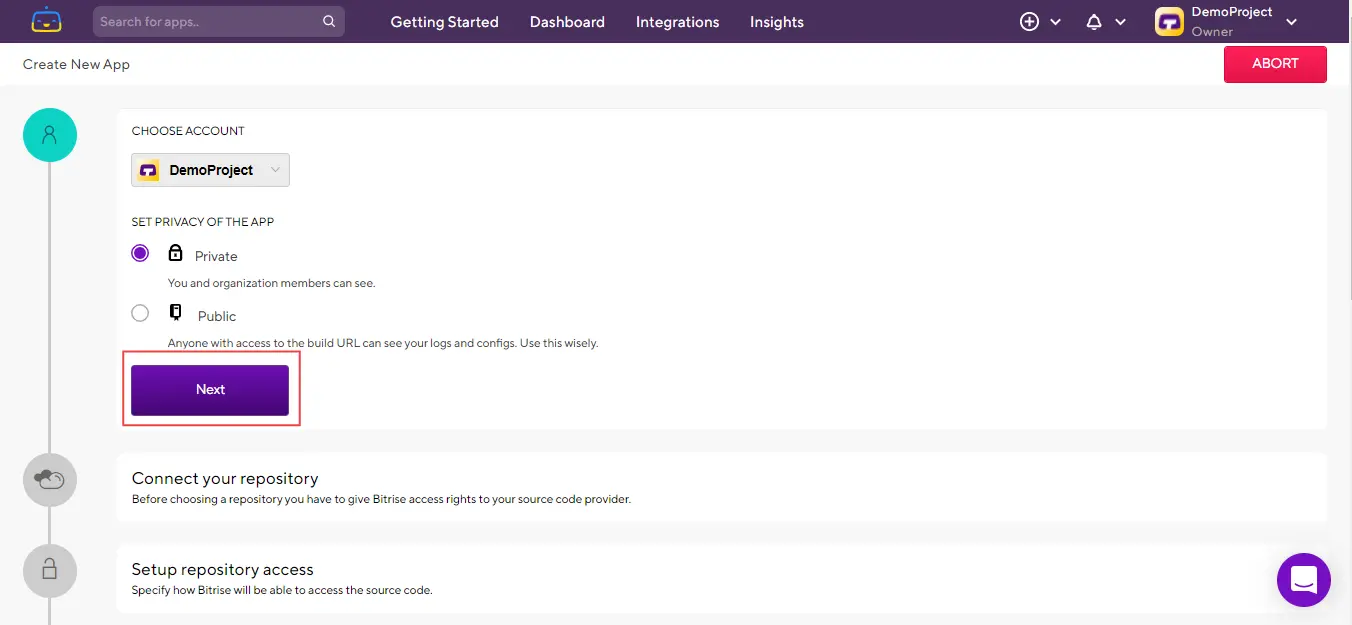
- Choose a source code provider (GitHub, BitBucket, GitLab or others).
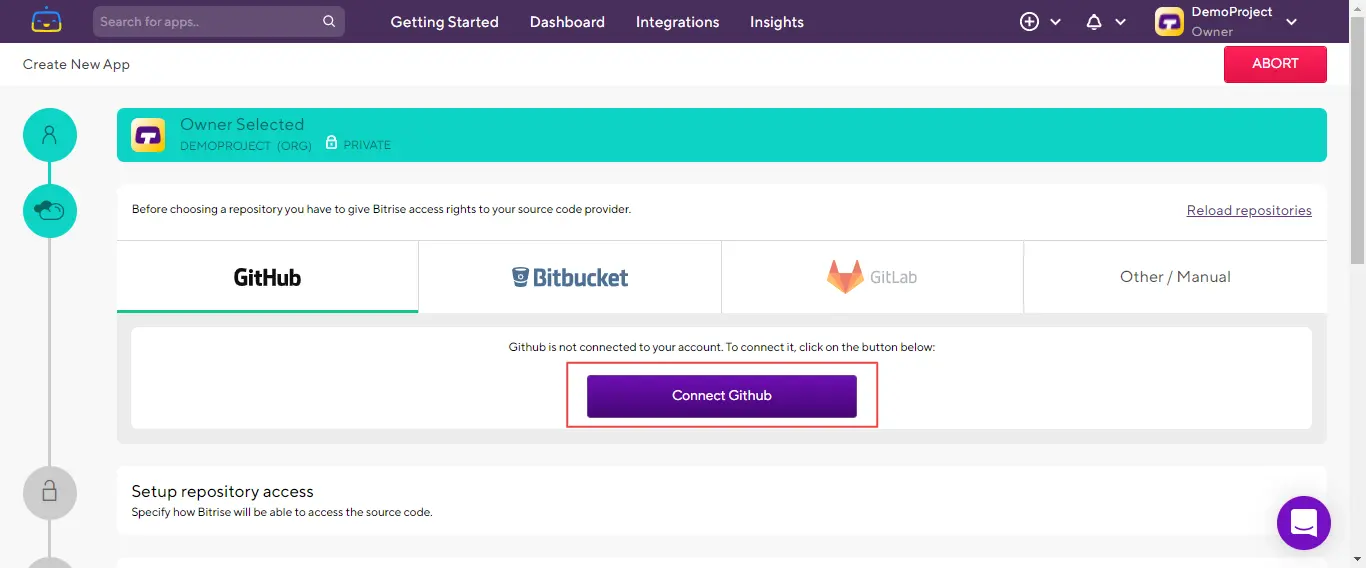
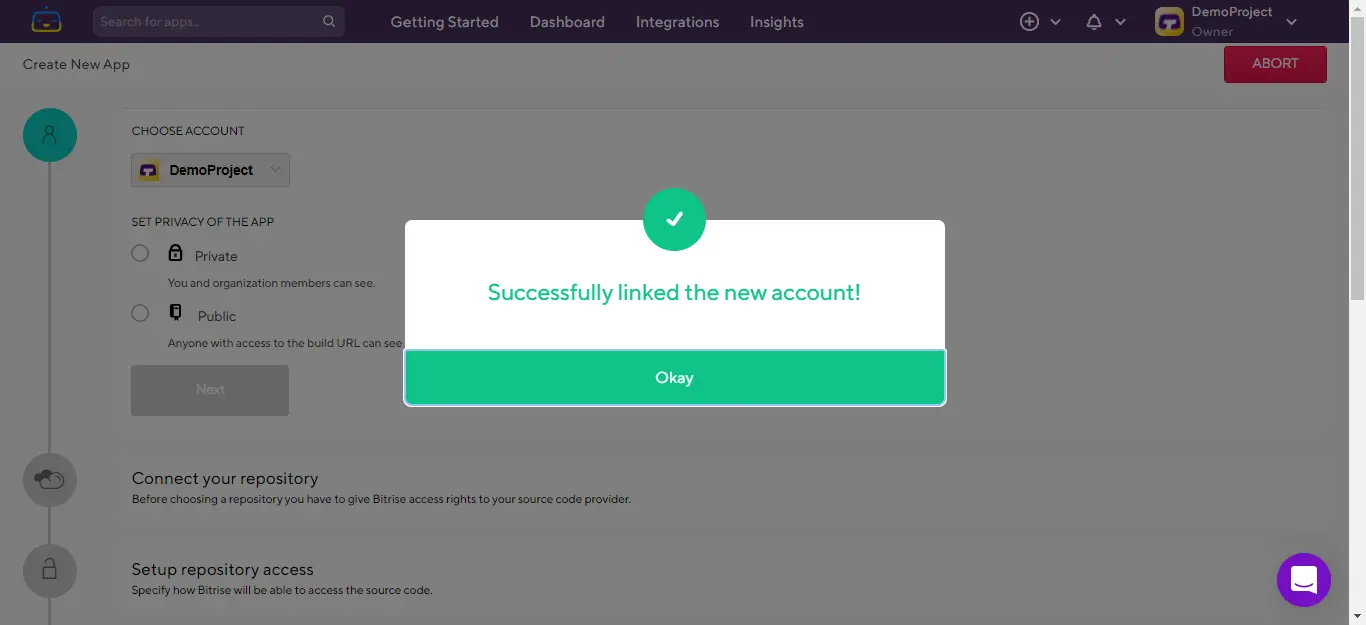
- You will be now asked to authenticate your source code provider with Bitrise.
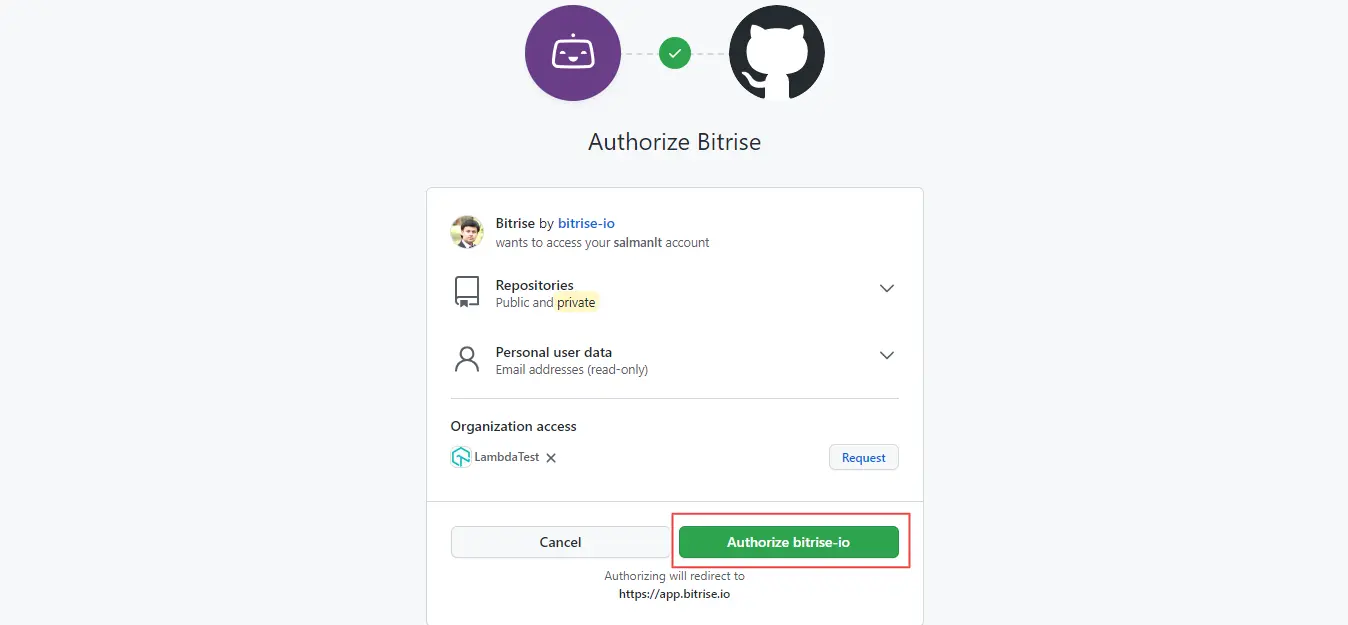
On successful authentication, you'll receive a confirmation message.
- Now again click Next.

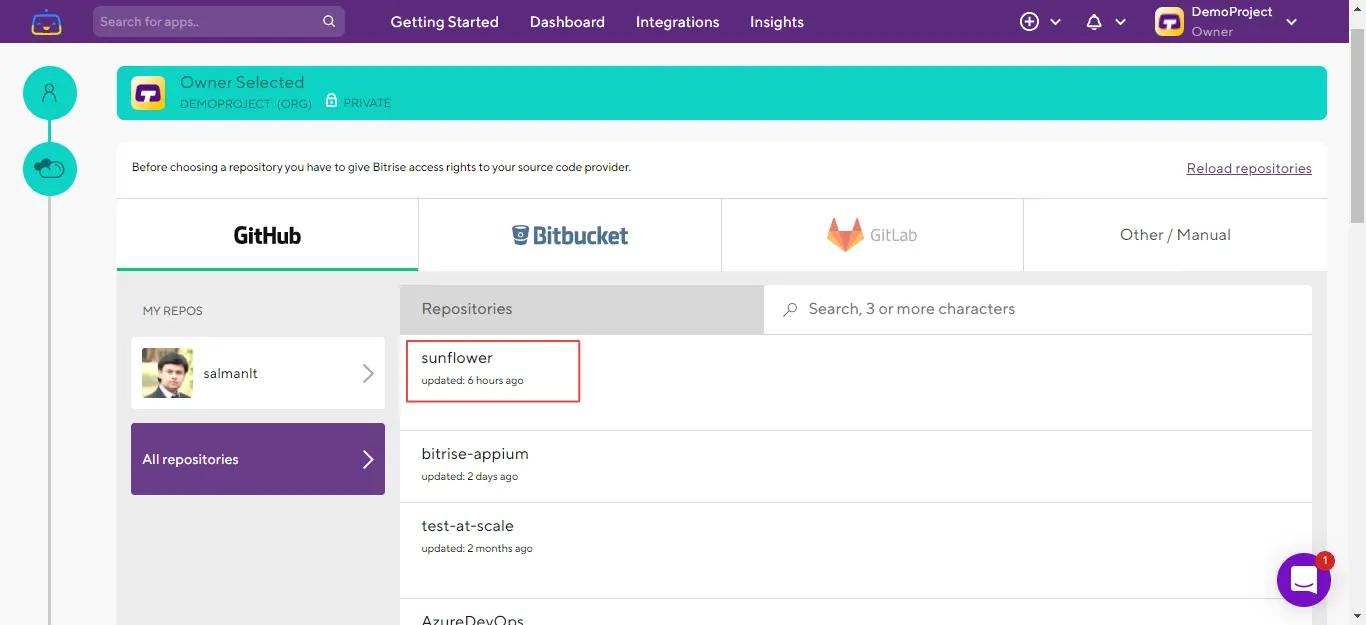
- Select your repository from the version control system.
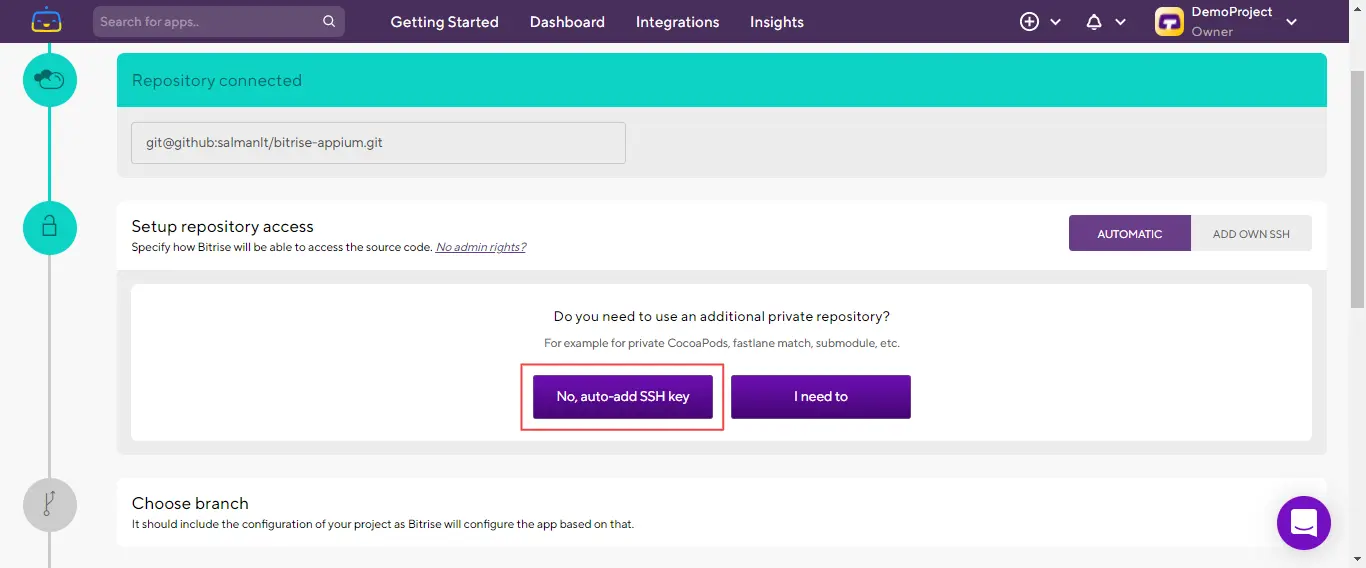
- From the Setup repository access section, click No, auto-add SSH key to add your SSH keys.
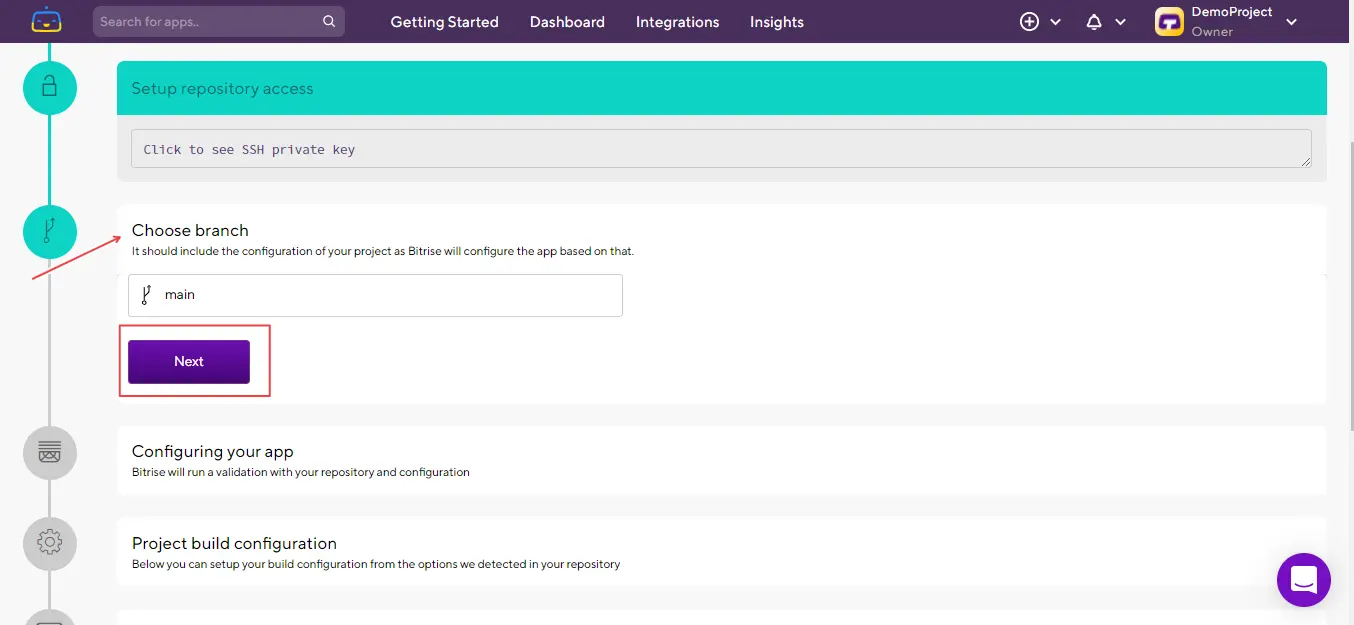
- Enter your branch name and click Next. Your app will be configured and this will take few minutes.
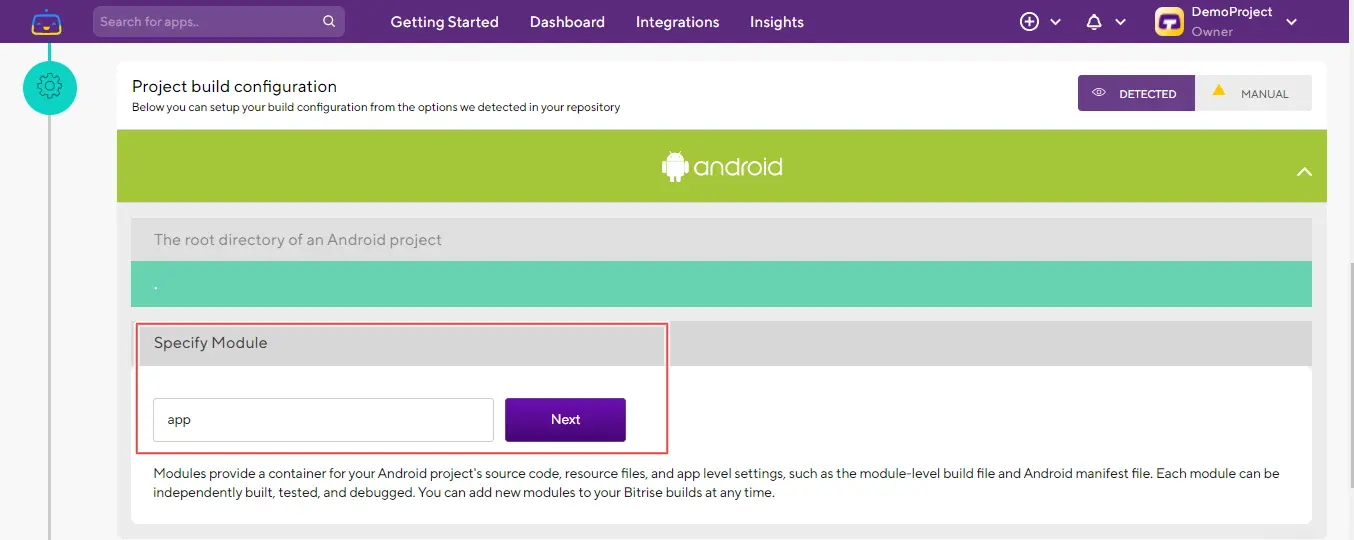
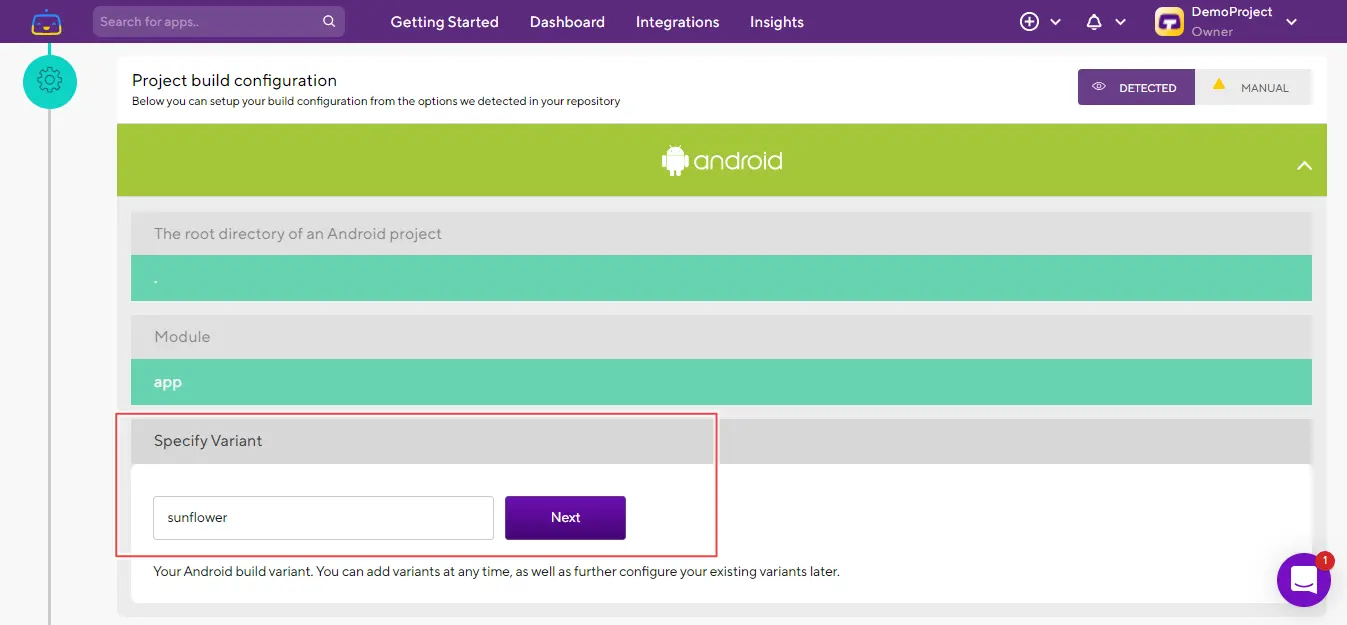
- In Project build configuration:
- Specify module and click Next.
- Specify variant and click Next.
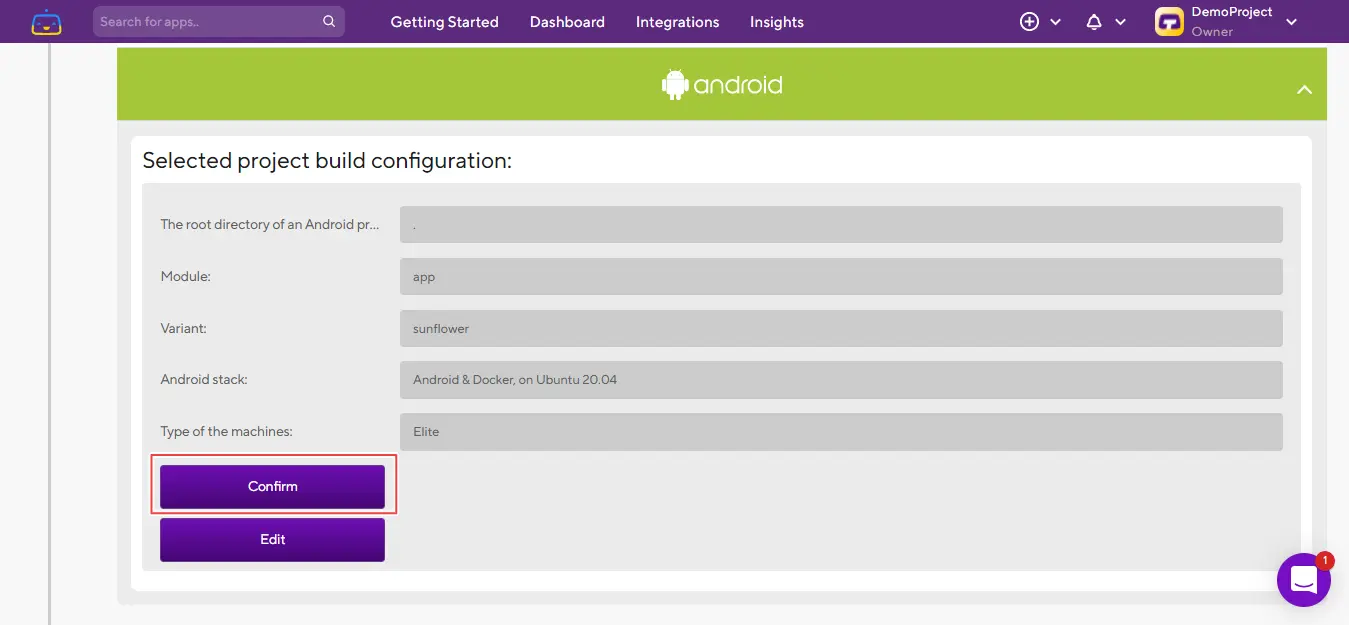
- A build information will show up. Click Confirm.
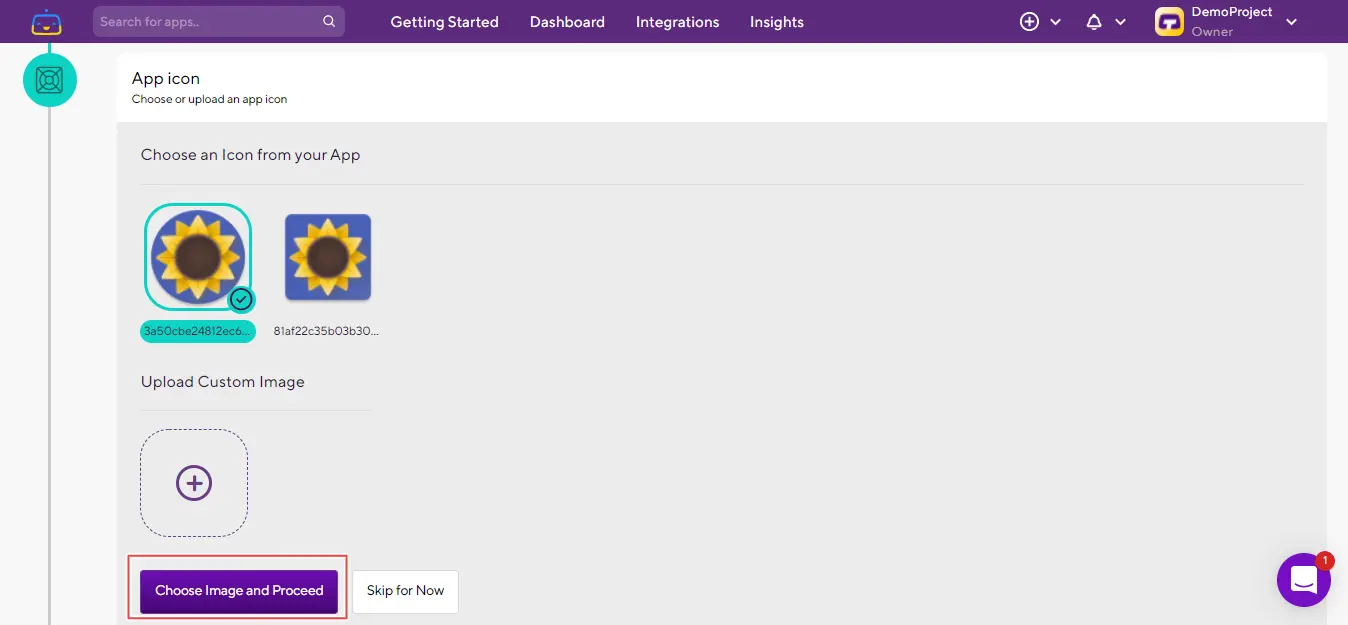
- Choose and upload your App icon. Then click Choose Image and Proceed.
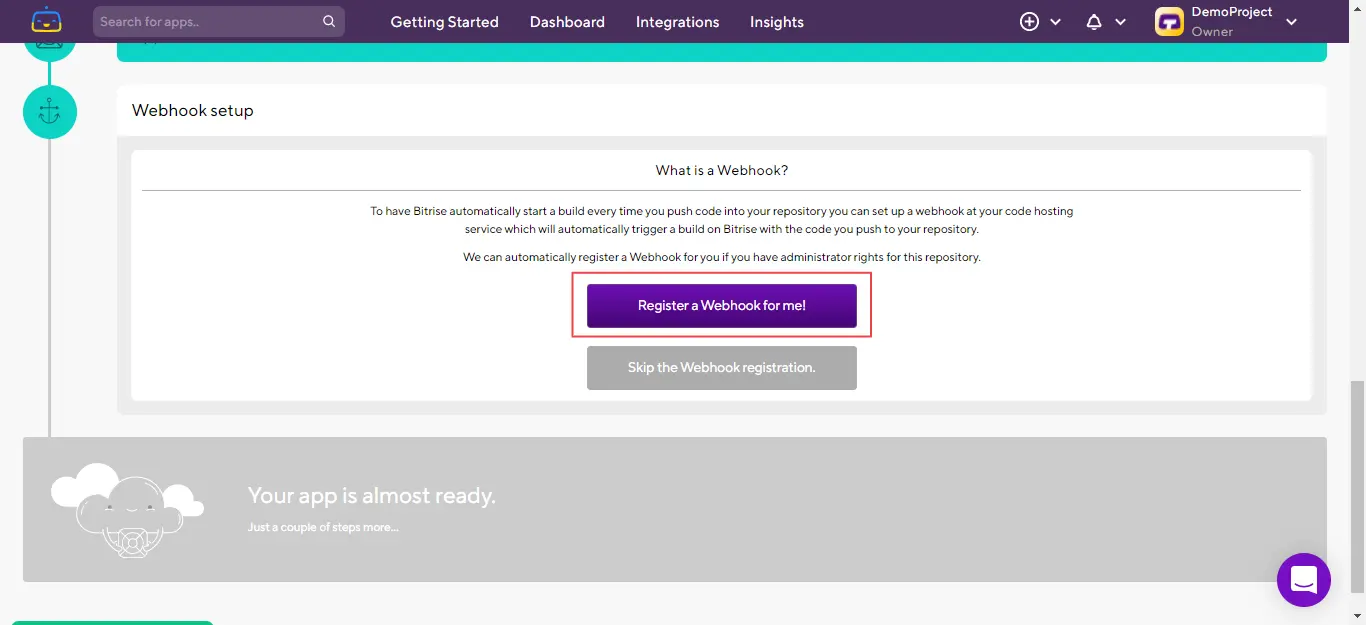
- From the Webhook setup, register or skip Webhook registration. In this case, let's select Register a Webhook for me!
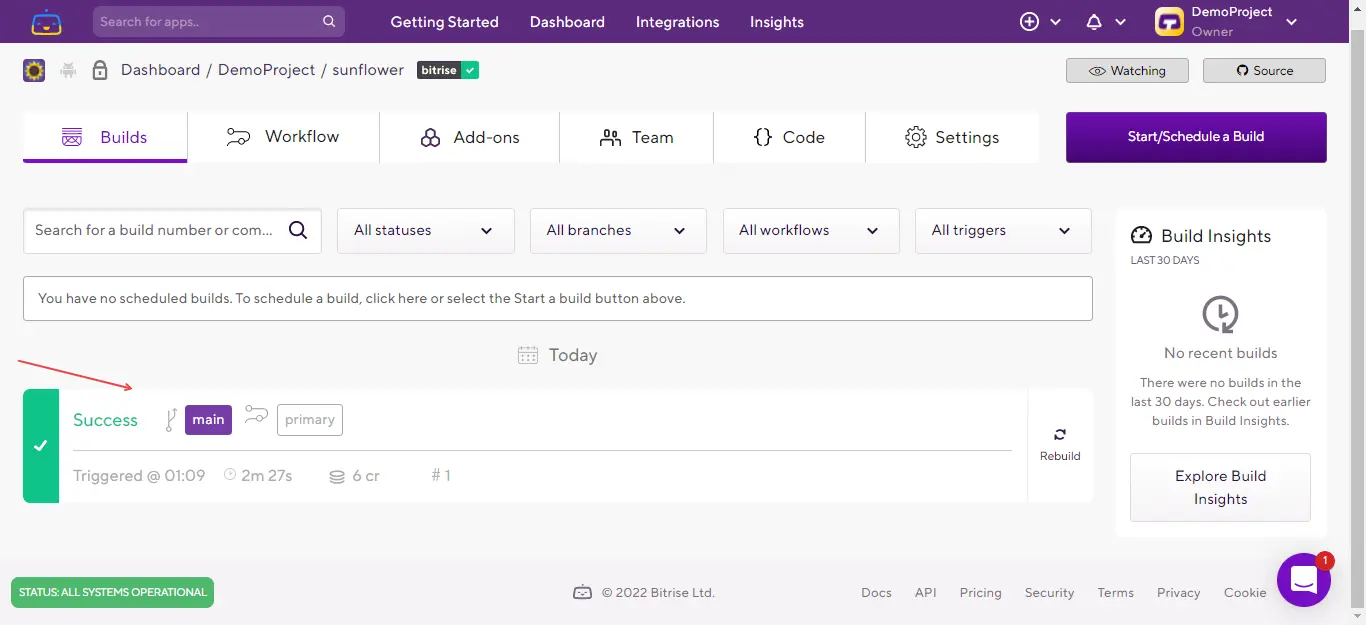
- Now click on the message that says - We've kicked off your first test build for you!
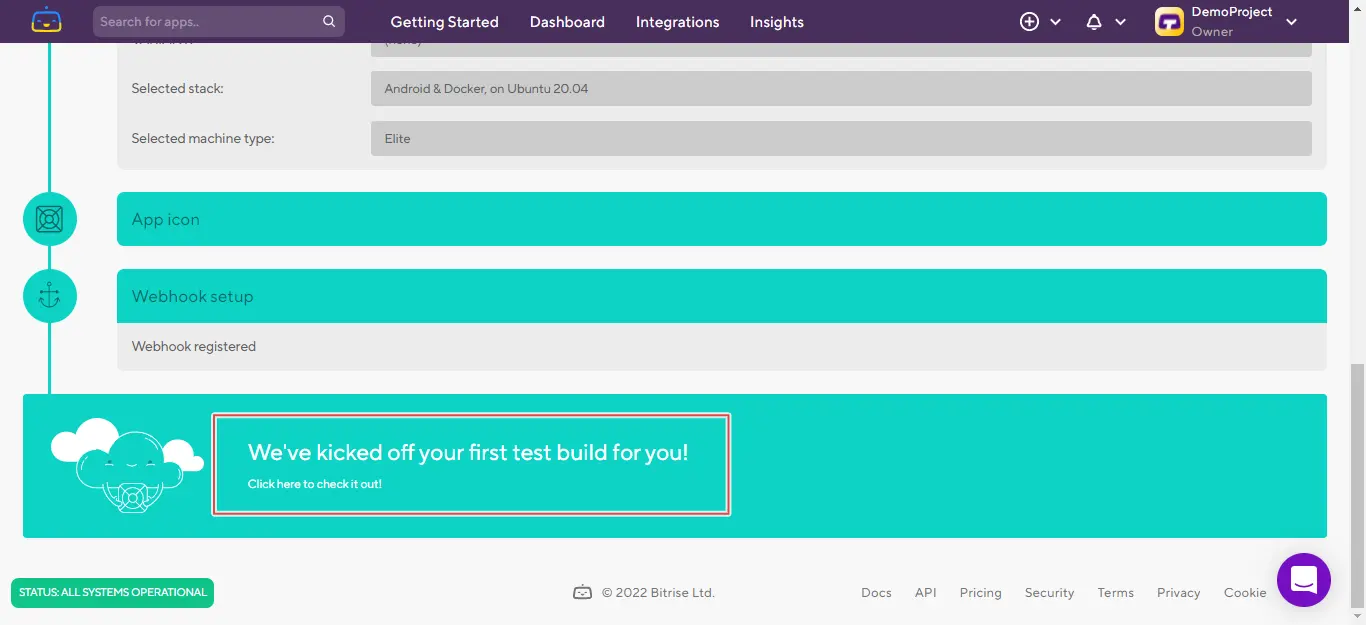
Your app build will now trigger and start running.
Generating The App URL
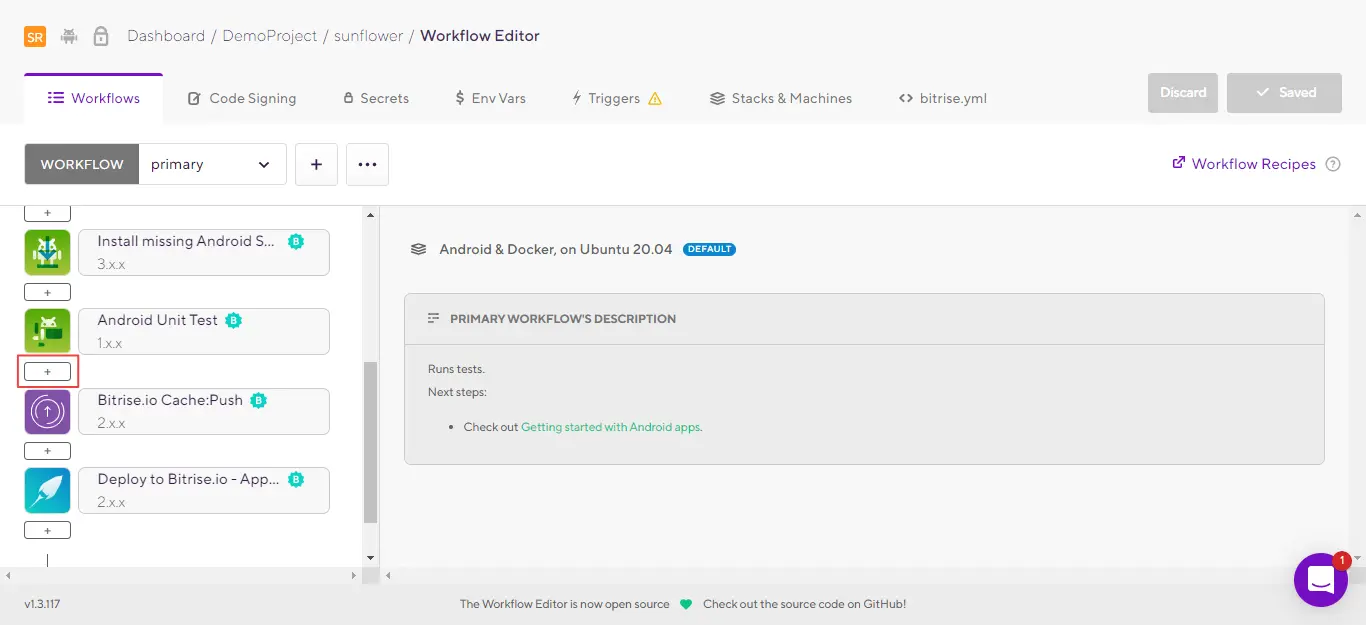
- Once your build process is completed, click Edit workflow.

- Click + icon under Android Unit Test.
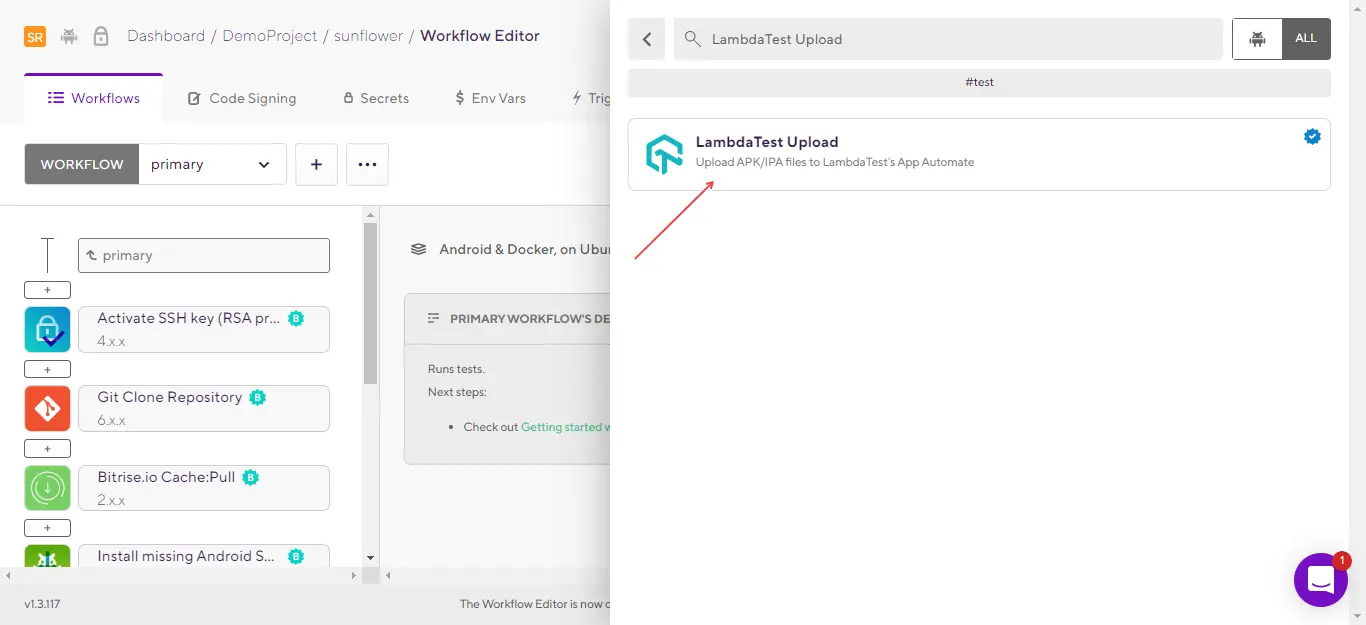
- A search steps box will appear. Enter TestMu AI Upload and click TestMu AI Upload card.
- In Input variables category:
- Provide your App path.

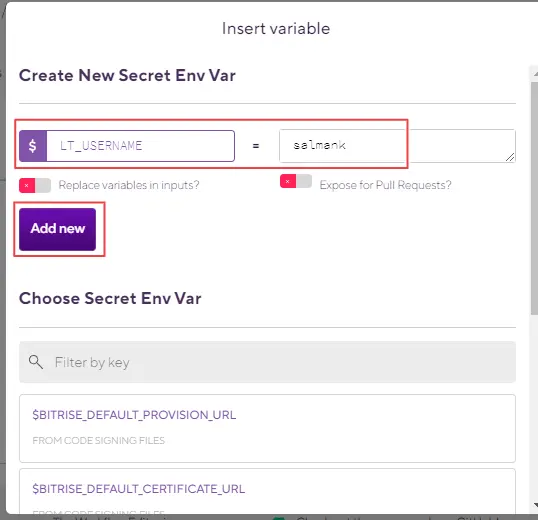
- In TestMu AI username, click Select secret variable.

- Enter the key (it can be anything), your TestMu AI username and click Add new.
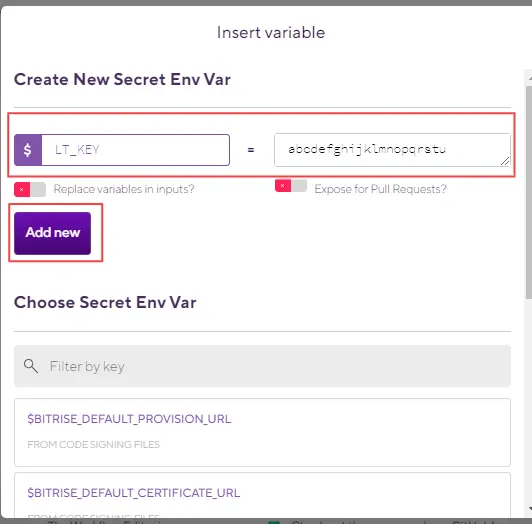
- In TestMu AI access key, click Select secret variable.

- Enter the key (it can be anything), your TestMu AI access key and click Add new.
- Provide an App name.

- Enter your Custom Id (optional).

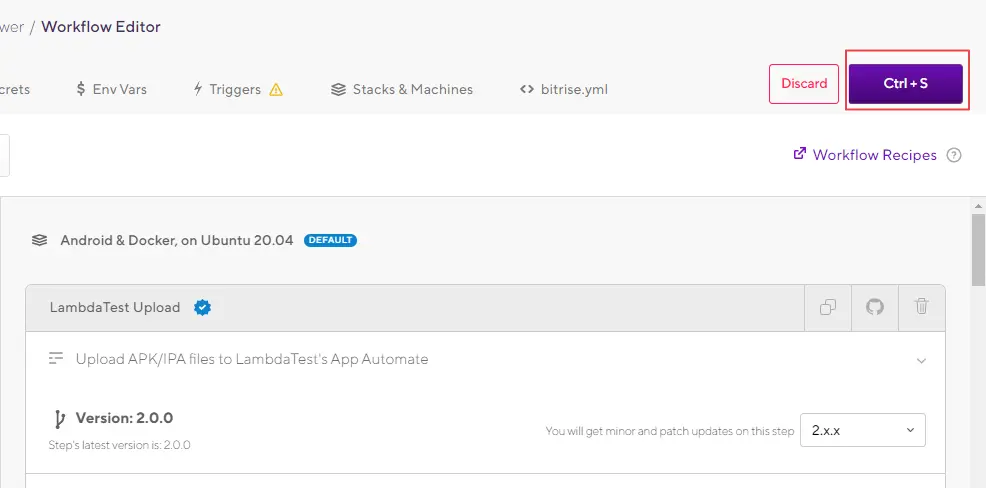
- After that, click Ctrl+S.
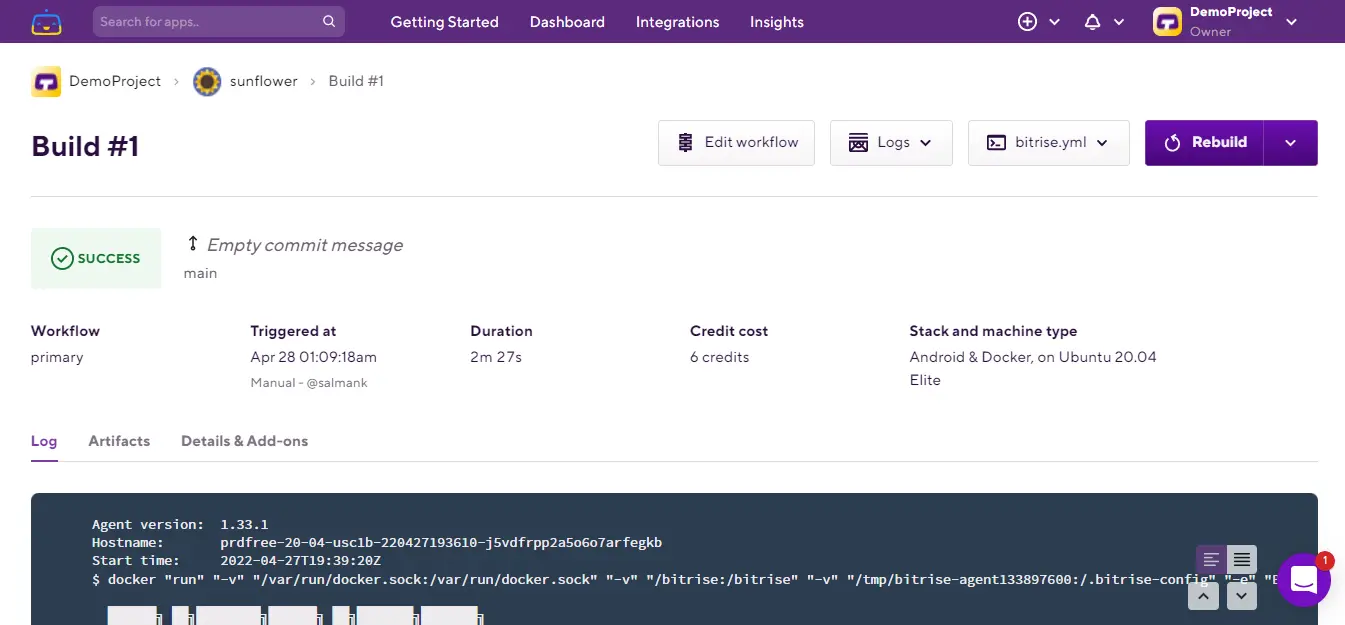
- From the breadcrumb navigation, click on the Repo name.
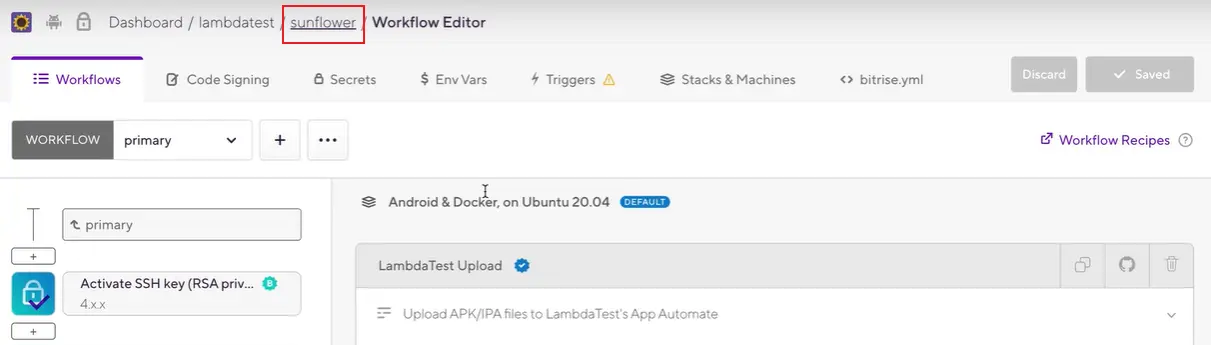
- A build will be shown that you just run. Click on the build.
You'll be taken to the build interface as shown below.
- Scroll down and click on three dots adjacent to the TestMu AI icon.

- Scroll a bit more and you'll see an App URL.
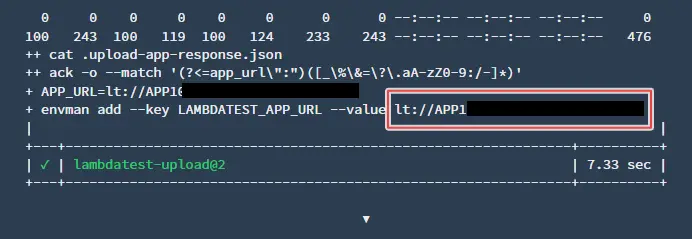
You're done! With this App URL, you can now perform Mobile App Automation. This app will also be available under Real Time Testing > Real Time > App Testing in the uploaded apps section.

