KaneAI - Command Guide
KaneAI lets you write natural language instructions that it converts into executable automation steps. This guide covers a wide range of commands that help you interact with web pages, control tabs, handle waits, perform assertions, and build dynamic, reliable tests without writing code, best practices and troubleshooting tips to help you get the most out of KaneAI.
Navigation & Page Interaction
Use the below commands to move around the page:
| Action | Example Commands |
|---|---|
| Open URL | go to https://example.com , open https://example.com |
| Click | click on login button |
| Type Text | enter "user@example.com" , type "password123" |
| Clear Field | clear email input field |
| Select Date | select 21st september date |
| Hover | hover on shop by category option |
| Search | search for "laptop" |
| Refresh | refresh the page |
| Navigation | go back , navigate back , go forward , navigate forward |
Waits & Timeouts
Wait until element
Every element interaction automatically includes a default maximum wait timeout of 10 seconds, giving the element time to become interactable. This ensures that commands with locators such as click or type don't fail due to slow loading or page transitions.
Explicit Waits
You can define timeouts explicitly when you expect a slower response or need to wait longer than the default. Use simple, natural language commands like:
- wait for 5 seconds - This will pause the script for exactly 5 seconds before proceeding to the next step.
This is useful when you need precise control over wait times for specific actions or page loads.
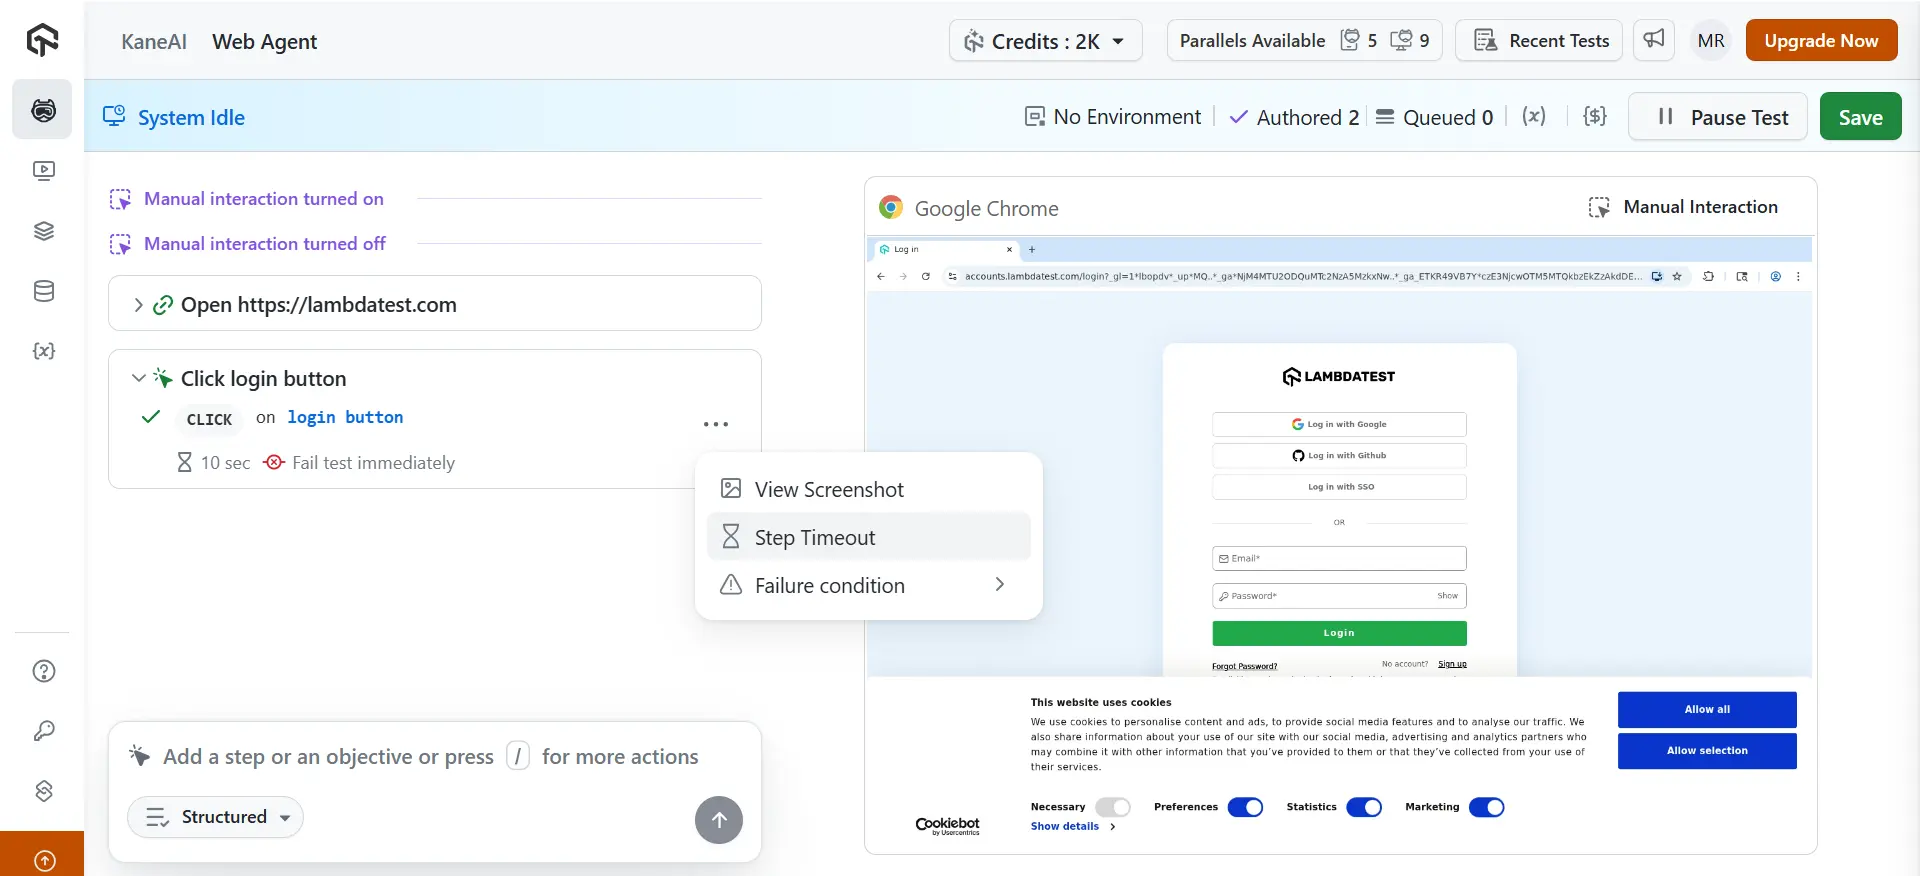
Custom Timeouts
If you prefer, you can also set custom wait timeouts directly in the step menu:
- Click the step menu
- Select Step Timeout
- Enter your preferred timeout value (up to 300 seconds)
Use custom wait timeout when dealing with slow page loads or dynamic content.
When to Use Explicit & Custom Waits
- Custom waits are ideal for cases where you need to adjust the wait time for certain elements to load (such as dynamic content or external API calls). [RECOMMENDED]
- Use explicit waits when you know an action (like a button click or form submission) will take longer than usual.
Custom waits apply only to element-based interactions.
Tab Management
KaneAI makes it easy to manage browser tabs during automated tests, whether you’re opening new tabs, switching between them, or closing them. Here's how to control your tabs with simple commands:
Opening a New Tab
To open a new tab in your browser, use the following command:
- Open amazon.com in a new tab. This will open a new tab, allowing you to work in multiple tabs during your test.
- IMPORTANT: Highlight that even when a new tab is open, we need to explicitly switch context of the application to that new tab by adding an instruction for “Switch to Amazon tab” or “Switch to 2nd tab”
Switching Between Tabs
Switching between tabs lets you interact with different pages or elements within the same session. You can switch by tab number or by the tab's name:
- Switch to 2nd tab: This switches focus to the second tab (index starts at 1), allowing you to perform actions on that page.
- Switch to Lambdatest tab: Switch to the tab named "Lambdatest", regardless of its position in the tab order.
Use these commands when you have multiple pages open and need to shift focus between them.
Closing Tabs
You can close tabs either by position or by name when you're done with them:
- Close Lambdatest tab: Closes the tab named "Lambdatest". This is useful when you’ve finished interacting with a specific page and want to clean up the session.
- Close 2nd tab: Closes the second tab in the current session. This command is useful when you want to manage tab resources and focus on a single page.
Tips for Managing Tabs
- When switching tabs, be sure the tab is open before using a switch command. If the tab doesn’t exist or has already been closed, the command will fail.
- Tabs are indexed in the order they were opened. Keep track of the open tabs to avoid confusion, especially when switching by position.
- Use explicit waits if the tab change involves loading content or dynamic changes.
Scrolling Commands
KaneAI allows you to easily control scrolling behavior on your web pages. Here’s how you can scroll to elements, pages, or specific sections:
Scroll Until Element is Visible: This command scrolls the page until a specific element, like a button, becomes visible in the viewport. It's perfect for revealing hidden elements that are off-screen initially. [Currently only supported on Web]
Scroll by a Set Amount
- Scroll by 100px: Scrolls the page down by 100 pixels, allowing for fine-grained control of the viewport position.
- Scroll by 20 percent: Scrolls the page down by 20% of the current page height, which is useful for relative scrolling in dynamic pages.
Scroll to Specific Positions
- Scroll to the bottom: Scrolls to the very bottom of the page, making the last section or content visible.
- Scroll to the top: Brings the page back to the top, useful for navigating or resetting the viewport.
Scroll Multiple Times
- Scroll 3 times: Repeats the scroll action three times, which can be helpful for interacting with infinite scroll pages or loading dynamic content.
Use scroll until for elements not yet visible in the viewport. Works for entire pages and scrollable subsections.
Assertions
Assertions are used to validate whether your expectations match the actual outcomes in the application. KaneAI supports several types of assertions to check various elements during test execution:
| Category | Example |
|---|---|
| Driver Assertions | Validate browser state ( current URL, window dimensions).
|
| Text Assertions | Check for presence/absence of text.
|
| Visual Assertions | Confirm image or logo visibility.
|
| Relative Assertions | Validate element relationships.
|
| Mathematical Assertions | Check numeric calculations.
|
Since July 20, 2025, all assertions fail tests immediately by default.
Older tests may still use warn-and-continue until edited.
More info: Failure Conditions
Unsupported Assertions (Coming Soon)
Currently, the following assertion types are not available in KaneAI. These features are being developed and will be supported soon:
| Category | Example | Description |
|---|---|---|
| Element State | Assert if submit button is disabled | Directly accessing and asserting an element's state (e.g., enabled/disabled) is not supported yet. |
| Element Property | Assert if font size is 16px | Direct assertions on element properties (like CSS styles) are not yet available. |
| Spatial | Assert the 5th column of the table contains "Jordan.Mathews" | Requires detailed knowledge of the DOM structure to assert based on element positions and arrangement. |
| Action-based | Assert tooltip appears after hover | Assertions based on actions (e.g., hover or click) are split into multiple steps and not fully supported as a single assertion yet. |
| Nested Assertions | Assert login button enabled AND welcome message visible | Nested assertions involve multiple layers of validation within a single assertion. |
Query Information
KaneAI allows you to retrieve specific information from your web page during tests:
- query the current URL: Retrieves the current URL of the active page
- query the time mentioned in the poster: Extracts specific text or data, such as the time listed on a poster or other page element
Conditional Actions
Highlight that nested conditions are not yet supported. Additionally usage of modules within if else conditions is part of the roadmap.
Use conditional logic to execute actions based on specific conditions on the page.
Conditional Click Example: if pop up is present in the viewport then click on it: clicks on a pop-up element if it is visible within the current view.
Conditional Selection Example: if price < 200 then click add to cart else select second product: selects an action based on the price condition. If the price is less than $200, it adds the item to the cart. Otherwise, it selects the second product.
Do's and Don'ts
Follow these examples for better clarity and performance during test writing:
| Do (Good Example) | Don’t (Bad Example) |
|---|---|
Assert text "Submit" on form footer is visible | Assert that the submit button works and the layout is correct |
Assert textbox contains the exact value 'heading1' | Assert the textbox has heading (vague, unclear what “heading” refers to) |
Assert logo is visible | Assert 3 search results are shown |
Assert search results appear after a wait step | Wait for search results and then assert they are visible (assertion contains action) |
Assert the divider looks red | Assert divider color is #ff5733 (too detail‑specific, fragile visual check) |
Assert no text in table overflows its cell | Assert the page looks well designed (subjective, unclear) |
Key Takeaways:
- Be specific and clear: Avoid vague assertions like "heading" and ensure conditions are well-defined.
- Don’t mix actions with assertions: Keep actions (like waiting for an element) separate from assertions.
- Avoid overly specific checks: Instead of checking for exact visual details (like a color code), focus on functionality (e.g., "Assert divider is visible").
- Limit the number of assertions: Avoid making too many assertions in a single step. Test one clear outcome per assertion.
Best Practices
Follow these best practices to write effective and reliable tests:
- Write clear, specific commands: Ensure your instructions are precise and unambiguous to improve test reliability.
- Combine command types for richer tests: Use a mix of commands like waits, clicks, and queries to create more complex and dynamic test flows.
- Use conditional logic for dynamic scenarios: When a page changes dynamically (e.g., based on user interaction), use if-else logic to handle different conditions effectively.
- Apply waits thoughtfully for stability: Use waits when necessary to ensure elements are loaded and ready for interaction, preventing timing issues.
- Always add assertions to validate outcomes: After actions, always verify expected outcomes (e.g., element visibility, text presence) to ensure that the desired result has been achieved.
