Sharing TestMu AI Tunnel
TestMu AI is a cross browser testing tool which allows you to test your locally hosted website or web application on 3000+ real browsers. It does so with the help of a TCP with TLS 1.2 secure connection tunnel which establishes a secure and unique connection from your local system to TestMu AI cloud servers.
Earlier with TestMu AI Tunnel, users belonging to the same organization were able to choose any tunnel they want. So if a team had 5 members and all of them had configured their own tunnels, then they were able to shuffle their TCP with TLS 1.2 secure connection tunnel with any of the 5 connections. However, that is not the case anymore!
Now, a user can only work on a user-specific TCP with TLS 1.2 secure connection tunnel. In case you wish to keep a common TCP with TLS 1.2 secure connection tunnel across all your teammates then you will need to establish a shared TestMu AI Tunnel that would work for all of the teammates, listed under your organization at TestMu AI.
This document will help you share your TestMu AI Tunnel with colleagues listed as team in your TestMu AI account.
Configuring TestMu AI Tunnel
Step 1: Download the zip file of TestMu AI Tunnel for your operating system:
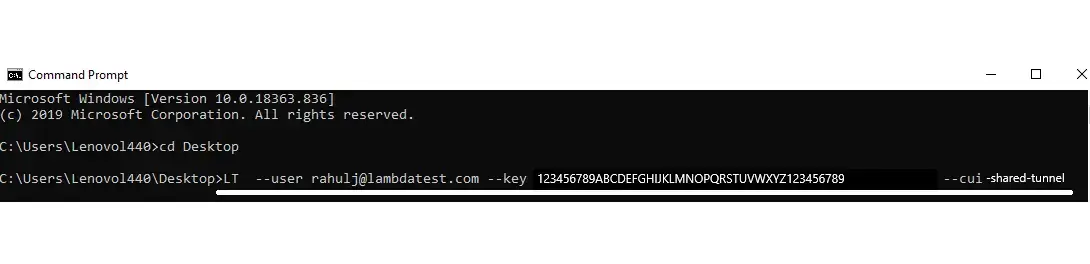
Step 2: Extract the zip file in your system and route your CMD/terminal to the same folder where the zip file is extracted. For demonstration purpose, we have extracted the zip file to desktop so you will find the CMD to be pointed towards the desktop.

Step 3: To configure a shared TestMu AI Tunnel you would need to append an argument --shared-tunnel to the command used for invoking TestMu AI Tunnel. Syntax to configure a shared TCP with TLS 1.2 secure connection TestMu AI Tunnel would be:
LT --user {user's login email} --key {user's access key} --shared-tunnel --tunnelName {string}
So for example, if your user login email is example@lambdatest.com and your user key is 123asd123, the command would be:
LT --user example@lambdatest.com --key 123asd123 --shared-tunnel --tunnelName SharedTCP-TLS12-Example
Step 4: As you run the above command you will find the below console UI indicating with a message that the tunnel is successfully established.
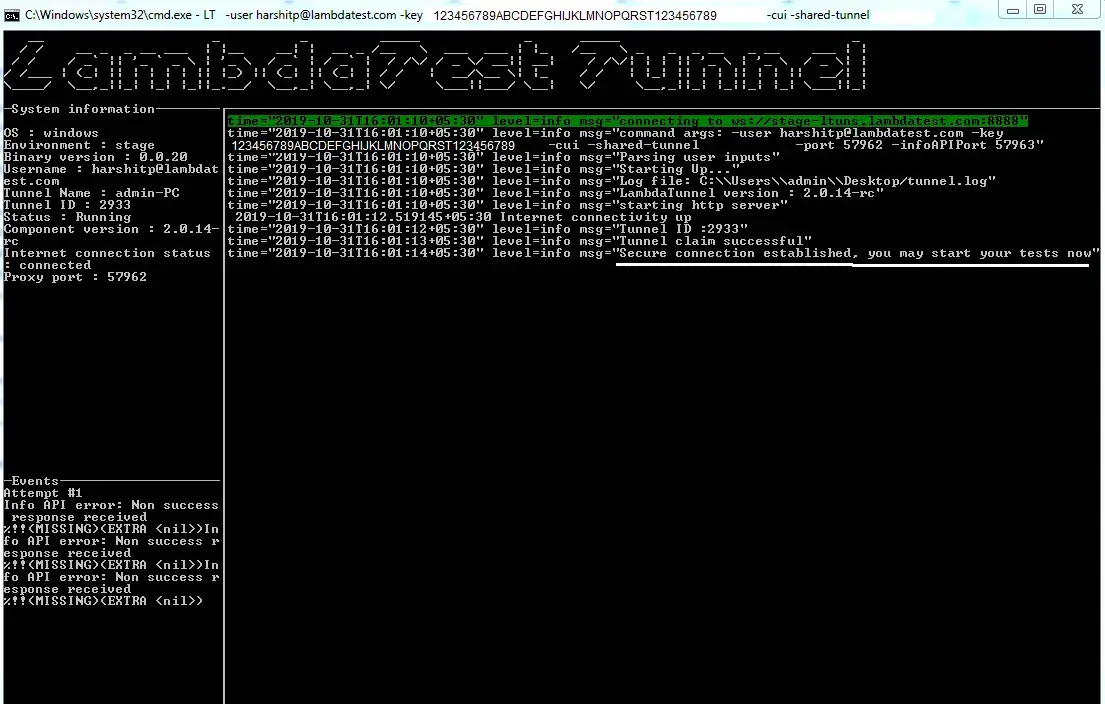
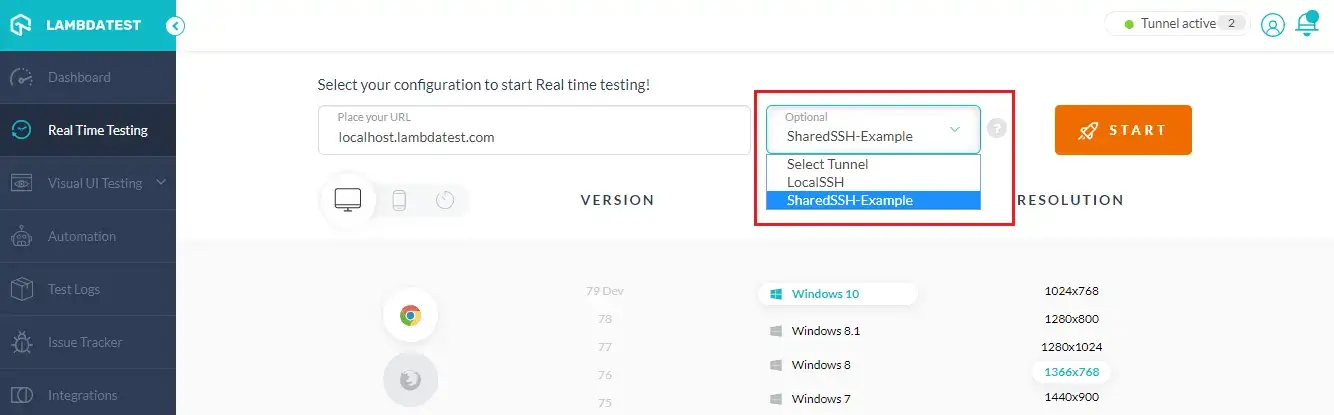
That is it, if your teammates will now open their TestMu AI account then they will find your Tunnel to be active for them by default.
Don't Forget To Name The Shared Tunnel
It could be problematic if 2 or more teammates start sharing their tunnels across the organization, as a best practice we recommend you to name the Shared tunnel appropriately so your teammates could easily identify which TCP with TLS 1.2 secure connection tunnel is their own and which is the one shared by you.
To name a shared tunnel you will have to append another argument in the command for configuring tunnel. The new argument would be: -tunnelName {string}
Syntax:
LT --user {user's login email} --key {user's access key} --shared-tunnel --tunnelName {string}
Example
LT --user example@lambdatest.com --key 123asd123 --shared-tunnel --tunnelName SharedTCP-TLS12-example
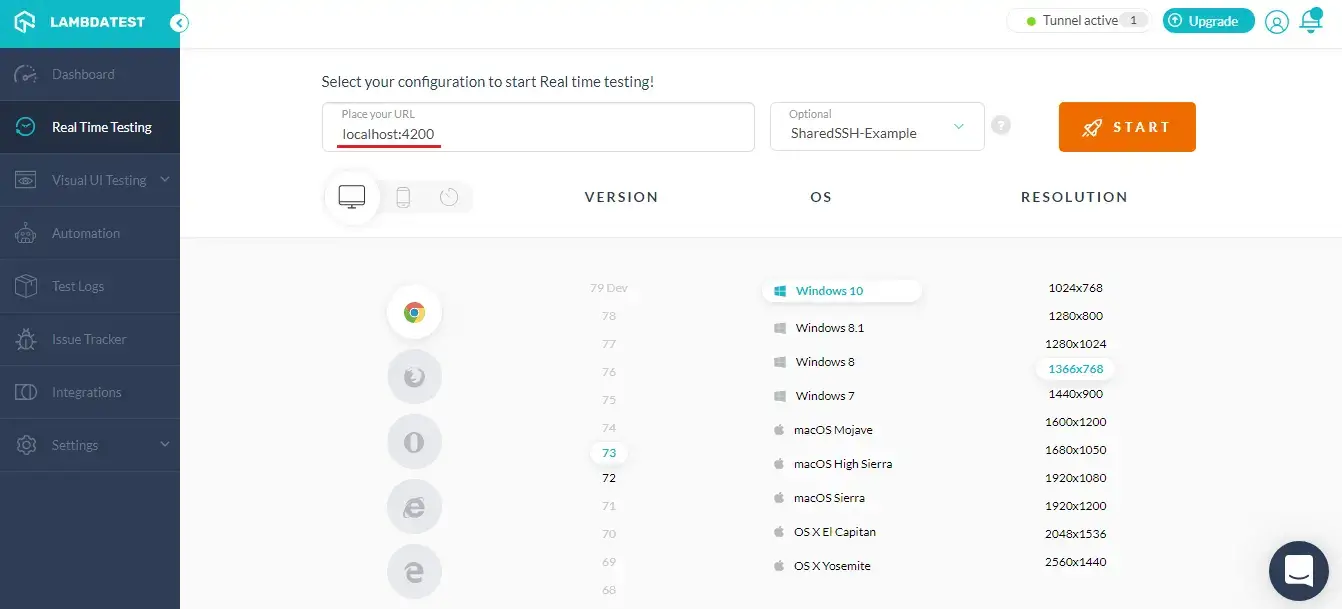
Important Note: If you are running local host at a port which is different from the default port being used your team then make sure to tell them so they can address it in the URL while performing cross browser testing at TestMu AI. For example, if you are running Apache server at port 4200, and want your teammates to hop over a URL that is hosted locally by you, then they will have to specify port 4200 before they hit the start testing button on TestMu AI.
Kudos! You have successfully created a Shared TestMu AI Tunnel for your organization. If you still have any questions, feel free to share them with us through our 24/7 chat support or by mailing to us on support@testmu.ai. Happy testing! 🙂
