Parallel Testing Of Locally Hosted Pages Using Load Balancing In TestMu AI Tunnel
Load Balancing feature allows you to perform parallel testing of your locally hosted or privately hosted website or web app on 3000+ real browsers through TestMu AI Tunnel. The Tunnels created under this feature will act as a single pool for the tests and thereby will help in performing parallel testing on the TestMu AI platform.
How To Activate Load Balancing In TestMu AI Tunnel?
The Load Balancing in TestMu AI Tunnel is achieved with the help of load balanced tunnel modifier, used as shown in the below syntax:
--load-balanced
Now to activate the Load Balancing feature in the TestMu AI Tunnel, create more than one tunnel with the same name and Load Balancing tunnel modifier. It means that, we need to open more than one tunnel binary and use the below command in each of them:
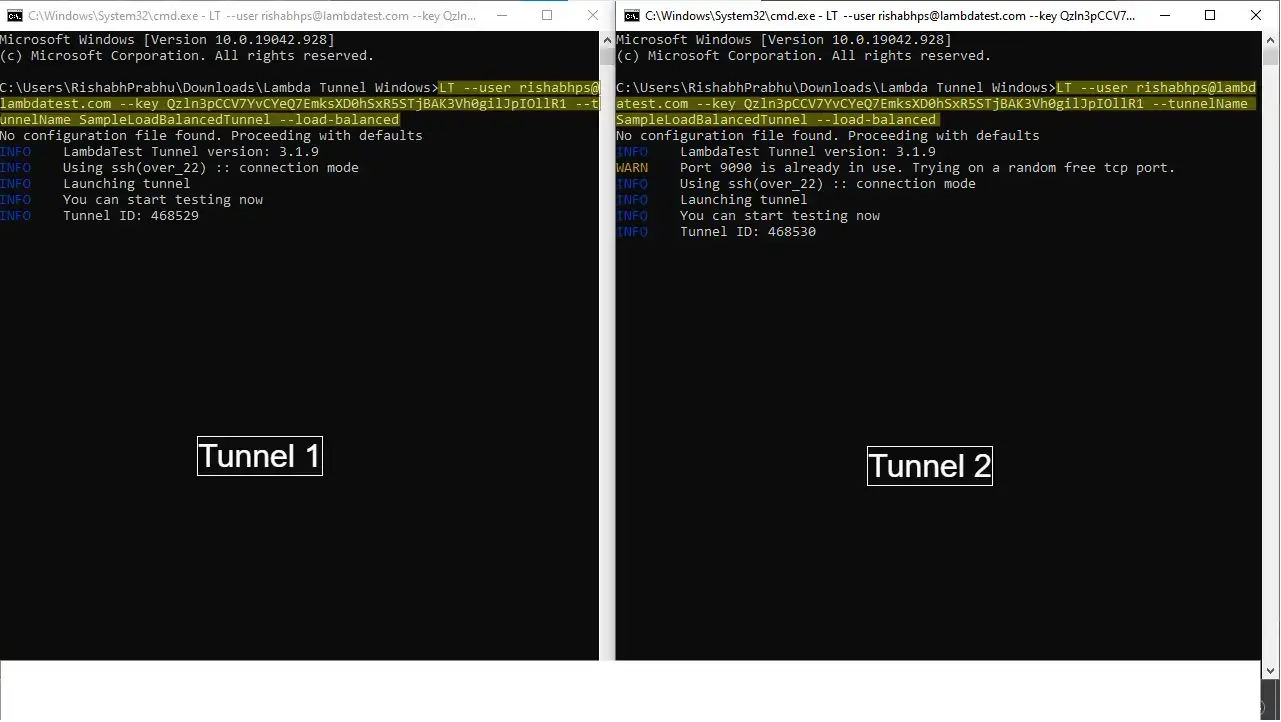
LT --user username --key access_key --tunnelName SampleTunnel --load-balanced
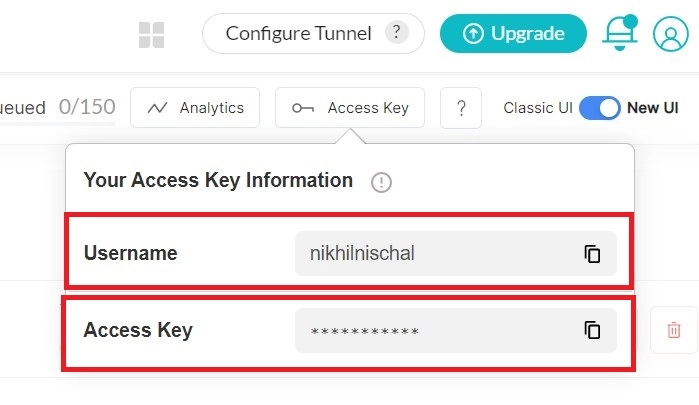
To get your TestMu AI Username and Access Key, visit your TestMu AI automation dashboard and click on the "key" icon, present on the left to the help button, on the top right corner.
For example, in the below screenshot, you can see two tunnels activated in the Load Balanced mode, using the above syntax:
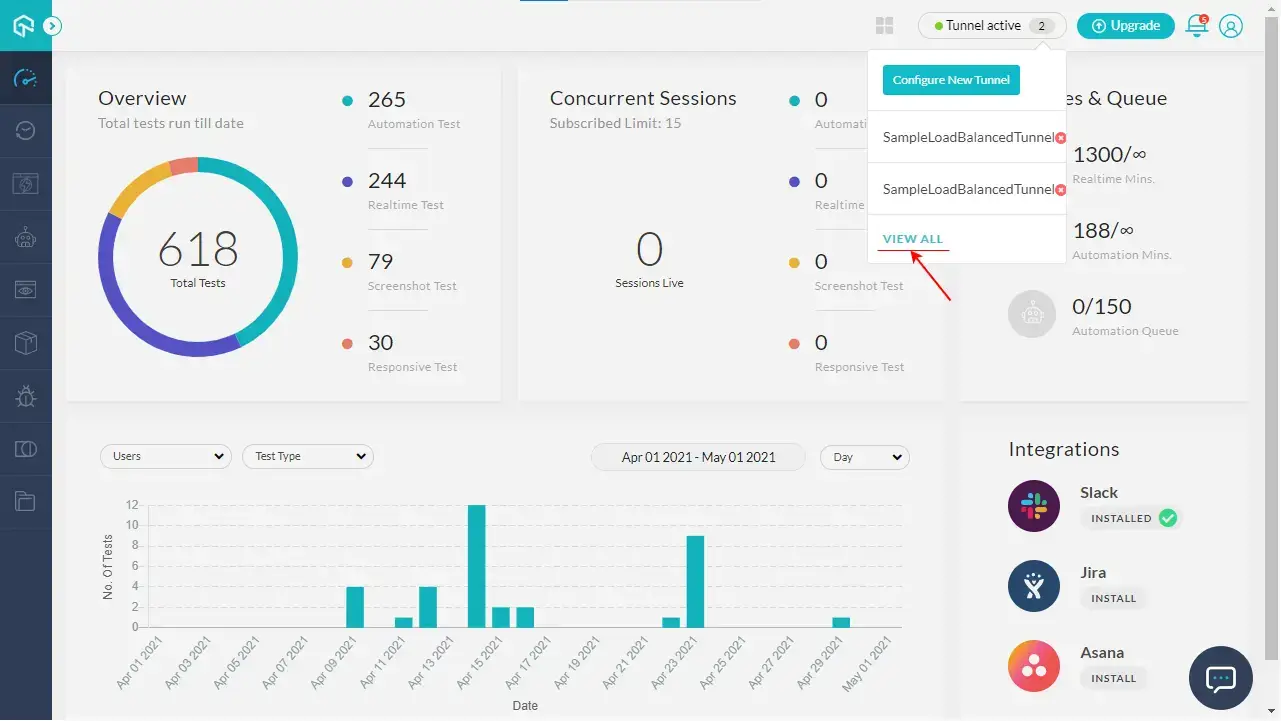
Now when you will go to you TestMu AI dashboard, you will find both the tunnels active with same name, stating that the tunnels are load balanced.

Parallel Testing Using Load Balanced TestMu AI Tunnel
After activating the load balanced tunnels, all you need to do is to pass the "tunnel" capability as true in your automation test script. This will automatically run your tests in parallel by taking advantage of the Load Balancing.
Please note that you do not need to set the "tunnelName" capability as the tunnel name will be automatically managed from active tunnels in your profile.
For example, here is the Automation Logs view of the test run using the Load Balancing feature of TestMu AI Tunnel.

As you can see, 10 tests have been executed in Parallel in 8.33 minutes due to the advantage of Load Balanced TestMu AI Tunnel, which otherwise would have taken much longer.
How To Stop The Active Load Balanced Tunnels?
You can stop the active load balanced TestMu AI Tunnels with the help of Tunnel sessions info. To do so, first you need to click on View All button in the Active Tunnel list, as shown below:
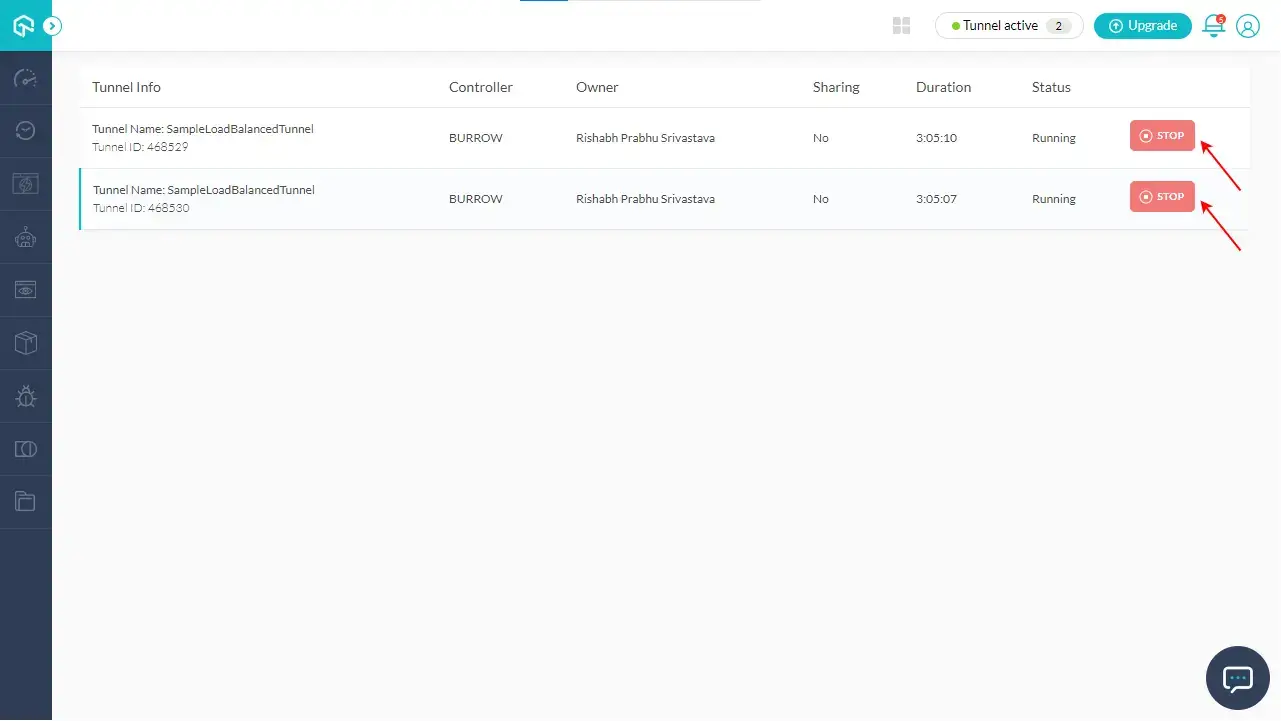
Then in the Tunnel Sessions info, you can see all the active tunnels with their information, active state and a Stop button to stop the corresponding active tunnel.
Just press on this Stop button against the tunnel you want to stop, and it will end the tunnel session right away.
That’s all! You can now successfully activate and use the Load Balancing feature of TestMu AI Tunnel, to test your locally hosted website in parallel. If you still have any questions, feel free to share them with us through our 24*7 Chat Portal or by mailing to us on support@testmuai.com.
Happy testing!
