Setting Up Charles Proxy Through TestMu AI Tunnel
This article will guide you on how to setup Charles Proxy for the tests run on TestMu AI platform through TestMu AI Tunnel.
Objective
By the end of this article, you will be able to :
- Configure TestMu AI Tunnel and setup Charles Proxy for your tests through the created tunnel.
- View Network Logs of the tests run on the TestMu AI Cloud Platform on Charles Interface.
- Manipulate the Network Requests of the tests through SSL Proxying on Charles.
What is Charles Proxy?
Charles proxy is an interactive web debugging tool which acts as an intermediate between a client (mobile or web app) and the internet. It enables the users in configuring the client environment to pass all the networking requests and responses through Charles proxy so that they can inspect and even change the data midstream to test how a app responds.
In Web and Internet development we are unable to see what is being sent and received between the client and the server. So, it is difficult to determine exactly where the fault is. By using Charles, users can get the idea of what is happening to quickly diagnose and fix problems.
Prerequisites
Before getting started with the setup, you would have to follow these steps:
-
Download Charles Proxy software from the official website and install it. You can also download from the links below.
-
Download the TestMu AI Tunnel binary file and extract it to setup the tunnel.
-
Or you can download the GUI tunnel application Underpass to setup the tunnel easily without using terminal.
Installing Charles Root Certificate
-
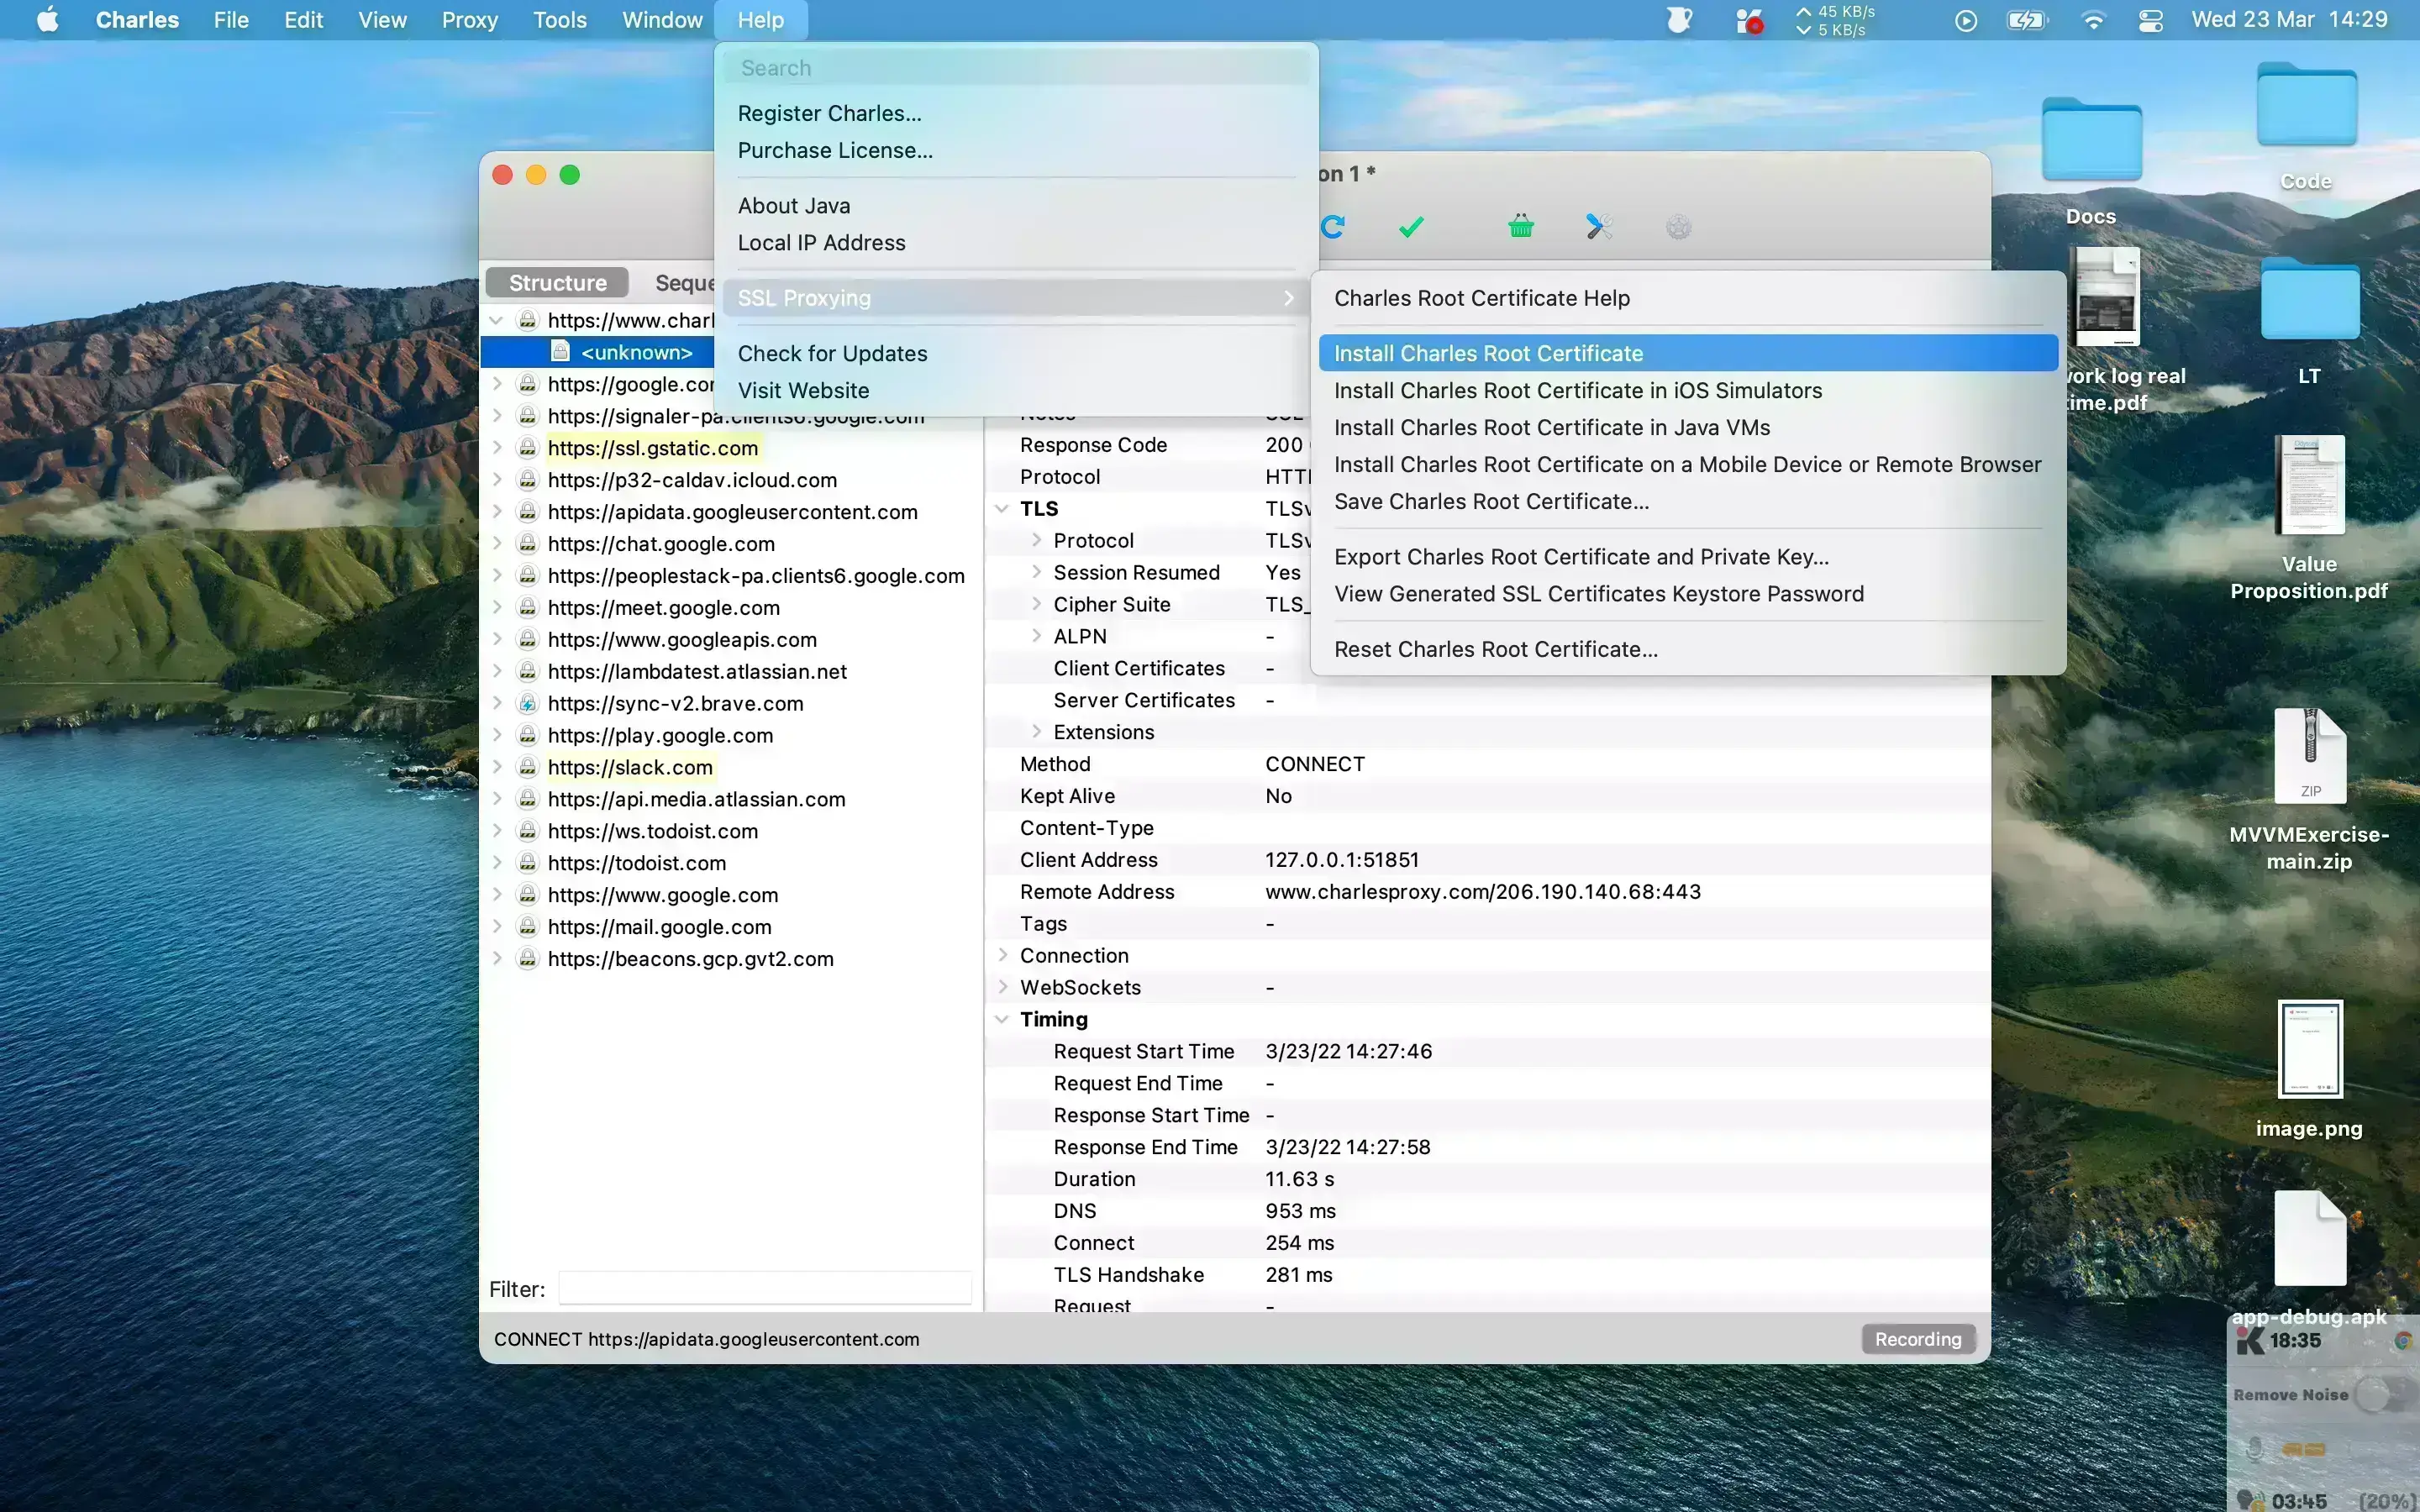
Once you install Charles, you would have to navigate to "Install Charles Root Certificate" under Help section.
-
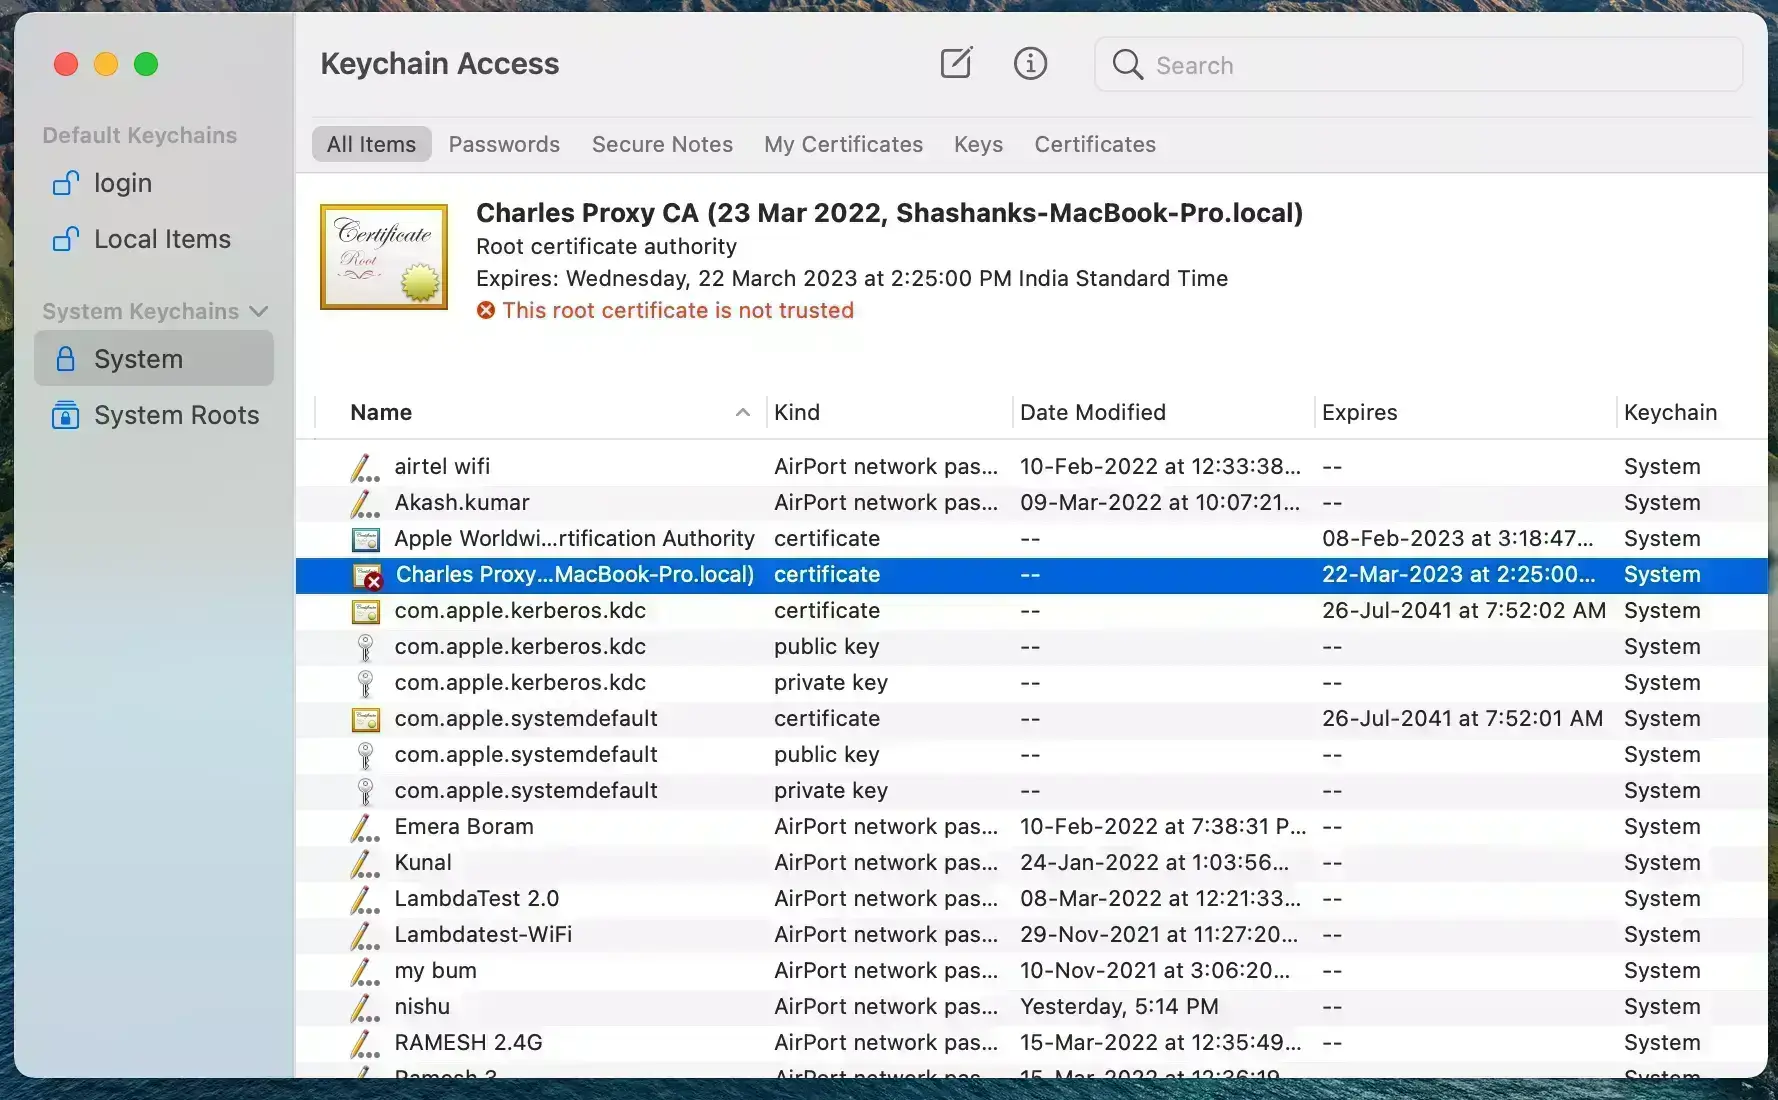
On clicking, you need to grant the access to install the certificate to your system. Then you will be able to view the certificate in Mac's Keychain Access as shown
-
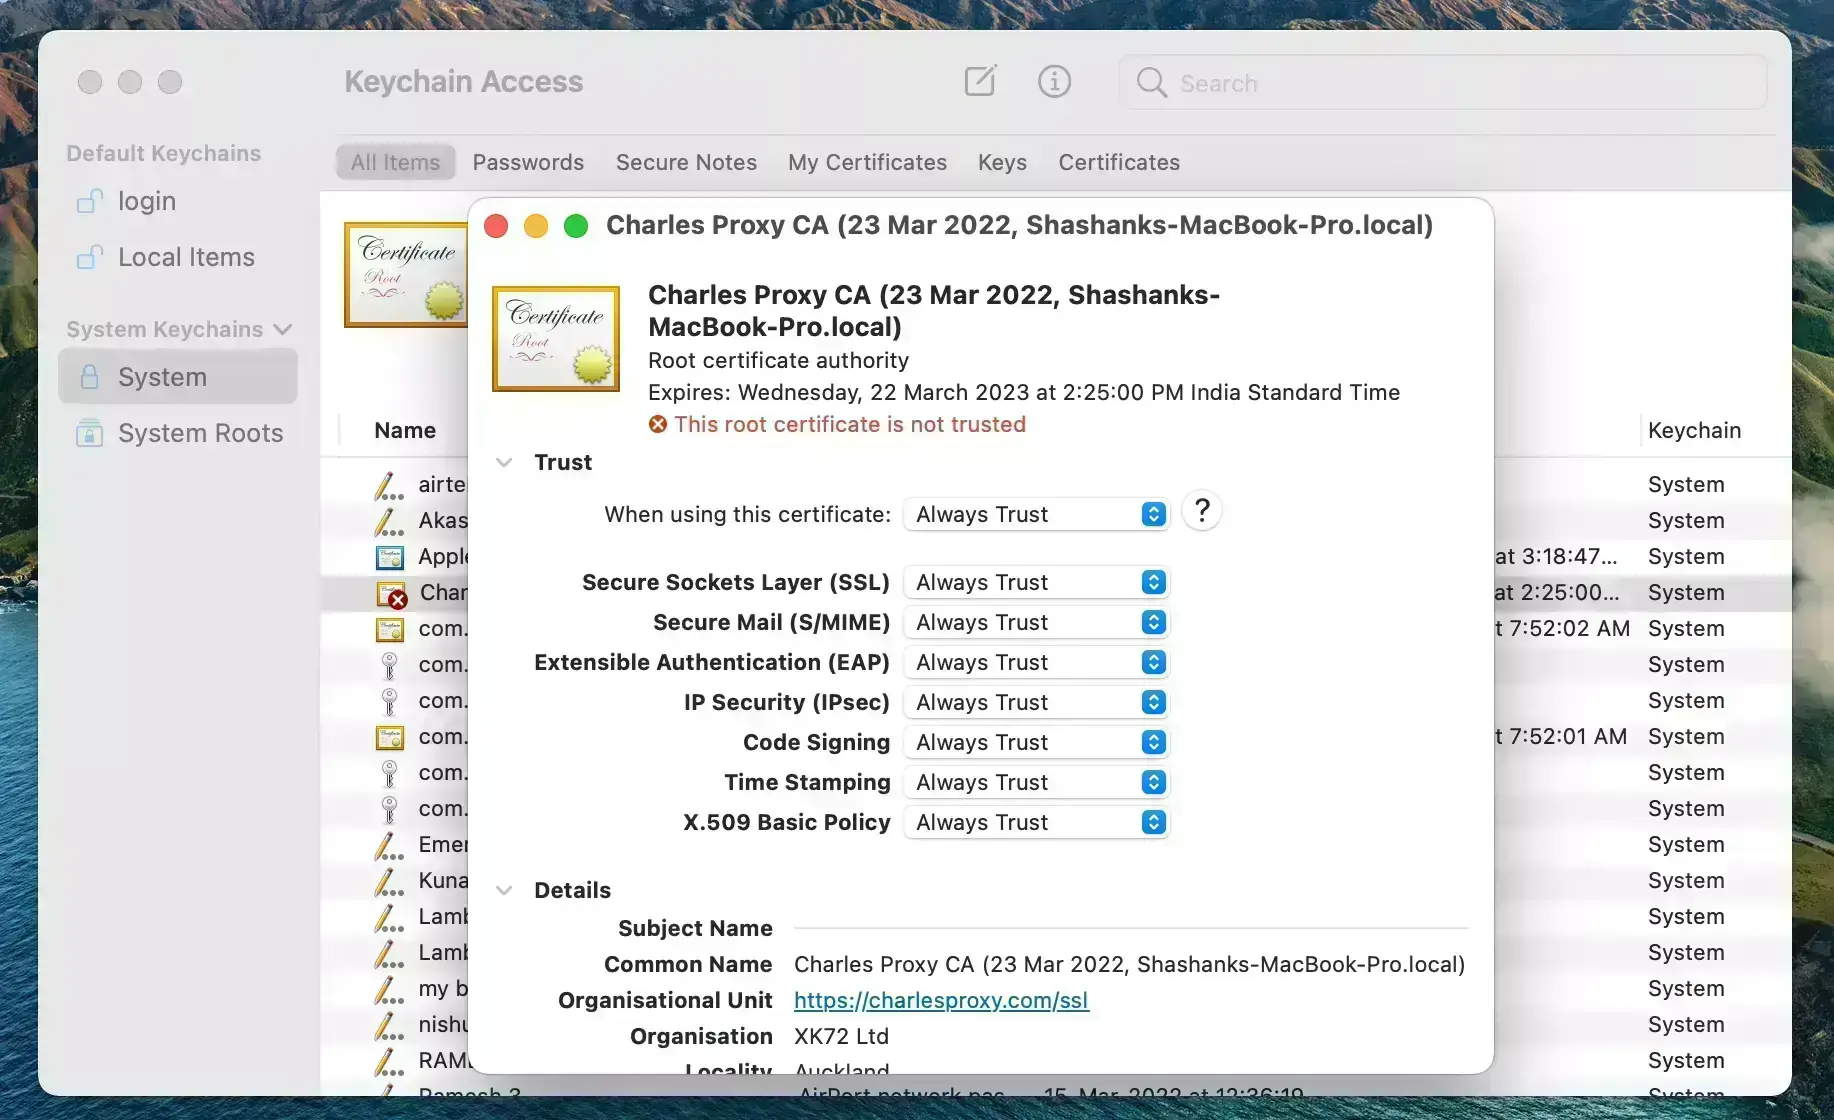
Now you need to open the installed certificate and select "Always Trust" option under the Trust section. This gives permission to the Charles Proxy to access the network resources from the system. Here you would have to grant the access again to save the modified settings.
Getting the Port Number
Now, navigate to the Proxy Settings on Charles to view the Port Number used by the Charles Proxy in your system.
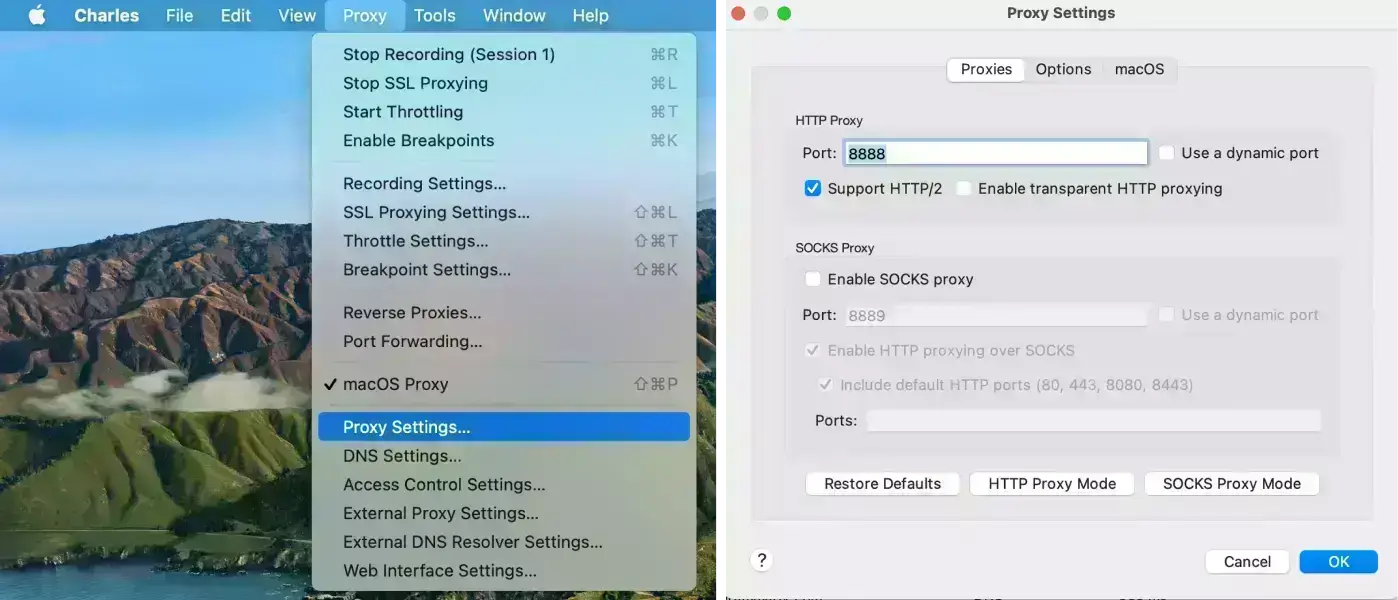
In this case the Port number which is in use is
8888. We will be using it to configure the TestMu AI Tunnel.
Configuring The TestMu AI Tunnel
Now you need to setup and configure the TestMu AI Tunnel through which you will be able to route the traffic of your tests run using Charles Proxy. You can configure a TestMu AI Tunnel by using the tunnel binary file or by downloading the GUI application Underpass by TestMu AI.
Through The Binary File
To configure the tunnel, you need to download the TestMu AI's Tunnel Binary File following the steps mentioned in the Prerequisites before. You can find the shell command in the TestMu AI Dashboard to setup a basic tunnel.
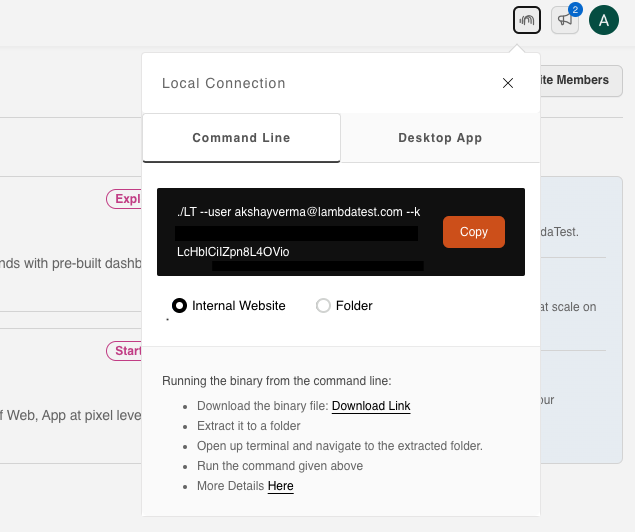
But here we need to add the Charles proxy server through which we want to route the traffic of the tunnel. We can do that by appending the --proxy-host (localhost) and --proxy-port (8888 in this case) options to the above command. The format of the command would be:
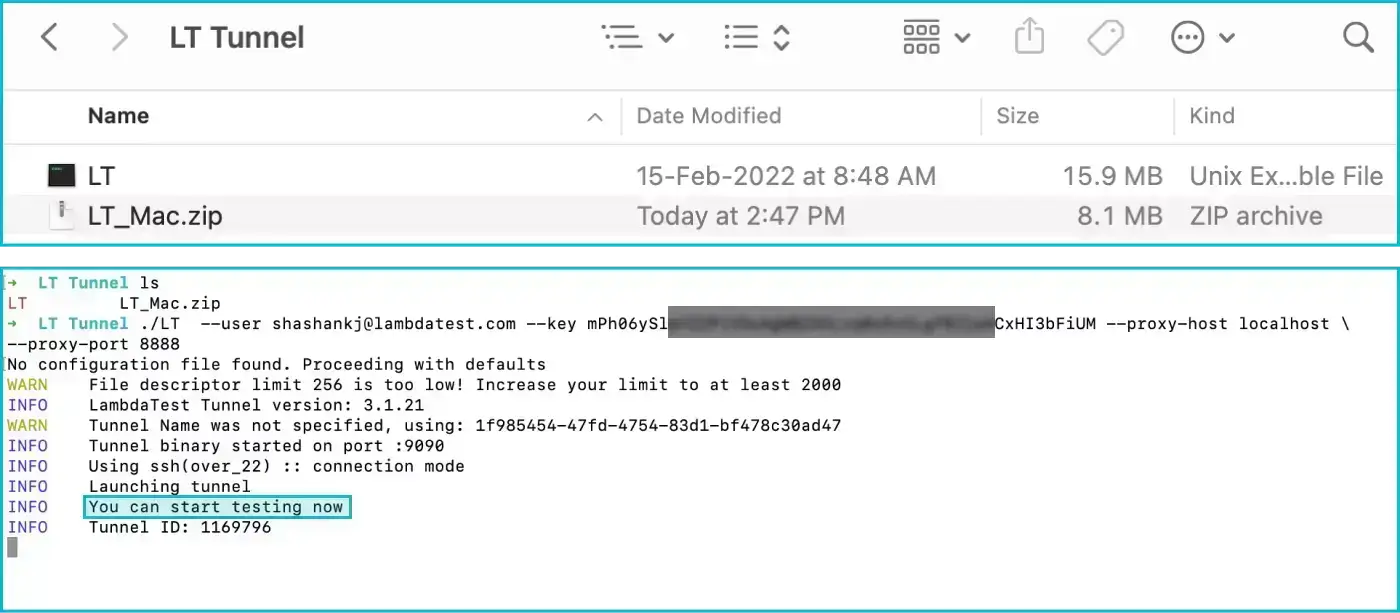
./LT -user {user’s login email} -key {user’s access key} \
--proxy-host localhost \
--proxy-port 8888
You can get your TestMu AI Access Key from the TestMu AI Automation Dashboard.
You need to run the above command from the terminal in the directory where you have extracted the LT binary file as shown. Make sure that Charles Proxy Session is up and running before you can start the tunnel. Now once the tunnel is setup, you will be able to see "You can start testing now" in the terminal as shown.
Through Underpass
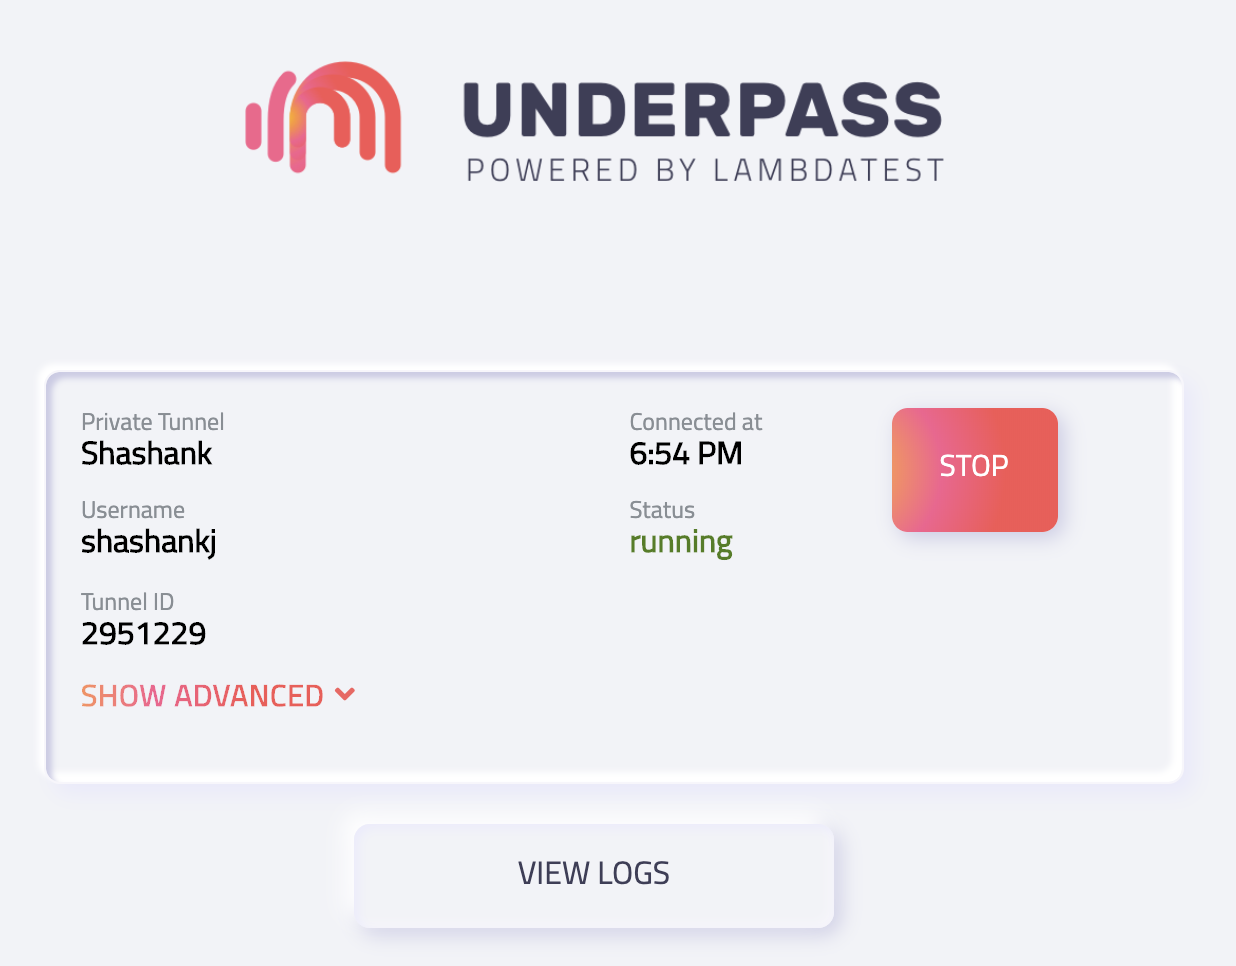
Before you can configure and setup the tunnel, you need to download the Underpass application as mentioned in the Prerequisites before. For more details about Underpass, refer to our guide on getting started with Underpass application. Once you install Underpass, you need to pass your TestMu AI authentication credentials as shown below.
Now to configure the tunnel with Charles Proxy, we need to add proxy to the tunnel. The proxy host : localhost and port : 8888 can be set using "Show Advanced Configuration option" in Underpass. You can set more advanced options through this if necessary.
Make sure to also select Advanced Configuration and turn on MITM (Man in the Middle) mode so that we can see the decrypted network data and perform changes to the data being exchanged.

On clicking the Launch button, you will be able to start the tunnel with the configured proxy setup. Make sure you are running the Charles Software before launching the tunnel using Charles Proxy Port. You will be able to see the status as "running" once the tunnel is launched successfully.
Steps to download the SSL certificate in the TestMu AI Private Real Devices:
Only for Private Cloud Users.
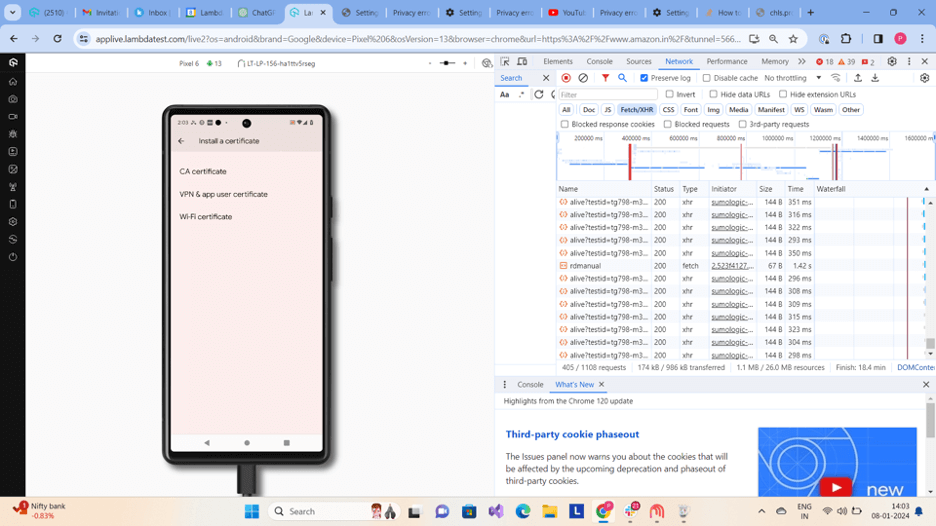
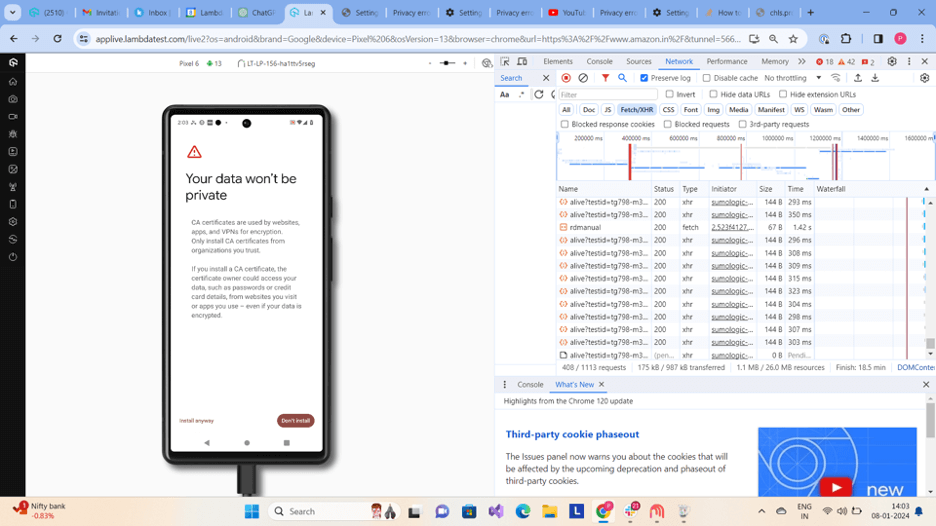
Step 1: Launch the session with the tunnel which we have enabled and visit http://chls.pro/ssl site to download the SSL certificate.
Step 2: Visit the settings of the device and search for "CA certificate"
Step 3: Click on CA certificate
Step 4: Confirm installation by clicking "Install Anyway" when prompted.
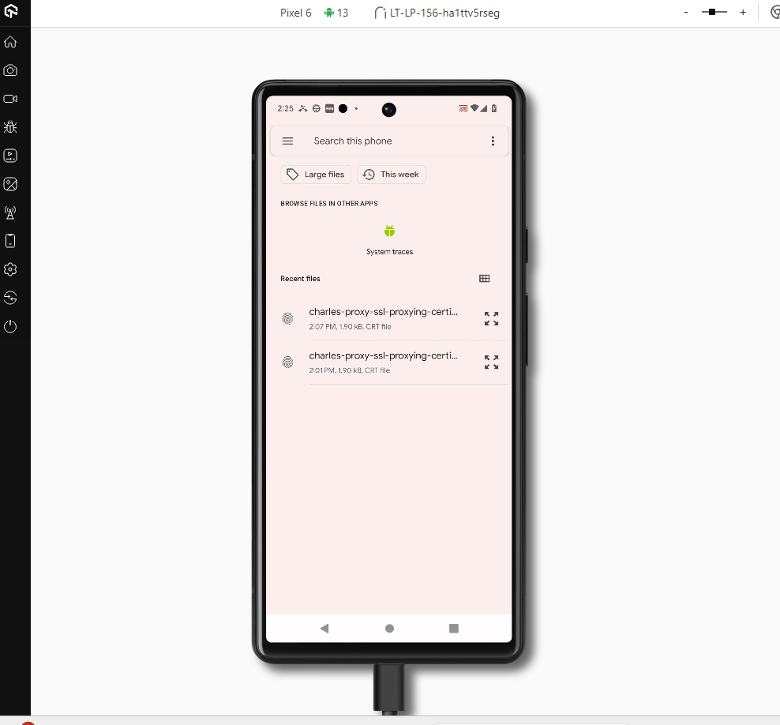
Step 5: Select the Charles Proxy SSL proxying certificate to install it.
Viewing Network Logs Through Charles Proxy
Once this is taken care of, the setup is now complete.
Now there are 2 ways of enabling SSL proxying without which we will not be able to view the data being exchanged.
Method 1: Adding domains
-
Navigate to SSL Proxying Settings under Proxy section.
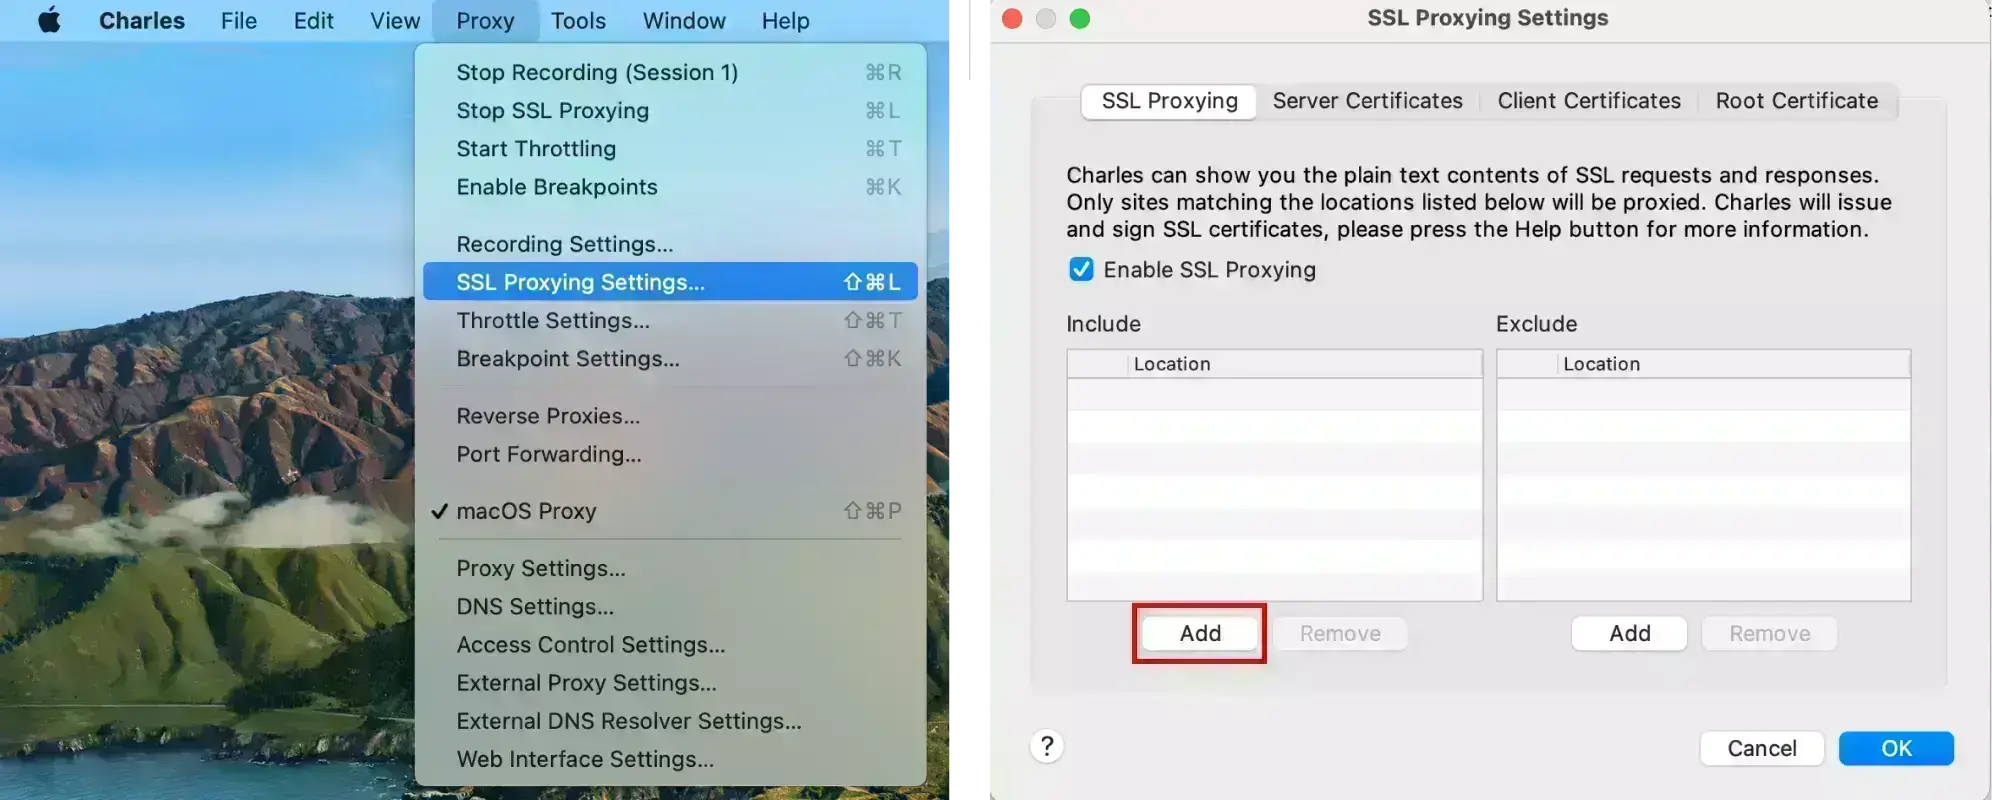
-
Then you need to add the host of the site [amazon.com] under Include to enable SSH Proxying.
There is no need to mention the port number here as it will be allocated by default on adding.
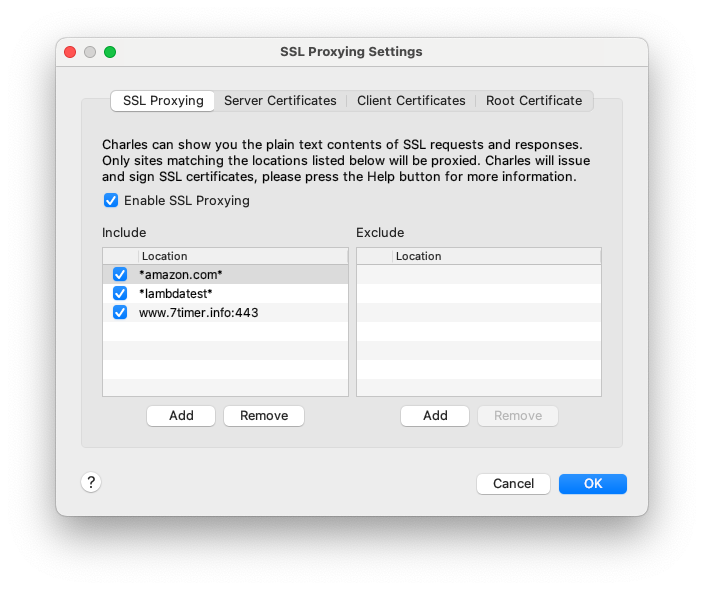
We have added
*amazon.com*so that we target the domain and all traffic that contains it in it's URL.
You can also add*(wildcard) and it will intercept end to end flow of data.
We need to ensure that the capabilities network and tunnel are passed as true to successfully get the network logs on Charles. On running the tests, you will be able to see the host in Structure panel with the Notes - "SSL Proxying enabled for this host".
We can now see the data flowing when we open Amazon on a real device.

Method 2: Right click & enable SSL proxy
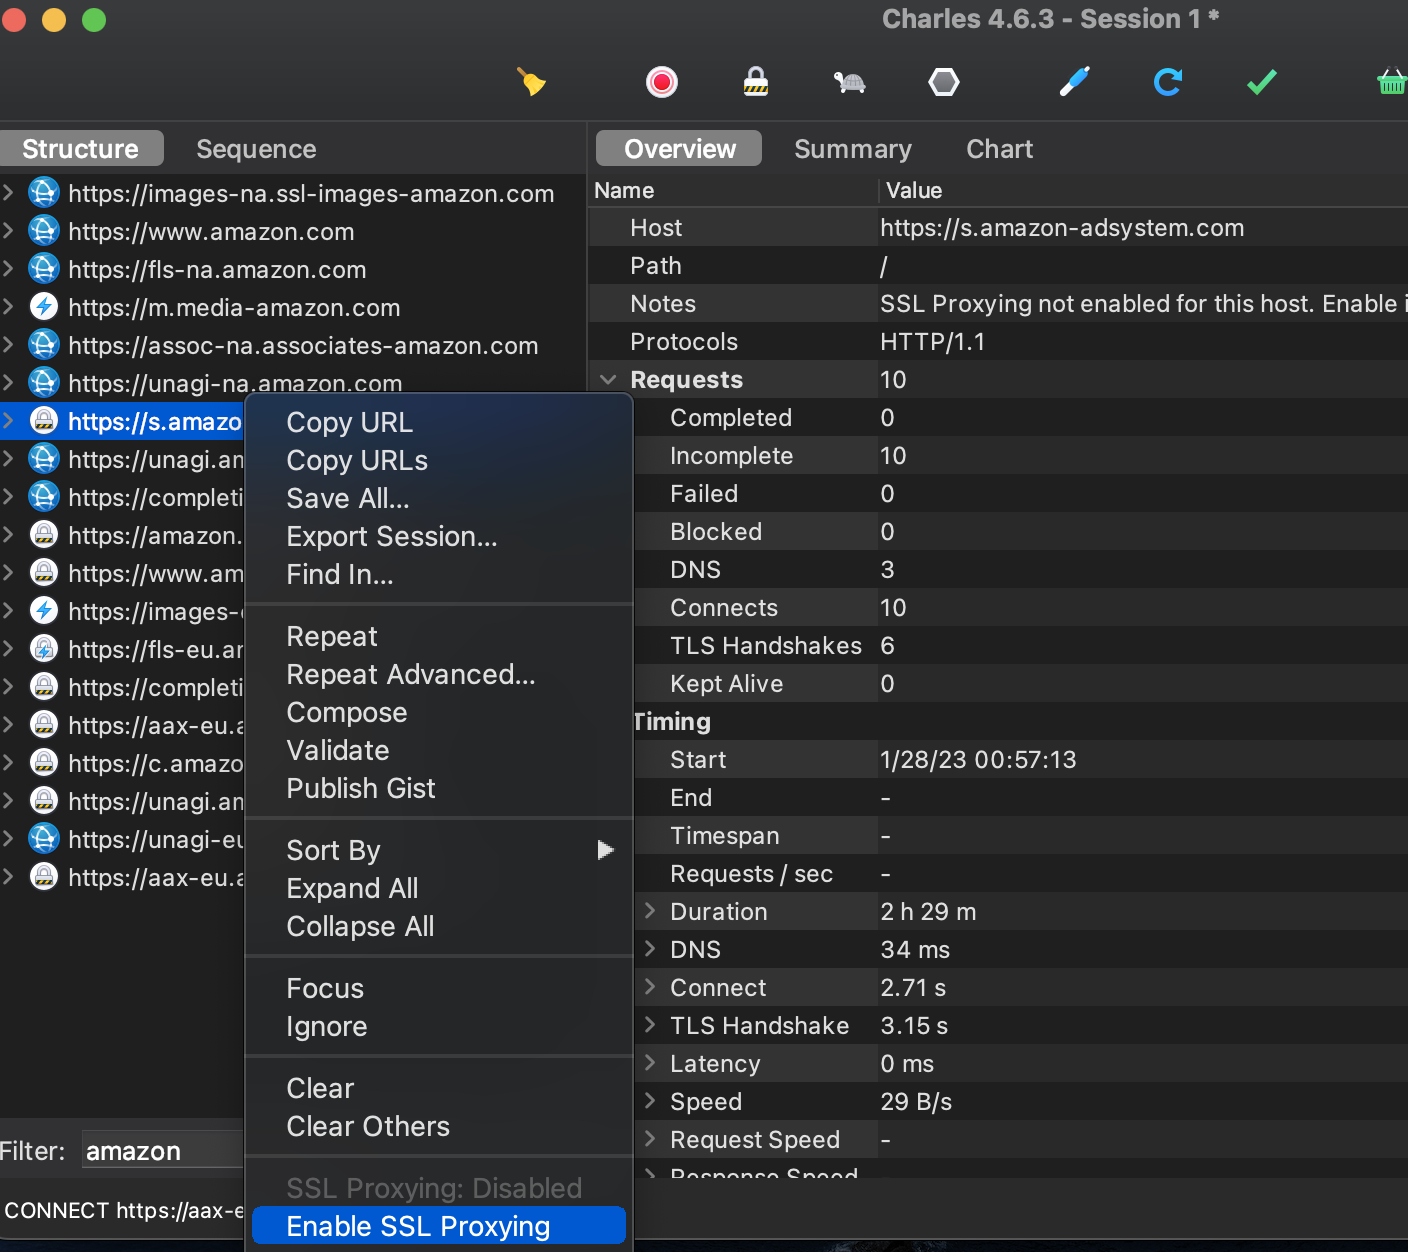
That's it, now all the Network logs will start to show up and we can interact with Charles Proxy.
Mocking data
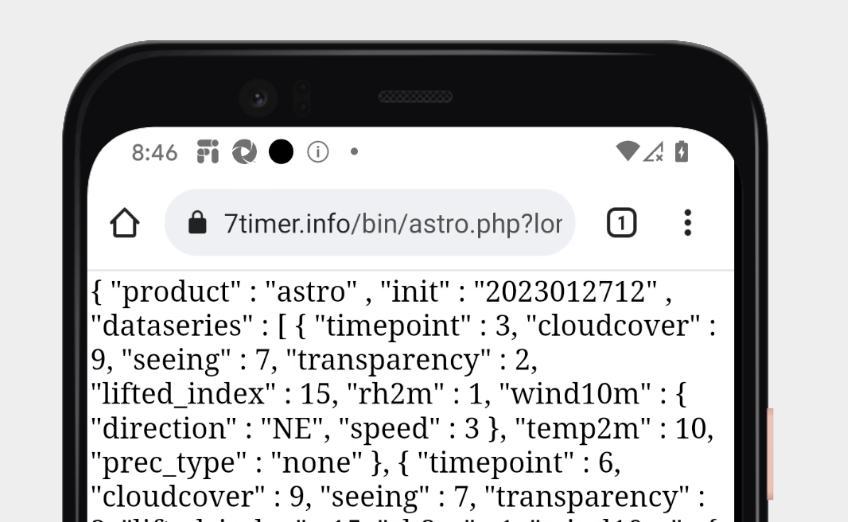
Charles Proxy offers the ability to mock the data that is being passed to and for. Let's look at one such example.
The clean data looks something like this:
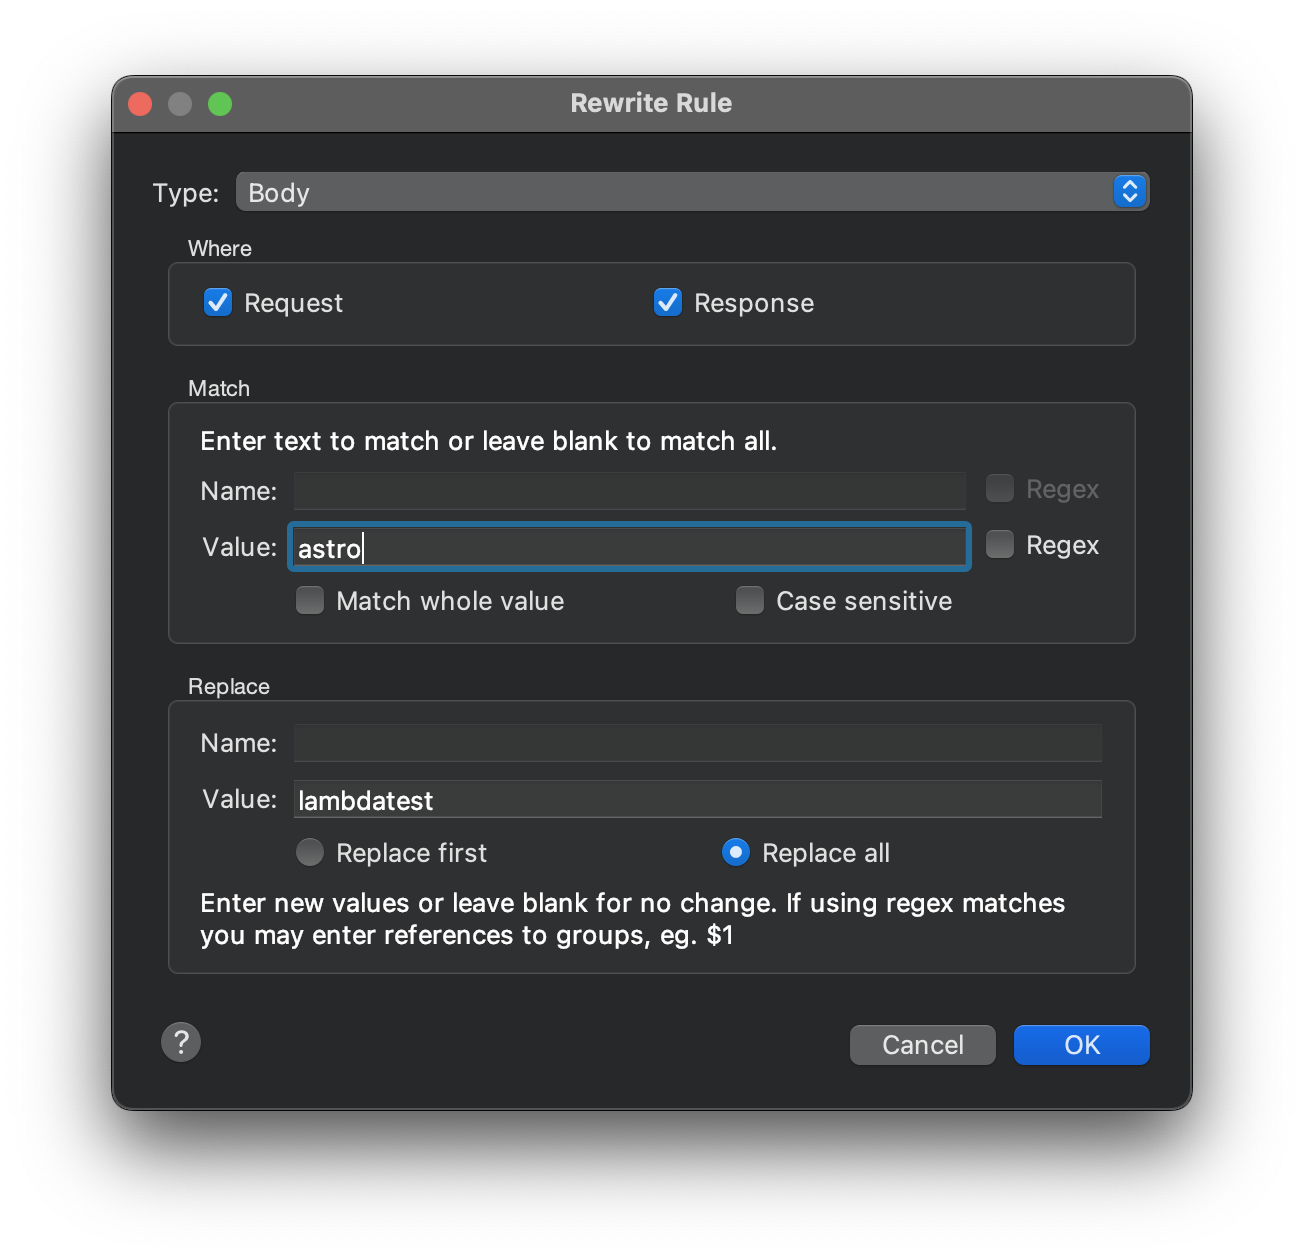
Let's try to change the astro to lambdatest
Click on Tools on the Nav bar and select Rewrite Now, check the Enable Rewrite option.
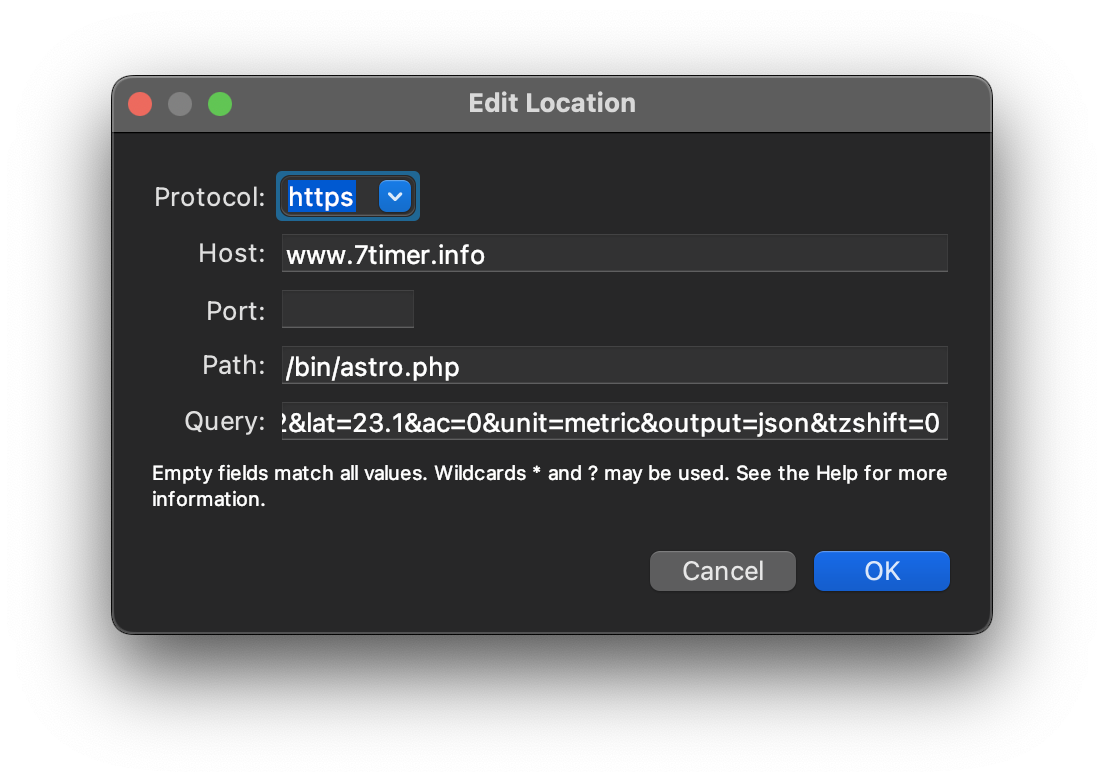
Once done, provide a name to the new rule you create. Then add the URL that you want to change and Charles Proxy will pick up all the data and fill up details.
Click add on the lower table where we'll be defining the data that will auto rewrite when the data is flowing.
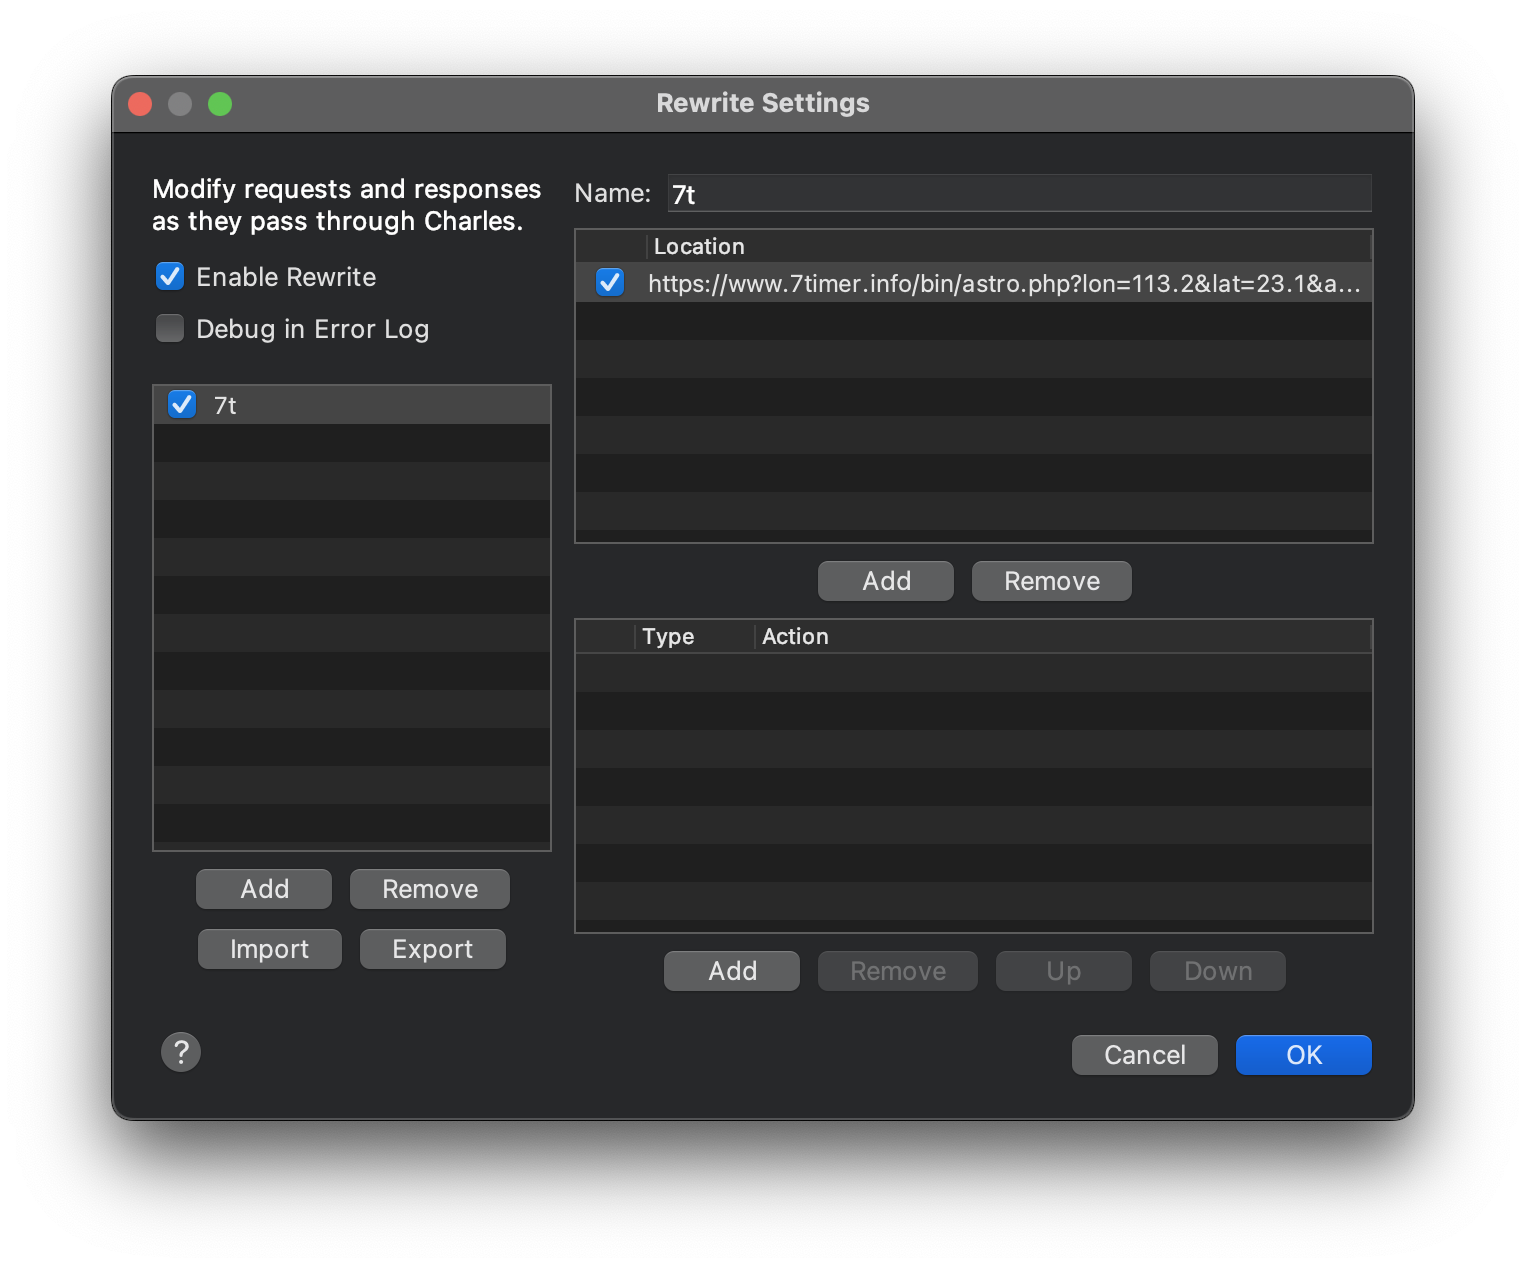
Click save and we're good to go!
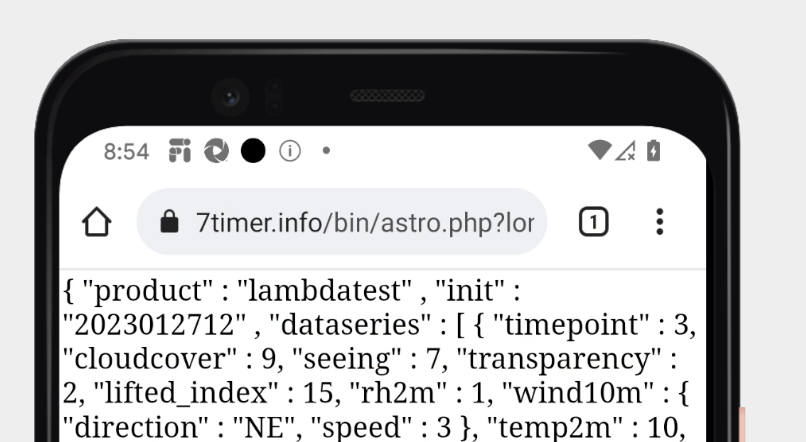
We can now re-launch the browser after closing the tab (on the real device) so that we can clear the cache on the device.
Now when we try opening the URL, we can see the lambdatest appear in the place of astro.
That’s all! In case you have any questions or need any additional information, you could reach out at our [24X7 Chat Support] or mail us directly at support@testmuai.com.
