Project Settings
This guide provides detailed information on how to navigate and configure the various options available in SmartUI's Project Settings. SmartUI offers a wide array of settings to customize your project, manage approvals, configure comparison parameters, and more. Before delving into the Project Settings, ensure you meet the following prerequisites:
Prerequisites for Accessing Project Settings in SmartUI
To access the Project Settings in SmartUI, you must meet the following requirements:
- You need an active account with LambdaTest.
- Ensure you have an active subscription plan with a valid screenshots limit.
- You must have created a project within the SmartUI web app.
Navigating to Project Settings
To access the Project Settings, follow these simple steps:
-
Log in to your SmartUI account and navigate to your desired SmartUI project and click on it.
-
Click on the "Project Settings" section within the SmartUI dashboard to access the settings related to your project.
Project Settings
- Project Token
- Basic Settings
- Comparison Settings
- Build Settings
- Notifications
- Other Settings
Project Token
The Project Token is a unique identifier that authenticates your SmartUI project for executing tests locally with CLI and APIs. You'll find your Project Token in the Project Settings after creating a project.
Setting Up Project Token
Use this key to authenticate your SmartUI project for executing locally with CLI and APIs.
- MacOS/Linux
- Windows - CMD
- PowerShell
export PROJECT_TOKEN='project#token'
set PROJECT_TOKEN='project#token'
$env:PROJECT_TOKEN='project#token'
Using Project Token
The Project Token is required for:
- CLI executions (
npx smartui exec,npx smartui capture) - API uploads
- Local test execution
- CI/CD pipeline integrations
Keep your Project Token secure and never commit it to version control. Use environment variables or secret management tools in CI/CD pipelines.
Basic Settings

- Project Name: Customize the name of your project to enhance its identification.
Changing the Project Name will automatically update the smartUI.project capability's options for Web/App projects.
- Approvers: Manage the list of authorized individuals responsible for approving changes within the project.
Altering Approvers will impact email notifications, which will be sent to the latest approver list for recent builds.
- Tags: Add tags to your project for better organization and categorization.
Comparison Settings
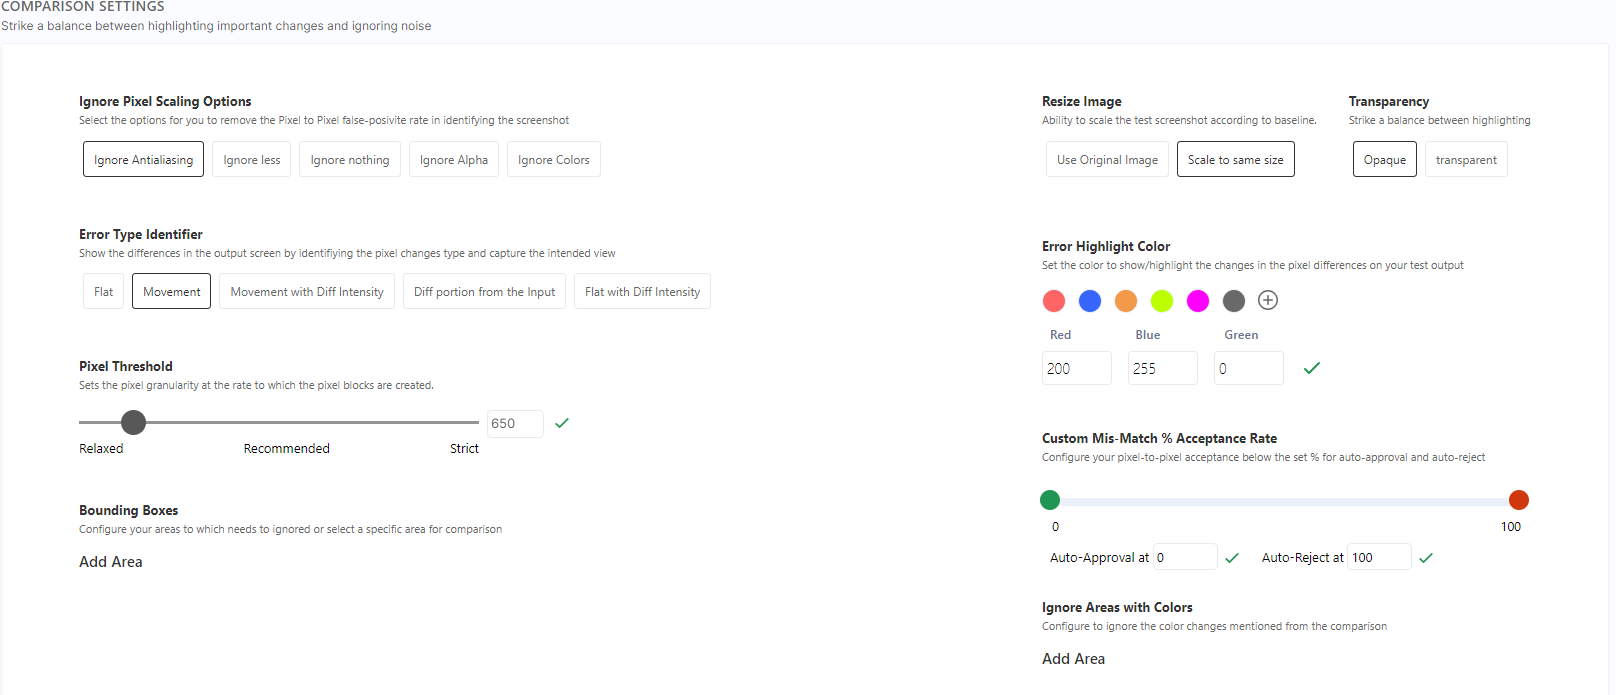
Comparison settings allow you to fine-tune how SmartUI compares screenshots, balancing between highlighting important changes and ignoring noise.
Pixel Threshold
Strike a balance between highlighting important changes and ignoring noise. The pixel threshold determines the sensitivity of the comparison algorithm.
Options:
- Relaxed: Higher threshold, fewer differences detected (good for pages with minor rendering variations)
- Recommended: Balanced threshold (default, suitable for most use cases)
- Strict: Lower threshold, more differences detected (good for precise comparisons)
- Custom: Set a custom threshold value (0-10000)
Example:
- Custom value:
5000- Higher value means more tolerance for pixel differences
Adjusting the Pixel Threshold in Comparison Settings will only affect new builds/screenshots captured after the update.
Error Highlight Color
Set the color to show/highlight the changes in the pixel differences on your test output.
Available Colors:
- Red (default)
- Blue
- Orange
- Green
- Pink
- Gray
- Custom: Enter a hex color code (e.g.,
#f687b3)
Use Case: Choose a color that provides good contrast against your page background for easier visual identification of differences.
Custom Mismatch Acceptance
Configure pixel-to-pixel acceptance percentage for auto-approval.
Settings:
- Accept: Percentage threshold for auto-approval (0-100)
- Reject: Percentage threshold for auto-rejection (0-100)
Example:
- Accept:
0%- No auto-approval - Reject:
100%- Auto-reject all differences
Use Case: Automatically approve screenshots with differences below the acceptance threshold, reducing manual review time.
Smart Ignore
Highlight content changes while smartly ignoring layout shifts and displacement differences.
Toggle: Enable/disable Smart Ignore for the project
Benefits:
- Reduces false positives from layout shifts
- Focuses on actual content changes
- Improves test reliability
For detailed information, refer to Smart Ignore Documentation.
Bounding Boxes
Configure your areas to which needs to be ignored or select a specific area for comparison.
Use Cases:
- Ignore specific regions (ads, dynamic content)
- Focus comparison on specific areas (main content, critical UI)
- Define regions of interest for comparison
Advanced Comparison Settings
Manage your Pixel to Pixel false positives and comparison view types.
Ignore Pixel Scaling Options
Choose options to remove the Pixel to Pixel false-positive rate in identifying the screenshot.
Options:
- Ignore Antialiasing: Ignore differences caused by antialiasing rendering
- Ignore Less: Minimal pixel difference tolerance
- Ignore Nothing: No pixel difference tolerance (strictest)
- Ignore Alpha: Ignore alpha channel differences
- Ignore Colors: Ignore color differences, focus on structure
Use Case: Reduce false positives from rendering differences, browser-specific rendering, or minor pixel variations.
Error Type Identifier
Show the differences in the output screen by identifying the pixel changes type and capture the intended view.
Options:
- Flat: Simple difference highlighting
- Movement: Highlight elements that moved
- Movement with Diff Intensity: Show movement with intensity levels
- Diff portion from the Input: Show only the different portions
- Flat with Diff Intensity: Flat view with intensity levels
Use Case: Choose the view that best helps you identify and understand the differences in your screenshots.
Transparency
Strike a balance between highlighting differences and maintaining visibility of the underlying content.
Options:
- Opaque: Full opacity, clear difference highlighting
- Transparent: Lower opacity, see underlying content
Use Case: Adjust transparency to see both the differences and the original content for better context.
Resize Image
Ability to scale the test screenshot according to baseline.
Options:
- Use Original Image: Compare at original size
- Scale to same size: Scale screenshots to match baseline size
Use Case: Handle cases where screenshots are captured at different resolutions or viewport sizes.
Changes to Project Settings will impact builds/comparisons executed after the changes and the previous builds/comparisons remain unaffected.
Additional Information: For detailed information on these options, refer to our Comparison Settings Documentation.
Build Settings
Smart Baseline

Smart Baseline is a feature that simplifies and automates the process of updating the baseline for approved screenshots in your baseline build. This feature provides convenience and efficiency by ensuring your baseline remains in sync with approved changes without manual intervention.

-
Baseline Branch: A baseline branch build consists of screenshots captured using SmartUI. All screenshots in this build are compared against non-baseline branch builds.
-
Non-Baseline Branches: Non-baseline branch(s) builds are sets of screenshots captured using SmartUI. All screenshots in these builds are compared against the baseline build, matching them by screenshot names.
When Smart Baseline is turned on, the system automatically updates the baseline for approved screenshots in the baseline build, streamlining the testing process and saving time.
Git Settings
Configure Git-related settings for your project, including the baseline branch name, auto-approval branches, GitHub repository linkage, and run status checks.
Additional Information: For detailed information on these options, refer to our Git Baseline Branching Documentation.
Overwrite Screenshot

-
This feature allows to update and overwrite screenshots with the same name, ensuring that the latest version is updated for that screenshot.
-
This capability provides users with more control over the management of screenshots with identical names, enabling them to maintain accurate visual records and efficiently track changes in their application's user interface over time.
Notifications

Configure how you receive alerts and updates about your SmartUI project.
Email Notifications
Receive email notifications whenever there are changes found in your build or the project baseline changes.
Settings:
- Build Changes: Get notified when visual differences are found in builds
- Baseline Changes: Get notified when project baseline is updated
- Approver Changes: Get notified when project approvers list is modified
Use Case: Stay informed about visual changes without constantly checking the dashboard.
Slack Alerts
Receive Slack alerts whenever there are changes found in your build.
Setup:
- Connect your Slack workspace in Project Settings
- Configure which events trigger Slack notifications
- Choose the Slack channel for notifications
Use Case: Integrate visual testing alerts into your team's communication workflow.
We are continually adding more notification channels for SmartUI.
TestMu AI Badge
Show the world that you are using TestMu AI for your visual regression testing.
Badge Code:
[](https://lambdatest.com)
Use Case: Add to your README or documentation to showcase your testing setup.
Delete Project
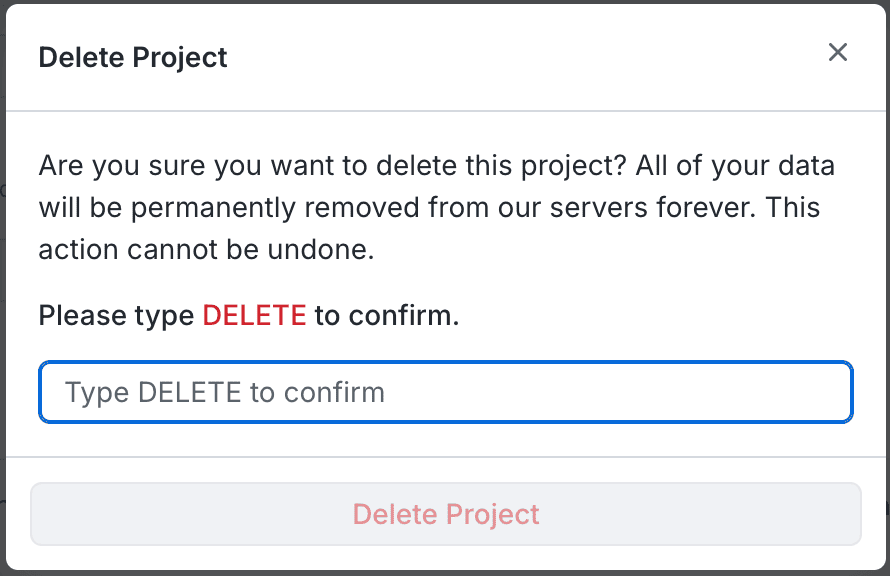
The "Delete Project" option allows administrators or project creators to permanently delete a project. Once a project is deleted, it cannot be retrieved.
Only the Admin or Creator of the project can delete a project. Once deleted, a project cannot be retrieved.
Additional Resources
- Comprehensive Troubleshooting Guide - Solutions for project configuration issues
- Baseline Management - Learn how to manage baselines effectively
- Handling Dynamic Data - Configure ignoreDOM/selectDOM for dynamic content
- Smart Ignore Feature - Automatically ignore layout shifts
- Configuration Options - SDK configuration file options
- Running Your First Project - Get started with SmartUI
- Test Settings Options - Advanced comparison settings
