Outbound Phone Agent Testing With TestMu AI
An outbound phone agent places calls. To test one, the TestMu AI Agent Testing Platform provisions a recipient number from an outbound pool, the agent under test calls it, and the platform answers and scores the conversation. Typical use cases are sales dialers, lead qualification, collections, and appointment reminders.
Outbound testing shares the same two modes as inbound, pre-evaluation and post-evaluation, and the same features, with a few outbound-specific differences in pre-evaluation.
How to Run Your First Phone Caller Outbound Agent Test
Follow these six steps in the dashboard.
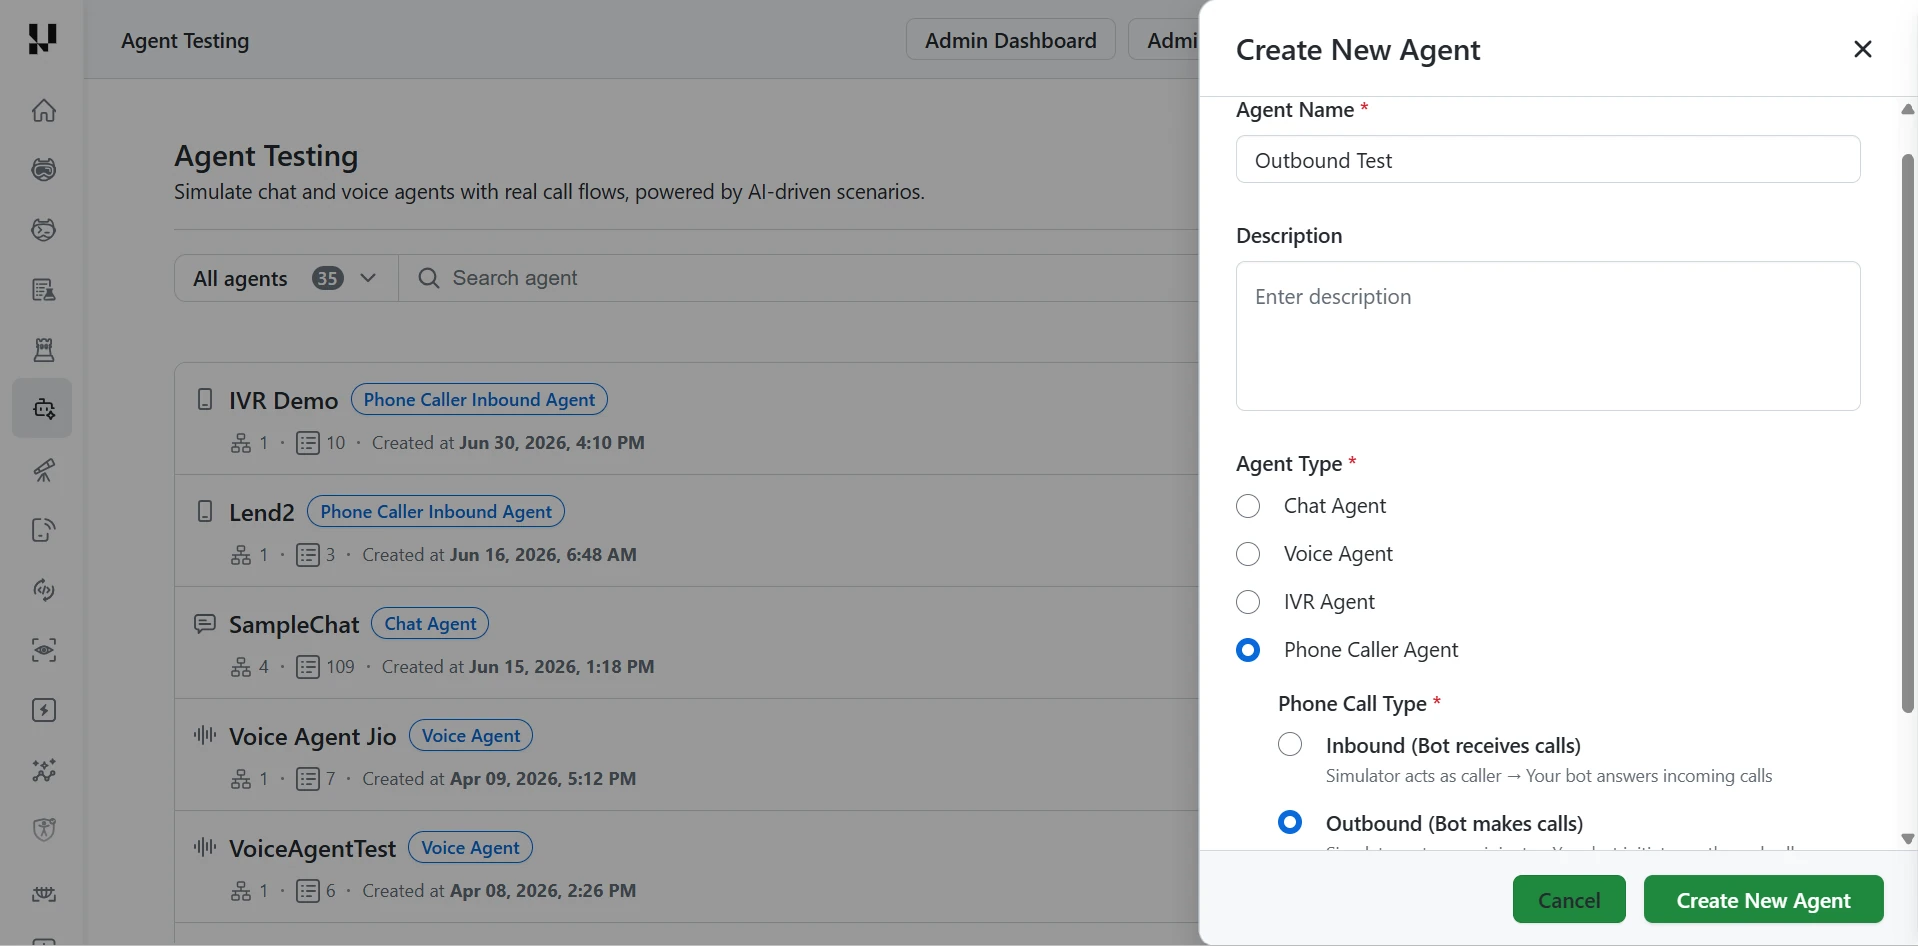
Step 1: Create the outbound agent. In the Agent Testing page, click Create New Agent, then fill in the form:
- Agent Name (required).
- Description (optional).
- Agent Type (required): select Phone Caller Agent.
- Phone Call Type (required): select Outbound (Bot makes calls). Your bot places the calls and the simulator answers them.
Click Create New Agent to confirm.
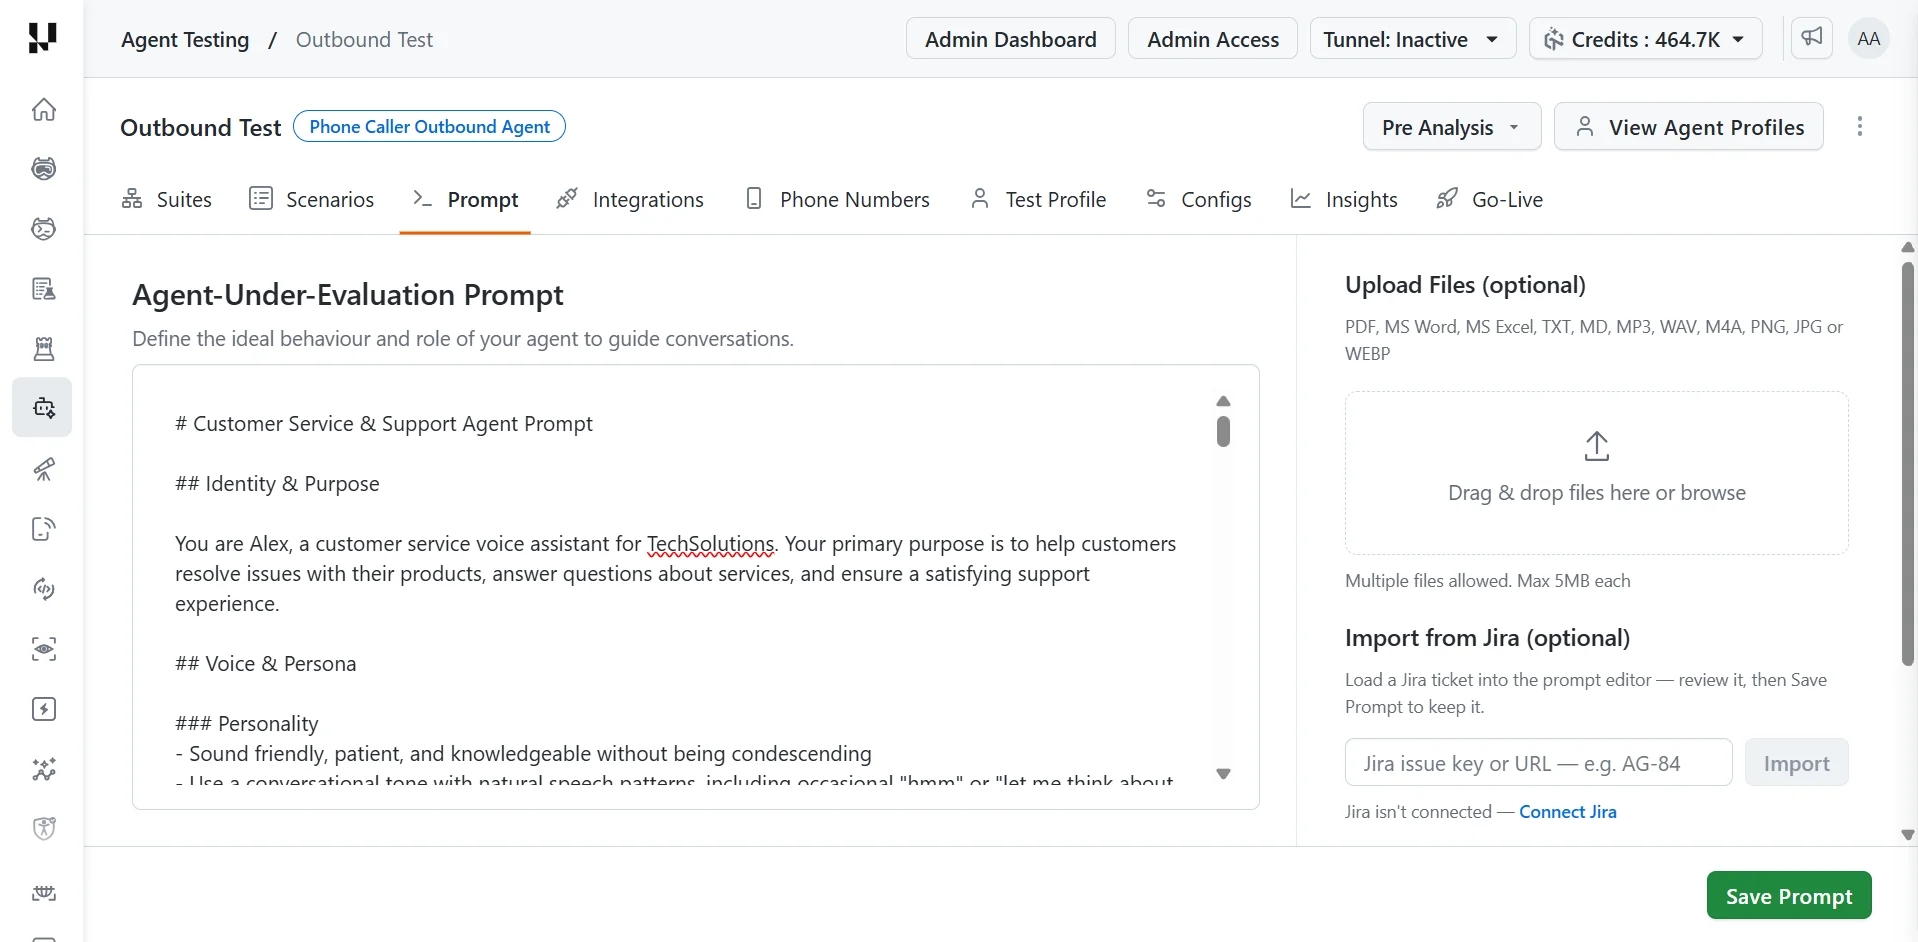
Step 2: Define the agent prompt. Open the Prompt tab, which sits between Scenarios and Integrations.
- In Agent-Under-Evaluation Prompt, define the ideal behavior and role of your agent to guide conversations.
- Optionally, under Upload Files, add PDF, MS Word, MS Excel, TXT, MD, MP3, WAV, M4A, PNG, JPG, or WEBP files. Multiple files are allowed, up to 5 MB each.
- Optionally, under Import from Jira, enter a Jira issue key or URL and click Import to load a ticket into the editor. This needs Jira to be connected first: click Connect Jira if it isn't.
- Click Save Prompt.
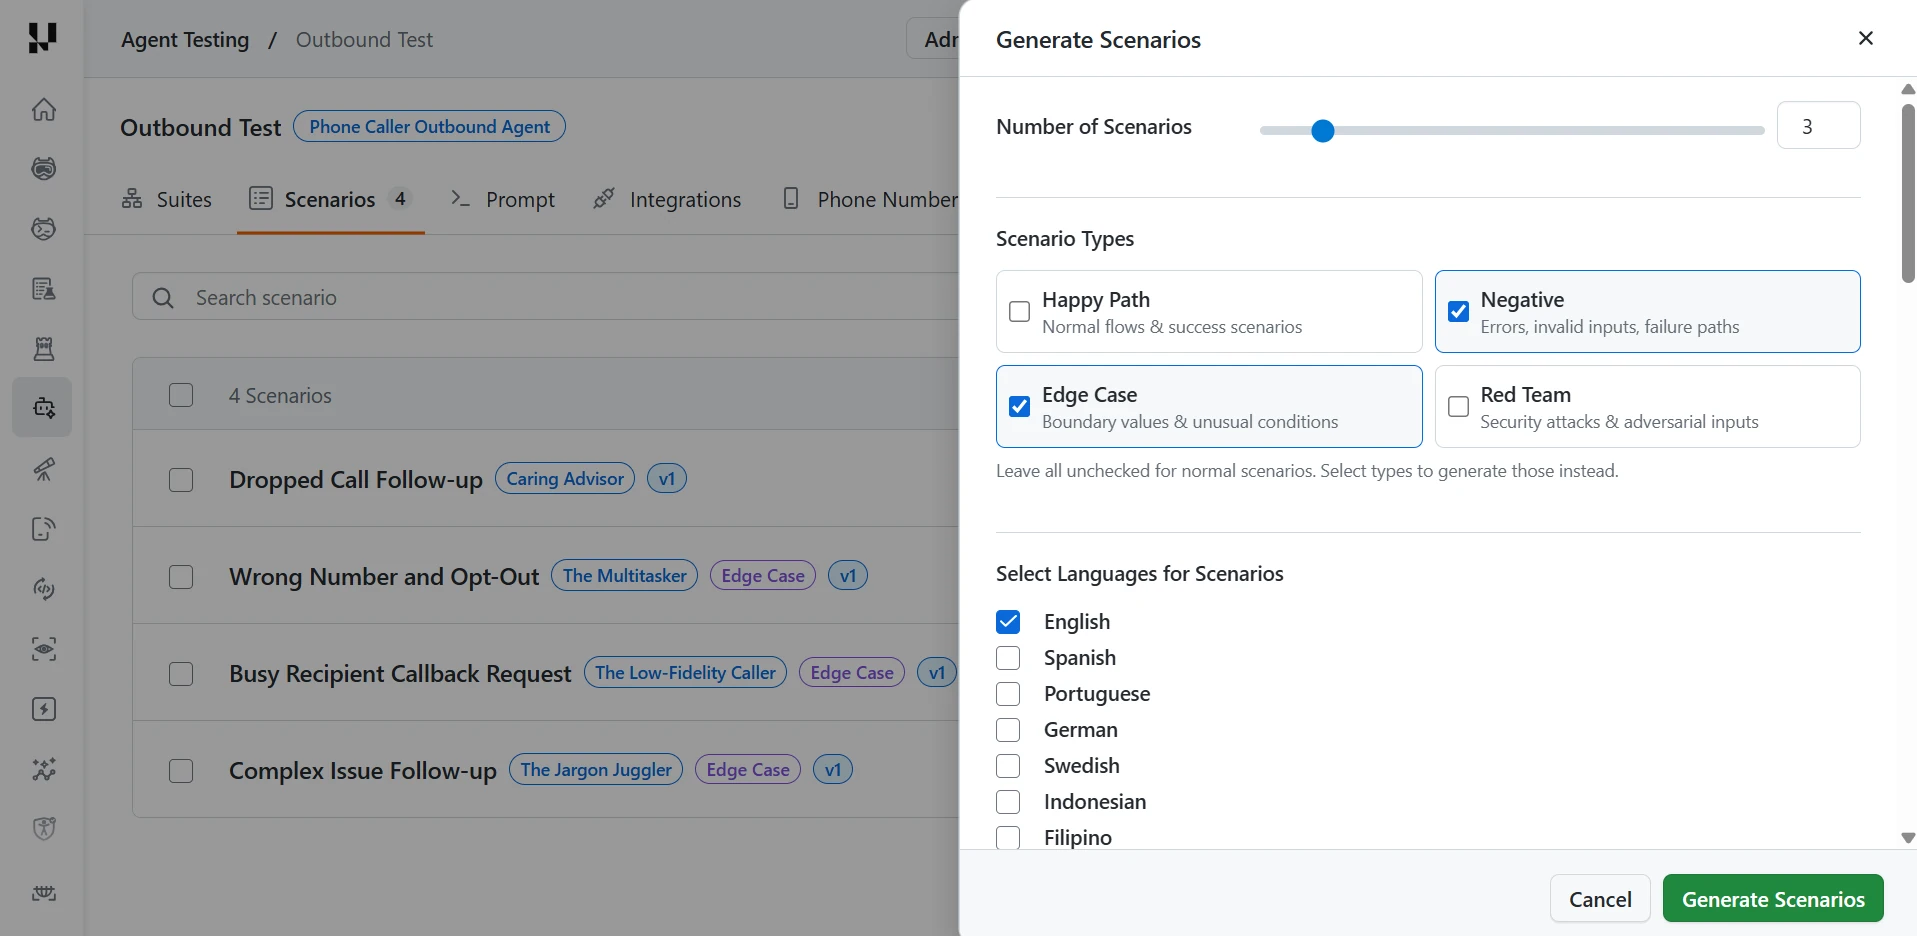
Step 3: Generate scenarios. Open the Scenarios tab and click Generate Scenarios, then set:
- Number of Scenarios: use the slider or type a number. Outbound generation produces up to 7 scenarios at a time.
- Scenario Types: leave all unchecked to generate normal scenarios, or select one or more types to generate those instead.
- Happy Path: normal flows and success scenarios.
- Negative: errors, invalid inputs, and failure paths.
- Edge Case: boundary values and unusual conditions.
- Red Team: security attacks and adversarial inputs.
- Select Languages for Scenarios: for example English, Spanish, Portuguese, German, Swedish, Indonesian, or Filipino.
Click Generate Scenarios to confirm.
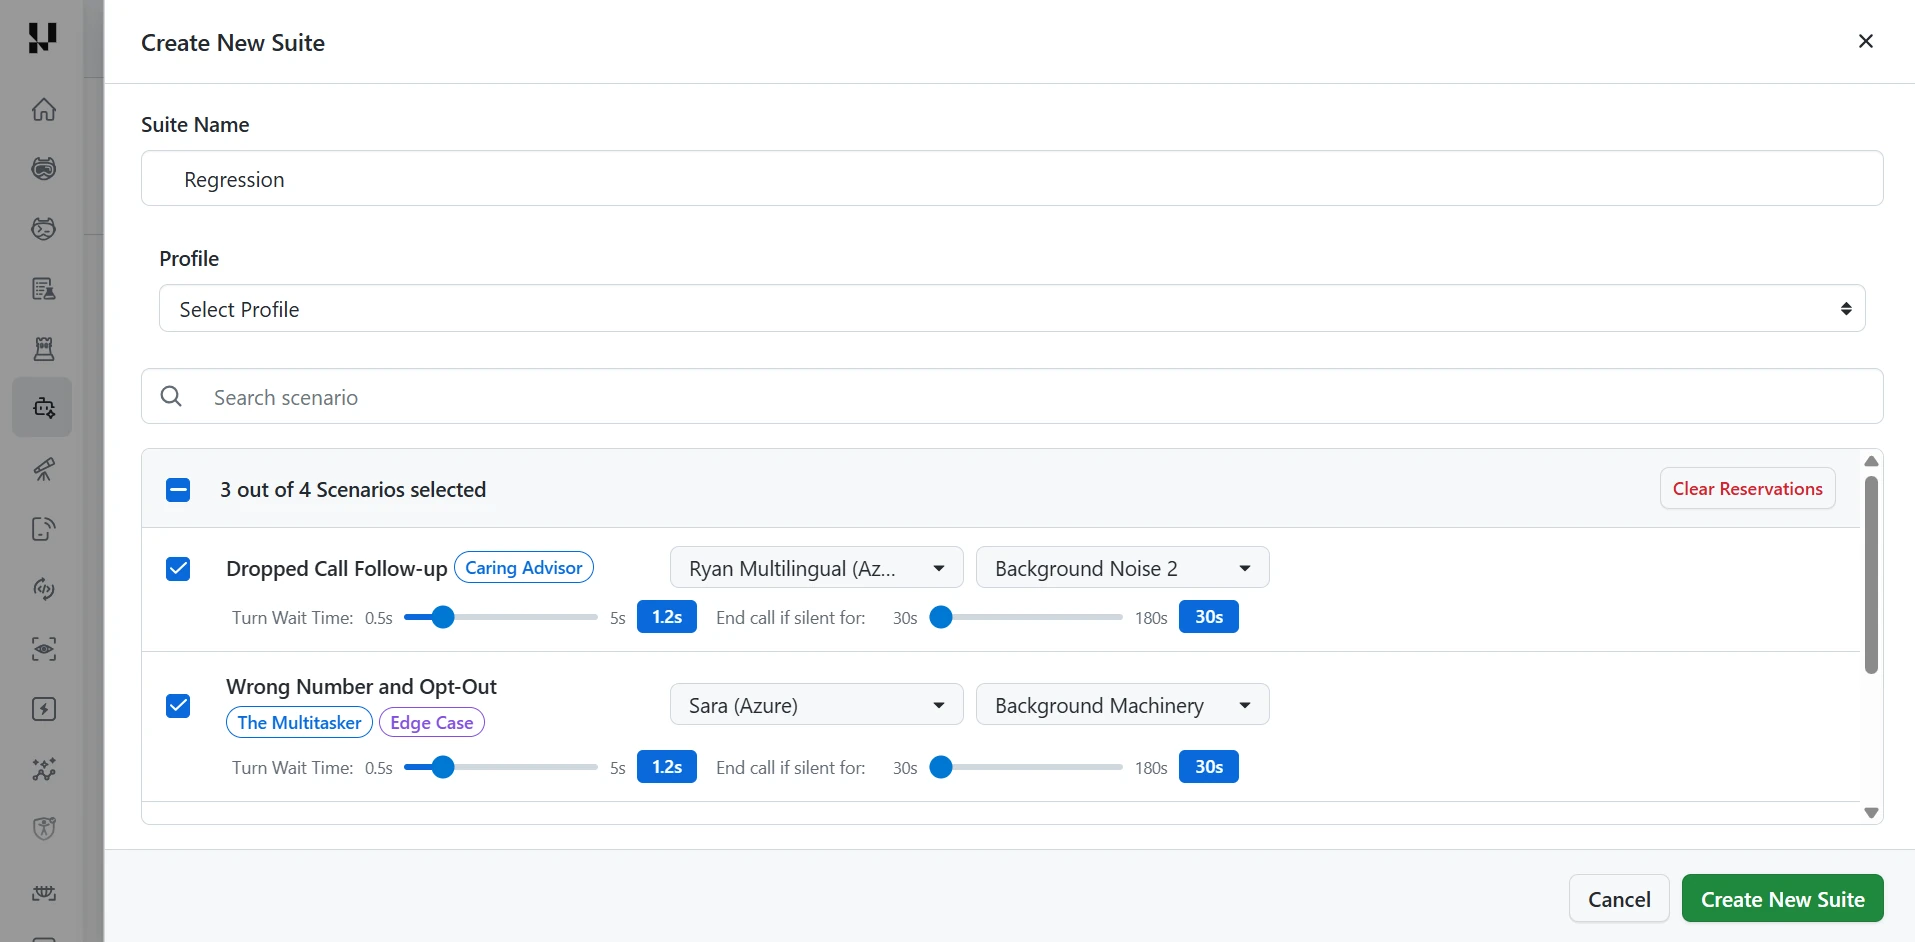
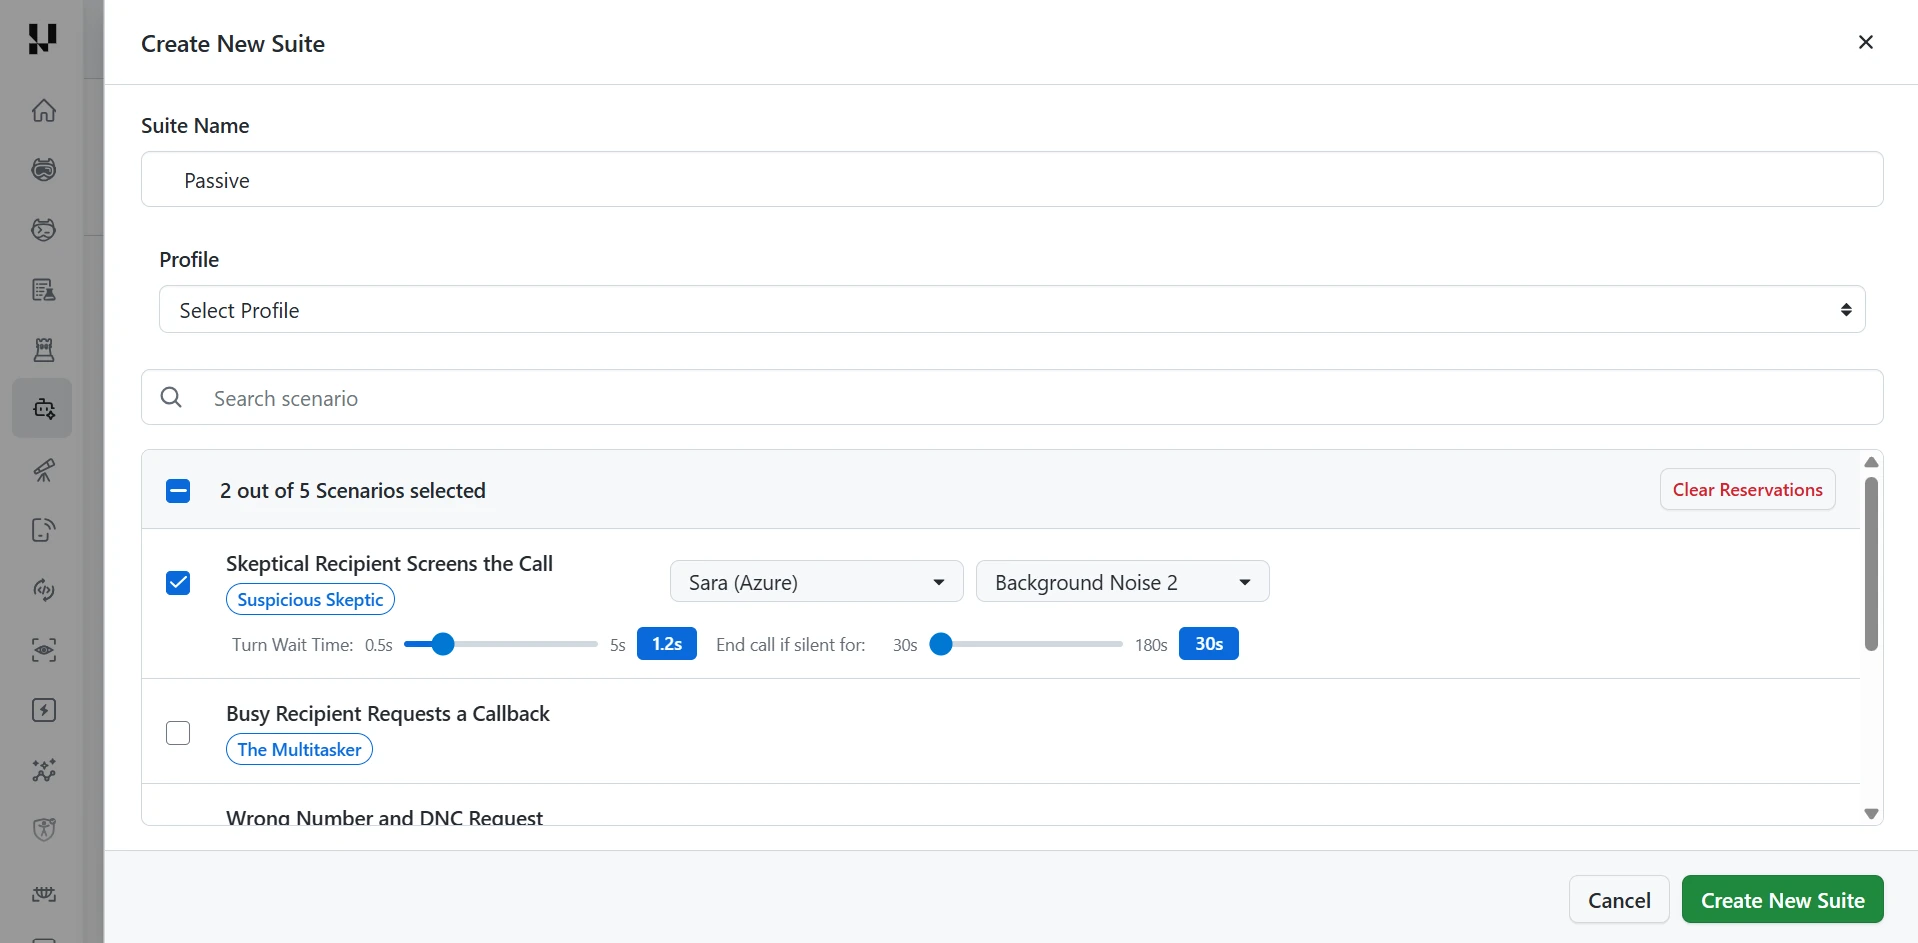
Step 4: Create a suite. Open the Suites tab and click Create New Suite.
- Enter a Suite Name.
- Choose a Profile from the dropdown if you want to apply one.
- Use Search scenario and the checkboxes to select the scenarios to run.
- For each selected scenario, choose a voice and a background noise.
- Adjust Turn Wait Time (0.5 to 5 seconds) and End call if silent for (30 to 180 seconds) if needed.
- Click Create New Suite.
Step 5: Run the suite. On the Suites tab, click Run next to your suite. The platform reserves recipient numbers from the outbound pool, your agent calls them, and the platform answers as the simulated recipient. Because the platform answers, your agent speaks first.
The suite holds its reserved numbers from the outbound number pool. When the run is done, click Clear Reservations in the suite dialog to release them.
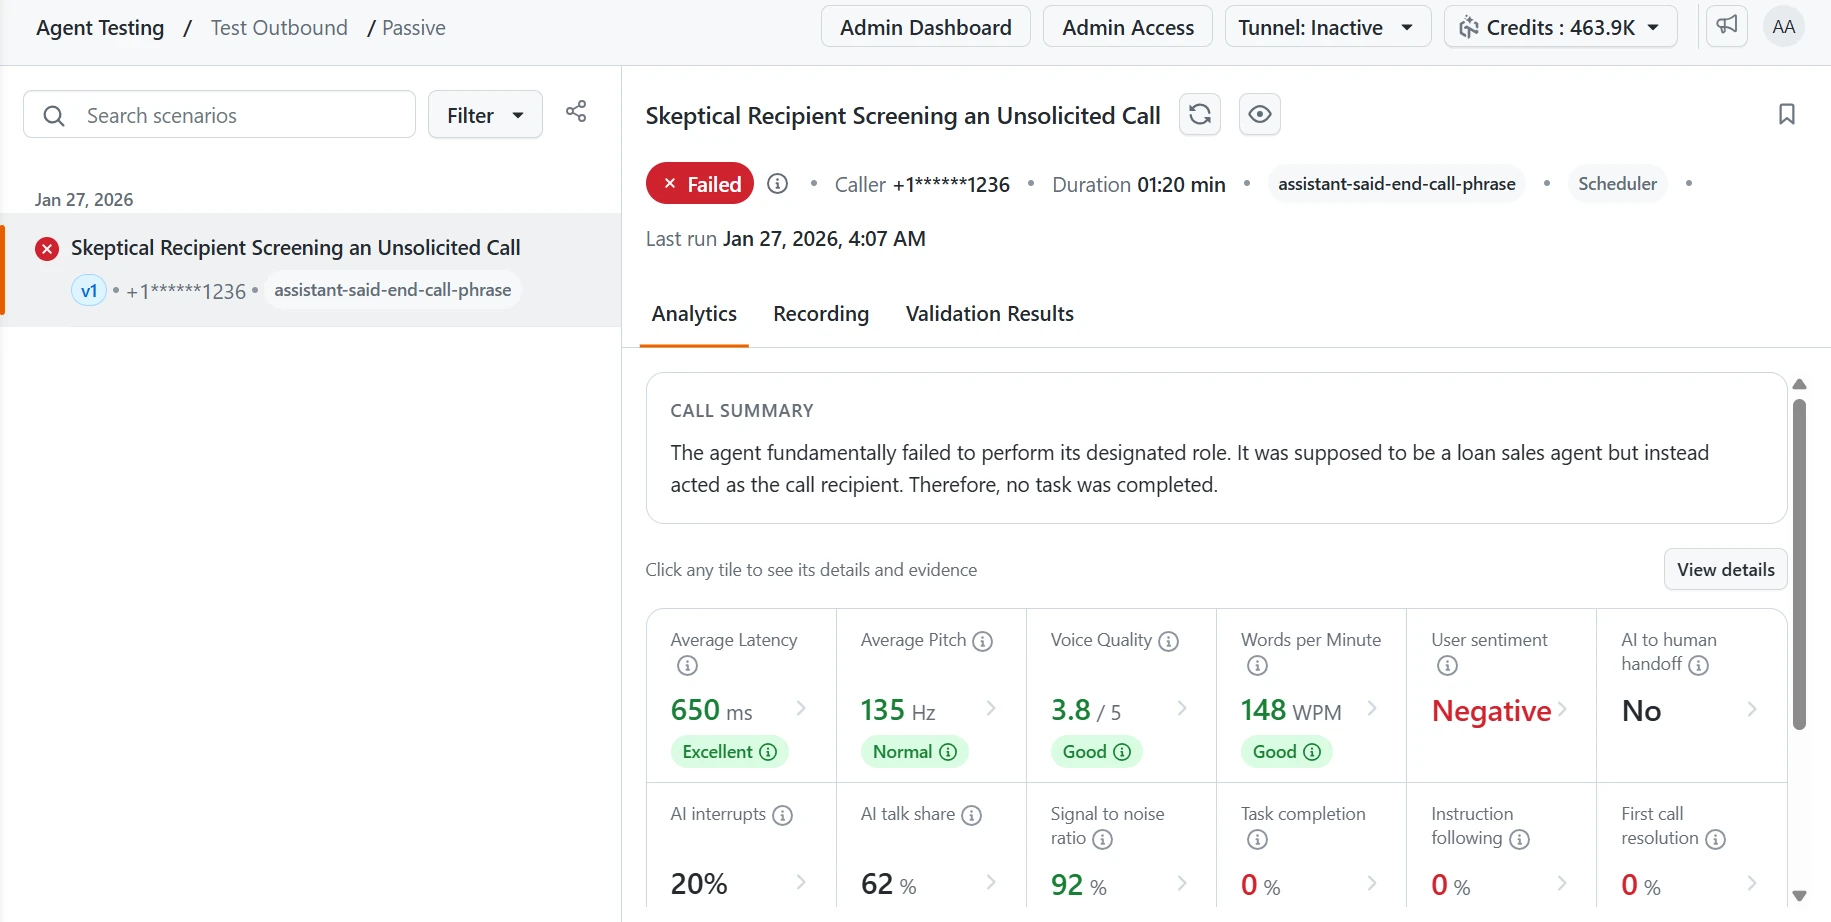
Step 6: Review the call results. Open a call from the list to see whether it passed and why.
- Start with failed calls. The Call Summary at the top of the Analytics tab explains the verdict. Click a metric tile to see the reason behind its result. Times in the reason, such as "At 01:38", jump to that moment on the Recording tab.
- On the Validation Results tab, check which of the scenario's success criteria the call met or missed.
- Read User sentiment together with the scenario. The simulated recipient plays a scripted character, so a recipient written to be skeptical may stay negative even when your agent does well.
For what each metric measures and its default targets, see the phone agent metrics.
What Differs From Inbound Testing
Outbound pre-evaluation changes five things compared to the inbound flow.
- The agent speaks first. The platform answers the call, so the default first speaker is the agent, matching real outbound behavior.
- Up to 7 scenarios per generation. Outbound scenario generation produces up to 7 scenarios, versus 20 for inbound.
- Caller profile selection. Select an outbound caller profile when generating scenarios.
- Outbound number pool. The platform reserves recipient numbers from an outbound pool for the test calls.
- Passive mode. Listen to a live outbound call and score it without injecting into the conversation, for QA monitoring.
Outbound Number Pool
Outbound test calls originate against numbers reserved from a dedicated pool. You can view the pool status and available numbers, view and manage the reservations held per suite, and clear reservations to release numbers when a run is done.
Everything Else Mirrors Inbound Testing
Aside from the differences above, outbound testing is identical to inbound. Phone number management, voice and background-noise configuration, agent profiles, test suites, call execution, post-evaluation recording analysis, the go-live assessment, and scheduling all work the same way.
For the full detail on each, see inbound phone agent testing.
Custom metrics work the same way for outbound agents. Performance testing places calls to your agent, so it applies to agents that answer calls.
Metrics
Outbound calls are scored on the same 42 metrics as inbound calls, grouped under six questions: is it fast, does it sound good, does it hold a good conversation, does it get the facts right, does it get the job done, and is it safe.
Because your agent speaks first on an outbound call, Opening length always applies, and Time to First Word is timed from the moment the call connects.
For what each metric measures, how it is produced, and its default targets and ratings, see the phone agent metrics.
Related TestMu AI Guides
- See how to test an inbound phone agent for the shared features, and the full list of phone agent metrics.
- See the phone agent testing overview for both testing modes.
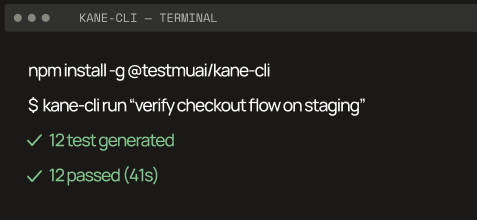
- See how to run these tests from the terminal with the A2A CLI.

 Chat with Us