Import Test Cases from CSV
CSV import in Test Manager allows seamless import of existing test cases from various sources, making the transition and consolidation of testing assets effortless.
Steps for Importing Test Cases:
Follow these steps to import test cases using a CSV file:
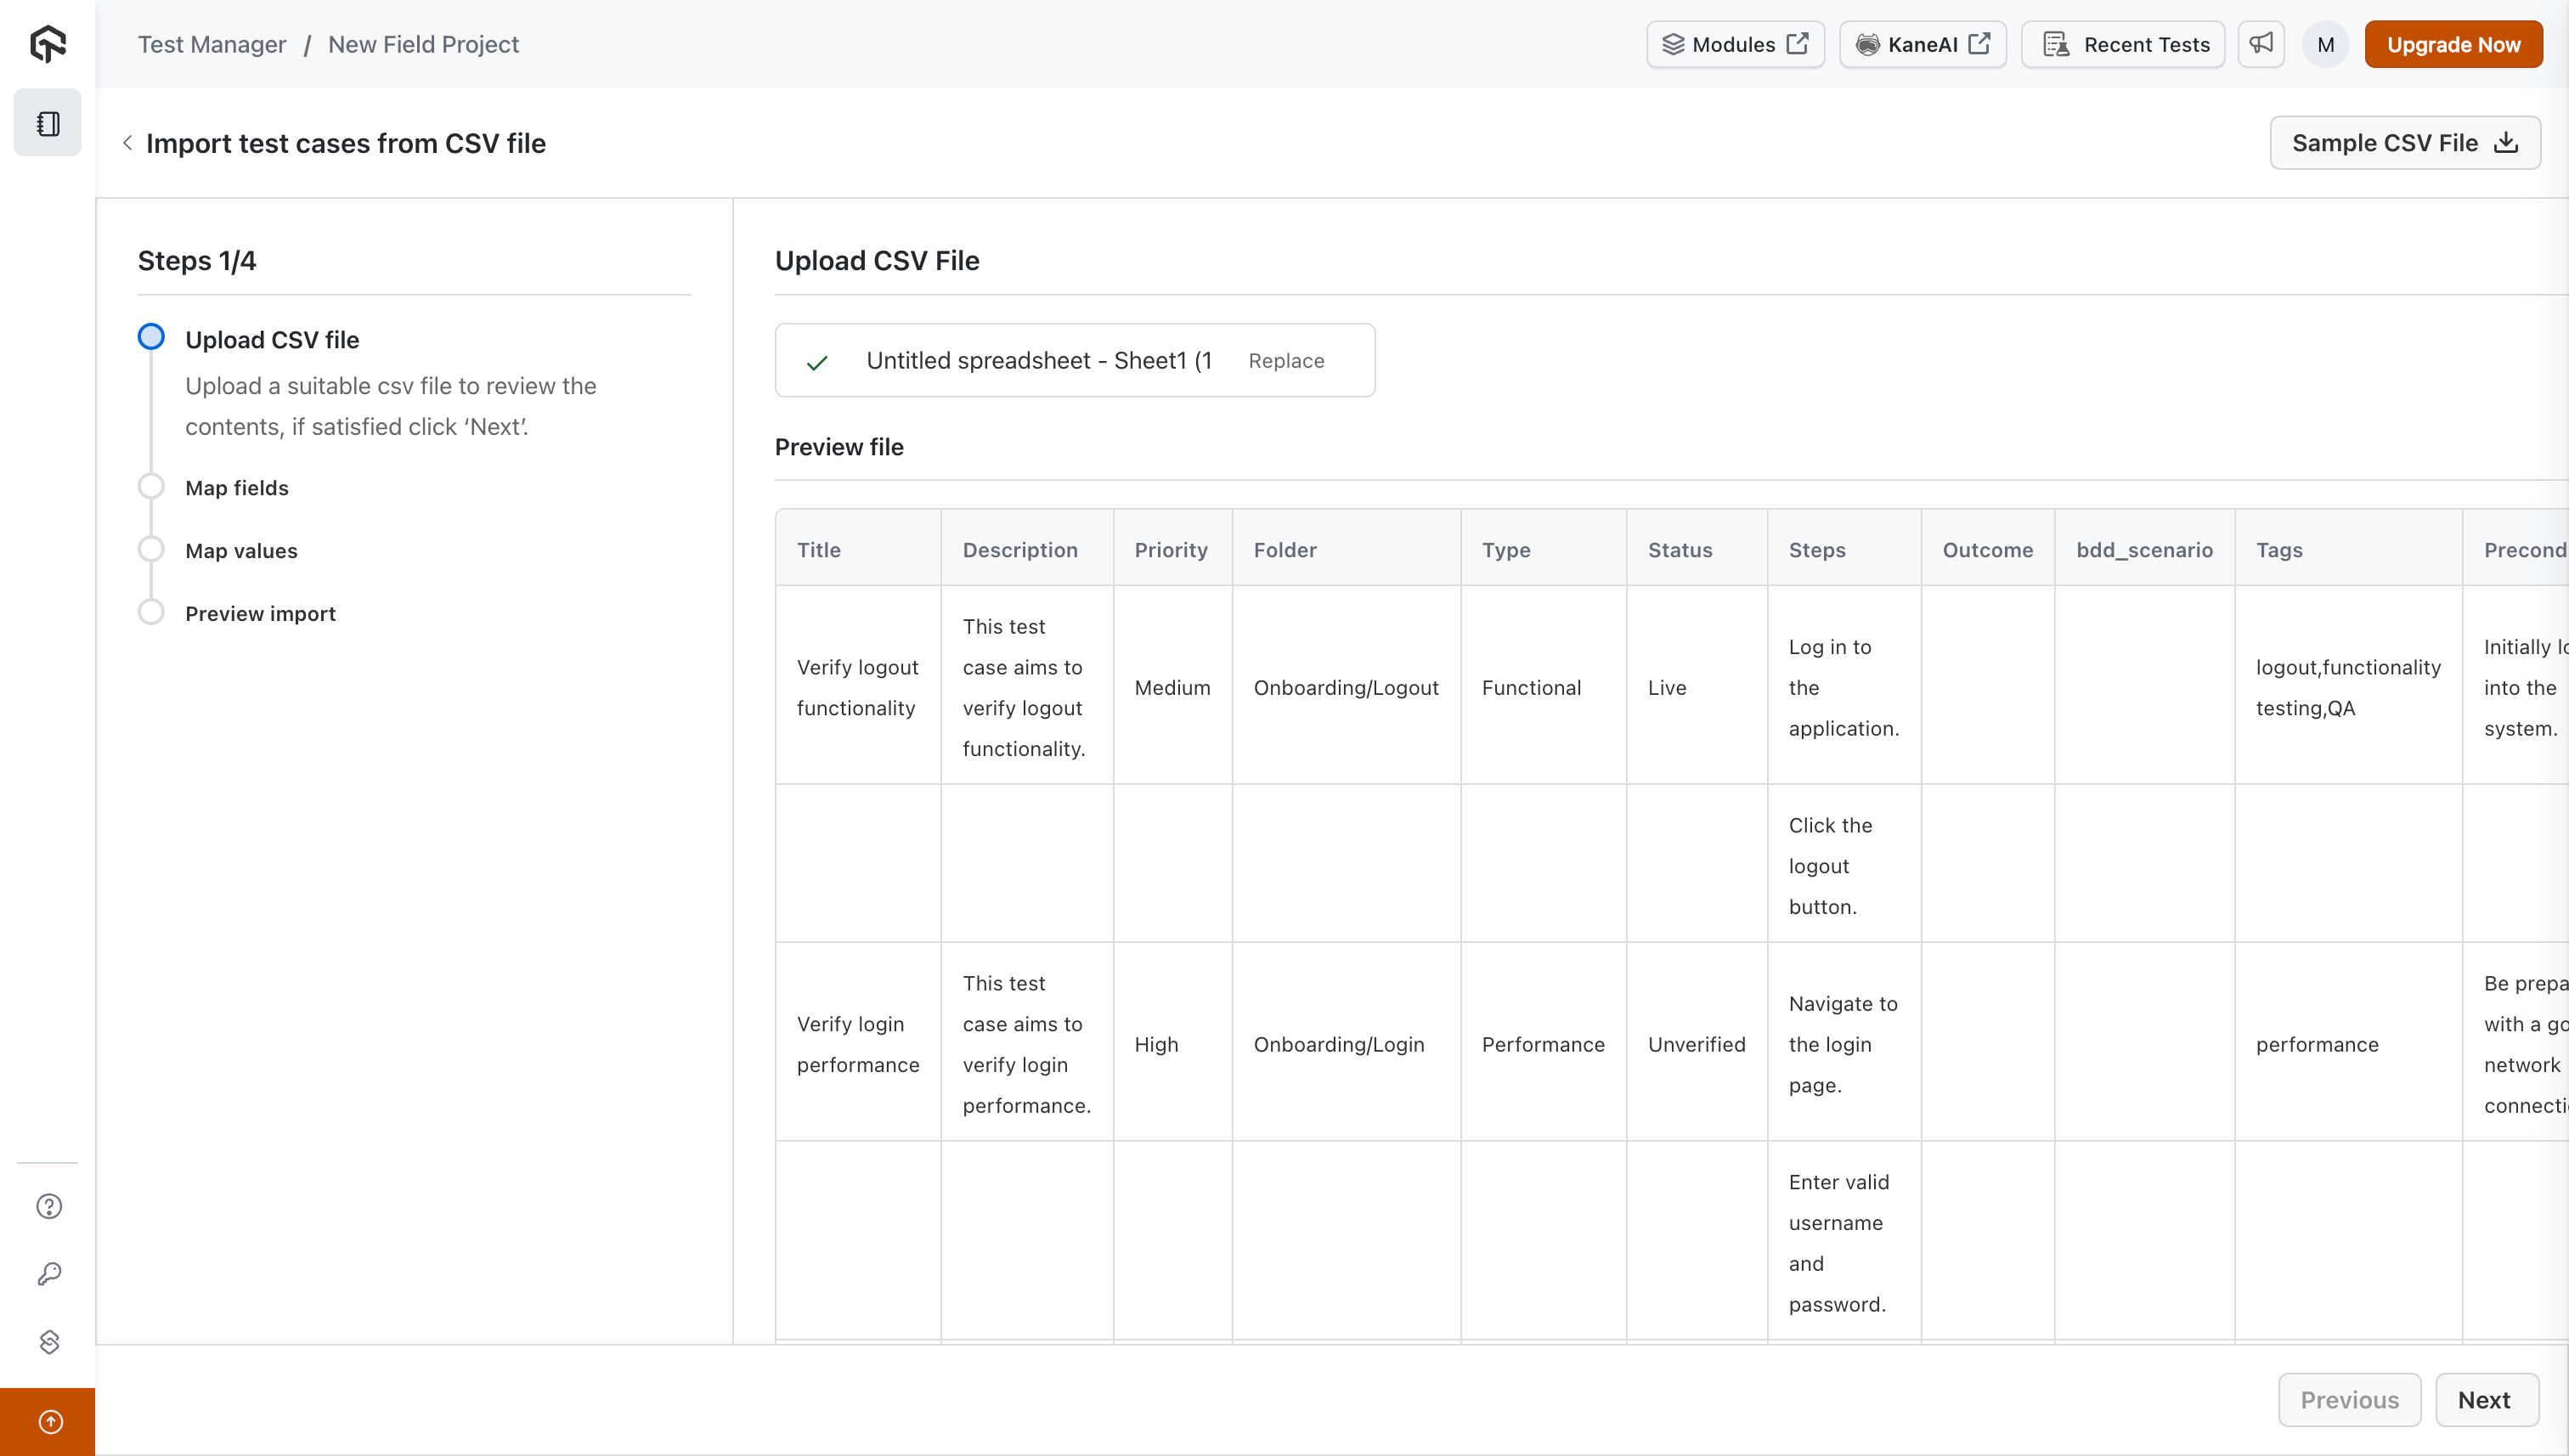
1. Upload CSV file
- Choose Project: Select the project into which you want to import the test cases.
- CSV Upload Option: If you have created a new project, you’ll see the Drop your CSV or browse option. Alternatively, navigate to
Add Test Case > Import CSVto initiate the import.
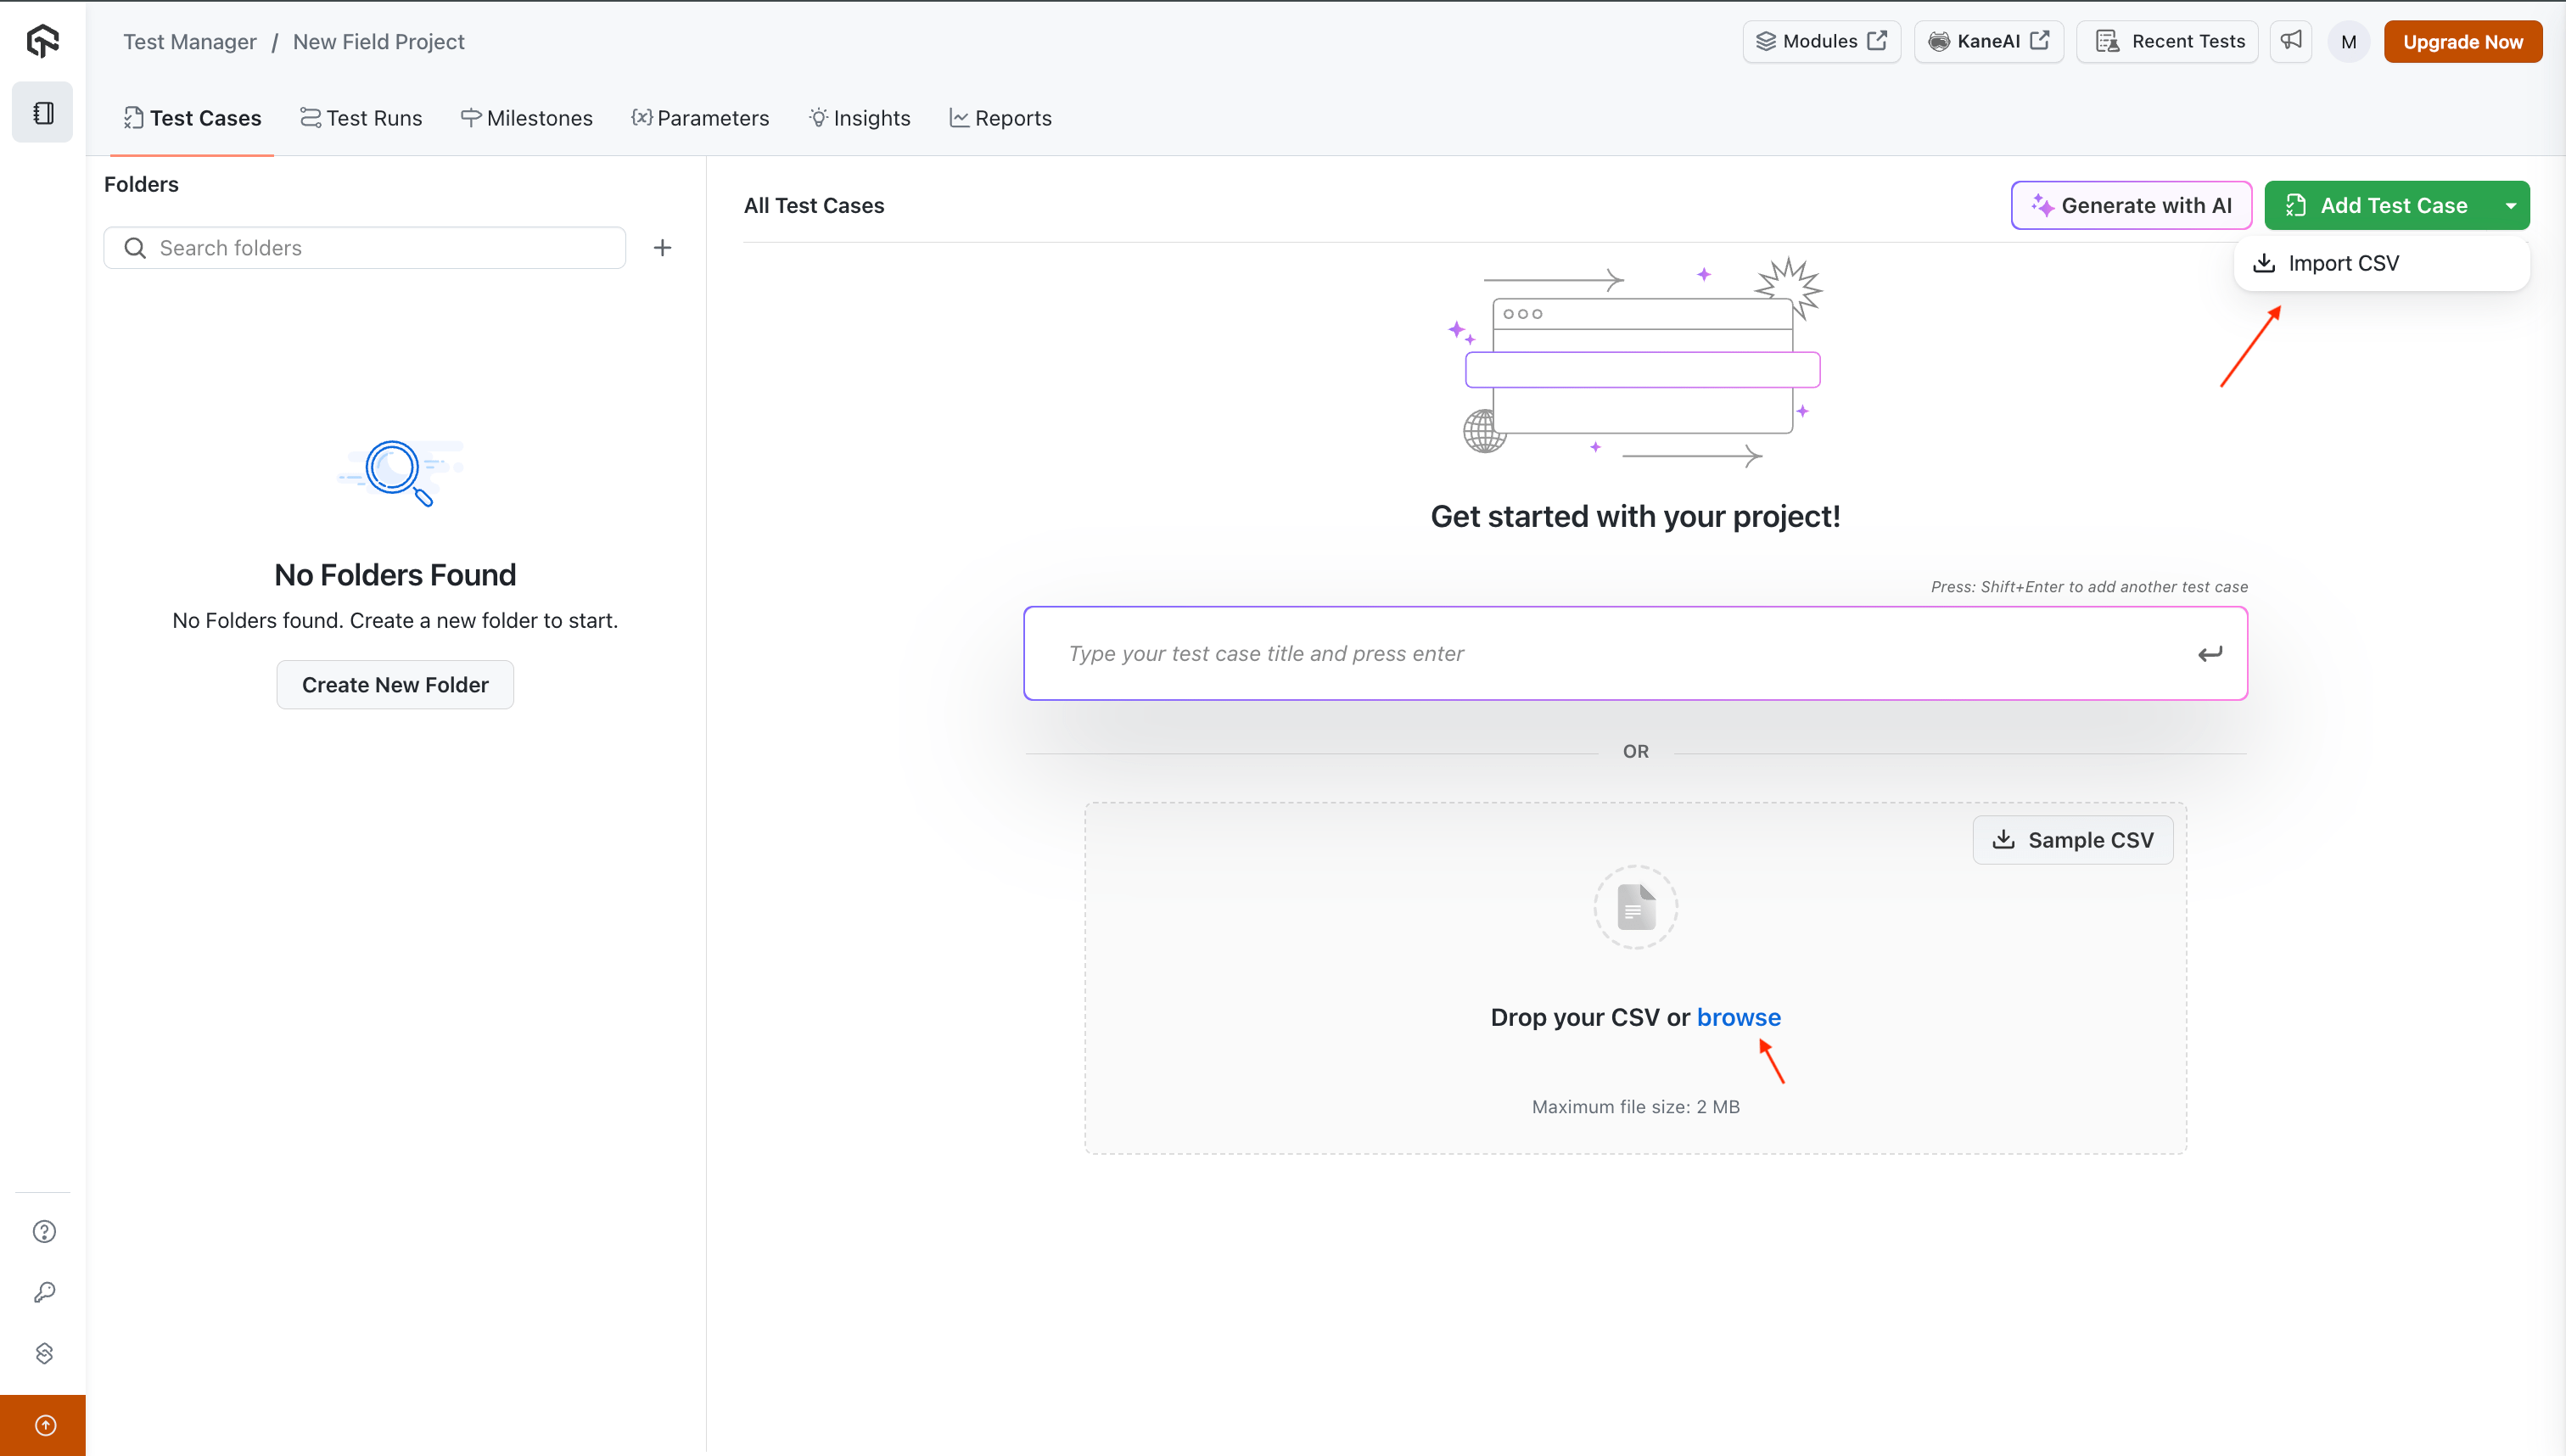
- File Preview: After selecting your CSV file, a preview will appear displaying the contents of the file to be imported.
- Next Step: Click Next to proceed to the Field Mapping stage.
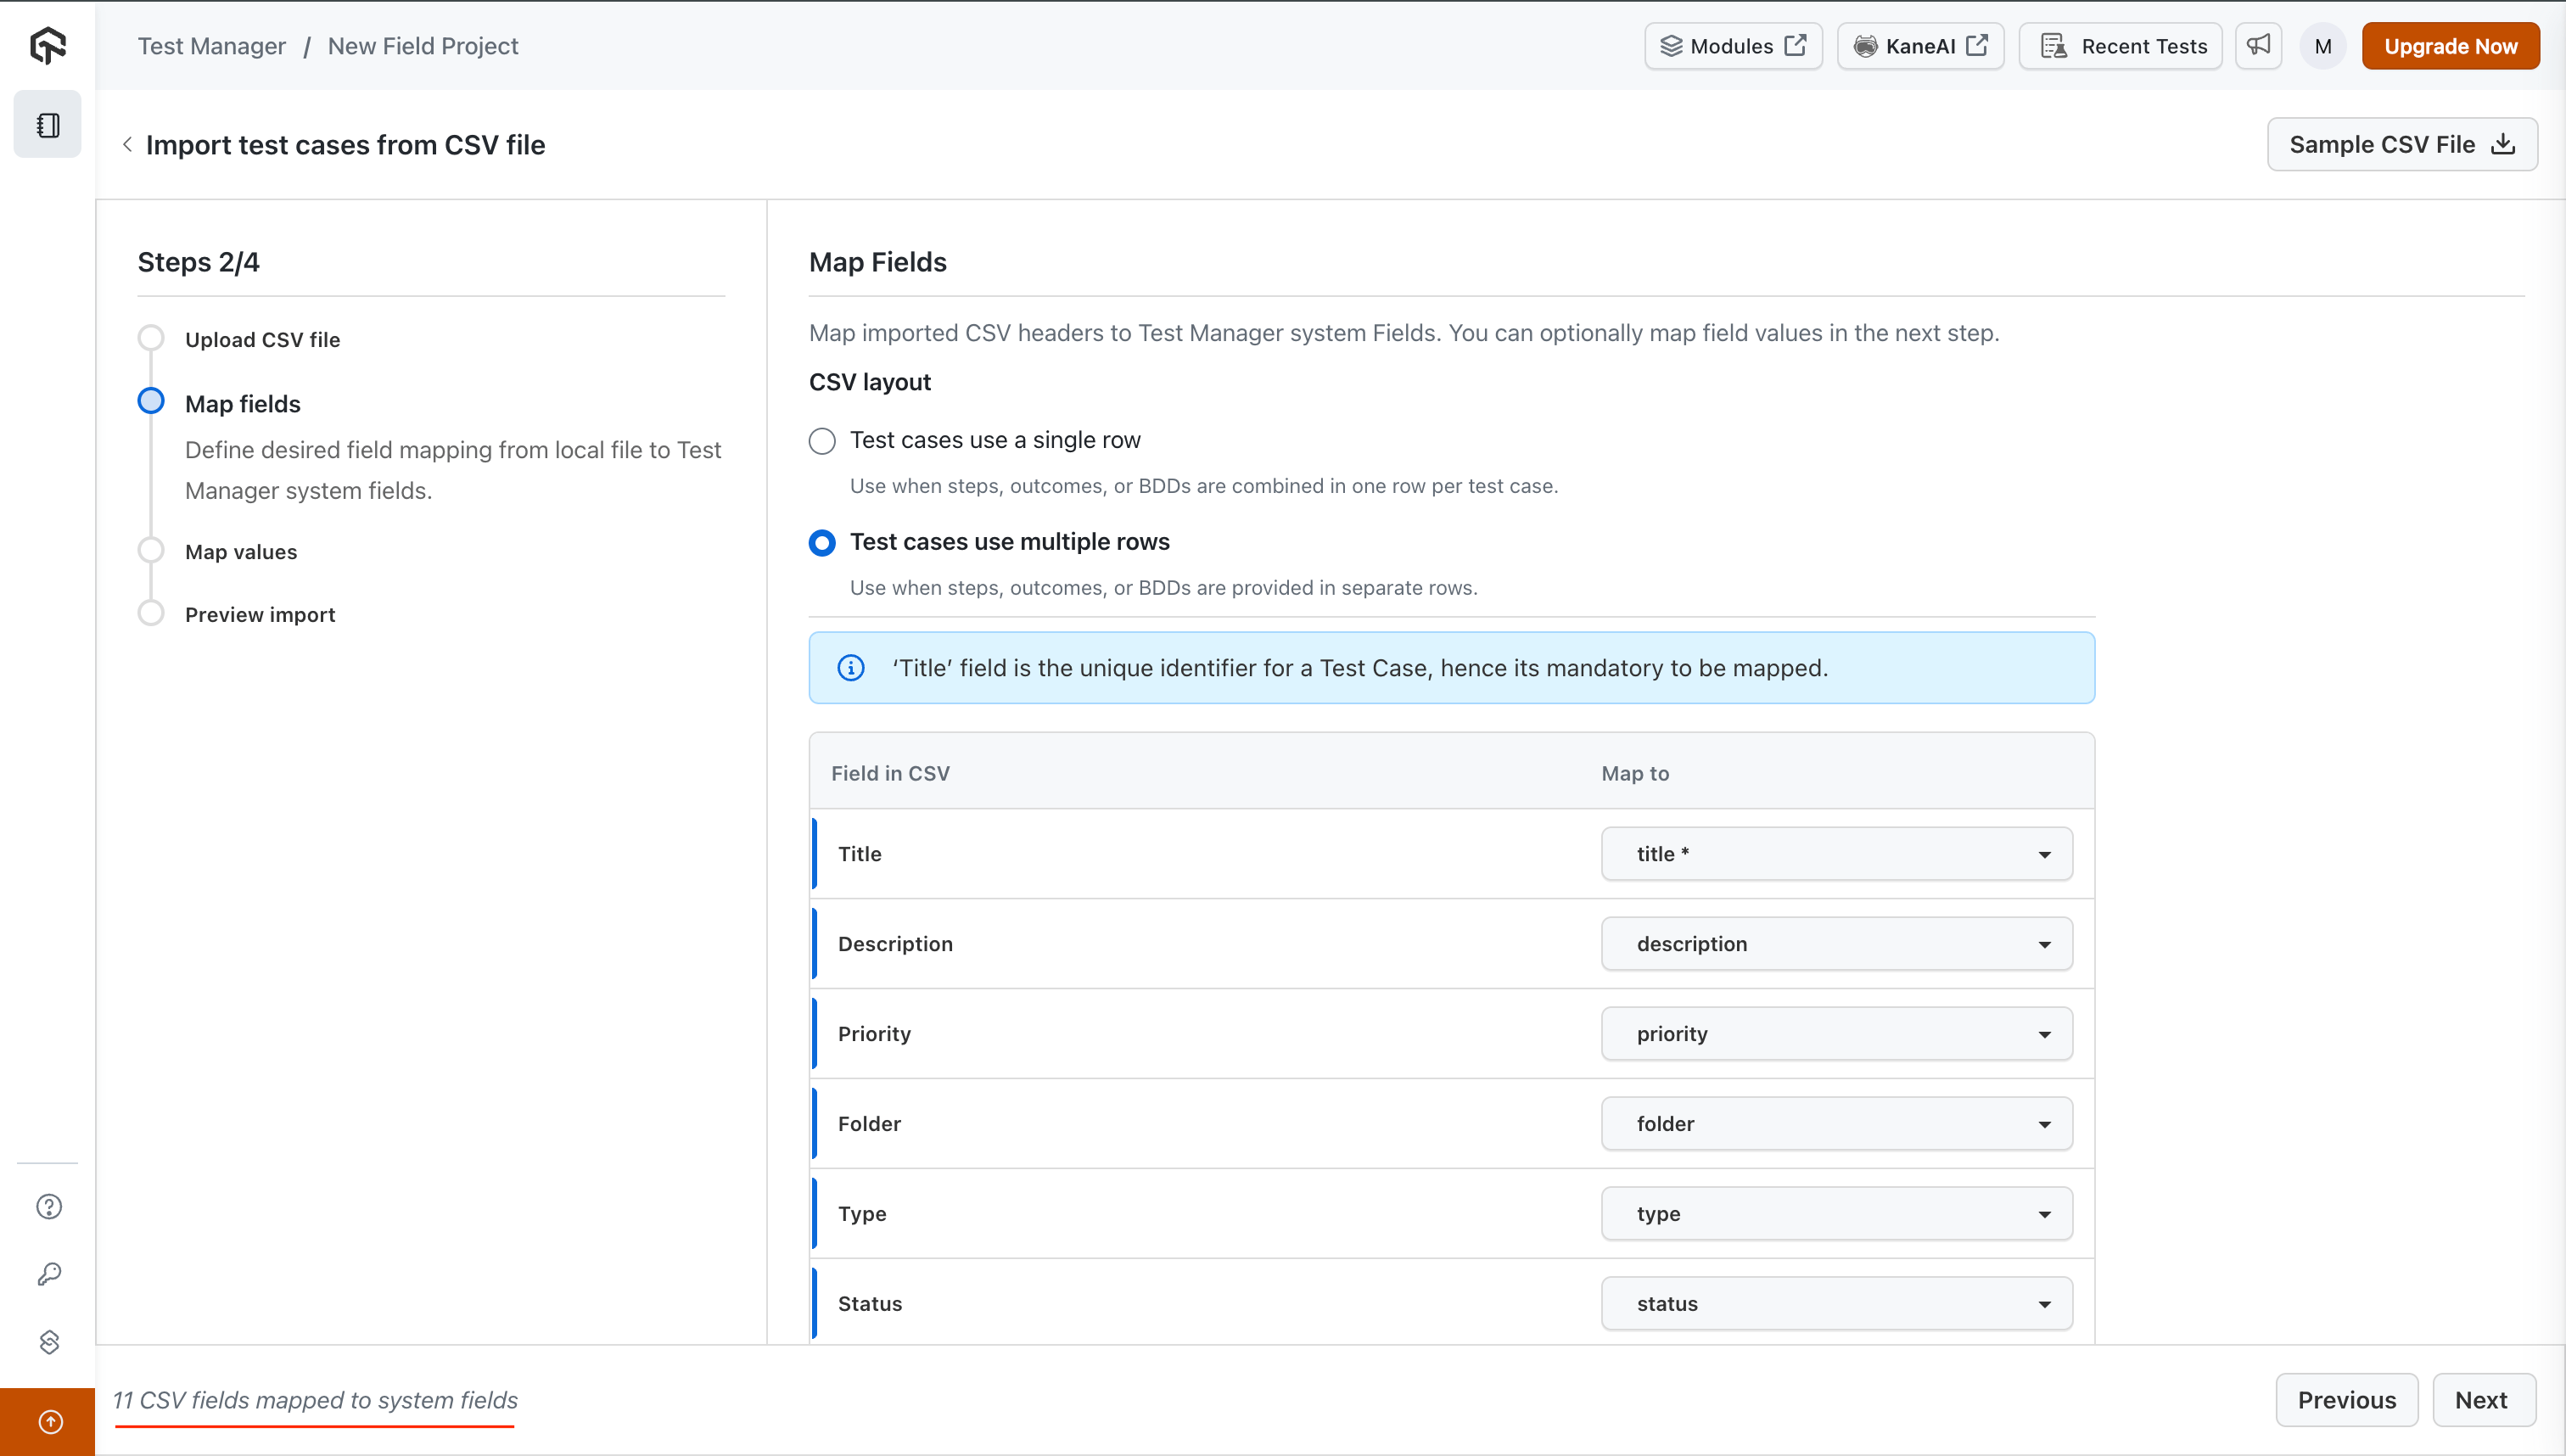
2. Map fields
In this step, you will map the CSV file headers to corresponding fields in Test Manager. This enables Test Manager to understand where each piece of information from the CSV should be placed. Following entities can be mapped & imported:
- Test Case Title: Using
Titleoption - Test Case Steps: Using
Stepsoption - Test Case Step Outcomes: Using
Outcomeoption - BDD Scenarios
- System Fields
- Custom Fields
- Folder Names: Using
Folderoption - Jira Tickets: Using
Link Jiraoption
Prerequisites:
- To map Custom Fields, ensure the custom fields are created and linked to the project before beginning the import process.
- To import Jira Tickets, ensure your Jira instance is connected to Test Manager (refer here). If you forget to connect it before starting the import, don't worry, the test cases will automatically link to the appropriate Jira tickets once the integration is set up.
Following format of Test Cases are supported for Importing:
- Test cases use a single row: Use this option when your steps, outcomes, or BDDs are combined in one row per test case & indexed like:
1. Got to lambdatest.com 2. click on login button - Test cases use a multiple row: Use this option when your steps, outcomes, or BDDs are present in separate rows.
Mapping at least one CSV header with the title field is mandatory in this step, as the title serves as the unique identifier for your test cases.
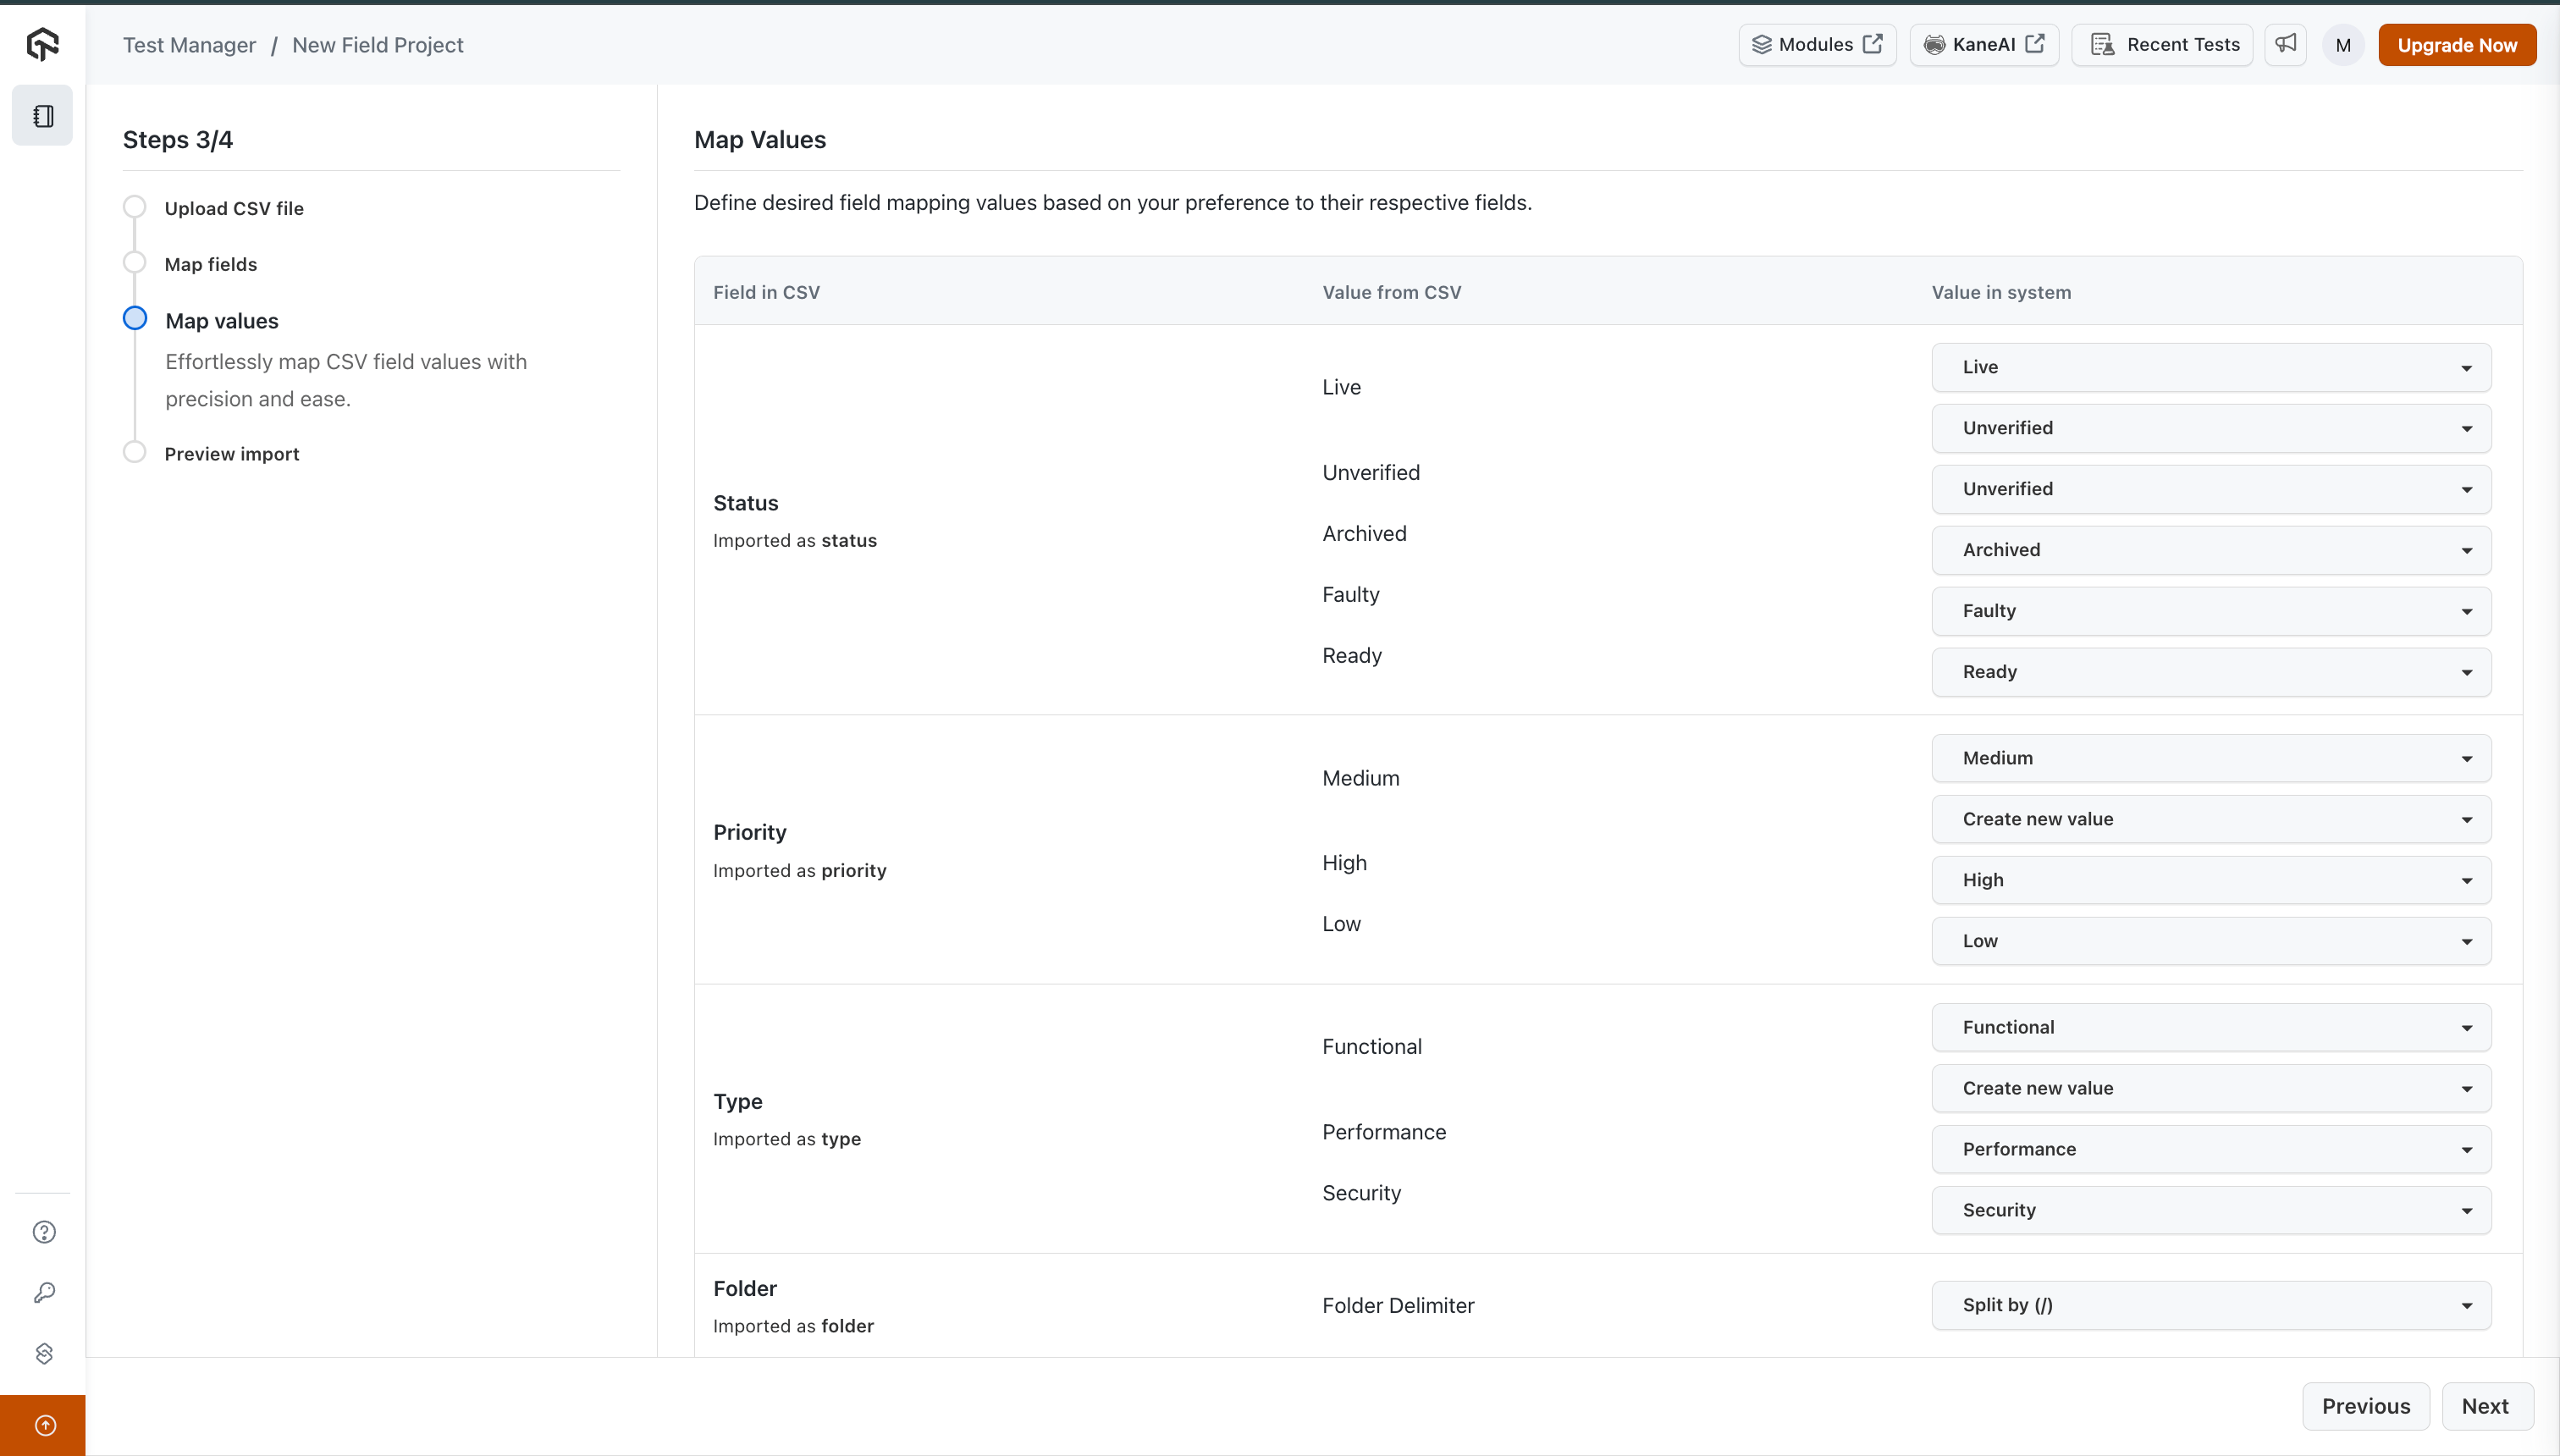
3. Map values
Once you've mapped the CSV headers to Test Manager fields, it's time to map the CSV field values to the selected fields.
- System Fields Values: Existing values will be automatically mapped. For any new values, you can map them to existing values or create new values using the
Create new valueoption. - Custom Fields Values: Values will be automatically generated and applied.
- Folder Names: If your CSV includes folder paths, you can select the appropriate delimiter to split the folder path when parsing. For example, use
/to split the folder path"folder1/folder2/folder3".
4. Preview import
-
Preview: Before finalizing the import, you’ll have a chance to preview the test cases and the mapped CSV values. This allows you to ensure everything is mapped correctly.
-
Import Test Cases: After verifying the mappings, click
Import Test Casesto complete the import process.

By default the Test Cases not having any folder defined for them, go into the Untitled folder.
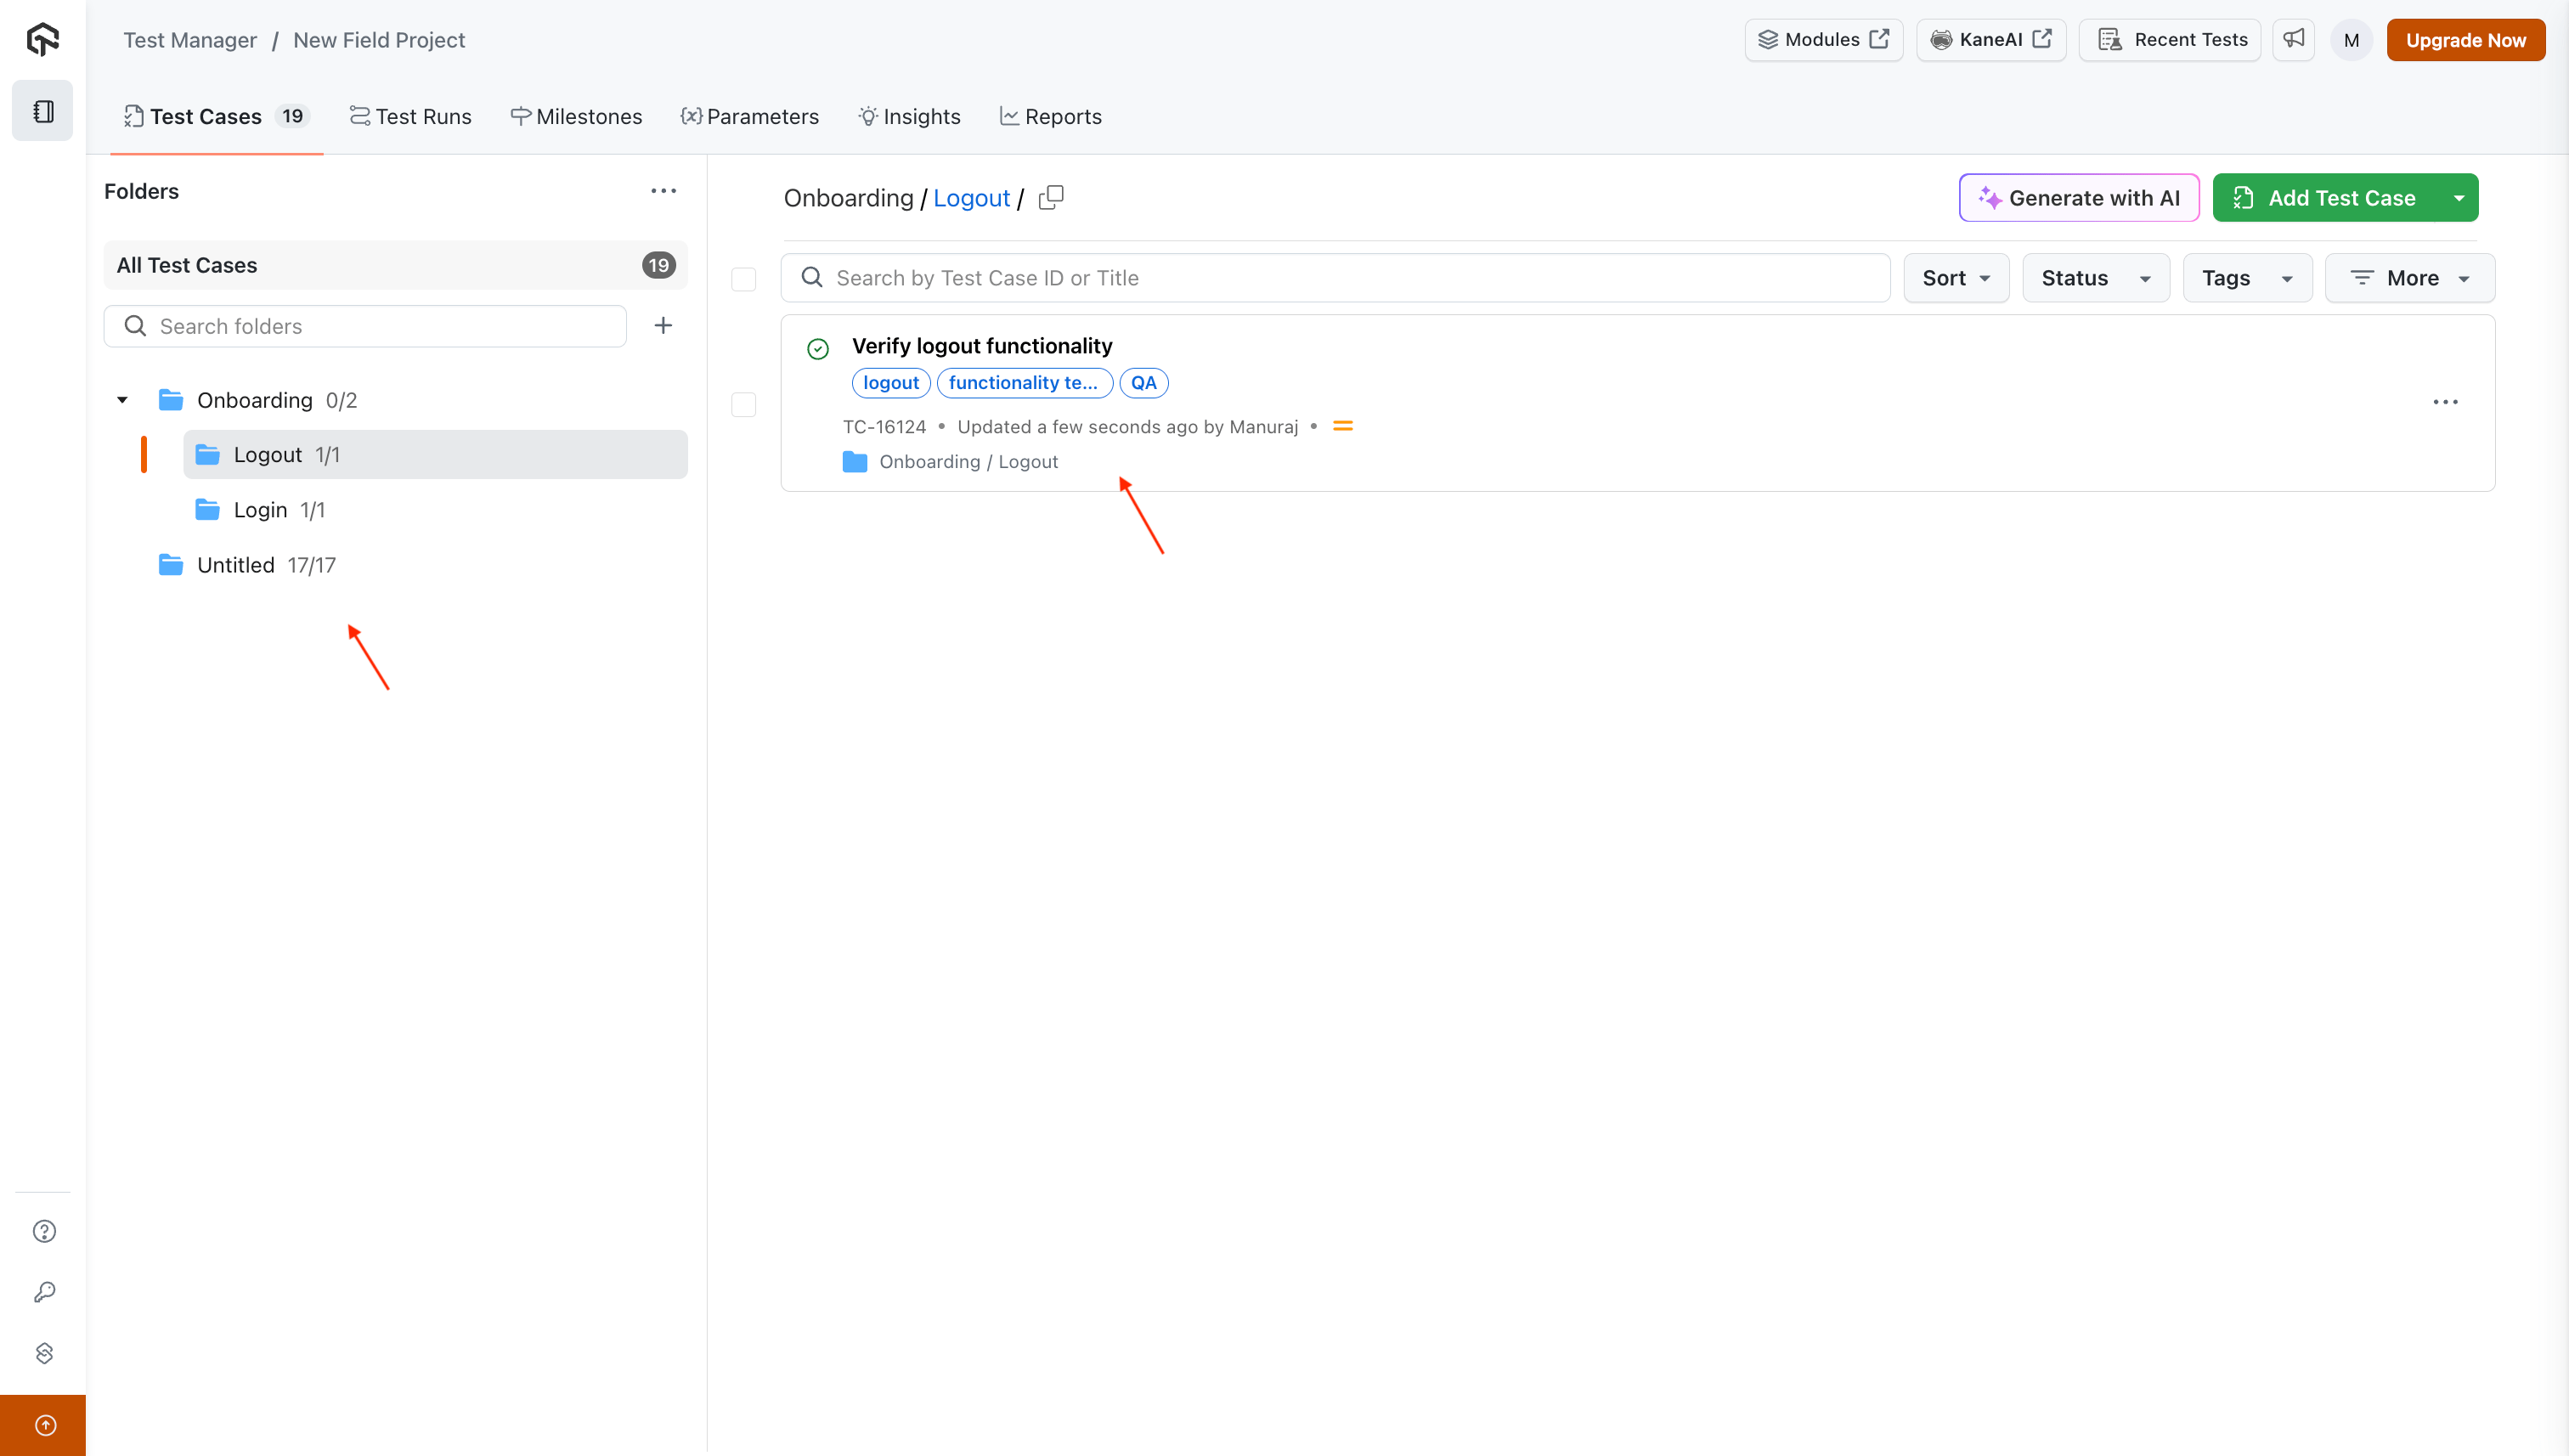
Let's see the imported data: