Netlify Integration With TestMu AI
Netlify is a cloud computing company that offers hosting and serverless backend services for web applications and static websites. It allows developers to deploy their websites and applications quickly and easily, with features such as continuous deployment, serverless functions, and global CDN.
This document will show you how to integrate Netlify Pipeline with SmartUI.
Prerequisite
-
A TestMu AI account. If you don't have an account, sign up for free.
-
You need to have a site deployed in your Netlify account.
Steps to Setup the Netlify Plugin
Step 1: Configure your TestMu AI Integration on Netlify Dashboard
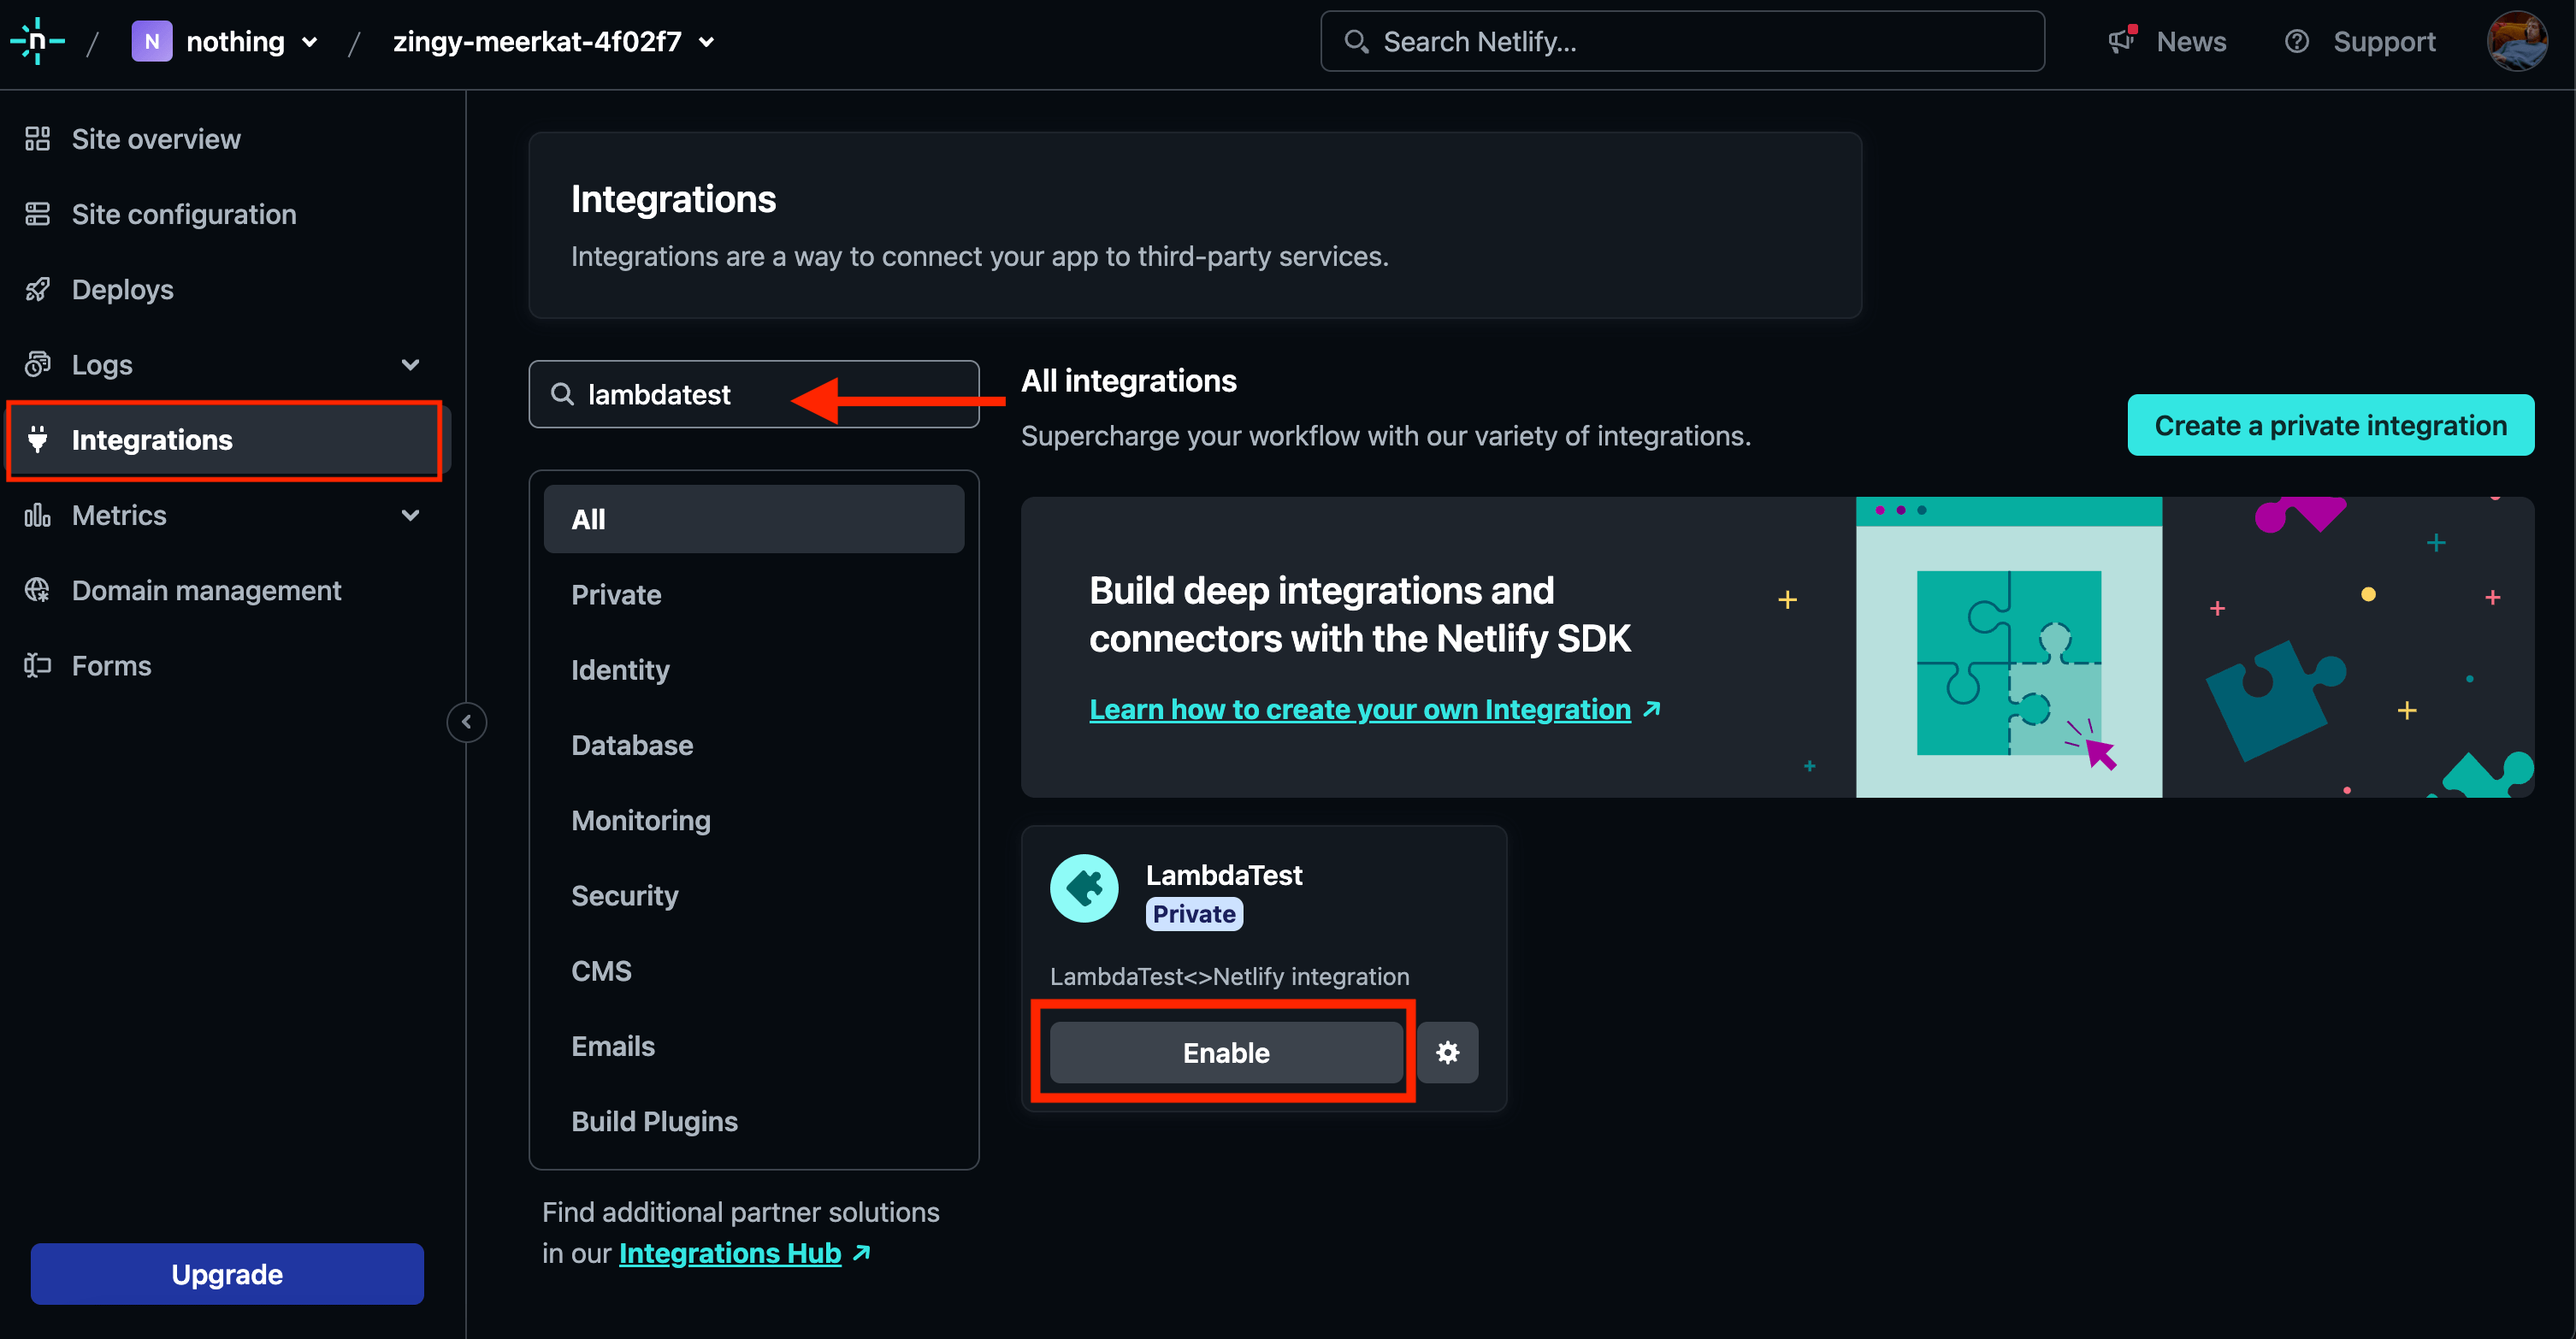
- Go to your Netlify Dashboard.
- Click on the Integrations tab, search for TestMu AI and click on the Enable button.
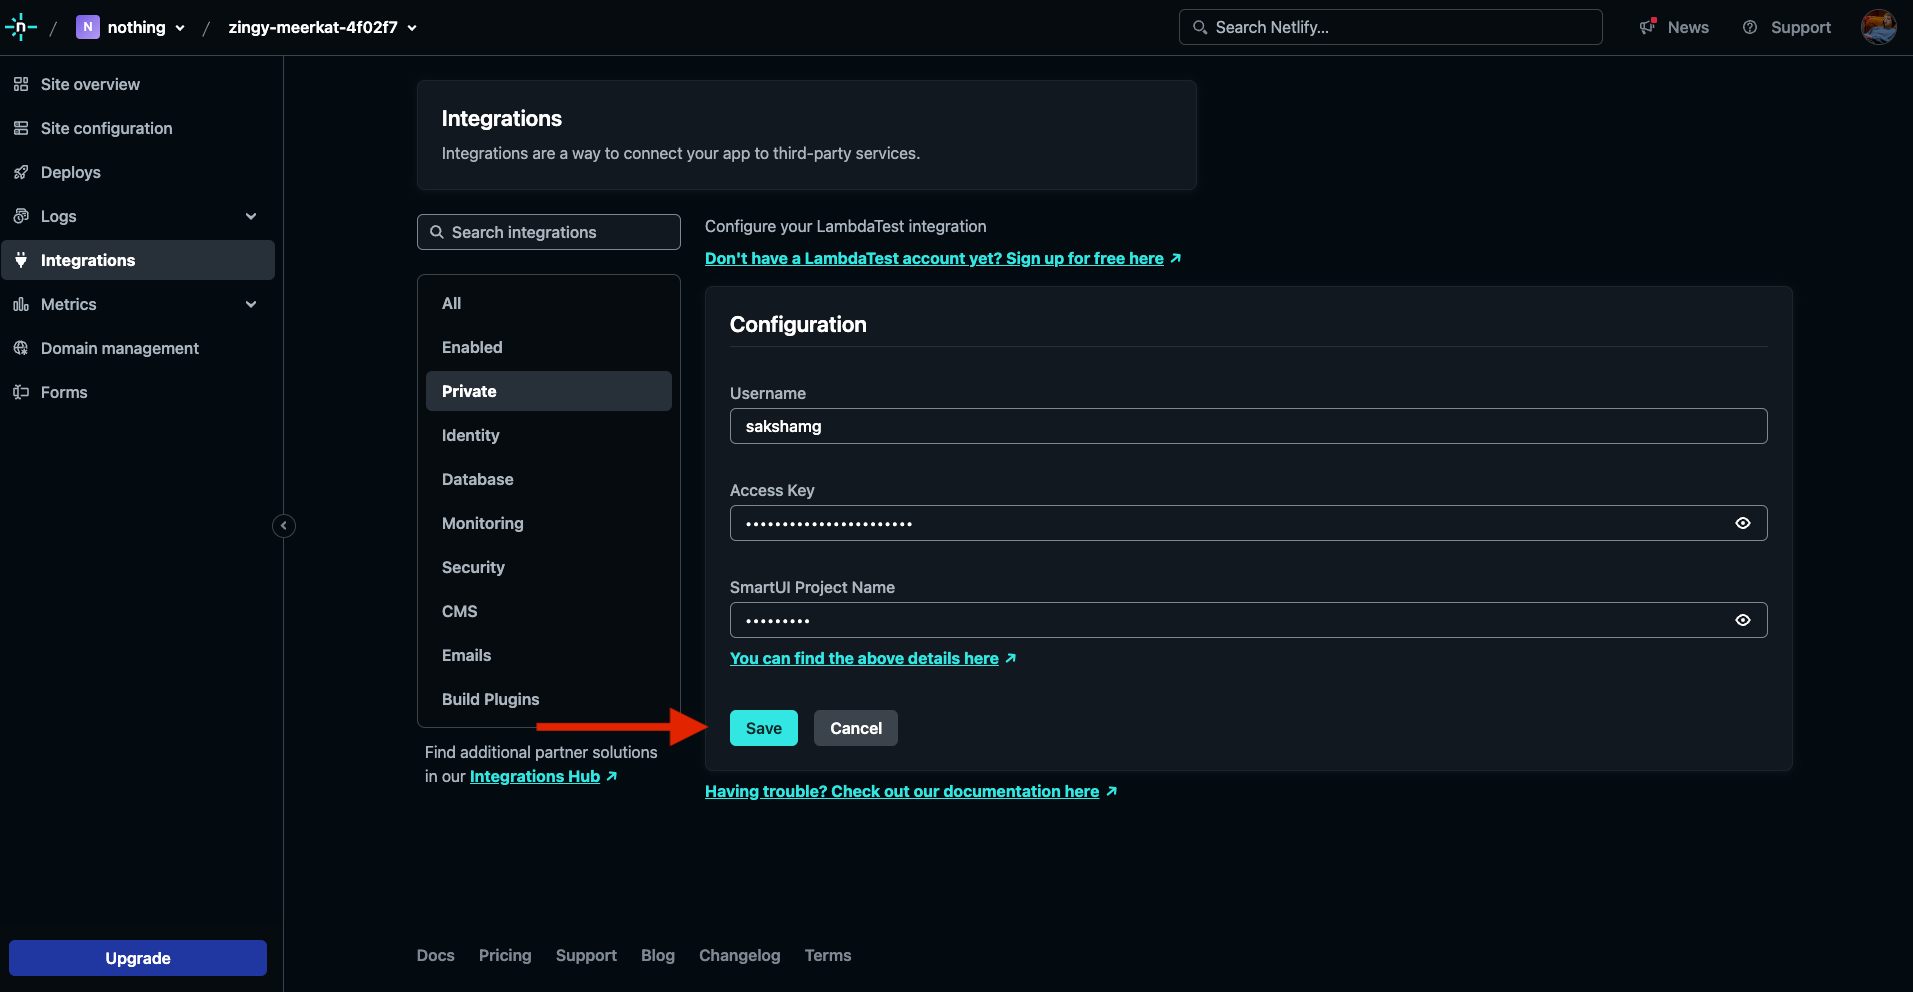
- You need to provide your configuration details
- Enter your Username and Access Key from the TestMu AI Dashboard.
- Enter your Smart-UI Project Name
For the Smart-UI Project Name, you can enter any project name. Even if you have not set up any projects in the SmartUI Dashboard.
You can also enter your already-existing smart-UI project name.
- Click on the Save button
Step 2: Deploy the Site for which you want to compare the results
- Go to the Deploys section, click on Deploy site button and deploy your project.
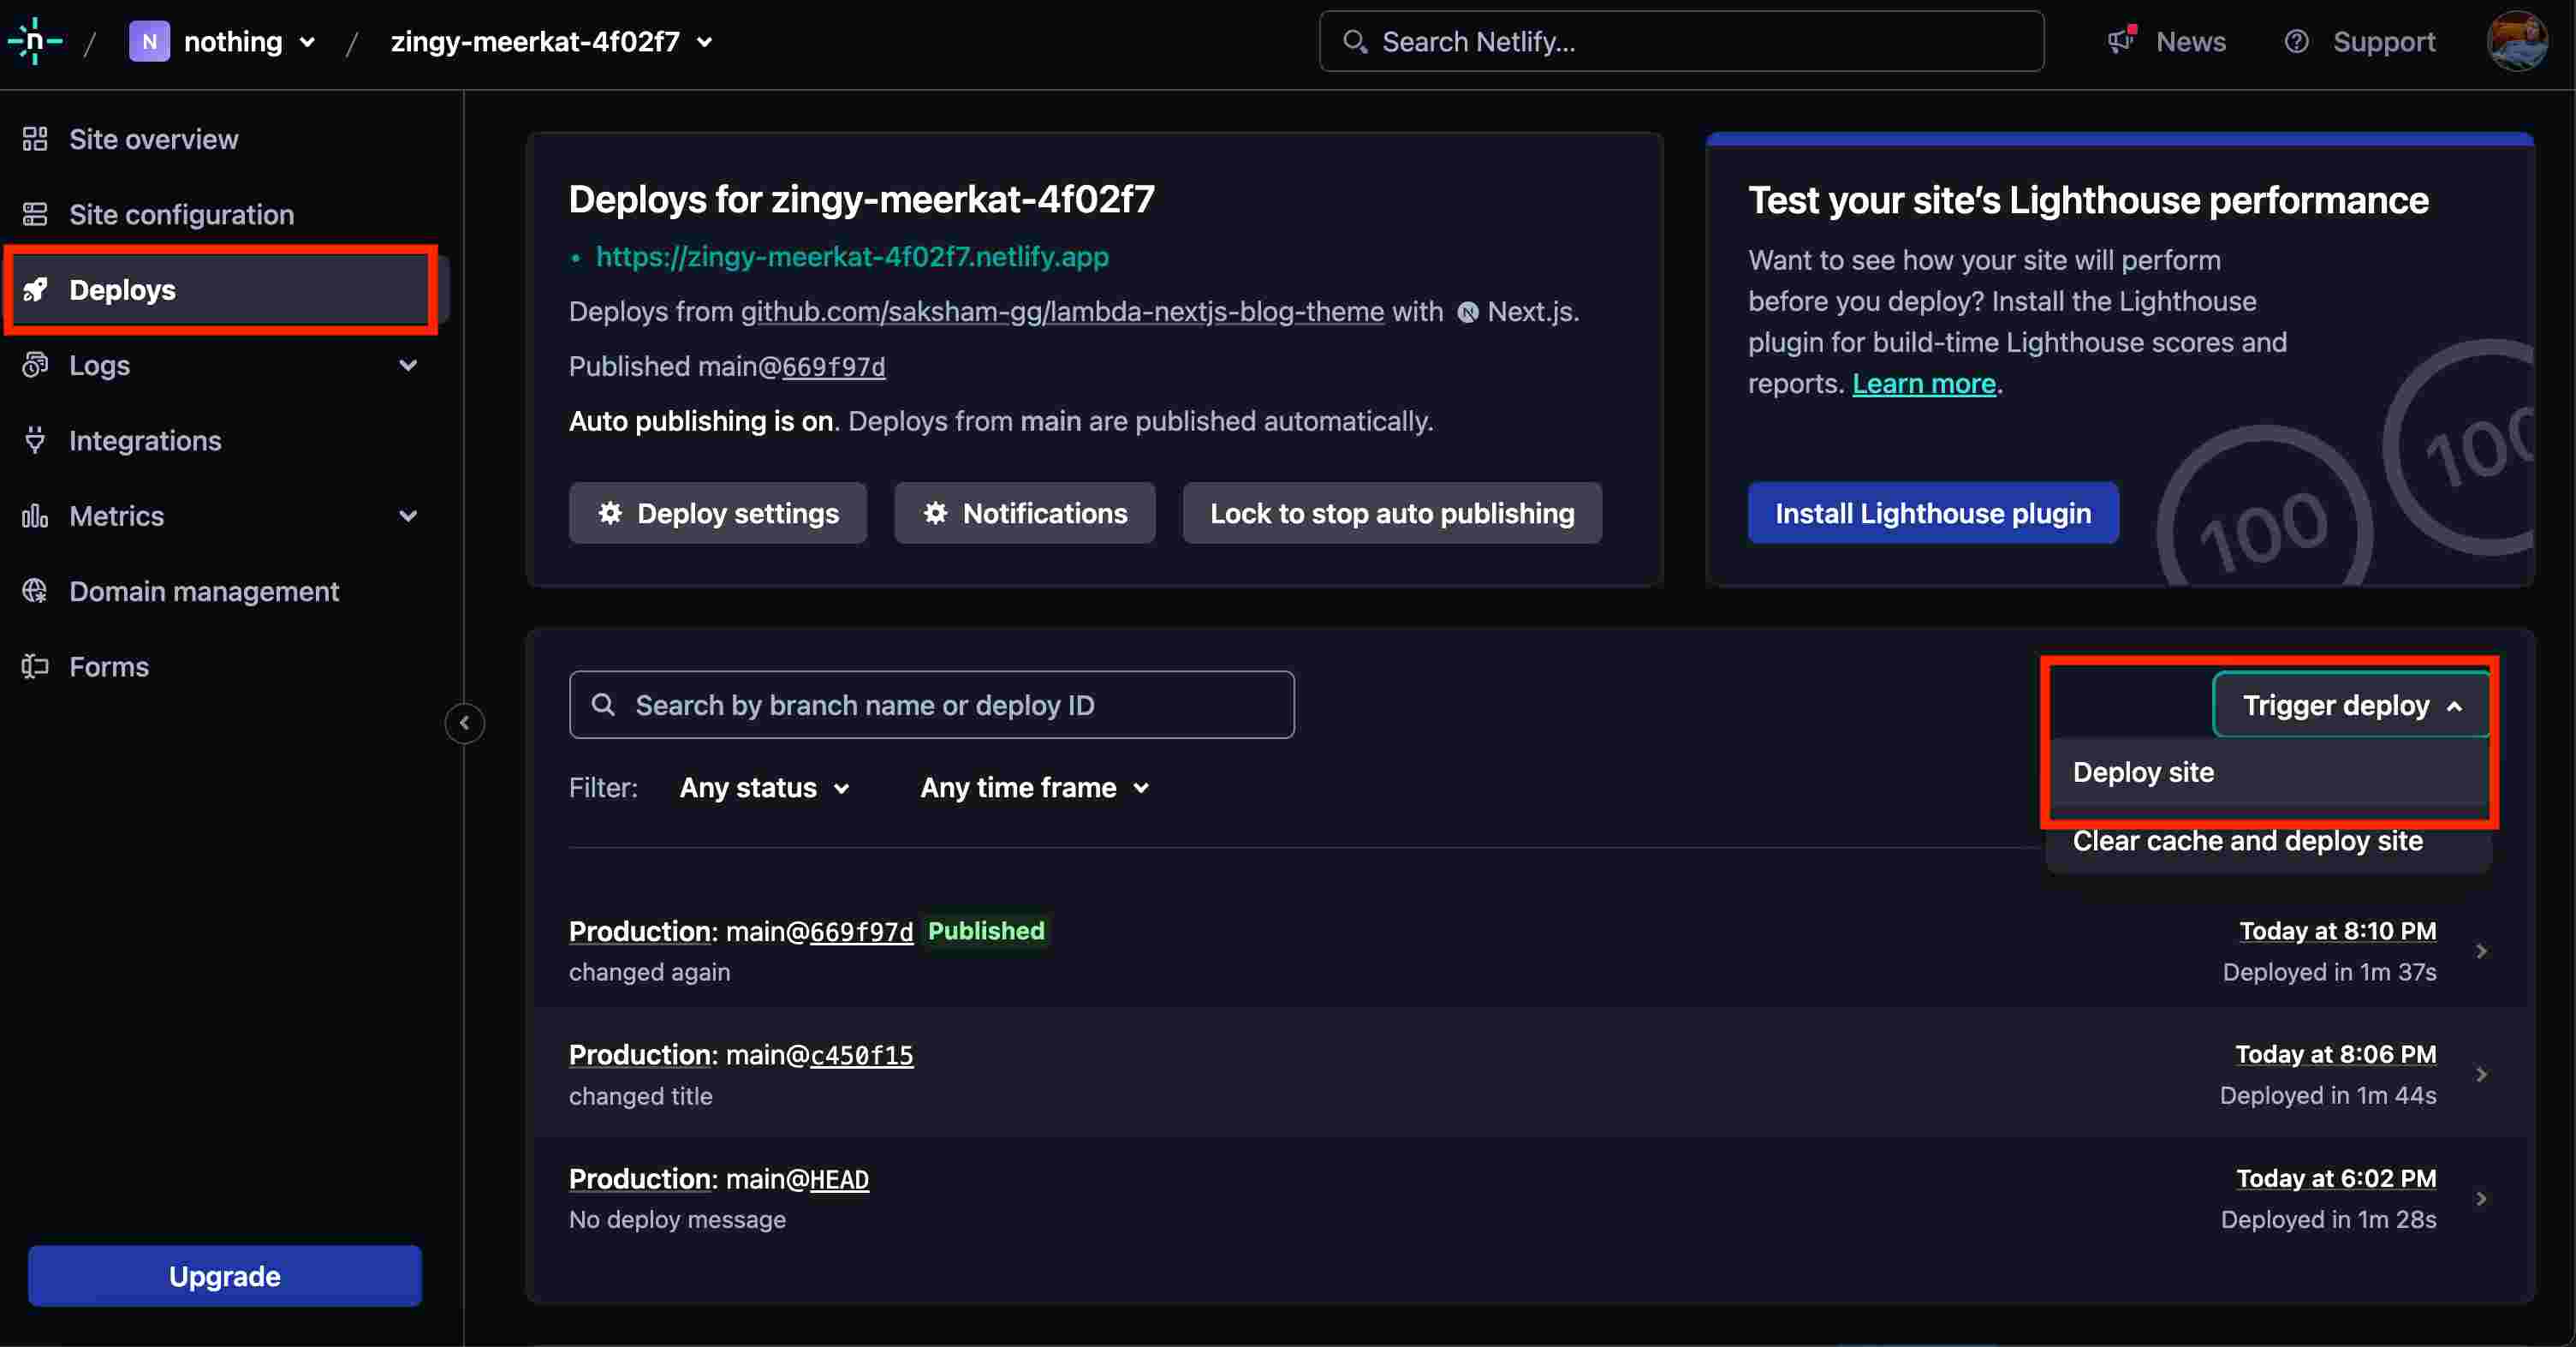
- This deployment is before any changes you have made and will be your Baseline image.
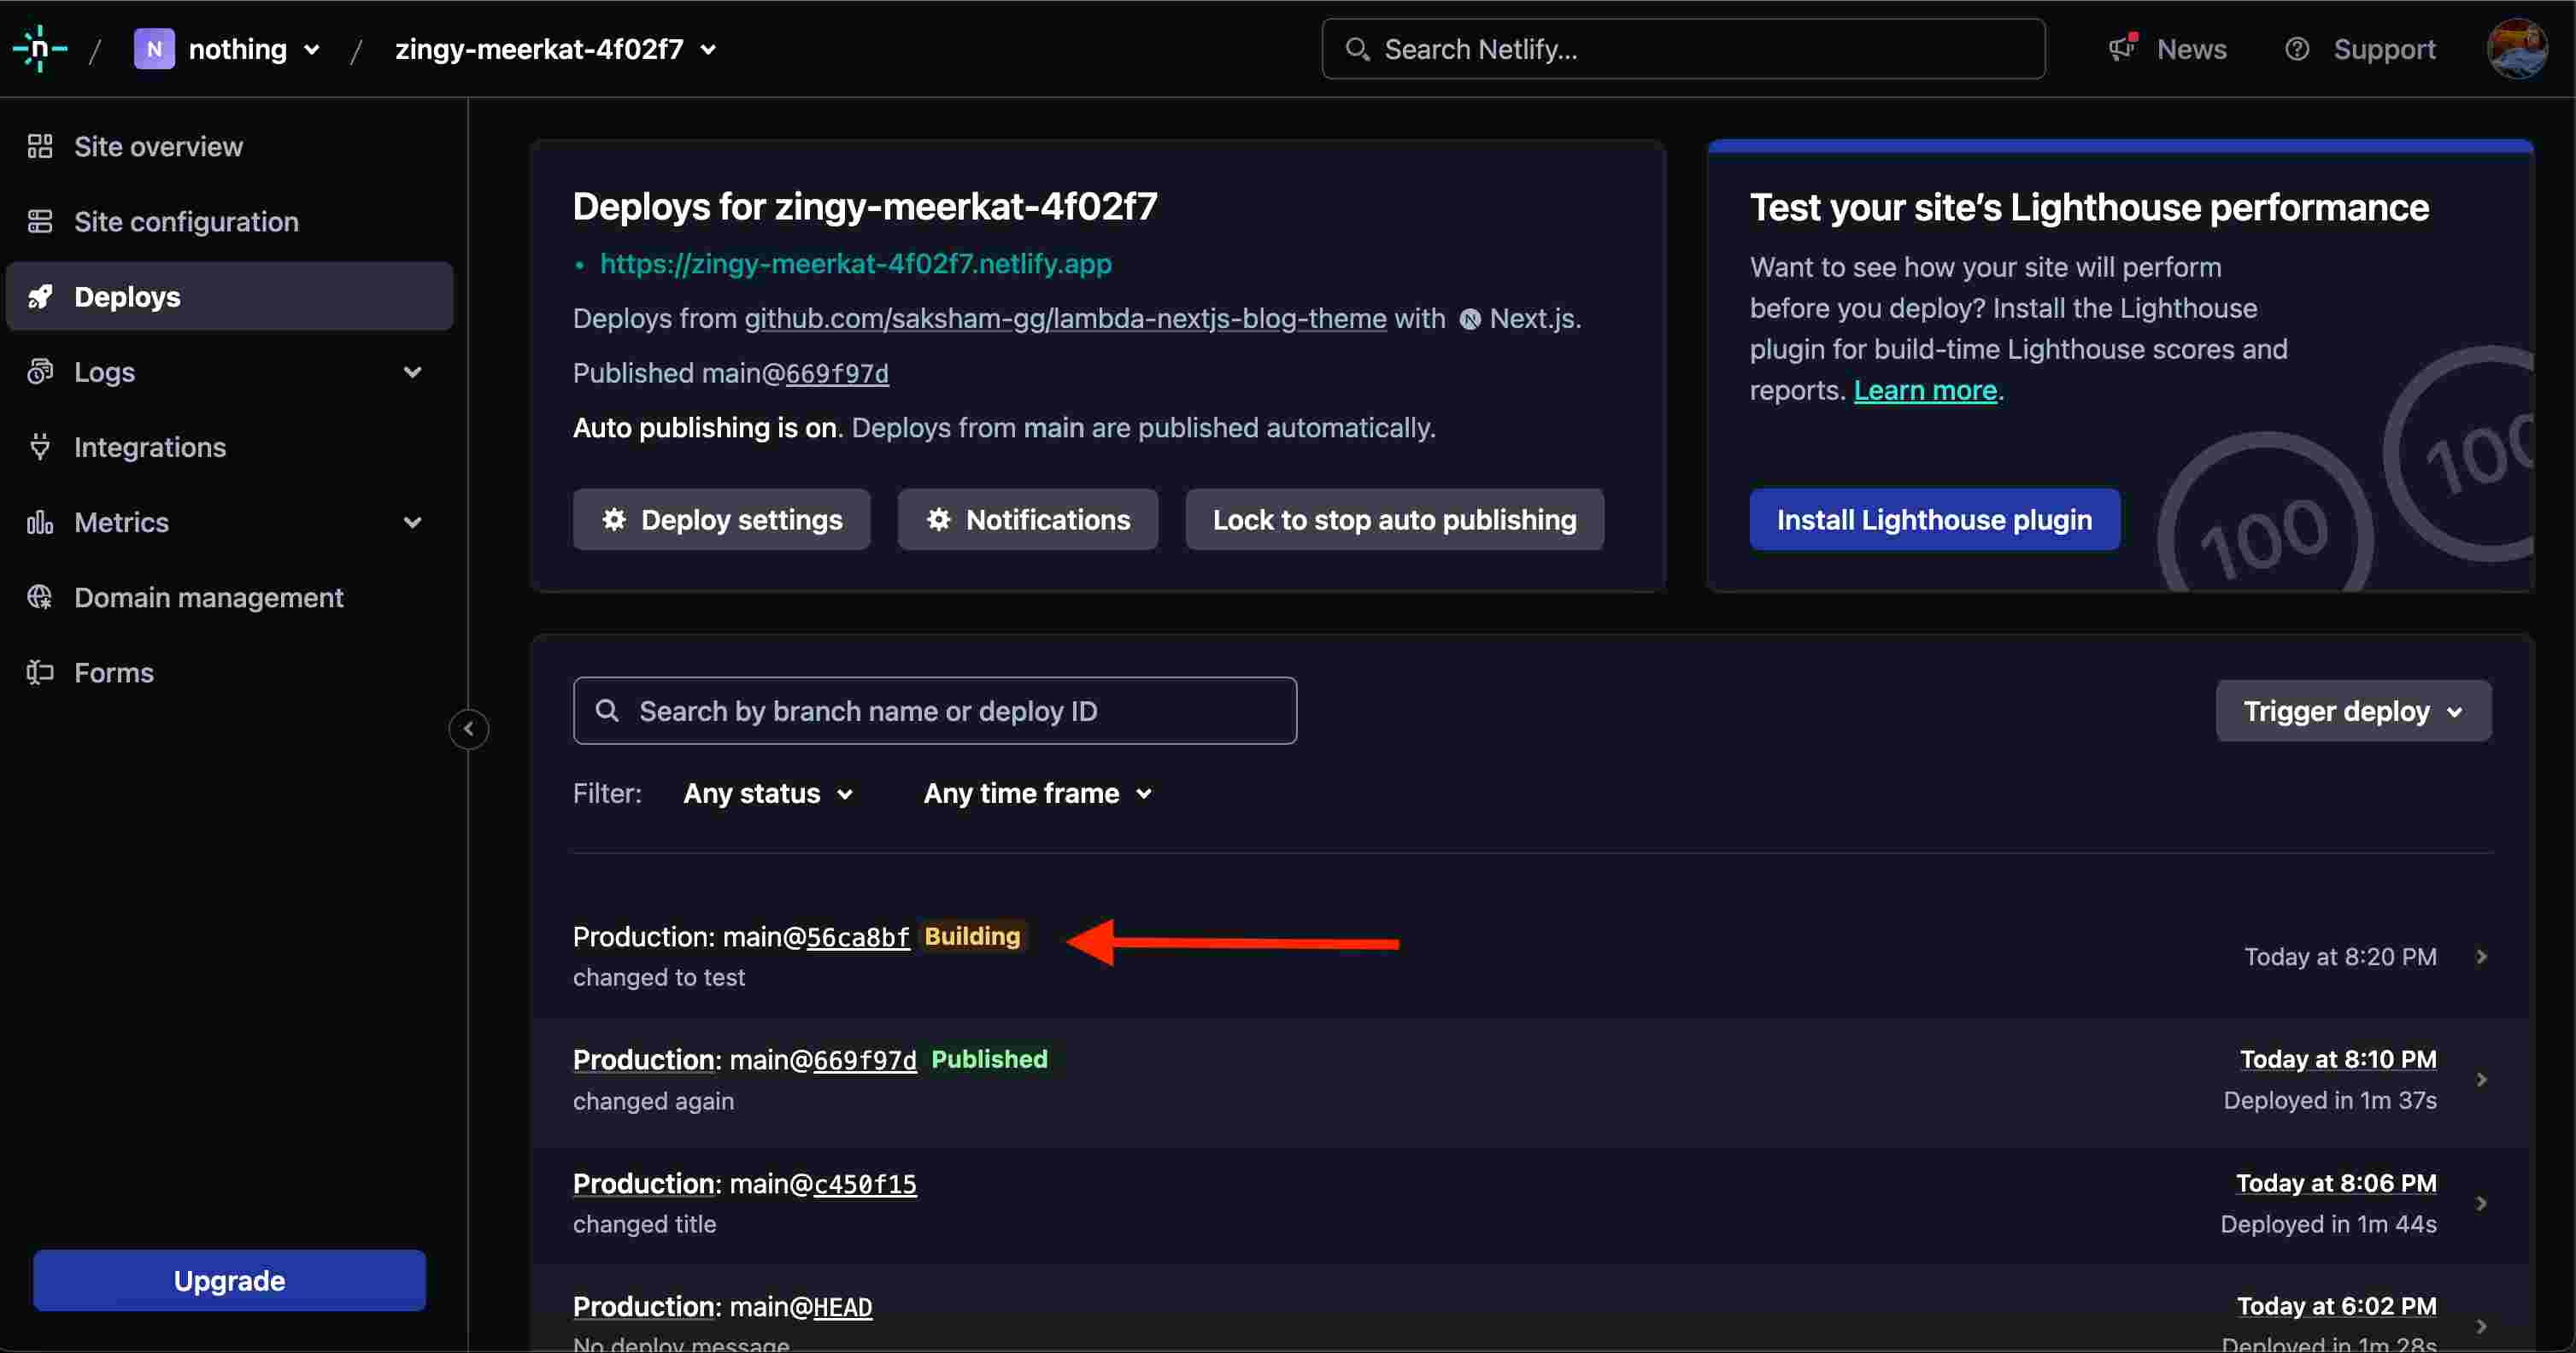
- Now you need to make the required changes in your project and push the changes.
- Visit the Netlify Dashboard again, and re-deploy your project.
Your changes will be triggered and deployed.
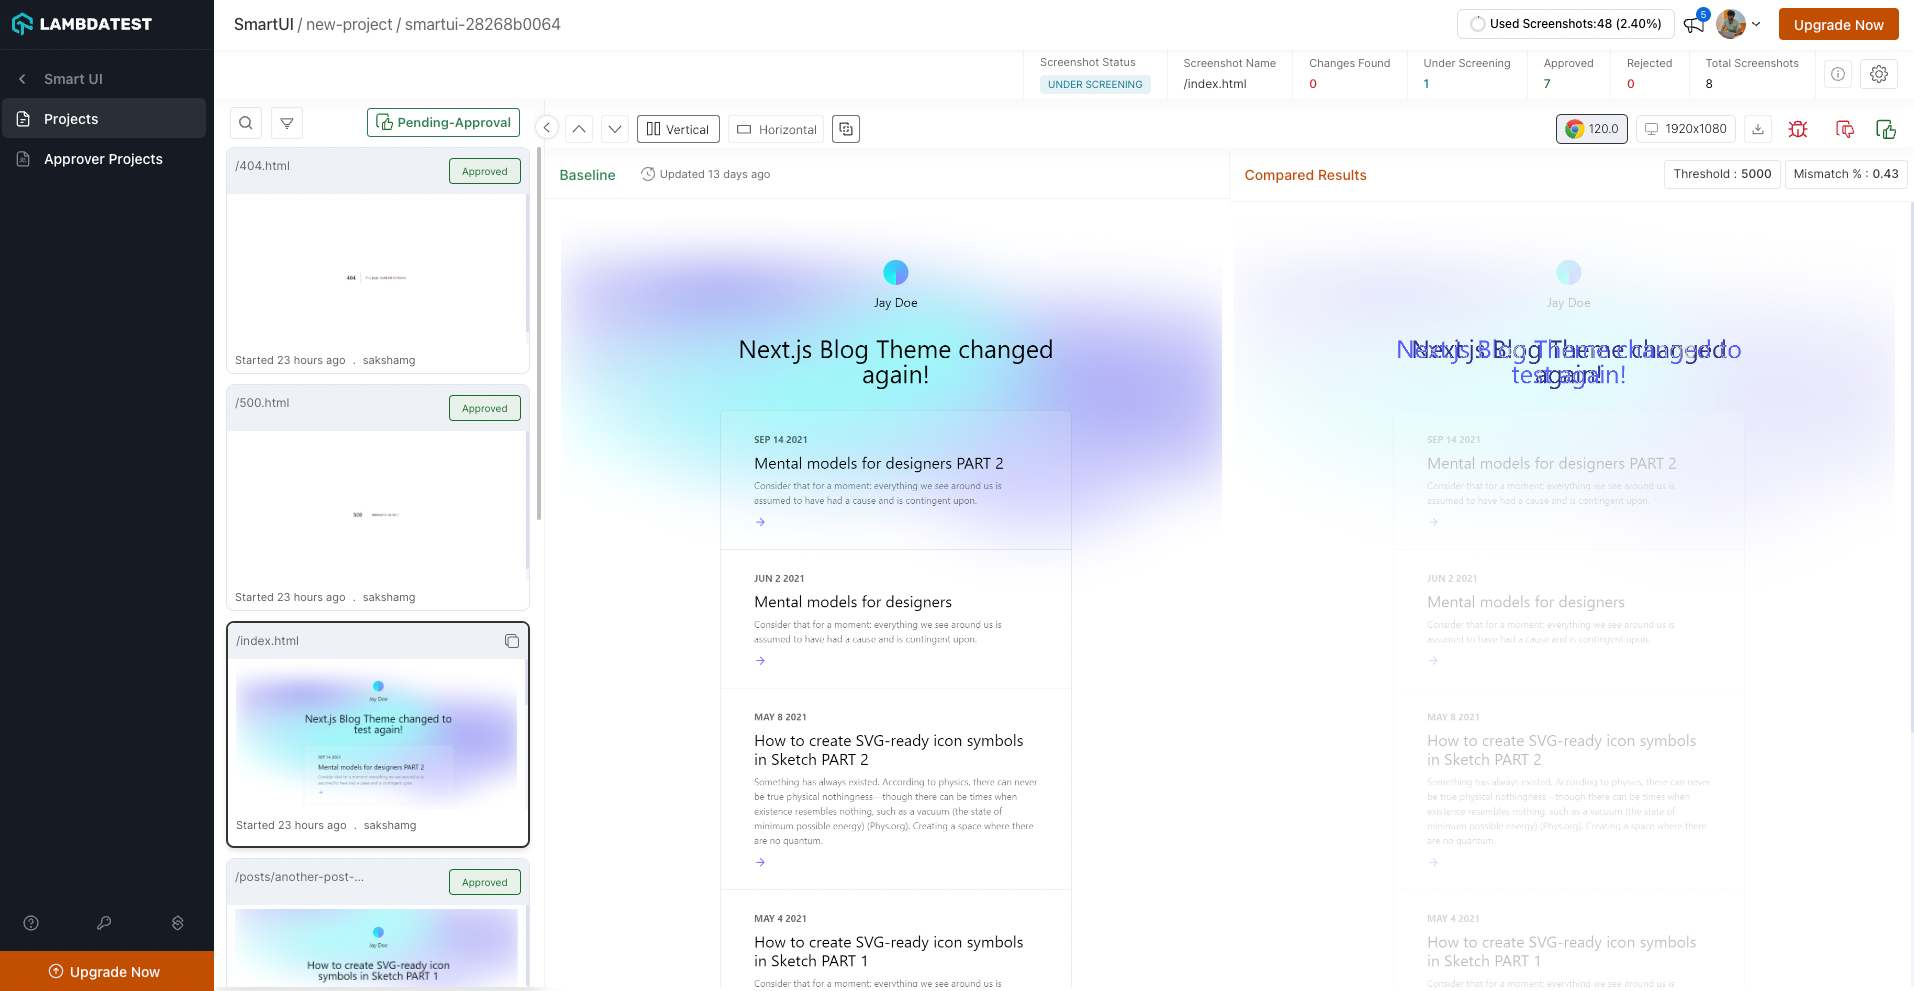
Step 4: Compare the Changes Smart-UI Dashboard
- Go to your Smart-UI Dashbard. You will notice there is already a project with the same name you entered while configuring in Step 1
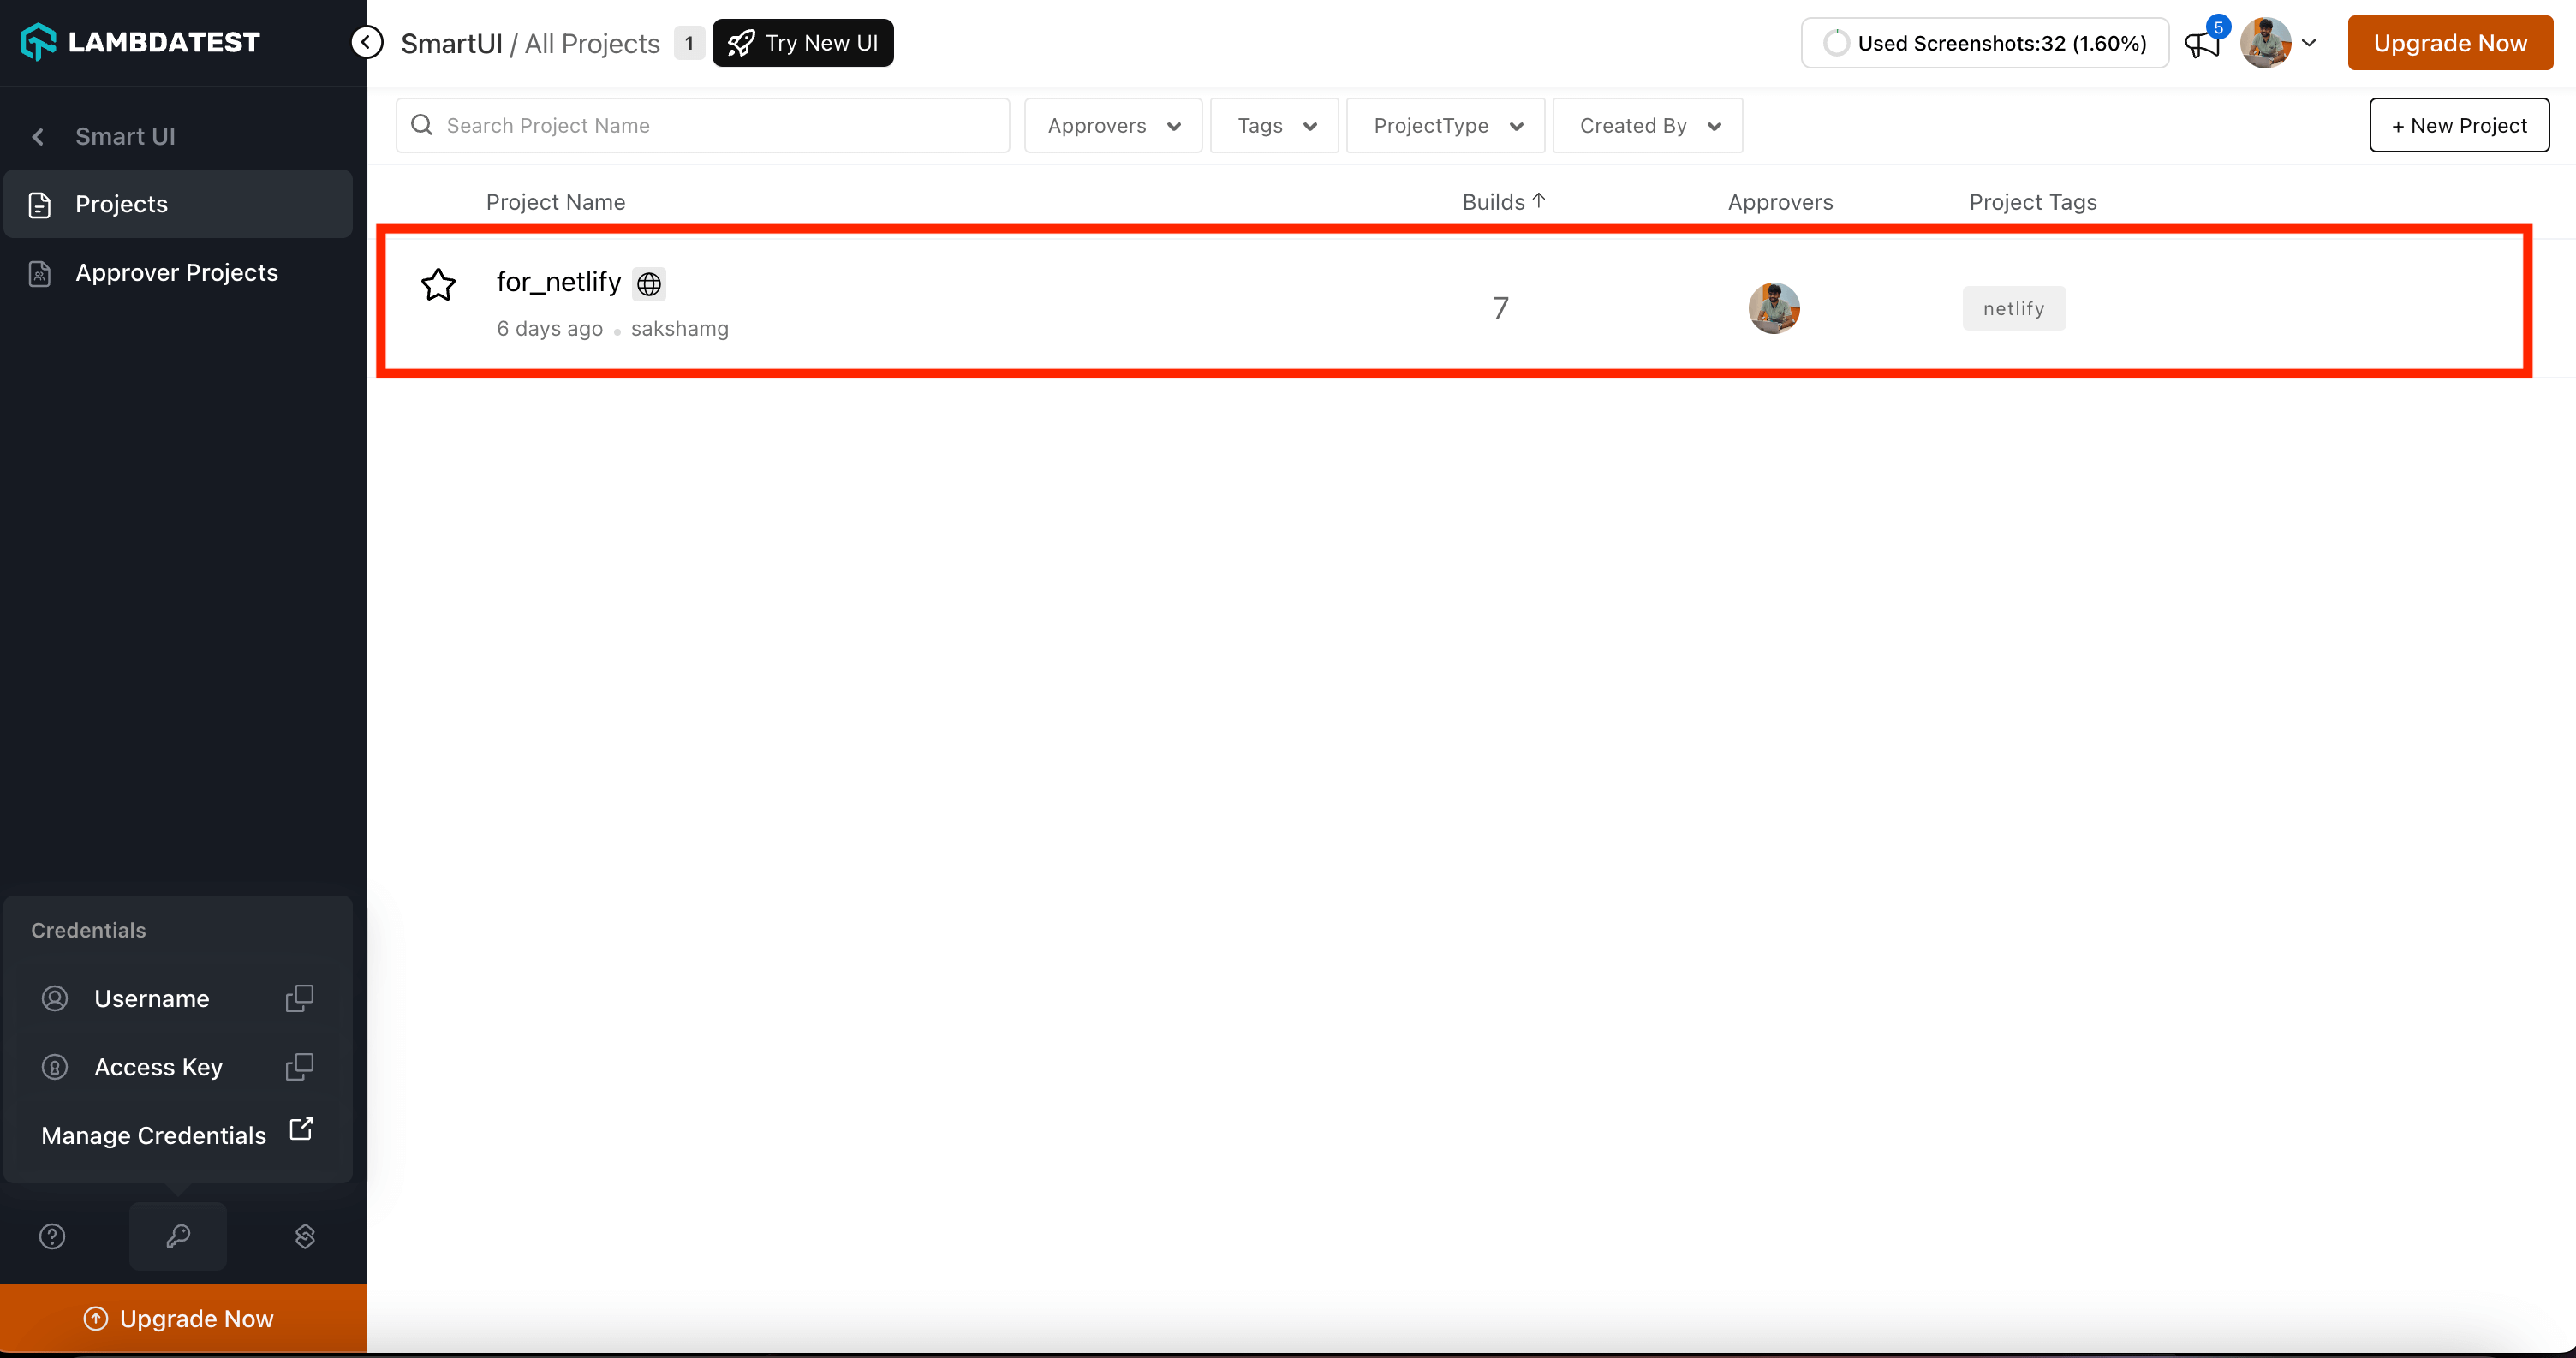
- Go on that project. Click on the latest build. You can now compare the changes done to your project with-respect-to the provious build.
Best Practices
- Project Naming
- Baseline Management
- Deployment Strategy
- Integration Configuration
- Comparison Workflow
- Comparison Workflow
Project Naming
- Use descriptive, consistent names for SmartUI projects
- Match project names with your Netlify site names for easy identification
- Avoid special characters that might cause issues
- Use consistent naming conventions across deployments
Baseline Management
- Establish baseline from stable deployment
- Review baseline before using for comparisons
- Update baseline when intentional changes are made
- Document baseline deployment for reference
Deployment Strategy
- Deploy baseline before making changes
- Test changes in staging before production
- Use meaningful deployment messages
- Tag important deployments
Integration Configuration
- Keep TestMu AI credentials secure
- Use Netlify's environment variables for credentials
- Rotate credentials regularly
- Use different projects for different environments
Comparison Workflow
- Review visual differences carefully
- Approve intentional changes promptly
- Document reasons for baseline updates
- Use SmartUI dashboard for detailed analysis
Comparison Workflow
- Review visual differences carefully
- Approve intentional changes promptly
- Document reasons for baseline updates
- Use SmartUI dashboard for detailed analysis
Troubleshooting
- Screenshots Not Appearing in Dashboard
- Project Not Found Error
- Integration Not Triggering
- Baseline Not Set Correctly
- Comparison Results Unexpected
Issue: Screenshots Not Appearing in Dashboard
Symptoms: Deployments complete but no screenshots appear in SmartUI dashboard
Possible Causes:
- Incorrect project name in Netlify integration
- TestMu AI credentials incorrect
- Integration not enabled
- Network connectivity issues
Solutions:
-
Verify project name matches exactly (case-sensitive) in Netlify integration settings
-
Check TestMu AI credentials:
- Go to Netlify Dashboard → Integrations → TestMu AI
- Verify username and access key are correct
- Re-enter credentials if needed
-
Ensure integration is enabled:
- Check integration status in Netlify dashboard
- Re-enable if disabled
-
Check network connectivity to TestMu AI servers
-
Review Netlify deployment logs for errors
Issue: Project Not Found" Error
Symptoms: Error indicating SmartUI project cannot be found
Possible Causes:
- Project name typo in Netlify integration
- Project doesn't exist in SmartUI dashboard
- Wrong account credentials
Solutions:
-
Verify project exists in SmartUI dashboard:
- Log into SmartUI Dashboard
- Check if project with specified name exists
- Create project if it doesn't exist
-
Copy project name directly from SmartUI dashboard
-
Update project name in Netlify integration settings
-
Check credentials match the account with the project
Issue: Integration Not Triggering
Symptoms: Deployments don't trigger SmartUI comparisons
Possible Causes:
- Integration not properly configured
- Integration disabled
- Deployment not triggering integration
- Configuration errors
Solutions:
-
Verify integration is enabled:
- Go to Netlify Dashboard → Integrations → TestMu AI
- Ensure integration shows as Enabled"
-
Check integration configuration:
- Verify all required fields are filled
- Check for any error messages
- Re-save configuration if needed
-
Test with a new deployment:
- Make a small change to trigger deployment
- Check if integration triggers
-
Review Netlify deployment logs for integration errors
Issue: Baseline Not Set Correctly
Symptoms: Comparisons show unexpected differences or baseline issues
Possible Causes:
- Baseline deployment not completed
- Wrong deployment used as baseline
- Baseline not approved
- Deployment state issues
Solutions:
-
Verify baseline deployment:
- Check SmartUI dashboard for baseline build
- Ensure baseline was from stable deployment
- Verify baseline shows as approved
-
Set new baseline if needed:
- Use stable deployment as baseline
- Approve baseline in SmartUI dashboard
-
Review deployment history:
- Check which deployment was used as baseline
- Verify deployment was successful
Issue: Comparison Results Unexpected
Symptoms: Visual differences don't match expected changes
Possible Causes:
- Dynamic content causing false positives
- Deployment timing issues
- Content not fully loaded
- Configuration issues
Solutions:
-
Review comparison in SmartUI dashboard:
- Check diff view for actual differences
- Verify differences are expected
-
Handle dynamic content:
- See Handling Dynamic Data
- Configure ignoreDOM/selectDOM if needed
-
Check deployment timing:
- Ensure deployment completed fully
- Wait for all assets to load
-
Review project settings:
- Check pixel threshold settings
- Adjust comparison settings if needed
Getting Help
If you encounter issues not covered here:
- Review the Comprehensive Troubleshooting Guide for detailed solutions
- Check SmartUI Configuration Options documentation
- See Handling Dynamic Data for dynamic content issues
- Visit TestMu AI Support for additional resources
- Contact support at support@testmu.ai or use 24/7 Chat Support
Additional Resources
- Comprehensive Troubleshooting Guide
- Project Settings - Configure comparison settings
- Baseline Management - Learn how to manage baselines
- Handling Dynamic Data - Handle dynamic content
- Running Your First Project - Get started with SmartUI
