Integrating Your First Repository
Once you have selected your setup mode, you are ready for the next step of setting up your repositories in TAS.
- For TAS Cloud - You will see your repositories immediately after selecting TAS Cloud as your setup mode therefore can directly start following the 3 steps given below.
- For TAS - Self Hosted - First you need to configure your self-hosted environments (see configuration steps), before you can start with the following steps to setup your repositories.
Step 1 - Integrating the repositories
- On the page where you see all of your repositories.
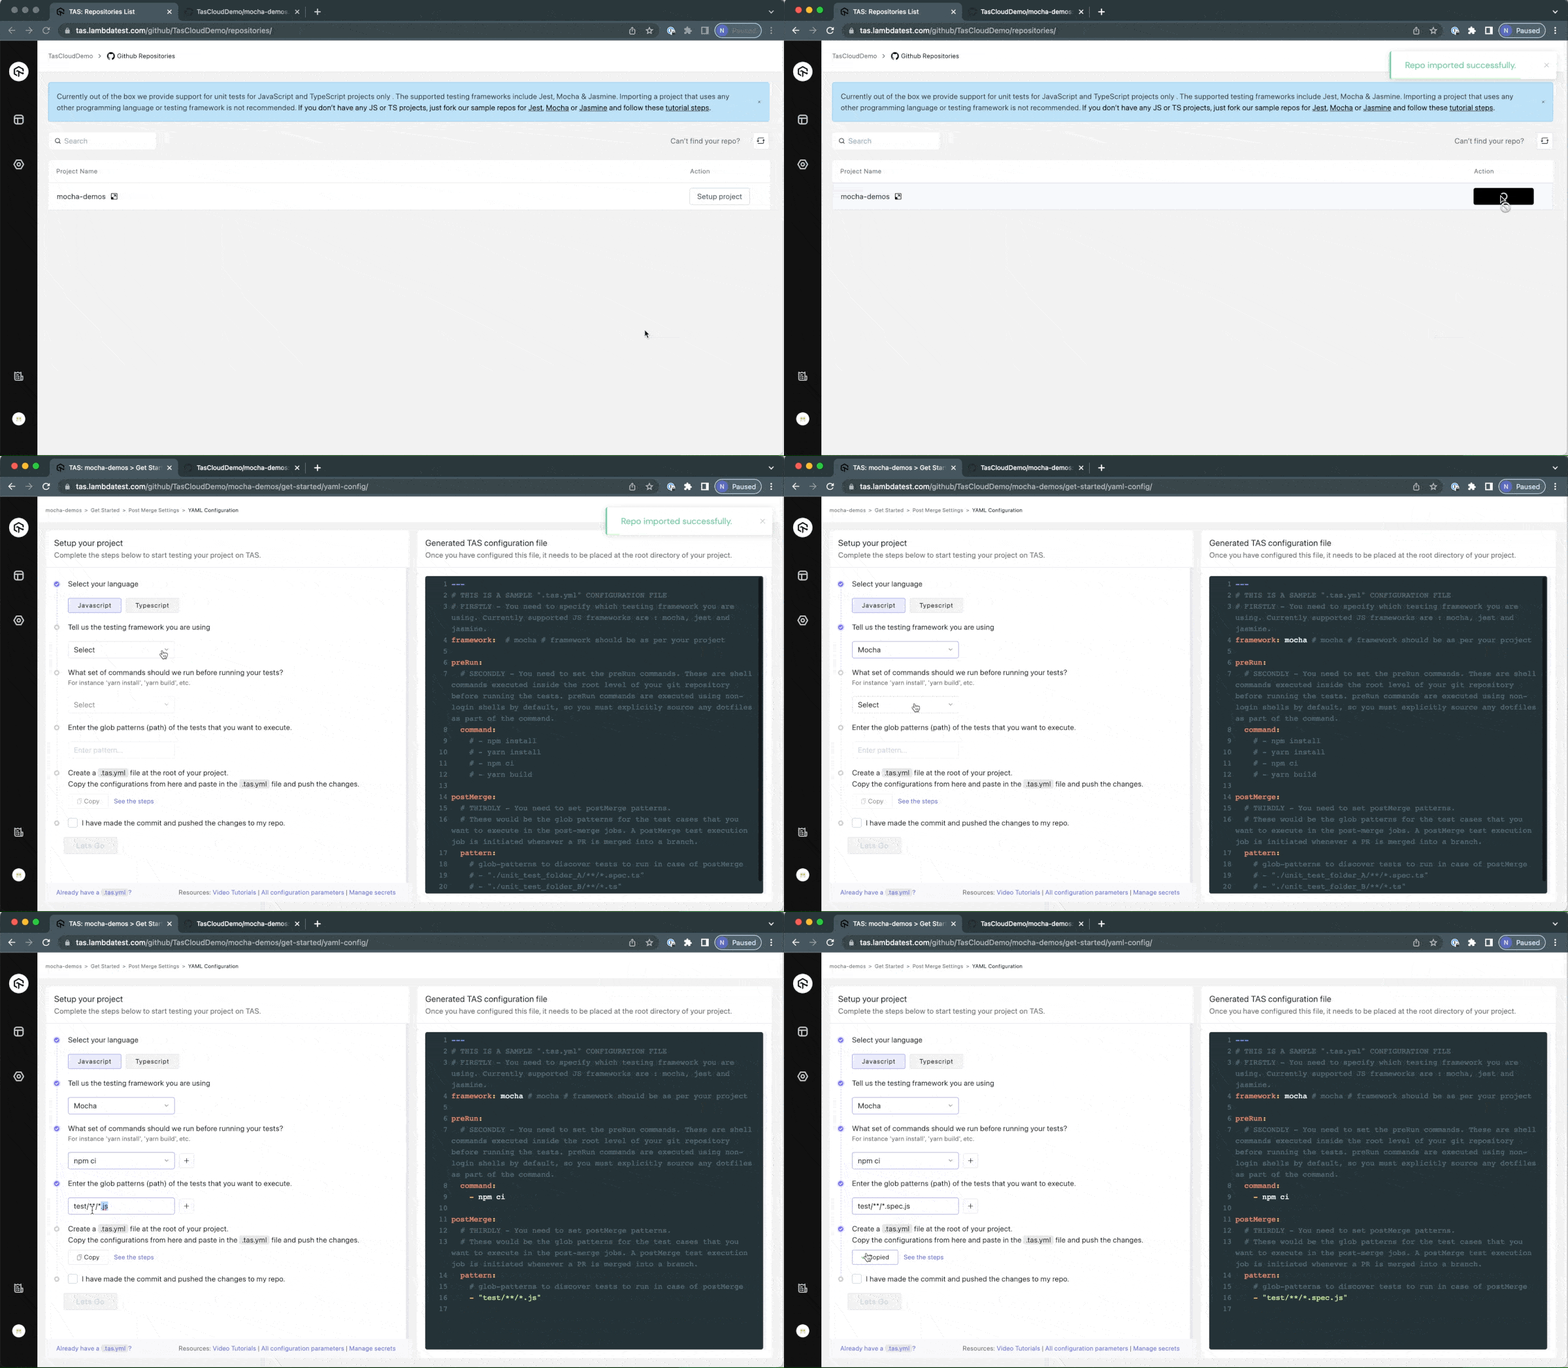
- Click the Setup Project button for the repository you want to integrate with TAS. It will redirect you to
tas.ymlconfigurations page.
Note: You need admin rights to integrate a repo with TAS. In case you do not have admin rights to a repository, you will not be able to import and integrate that project with TAS.
Step 2 - Configuring the .tas.yml
Preparing the file
Once you've imported the repo, you'll be taken to the .tas.yml configuration page.
This step remains same for both TAS Cloud and TAS - Self Hosted modes.
The three main parameters that need to be configured for successful execution are:
- framework : The name of the specify testing framework you are using.
- preRun : Shell commands executed inside the root level of your git repository before running the tests.
- postMerge : The glob patterns for the test cases that you want to execute in the post-merge jobs.
To Generate the TAS Configuration file
- Select your Language, Framework, Set Command you want to run before running tests and Enter the test file glob pattern. This will generate a basic
tas.ymlfile. - To copy the generated file, Click on Copy button.
A detailed list of all the configuration parameters can be found here.

Adding the file to your project
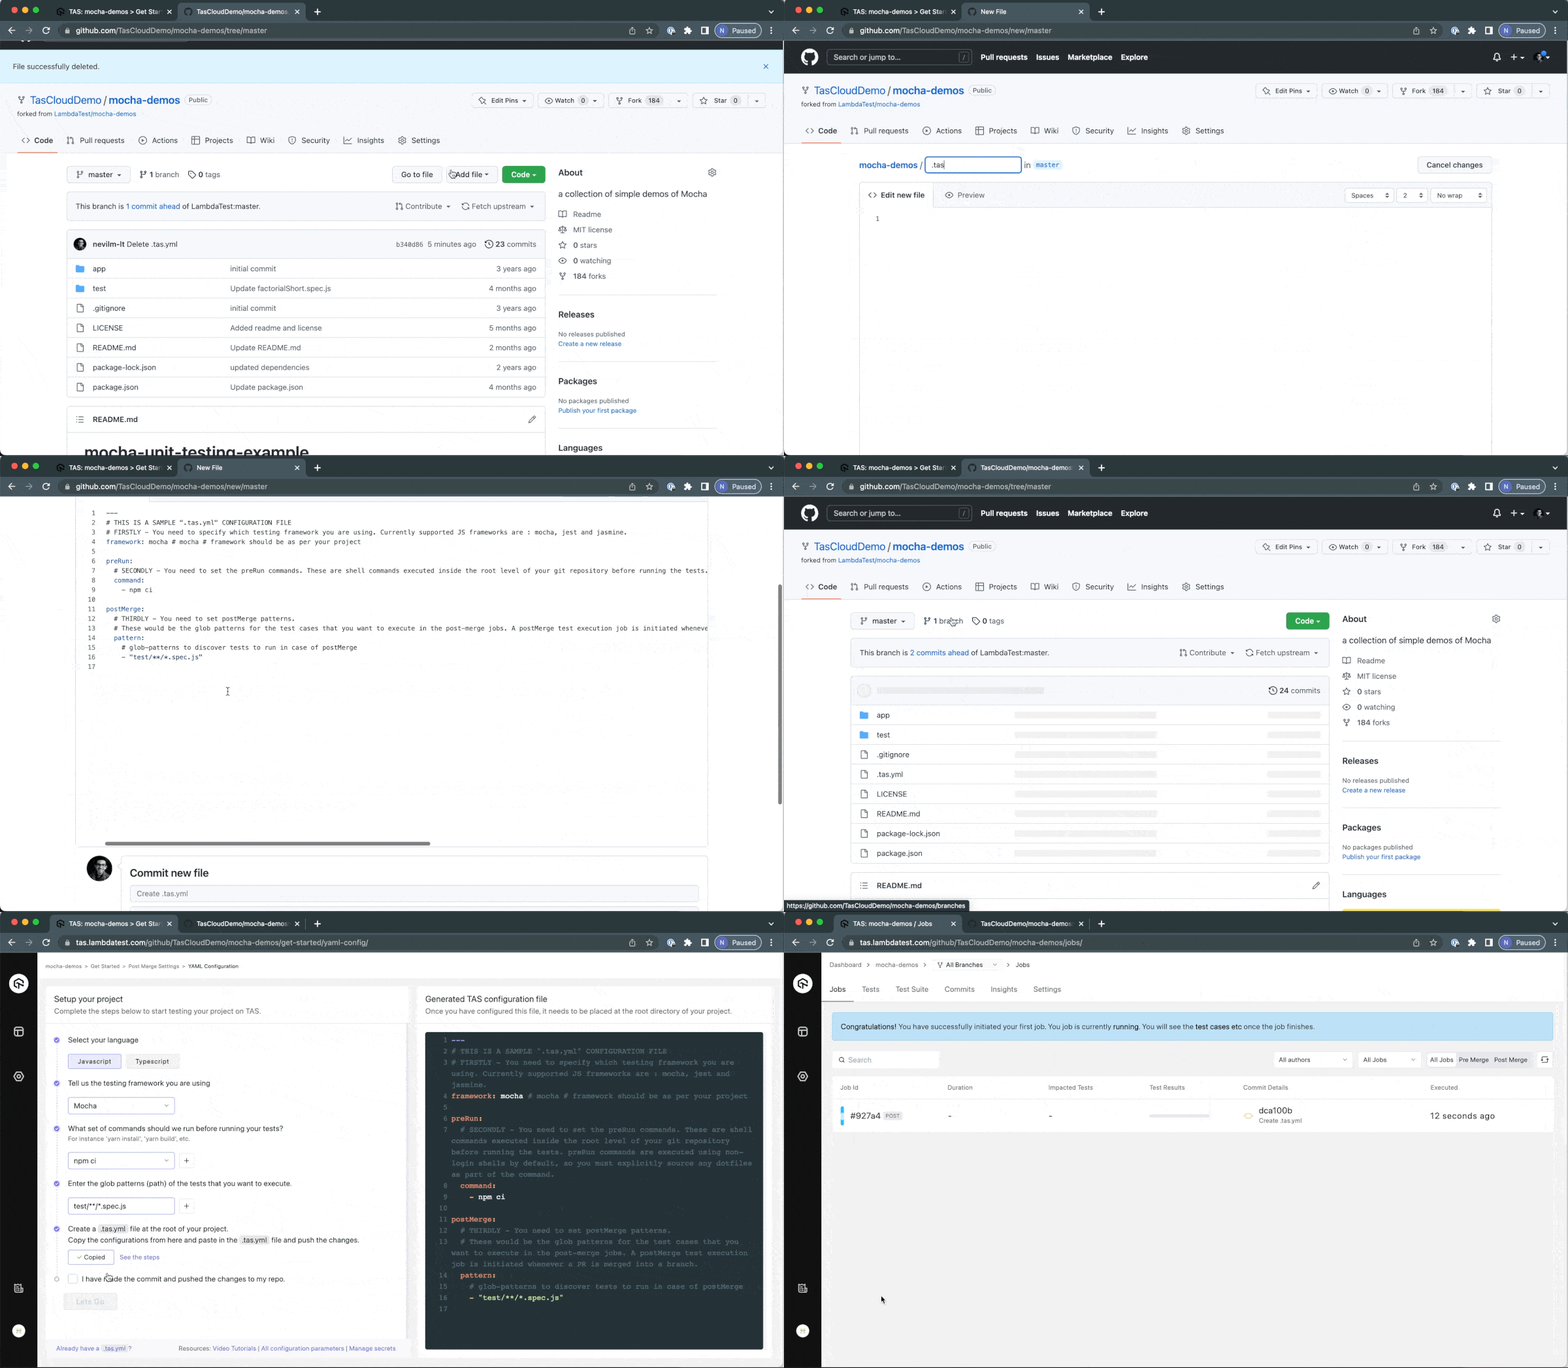
Once you have copied the configuration file, place this file correctly inside your repo using the steps mentioned below:
- In your master branch, create a new file as
.tas.ymlat the root level of your repository. - In the
.tas.ymlfile content, Paste the yml file you had copied using Copy button. - Commit and Push the changes to your repo.

