Netlify Integration with TestMu AI
Netlify is a cloud computing company that offers hosting and serverless backend services for web applications and static websites. It allows developers to deploy their websites and applications quickly and easily, with features such as continuous deployment, serverless functions, and global CDN.
Prerequisite
-
A TestMu AI account. If you don't have an account, sign up for free.
-
You need to have a site deployed in your Netlify account.
Steps to Setup the Netlify Plugin
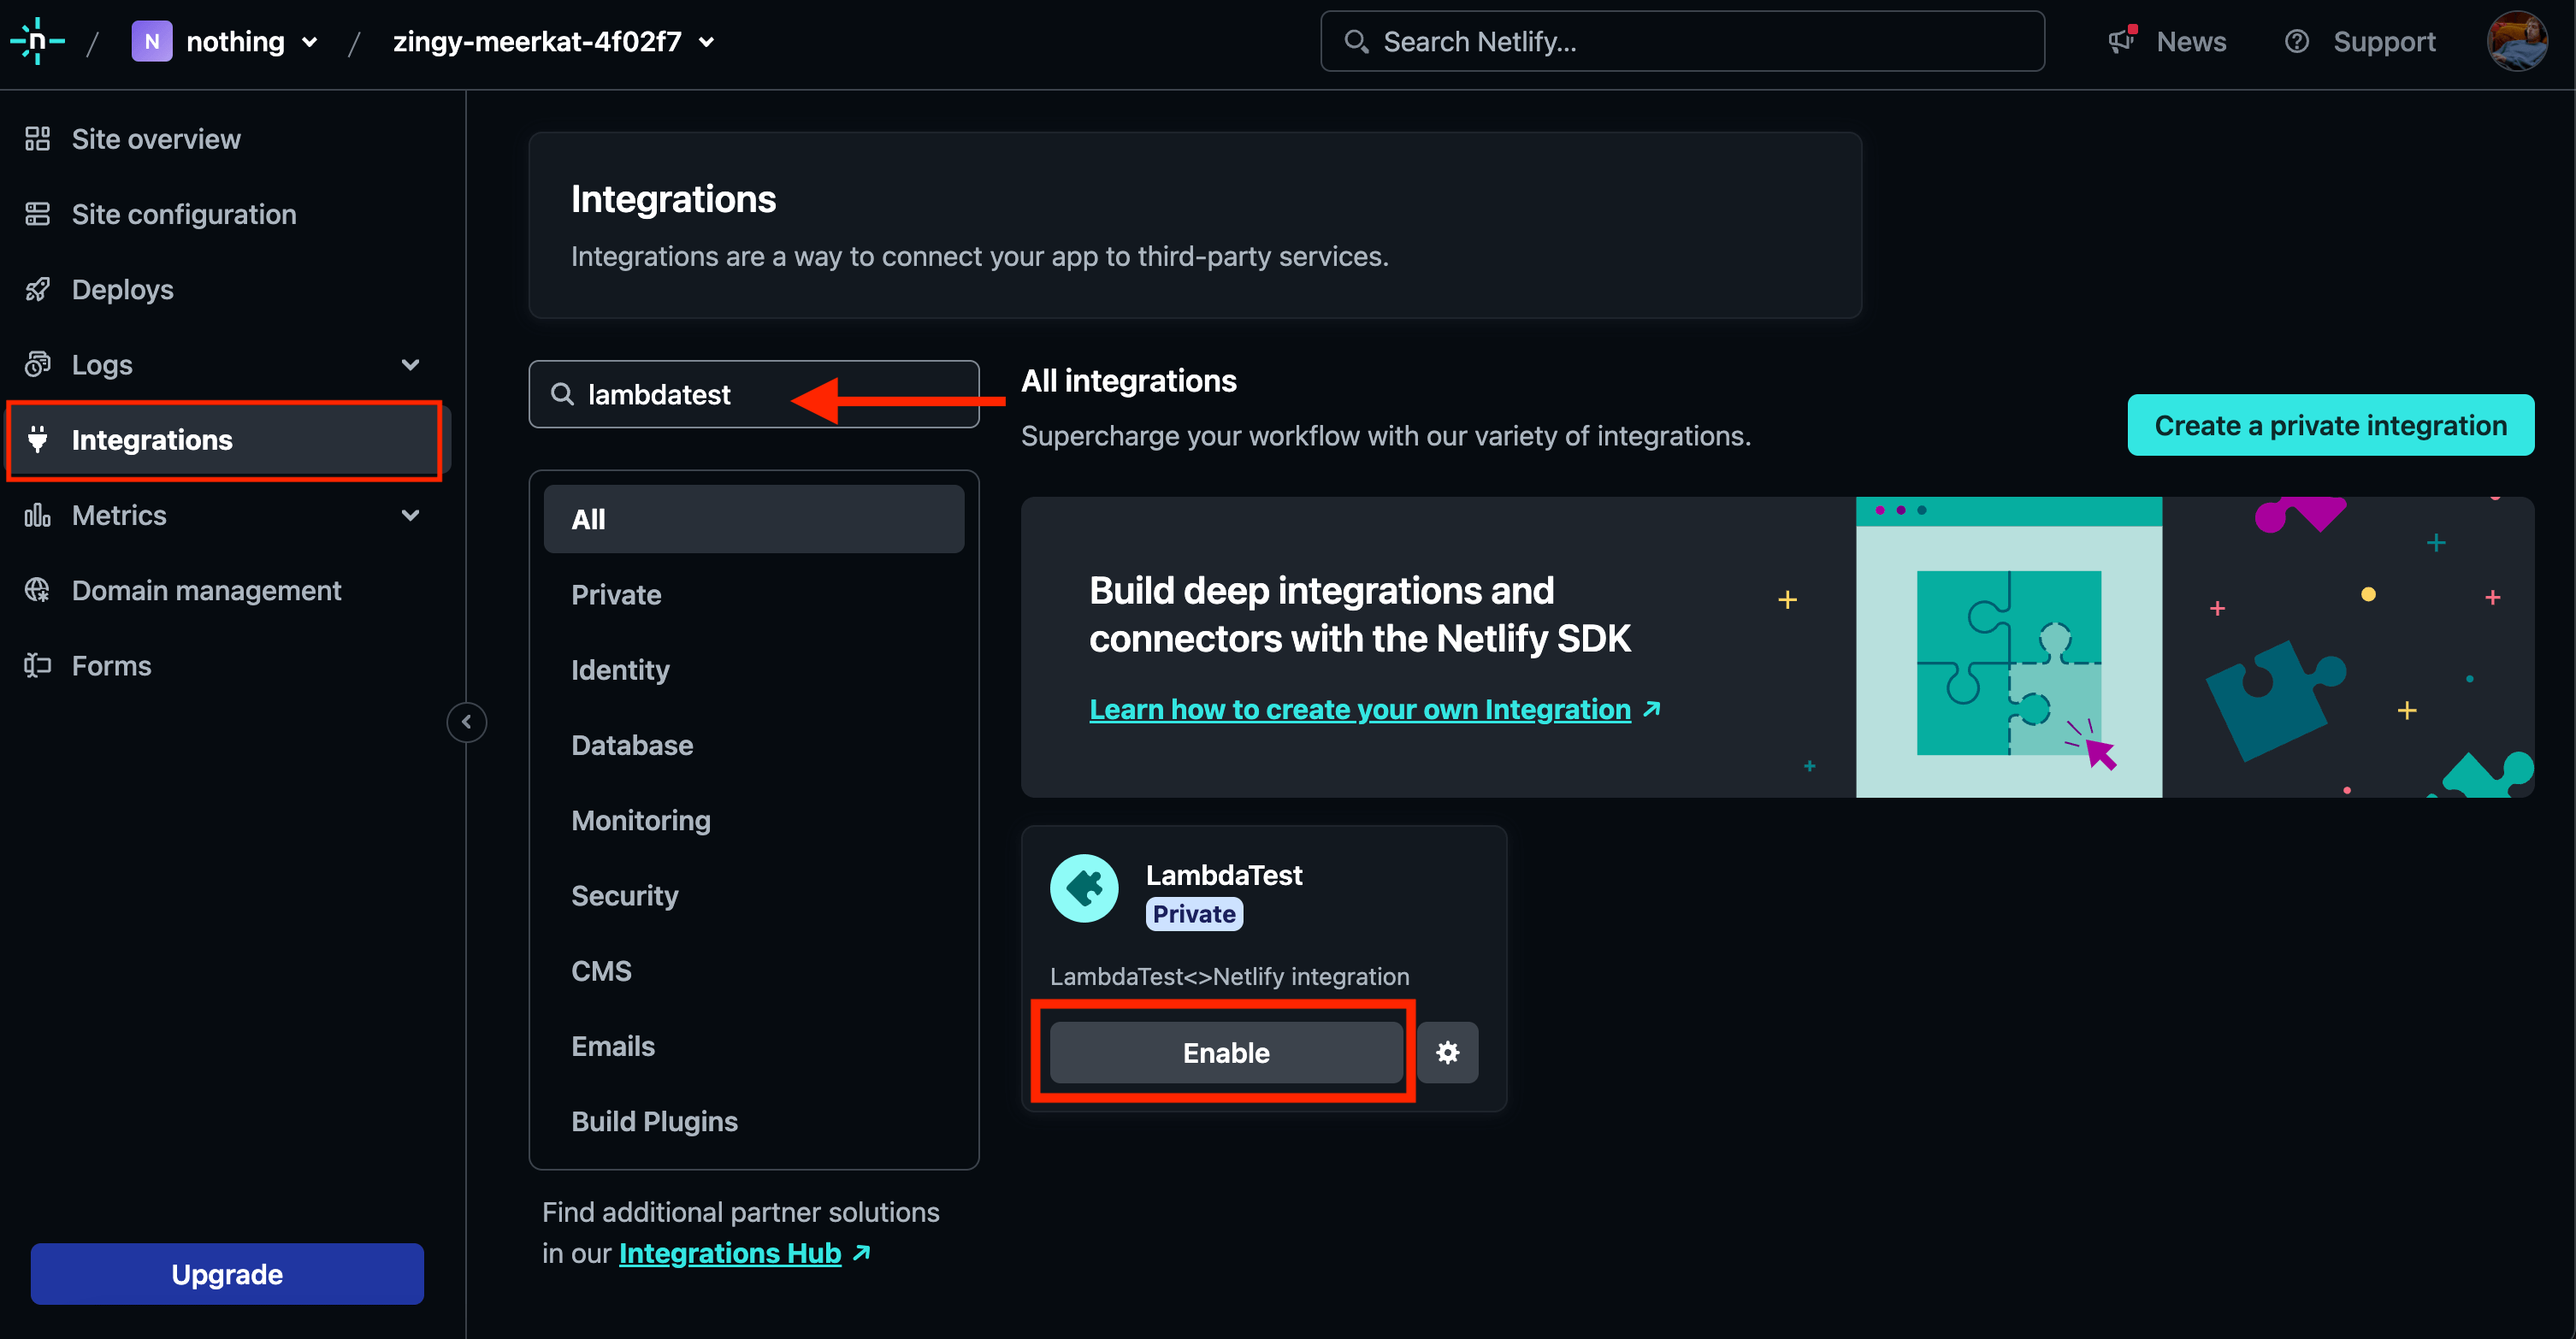
Step 1: Configure your TestMu AI Integration on Netlify Dashboard
-
Go to your Netlify Dashboard.
-
Click on the Integrations tab, search for TestMu AI and click on the Enable button.
-
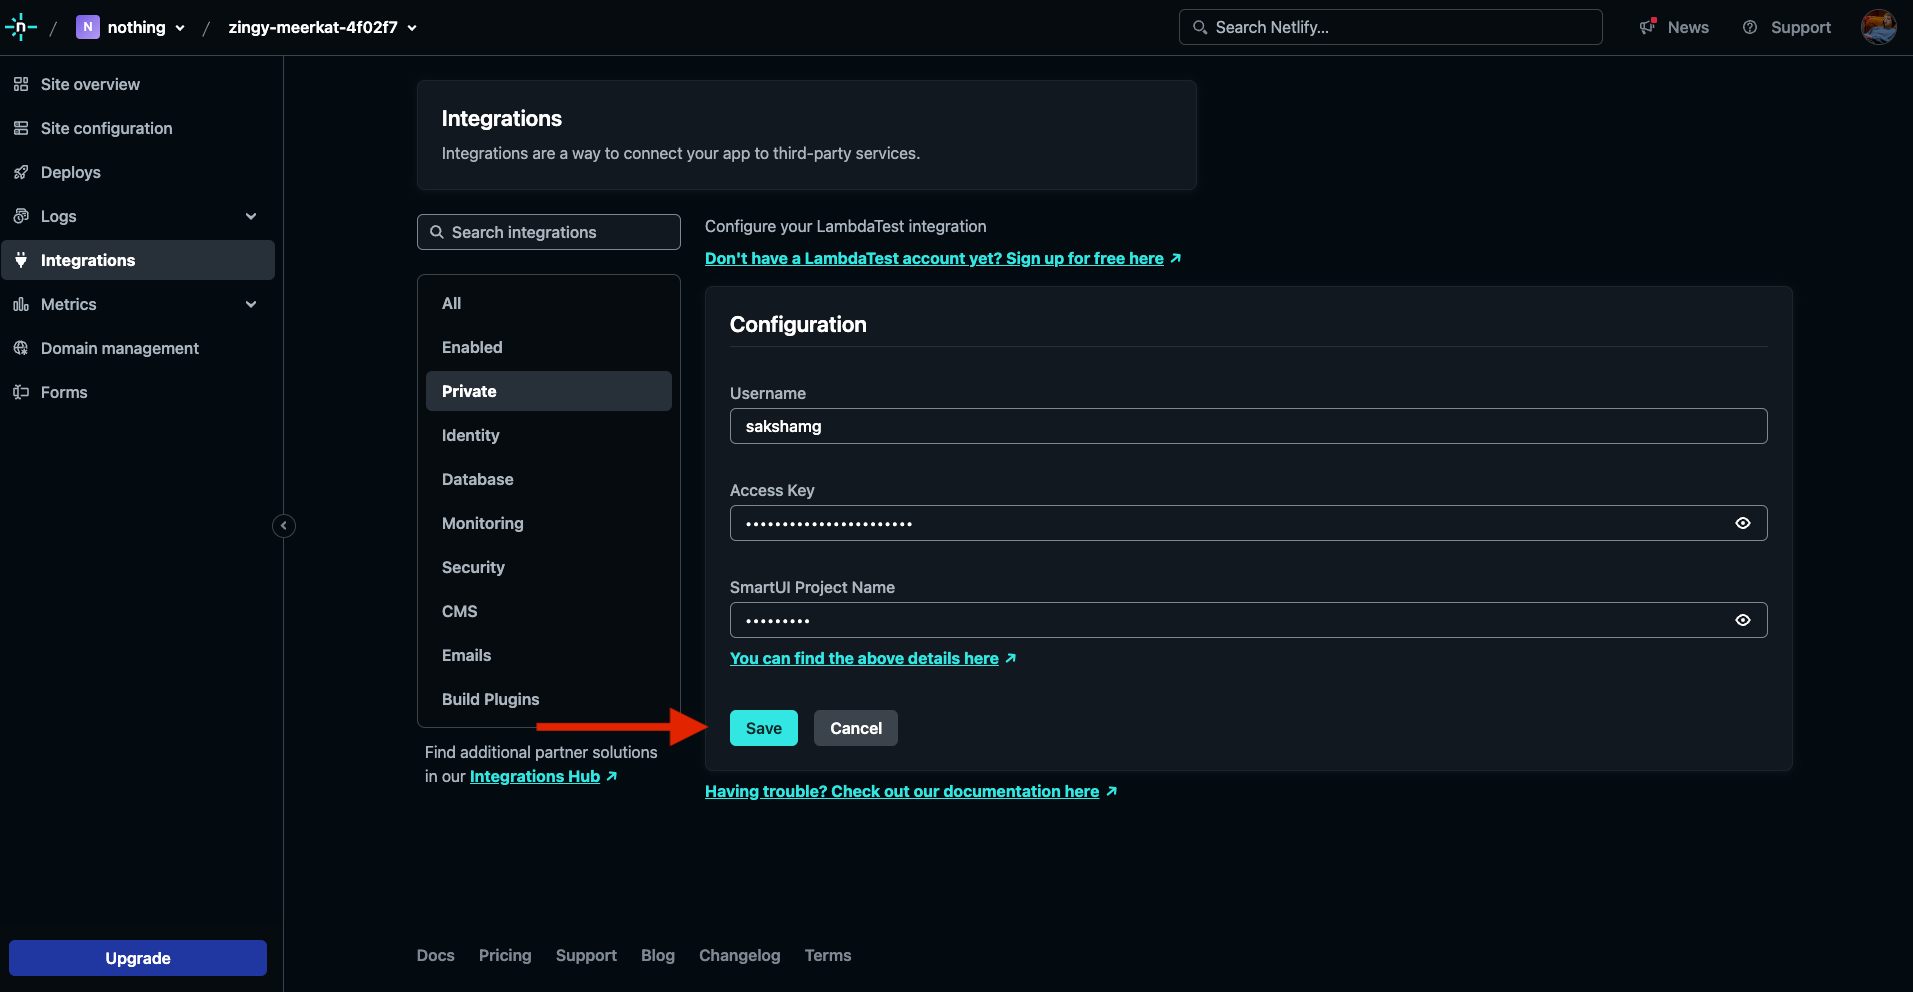
You need to provide your configuration details
-
Enter your Username and Access Key from the TestMu AI Dashboard.
-
Enter your Smart-UI Project Name
-
For the Smart-UI Project Name, you can enter any project name. Even if you have not set up any projects in the Smart UI Dashboard.
You can also enter your already-existing smart-UI project name.
- Click on the Save button
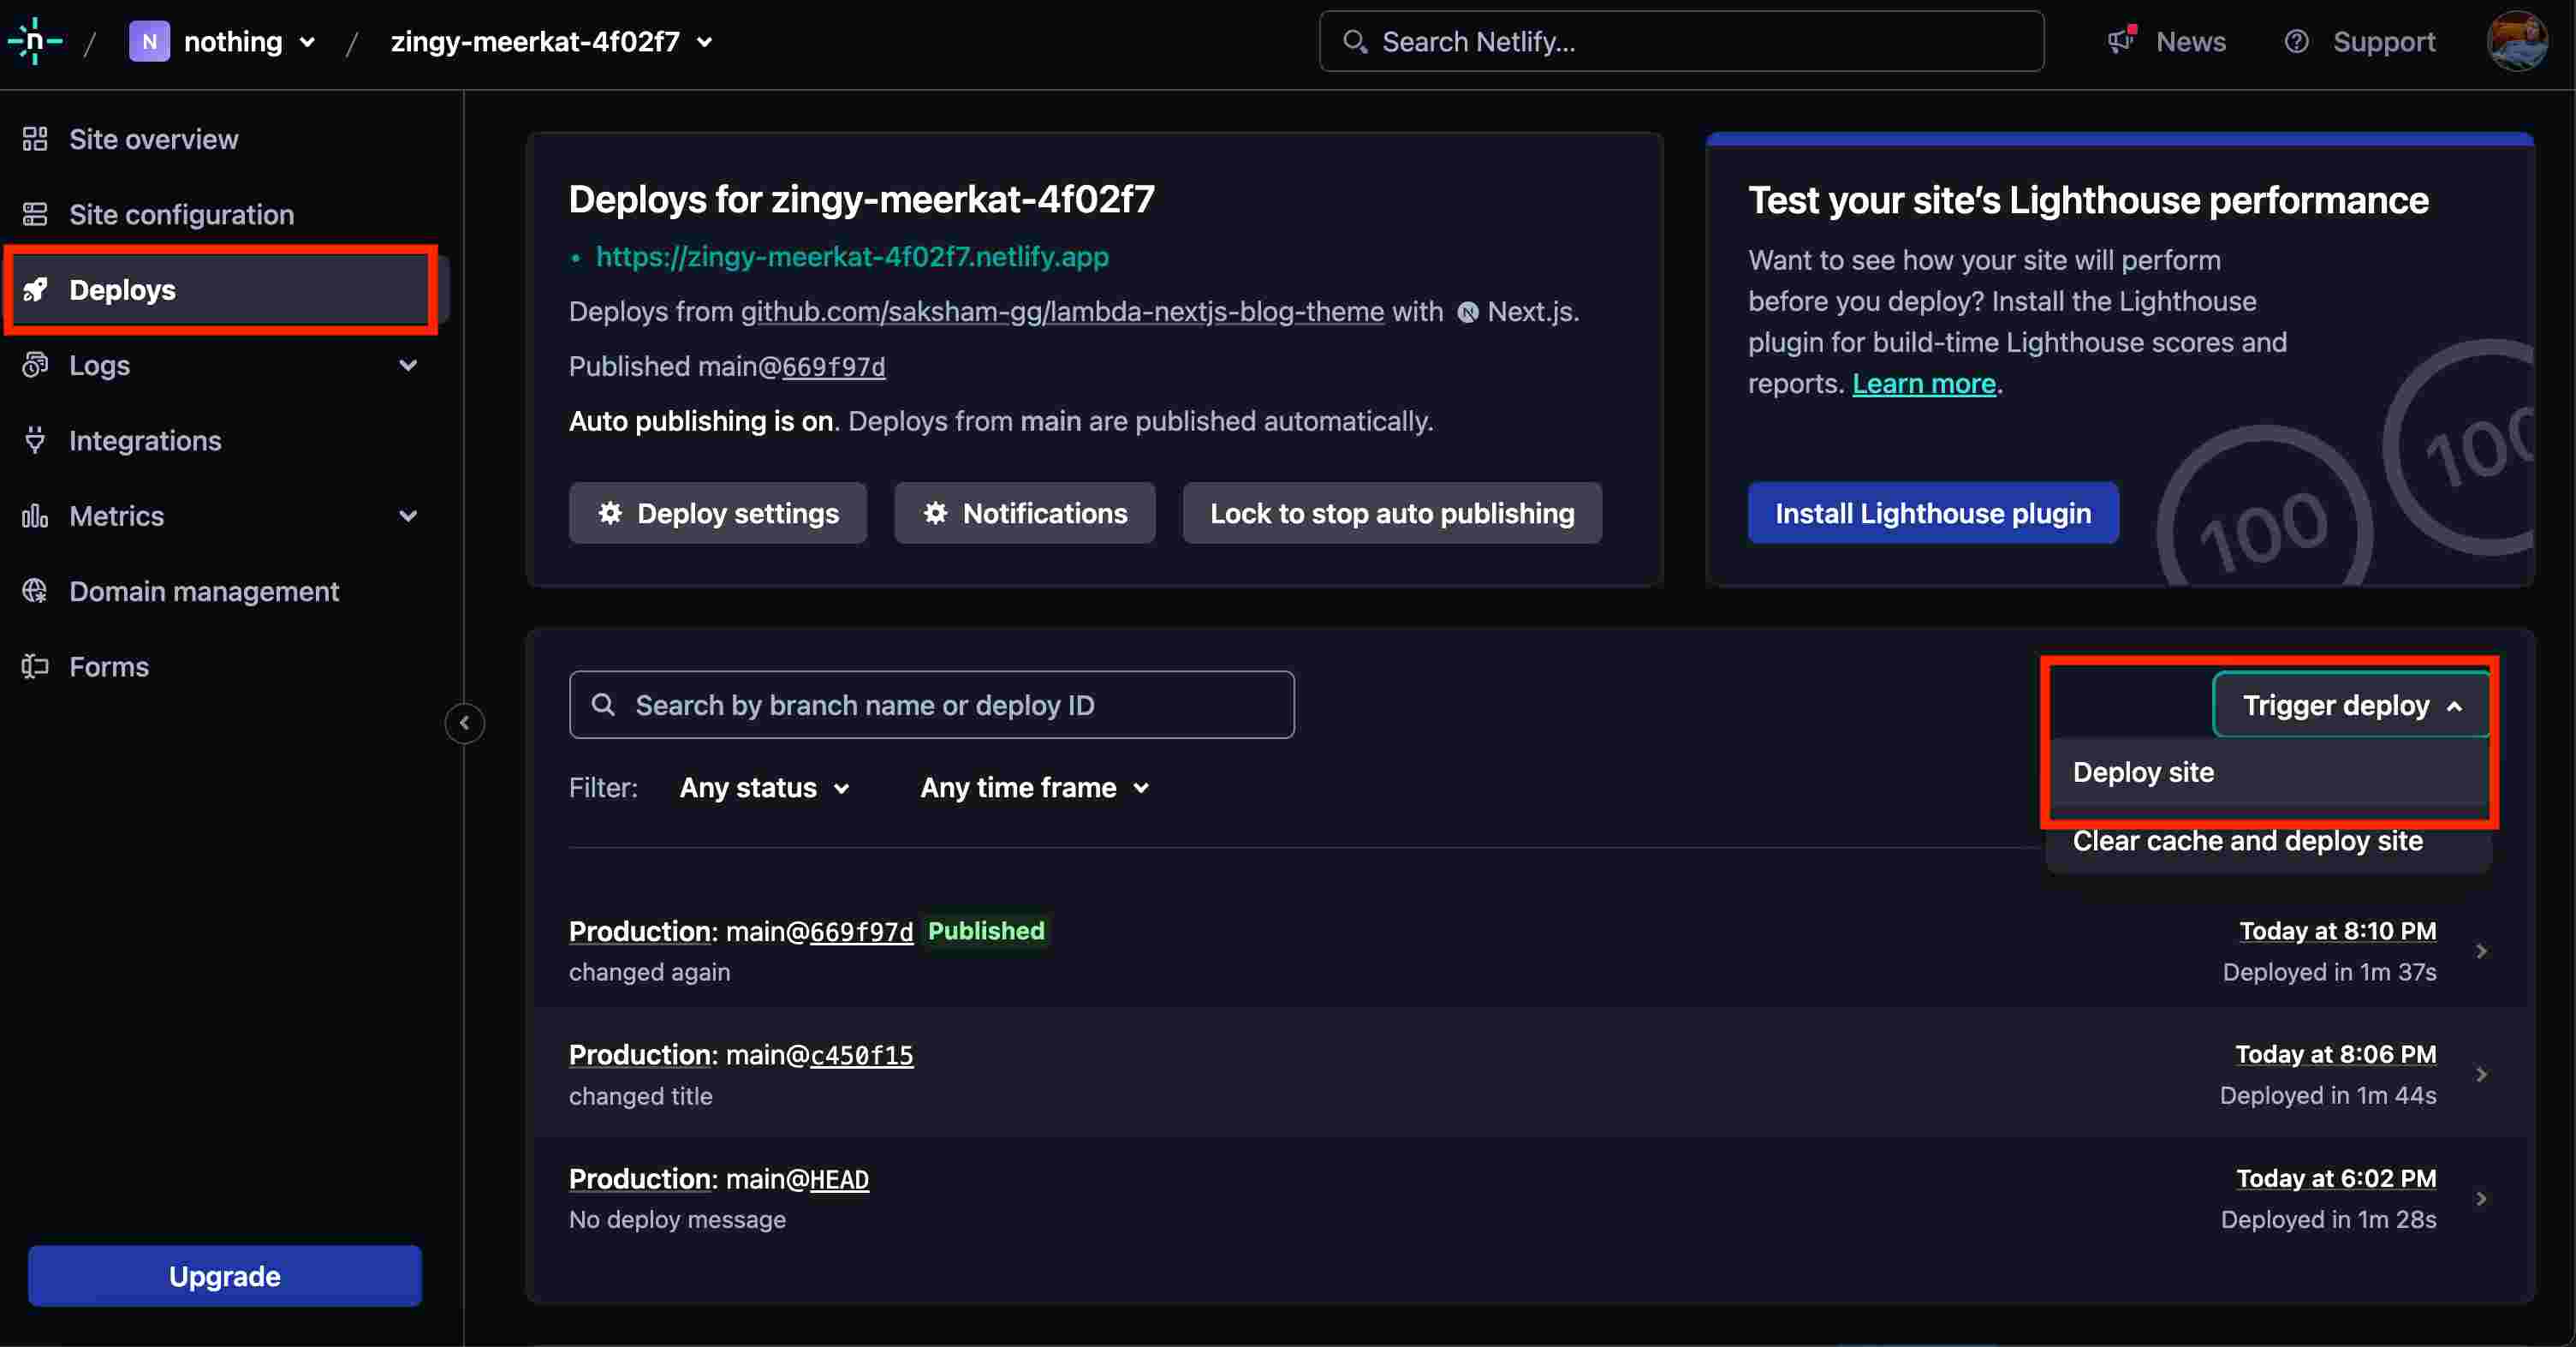
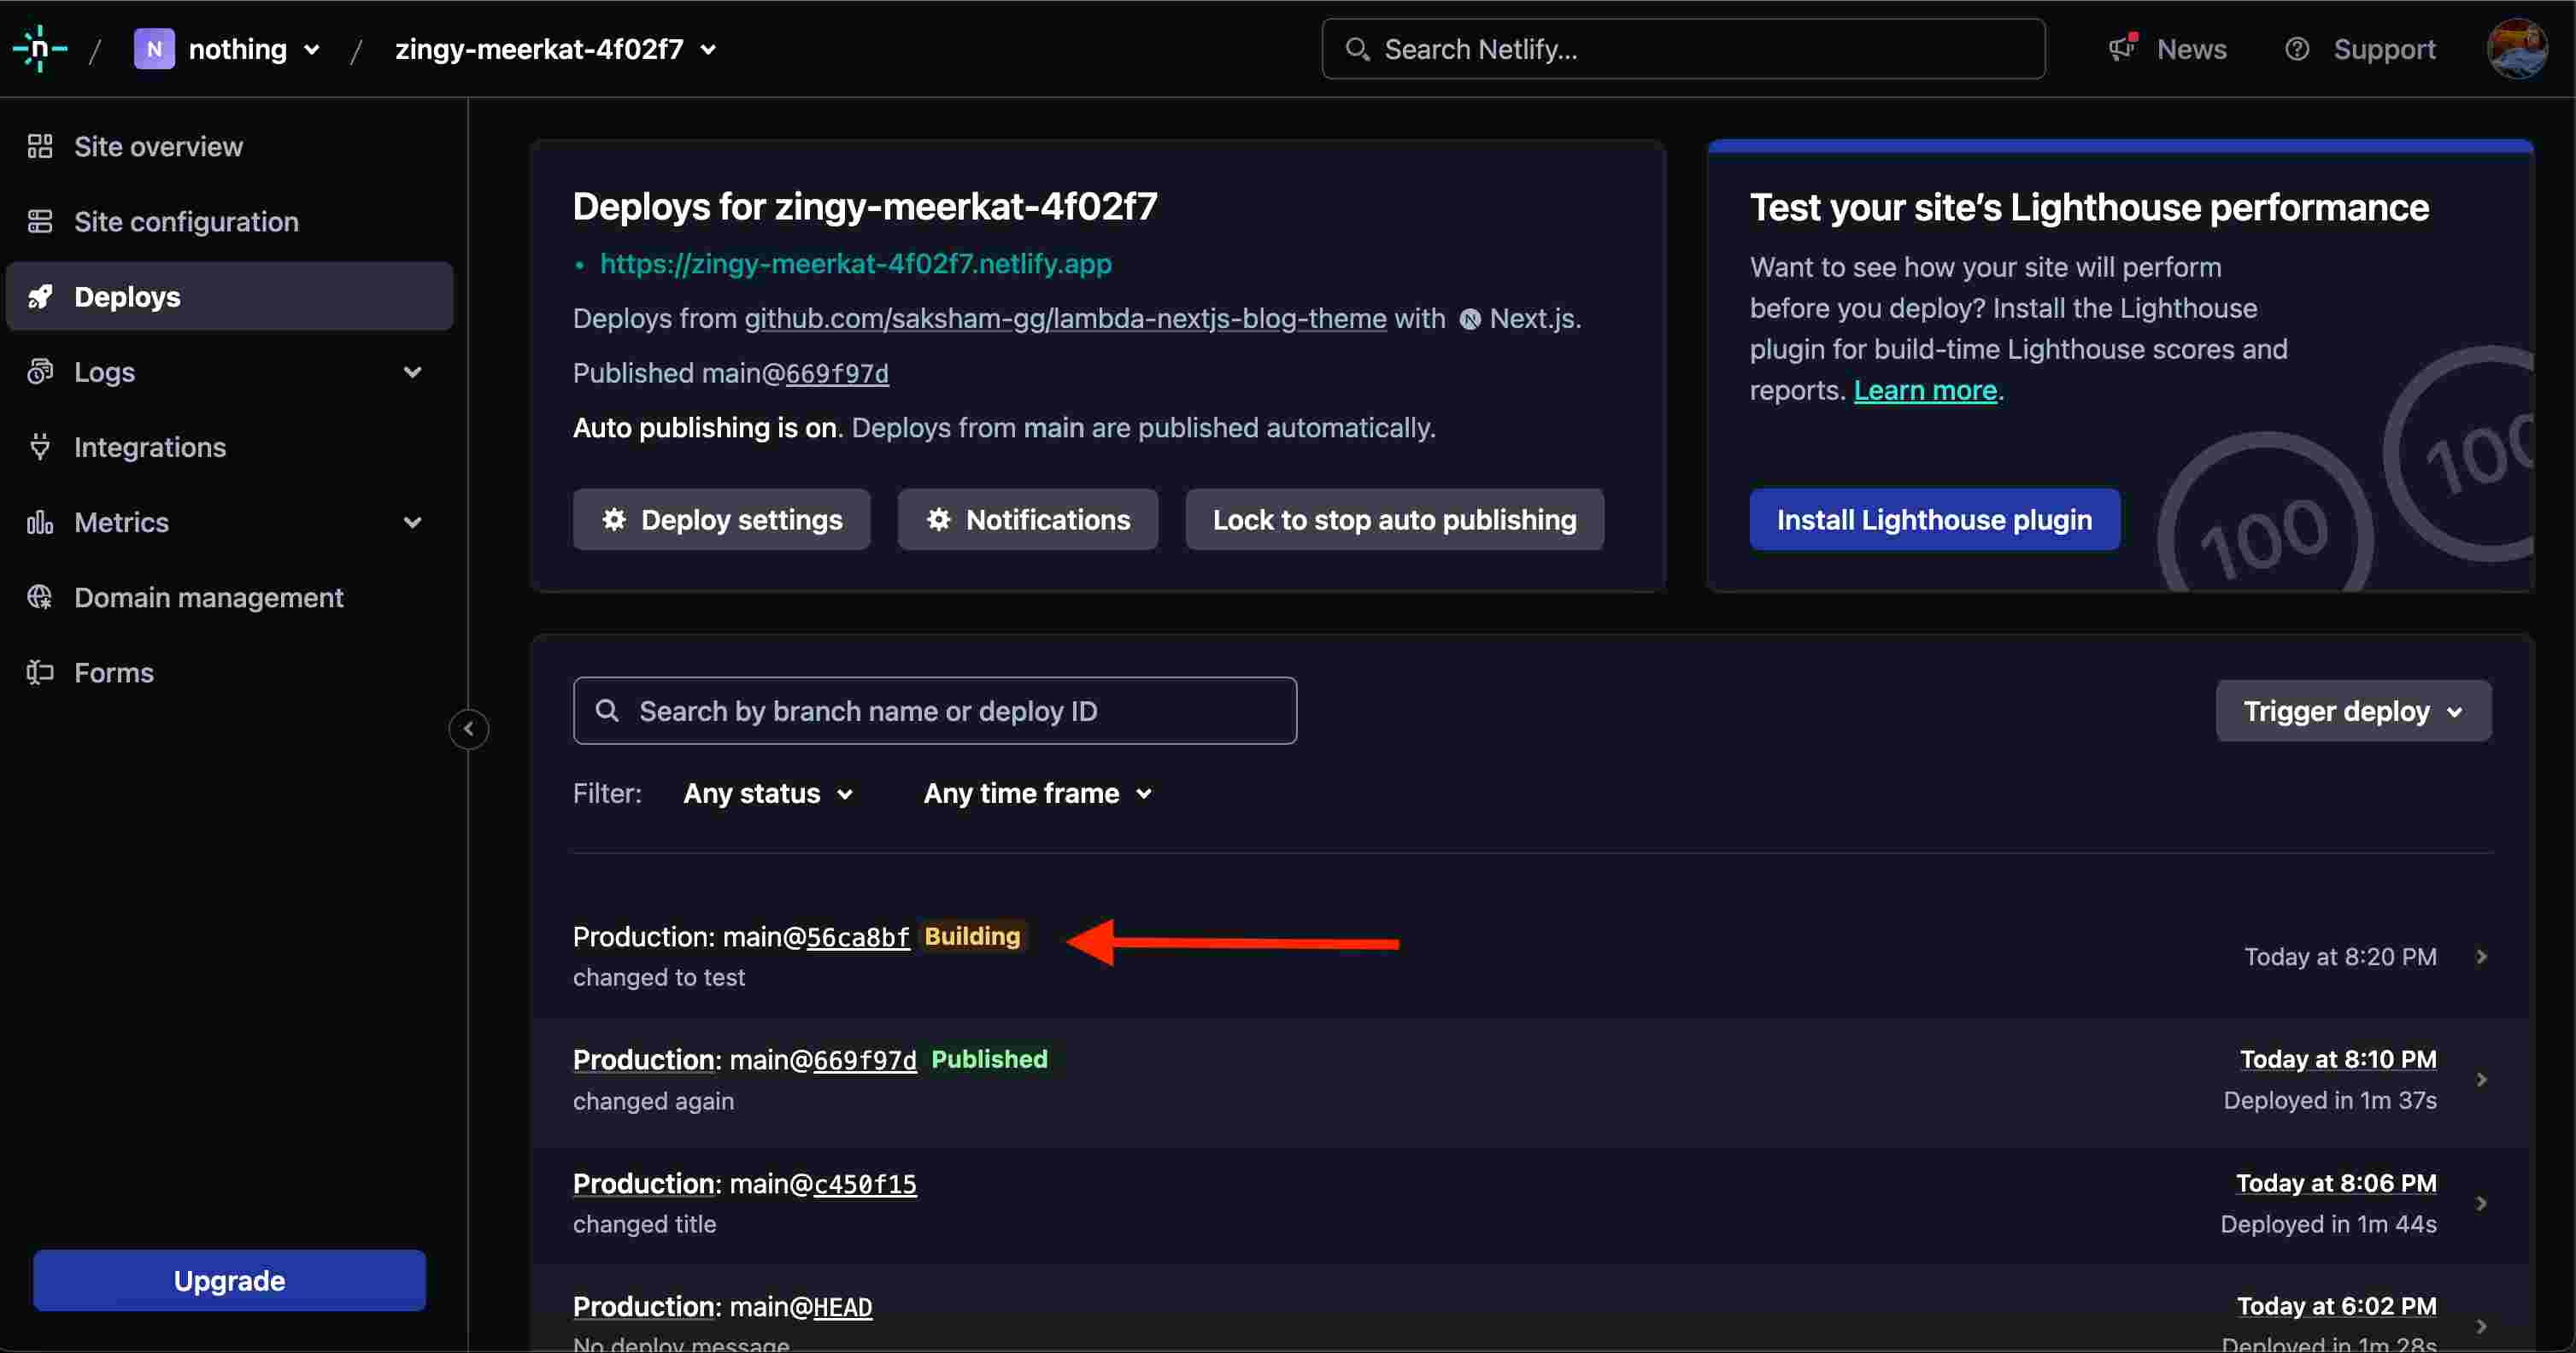
Step 2: Deploy the Site for which you want to compare the results
- Go to the Deploys section, click on Deploy site button and deploy your project.
-
This deployment is before any changes you have made and will be your Baseline image.
-
Now you need to make the required changes in your project and push the changes.
-
Visit the Netlify Dashboard again, and re-deploy your project.
Your changes will be triggered and deployed.
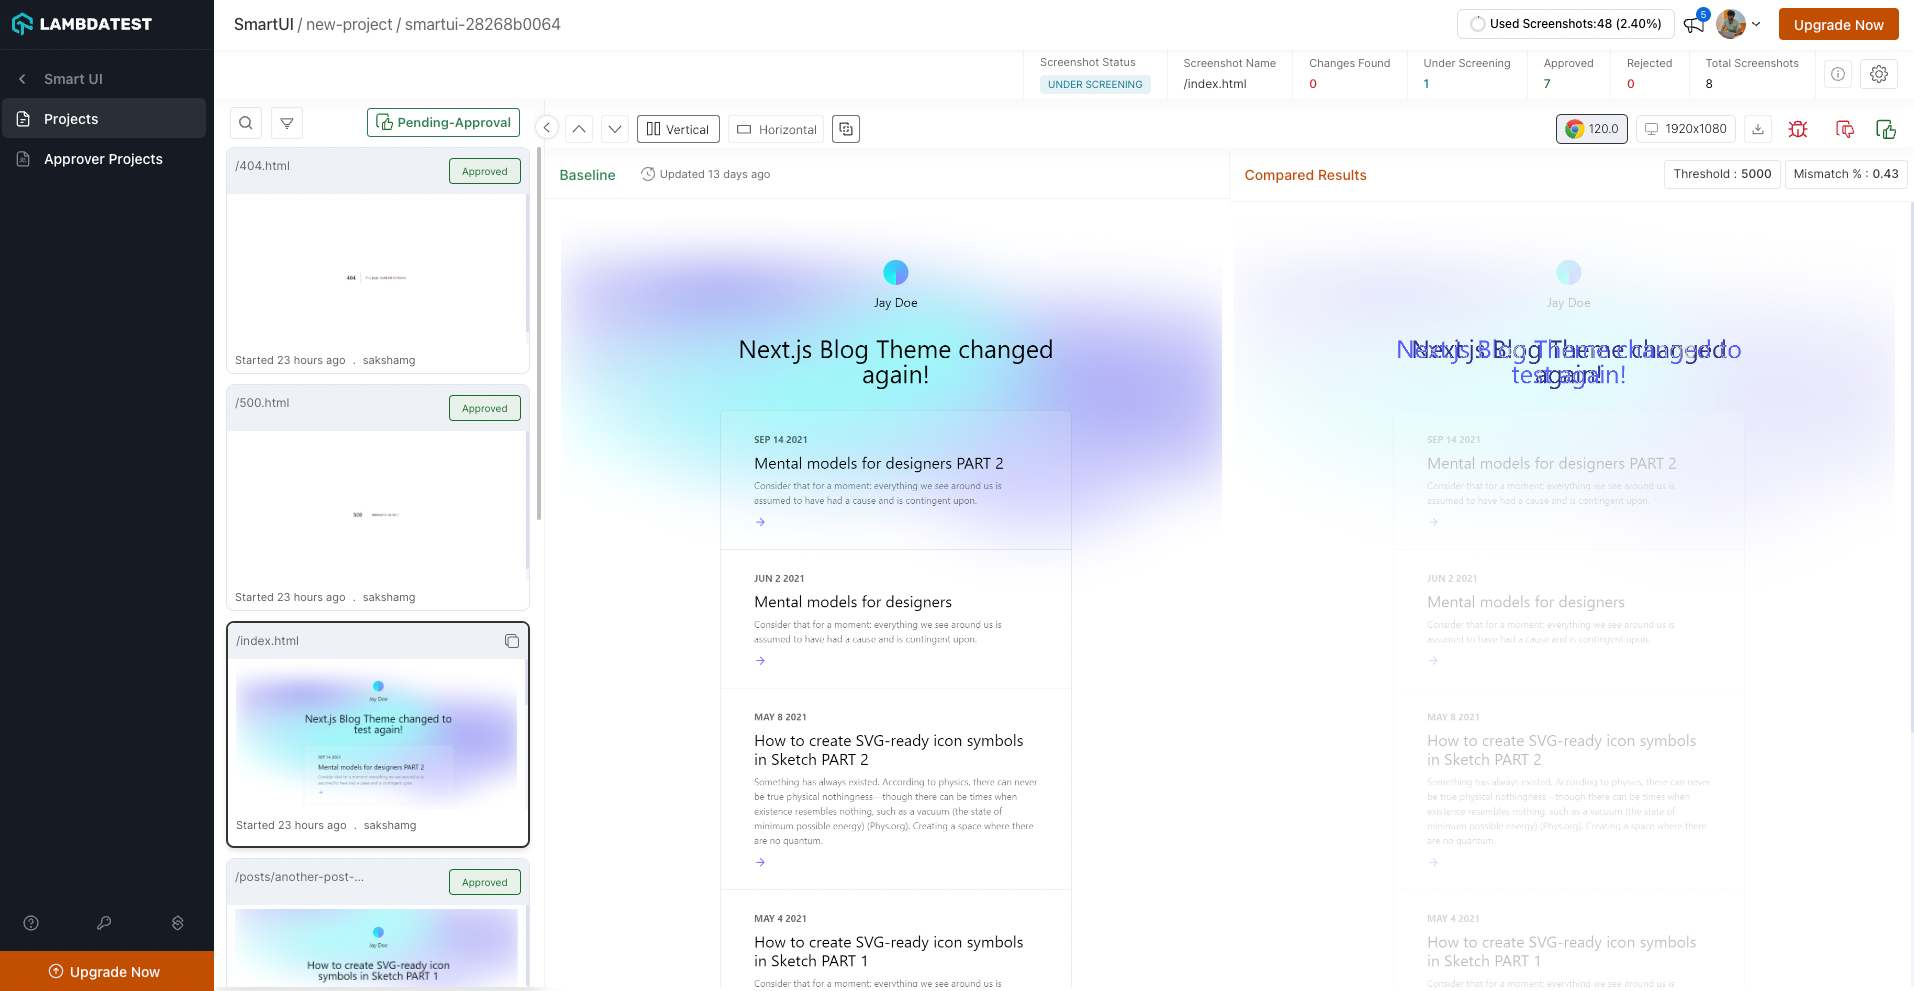
Step 4: Compare the Changes Smart-UI Dashboard
- Go to your Smart-UI Dashbard. You will notice there is already a project with the same name you entered while configuring in Step 1
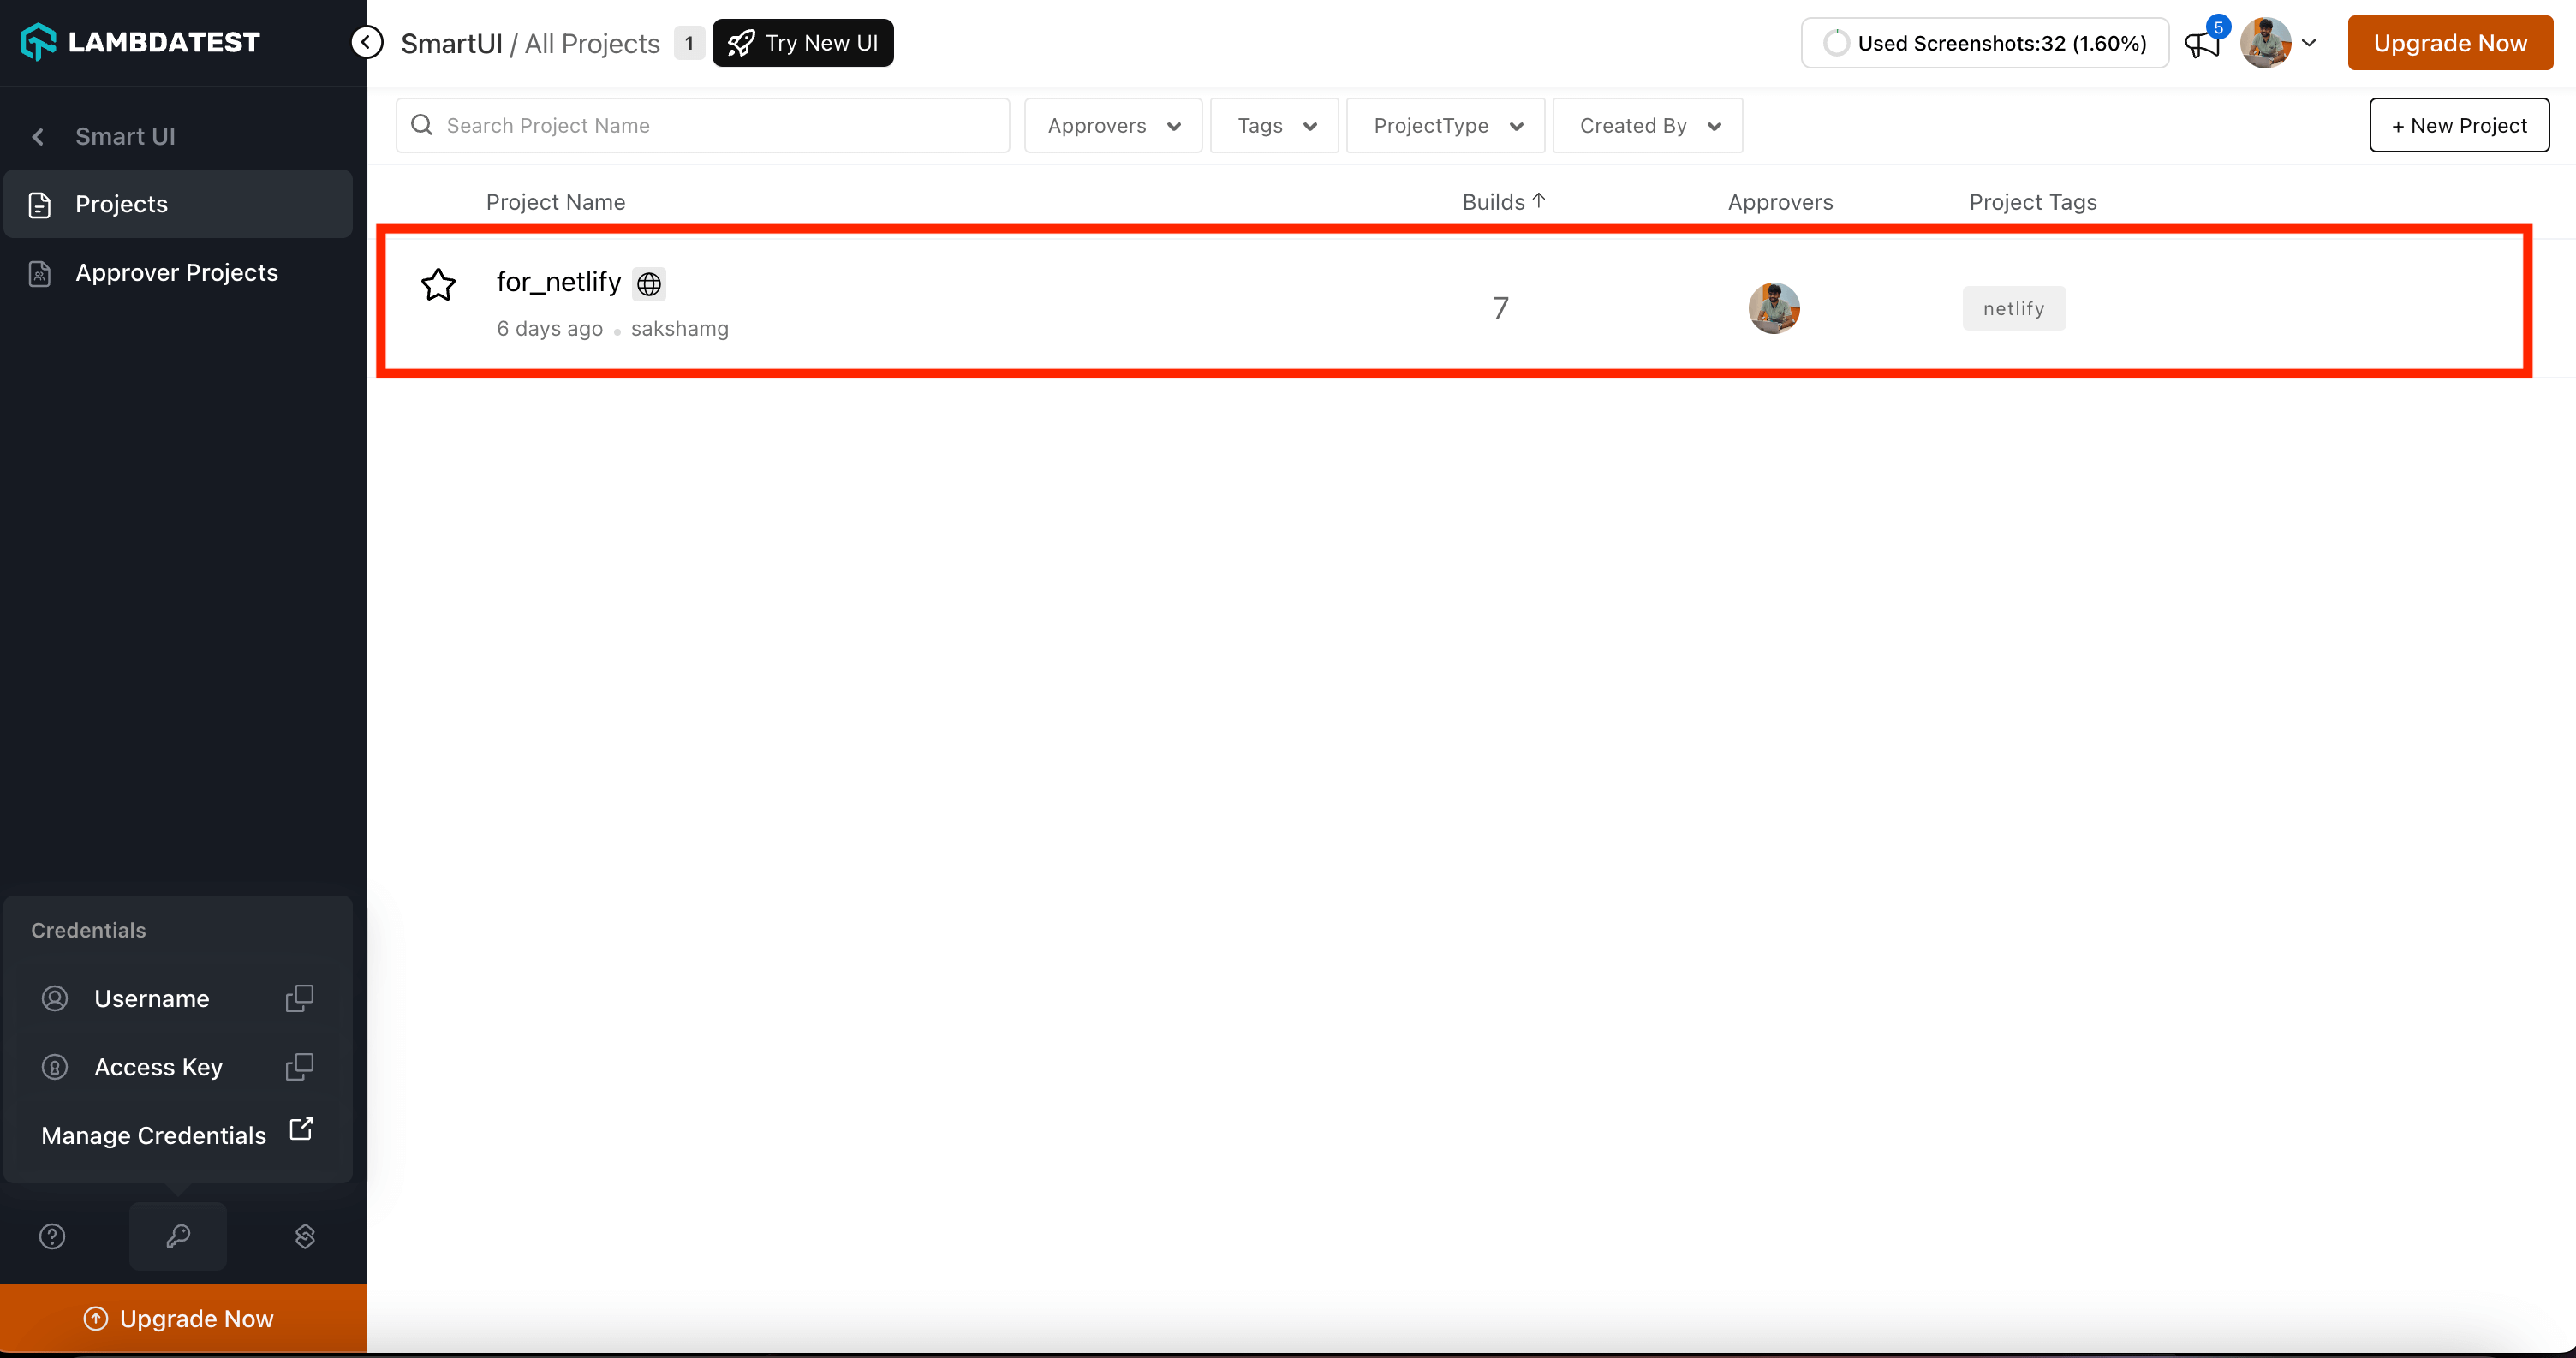
- Go on that project. Click on the latest build. You can now compare the changes done to your project with-respect-to the provious build.