Taking Screenshots of Pages Behind Login
TestMu AI offers Screenshot testing, a feature to automatically capture bulk, full-paged screenshots of any URL over different browsers. You can perform cross browser compatibility testing on both mobile and desktop browsers at the same time. Also, you can capture up to 25 screenshots in a single test session.
This document will help you understand how you can capture bulk screenshots of your web-application after the login page for different browsers to measure the cross browser compatibility. Refer to our Automated Screenshot testing document to know more.
How This Works?
A Login URL is fed into the browser. This URL is going to be the one pointing towards the login page of the website your wish to test and would be different from the Screenshot Test URL.
Then the locators(Username, Password, Submit button) specified by you for your login page are searched by the Screenshot driver. If all fields are correct, your test will pass onto the next stage; if fields are incorrect, then the test is marked as a fail.
Now, the form gets submitted, and your browser will wait for the new page to render.
Finally, the Screenshot test URL is fed into the Screenshot driver, allowing it to start generating automated screenshots in bulk on your desired test configurations.
Note: We recommend using your Login profile for a single test session before attempting multiple screenshots for cross browser testing.
Getting Started With Automated Screenshot After Login
To begin, we need to configure a login profile that would specify the website under test, locators, and login credentials. This is a one-time process. Without further ado, let’s configure the Login profile.
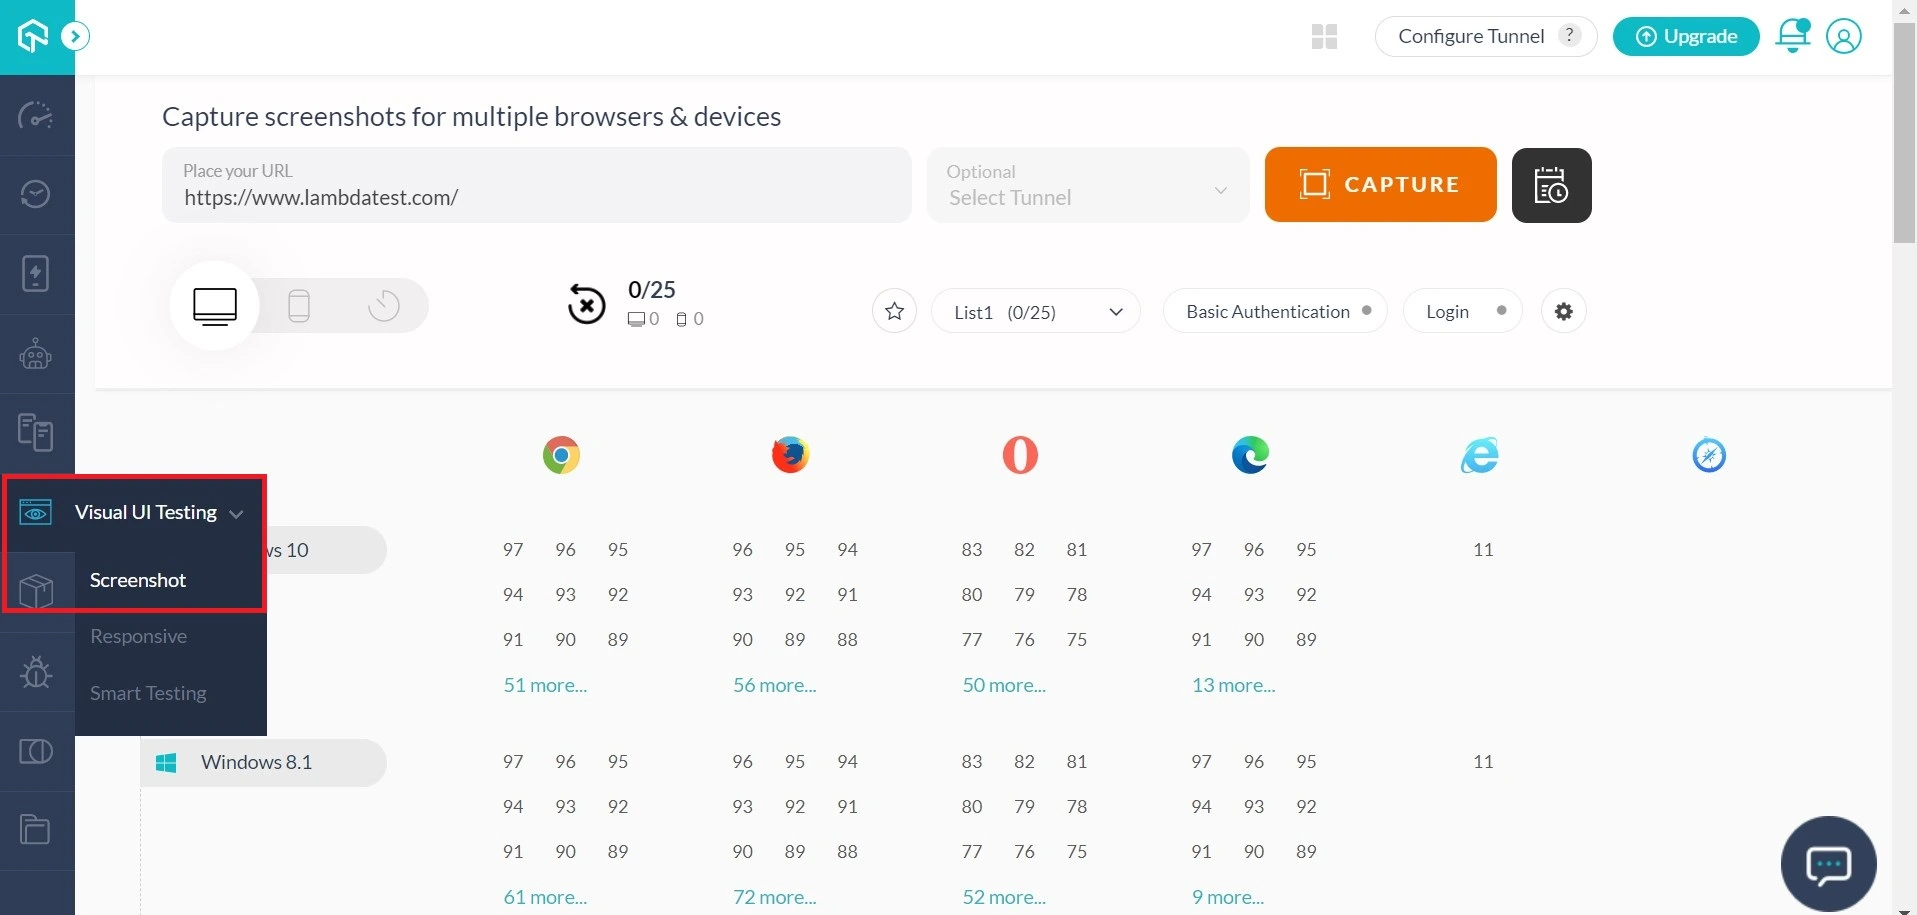
Login into your TestMu AI account and go to Screenshot by clicking on the drop down for Visual UI Testing from the left-navigation menu.
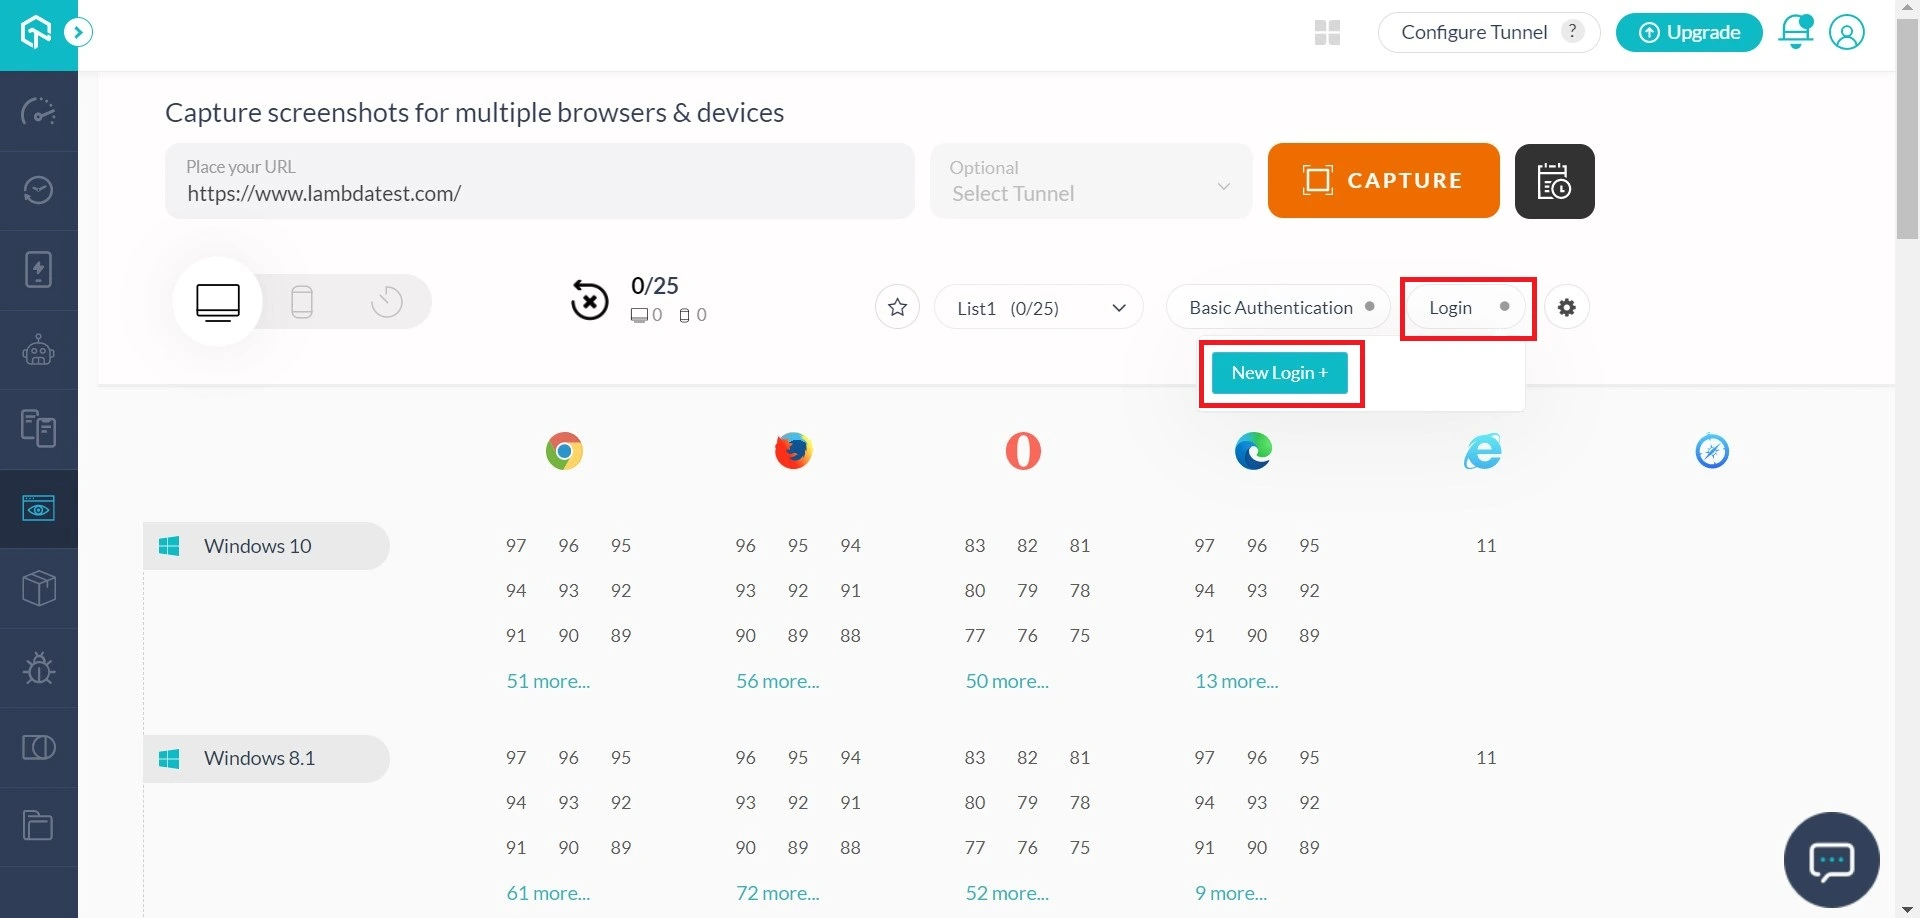
Set Up Login Profile
Configure the Login profile by clicking on the Login button and selecting a New Login+.
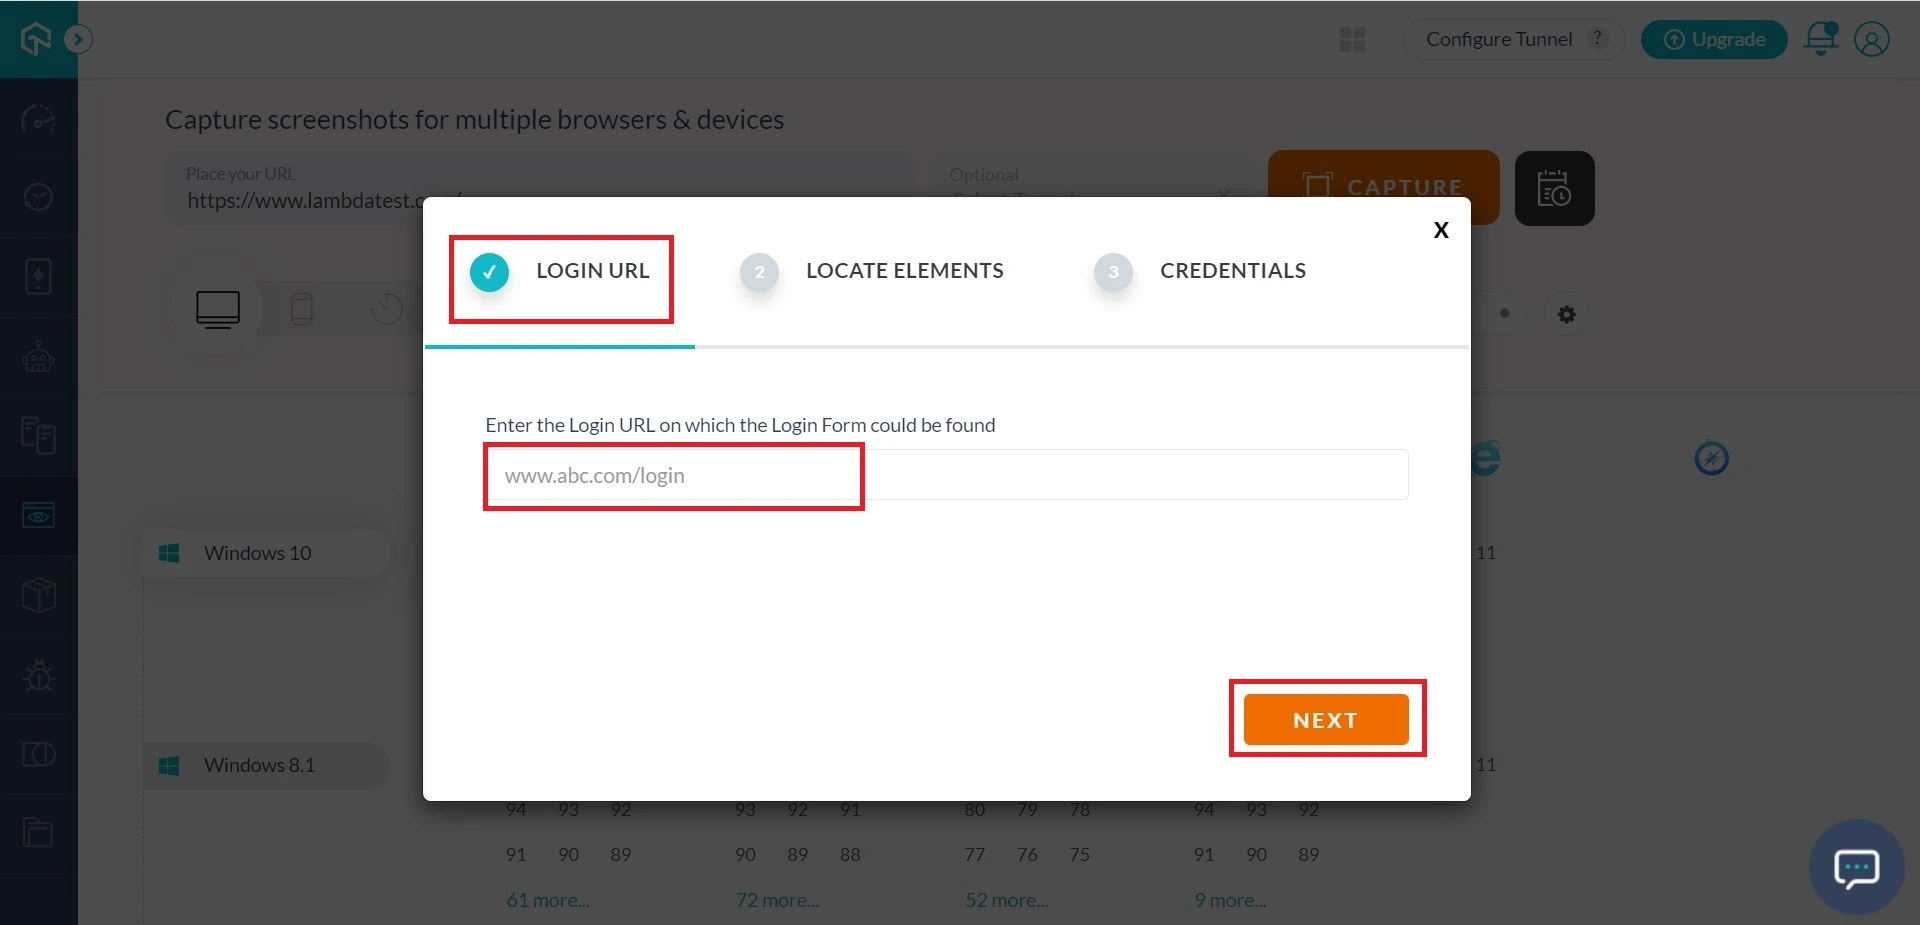
Provide The Login URL
A window would pop-up where you need to fill in the details, starting from the Login URL. Kindly ensure that you provide the URL of the login page for the website under test. Now, hit next.
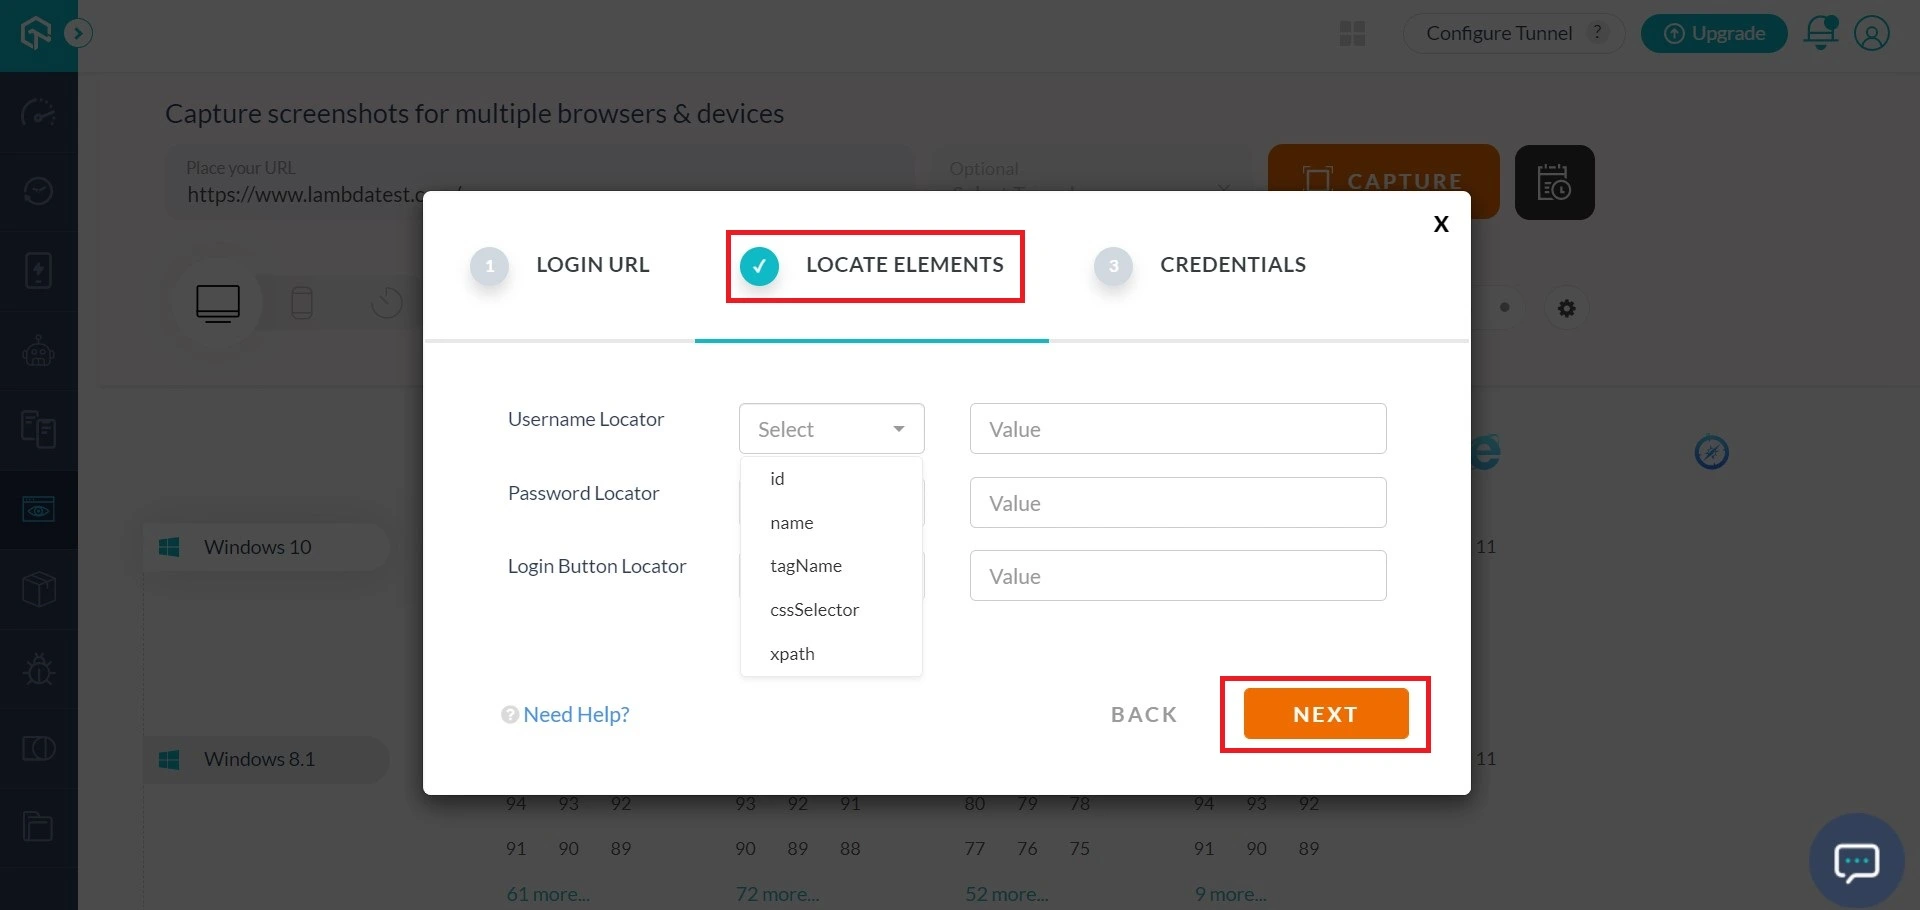
Provide The Locators
Select the locator as per your respective fields in the Login form.
For the demonstration, let us capture the details for TestMu AI Login.
Note: If you are already logged in to LambdaTest, make sure to perform this drill in incognito mode.
Step 1: Go to https://www.testmuai.com/login/. Right-click and select the option to open the inspection tools. For demonstration, we are using Google Chrome’s Dev Tools.
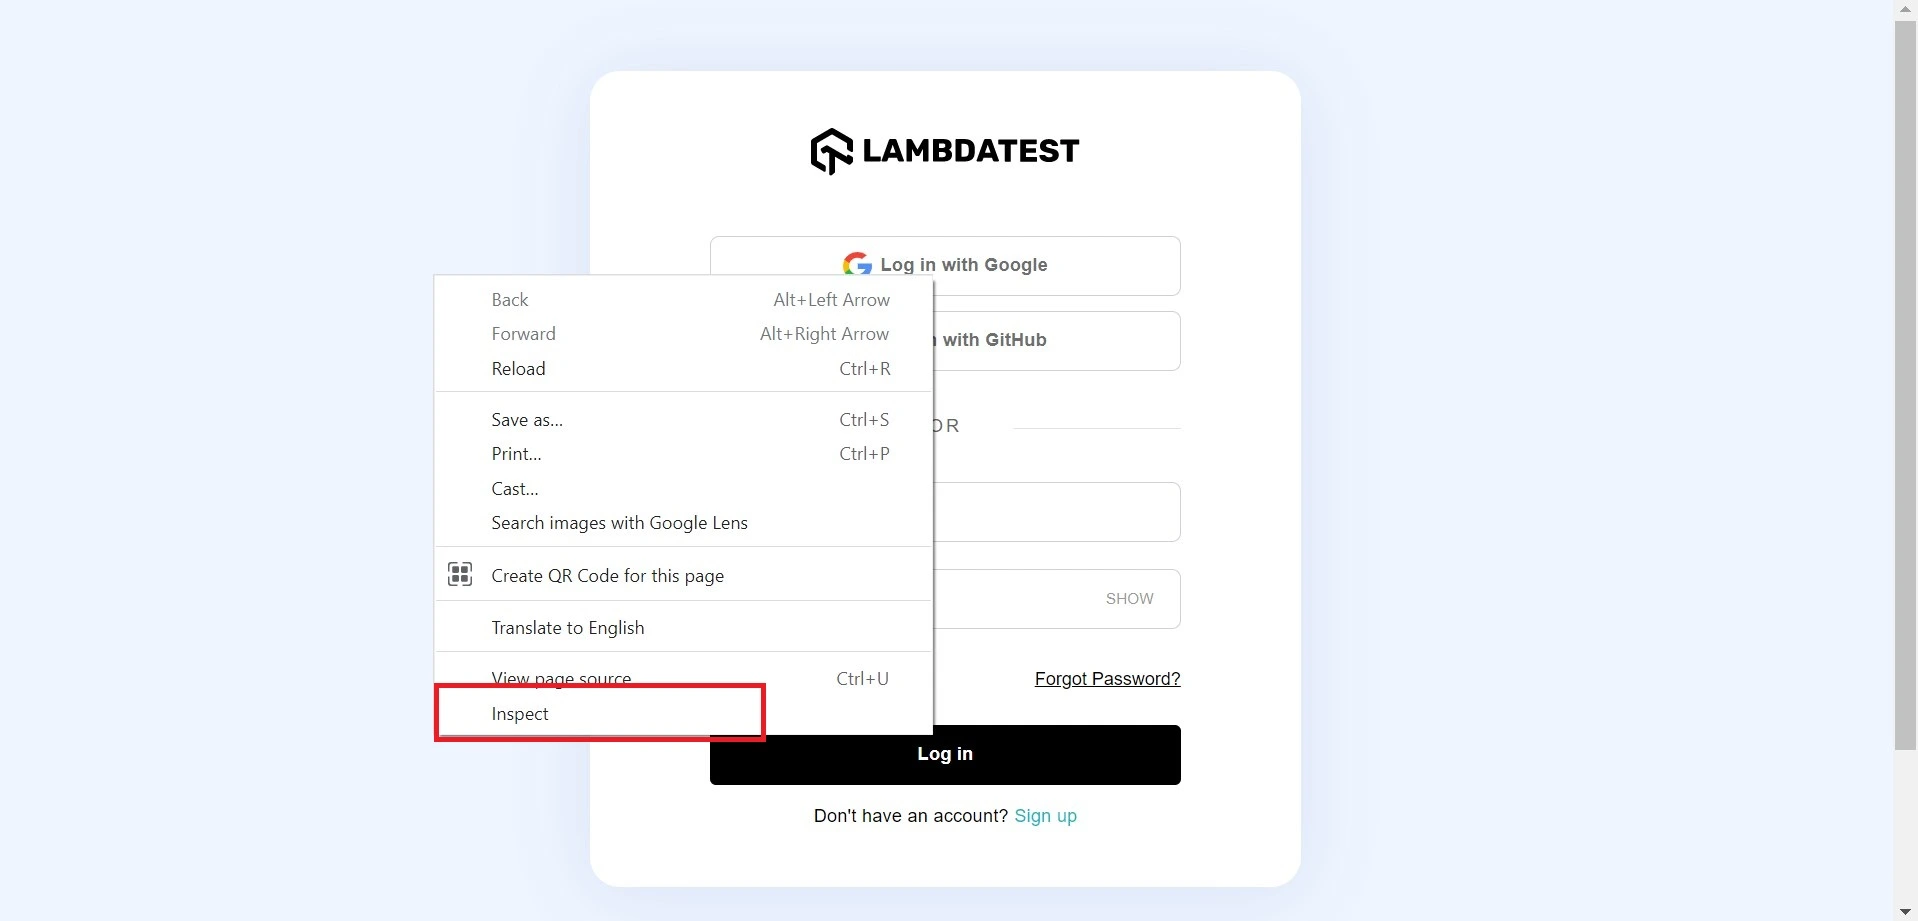
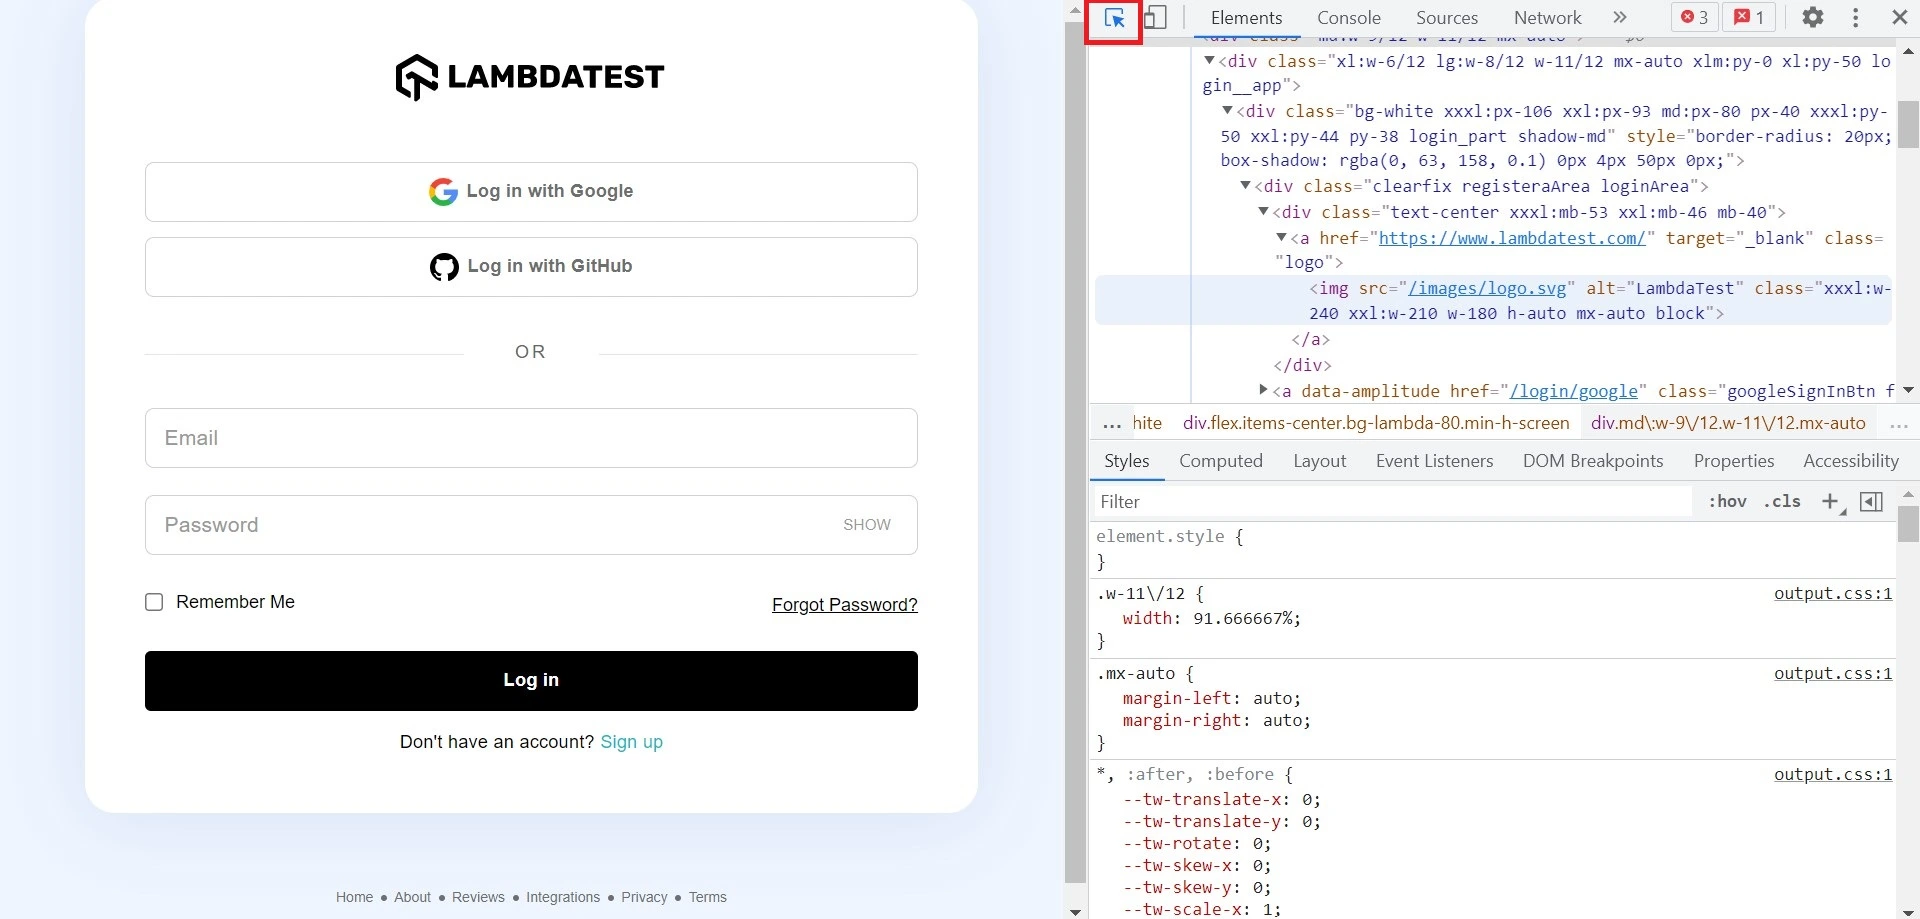
Step 2: Click on the highlighted arrow to help you select any element on your page to inspect.
Step 3: Now, click on the Email field in the login form, and you will notice that the name locator is populated with the value ’email’.
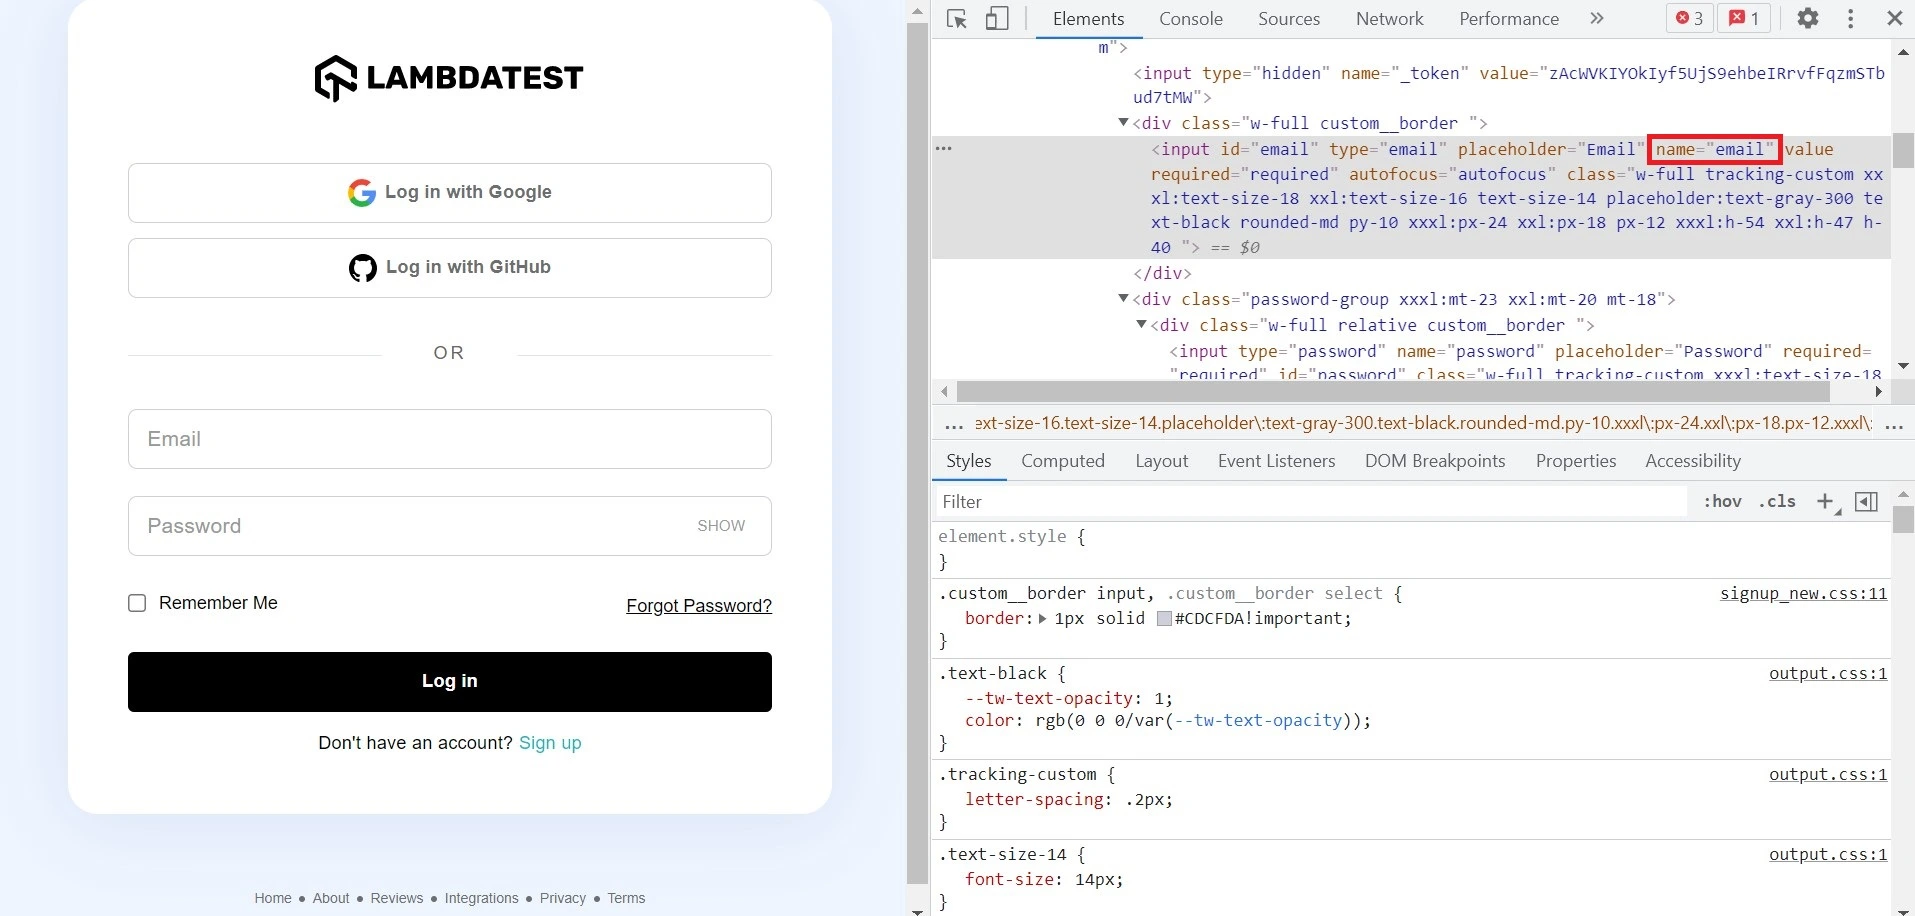
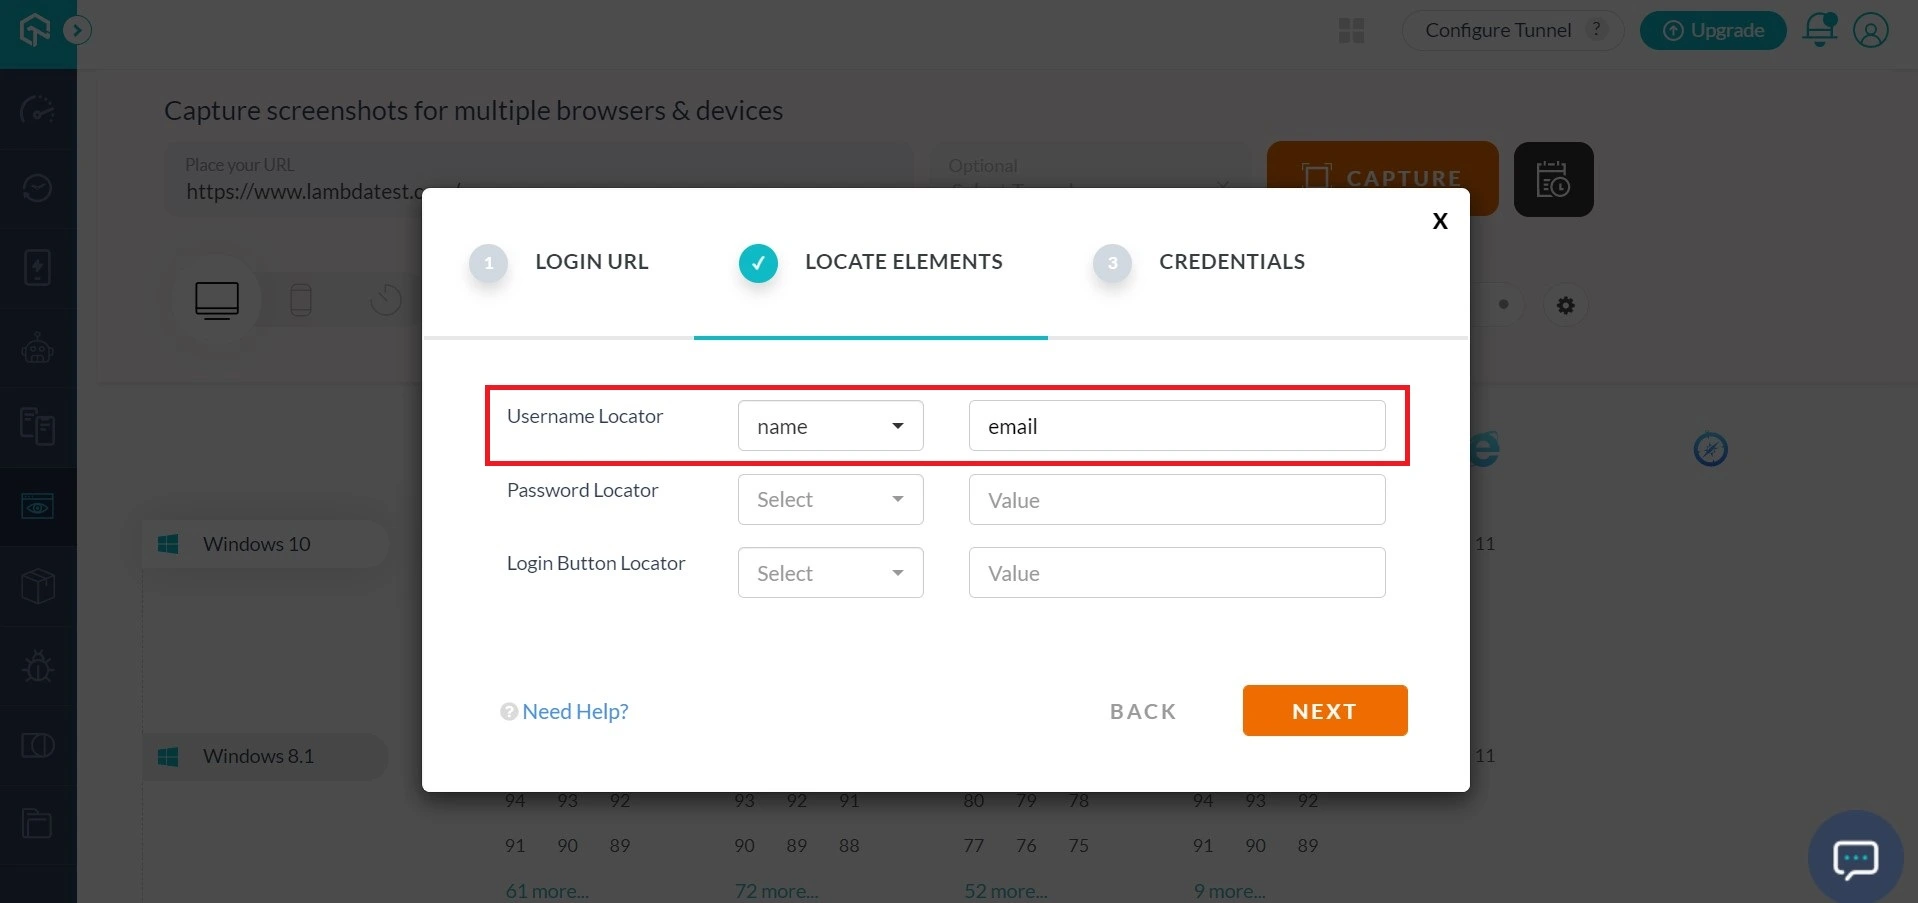
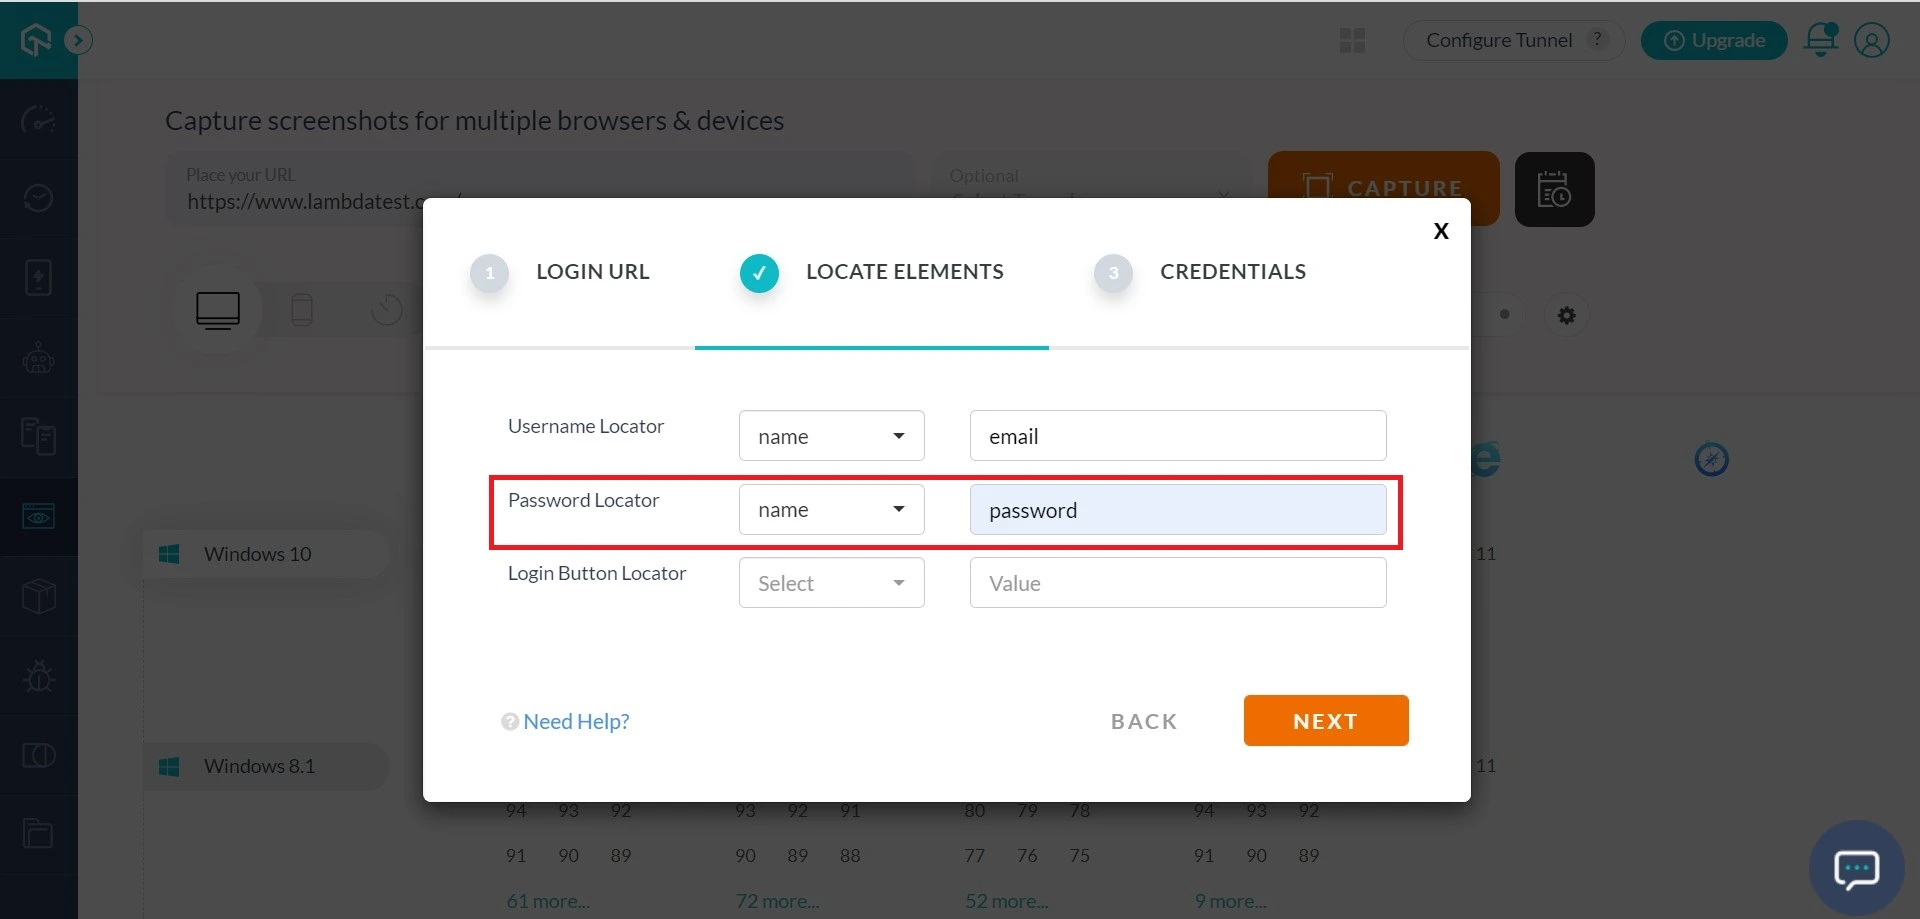
Step 4: Switch to your normal browser where you are logged into the TestMu AI application. Provide the Email field details in the Username Locators.
Step 5: Switch back to incognito mode and inspect the password field in the TestMu AI login form.
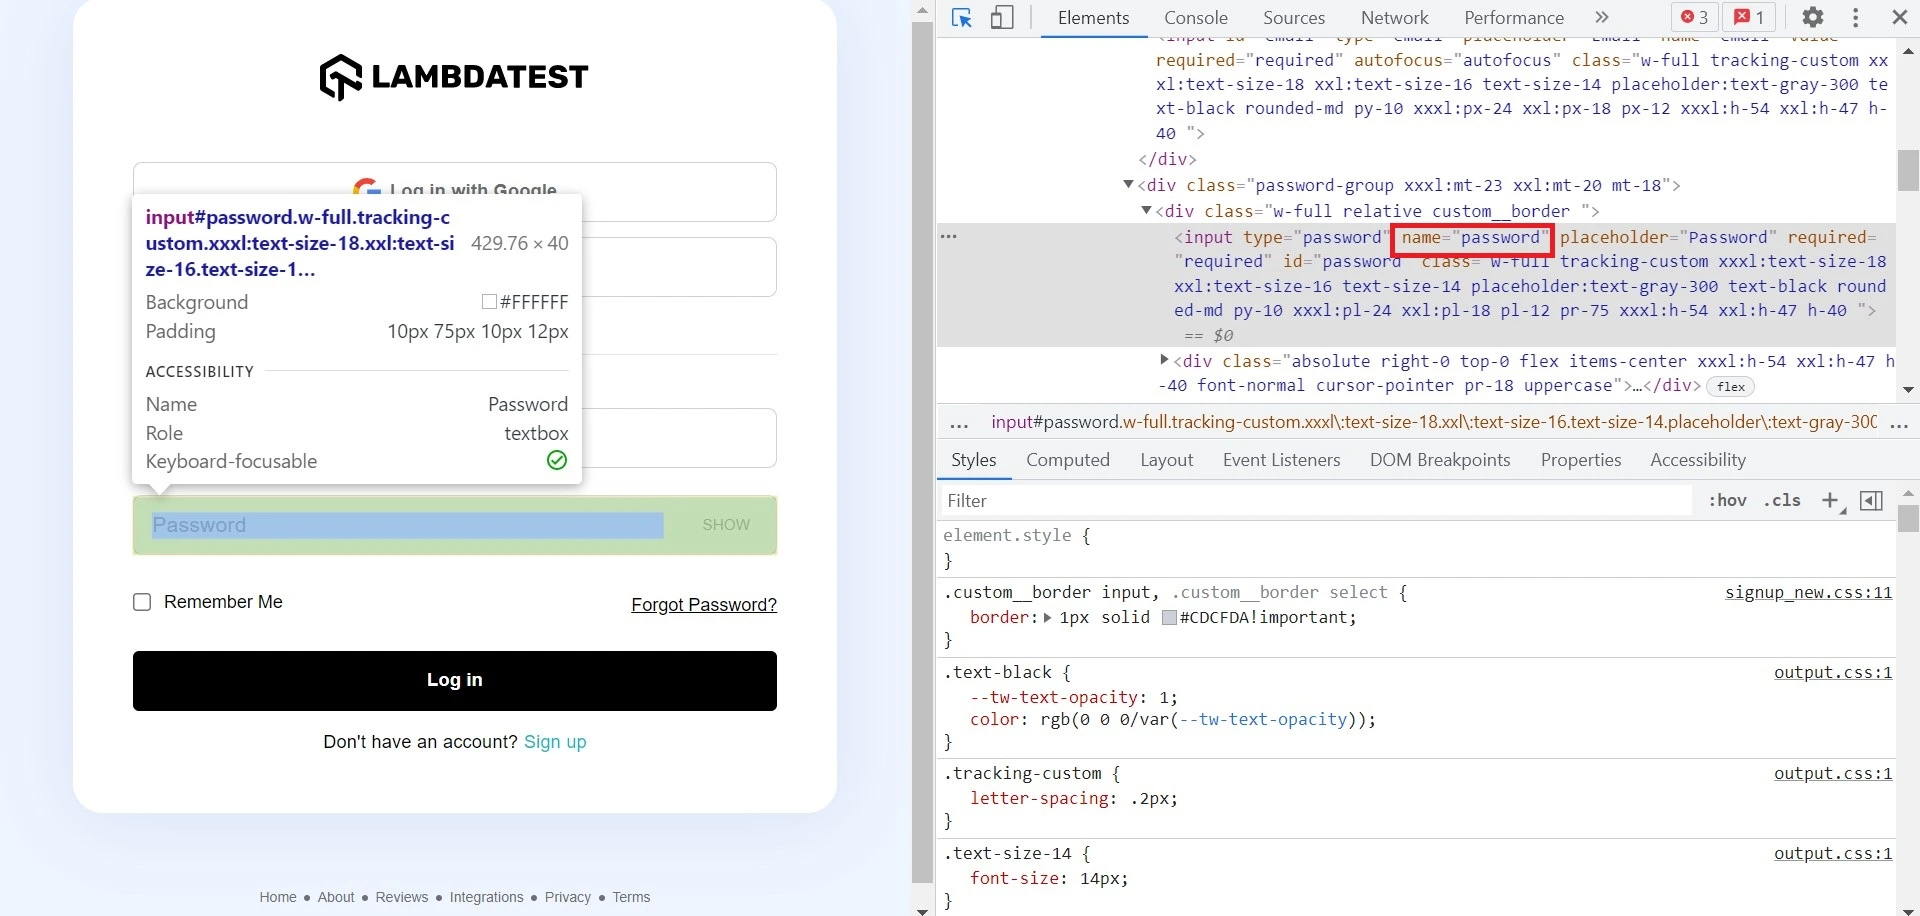
Step 6: Provide the Password field details in the Password Locators.
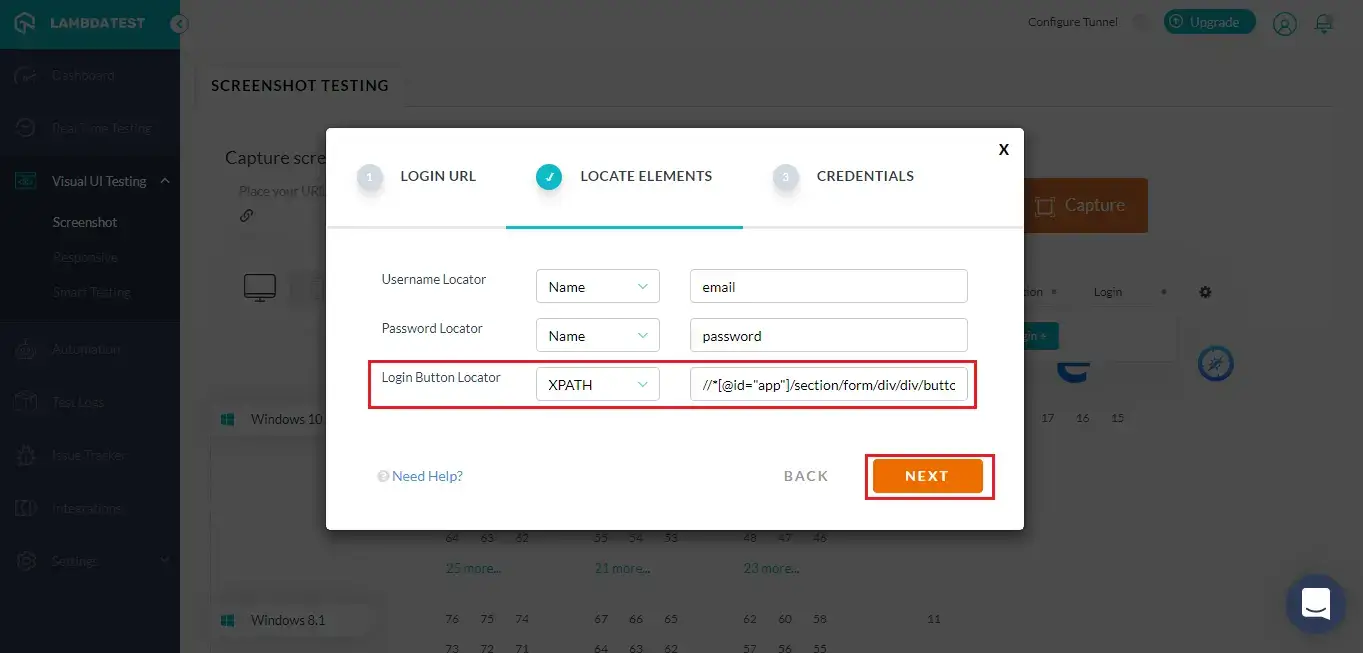
Step 7: Back to incognito mode, and inspect the Login button. Perform a right click on the piece of code highlighted for the login button, go to copy, and click copy XPath.

Note: In the above demonstration, you will find the class name placed for the login button in the TestMu AI login. However, the class name may be similar for multiple HTML elements located in a login form, so it is considered a best practice to copy the XPath for such scenarios.
Step 8: Now, on your normal browser, Select the XPath locator and paste the copied XPath for the Login button locator, and hit Next.
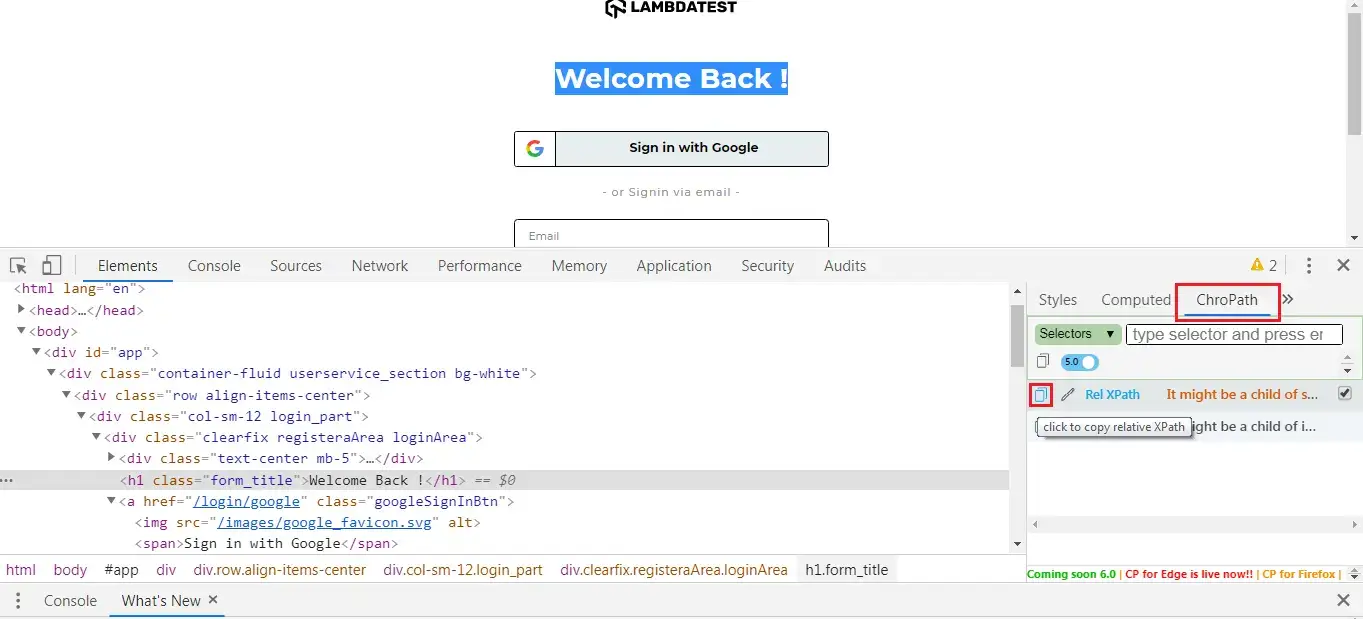
Leveraging AutonomIQ ChroPath To Easily Locate Elements For Selenium Testing
ChroPath is a productive Browser extension that instantly locates the elements over your web page inside the developer tool. Add the extension to your browser and visit your web-application. After that, open the Developer tools while inspecting the element for which you need the locators value. Select ChroPath from the sidebar.
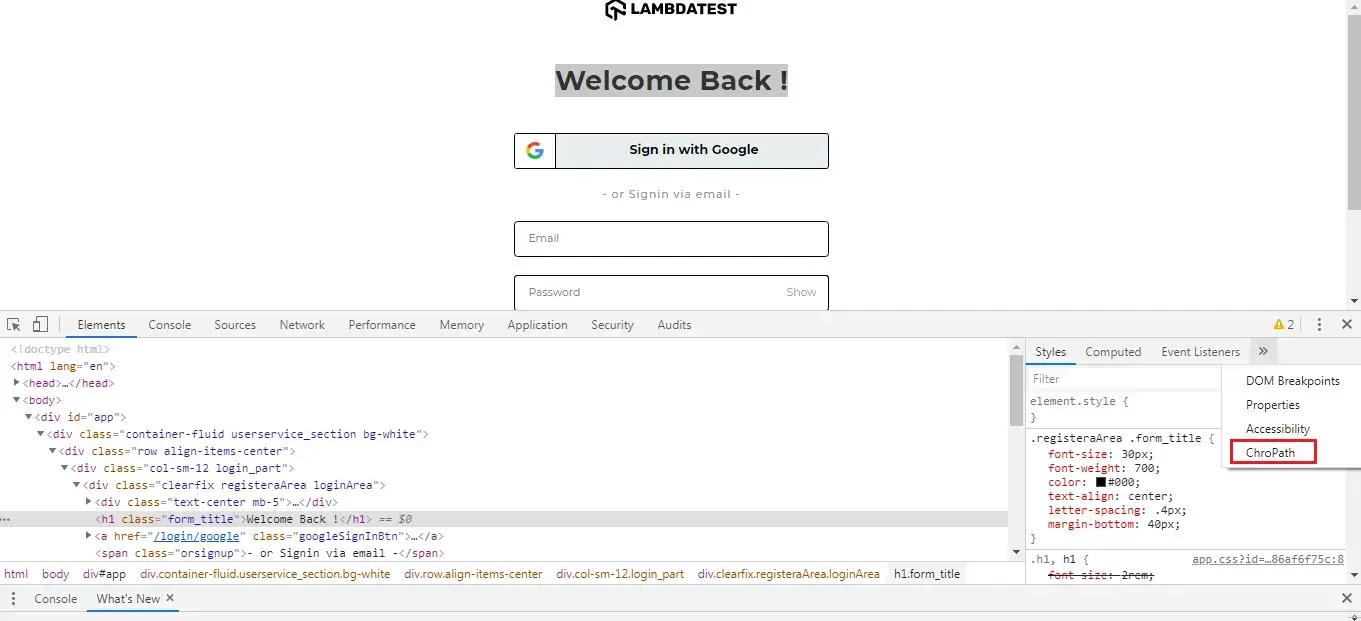
Once you select ChroPath, you can copy the locator value. For example, in the shared image, we are copying the relative XPath.
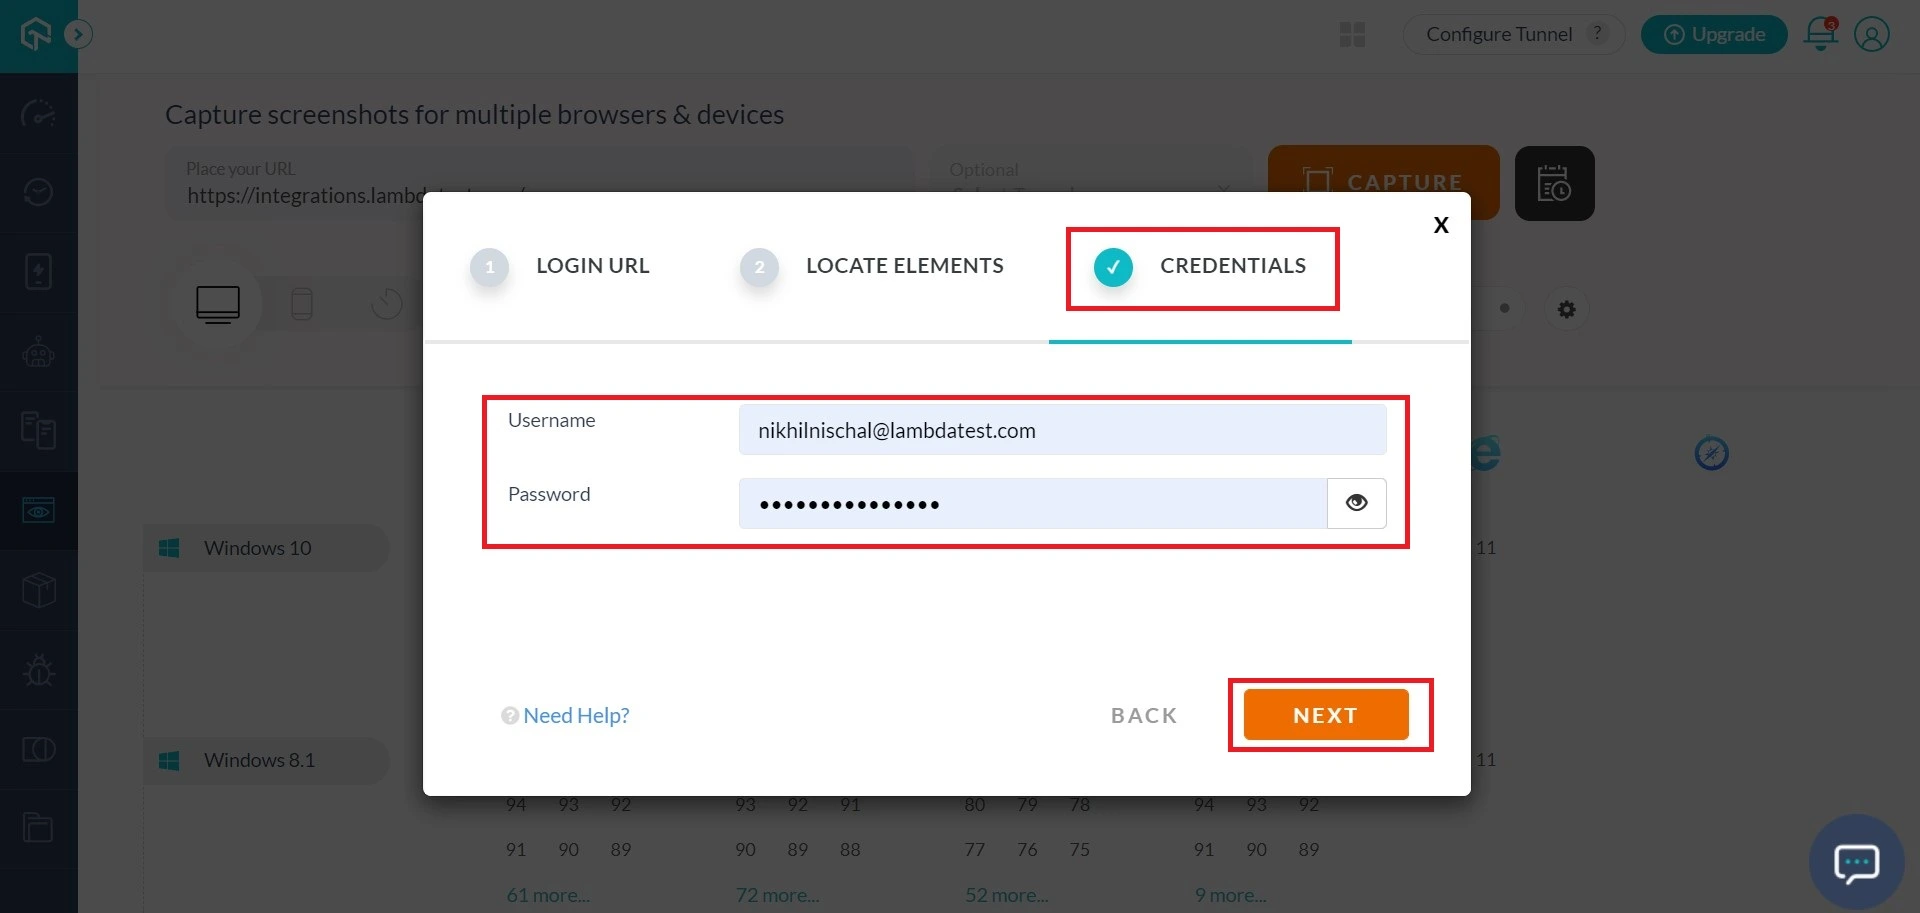
Provide The Login Credentials
Under the credentials, provide your login details for the website you wish to test and hit Next. For a demonstration, you can provide your TestMu AI login details.
Save The Login Profile
When you are done configuring the Login URL, Locators, and Credentials for your web-application under test, you only need to provide a name to save this login profile.

Once you hit the save button, you will find the below prompt indicating that the profile has been successfully created.
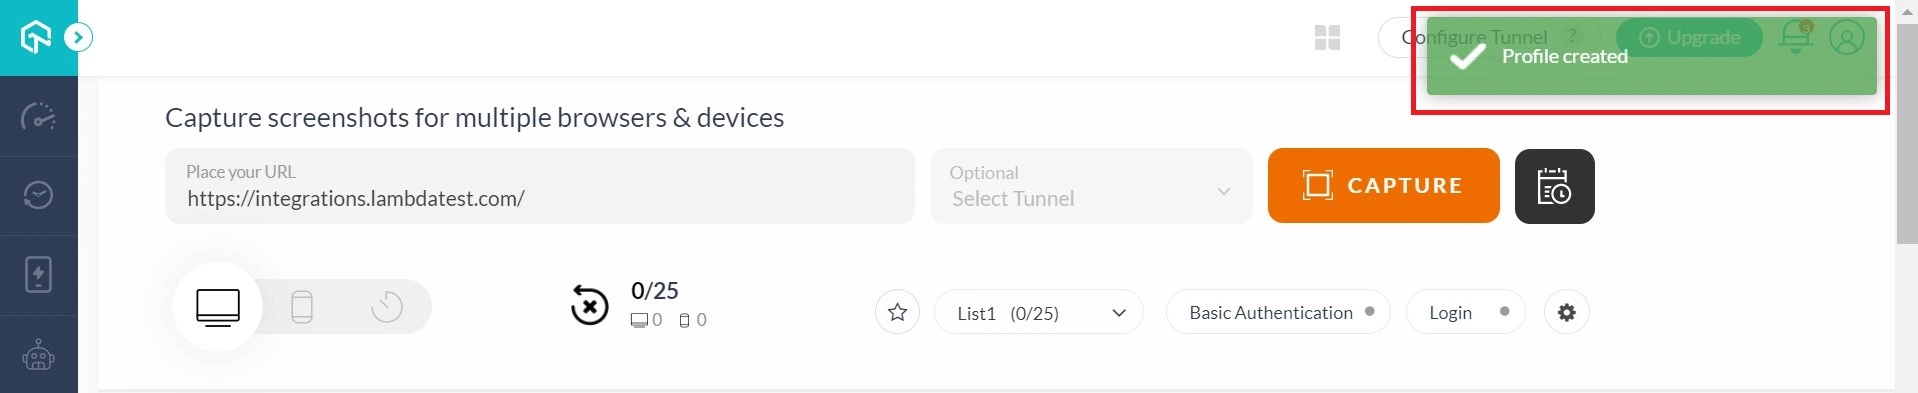
Kudos, you have successfully configured the Login profile. This profile will be saved in your TestMu AI account, so the next time you need to run a similar test, all you need is to enable the flag for this Login profile.

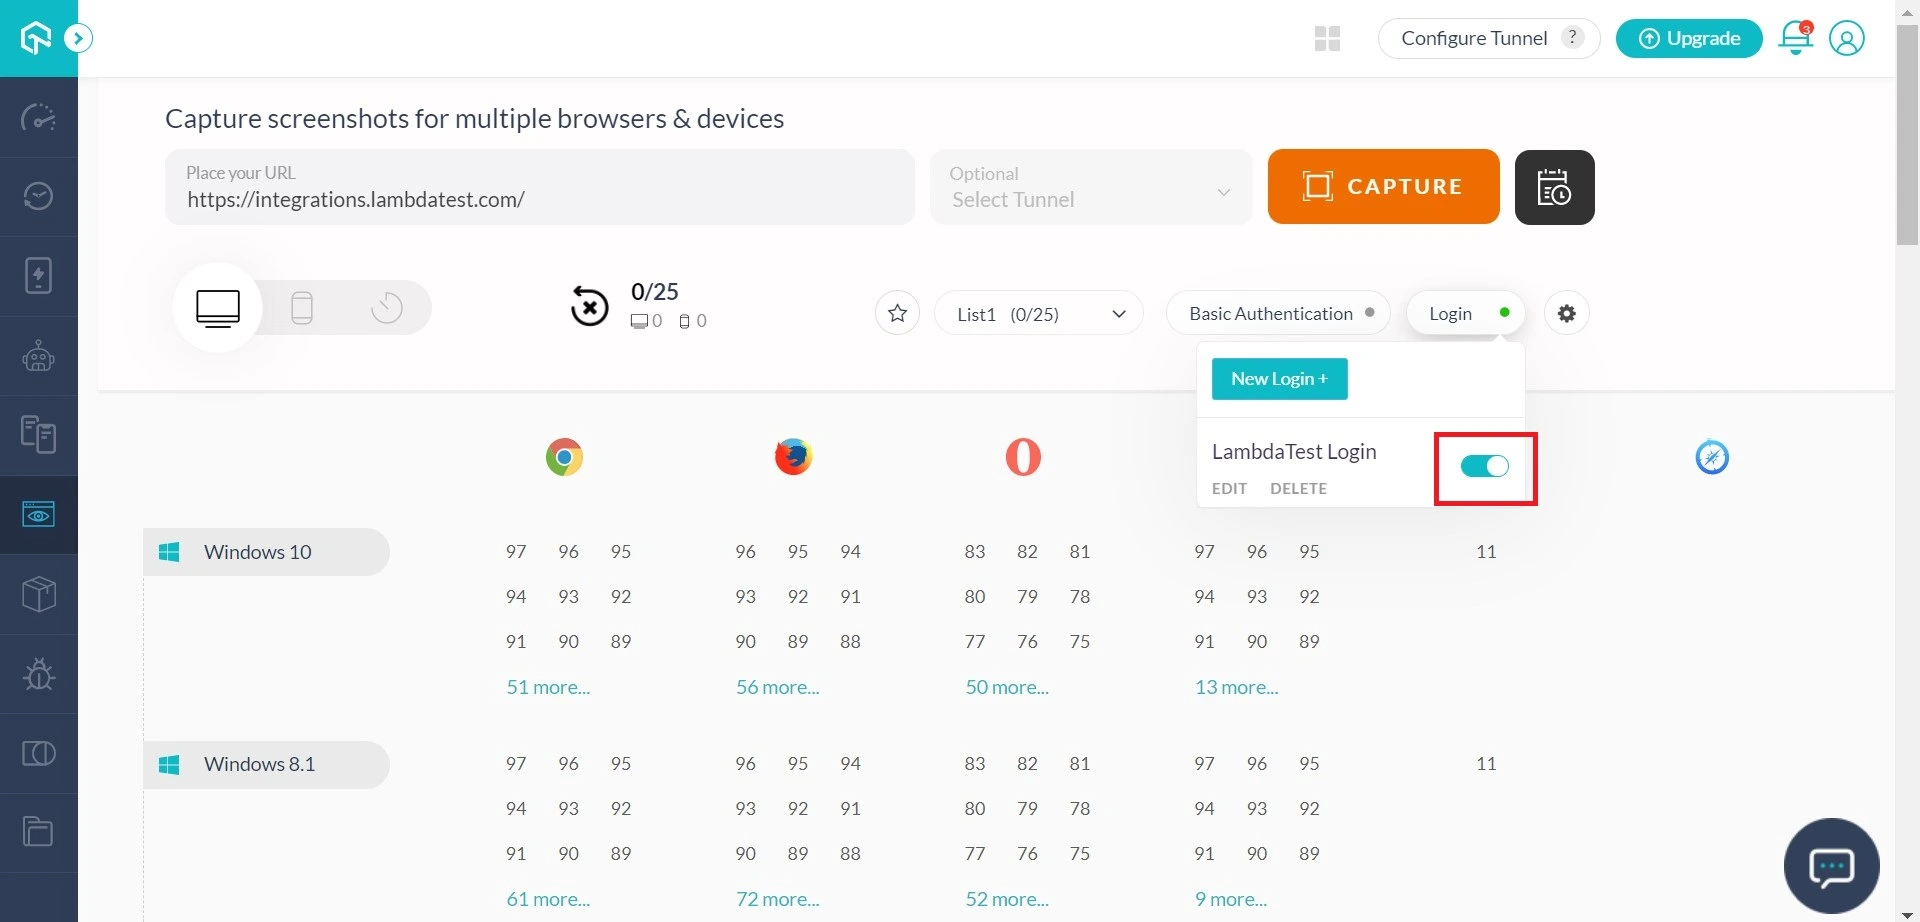
Running Automated Screenshot After The Login Page
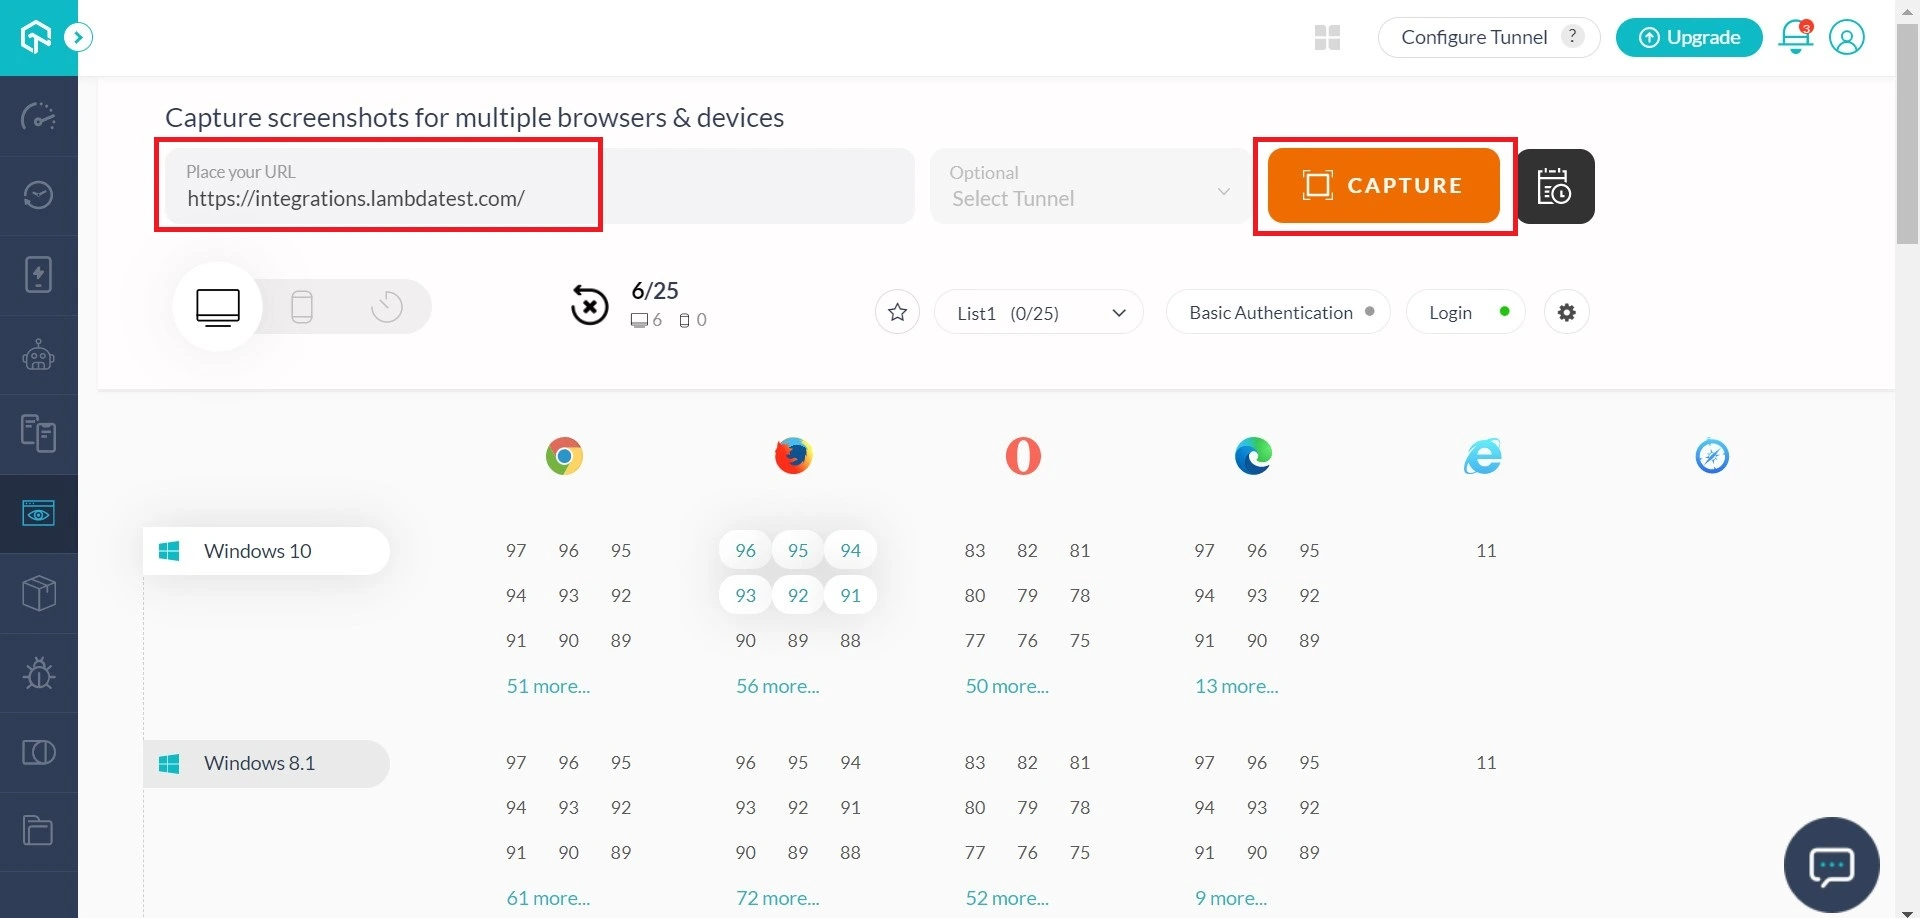
Step 1: Login to TestMu AI and go to Screenshot Testing. Enable the flag for the profile you wish to test.
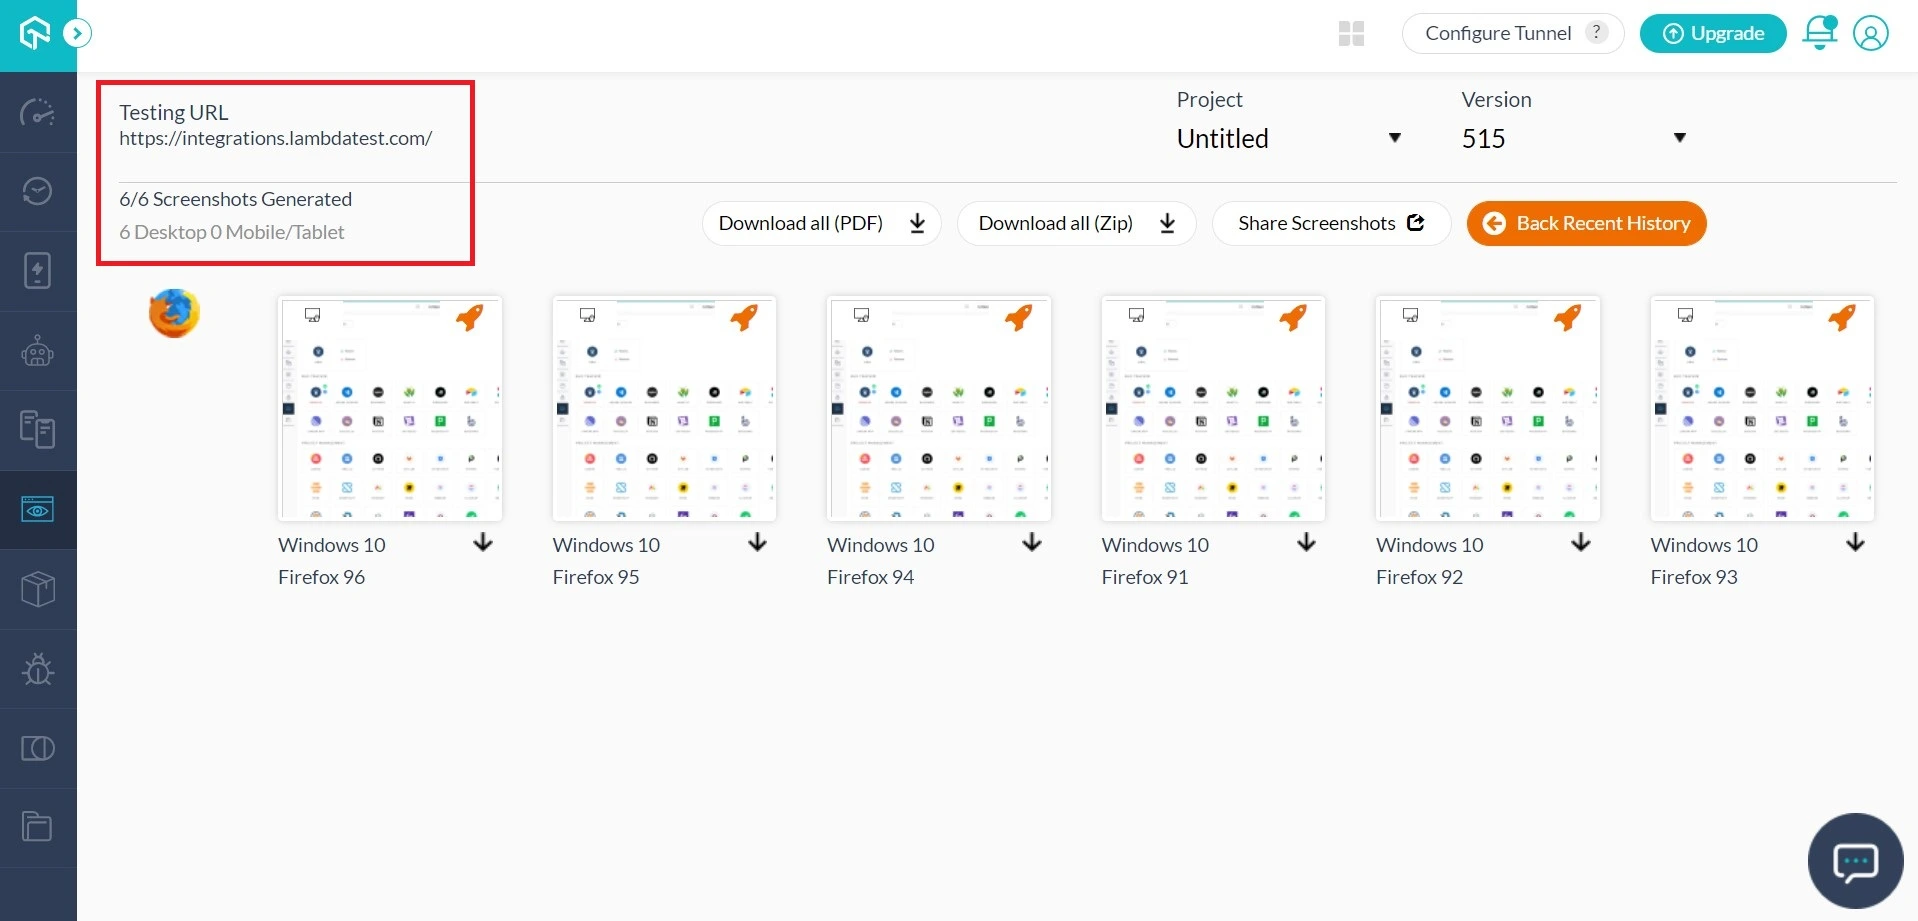
Step 2: Now, enter the Screenshot Test URL and hit the capture button. To carry out the above demonstration, we are making use of the Test URL: https://integrations.lambdatest.com/
Step 3: You will find all the screenshots generated for the web page that is accessible after login.
In case you have any questions, drop us an email at support@testmuai.com or simply give us a shout. We are here to help you speed your test suites 24/7. Happy testing! 🙂
