How to Get Element by Tag Name In Selenium
Vipul Gupta
Posted On: June 6, 2024
![]() 233750 Views
233750 Views
![]() 17 Min Read
17 Min Read
Selenium locators are essential for locating elements on a web page. Among the locators available, such as className, CSS Selector, ID, linkText, partialLinkText, tagName, and XPath, users can choose any locator that fits their needs to locate web elements. While className, CSS selector, ID, and XPath are more frequently used by testers and developers, the tagName() locator is particularly useful for selecting elements based on their HTML tag.
This can be helpful when you want to interact with elements like all the links ( <a>tags), all the buttons ( <button> tags), or any other specific HTML tags on a web page. Despite its usefulness, the tagName() locator is less commonly used and has less working experience than other locators in Selenium.
TABLE OF CONTENTS
What Is a Tag Name Locator in Selenium?
A tag name is an integral part of an HTML Document Object Model (DOM) structure, representing different elements on a web page, such as input, button, and anchor tags. These HTML tags can have multiple attributes, including id, name, and class name.
The tagName() locator in Selenium uses the tag name to find elements without relying on these attributes. This method allows you to locate all aspects of a specific type, such as all buttons or all links, on a web page. The tagName() locator is particularly useful when extracting or interacting with the content within a specific tag.
However, Selenium WebDriver provides support for various WebElement locators in Selenium. These locators help identify elements on a web page and interact with them. Each WebElement locator can locate any HTML element on a web page differently, depending on the specific use cases.
| Locator | Syntax | Usage |
|---|---|---|
| id | driver.findElement(By.id(“ <id_attribute_value> ”)); | Allows to locate WebElement using the id attribute |
| name | driver.findElement(By.name(“ <name_attribute_value>”)); | Allows to locate WebElement using the name attribute |
| className | driver.findElement(By.className(“ <class_attribute_value>”)); | Allows to locate WebElement using the class attribute |
| linkText | driver.findElement(By.linkText(“ <actual_hyperlink_text>”)); | Allows to locate WebElement using the actual hyperlink text |
| partialLinkText | driver.findElement(By.partialLinkText(“ <partial_hyperlink_text>”)); | Allows to locate WebElement using the part of hyperlink text |
| tagName | driver.findElement(By.tagName(“ <HTML_tag>”)); | Allows to locate WebElement using the HTML tag |
| cssSelector | driver.findElement(By.cssSelector(“ <css_value>”)); | Allows to locate WebElement using the CSS selector value |
| xpath | driver.findElement(By.xpath(“ <xPath_value>”)); | Allows to locate WebElement using the Xpath value |
Navigating to the correct WebElement is important to perform any actions. You must know how to inspect the element on Mac and Windows or any OS you choose. To learn how to interact with WebElements in Selenium, watch the complete video tutorial and gain practical insights.
You can Subscribe to the LambdaTest YouTube Channel to get more video tutorials on other Selenium testing techniques, various automation testing tools, and more.
To effectively use the tagName(), locator, it is essential to understand when to apply it for accessing elements and how to get elements by tag name on a web page.
When To Use Tag Name Locator in Selenium?
The tagName() locator in Selenium is used to identify elements using tag names like <div>, <table>, <h1>, and so on. You might wonder when to use the tagName() locator in Selenium. It is particularly useful when attribute values such as id, class, or name are unavailable. In such cases, you can rely on the tagName() locator to locate a WebElement.
For example, if you wish to retrieve data from a table, you may use <td> tag or <tr> tag to retrieve data.
|
1 |
WebElement element = driver.findElement(By.tagname("tr")); |
Similarly, when you wish to verify the number of links and validate whether they are working, you can choose to locate all such links using the anchor tag (<a> tag).
|
1 |
WebElement element = driver.findElement(By.tagname("a")); |
One important thing to note is that using a tagName() locator may lead to multiple elements being identified due to similar tags. In such cases, Selenium will select the first tag that matches the provided locator.
Therefore, be mindful when using tagName() locators in Selenium.
The Selenium WebDriver provides two methods to locate web elements on a webpage.
- findElement(): To find a single WebElement and return it as an object of WebElement. If there are multiple matching WebElements, the first occurrence is returned.
- findElements(): To find all the matching WebElements and return them as a list of WebElements.
|
1 |
WebElement element = driver.findElement(By.tagname("input")).sendKeys("LambdaTest"); |
|
1 |
List<WebElement> elements = driver.findElements(By.tagname("input")).sendKeys("LambdaTest"); |
If you intend to locate a single element, use the findElement() function, which returns the first occurrence. If you need to locate all elements with matching tags, use the findElements() function, which returns a list of WebElements. You can learn more about these functions through this blog on findElement() and findElements() in Selenium.
Struggling with locating elements by tag name in Selenium? KaneAI by LambdaTest makes it effortless. With KaneAI’s natural language capabilities, you can quickly identify elements by tag name without writing complex scripts.
KaneAI is an AI test assistant tailored for high-speed quality engineering teams, packed with powerful AI-driven features for test authoring, management, and debugging. It allows users to create and modify complex test cases using natural language, streamlining the test automation process and eliminating the need for deep technical expertise.
Demonstration: Find the First WebElement Using the tagName()
Now that we have learned the tagName() locator and when to use it, we will demonstrate how to get elements by tag name to identify and locate web elements on a web page.
For demonstration purposes, we will execute all the further test cases or scenarios using a cloud testing platform to leverage the true capability of automation testing and to scale the test process.
Cloud testing platforms like LambdaTest allow businesses to test their applications in a virtual environment, replicating real-world scenarios without a physical hardware setup. LambdaTest is an AI-powered test orchestration and execution platform that lets you run manual and automated tests at scale with over 3000+ real devices, browsers, and OS combinations.
This platform provides a robust test infrastructure where you can perform web application testing using various automation testing frameworks like Selenium, Cypress, Playwright, and more.
Before we use this approach to get element by tag name, it’s essential to set up your project and write a test script. This script should use the findElement() function in Selenium WebDriver to fetch the first matching WebElement by tag name.
Additionally, you can use the findElements() function to get a list of all matching WebElements by tag name. By leveraging these functions, you can efficiently interact with elements like links (<a> tags), buttons ( <button> tags), and other specific HTML tags on a web page.
 Note
NoteRun your tests across 3000+ browsers and OS combinations. Try LambdaTest Today!
Project Setup:
For demonstration purposes, we will use the Eclipse IDE to create the project, with Java as the programming language and TestNG as the automation testing framework. We will create the project with Maven, which uses a POM file to store the project dependencies.
However, if you are just starting with Selenium testing, you can follow this guide on getting started with Maven for Selenium testing to learn everything you need to know about Maven and why it is required when creating projects with Java.
The same project setup is used for all the test scenarios that will be executed. To add a test case for each scenario, we will only add a new Java class file. Therefore, carefully follow the setup to prevent any errors.
To get started, follow the steps below.
Step 1. Launch Eclipse IDE and create a Maven project called GetElementByTagNameSelenium.
Step 2. As the project uses TestNG in Selenium, add the latest stable versions of Selenium 4 and TestNG dependencies inside the pom.xml. You can find the latest dependencies from the Maven repository.
Update the pom.xml with the dependencies; it should look as shown below.
Next, create a Java class file called BaseTest.java. This Java file contains all the common code for test execution, like setup and initializing the WebDriver, declaring and initializing public variables for the project, handling driver termination after test completion, connecting to LambdaTest cloud grid for execution, and more.
Before checking the test results, let’s understand the code present in BaseTest.java in detail.
Code Walkthrough:
- Create an object of RemoteWebDriver and initialize it as null.
- Fetch your Username and Access Key for the LambdaTest by navigating to Account Settings > Password & Security and provide the same to the cloud grid for test execution.
- Create a string variable as status and initialize it with value as failed. This will be used to update the test status on the LambdaTest dashboard after each test is executed.
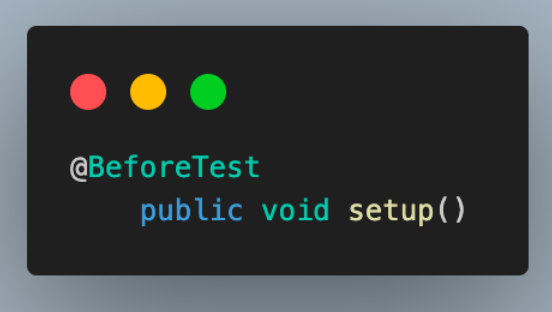
- Add the first method as setup() and annotate it with @BeforeTest to execute it before each test.
- Start by creating an object of the ChromeOptions() class to set the required browser properties for running tests. This can be used to set the OS and browser versions. We are using the latest available versions here.
- To specify the additional browser capabilities required by the LambdaTest platform for execution on their cloud grid, use a HashMap type variable. This will help identify the dashboard test results using the build name and other details.
- Fetch the required browser capabilities from the LambdaTest platform by navigating to the LambdaTest Capabilities Generator. This provides ready-to-use code for setting up browser capabilities, and you can set up other configurations that your test should have that can be used in the execution.
- Use the Selenium RemoteWebDriver to connect to the LambdaTest remote grid using your credentials and the ChromeOptions object, which contains all specified browser capabilities.
- Add another method closeDriver(), to quit the driver instance after each test. For this, use the @AfterTest annotation to execute it after each test execution. Also, this method executes the script to update the status on the LambdaTest dashboard before quitting the WebDriver.
- Navigate to LambdaTest eCommerce Playground.
- Fetch the first WebElement using the tagName() locator for the HTML tag <h4>.
- Get the text for the WebElement and print it.
- Create the test class and inherit BaseTest.java to use the common WebDriver’s functions.
- Add the test case and name it as testFindFirstElementByTagName(). Annotate it with @Test annotation, as we are using TestNG to execute the cases.
- Navigate to the LambdaTest eCommerce Playground.
- Fetch the first element using the driver.findElement(By.tagName)and use the tag <h4> tag. As you want to locate only the first WebElement, the findElement() function of webDriver is used here.
- Print the text of the WebElement located in the previous step.
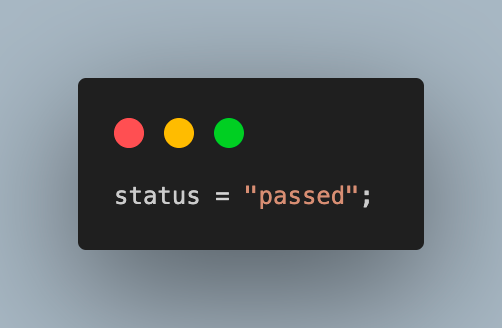
- Update the value of the status variable to pass to showcase that we encountered no errors and that the execution was successful.
- Navigate to LambdaTest eCommerce Playground.
- Fetch all the matching WebElements using tagName() locator for the HTML tag <h4> and store it in a list.
- Print the total number of located WebElements.
- Traverse the entire list and print the text for each WebElement.
- Add the next test class file to understand the implementation of locating all the elements by using tagName(). Name it at TestFindAllElementByTagName and inherit BaseTest.java.
- Add the test method and annotate it with @Test annotation.
- Navigate to the LambdaTest eCommerce Playground.
- Fetch all the elements using the h4 tag on the webpage. For this, we use the findElements() method of the Selenium WebDriver. Store this list of WebElements in the List variable.
- Print the total number of located WebElements using the tagName() locator using the size() method.
- Traverse the entire list of webElements to print the text of each located element.
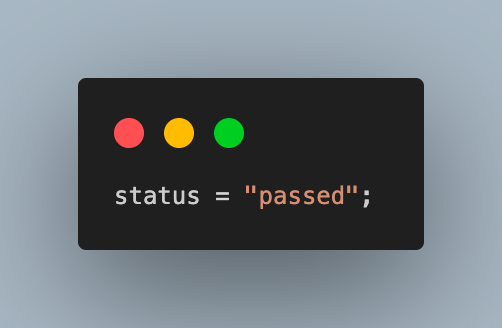
- Update the value for the status variable as passed.


Alternatively, you can configure these as environment variables and directly fetch them in code.
For Windows:
|
1 2 |
set LT_USERNAME=LT_USERNAME set LT_ACCESS_KEY=LT_ACCESS_KEY |
For macOS and Linux:
|
1 2 |
export LT_USERNAME=LT_USERNAME export LT_ACCESS_KEY=LT_ACCESS_KEY |


To learn more about various annotations for better prioritizing the test cases, follow this guide on TestNG annotation in Selenium.

In the above section, we set up the required dependencies and libraries in the pom.xml file and the BaseTest.java file. Now, we will look into the test scenarios we will execute to understand how to get elements by tag name.
The test scenario below is one that we will be executing to understand how to get elements by tag name using findElement() with tagName() locator.
Test Scenario:
|
|
Below is the code implementation for the test scenario to get the first WebElement by tag name in Selenium.
Before we jump to the result, let’s look into the code above to understand how it works step-by-step.
Code Walkthrough:


Output:
Executing the above test to get the first WebElement by tagName() locator in Selenium will give output on the console like the one shown below.

Result:
The test execution logs on the LambdaTest Dashboard can be viewed under the Automation > Web Automation section.

To learn more about performing automation testing on the LambdaTest platform, watch the video tutorial below and get started on your automation testing journey.
We have learned how to get elements by tag name to fetch the first WebElement using the findElement() method with the tagName() locator property. Next, we will use the findElements() method to return all the matching WebElements in a list using the tagName() locator property, along with a code demonstration.
Demonstration: Find All WebElements Using the tagName()
Now, let us understand how to get elements by tag name to locate all the WebElements using the tagName() locator. As mentioned before, we will use the same BaseTest.java file that consists of the same code as used in the above demonstration.
Below is the test scenario we will execute to understand how to get elements by tag name using findElements() with tagName() locator.
Test Scenario:
|
|
You must create a new file named TestFindAllElementsByTagName.java to write your test script for the test scenario above.

Code Walkthrough:


Output:
Executing the above test to get all the WebElements by tagName() locator in Selenium will give the output on the console like the one shown below.


Result:
The test execution results will be displayed on the LambdaTest Dashboard, which can be viewed under the Automation > Web Automation section.

Conclusion
With this, we have come to the end of this blog on how to get elements by tag name in Selenium with Java. We have used the tagName() locator in Selenium on different scenarios to fetch the first and all matching elements. We learned when to use the tagName() locator, and this will help you to use it more effectively and write reliable, robust automation test scripts. Now, it is time for you to go ahead and start using it in your scripts and explore if it can be used in combination with other locators. Happy locating !!
Frequently Asked Questions (FAQs)
What is the purpose of WebElement?
WebElement is an HTML interface element allowing users to interact with them using Selenium WebDriver. It allows users to perform several actions, like clicking, submitting, entering data, and asserting as required.
What are the top web element locators in Selenium?
Mostly 8 web element locators are used in Selenium. These are ID, Name, className, tagName, linkText, partialLinkText, CSS Selector, and XPath.
What is the best way to find the total number of matching elements with a tag?
If all the matching elements are located using the findElements() method, then the size() function of the Java util class can easily find the total number.
Which is the best web element locator and why?
ID is considered the best web element locator because, as per the web development standards, the ID of all the elements is unique on the web page, making it safe from any issues.
What is a locator, and how is it different from a WebElement?
Locator is how to identify and access a web element on the webpage. Locators are used to perform actions on web elements using Selenium WebDriver. However, a web element, on the other hand, is an HTML element on a webpage. A WebElement can be a textbox, checkbox, dropdown box, label, header, title, button, etc.,
What makes an ideal locator?
An ideal locator should be unique to the desired element and use minimal information or text related to the locator that might get changed.
Got Questions? Drop them on LambdaTest Community. Visit now


