Auto Healing for HyperExecute
HyperExecute's Auto Healing feature automatically recovers from locator failures during test execution, reducing flaky tests and improving the reliability of your test suites.
Enable Auto Healing
Step 1: To enable the Auto Healing feature, you need to pass the autoHeal: true as a capability in your WebDriver configuration.
const capability = {
    "browserName": "Chrome",
    "LT:Options": {
        "platformName": "Windows 10",
        # highlight-next-line
        "autoHeal": true
    }
}
Step 2: Now, trigger your test on HyperExecute using the mentioned command. Please replace the placeholder values with your details.
./hyperexecute --user undefined --key undefined --config RELATIVE_PATH_OF_YOUR_YAML_FILE
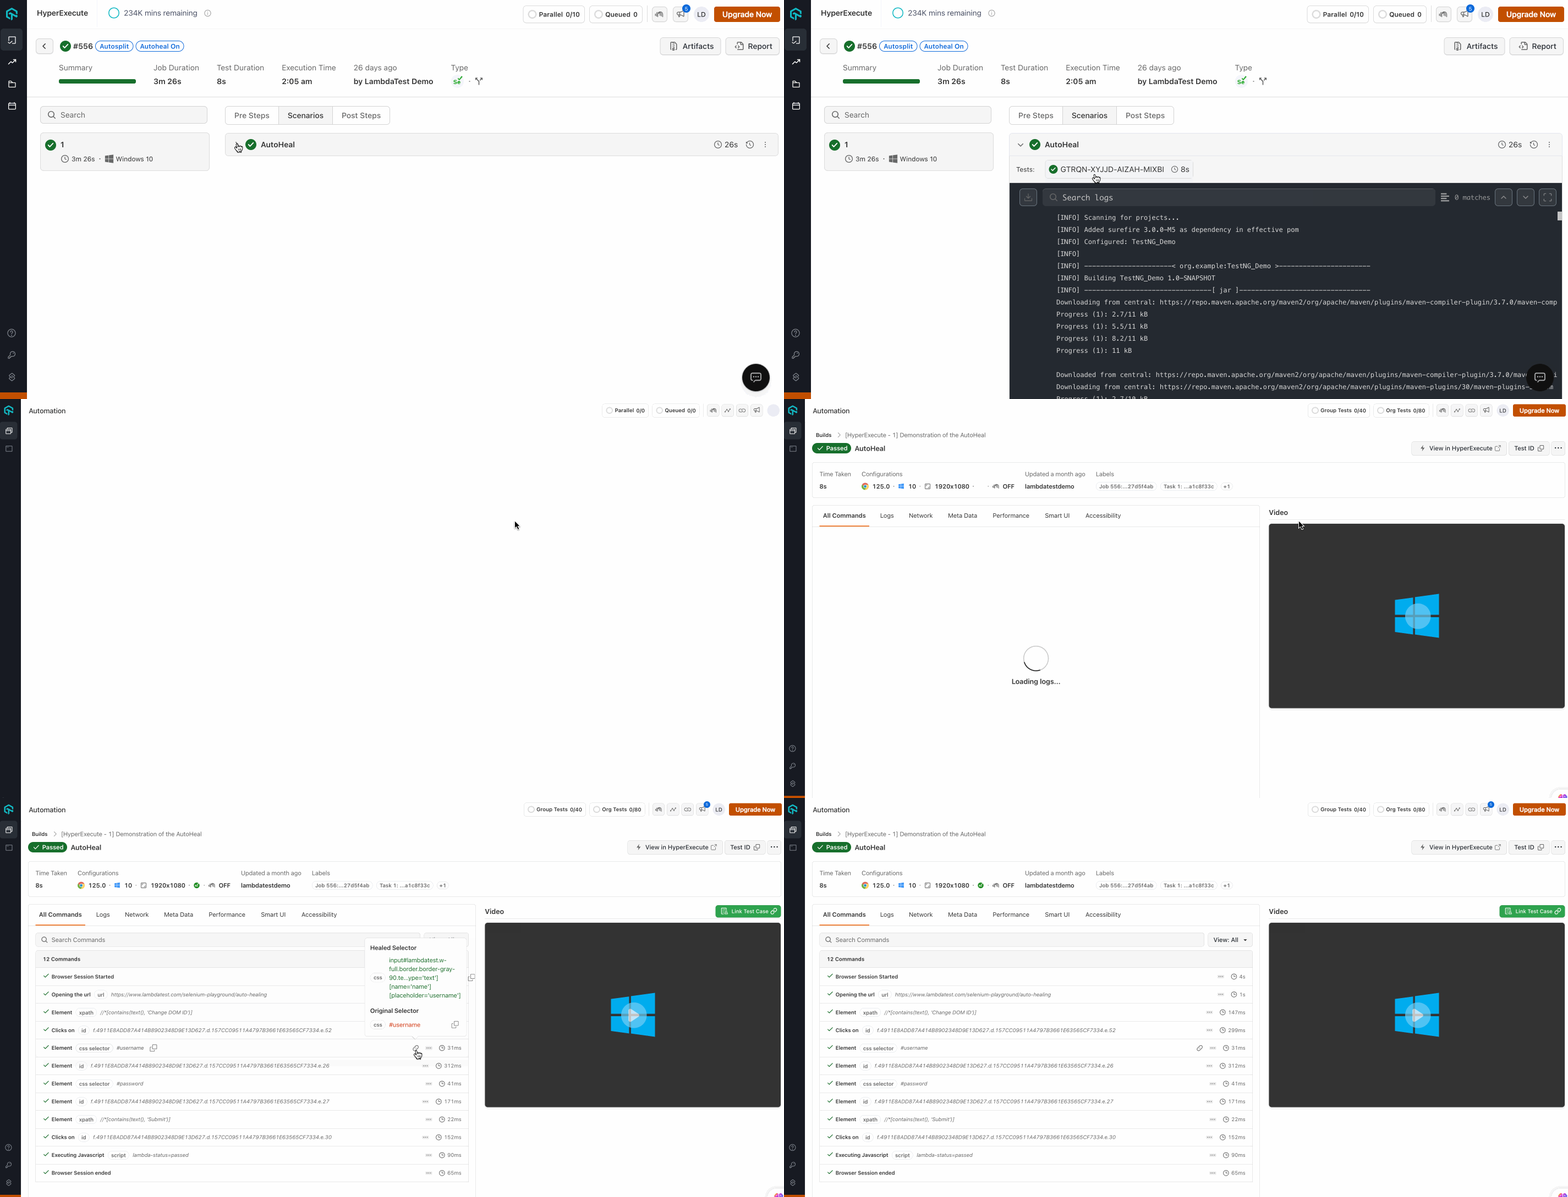
Step 3: Now visit the HyperExecute Dashboard to check your triggered test. Click on the View Test Detail button.
Step 4: Click on the band-aid icon as shown below to check what part of your test case is healed.
How Auto Healing Works
Auto Healing employs a dynamic locator strategy that adapts to DOM (Document Object Model) changes in real-time:
- Record: When an element is initially located, the system records its DOM path and associated attributes.
- Detect: If subsequent attempts to find the element fail due to application updates, the Auto Healing mechanism activates.
- Heal: It analyzes the current DOM structure, compares it against the previously recorded state, and generates new locators by combining element attributes and hierarchical information.
- Continue: The test continues execution seamlessly despite locator changes.
Using AutoHeal with Hooks
In addition to enabling AutoHeal globally through capabilities, HyperExecute also supports AutoHeal Hooks for fine-grained control during test execution.
These hooks allow you to start or stop the AutoHeal mechanism dynamically at any point within your Selenium test scripts. This is especially useful when only certain test steps involve dynamic elements or frequently changing locators.
By using these hooks, you can:
- Start AutoHeal before performing actions on elements likely to change.
- Stop AutoHeal immediately after those interactions are completed.
- Ensure the rest of your test executes with standard Selenium behavior.
This provides precise control over when element healing should be applied, improving reliability and reducing flakiness without impacting unrelated steps.
To learn how to use AutoHeal hooks in your Selenium scripts, refer to the detailed guide: How to Use AutoHeal using Hooks
Benefits of Auto Healing
- Reduces Flaky Tests: Automatically recovers from intermittent locator failures caused by DOM changes.
- Improves Test Reliability: Tests continue execution despite minor application updates, increasing confidence in results.
- Saves Time and Effort: Reduces manual effort spent debugging and fixing broken locators.
Limitations
- Non-recoverable Errors: Auto Healing cannot recover from WebDriver initialization errors or system-level failures.
- Test Accuracy: May mask real issues in your application or test scripts. Review logs to understand why a test needed healing.
- Performance Impact: Minimal, but enabling Auto Healing can slightly increase test execution time.
Related Docs
- Selenium Auto Healing:Auto-heal for Selenium web automation tests
- Playwright Auto Healing:Auto-heal for Playwright web automation tests
- Smart Heal for Appium:AI-powered self-healing for mobile app automation on real devices
- Auto-Heal in KaneAI:AI-native auto-heal with natural language understanding for KaneAI-authored tests


 Chat with Us