LT Browser - Test Website For Responsiveness Easily
LT Browser allows you to ensure your website's responsiveness over a variety of major devices and view ports. You can open a website in the LT Browser and perform live testing across 50+ pre-installed device viewports.
To get started, you need to download the executable file from here.
Note: After you are done with the installation, you will need to login to the LT Browser through your TestMu AI login credentials.
This document will help you:
- Run First Responsive Test With LT Browser
- Add A Custom Device To LT Browser
- Search Devices In The LT Browser
- Capture Screenshot & Highlight Bugs
- Share Highlighted Bugs From The LT Browser
- Record Video Of A Test Session
- Find Recorded Videos & Highlighted Images In Media
- Test Locally Hosted Web-Apps or Websites
- Test Web Pages Behind Login
- Debug Your Website Using LT Browser
- View Performance Report Of Your Website Using LT Browser
- Network Throttling To Test Website Responsiveness
- What Is Scroll Sync In LT Browser?
- Capturing Full-Page Screenshots Of Your Websites
- Using Mouse Pointer For Touch Mode
- Getting The JavaScript Error Report Of Your Website
- What Is LT Browser Feedback Board?
- Keyboard Shortcuts
Running Your First Responsive Test With LT Browser
Step 1: Open the LT Browser. Provide the testing URL in the address bar and hit Enter.
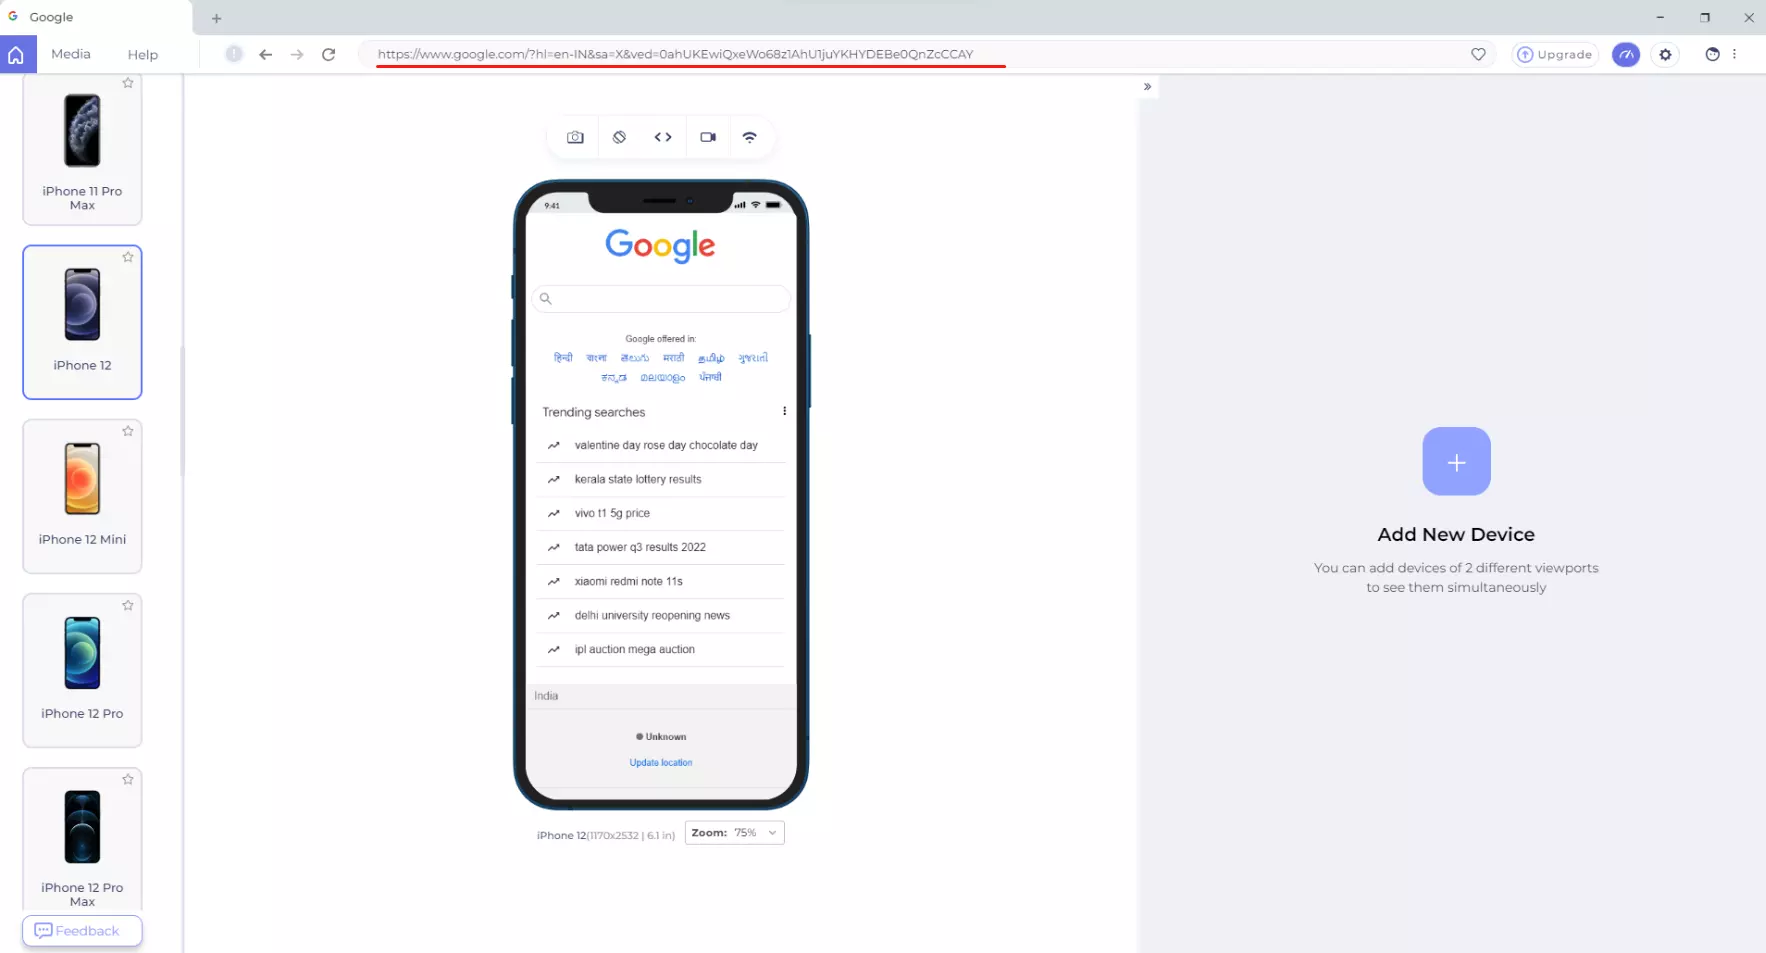
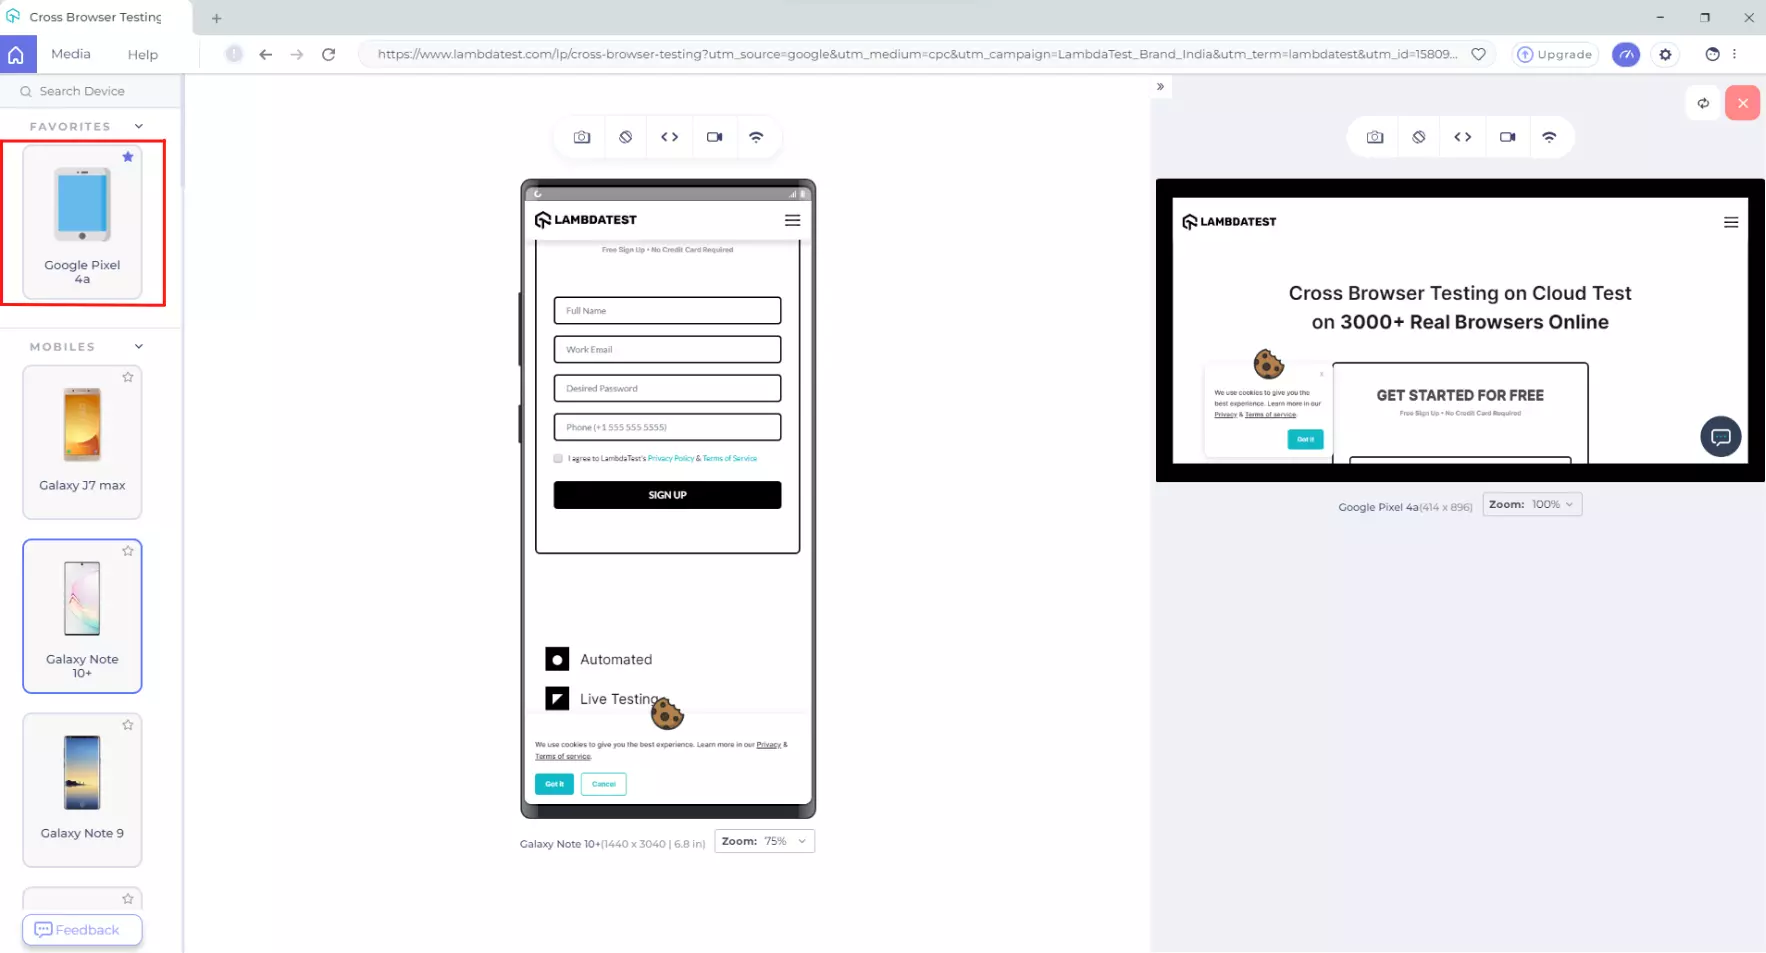
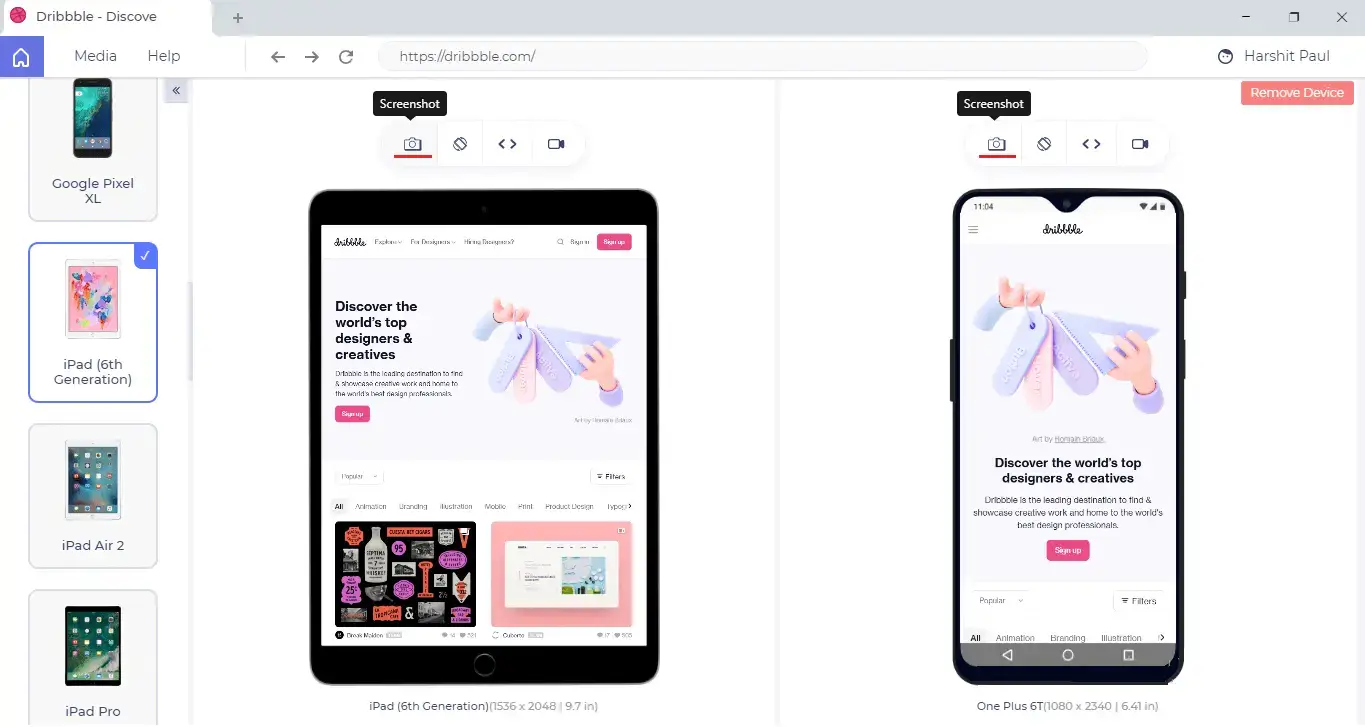
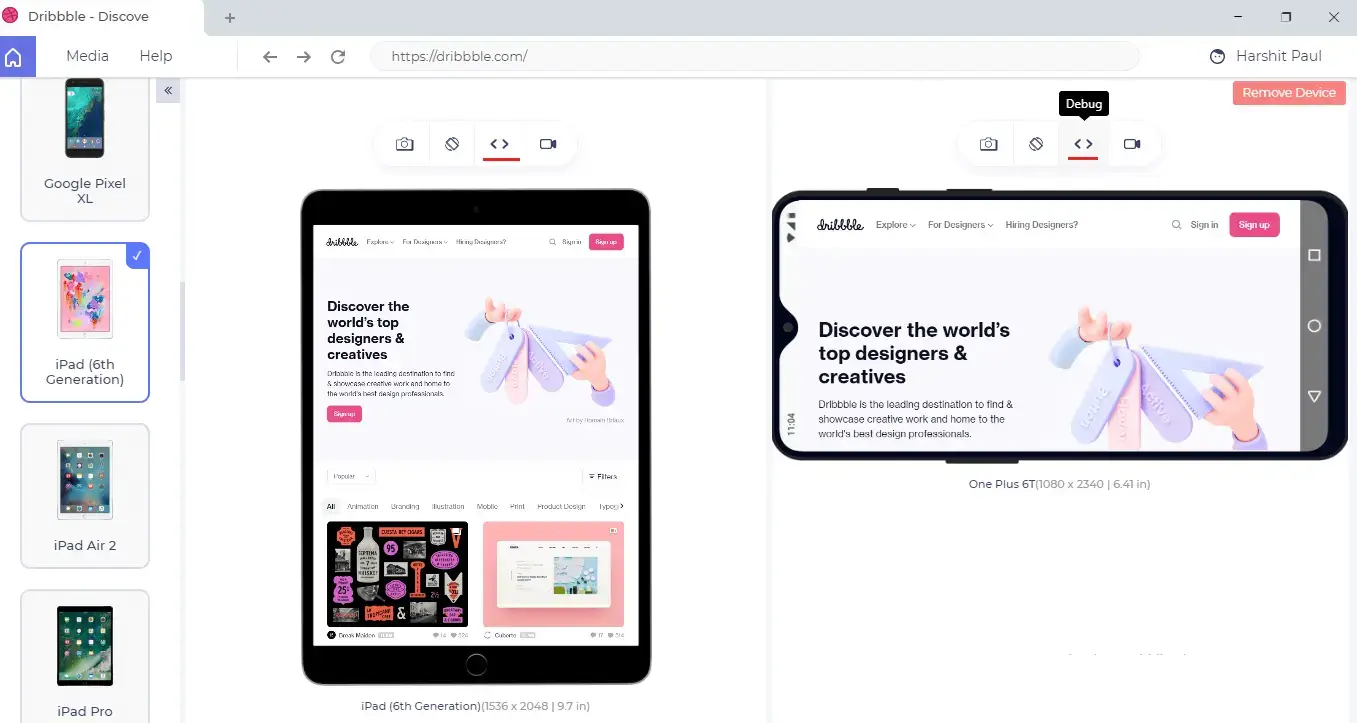
Step 2: Once you hit Enter, the website would be loaded on 50+ devices. You can select any device to start responsive testing from the sidebar on the left. You can also monitor two different devices side by side by adding a device on the view screen.

Step 3: After you click on the + button to add a new device, you will be prompted with a screen from which you can select the specific device you want to test side by side. Select the device and hit the button to add device.
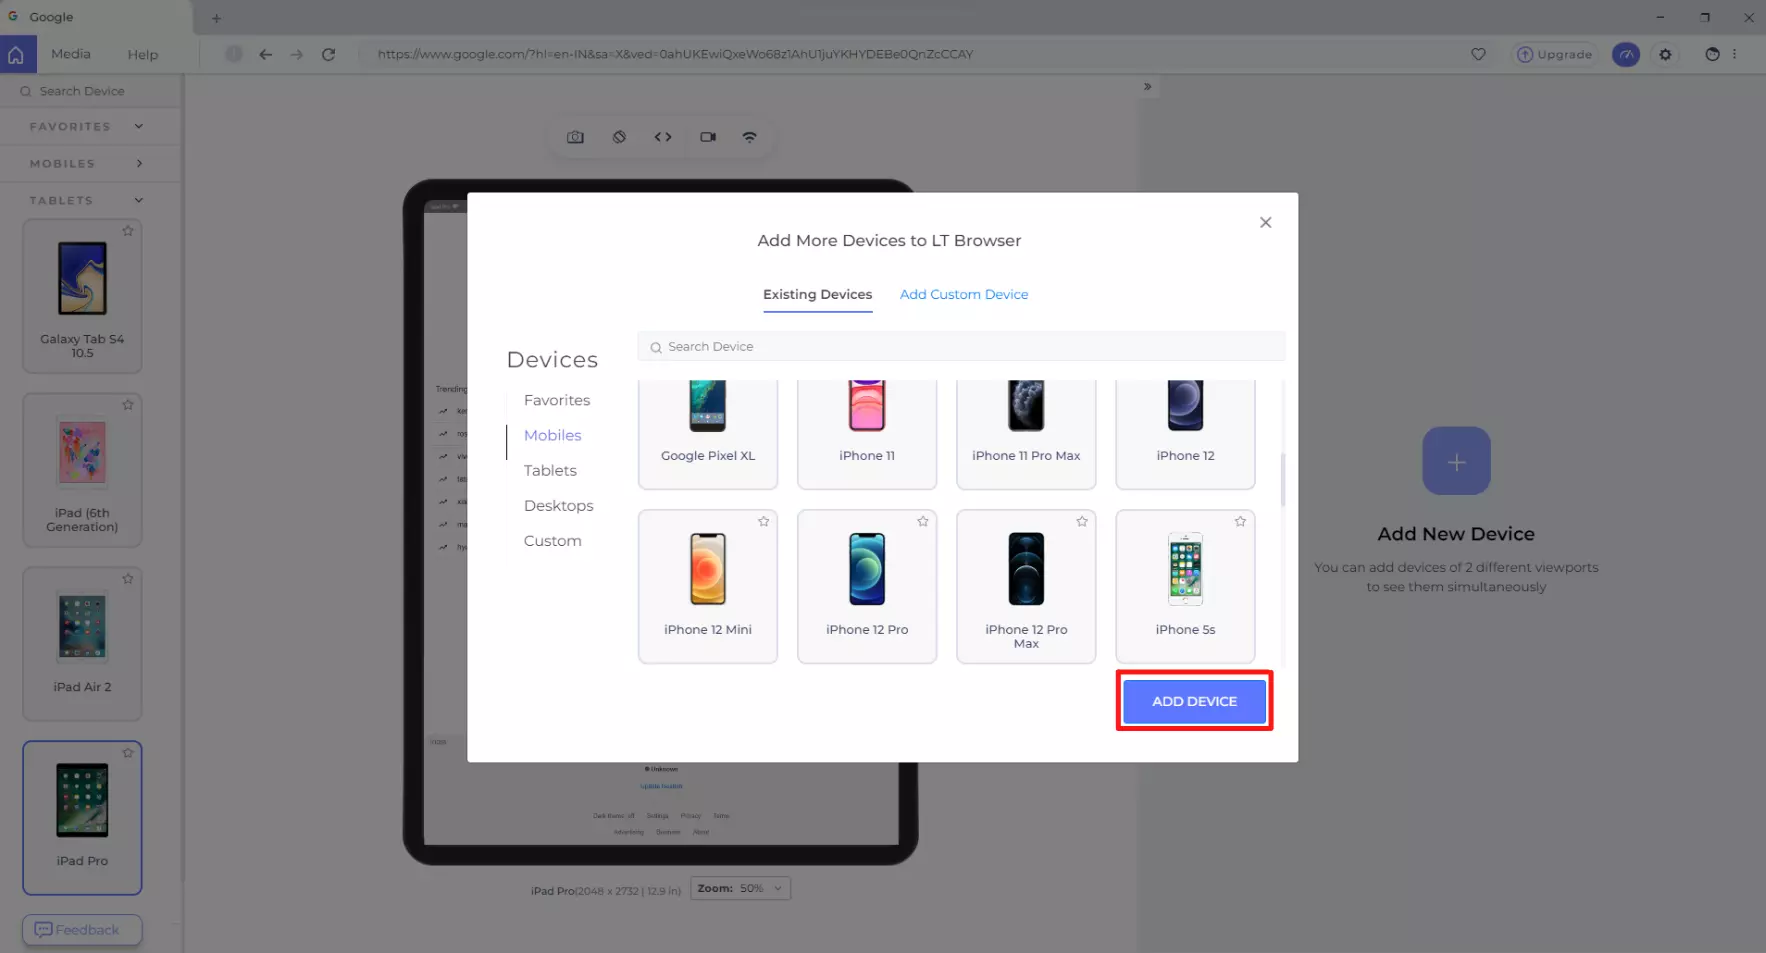
Step 4: You will now find the added device on the view area inside LT Browser. That way you can compare responsive web design on 2 different device through a side by side view.
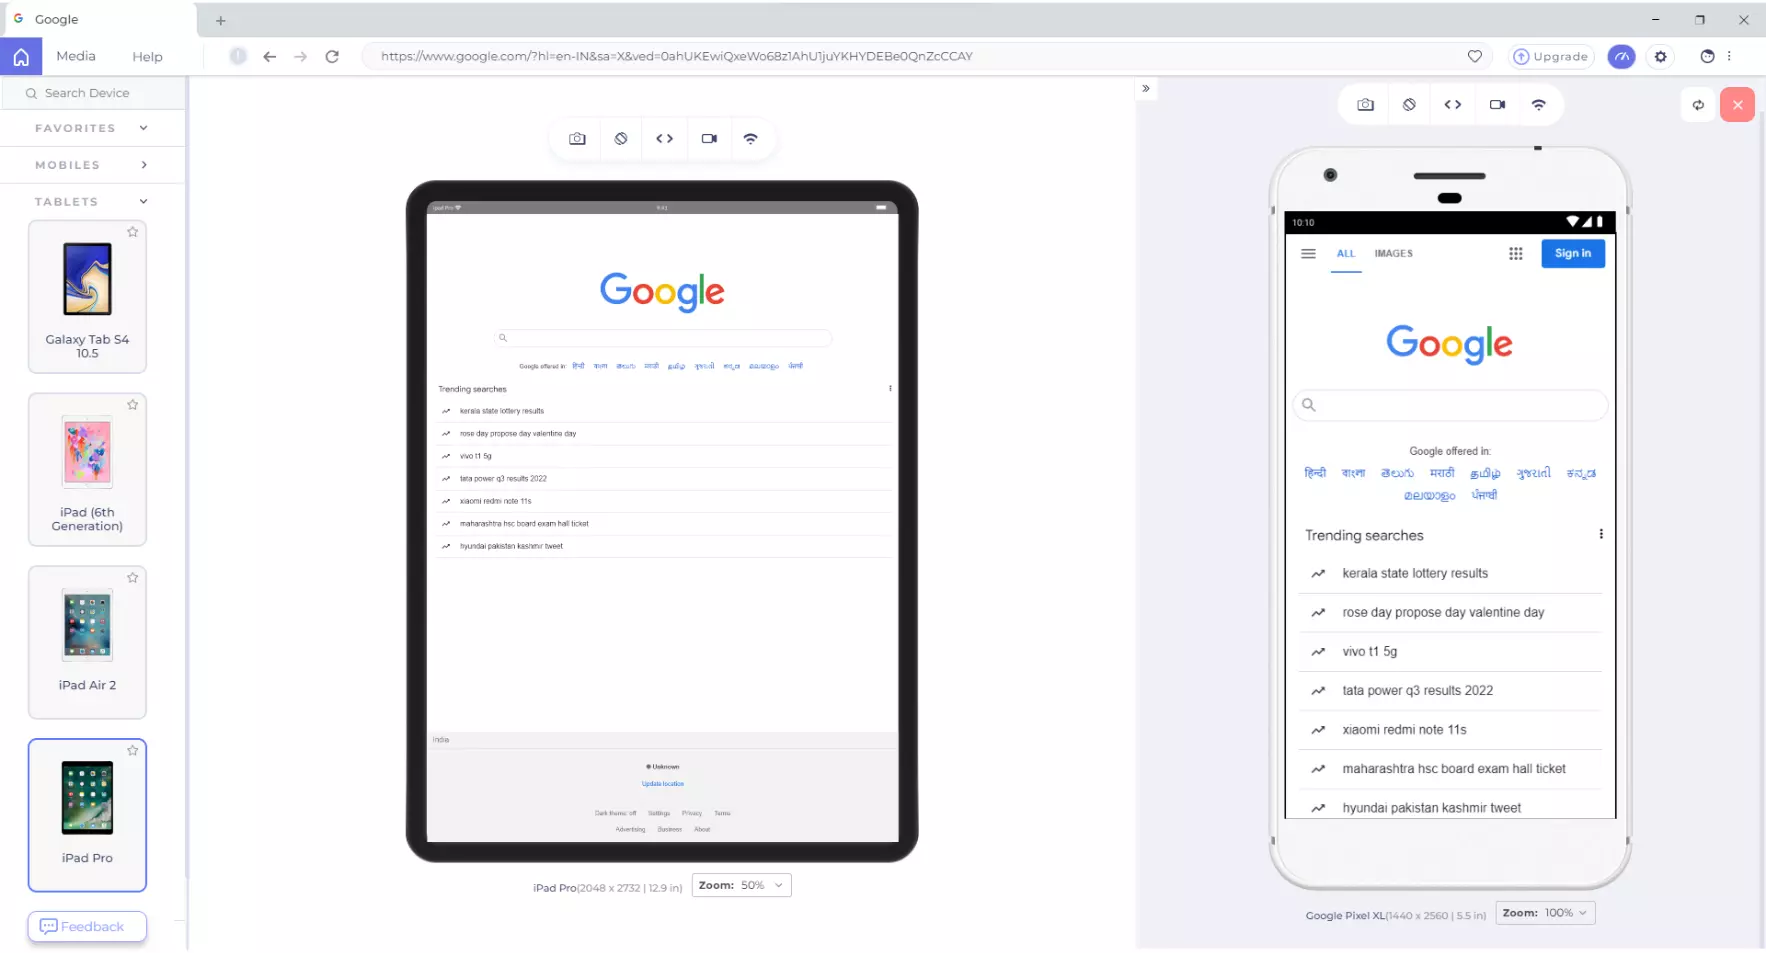
Rotating Device From Portrait To Landscape View Or Vice Versa
You can rotate any or both devices by clicking on the highlighted button with the rotate icon.

Couldn't Find Your Favourite Device? Add A Custom Device
Although, we try our best to deliver the most majorly used devices to our user as per the global market share. However, in case you are unable to find a device that matches the view port or device pixel ratio of your requirement then you can even add a custom device to your LT Browser. To do so, you need to click on the tab which says add a custom device.
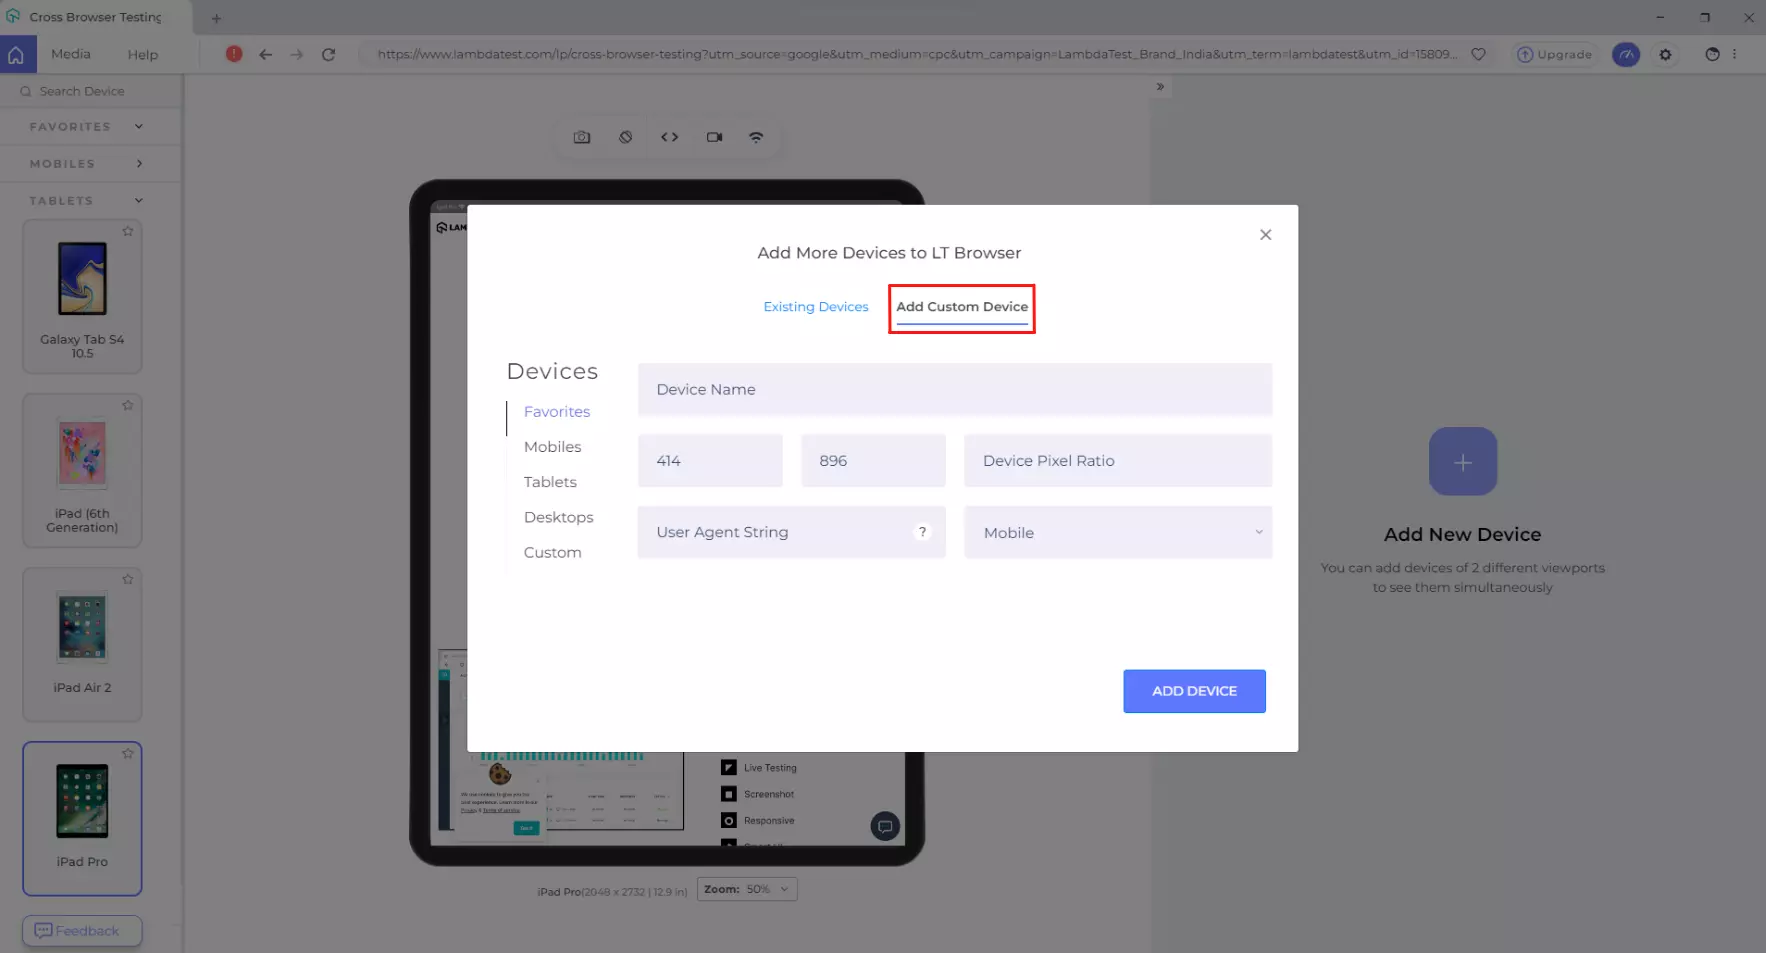
You will now be routed to the below screen where you can specify device details. You can specify:
- Device Name
- View Port Specifications
- Device Pixel Ratio
- User Agent String
- Device Platform

Let's try adding OnePlus 5 to the LT Browser. We will provide the mandatory details to add OnePlus 5 as a custom device.

As you click on add a device, you will find the custom device One Plus 5 added to your mobile view area on the LT Browser. You will also find it added over the top of sidebar on the left with a bin icon to delete the custom device, if needed.
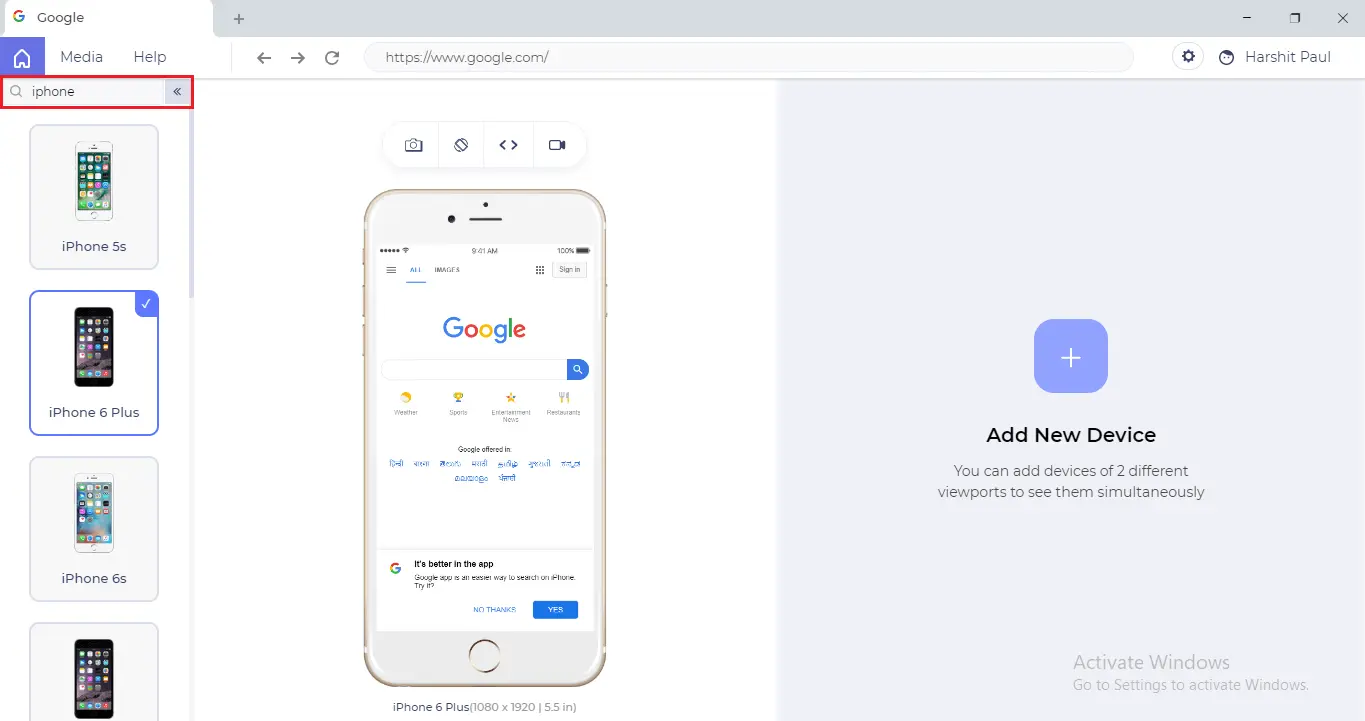
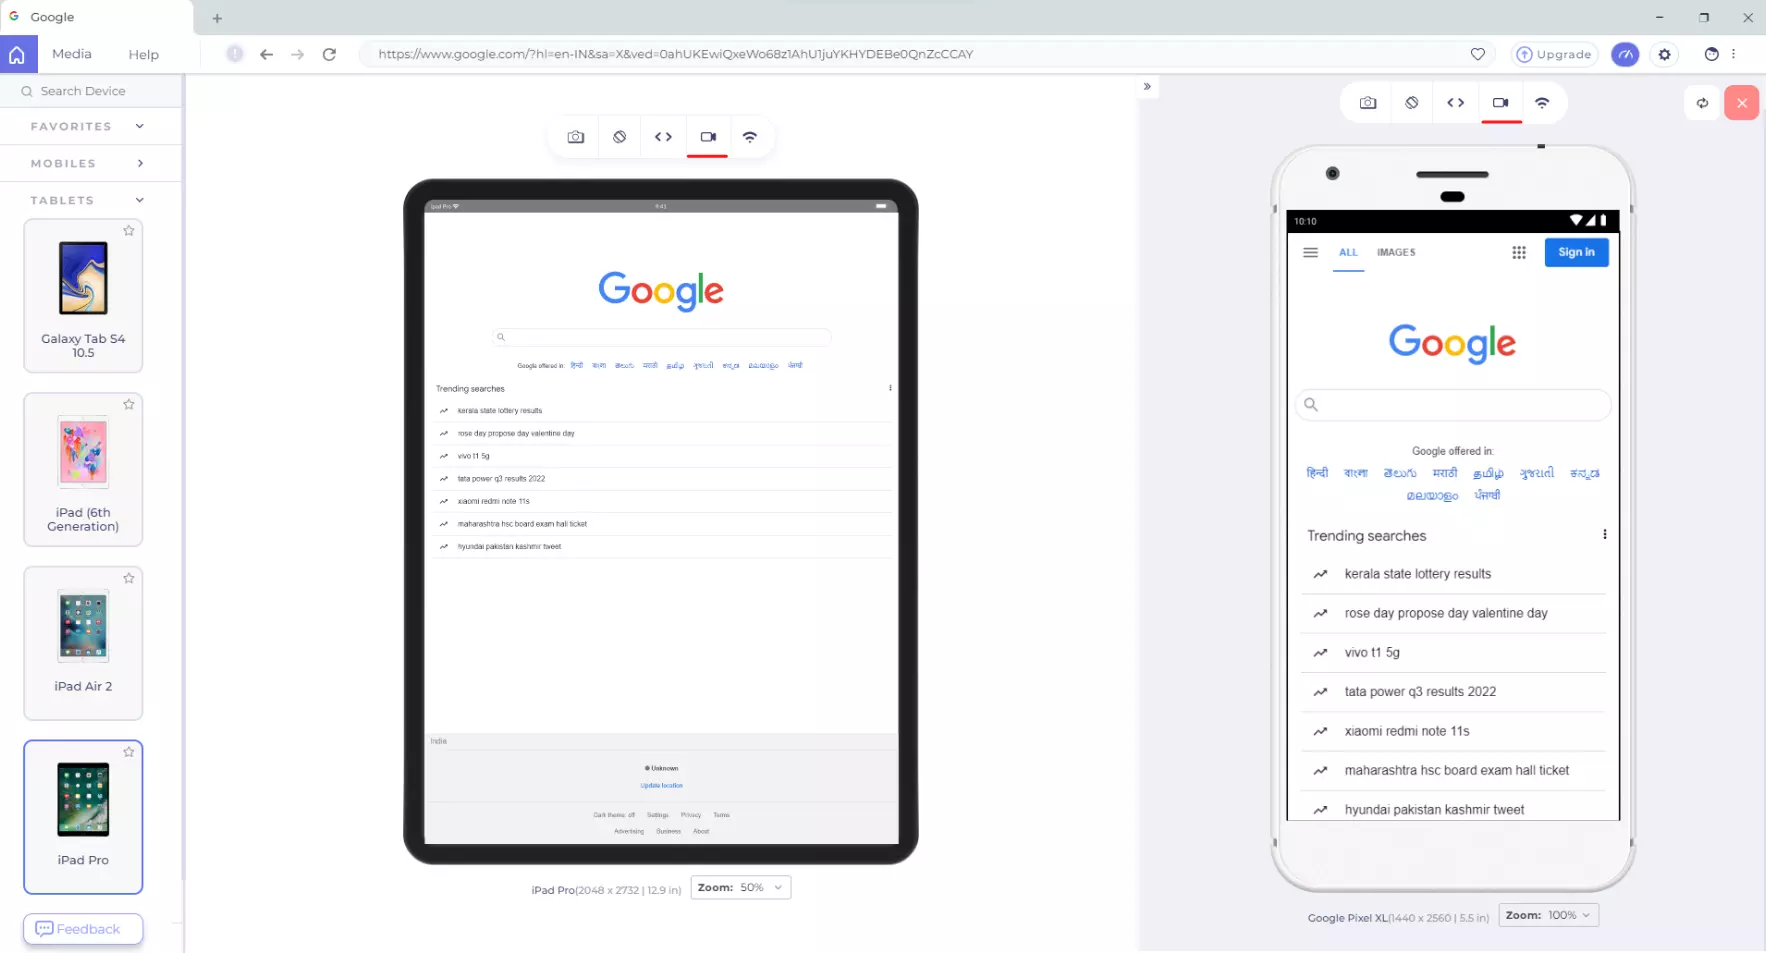
How To Search For A Specific Device In The LT Browser?
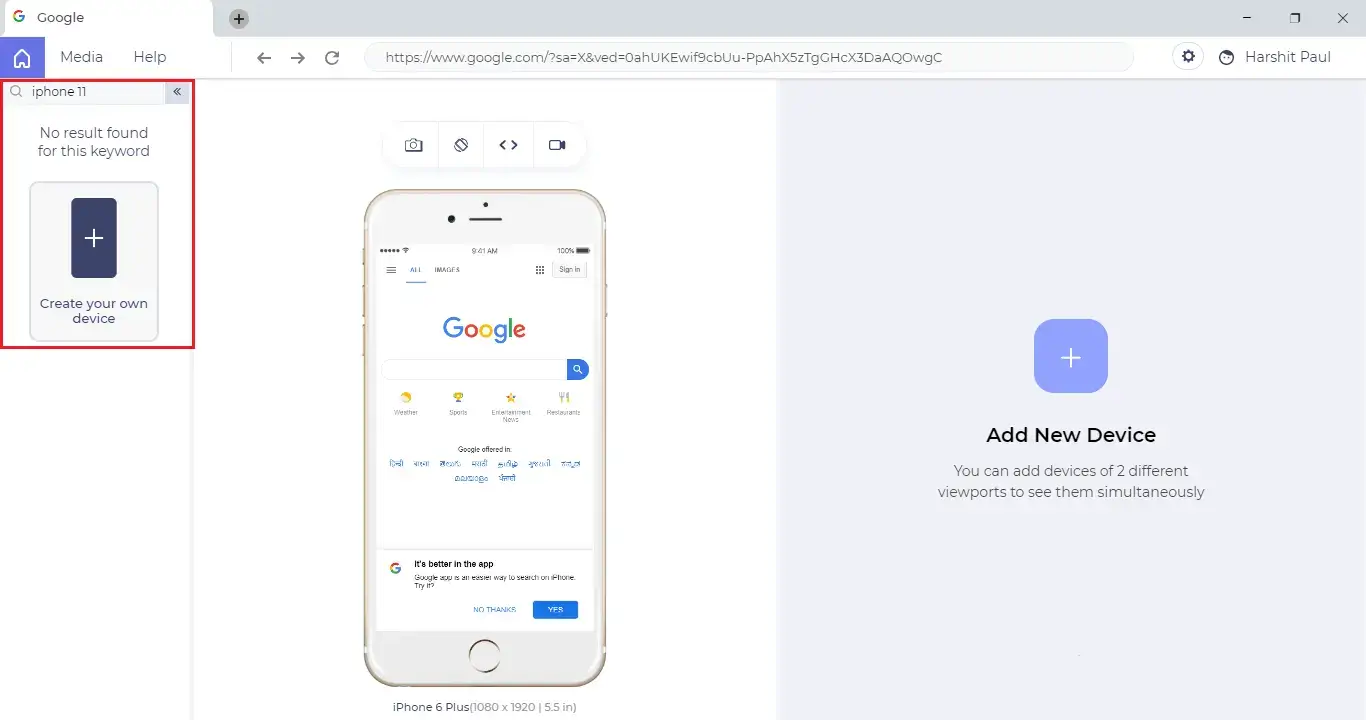
If you open the LT Browser, you will notice a search bar displayed over the top-left. You can leverage the search bar to quickly find your favourite devices. After you search a string, you can select the particular device & the selected device will be rendered over the browser instantly.
Fun Fact: If you search for a device name which isn't added to your LT Browser yet, you will find a button that will help you instantly add a custom device.
How To Capture A Screenshot & Highlight The Bugs?
Step 1: Click on the camera icon to capture screenshot of your website inside a mobile device screen of your choice.
Step 2: Once you click on the camera icon, a built-in image editor would open up to present the captured screenshot of the selected device's screen.
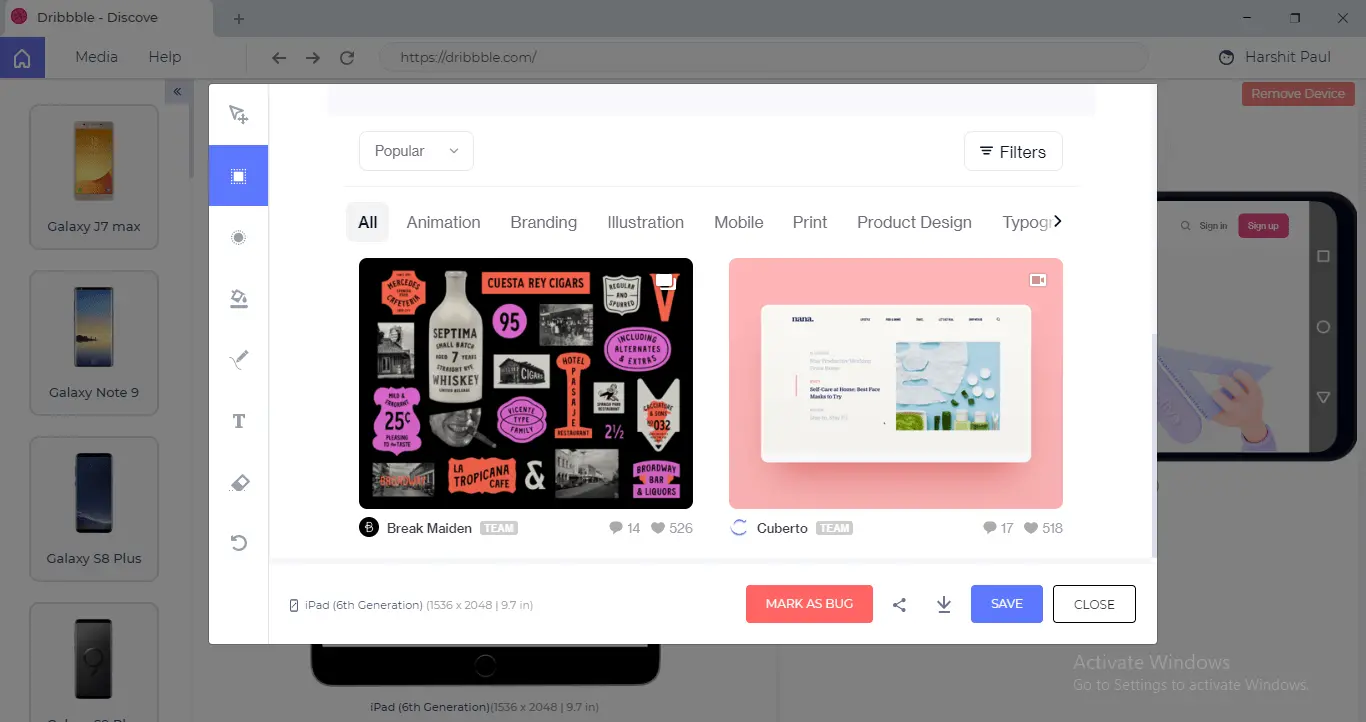
Note: The camera button won't capture a full-page screenshot but will capture screenshot of the view in the screen of a particular device. You can leverage our Automated Screenshot Testing to capture full-page screenshots of your website over multiple browsers + OS combinations in a single test session.
How To Edit Captured Screenshot? Use Built-In Image Editor
TestMu AI offers a built-in image editor to help you easily mark the bugs over your website and share it across your teammates. You can highlight the bugs in various shapes with different colors. Let us have a look at everything that you can do with the image editor.
Draw A Line
Highlight Bug With A Circle
Draw A Rectangle
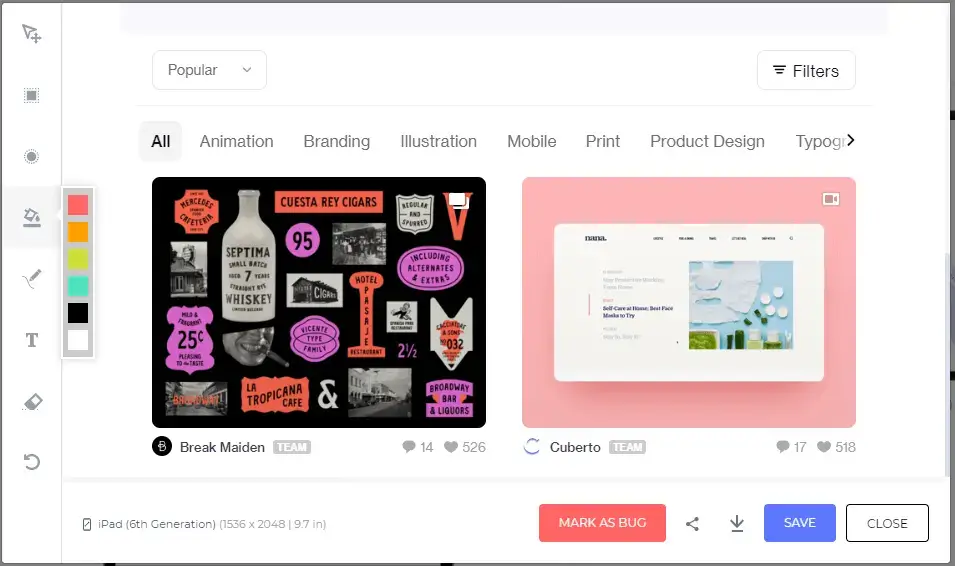
Highlight The Bug From Multiple Colors
Add Text In The Captured Screenshot
Freestyle Highlighting With Marker
Removing Your Edits With Eraser

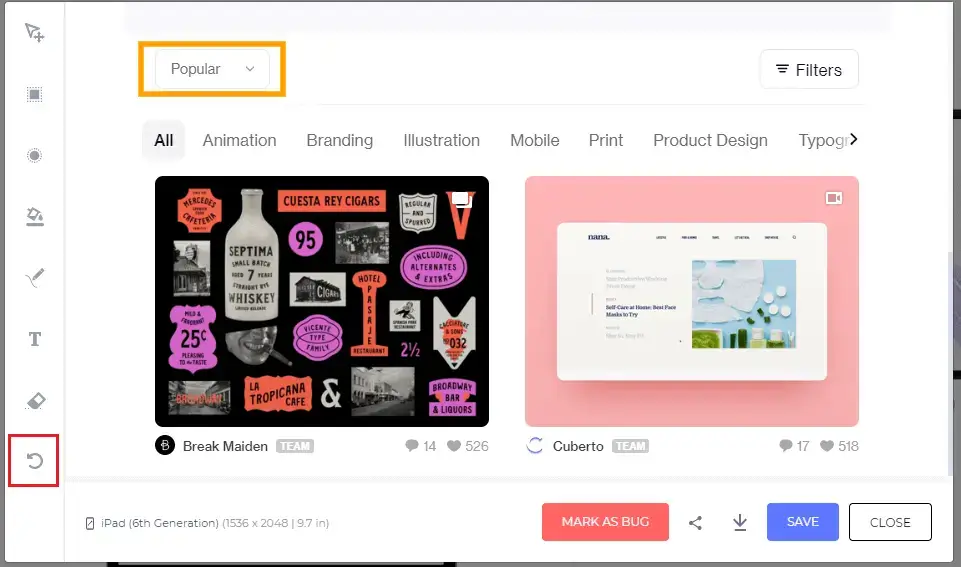
Undo Your Edits
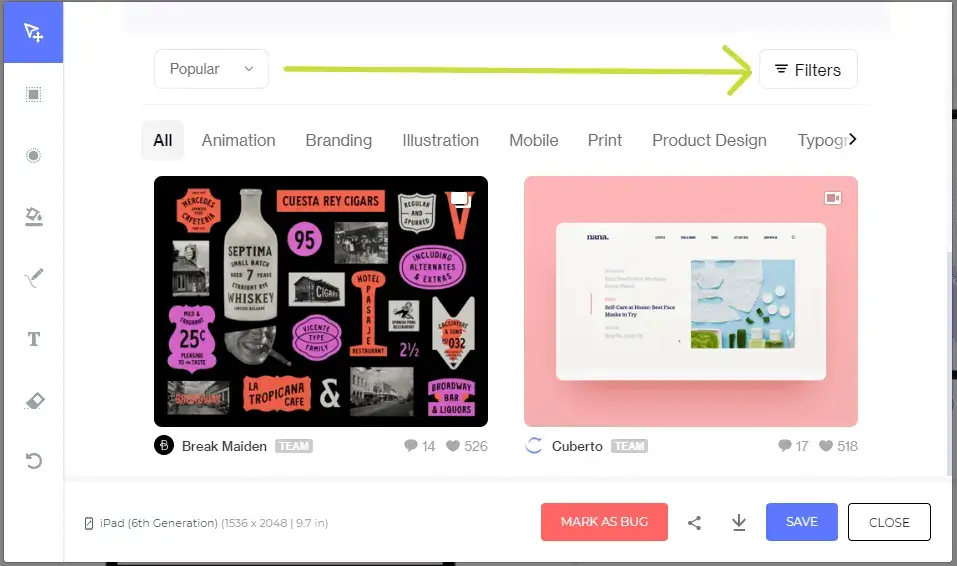
How To Share The Highlighted Bugs With The Team?
We understand that one of the most streneous task for any tester is to collect & share the bugs across your teams. Keeping that in mind, we offer multiple ways for you to share the highlighted screenshot with others through LT Browser.
1. Download The Screenshot In Your System
You can download the highlighted screenshot in your system and share it with your team as you like through emails, instant messaging or more.
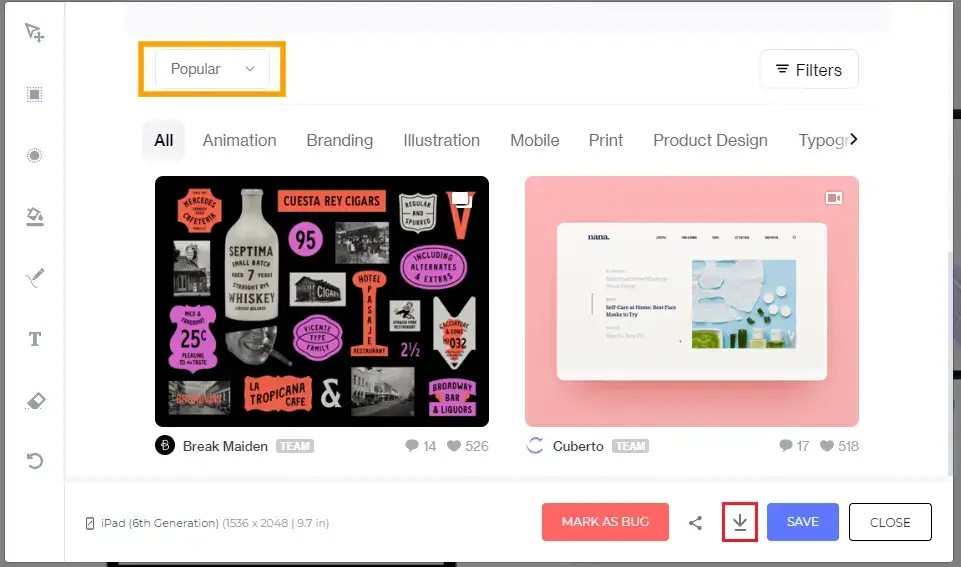
2. Saving The Screenshot Over LT Browser
After capturing the screenshot, you can save the screenshot over the LT Browser by clicking the Save button.
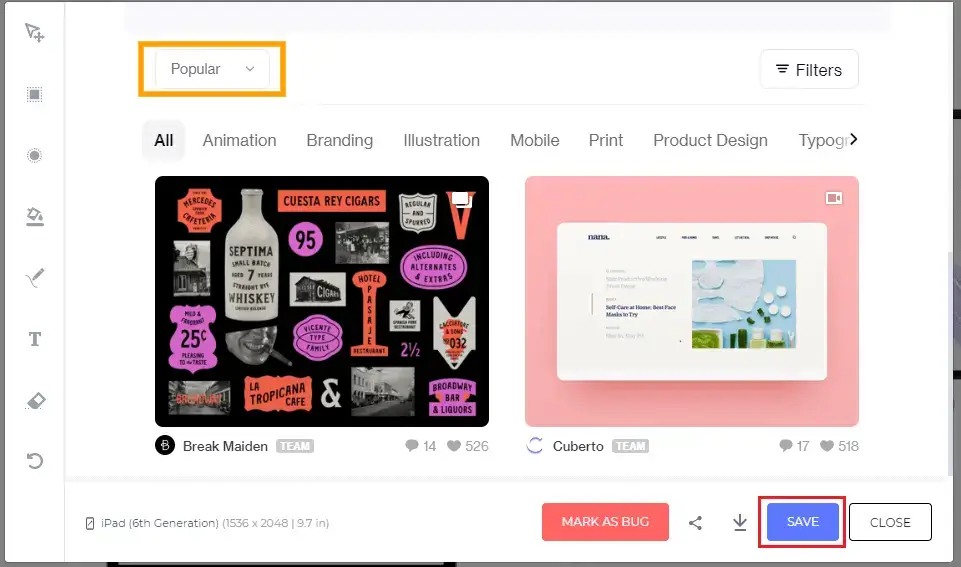
This will save your screenshot inside the Media over your LT Browser. You can find these saved screenshots by clicking Media in the header of the LT browser.
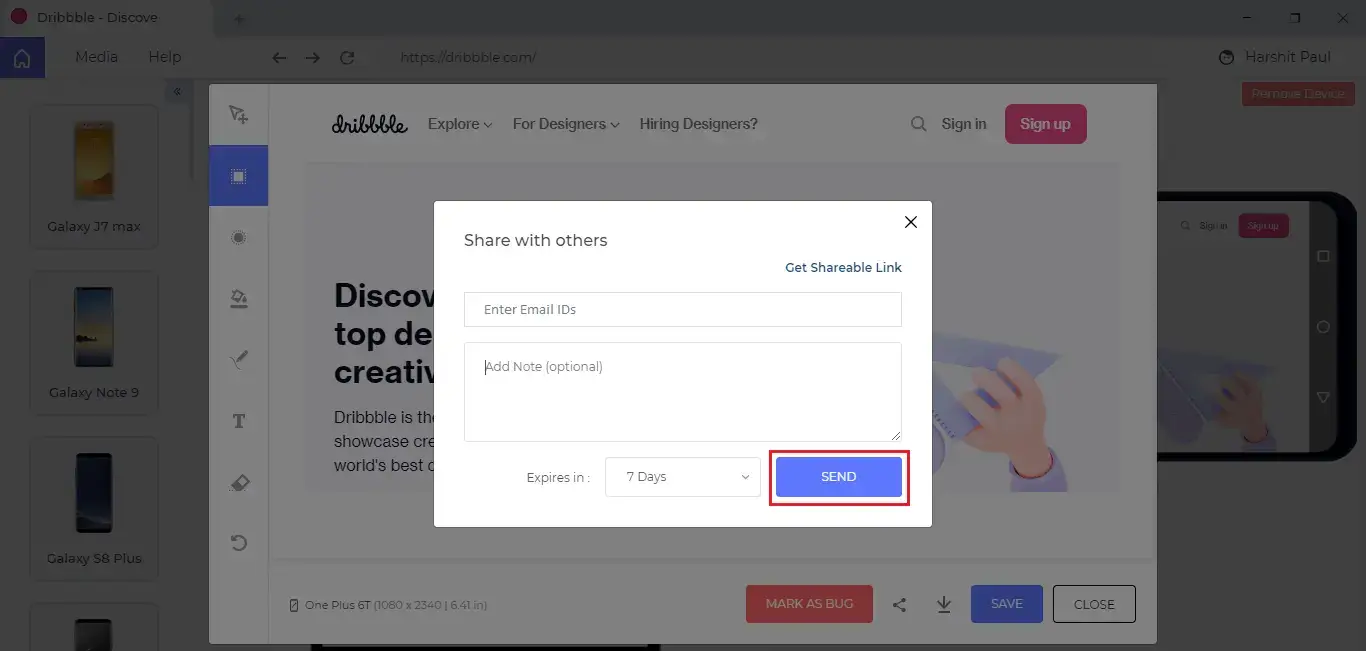
3. Sharing The Screenshot To Multiple Email IDs
Step 1: After highlighting the screenshot, click on the share icon.

Step 2: You will be prompted with the below screen where you can enter the note or description around your observation of the screenshot. You can also feed multiple Email IDs and as you hit the Send button an email is sent to the specified Email IDs from the LT Browser. This E-mail would contain your highlighted screenshot as well.
4. Get Shareable Link
You may have noticed the option to get shareable link after you hit the share icon.
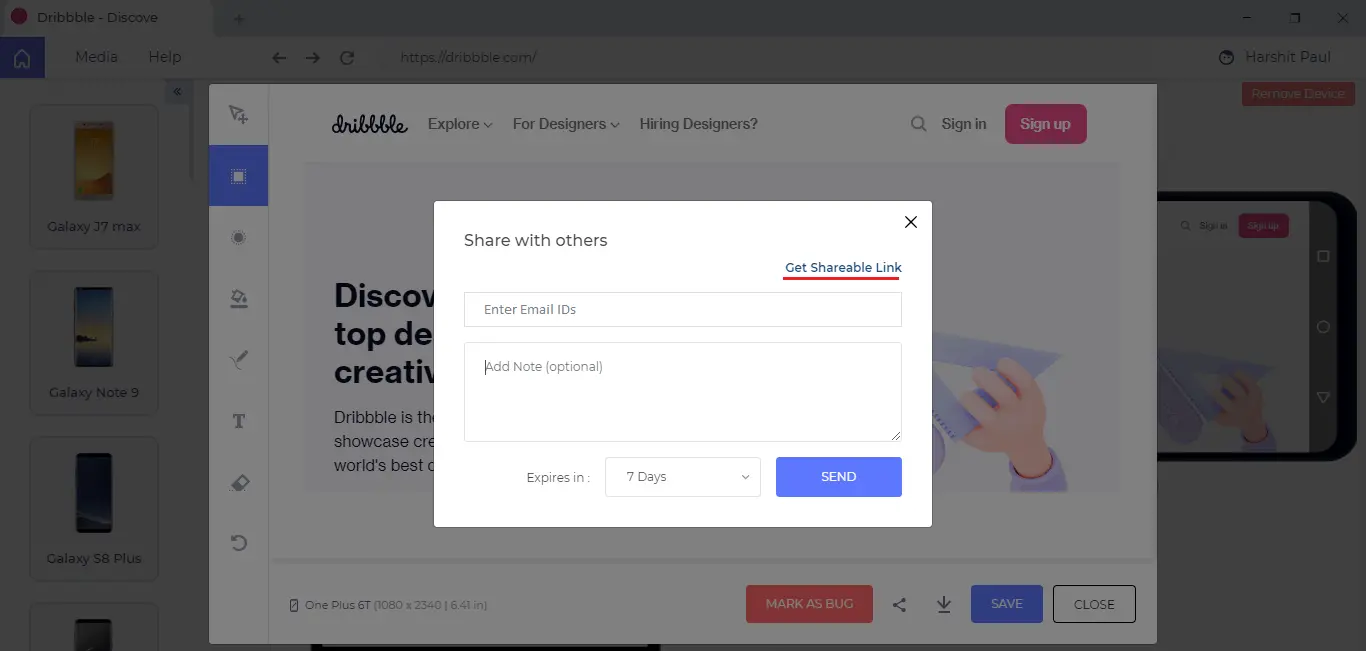
If you click on it, you will generate a shareable link to access the highlighted image. You can copy the generated link and share it with your teammates.

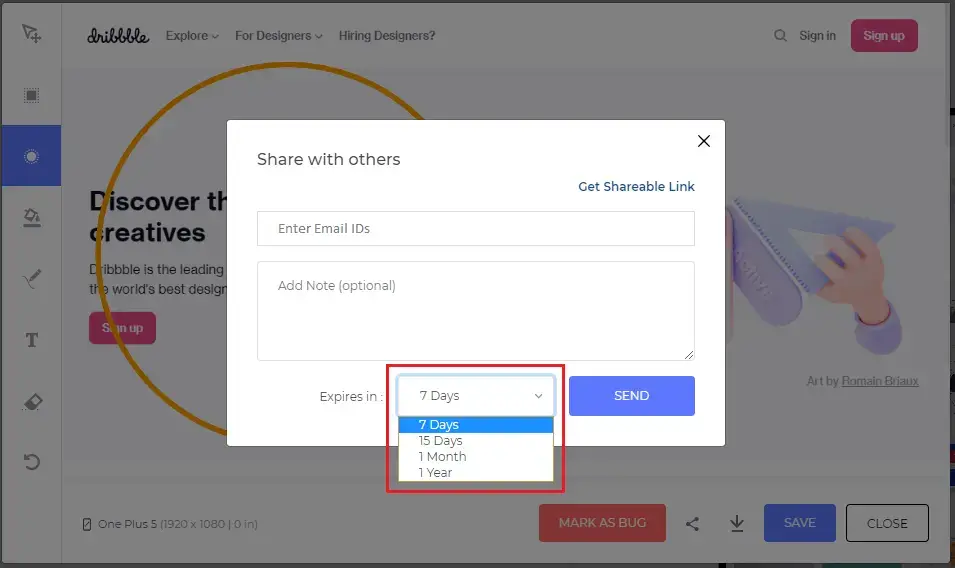
Note: You can set a validity to the shared screenshots and shareable link.
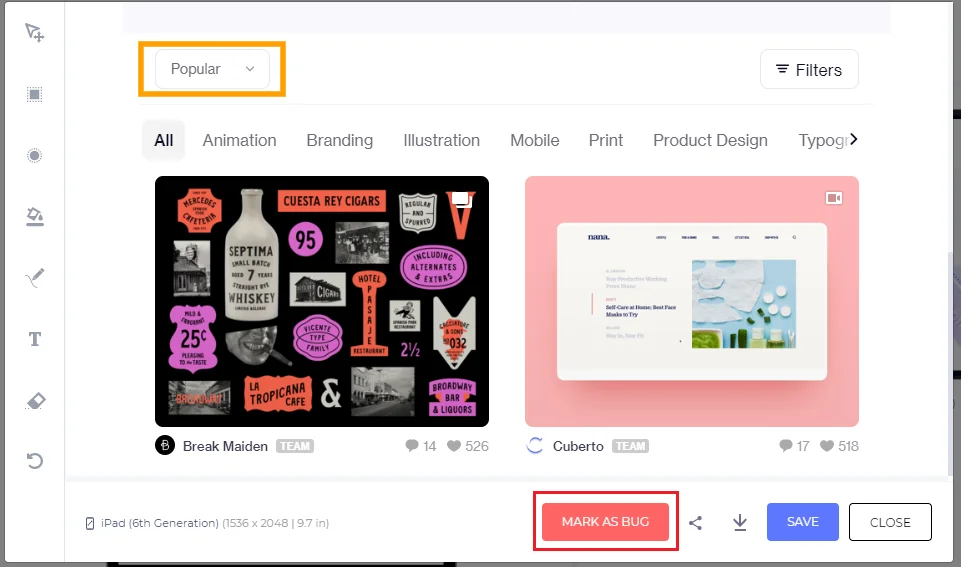
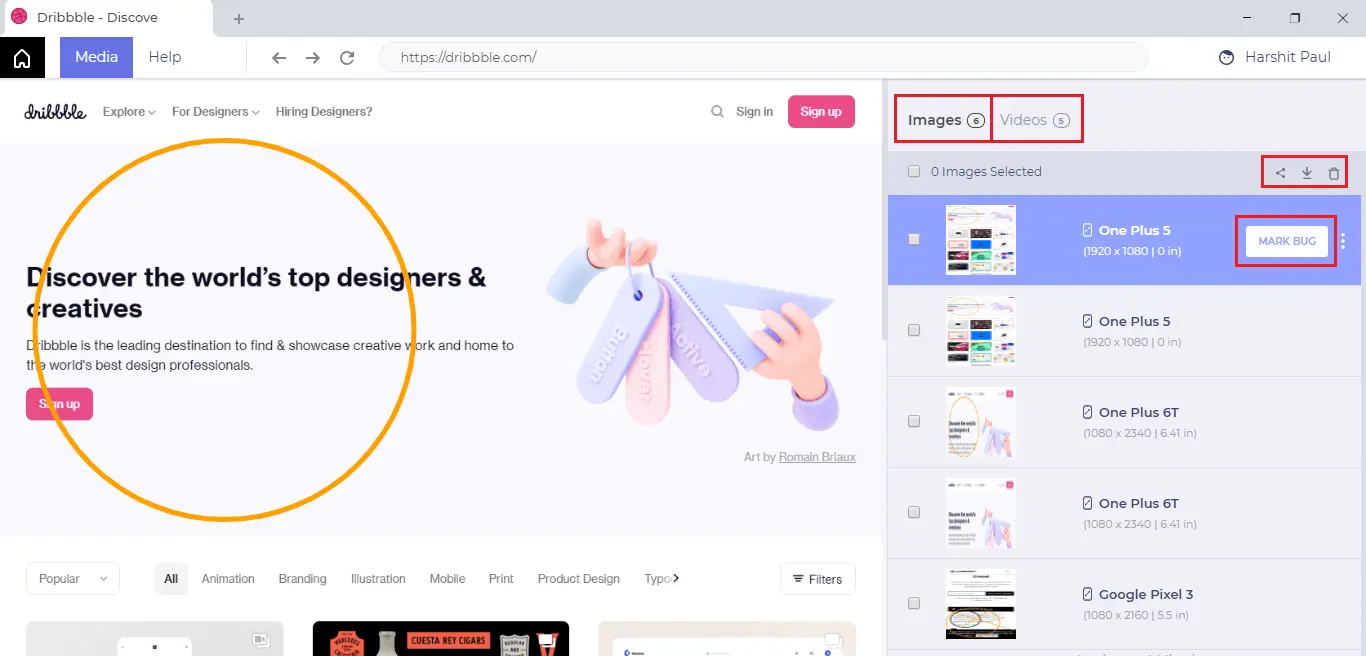
5. Mark As Bug Directly To Third-Party Tools
TestMu AI offers numerous integrations to third-party tools for project management, bug tracking, instant messaging, CI/CD and more. Once you integrate your TestMu AI account with your desired third-party integration. You can leverage the mark as bug button to push the bugs directly to your projects over third-party platforms. Meaning, you can share your highlighted screenshots across Jira, asana, Trello, slack and more.
As you click on the mark as bug button, you will be presented with the screen which will present you few of TestMu AI integrations. If your favorite integration isn't presented then you can click on more integrations to view all of the TestMu AI integrations.
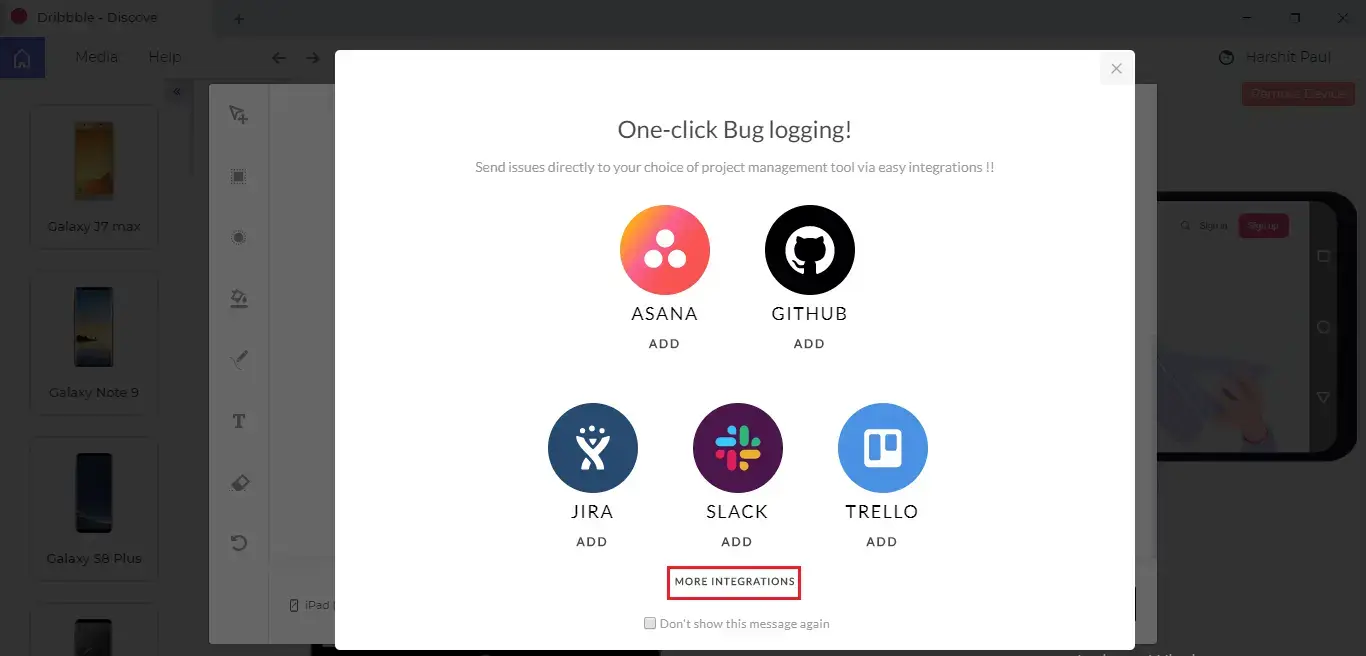
Once you integrate the LT Browser with your favourite third-party integrations then you can log bugs directly from the LT Browser to your project over a third-party tool such as GitLab, GitHub, and more.
How To Record Video Of A Test Session?
Step 1: Open you website in any device and click on the video recording button, you will be able to record your interaction of the website within the device.
Step 2: Perform live-interaction with your website. You will find a timer on top of the device. This timer indicates the length of the video recording of your live testing session. The timer will continue to run unless you stop the recording by clicking over the same video recording button.
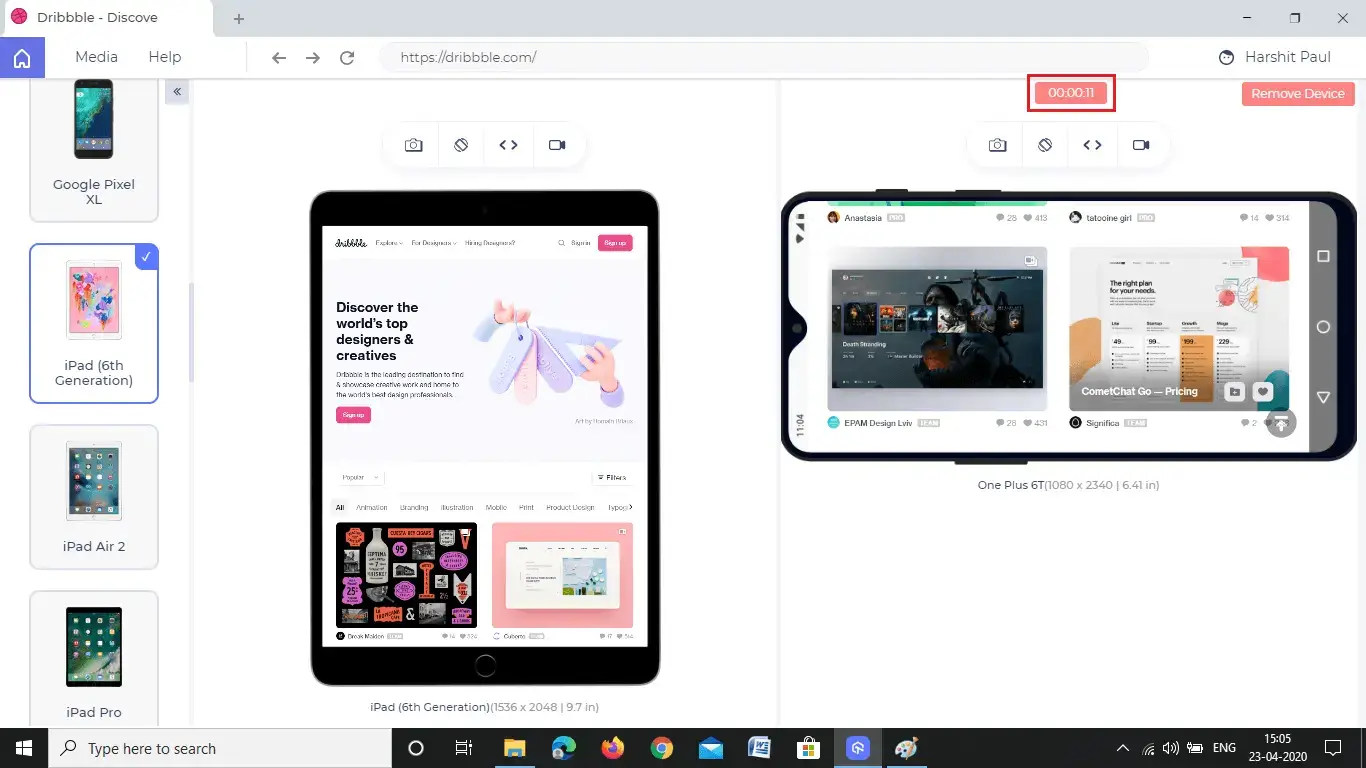
Step 3: After you stop the recording, you will find a message on top of the LT Browser indicating that your video of the test session has been successfully saved.
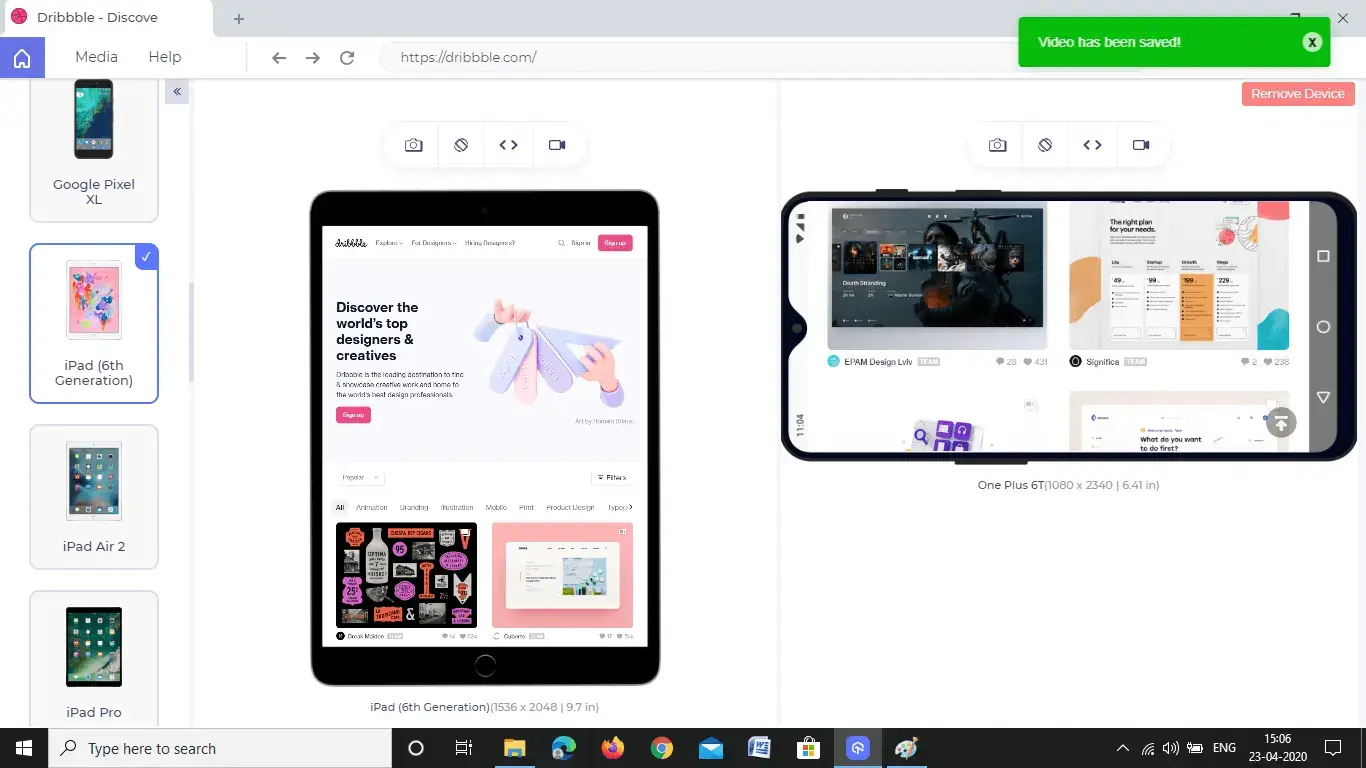
Now, to access this video you will need to go to Media.
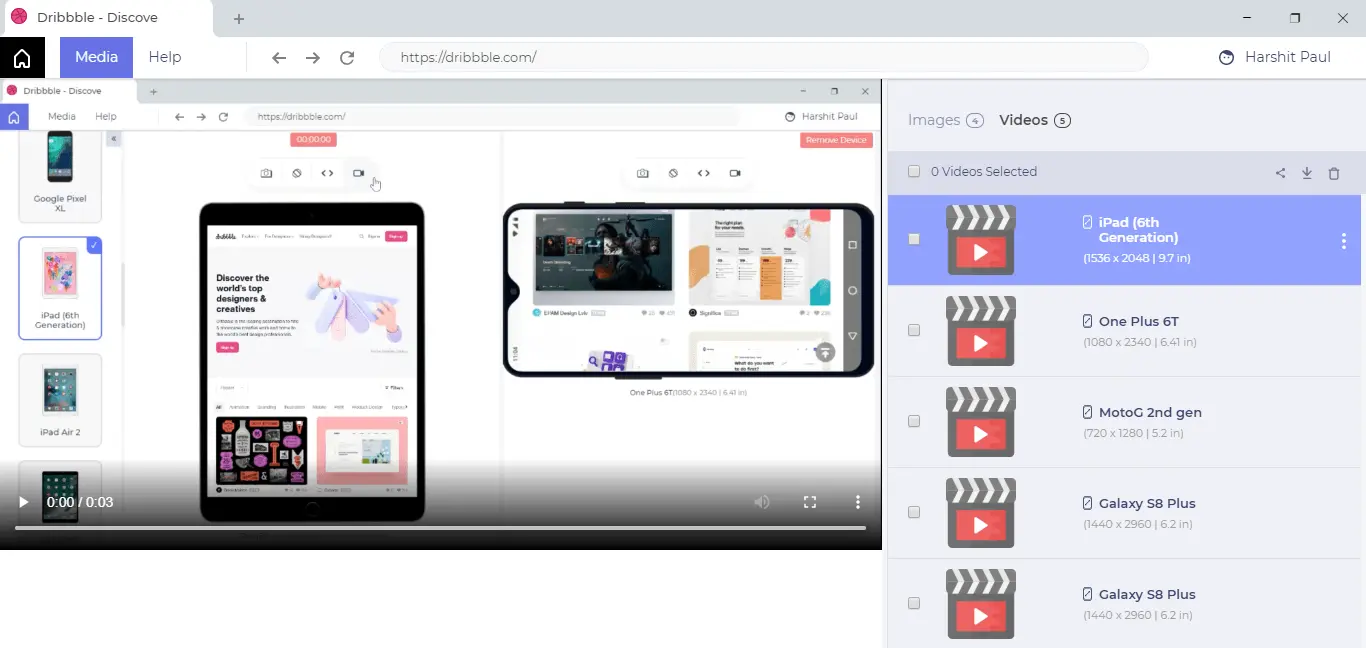
What Is Media?
To access any of your captured screenshots or recorded video, visit the Media. Consider Media as a Gallery which will comprise all your images and video that you may capture while testing your website through the LT Browser.
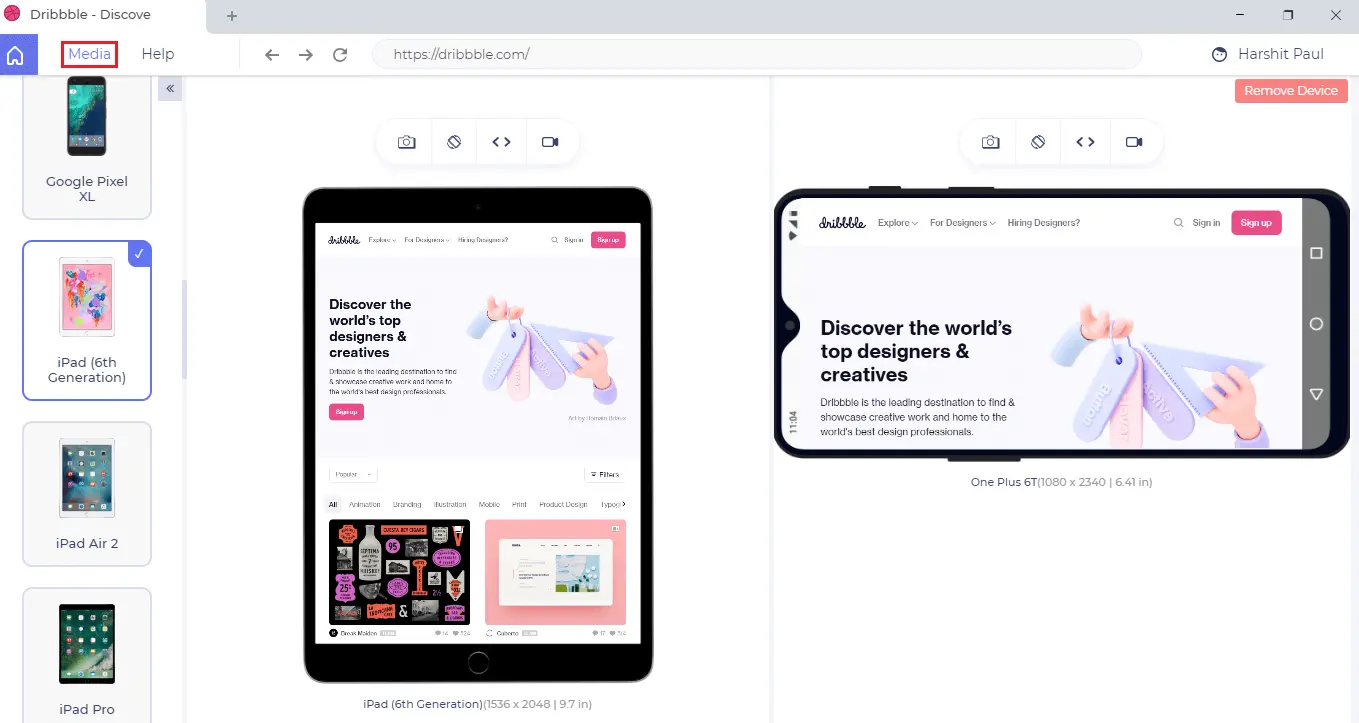
In Media, you'll find tabs for Images & Videos. You can download, share, and delete any image or video from the Media tab. And similar to in-built image editor, you can mark a bug from an image stored in Media as well.
If you switch to Video tab, you will find full recordings of your live interaction from different test sessions.
Quick Access to Media: You can also use keyboard shortcut to visit Media instantly.
- Windows:
Ctrl+M- macOS:
Command+M- Linus:
Ctrl+M
How To Test Locally Hosted Web-Apps or Websites?
All you need to do for testing your locally hosted web-apps or websites, is to provide the localhost string as the URL in the header of your LT browser and you'll be able to access your localhost server.
For example, if you are running localhost with Apache through XAMPP and have your website in XAMPP's htdocs folder.
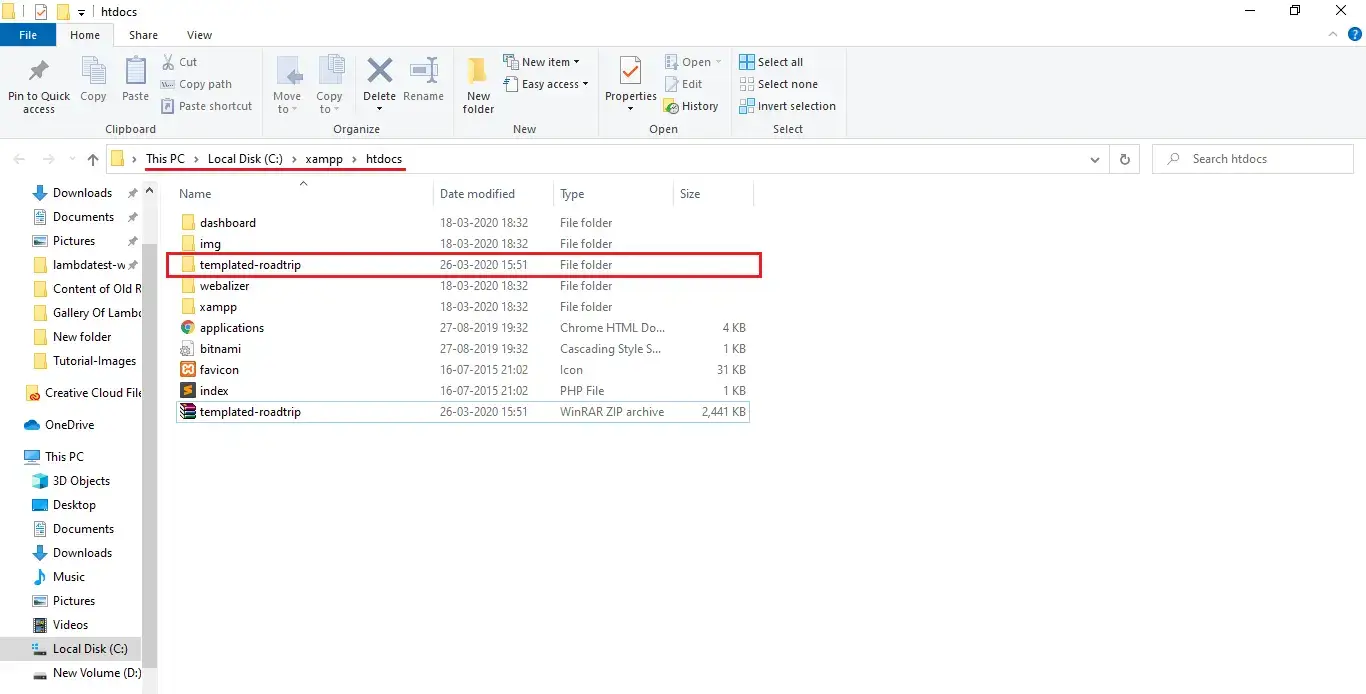
All you have to do is open the localhost and append the URL with the webpage or website-folder you want to test.

It is as simple as that!
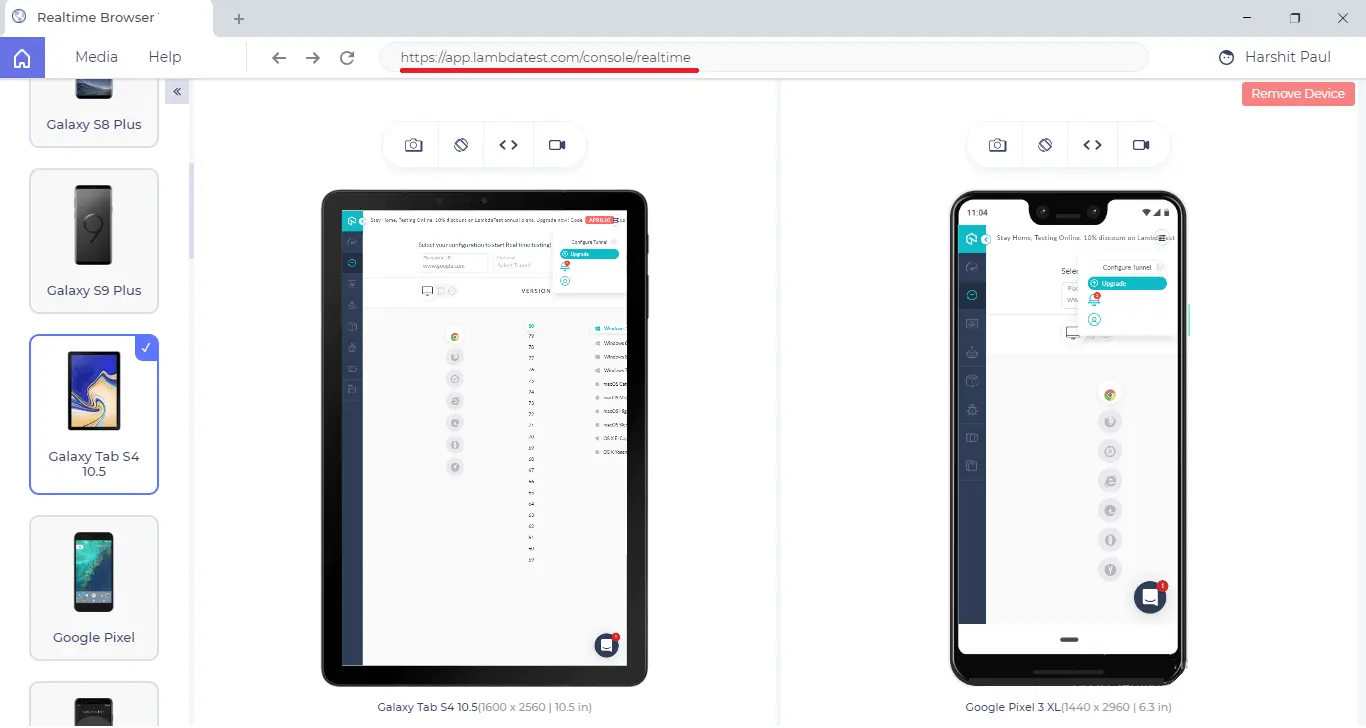
Can I Test My Web Pages Behind Login?
Yes, you can! LT Browser aims at providing responsive testing along with live-interactive testing experience. You can simply load a website, login to the web-application and start testing your web pages that come after login.
Here is a screenshot of the TestMu AI web-application which is captured after logging in from the TestMu AI website.
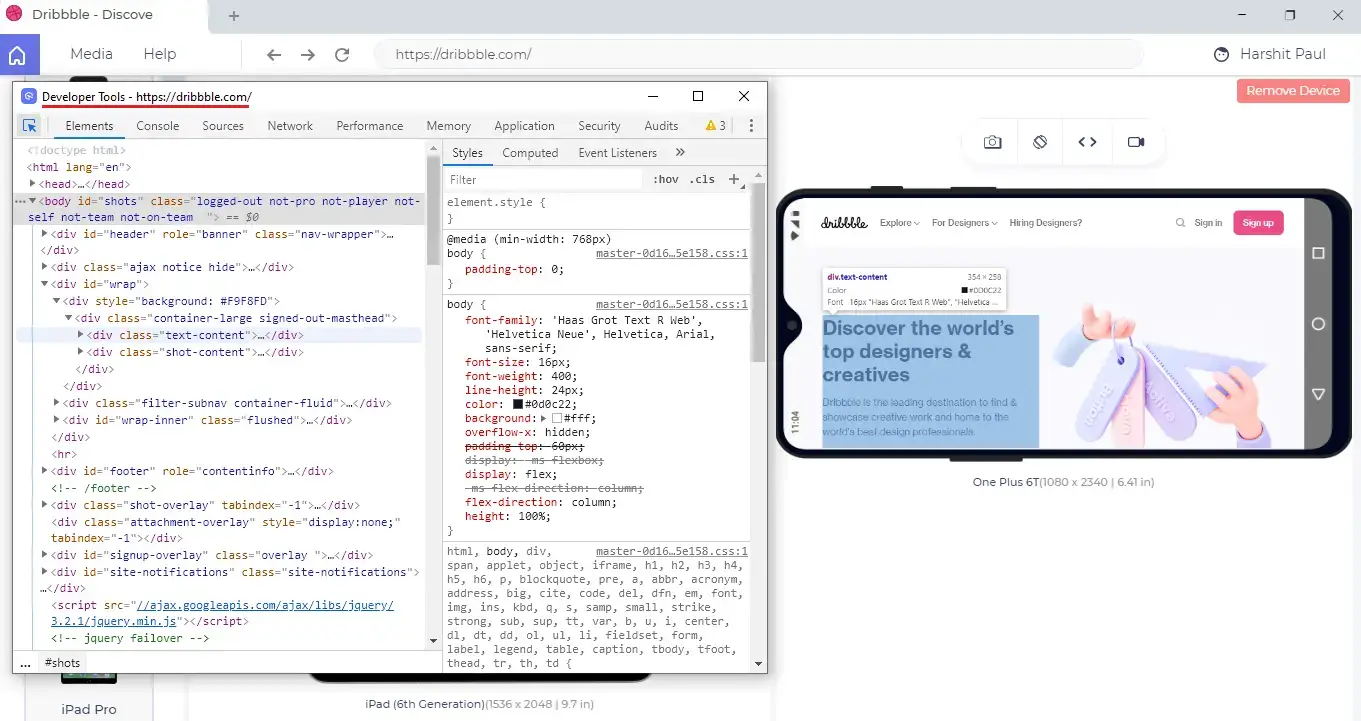
How To Debug My Website In LT Browser?
With LT Browser, not only can you evaluate how your responsive web design might look over 50+ device viewports but you can also debug your web-application to figure out the root cause behind a browser or UI bug.
To debug your website, click on the highlighted button with the debug icon.
As you click on the debug icon, you will be able to access the developer tools.
Ta da! You can now perform responsive testing and debug any issues on the go. Cheers!
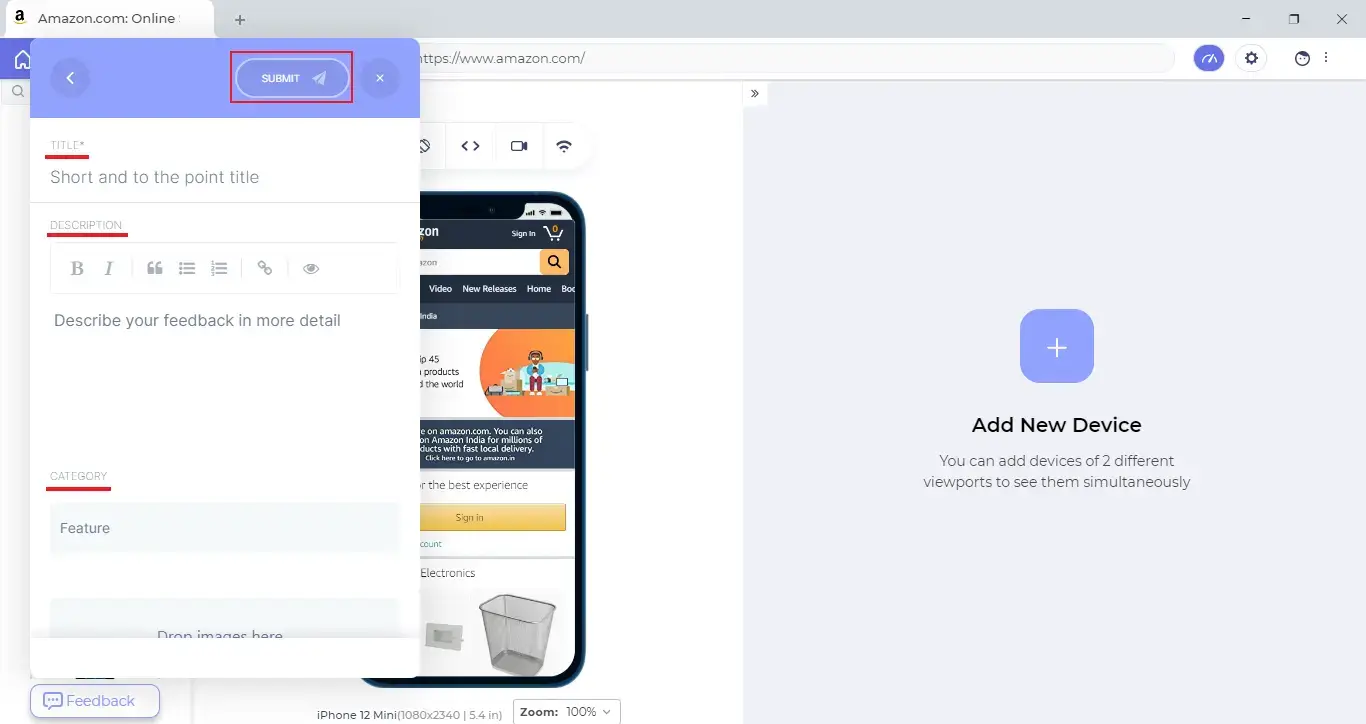
What Is LT Browser Feedback Board?
A feedback board is an ideal way to acquire immediate feedback from the users. You can use the LT Browser feedback board to leave your suggestions/feedback on LT Browser.
You can leverage feedback board to give feedback or suggestions about the next features to develop, integrations to implement, issues and enhancements on LT Browser.
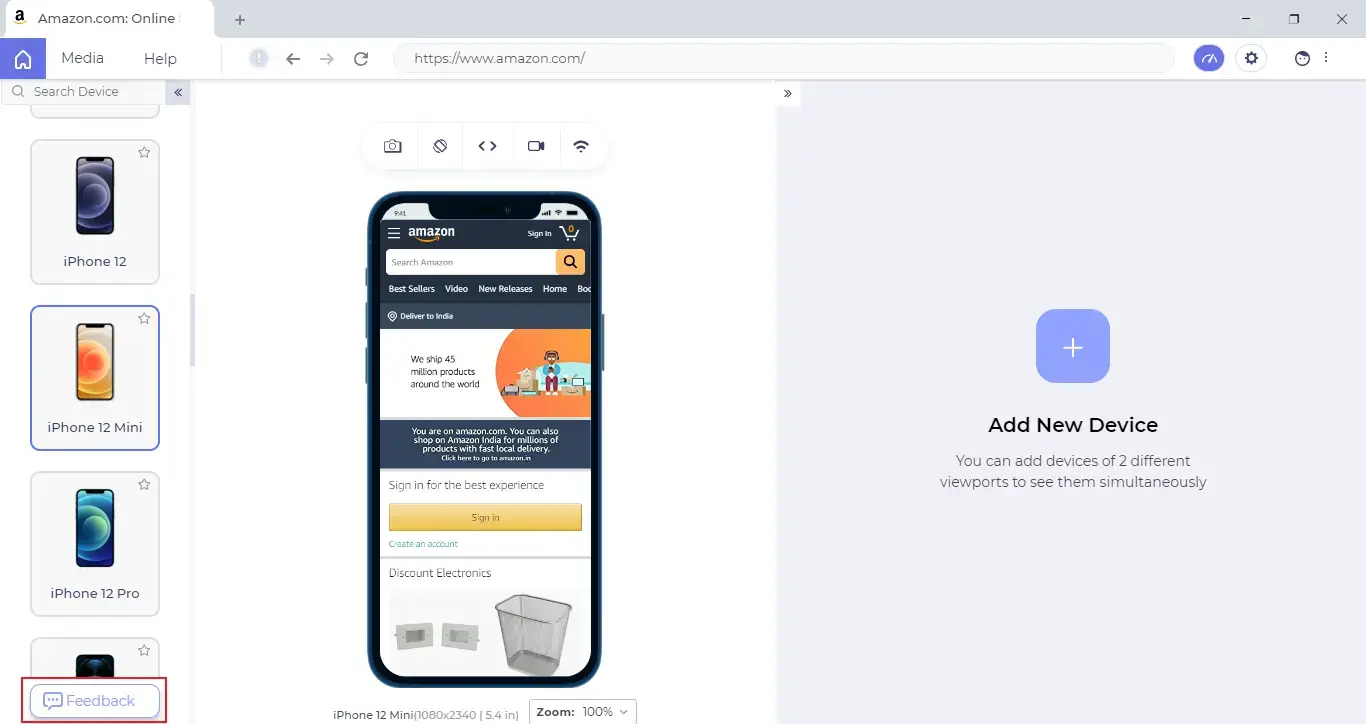
Step 1: To submit the feedback,click on the Feedback icon.
Step 2: Click on ADD icon that says Give Feedback.
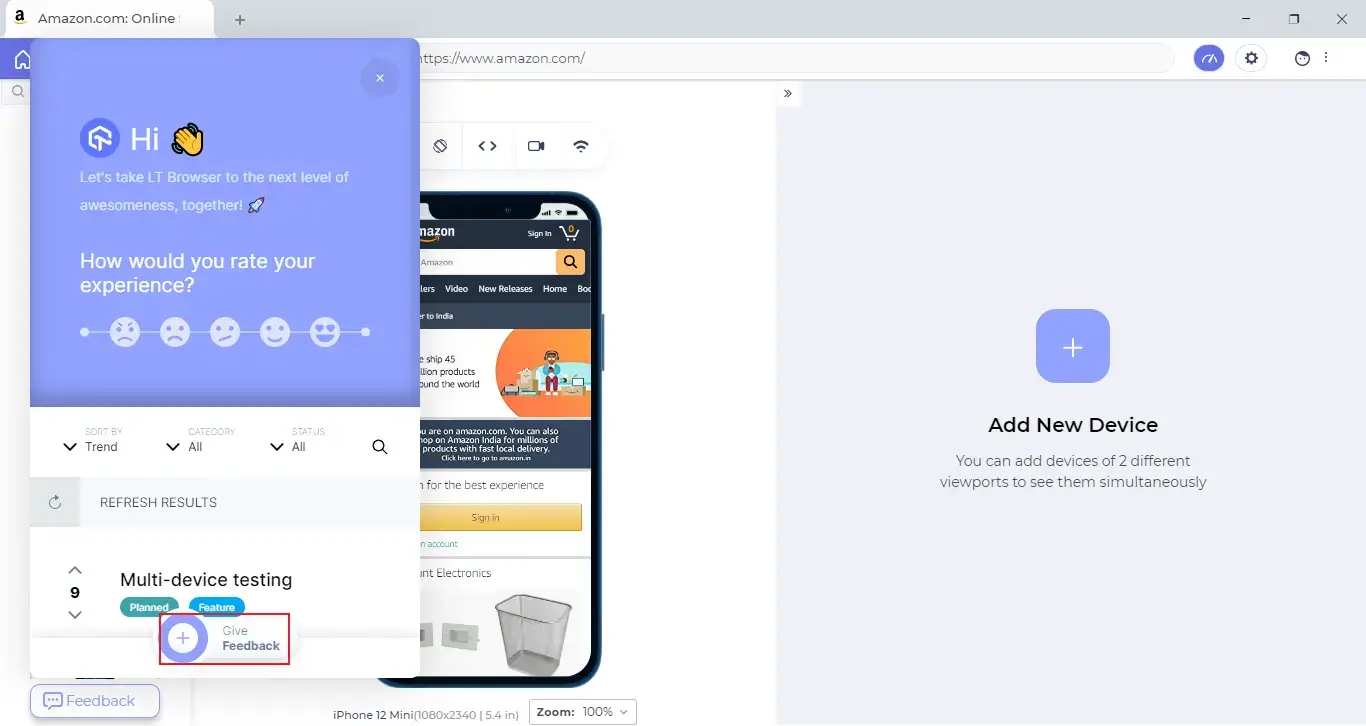
Step 3: A Feedback form will open up where you will ask to enter your feedback details like title, description, category and images. After furnishing the required details, click on the Submit button.
Keyboard Shortcuts
You can't really work with a browser which doesn't have any keyboard shortcuts, right? Well, don't worry! LT Browser has got your back on that! Here are the keyboard shortcuts for LT browser.
For macOS
| KEYBOARD SHORTCUT | WHAT DOES IT DO? |
|---|---|
| Command+Z | Undo |
| Shift+Command+Z | Redo |
| Command+X | Cut |
| Command+C | Copy |
| Command+V | Paste |
| Command+A | Select All |
| Ctrl+Command+F | Toggle Full Screen |
| Command+M | Minimize |
| Command+Q | Quit |
| Command+T | Opens a new tab. |
| Command+W | Close the active tab. |
| Command+Shift+M | Navigate to Media page. |
| Command+Shift+H | Navigate to Home page |
| [ | Expand and collapse the sidebar |
| Shift+P | Viewing the performance report |
| Command+Shift+R | Replacing or adding a right device |
| Command+Shift+D | Removing the right device |
For Windows & Linux Operating Systems
| KEYBOARD SHORTCUT | WHAT DOES IT DO? |
|---|---|
| Ctrl+R | Reload |
| Ctrl+Z | Undo |
| F11 | Toggle Full Screen |
| Alt+F4 | Close |
| Ctrl+X | Cut |
| Ctrl+C | Copy |
| Ctrl+V | Paste |
| Ctrl+T | Opens a new tab. |
| Ctrl+W | Close the active tab. |
| Ctrl+M | Minimize. |
| Ctrl+Shift+M | Navigate to the Media page. |
| Ctrl+Shift+H | Navigate to the Home page. |
| Shift+Ctrl+Z | Redo |
| Ctrl+Shift+D | Removing the right device |
| Ctrl+A | Select All |
| [ | Expand and collapse the sidebar |
| Alt+P | Viewing the performance report |
| Ctrl+Shift+R | Replacing or adding a right device |
That is all about the LT browser. Don't forget to share you experience or questions with us. You can drop us an email through support@testmuai.com or you could wave us a hello over our 24/7 customer chat support. Happy testing! :)
