AutoSplit Strategy
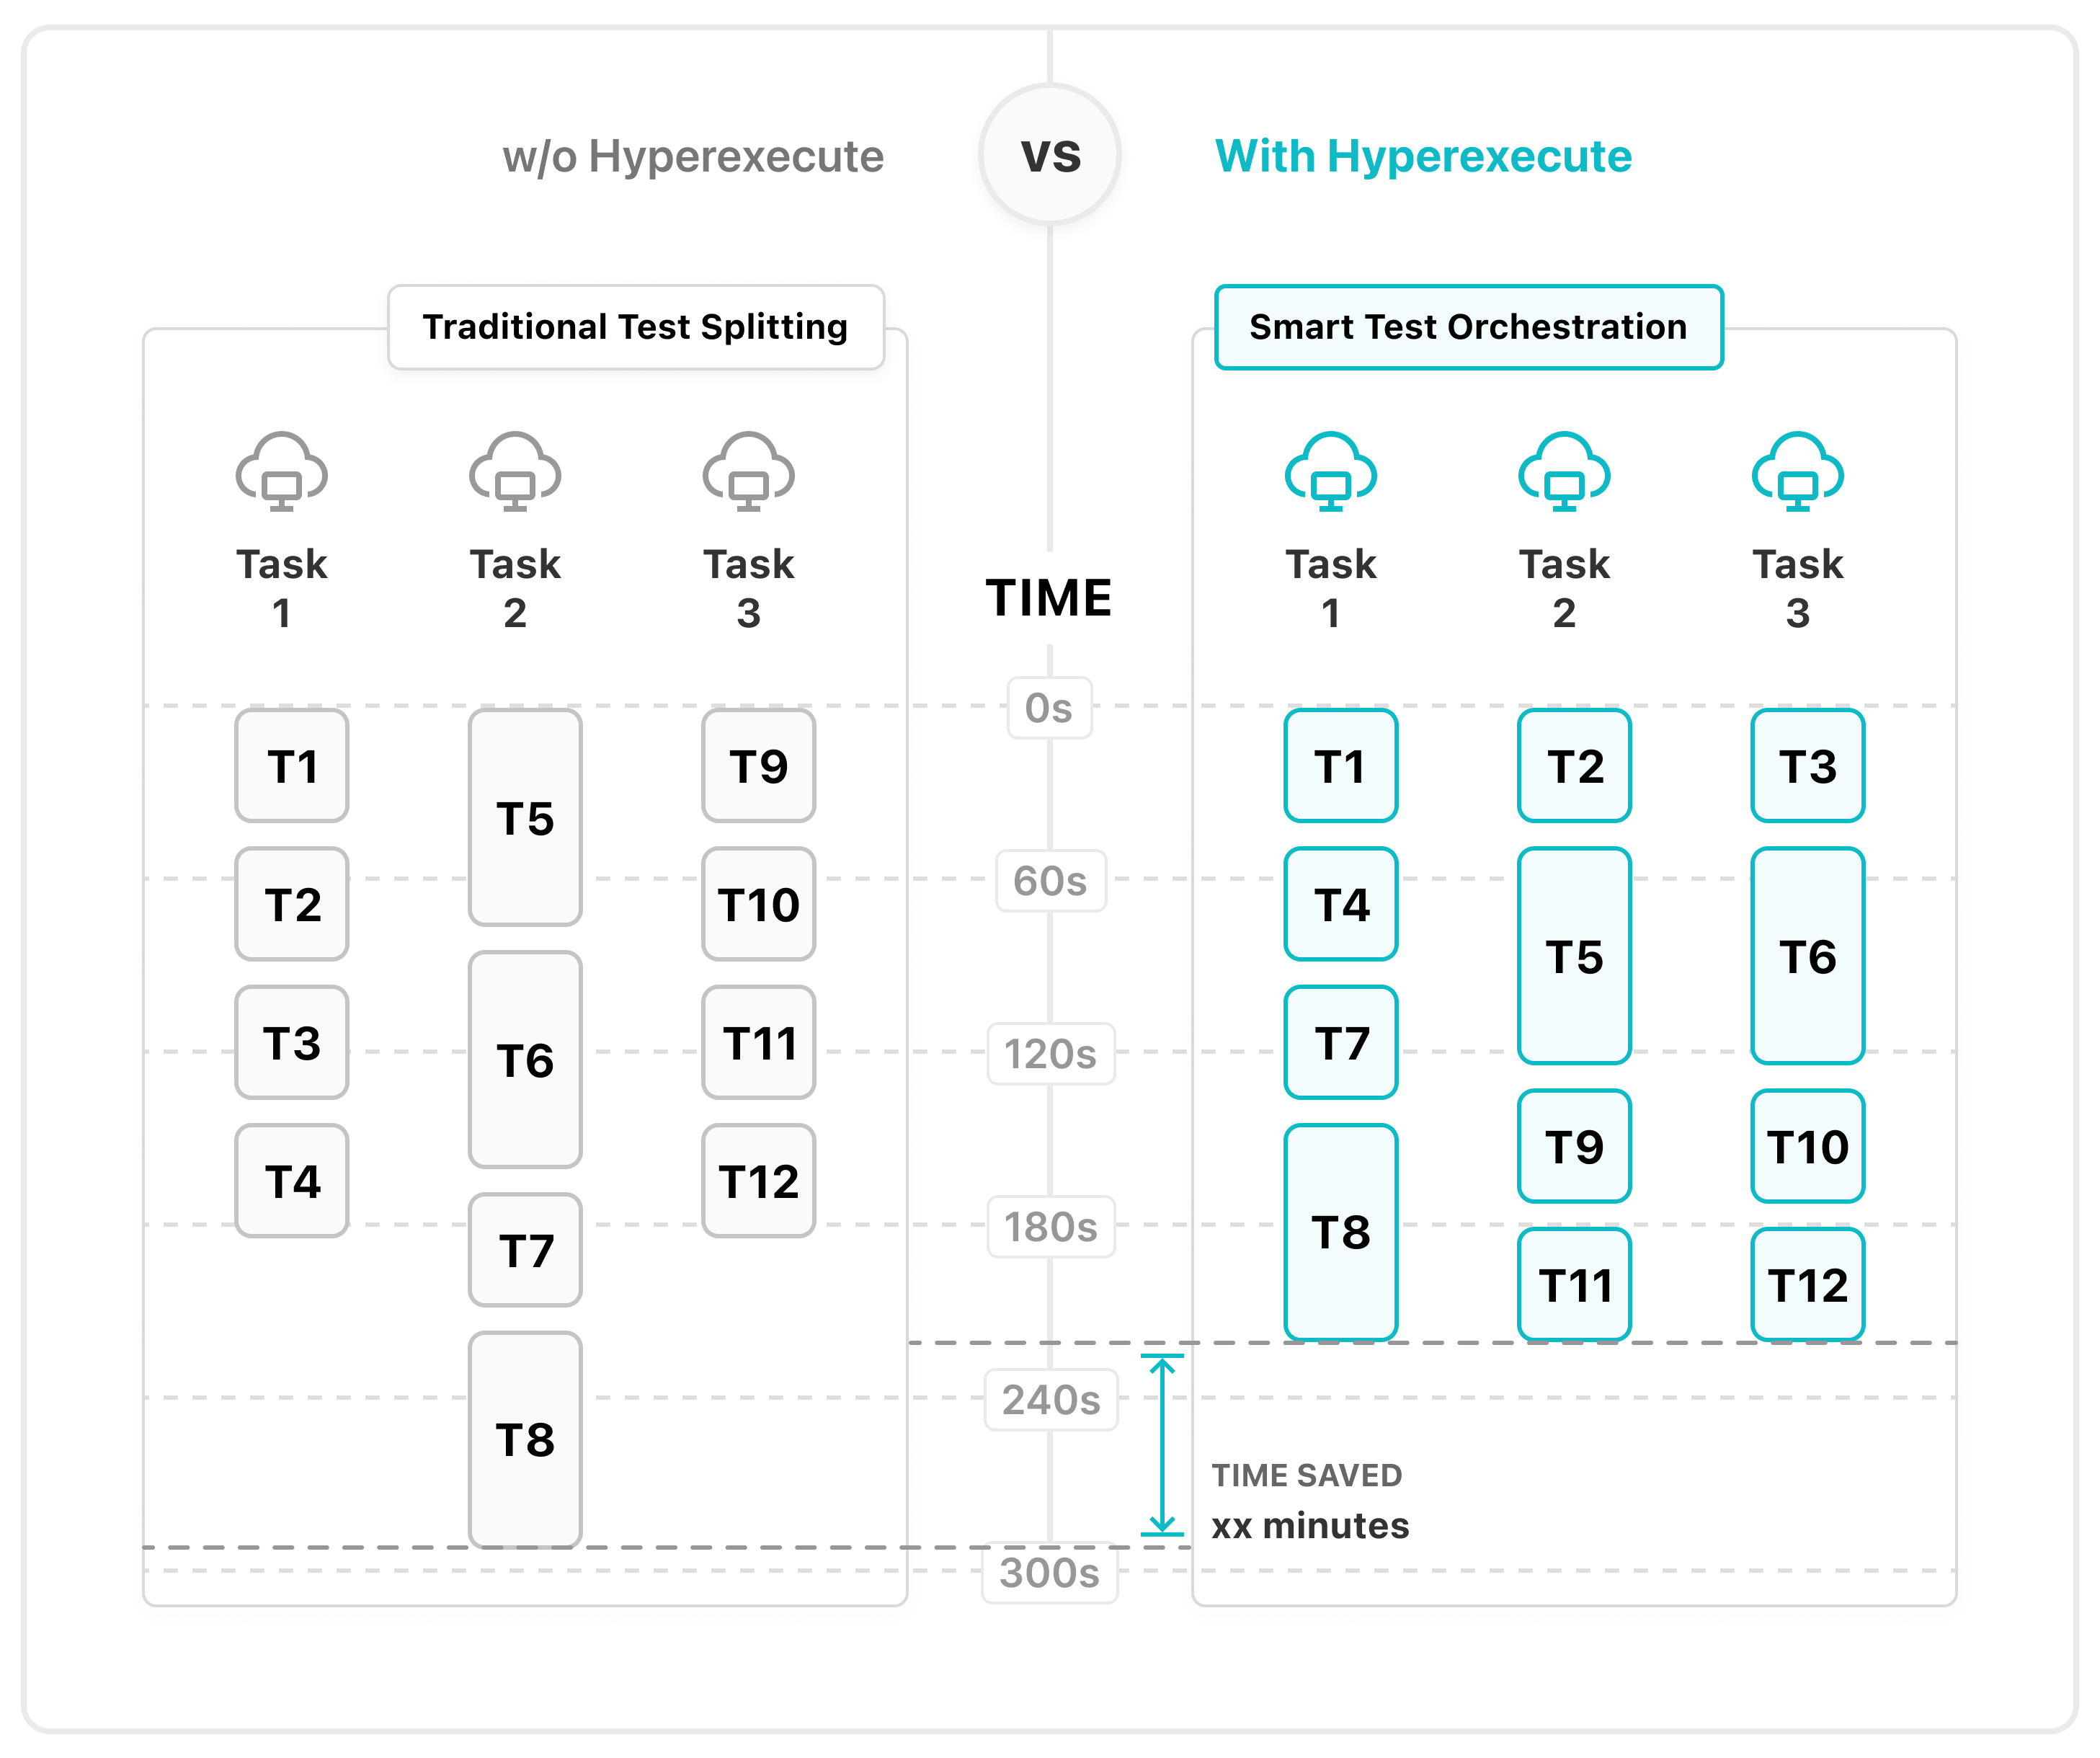
The Smart Auto Split Strategy enables you to distribute tests across multiple virtual machines efficiently. This strategy ensures optimal utilization of concurrency by allowing you to split tests based on various levels, such as files, modules, and scenarios.
Key Benefits of Auto Split Strategy
- Efficient distribution of tests across nodes.
- Fine-grained control over test distribution.
- Maximization of concurrency for faster results.
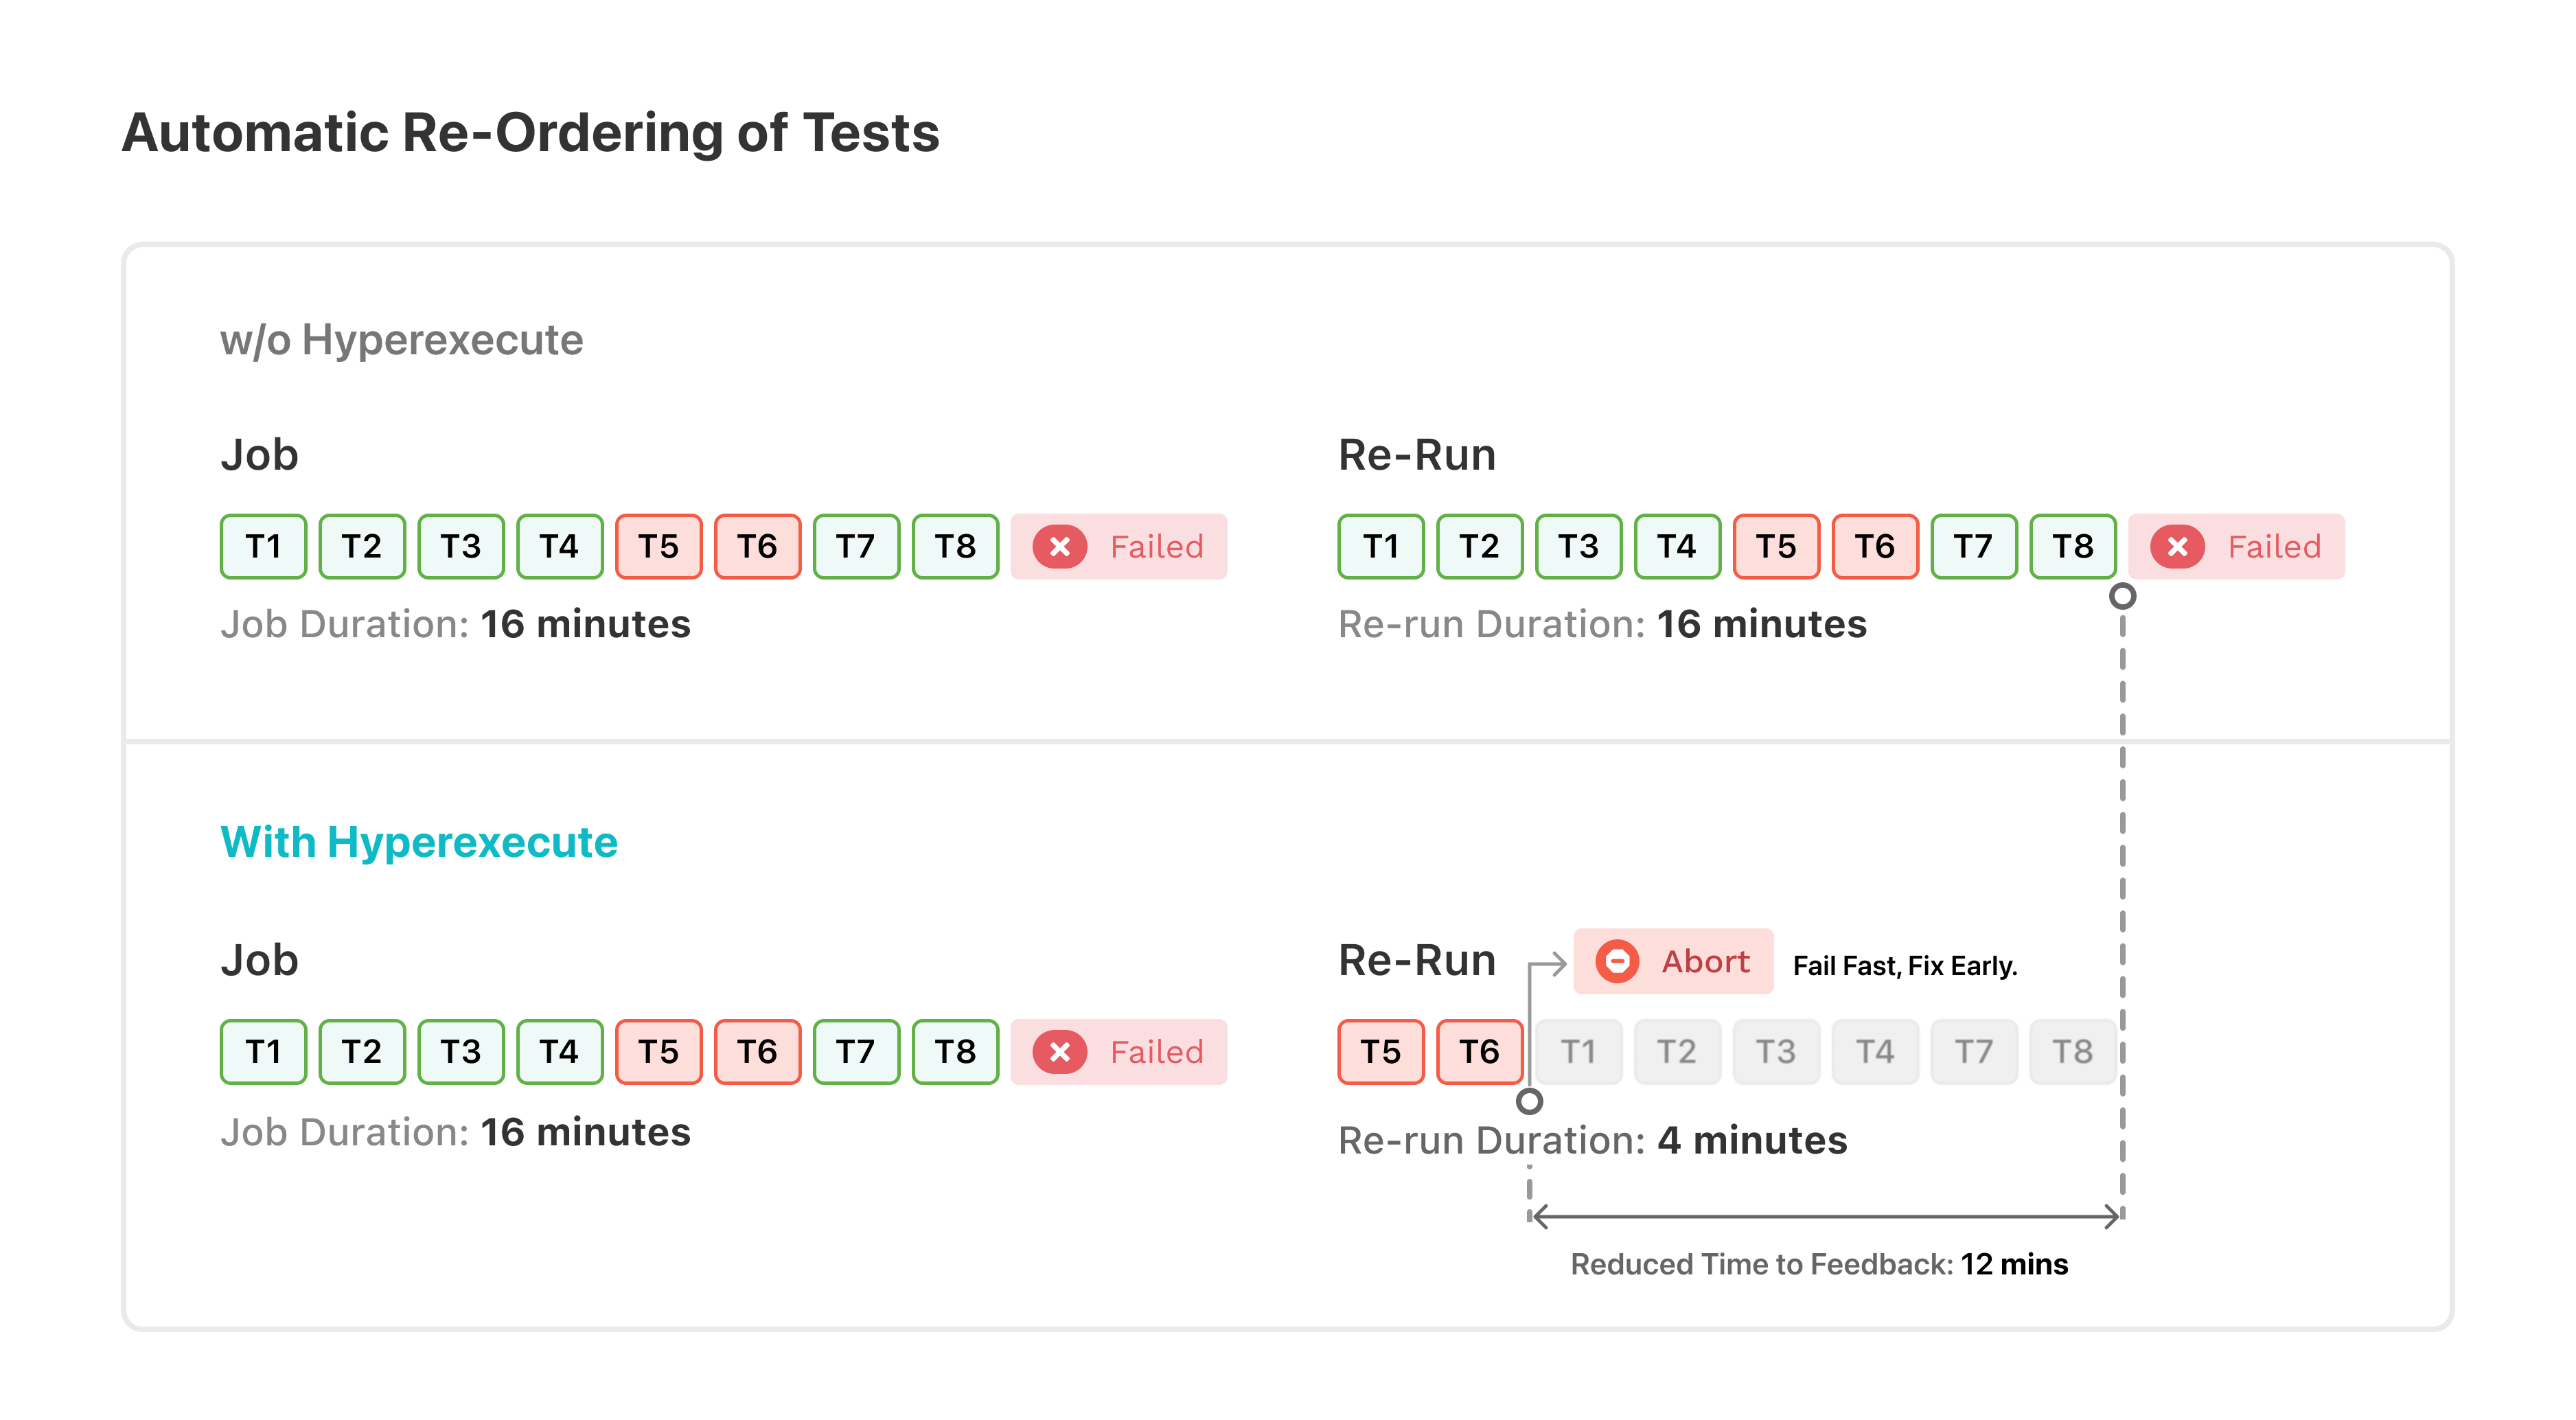
- Automatic reordering of test cases, prioritizing failed ones for faster feedback in subsequent executions.
HyperExecute provides flexibility to distribute tests at file level, scenario level, module level, and practically anything, provided you have a way to list down all the possible values of the entity that has to be distributed.
Enabling Auto-Test Splitting
For enabling auto-test splitting, set the autosplit key to true in the HyperExecute YAML file.
autosplit: true
Along with that, you need to provide testDiscovery and testRunnerCommand flags in your YAML file as well.
Configuration Parameters
1. concurrency
The concurrency key indicates the total number of concurrent sessions that can run in parallel. With both of these commands (testDiscovery and testRunnerCommand), HyperExecute intelligently distributes tests over multiple virtual machines as specified by the concurrency directive in the YAML file.
For example, assume that the total number of test scenarios [discovered via testDiscovery] are 27 and concurrency is set to 7. In this case, HyperExecute would allocate 7 nodes for running the 27 tests in parallel.
concurrency: 7
2. testDiscovery
- It is used to list down all the values to be distributed. HyperExecute will execute the
testDiscoverycommand verbatim and expects distinct values to be on separate lines. It can be as simple as a list of files on different lines. - This can be used later to split tests over files, modules, or any level supported by your language and framework.
- It is used for locating/discovering the tests that are a part of the project. You can use the combination of grep,
awk,sed, or any valid command to locate the tests that you intend to run. For NodeJS, usually at file level, for Python at class level, in Java at class and module level. For Cucumber based frameworks at scenario level or feature level or at tag level.
A few samples are given below:
# The following command (or value) when assigned to testDiscoverer key searches for the scenarios by matching the string Scenario [or Scenario Outline] in the .feature  files located in the *src* directory of the project.
testDiscovery:
  type: raw
  mode: remote
  command: grep -nri 'Scenario:\^|Scenario Outline:' src -ir --include=\*.feature |  awk '{print $1}' | sed 's/\.\///g' | sed 's/\(.*\):/\1 /'
testDiscovery:
  type: raw
  mode: remote
  command: grep 'class name' testng.xml | awk '{print$2}' | sed 's/name=//g' | sed 's/\x3e//g'
3. testRunnerCommand
- It is used to run a single item from the
testDiscovery. You need to add$testin thetestRunnerCommandfor interpolating one of the values from thetestDiscovery. - It tells the system how to run a single test entity in isolation. This entity could be a file, module, feature or scenario. Test runner command will run over each of the values extracted from the
testDiscoverycommand.
Advanced Concepts
Automatic Reordering of Test Cases
Suppose you are performing regression testing in your large test suite project via github actions, but some test cases are failing unexpectedly for no reason. These flaky tests have become a time-consuming nightmare for QA and developers. After fixing the issues, you trigger the testing pipeline again, but you have to wait to check the status of that particular test.
It would be much better if those flaky tests ran first in the sequence, so you don't have to wait longer to see the status of your previously failed tests.
That's exactly the problem HyperExecute's autosplit with automatic re-ordering aims to solve! It's like having a testing assistant who remembers which tests were tricky last time.
How does it work?
When you run tests with HyperExecute's autosplit feature, your tests are divided up and run simultaneously on multiple machines, executing them in parallel. This is great for speeding things up, but during this run, HyperExecute keeps track of which tests fail.
After the initial run is complete, HyperExecute takes note of the failing tests. It may use this information to automatically reorder your tests for the next time you run them.
On subsequent runs, HyperExecute might prioritize the failing tests from the previous run for faster feedback.