HyperExecute GUI App
HyperExecute Graphical User Interface (GUI) streamlines your test automation workflow and brings HyperExecute's power of test orchestration with the most intuitive way to interact. HyperExecute GUI makes testing simple, fast, and powerful. It abstracts all technical complexity to make high-performance test execution available to everyone.
Why HyperExecute GUI?
HyperExecute has been a cornerstone for automation testing, offering unparalleled flexibility with its YAML configurations and command-line interface. Now, with HyperExecute GUI, you can experience AI-powered test detection, set up test environments with simple clicks and run your tests without coding.
Prerequisites
HyperExecute GUI is currently in BETA and supports the Java TestNG Framework (with Java Version 11 or higher). We're actively working on expanding support for additional frameworks. If you have specific framework requests, please reach out to our support team.
1. HyperExecute Access : You need a TestMu AI account to use the HyperExecute GUI. If you don’t have one, sign up now. Ensure your account includes HyperExecute access (free or paid plan) to get started.
2. UnderPass App Download : Before getting started, download the TestMu AI UnderPass installer from your dashboard and install it on your system. Run the installer by following the on-screen instructions and launch the application.
Currently HyperExecute GUI is a part of the TestMu AI UnderPass Application. If you already have UnderPass app on your system, please update it to the latest version.
You can download the app directly from your HyperExecute Dashboard or simply click the links below based on your operating system:
Getting Started
Step 1: Select and Analyze Your Project
Launch the application, log in with your TestMu AI credentials, and select your test project folder. The GUI analyzes your project i.e. the framework and language, network connectivity etc. Once the analysis completes, click "Proceed" to continue to the next step.
If you do not have a project handy, please feel free to use this Sample Project for trying out the GUI.
The GUI will check the system and your project to ensure everything is ready. If any issues are found, you'll see clear instructions to resolve them. Some common issues faced by the users are:
- Missing programming language or package manager: If your project uses a language or package manager that isn't installed on your computer, the GUI will guide you through installing it.
- Network connectivity issues: If the GUI can't connect to TestMu AI servers, it will ask you to set up the necessary network settings through proxy.
Step 2: Manage Configurations
A "Configuration" is a saved combination of selected tests and execution settings that helps you create different run-profiles for easy management and operation.
- For new users: A default configuration will be created to help you get started quickly. You can select the tests and run config settings as per your requirements.
- For existing users: If you have existing configurations (version 0.2 YAML files) in the project, they'll be automatically imported, preserving all your settings. This ensures a smooth transition for existing HyperExecute users while providing a more intuitive interface.
Quick Edit and Run
At the configuration listing page you can find basic details and tags for each configuration. You can also make quick changes and run the configuration without going inside the configuration. There are a few other operations which you can access from this page like Duplicate, Rename, Delete or Download the configuration as YAML.

What is a Configuration?
Step 3: Discover and Select Tests
Once you navigate to any Configuration, the app will automatically initiate Test Discovery. Test Discovery is an automated process that scans your project to identify and organize all test cases of your project. You can use either of the following methods for Tests Selection
Manual Selection
Allows you to browse and select tests individually or in groups. Tests can be organized by Suite Tests, Files, Classes or Methods for better visibility and easier navigation. You can select or deselect tests manually using checkboxes. This method works well for smaller test suites or when you need precise control over specific test cases.
Query Selection
For larger test suites, the query selection provides powerful filtering capabilities to automatically select tests based on specified criteria. For detailed instructions on creating and using advanced queries, refer to our Query Selection Guide.
- Orchestration Level: When using query selection, you can define the orchestration level to determine how tests are distributed and executed across multiple parallel instances. This feature helps optimize execution time by intelligently grouping and distributing tests.
Step 4: Specify Run Config
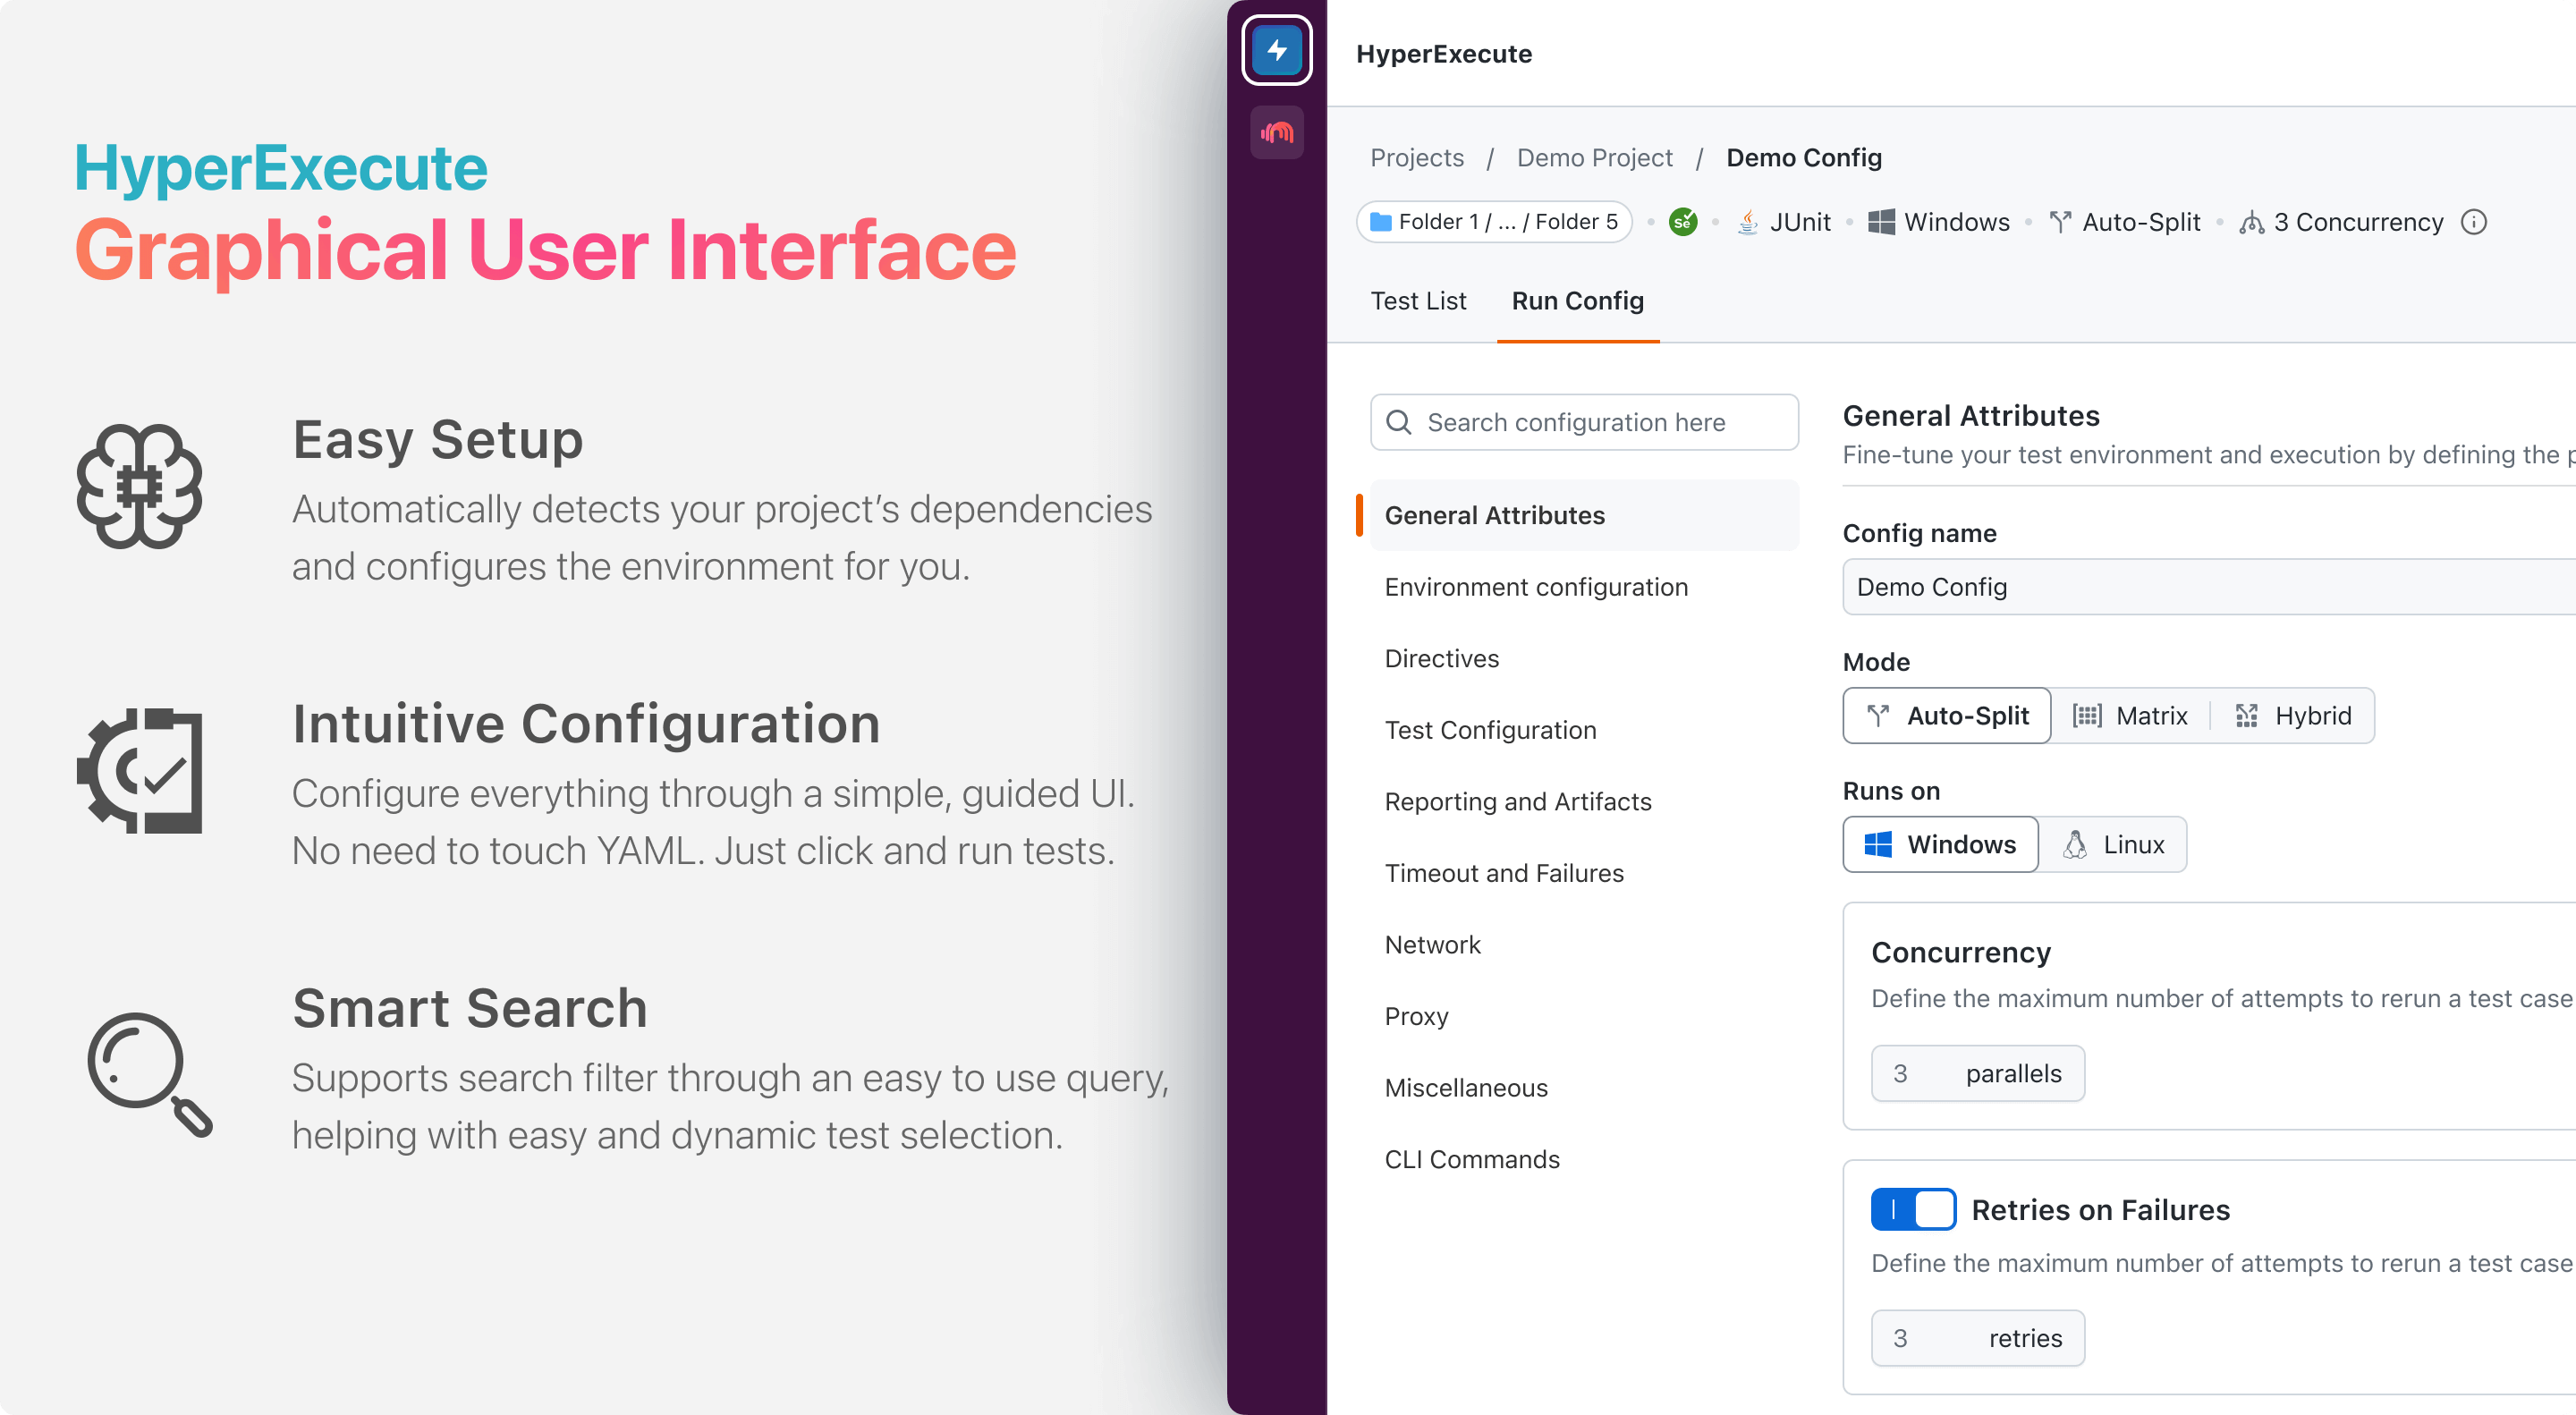
The Run Config tab in HyperExecute GUI offers an intuitive visual interface to configure your test environment and execution settings. You’ll find the basic preset configurations displayed just below your project name. If you need to modify or customize these settings, simply navigate to the Run Config tab and adjust your execution environment effortlessly — no YAML editing required.
To learn about any configuration in detail, please search for the keyword in the HyperExecute YAML Documentation. Please note that the GUI follows version 0.2 YAML parameters instead of discovery and runner commands as in version 0.1 YAML which you can find here.
Step 5: Run Tests and View Job
Once you've set up your configuration by selecting the appropriate tests and reviewing your execution settings, you're ready to run your tests. The "Run Tests" button is available both from the configuration details screen and directly from the configurations listing page for quick access.
A sidebar panel with job status and creation logs will appear with option to navigate to HyperExecute Dashboard to view more details. The HyperExecute-GUI displays the job logs in real-time as your tests run. Once complete, you can view the detailed test results in the HyperExecute Dashboard.
Already Using HyperExecute via YAML?
If you’re a HyperExecute version 0.2 YAML user, you can easily import your existing version 0.2 YAML configurations into the GUI. Here’s how:
Once your project is set up and you want to import a configuration using an existing YAML file :
- Go to the Configuration Listing page.
- Click on "Import Config.”
- Choose a YAML file from your project, and its settings will be imported to a new configuration.
