Running Your First Job on HyperExecute
This page outlines how you can run your first test execution job on HyperExecute.
Before you start
We recommend running your first test execution job using a sample project on HyperExecute. This can be done in three different ways, as mentioned below:
- Using Quick Run: Execute tests directly from the HyperExecute Portal. (Recommended for new users)
- Using Local System: Execute tests from your Local System. (Requires HyperExecute CLI)
- Using GitPod: Execute tests using GitPod. (Requires a GitPod account)
1. Using Quick Run
As you are running tests directly from the HyperExecute GUI, you don't need to do anything. The platform automatically gets the instructions from the HyperExecute YAML file and starts execution using the HyperExecute CLI.
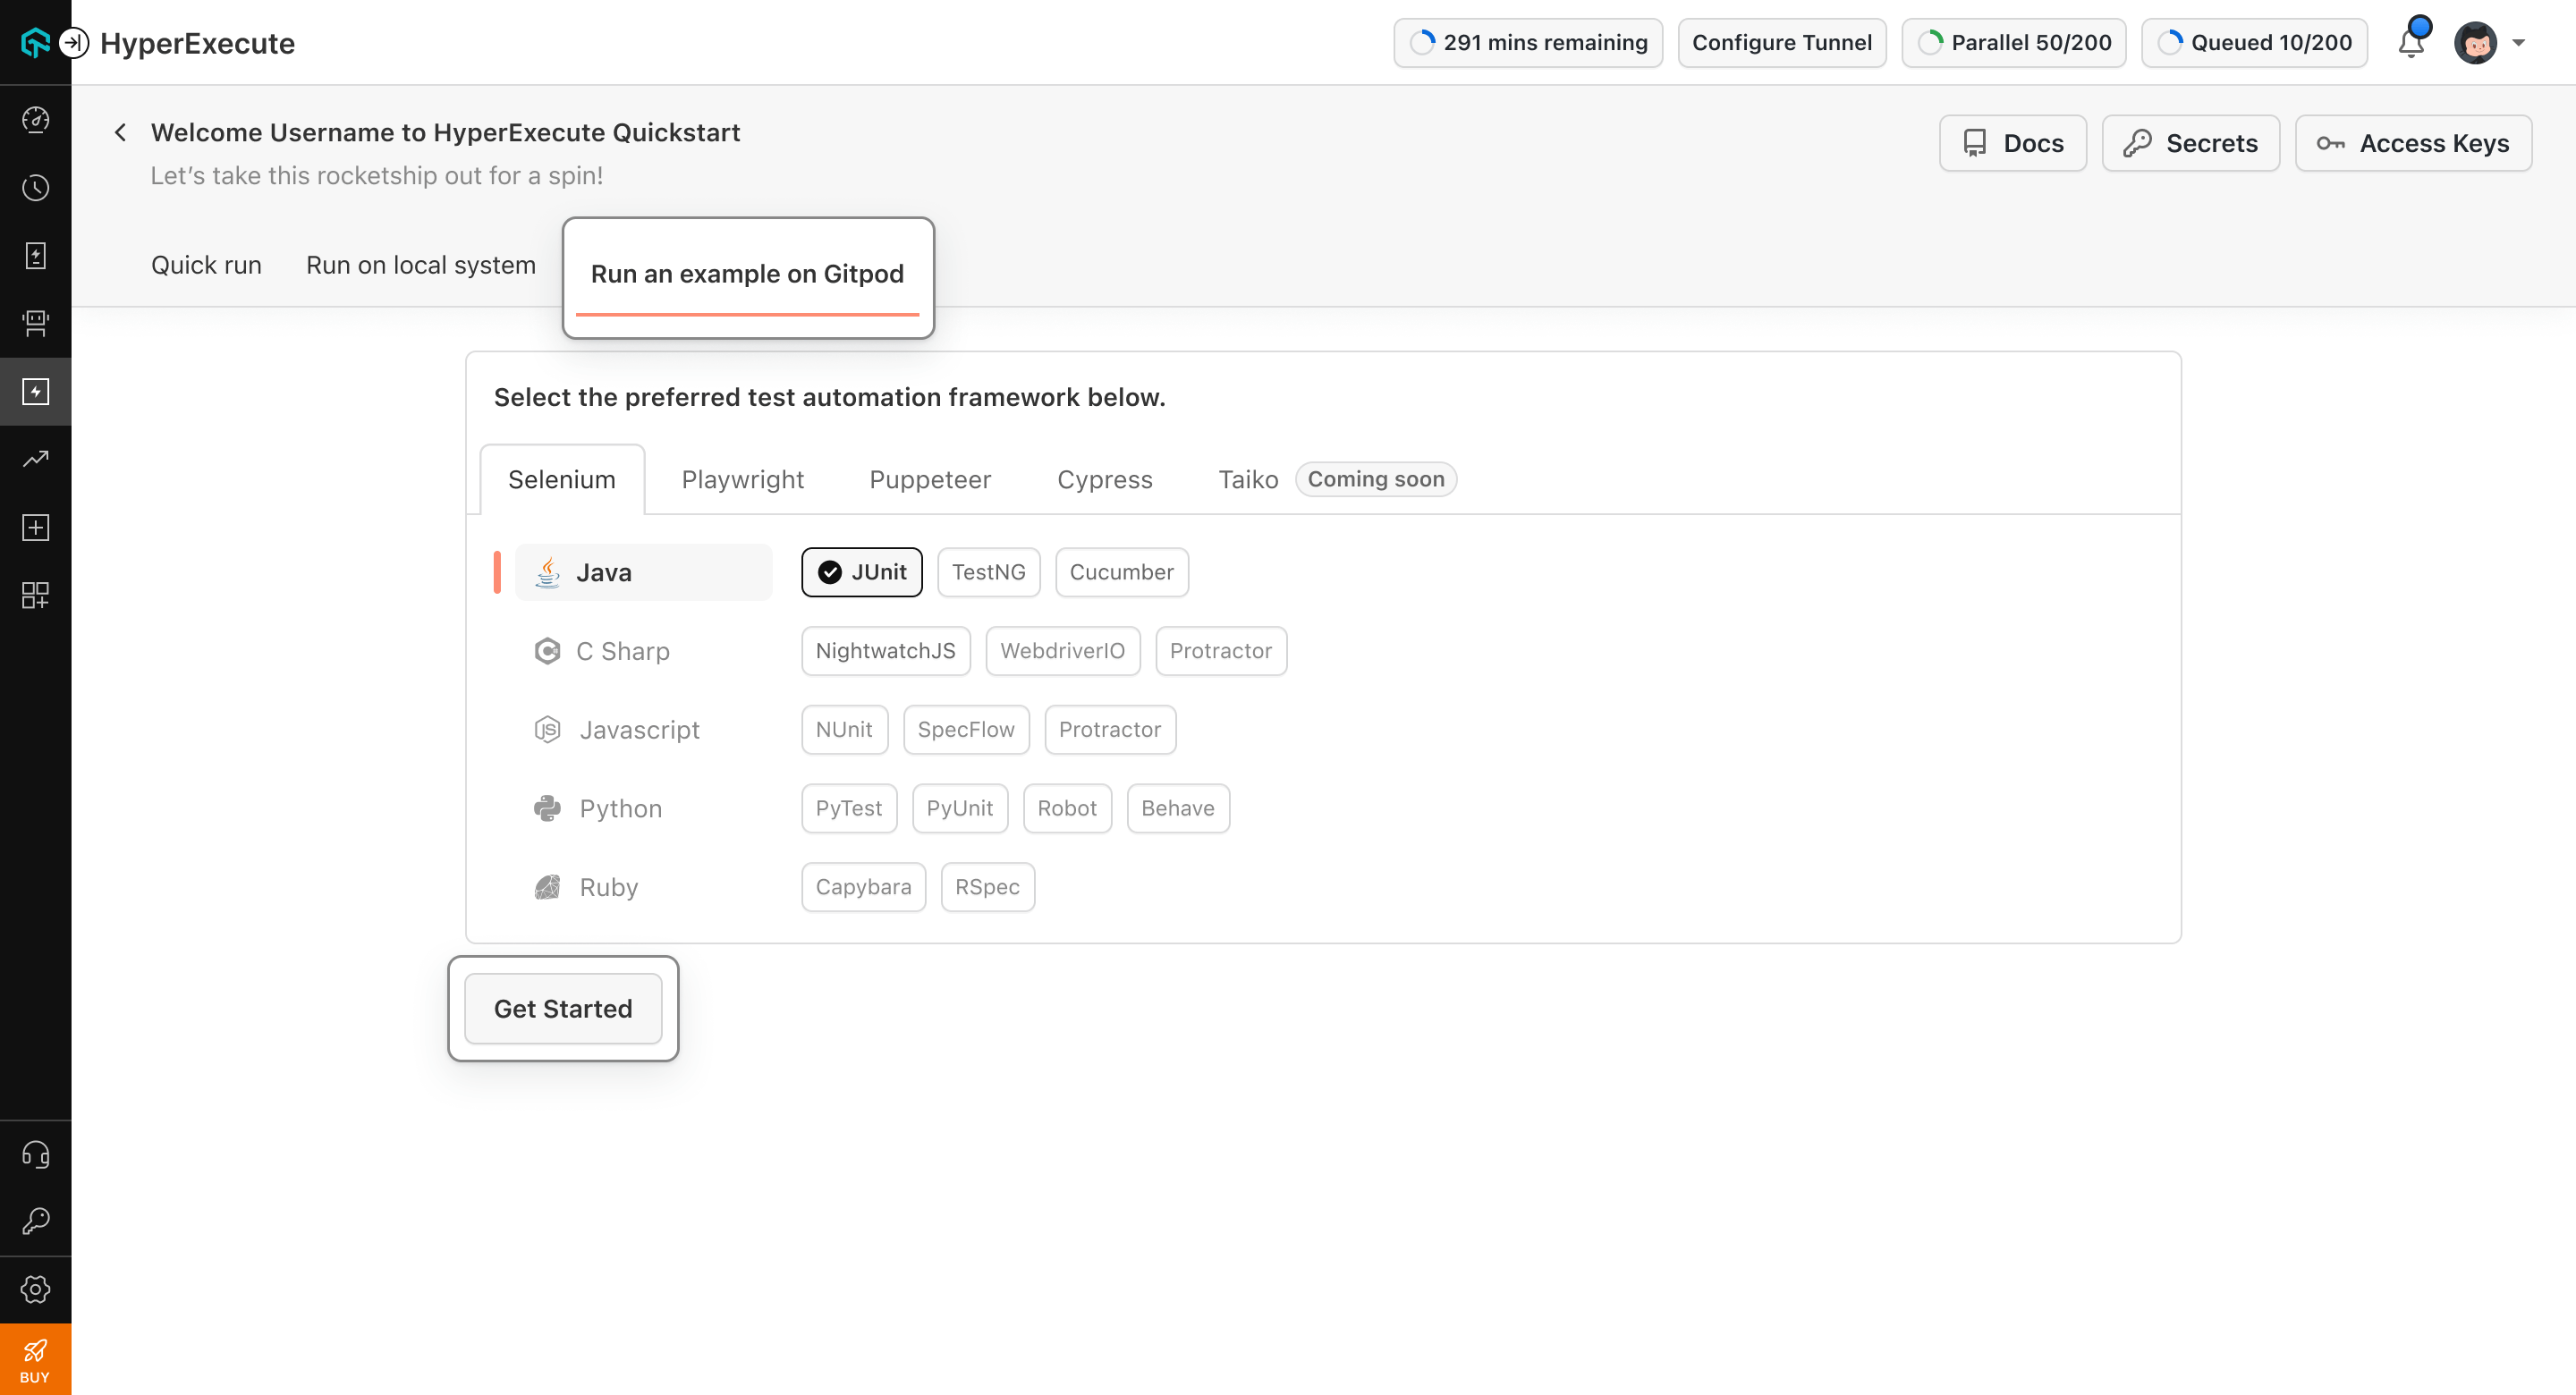
Step 1: Go to the Quickstart page.
Step 2: Select your preferred test automation framework and hit Get Started.
Step 3: Configure your HyperExecute YAML (optional), otherwise just click on Trigger test to run your first job.
Step 4: Your test execution is initiated using the HyperExecute CLI in the background.
Step 5: Click on View Test Result to navigate to HyperExecute Dashboard where you can see the job getting executed and the test results.
2. Using Local System

To run your Test Scripts on HyperExecute from you Local system, you'll need the following:
- HyperExecute YAML file which contains all the necessary instructions.
- HyperExecute CLI in order to initiate a test execution Job .
- Your TestMu AI Username and Access key
We will be taking care of everything one by one, just follow the steps given below:
Step 1: Go to the Quickstart page.
Step 2: Choose your test automation framework, Select Run on Local System and click on Get Started.
Step 3: Download our sample project by clicking on Download Sample. (Skip this step if you already have a project you want to test)
Step 4: Download the HyperExecute CLI as per the OS that you are on.
Step 5: Select the OS on which you want to run your tests and then download the HyperExecute YAML file shown on screen. This contains all the configurations required for running tests on HyperExecute.
Note: Your Yaml file should be in the root directory of your project. If you are renaming it, also change the file name in the execution script as well. You can learn more about the advanced configurations here, however for the given sample projects you can simply download the file using the small icon on top right.
Step 6: In order to run your tests, copy the command from screen and run in your terminal.
Step 7: When you run this command, the HyperExecute CLI will send your test scripts to the HyperExecute Platform for execution across multiple parallel Test Execution Nodes.
Step 8: Once your Job is running, you can click on View Test Results to navigate to HyperExecute Dashboard where you can see the job getting executed along with the test results.
The generic command required to initiate test execution is given below. You will need to insert the name of your YAML file in place of the RELATIVE_PATH_OF_YOUR_YAML_FILE before running this command. (Skip if you already used the command from Step 6. )
./hyperexecute --user undefined --key undefined --config RELATIVE_PATH_OF_YOUR_YAML_FILE
In case of MAC, if you get a permission denied warning while executing CLI, simply run chmod u+x ./hyperexecute to allow permission. In case you get a security popup, allow it from your System Preferences → Security & Privacy → General tab.
If you are facing any issues in running your first job? Watch our Webinar Video
3. Using Gitpod
Step 1: Go to the Quickstart page.
Step 2: Choose your test automation framework, select Run test on Gitpod and click on Get Started.
Step 3: You will need to login into your Gitpod account, or create a new one.
(If you are creating a new account, choose your preferred editor. We recommend VS Code)
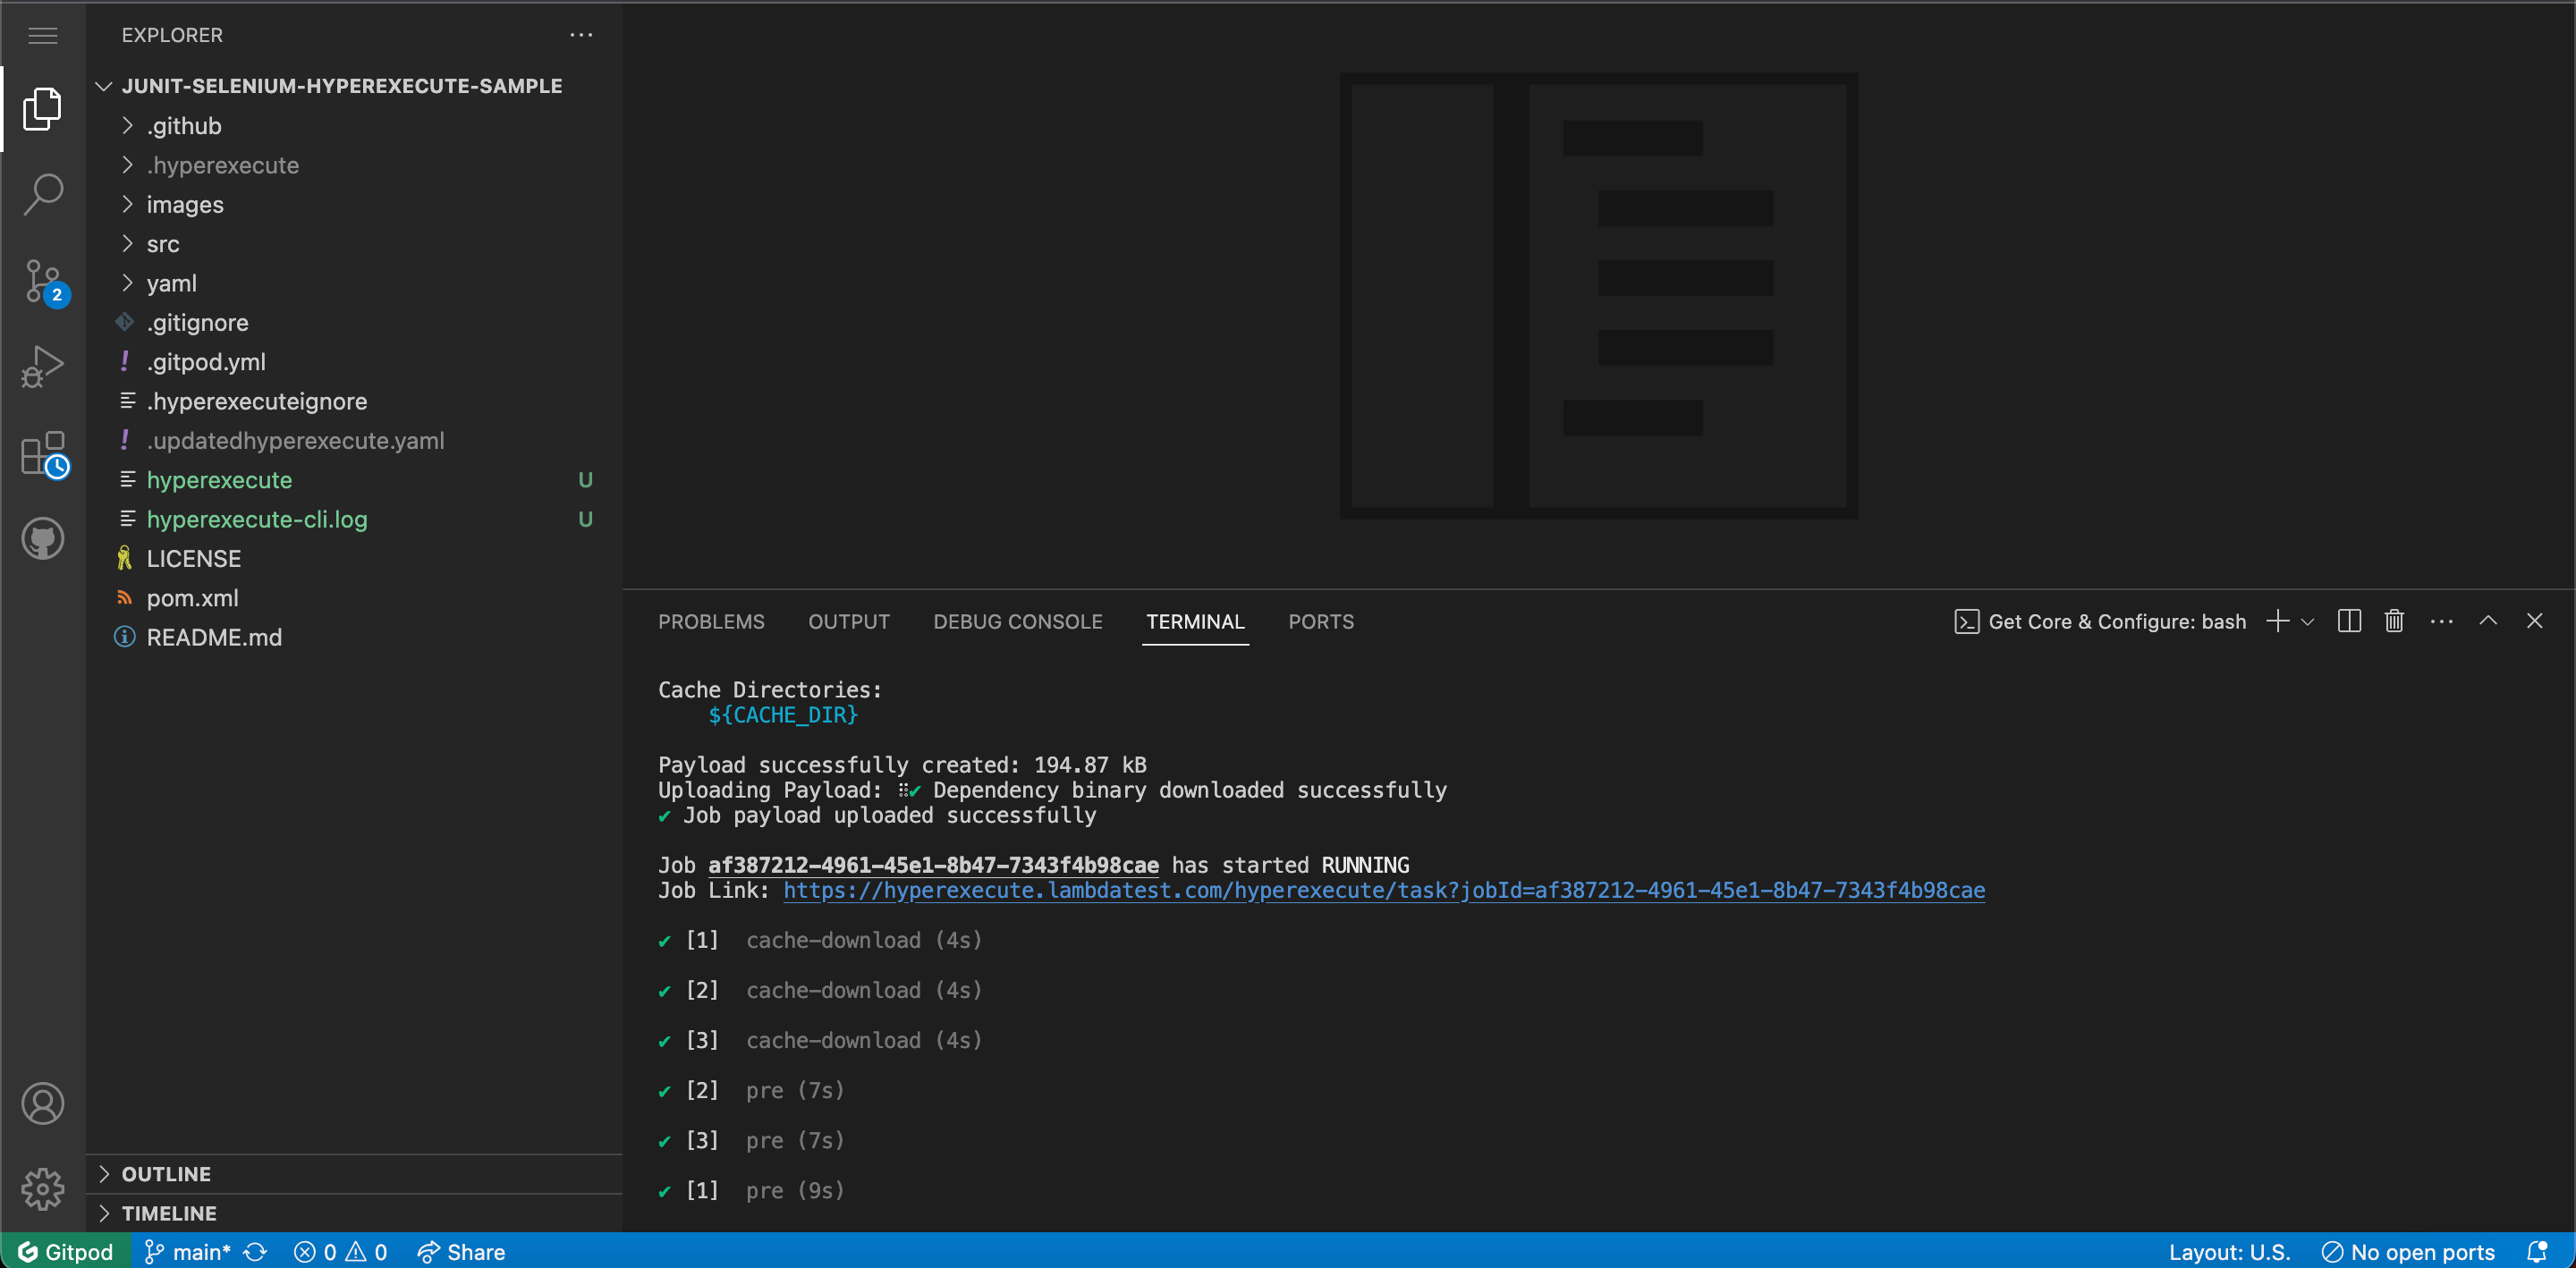
Step 4: As you are running a sample project, Fetching of the Test Scripts, HyperExecute YAML, HyperExecute CLI and Triggering your tests using the Execution Command will be automated.
Step 5: Once you see the Job Link in the logs, you can visit the HyperExecute dashboard to see the tests getting executed.
