Mark As Bug In Responsive Testing
You can now avoid the hassle of capturing a screenshot, annotating the same before you finally share it with a teammate by logging onto a respective tool for creating a task. TestMu AI does it all for you. Mark as Bug is a feature that would help you highlight any UI observation from your test sessions on TestMu AI. And it let you share the same with your colleagues on their favorite project management/ bug tracking tools such as Jira and Trello, Hive, Paymo, etc. You can choose the assignee who handles your reported task or bug. You can even mention the description to help them understand your point better. You can do all that while testing on TestMu AI, without having to hop on to any other platform or tool.
Note: Mark as Bug feature is not restricted to any particular feature at TestMu AI. In other words, every type of testing that you perform on TestMu AI will have a mark as a bug embedded in it. Below are various types of testing that we offer at TestMu AI.
-
Real Time Testing: To help you test your web-app with live interaction by running it on VMs hosted by TestMu AI cloud server.
-
Screenshot Testing: Automated bulk screenshot testing on 25(browsers + OS) combinations in a single test session.
-
Responsive Testing: Perform cross browser testing across various mobile & desktop devices to ensure your website renders well across different view-ports. Run responsive testing on 45+ devices in a single test session.
-
Automation Testing: Perform automated cross browser testing with our on-cloud Selenium Grid. You can execute parallel testing to trim down your test cycles drastically. Our Selenium Grid support is compatible with every test automation framework that supports Selenium.
-
Smart UI Testing: Automated visual regression testing that performs a pixel-to-pixel comparison between multiple images & highlights any UI deviations such as padding, icon, text, etc., with respect to the baseline images.
Did You Know?
TestMu AI offers more than 2000 real browsers and browser versions on every type of testing so you could maximize test coverage of your cross browser testing.
How Can I Mark As Bug While Responsive Testing?
Note: Below is a demonstration of marking a bug from Responsive testing.
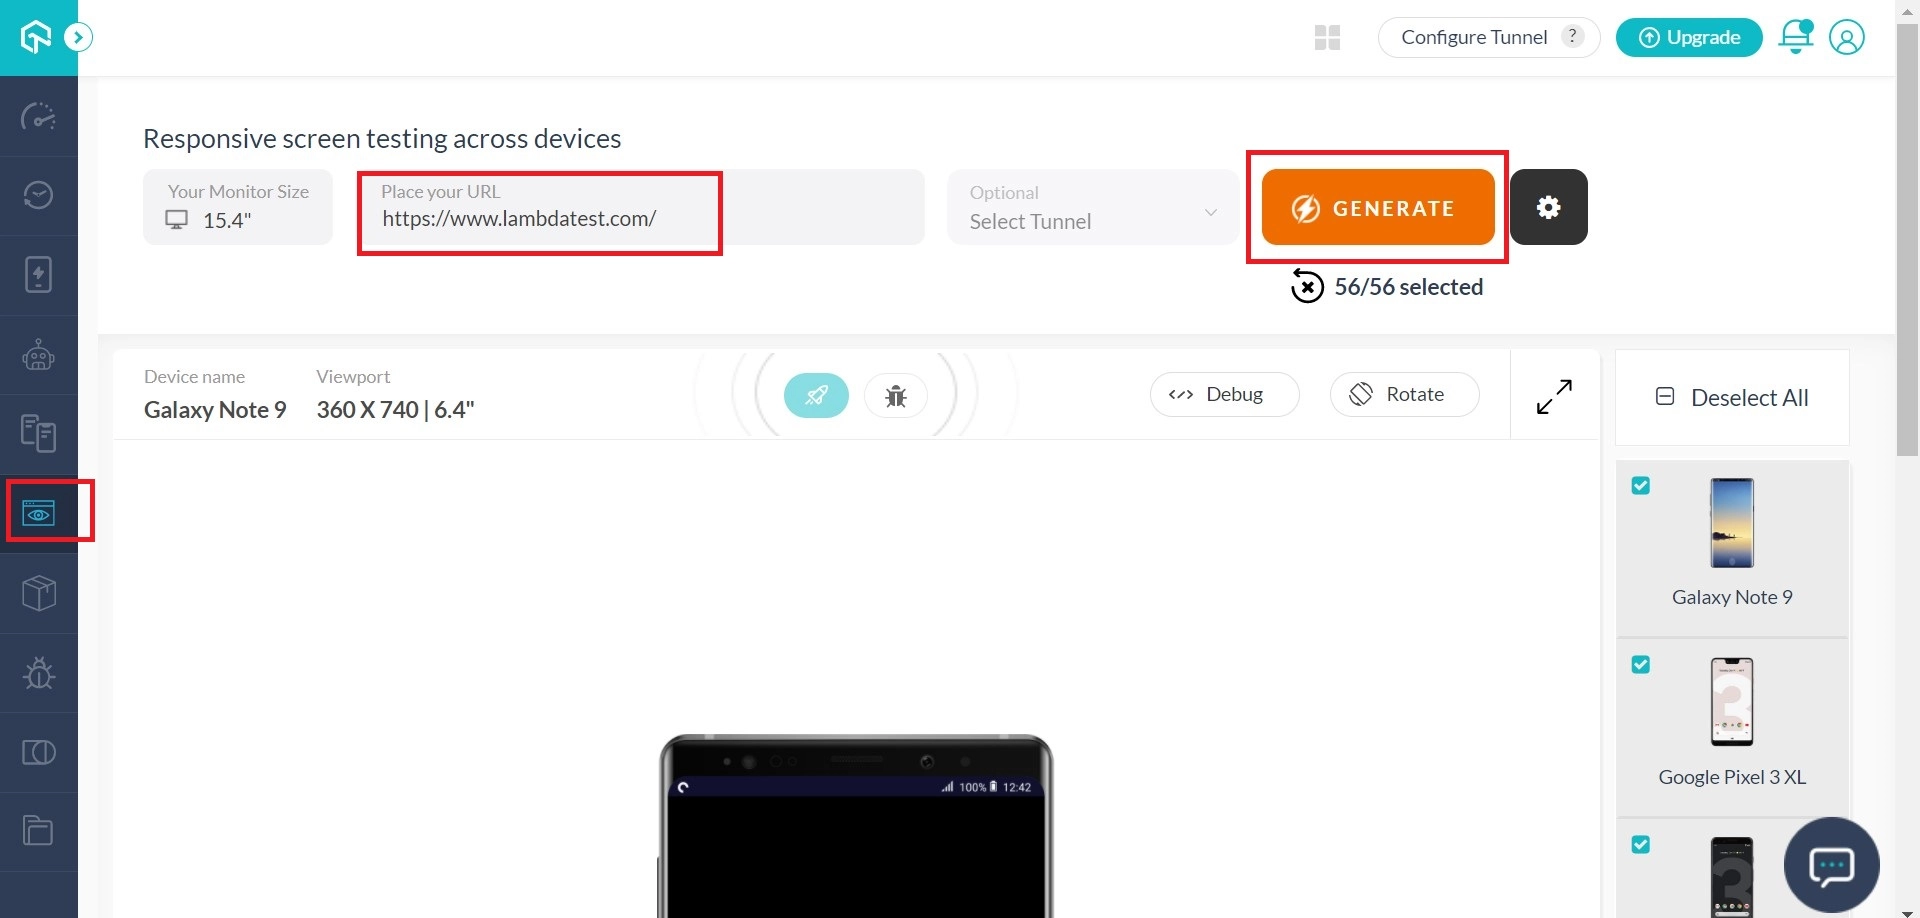
Step 1: Go to Responsive testing from the left navigation menu, provide the testing URL, and hit the Generate button to start your responsive test session.
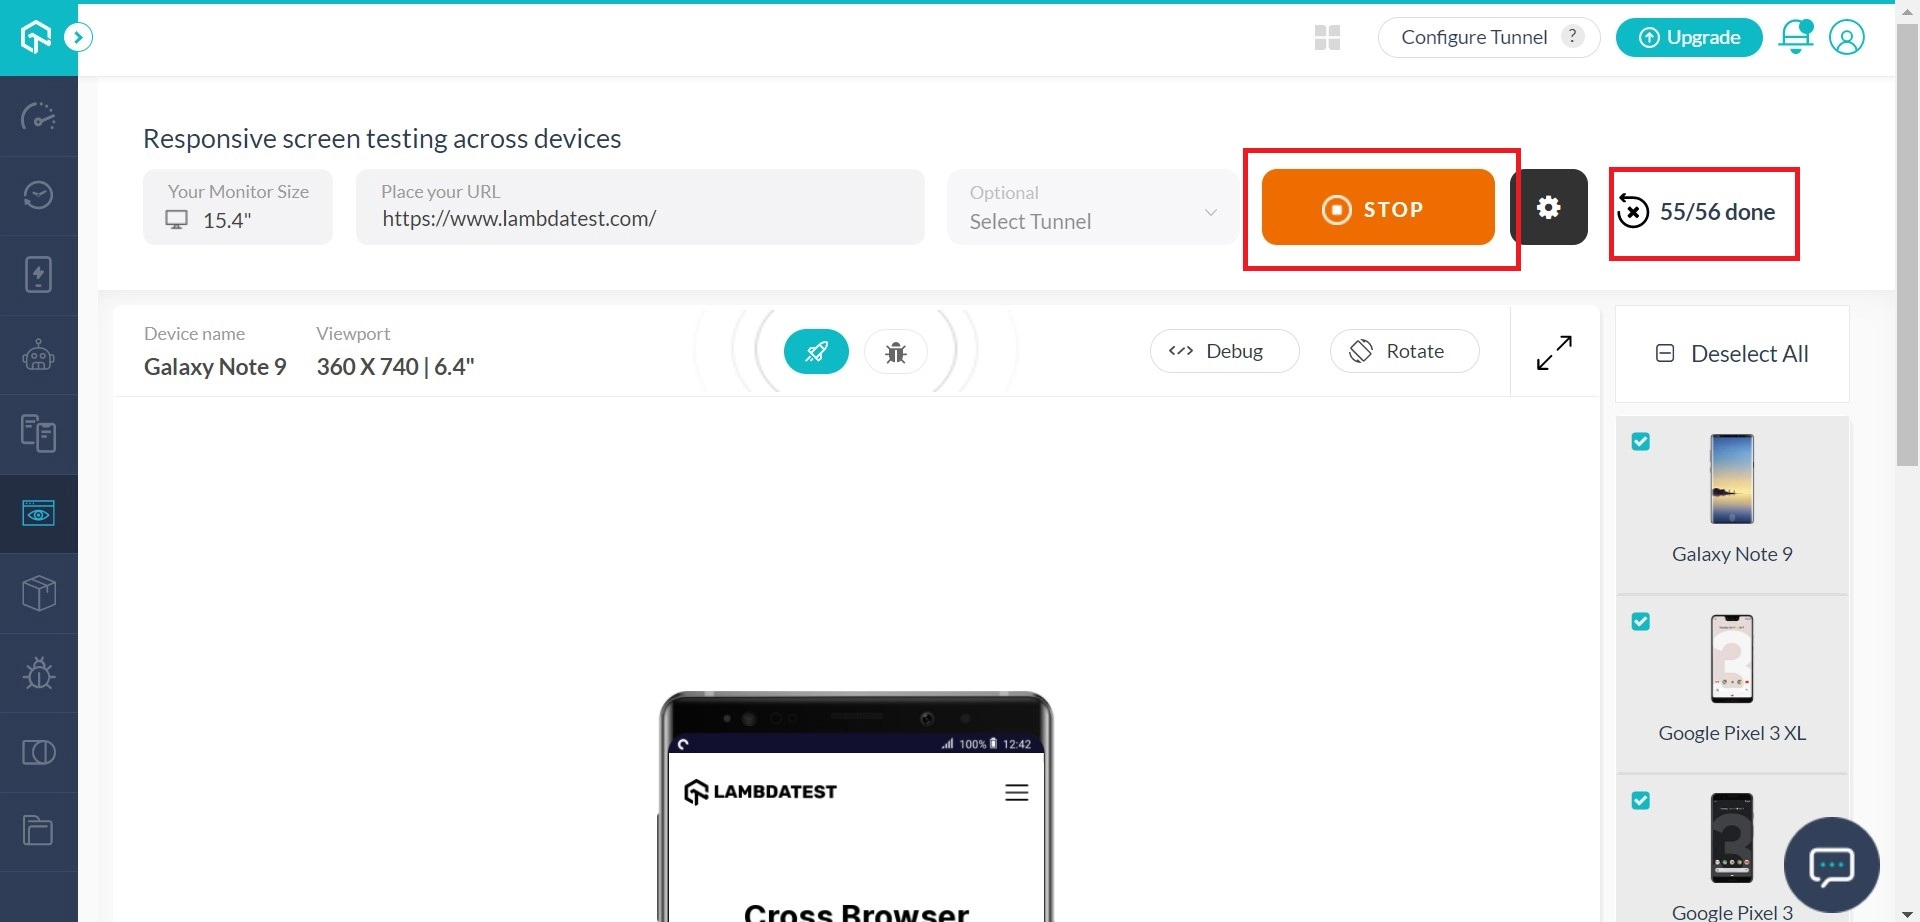
Step 2: Once you hit the Generate button. You will find a loader on devices mentioned on the right side of the screen, an indication that the screenshot test has begun. A counter will represent the number of devices for which the screenshot has been successfully generated. You can stop the test anytime by using the Stop button.
Step 3: Once your responsive test session is complete, you can perform a vertical-scroll to find your desired device for ensuring your RWD(Responsive Web Design). After selecting the device, double-click on the camera icon on top for marking a bug.

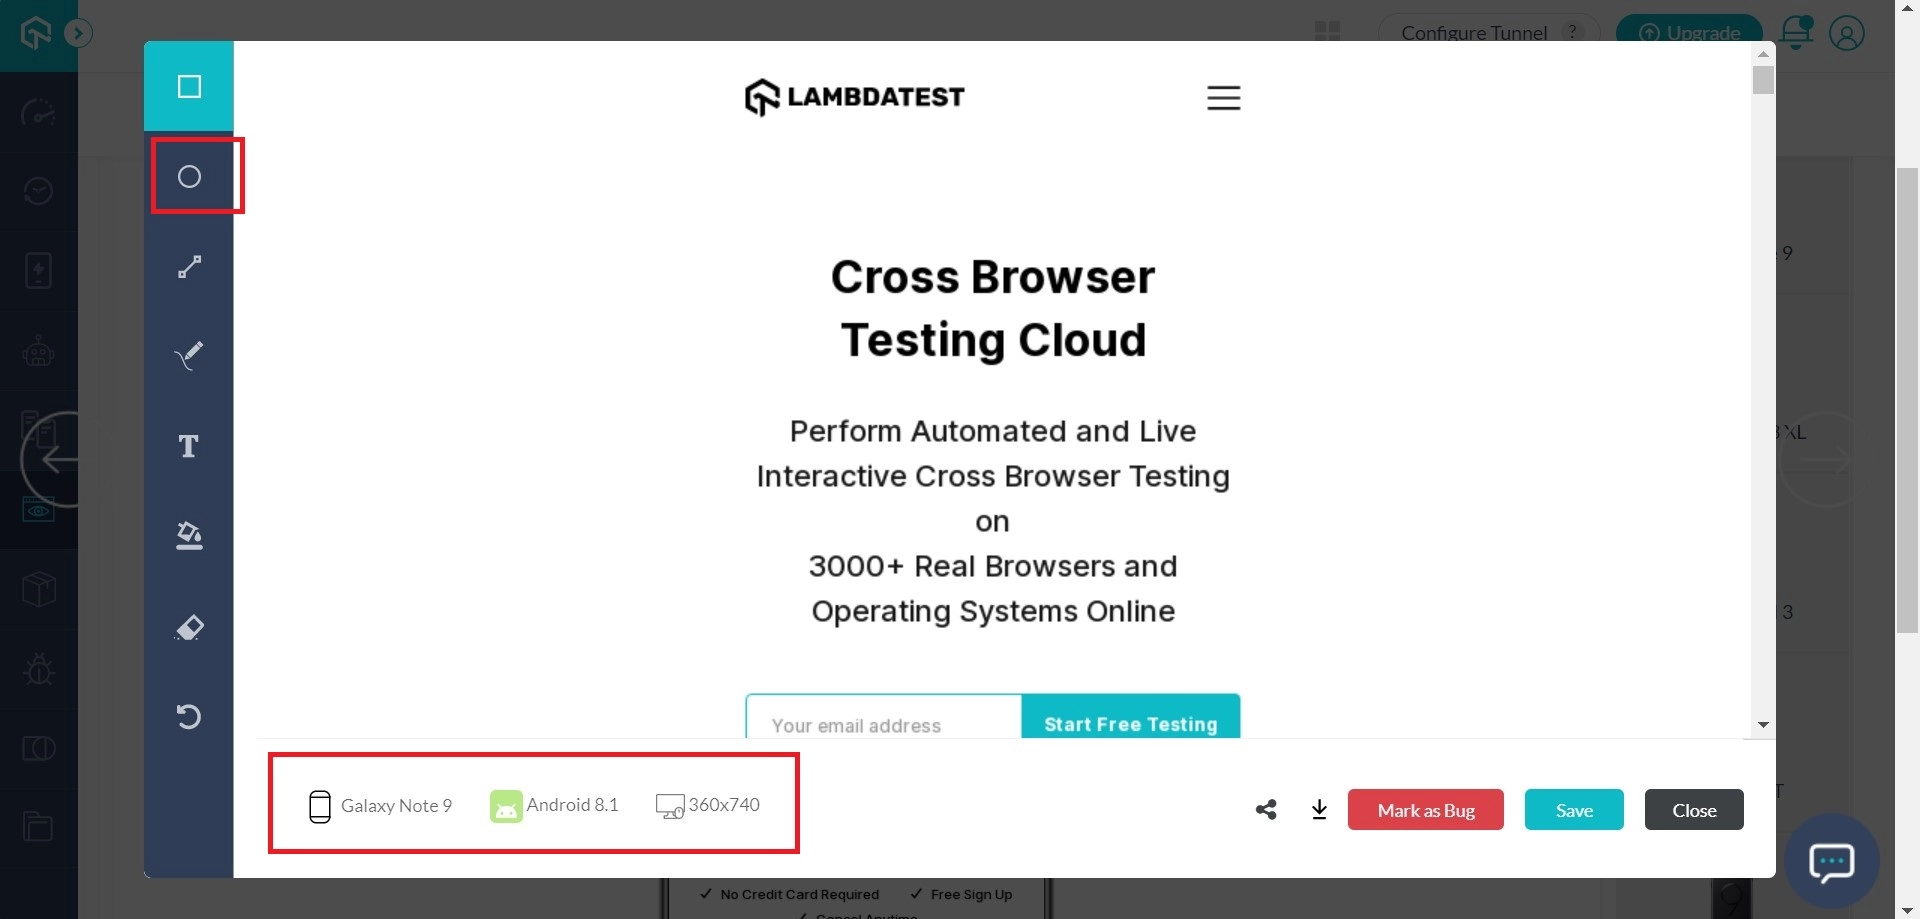
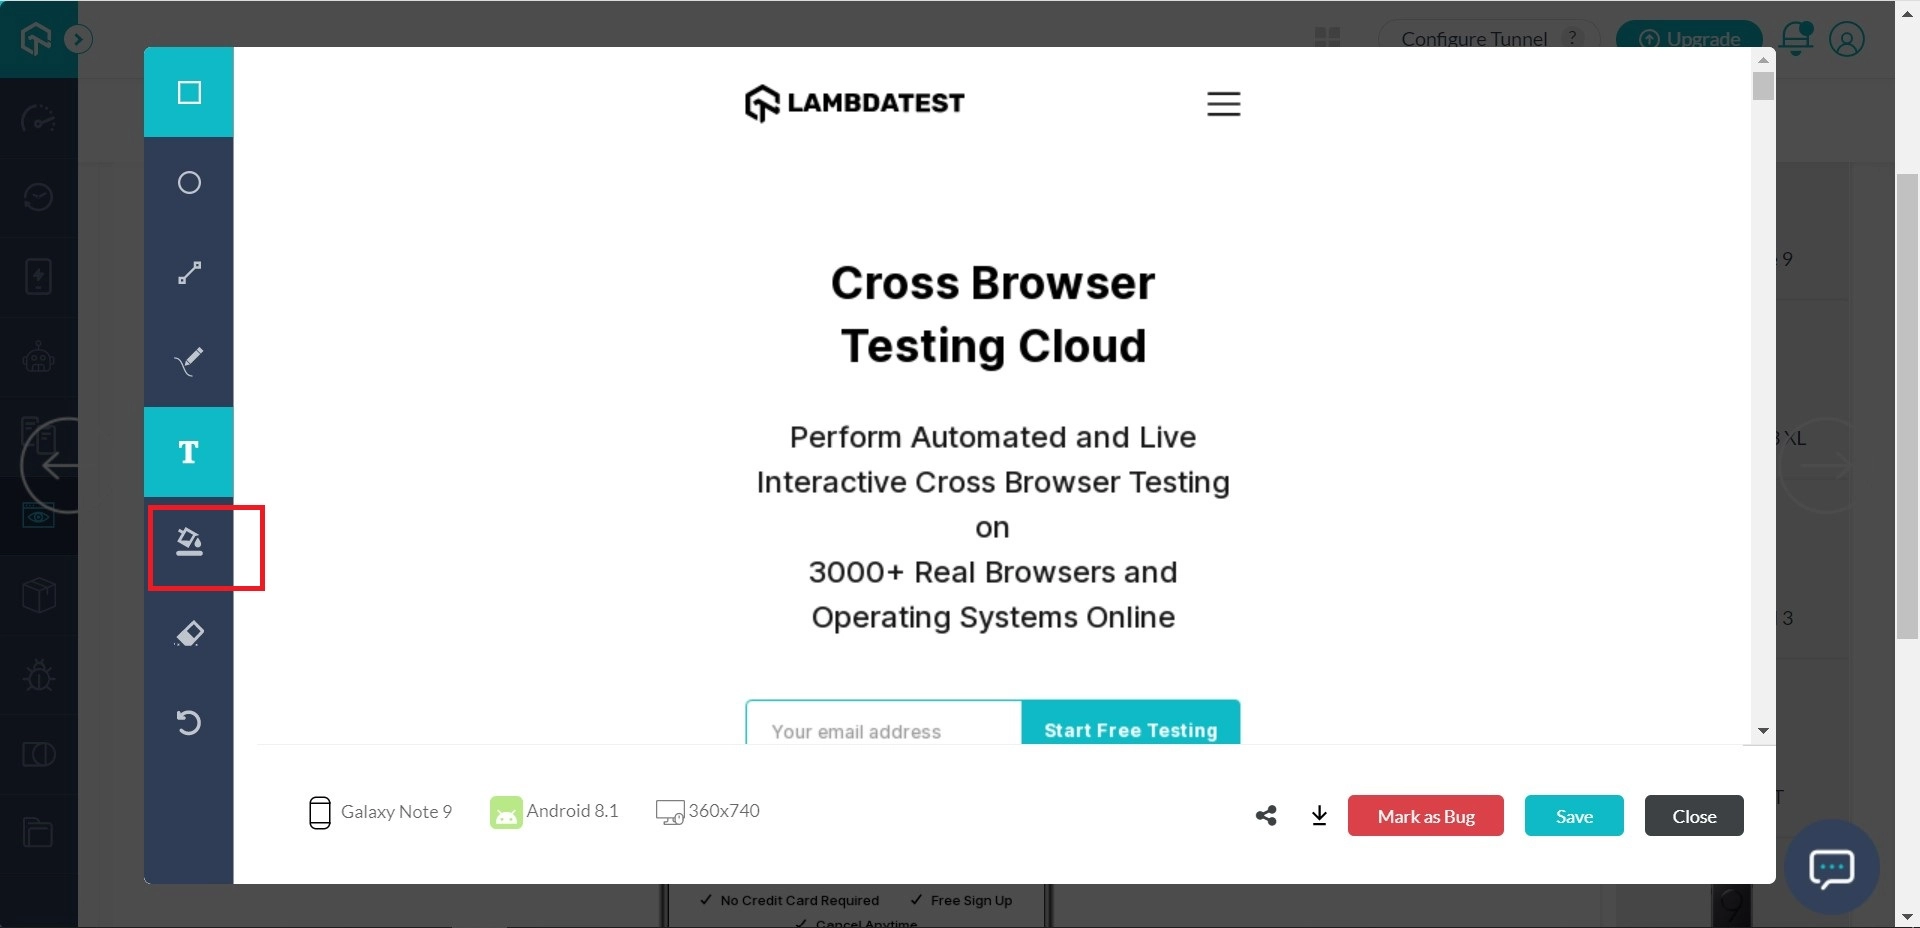
Step 4: As you double-click on any screenshot, an image editor will pop up with various buttons to help you highlight and annotate your UI observation before sharing the screenshot with your colleagues.
- You can highlight the bug through different shapes like square, rectangular, circular, or you can even underline. Environment details of the test will be presented at the bottom-left of the image editor.
- You can also scribble the bug using the pencil icon & add text for annotating the screenshot with the text button's help.
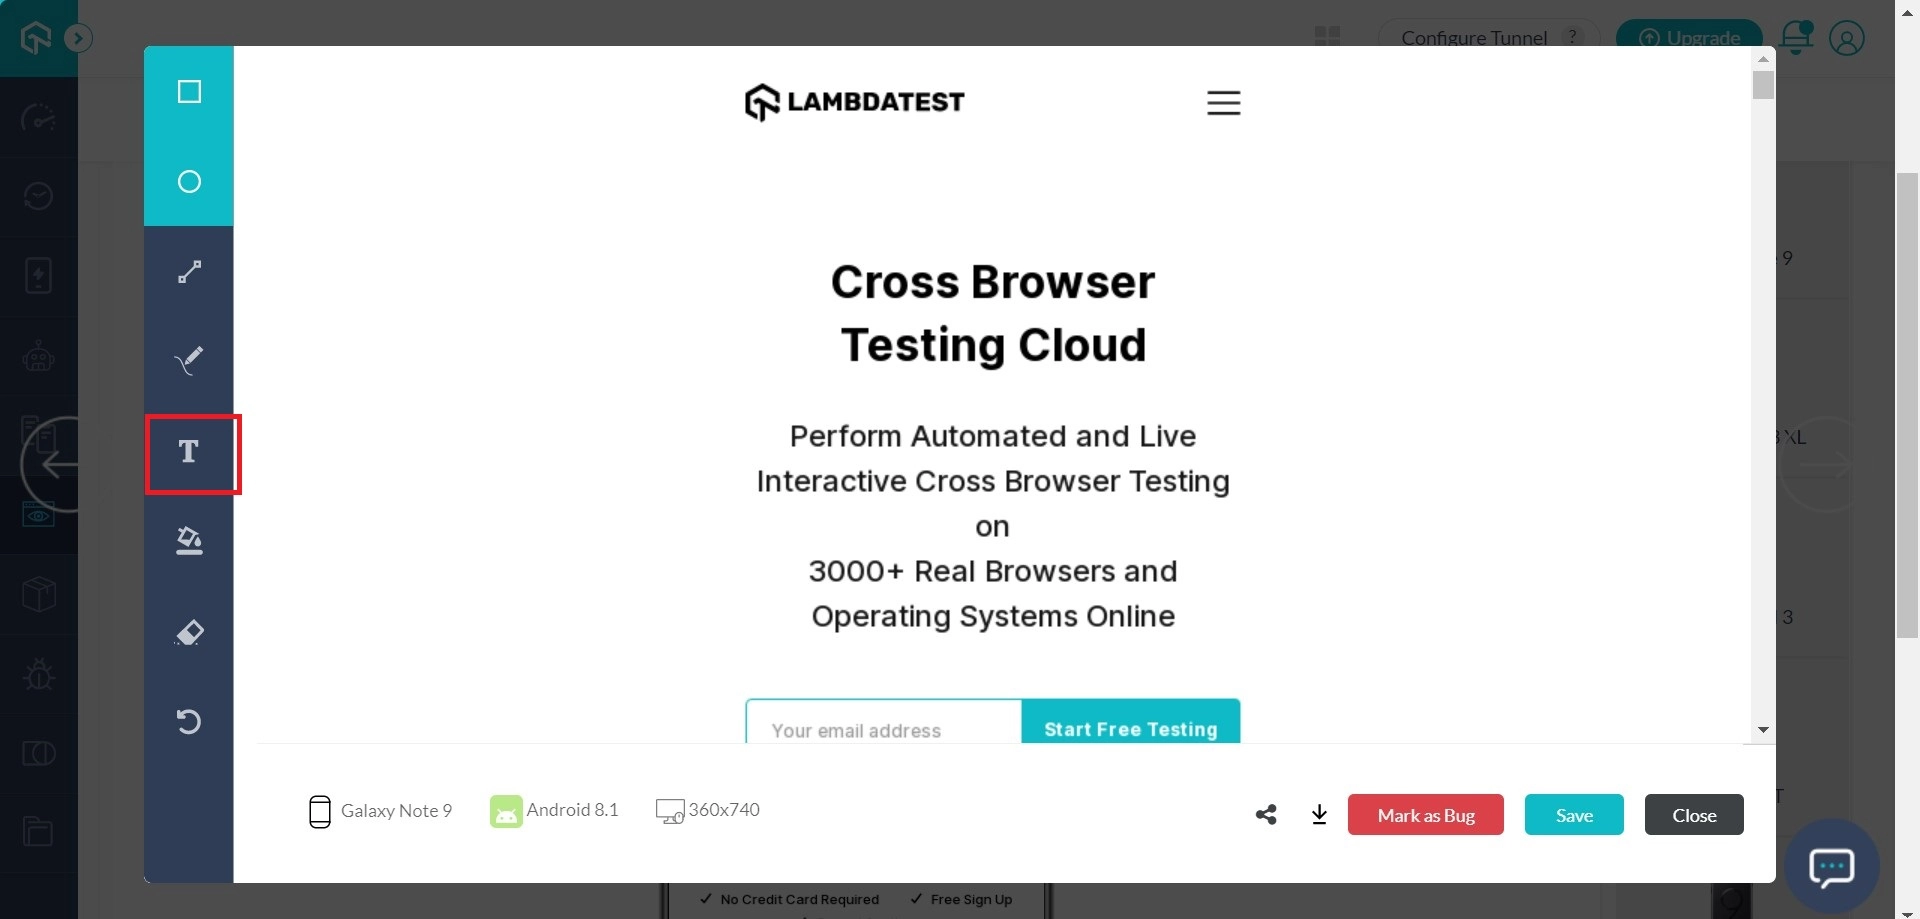
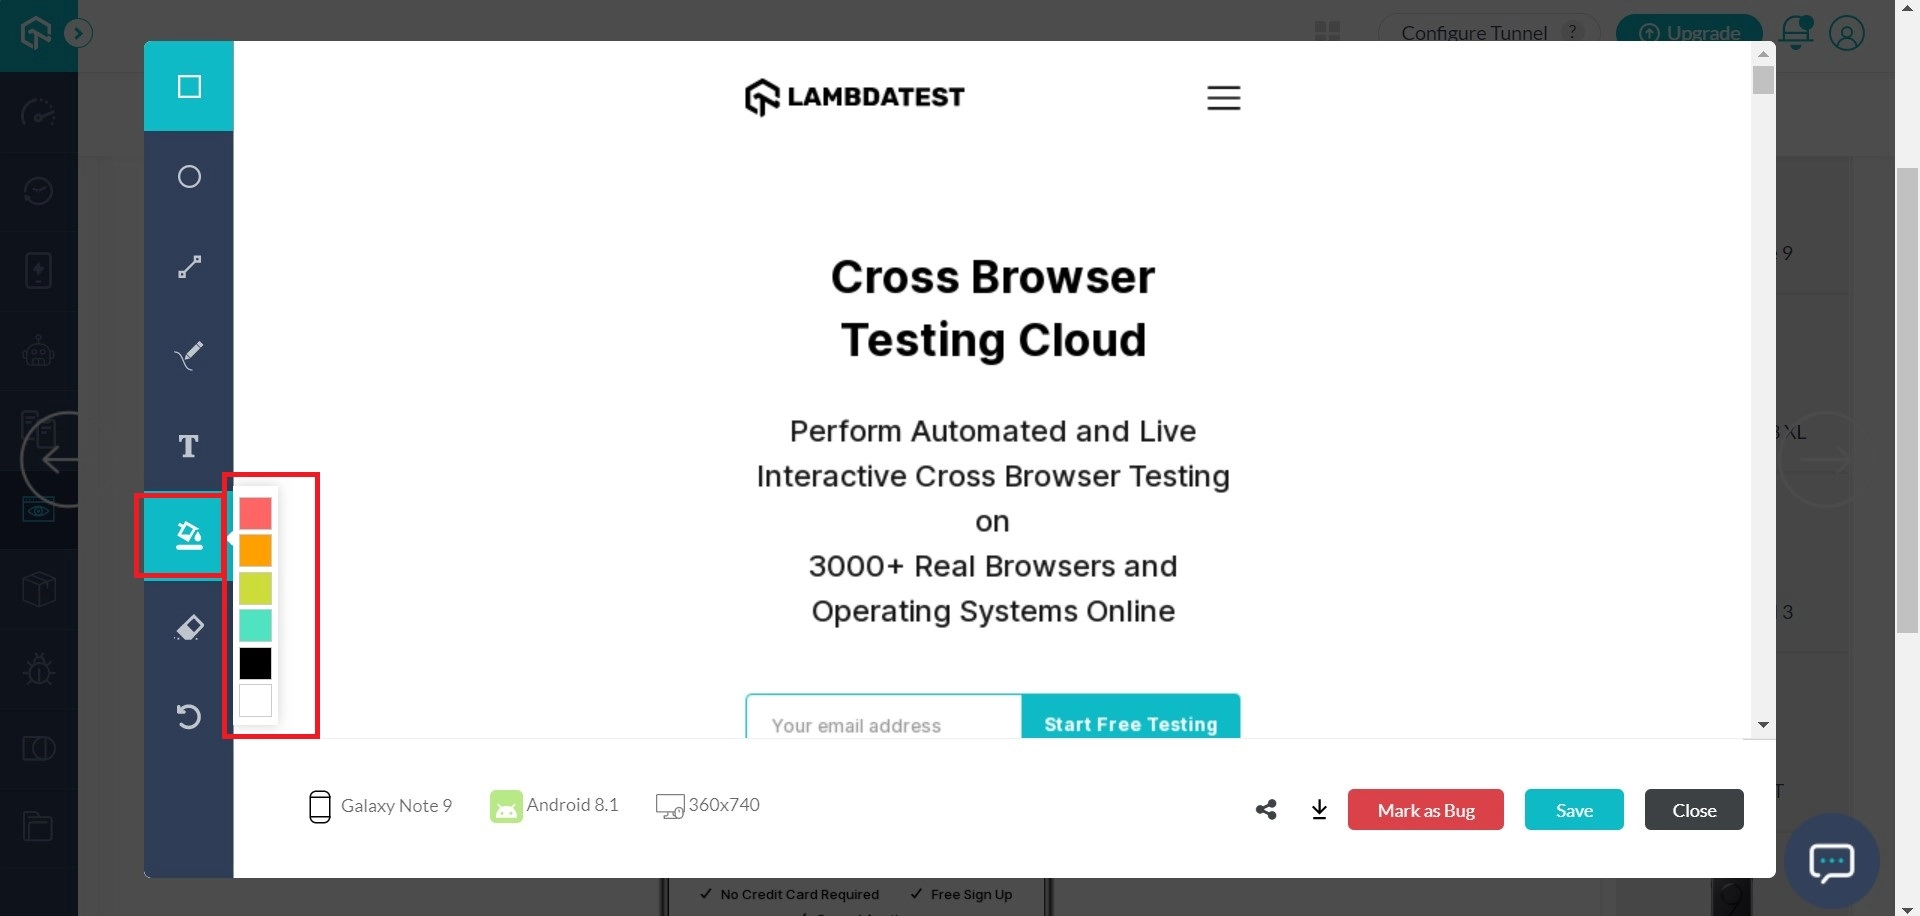
- Choose from a variety of colors to make the bug more noticeable.
- The eraser icon highlighted below will help you to erase any unwanted highlights.
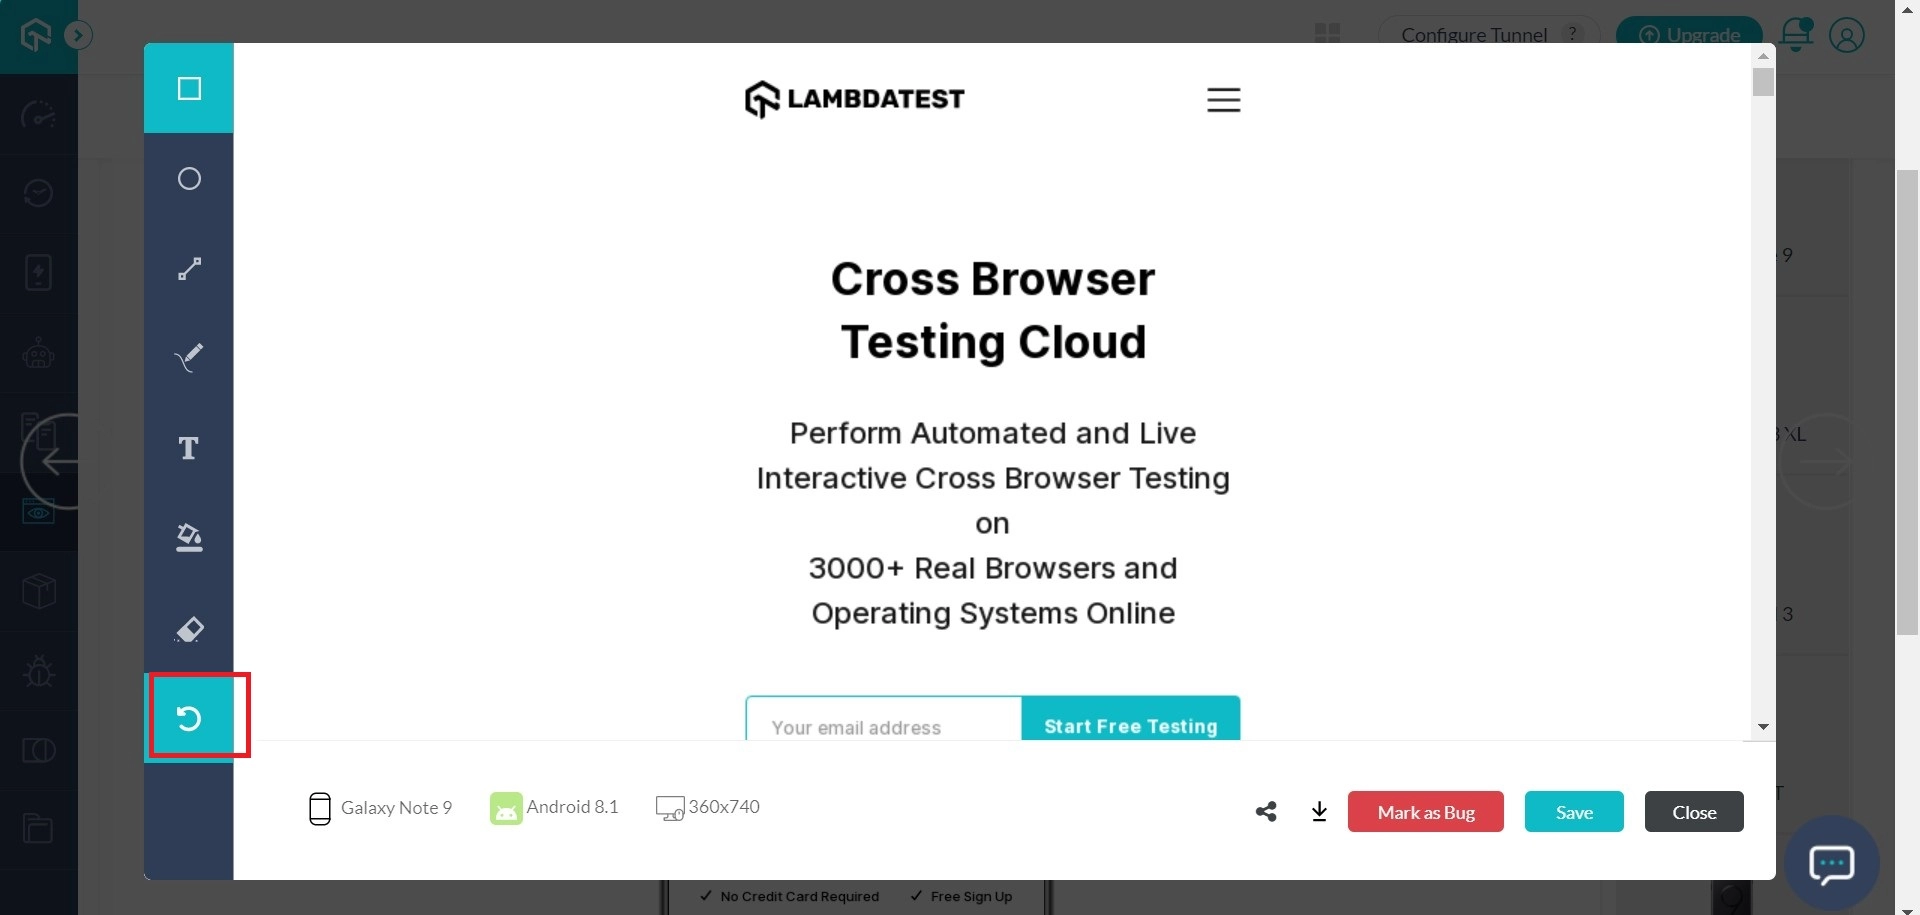
- If you have got too much to erase, then the last button at the bottom will do the job for you. It will help you undo any unwanted change in the screenshot.

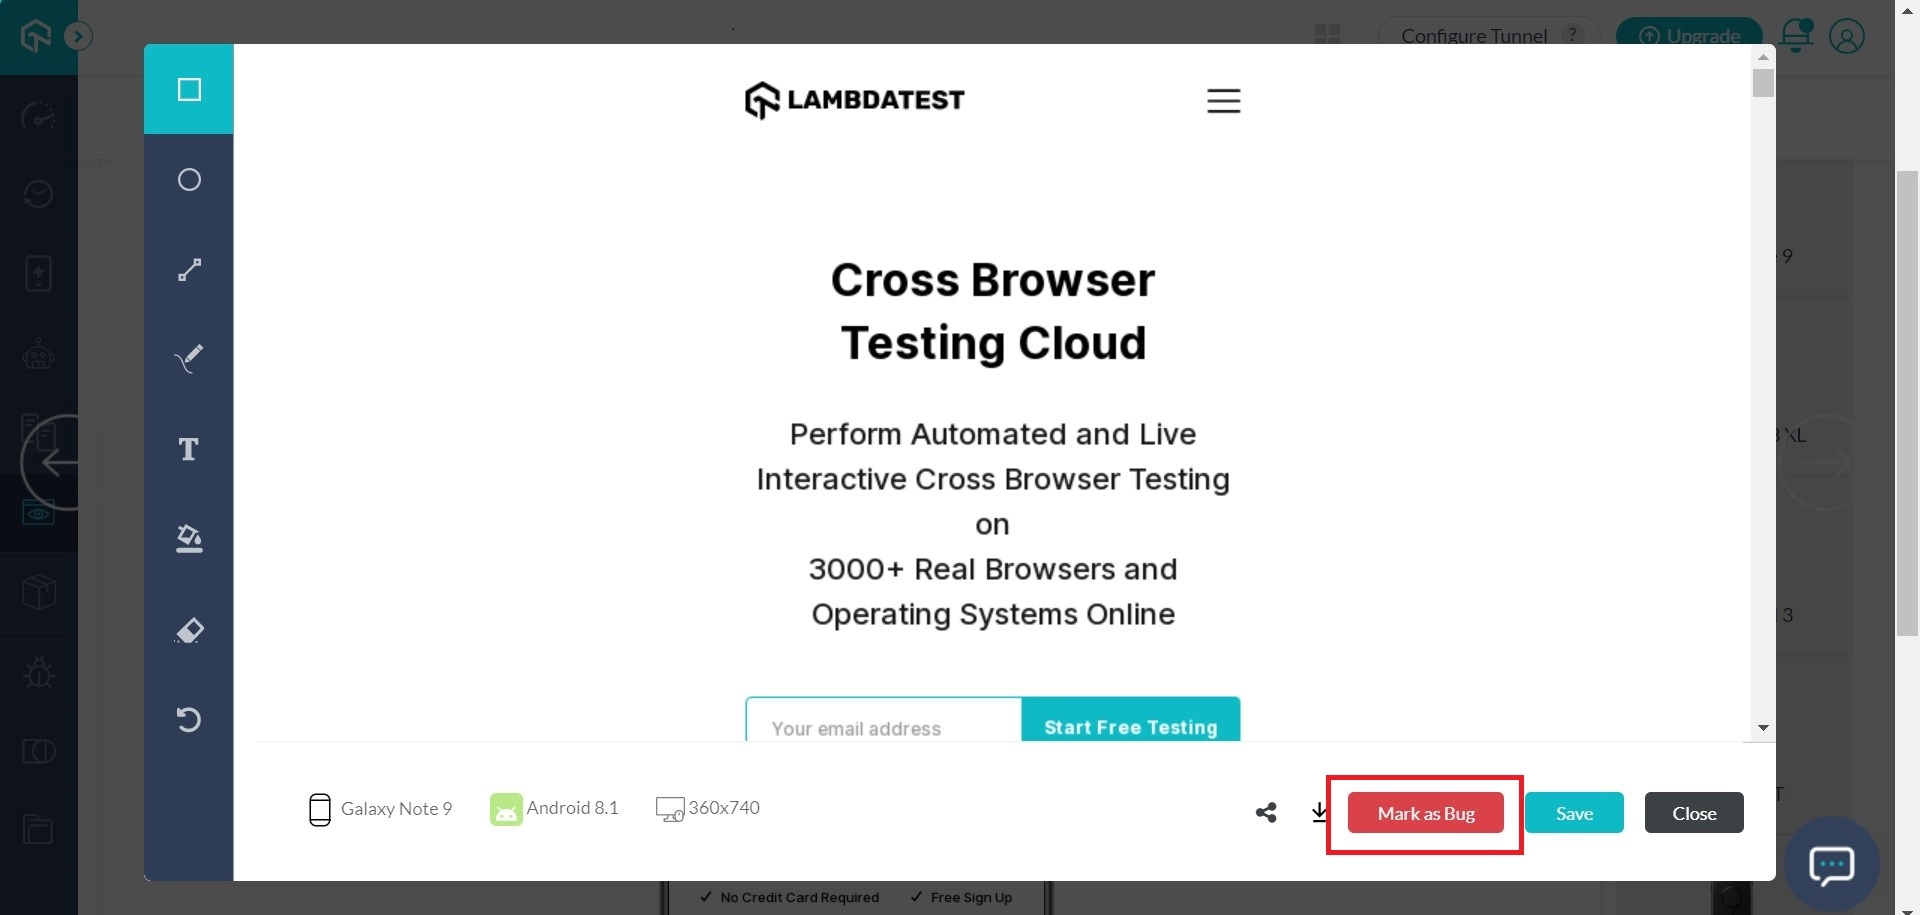
Step 4: Once you are done annotating the screenshot, you need to click on the Mark as Bug button at the bottom-right of the image editor.
Pushing Bugs To Third Party Tools
TestMu AI provides integration with various 3rd party applications to help you collaborate with your teammates easily as you perform cross browser testing on our cloud-based platform. The "Mark as Bug" button will help you to push your edited screenshot to your integrated workspace instantly. You can integrate with the below mentioned 3rd party tools.
- JIRA
- Slack
- Asana
- Trello
- GitHub
- GitLab
- Bitbucket
- Azure DevOps previously known as VSTS
- Paymo
- Teamwork
- Hive
- Shortcut
- BugHerd
- Mantis
- Monday.com
- Breeze
- Clickup
- Zipboard
- Backlog
- Pivotal
- Practitest
- Miro
We are continually adding more integration to our platform. If you use some other tool, don’t hesitate to share it with us! Just drop a message through chat & we’ll bring it here on our platform for you.
As you click on the "Mark as Bug" button, an integration specific form would open up. Fill in the fields as per your requirement. For instance, if you have installed TestMu AI + Asana integration, you can fill the below represented fields.
- You can select which workspace the should the task go under.
- You can specify which project the task should be placed under.
- You can select the assignee for that particular task.
- You can also provide a summary to help you organize & easily identify your tasks.
- You also get to post a description in the description field to help relate the cause of the issue or the card.
All the fields you populate will be directly reflected in your respective project based upon the integration you have configured with your TestMu AI account. In the above case, the changes would be reflecting on the respective Asana instance.

Got any questions?
Feel free to share them with our 24/7 chat support, or you can drop us a mail at support@testmuai.com. Happy testing!
