Jira Integration
The TestMu AI Jira integration helps you create issues in Jira directly from the TestMu AI platform itself. With simple one-click integration, you can push annotated issues to the project of your choice, assign them to the required teammate, and attach screenshots. You can do all that while in the middle of a test session in the TestMu AI platform. The fields populated by you when marking as a bug through TestMu AI are displayed as information on the Jira ticket for a testing instance.
Jira Integration with TestMu AI, like all of the integrations to 3rd party applications, is available for freemium as well as premium plan.

How to Establish Integration with Jira from Your TestMu AI Account?
Step 1: Login to your TestMu AI account. You would need to have Admin or User level access to see and install integrations. Don't have an account, register for free.
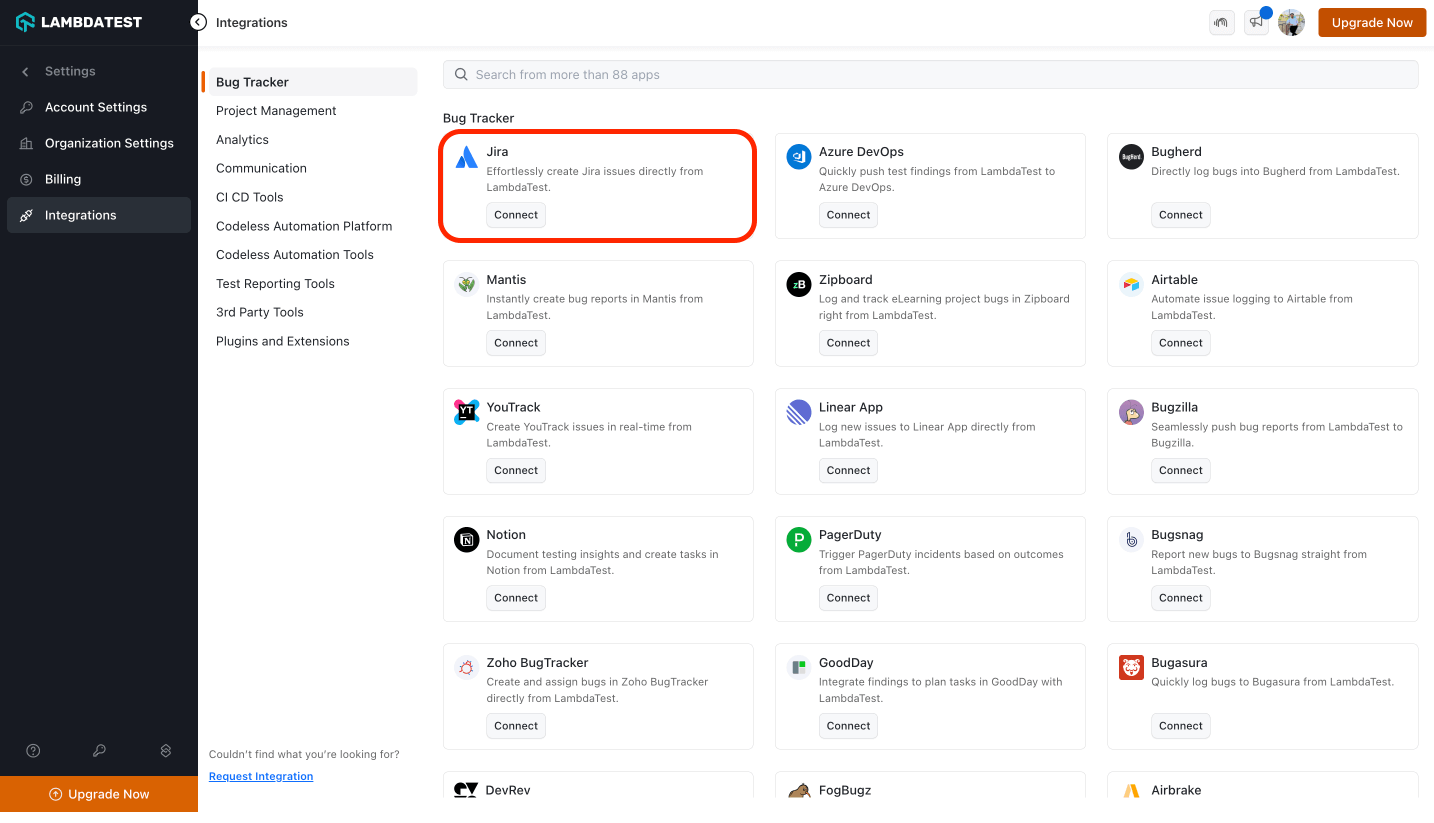
Step 2: Select 'Integration' from the left navigation menu bar. This will guide you to a screen where you will find a list of 3rd party applications, available to integrate with your TestMu AI account.
Step 3: Click on 'ADD' under the block that says 'Jira'.
Step 4: Once you click on Connect, you will be redirected to the below screen. Where You have to select Instance type. If you have a Self Hosted Jira instance, you can prefer this document Self-hosted.
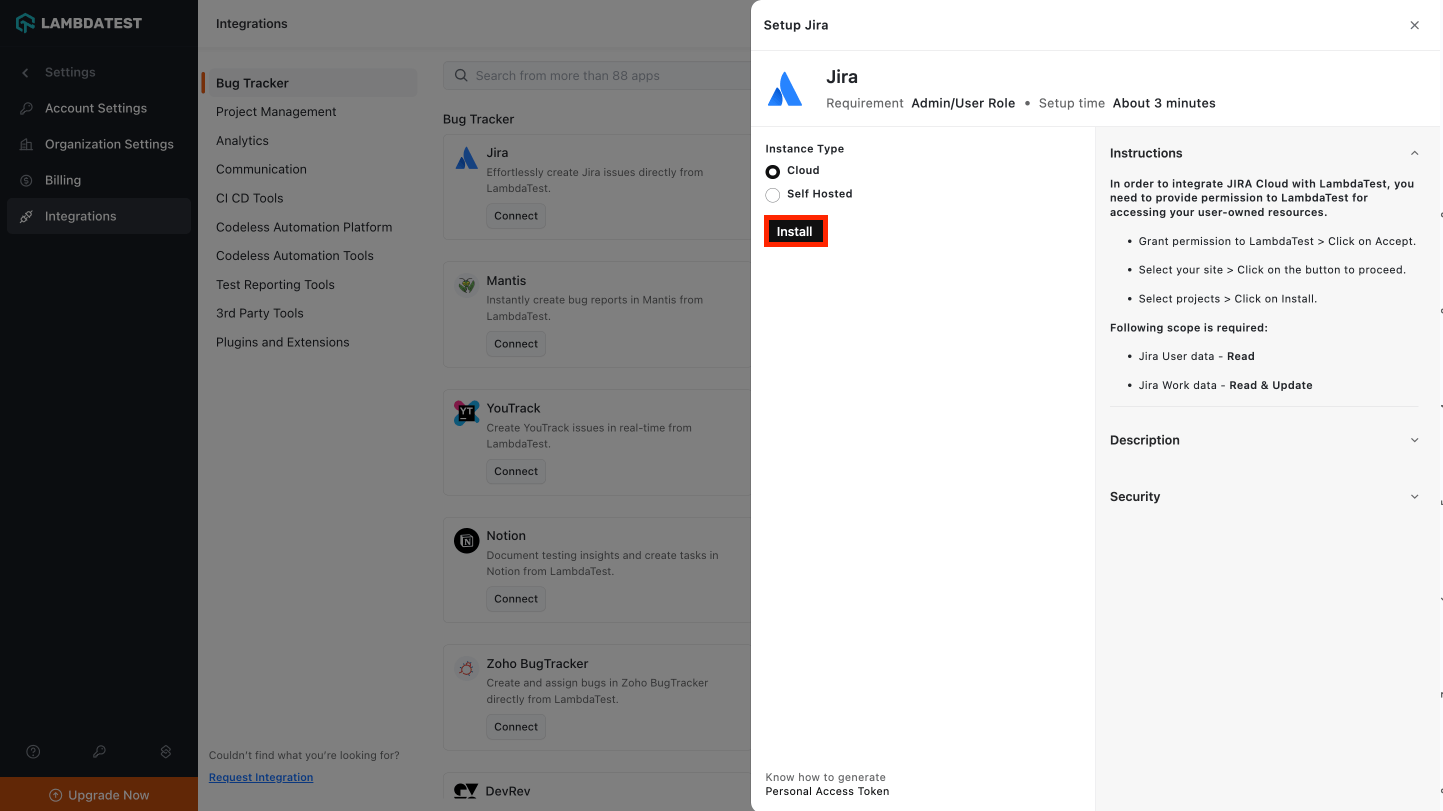
Step 5: Click on the Install button to be redirected to the Jira dashboard.
Step 6: Click on Accept.
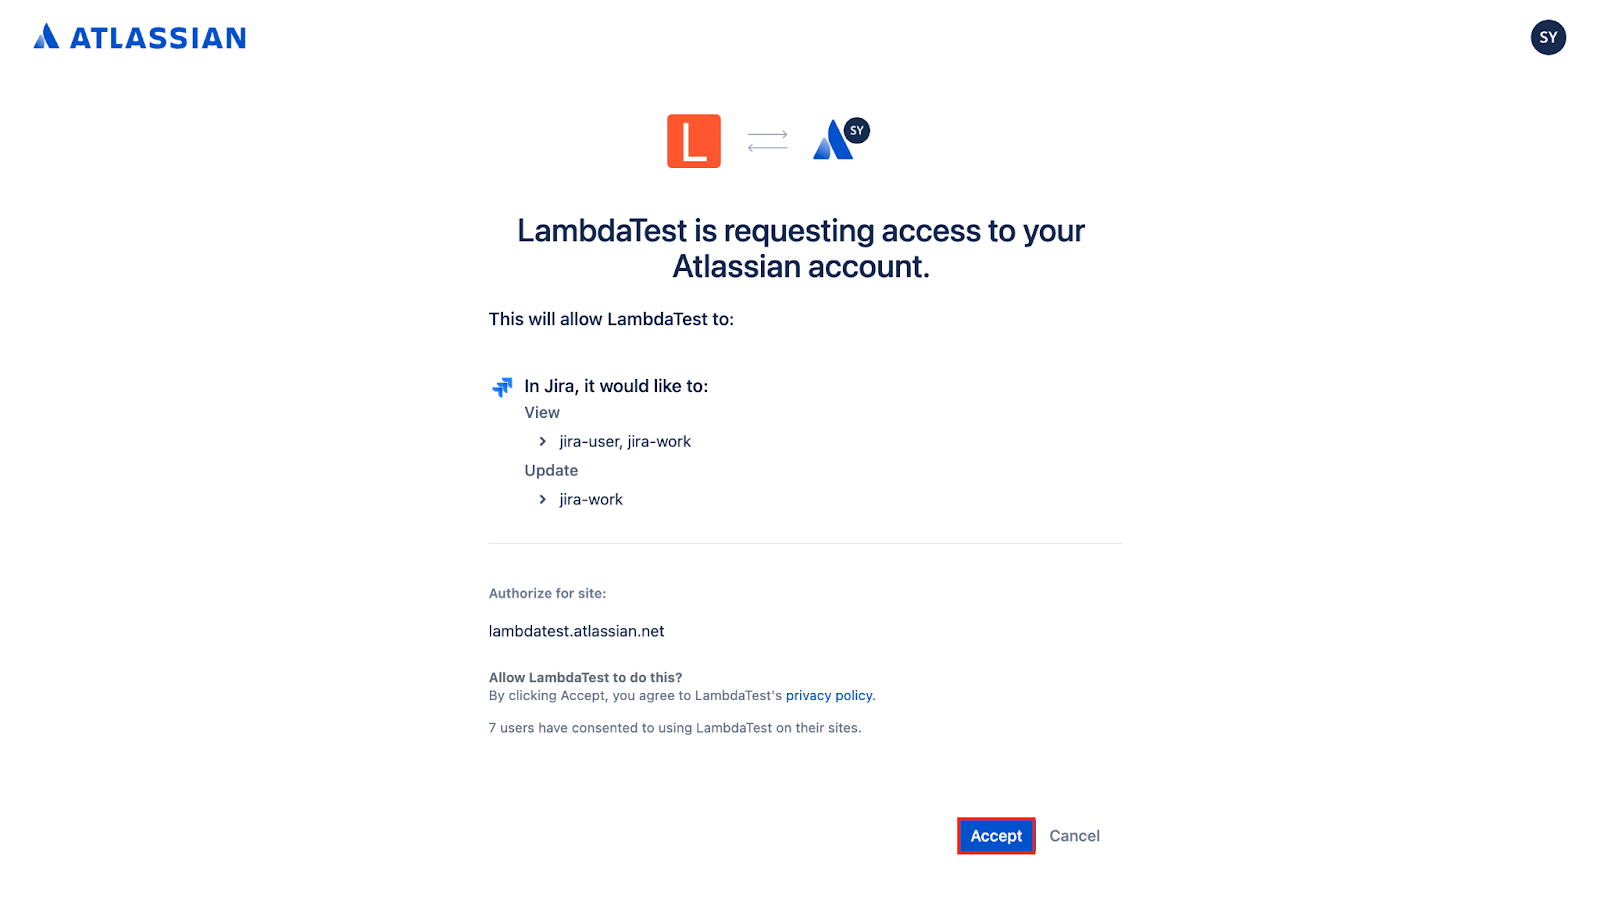
Step 7: Once you click on Accept, you will be redirected to the screen below, where you have to select your site and click on the Select Site and Proceed button.
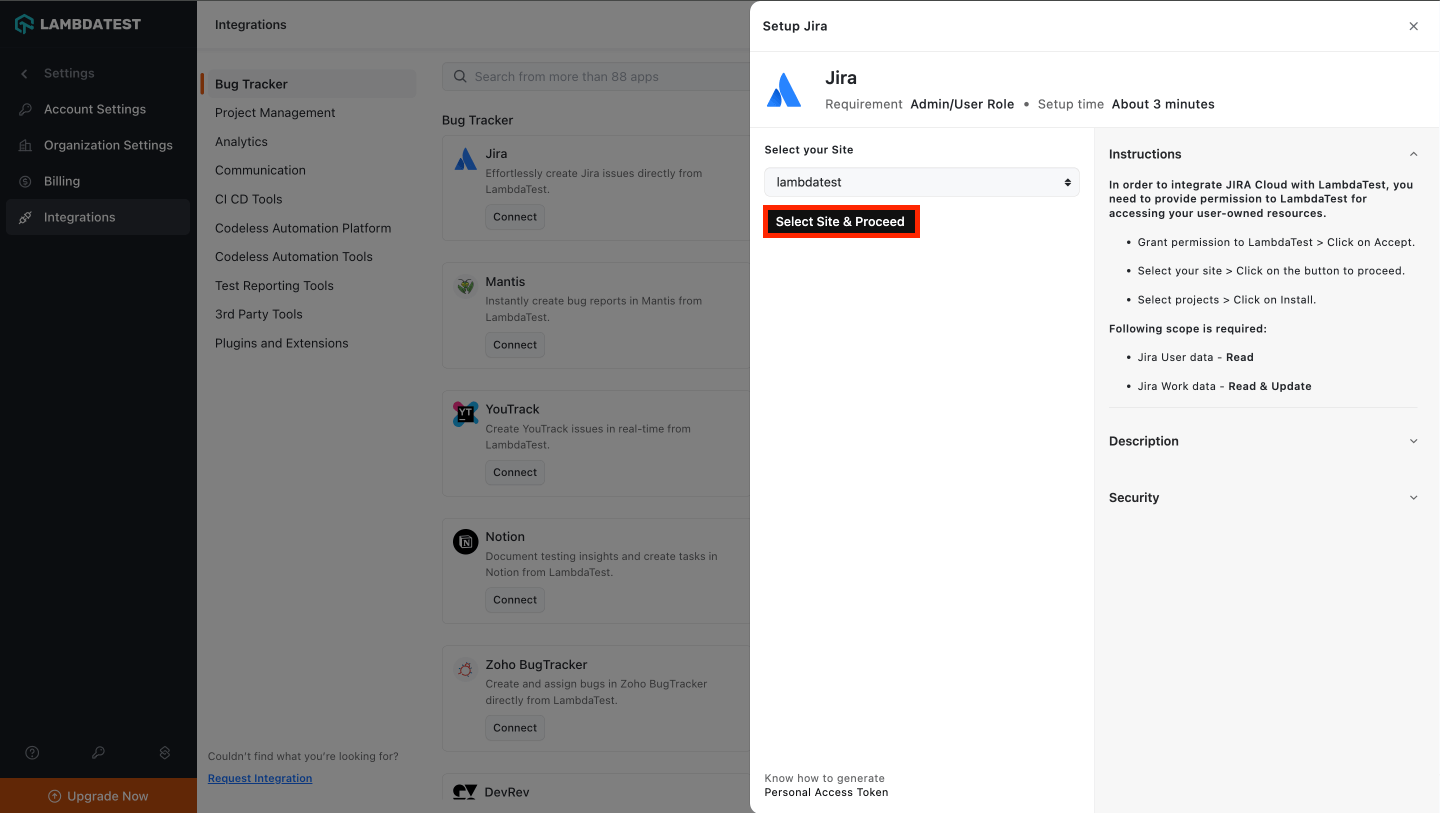
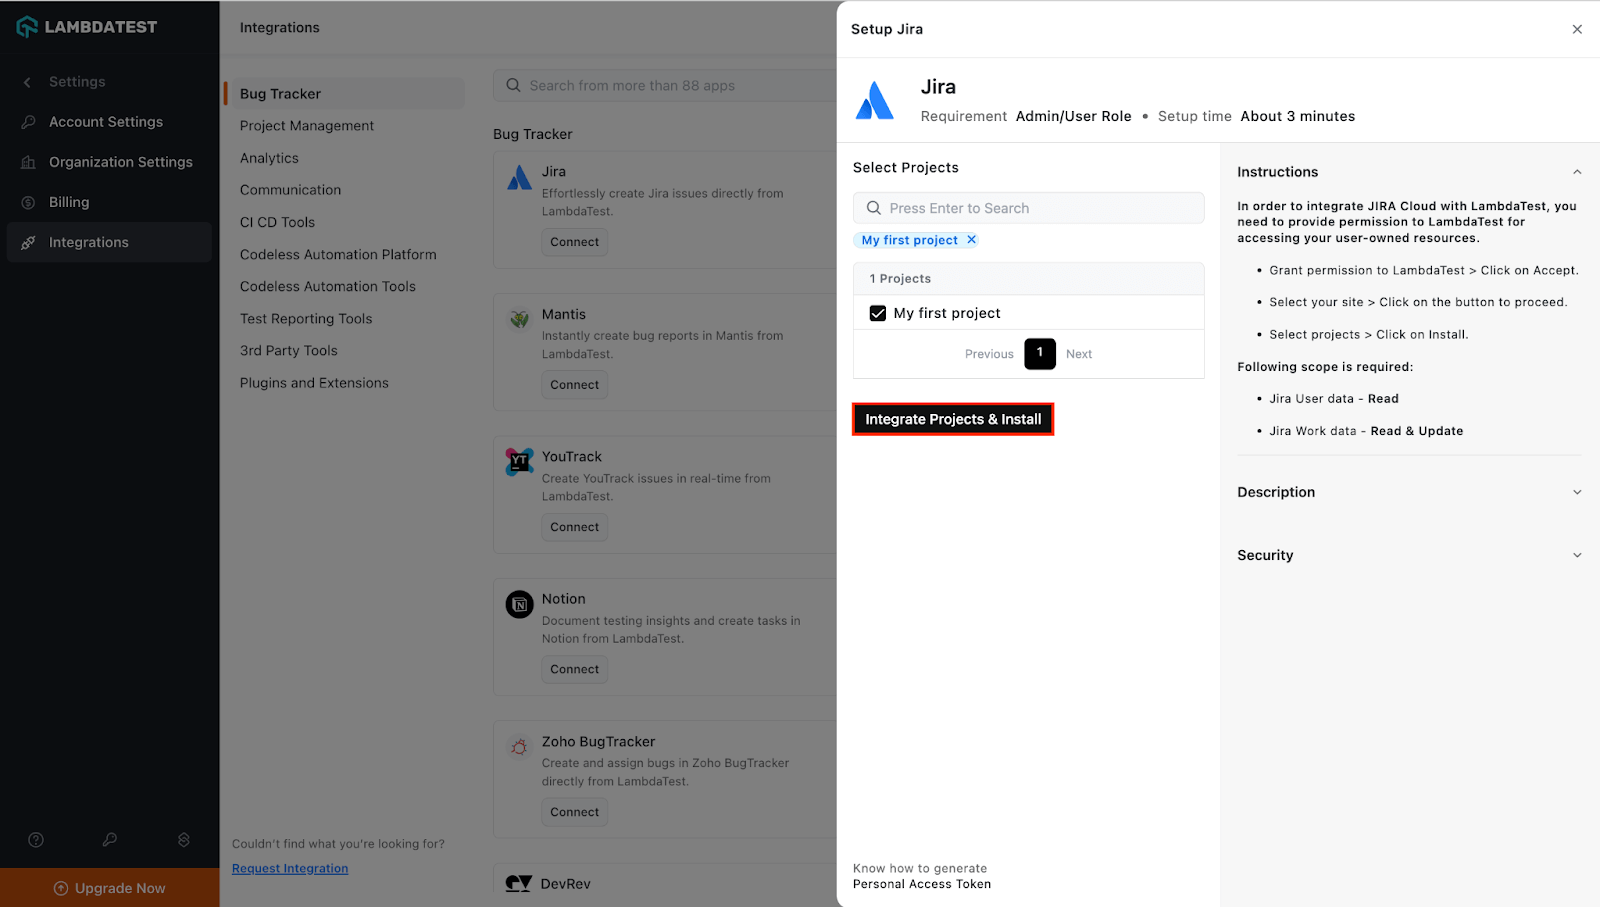
Step 8: When you click on the Select and Proceed button, you will be redirected to the below screen, where you have to select projects that you want to integrate and click on the Integrate Projects and Install button.
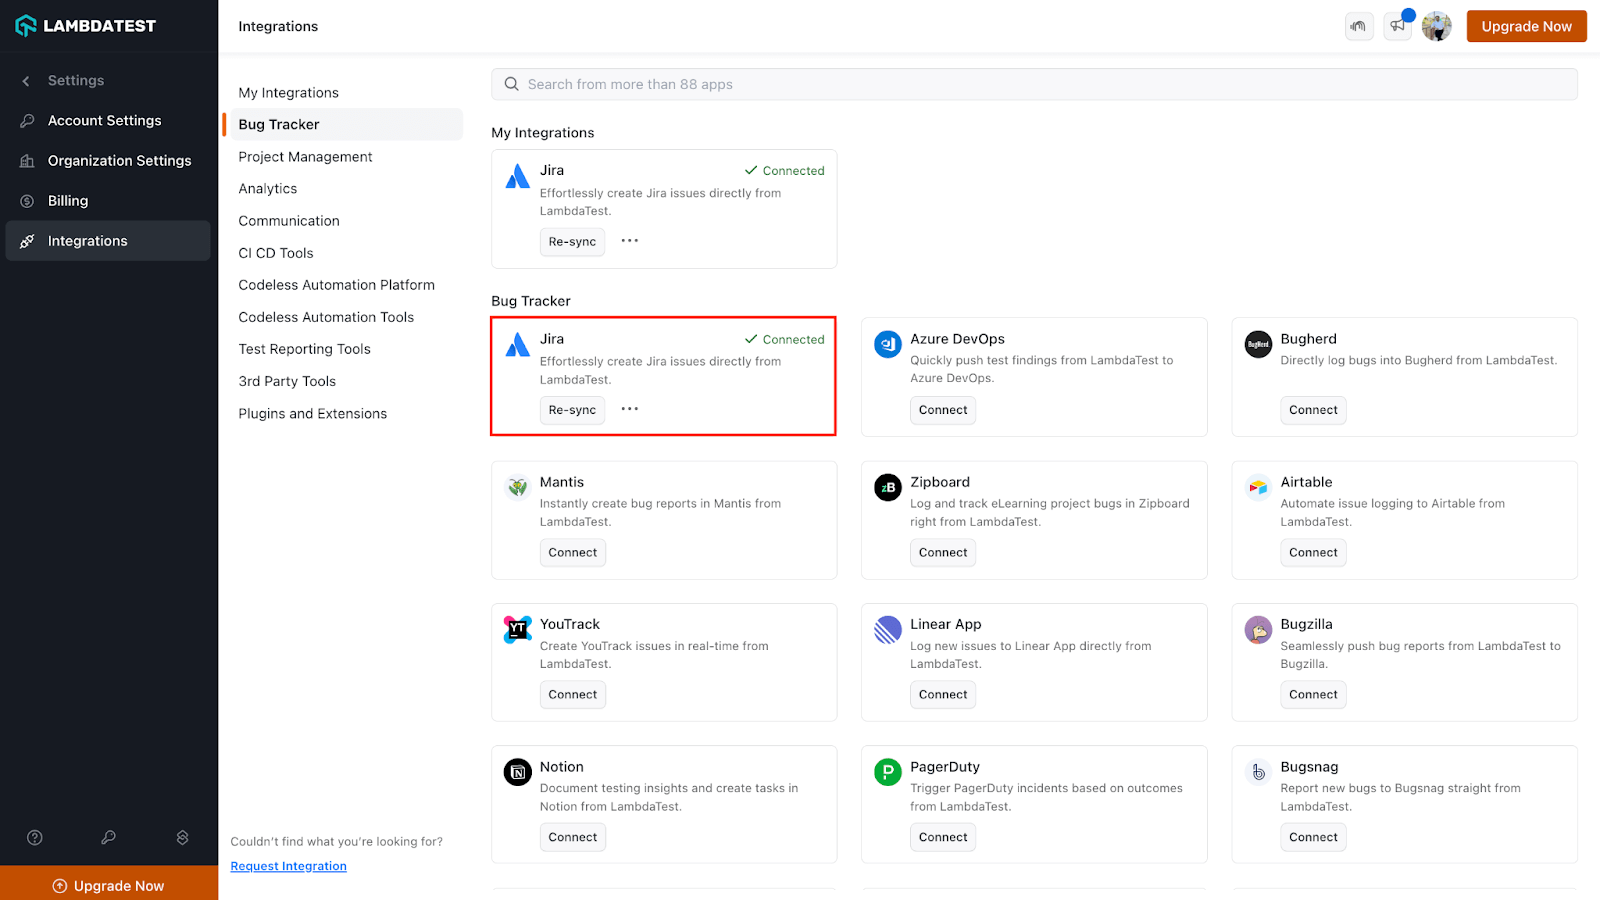
That's it! Go to Integrations again, and you will be able to notice a green tick indicating that Jira is successfully installed. You are all set to experience one-click bug logging to share your issues directly from your TestMu AI account with our teammates on the Jira project.
How To Log Your First Bug Through Jira Integration?
Step 1: Go for any of the tests from the left navigation menu. For the demo, we will be taking the "Real Time Testing" option.
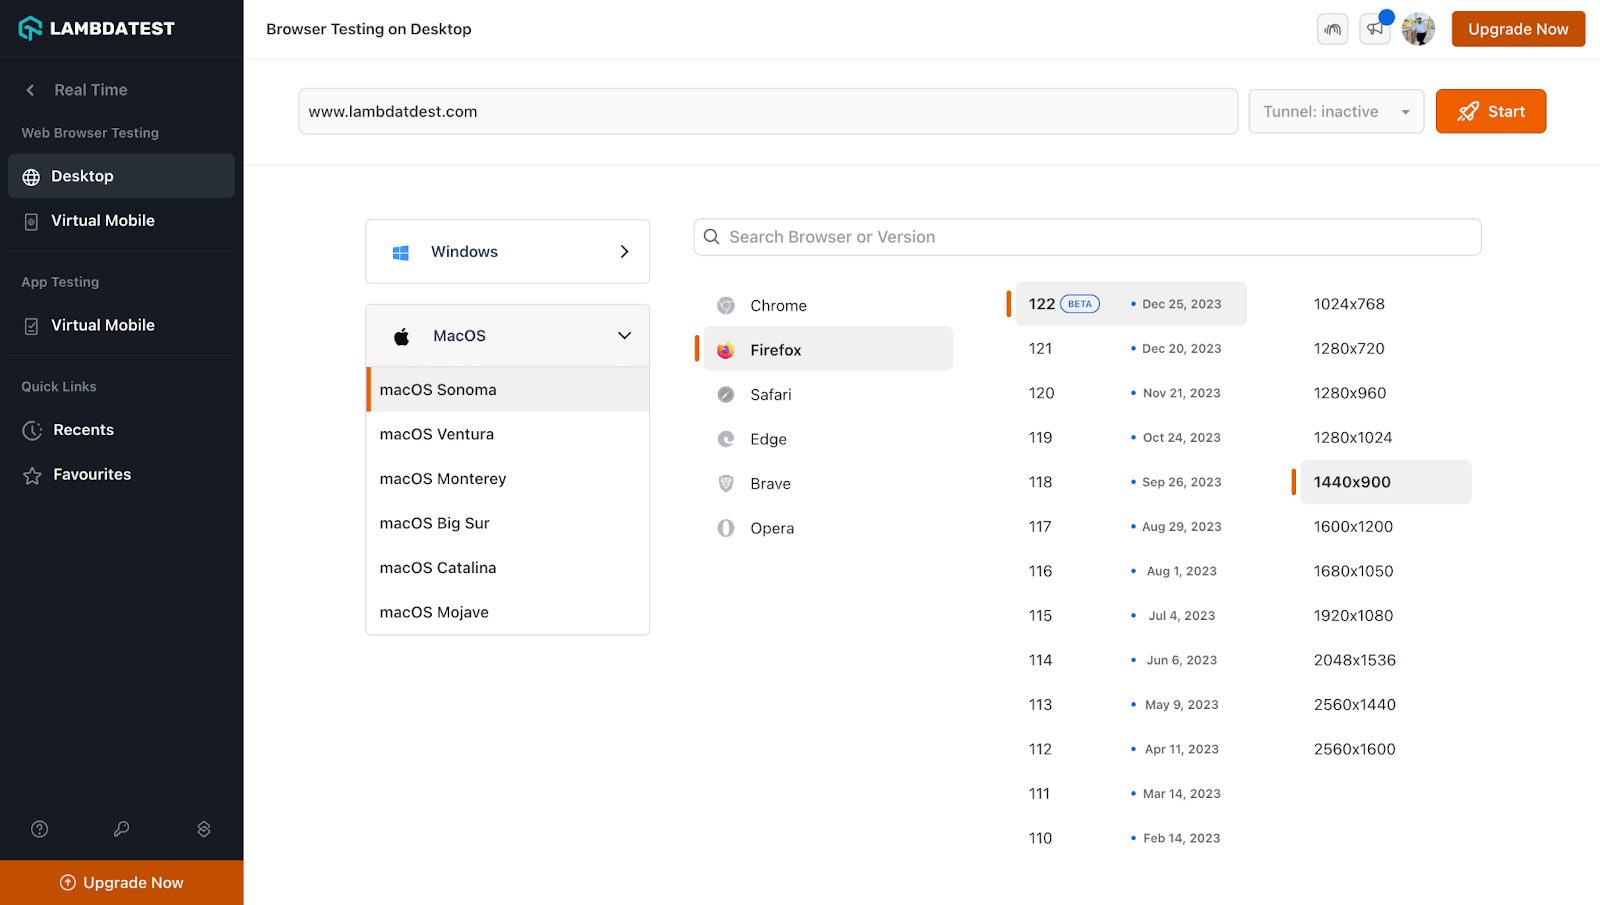
Step 2: Present the URL of the web app you need to test in the dialog box. After that, select any configuration for the browser and operating system of your choice & hit 'Start'.
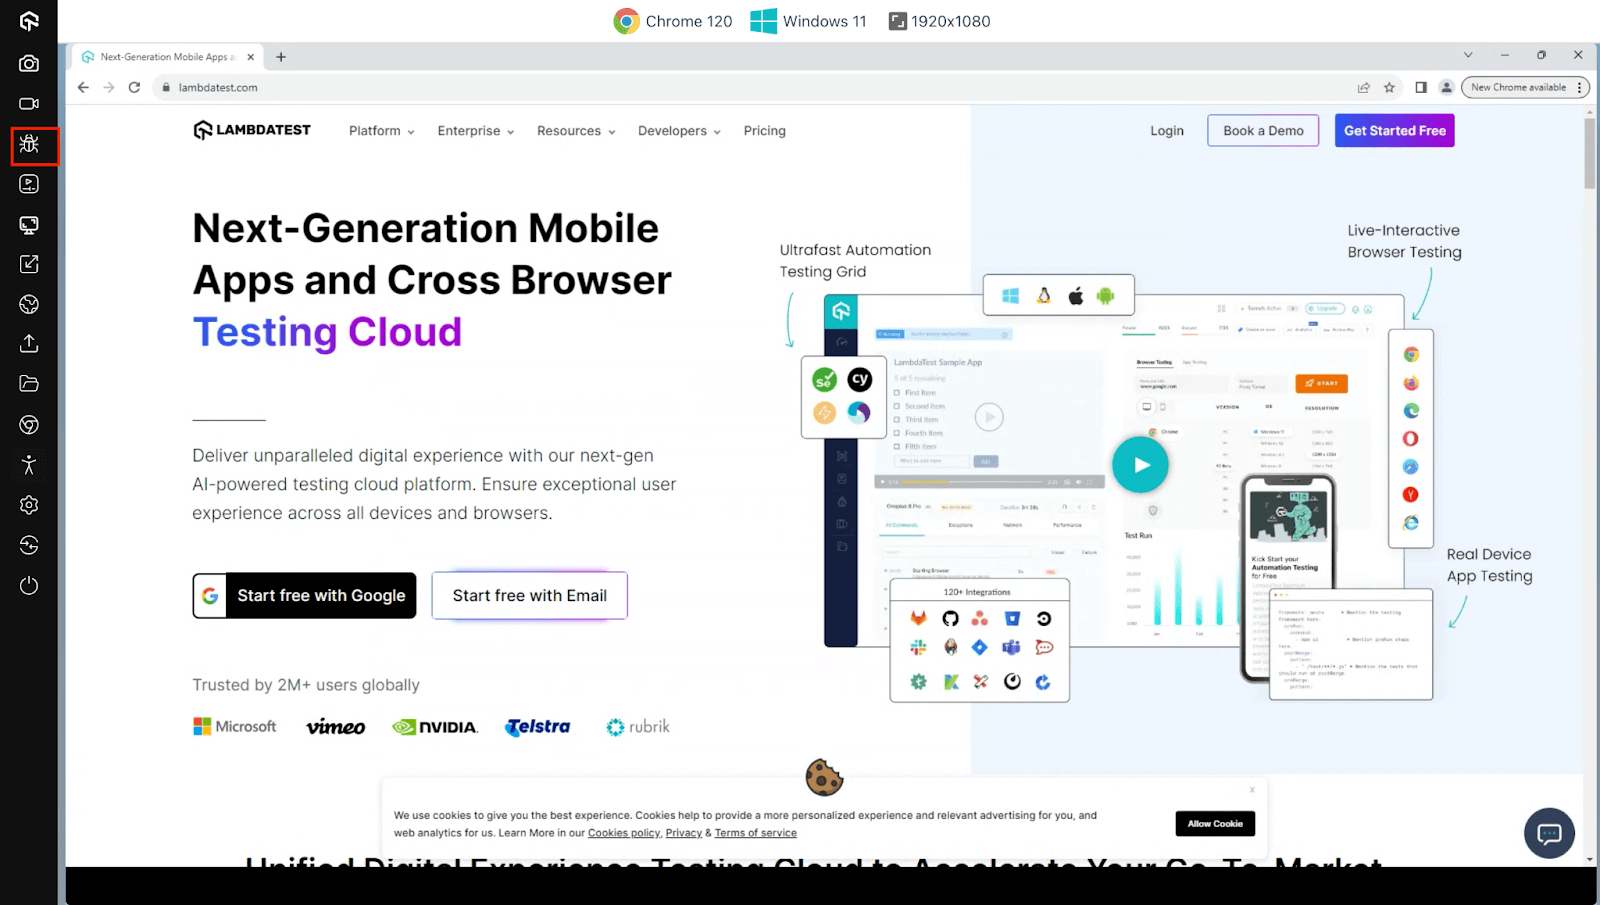
Step 3: After the VM is launched and operable. You can perform testing on your web-app for finding bugs. If a bug gets revealed, then you need to click on the Bug icon from the left panel for capturing a screenshot of the same. We have highlighted that option with yellow in the below image.
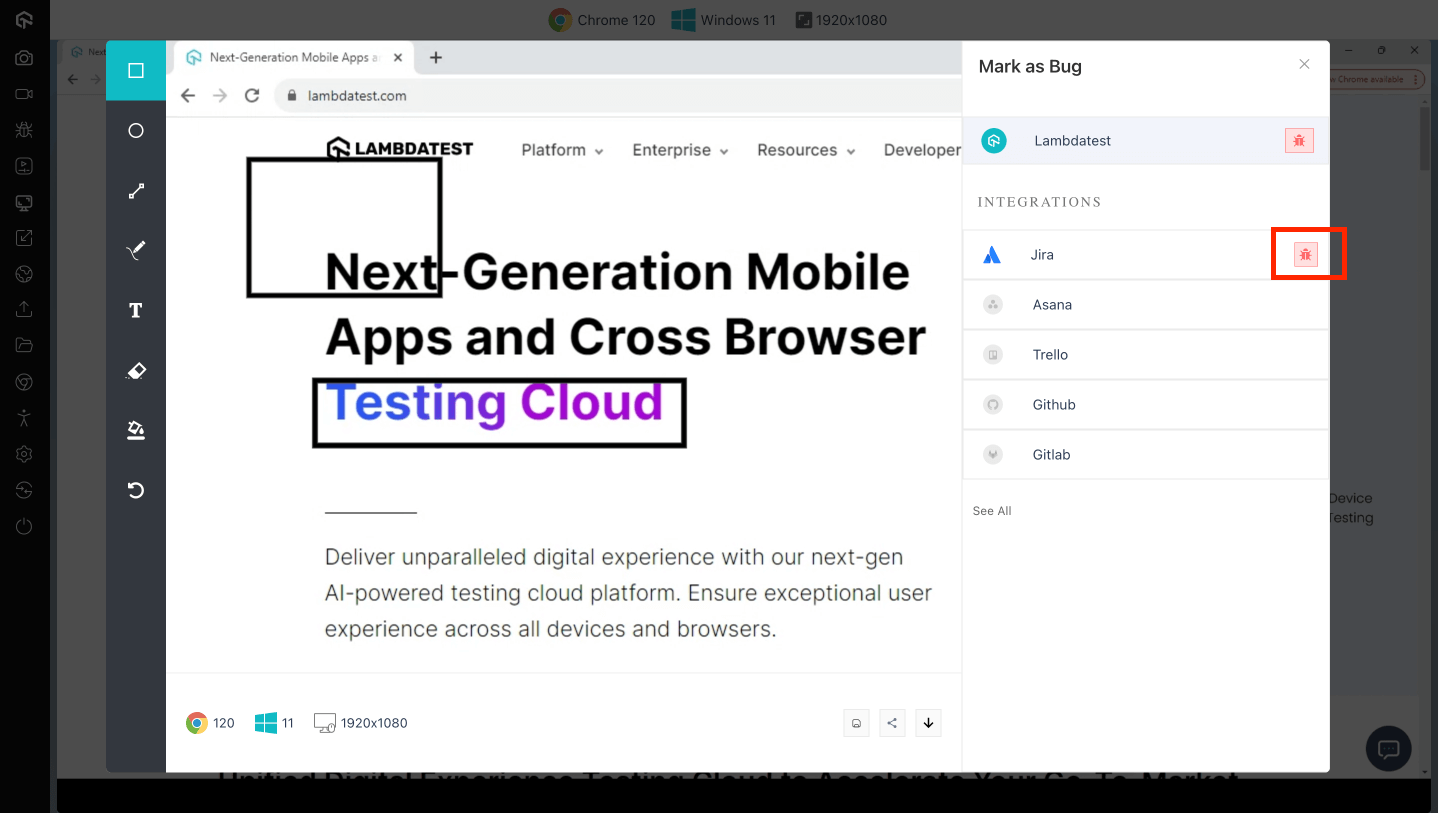
Step 4: After a screenshot is captured, you can annotate any issue or a task with an in-built image editor. Once you are done highlighting the bug, click on the bug icon which is beside Jira.
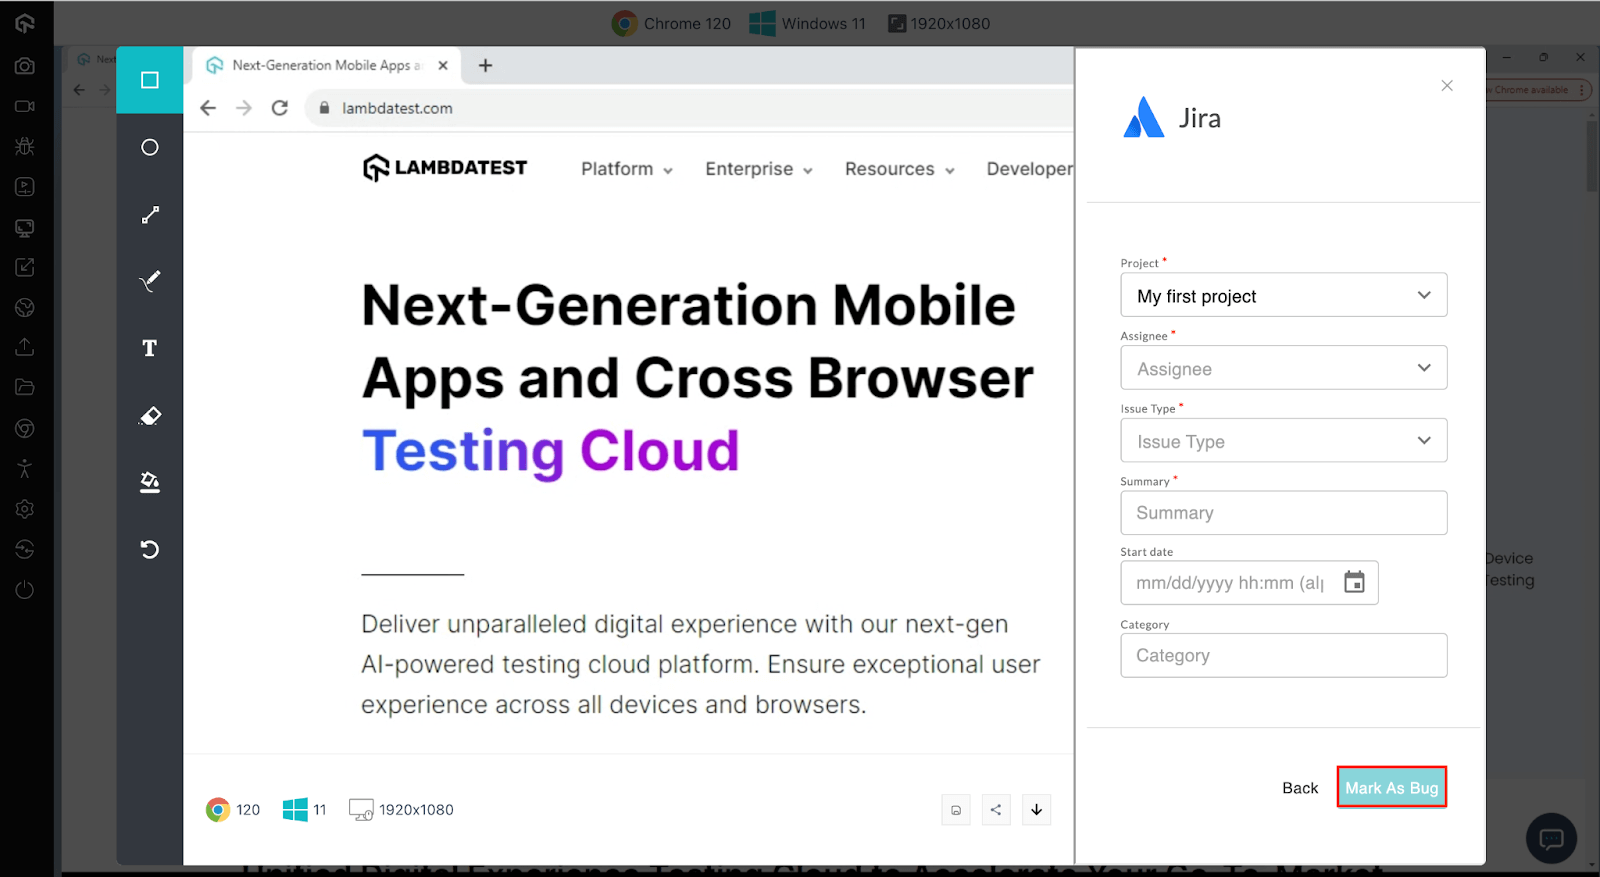
Step 5: After clicking on "Mark as Bug" button a Jira specific form would open up. Fill the fields as per your requirement.
- You can select which project should the ticket go under, along with the Issue type.
- You can set the priority of the bug.
- You can assign the bug to a colleague by populating the field 'Assignee'.
- You also get to post a description to help relate the cause of the issue or the task in Summary section.
Note: Only projects with work type as BUG enabled will be seen in the project dropdown. If you don't see a project in the dropdown, please add work type as BUG for your Jira project and resync the integration from the integrations page.
Step 6: Click on "Mark As Bug" & observe it being successfully marked through a single click effort. Once you hit the button, you will get prompt messages on top of your Virtual Machine indicating the progress of bug logging. You will get a prompt message in few seconds mentioning "Your bug has been logged successfully" indicating that the issue has been successfully pushed to the respective workspace.

Step 7: Log in to your Jira dashboard. You will be able to notice the logged issue right away! All the data you provided through TestMu AI would already be presented in it. TestMu AI automatically includes test environment details and related screenshots in the ticket as attachments.
How To Remove Jira Integration?
Step 1: Login to your TestMu AI account.
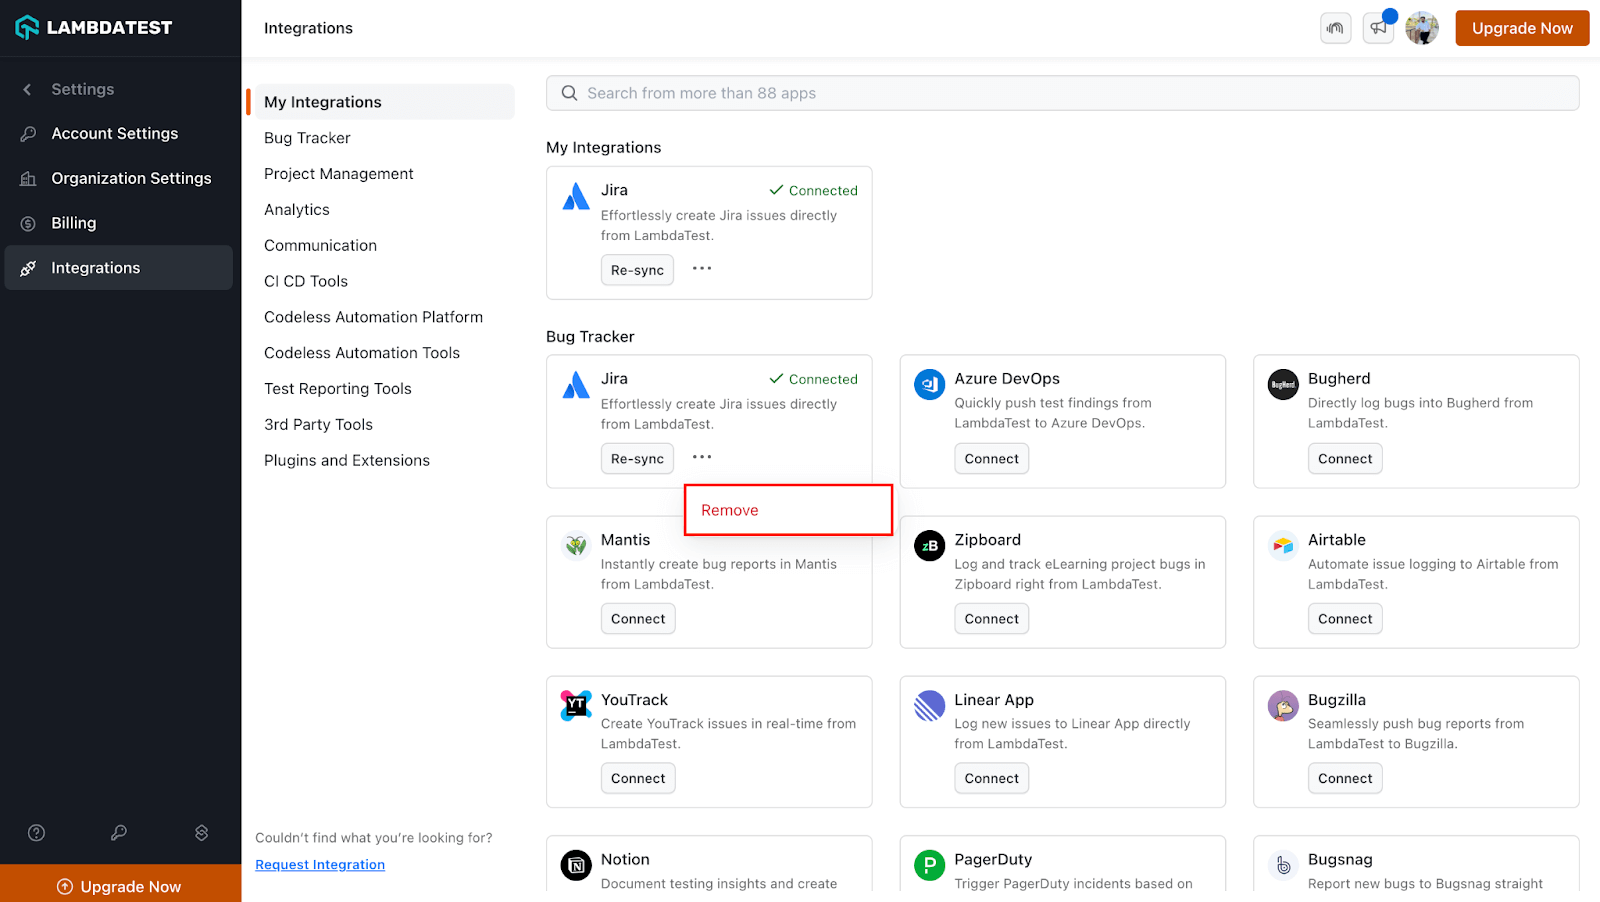
Step 2: Select 'Integration' from the left navigation menu bar. This will guide you to a screen where you will find 3rd party applications, available to integrate with your TestMu AI account.
Step 3: Click on 'Remove'. You can find the Remove button when you click on ellipsis in ‘Jira’ block.
That was all you need to know for TestMu AI + Jira Integration. Increase your productivity with our integrations. If you still have any questions for us, please feel free to let us know. Our experts are always available on chat to help you out with any roadblock regarding our product. Happy testing!
