Mantis Integration
Mantis is a free and an open source bug tracker. Mantis supports multiple OS such as Windows, Linux, and macOS, from the server side. Along with platform compatibility, It also offers cross browser compatibility on Google Chrome, Mozilla Firefox, Opera, Safari and IE10+. Mantis is highly customizable, you can customize your issue fields, workflows and notifications. You can also declare access as per role based in your organization. All these features along with email notifications to keep you updated on everything regarding the project makes Mantis a great choice as a project management tool.
TestMu AI integration with Mantis helps you in filing issues to your project in Mantis directly from TestMu AI platform. With one-click integration you can push annotated issues to the project of your choice, assign it to the required team mate, and attach necessary screenshots. You can do all that while in the middle of a test session in TestMu AI platform. The fields populated by you when marking as bug through TestMu AI are displayed as information on the Mantis for a testing instance.
Mantis Integration with TestMu AI, like all of the integrations to 3rd party applications, is available for freemium as well as premium plan.
How To Establish Integration With Mantis From Your TestMu AI Account?
Step 1: Login to your TestMu AI account. You would need to have Admin or User level access to see and install integrations.
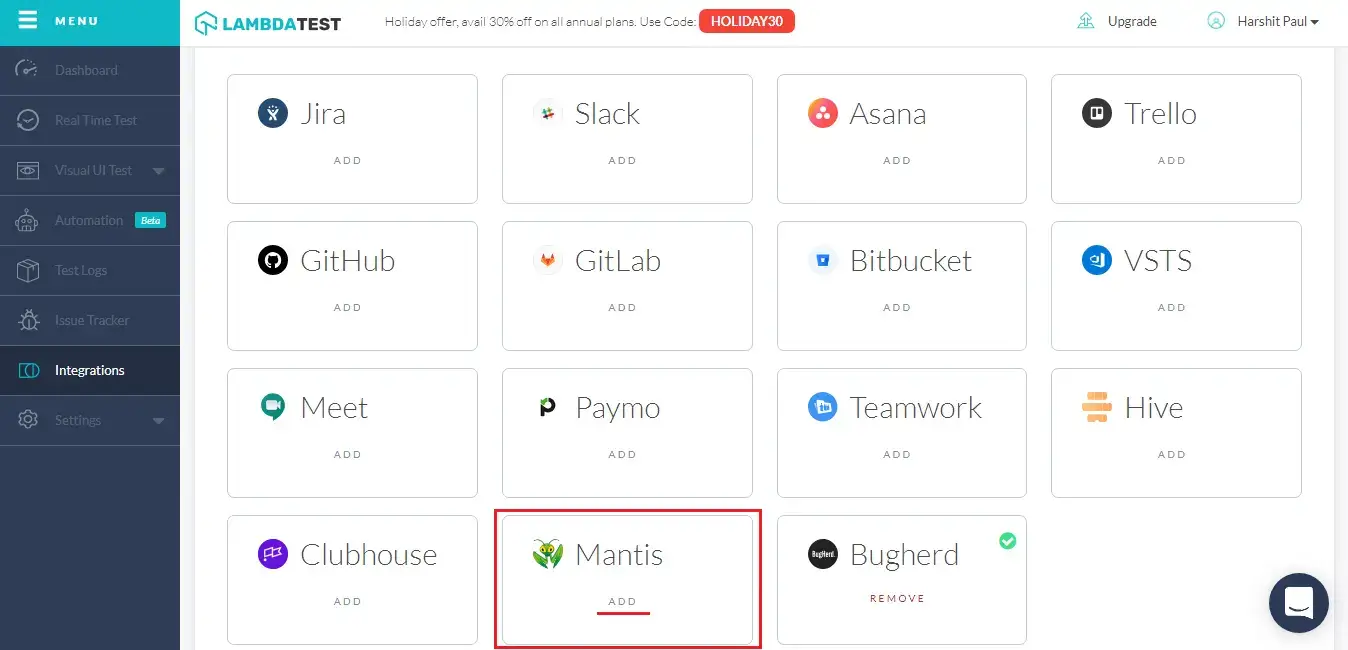
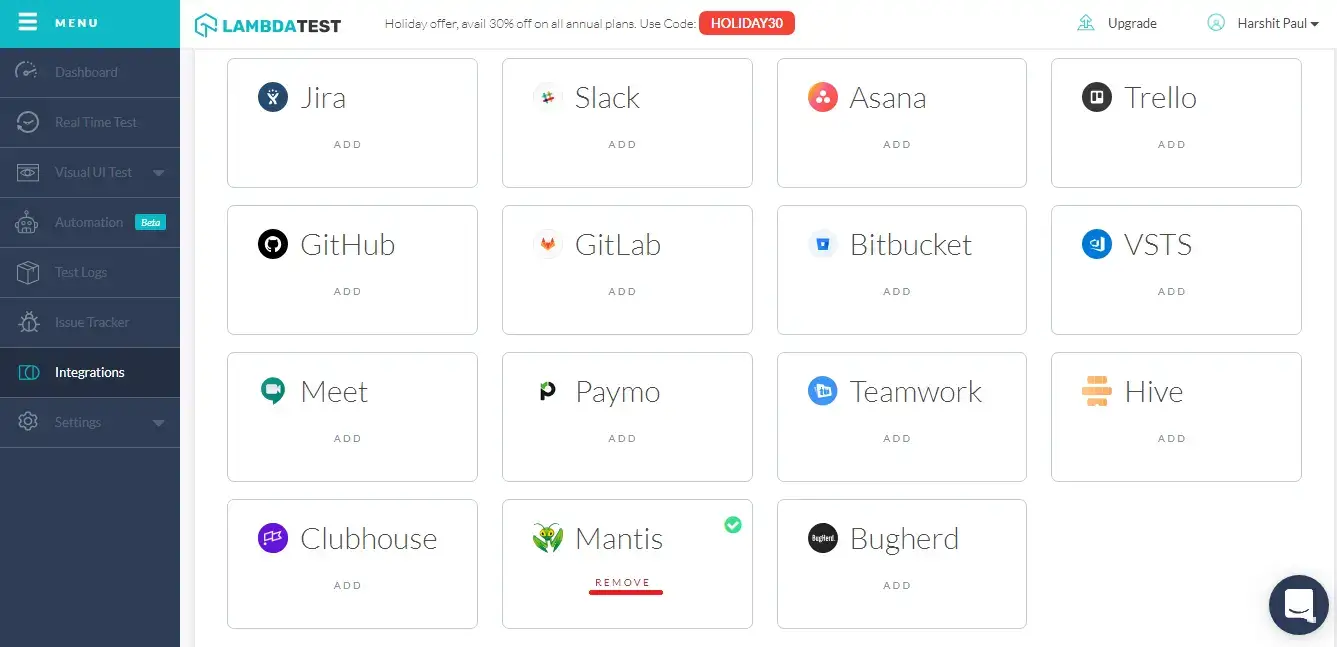
Step 2: Select ‘Integrations’ from the left navigation menu bar. This will guide you to a screen where you will find a list of 3rd party applications, available to integrate with your TestMu AI account.
Step 3: Click on ‘ADD’ under the block that says ‘Mantis’.
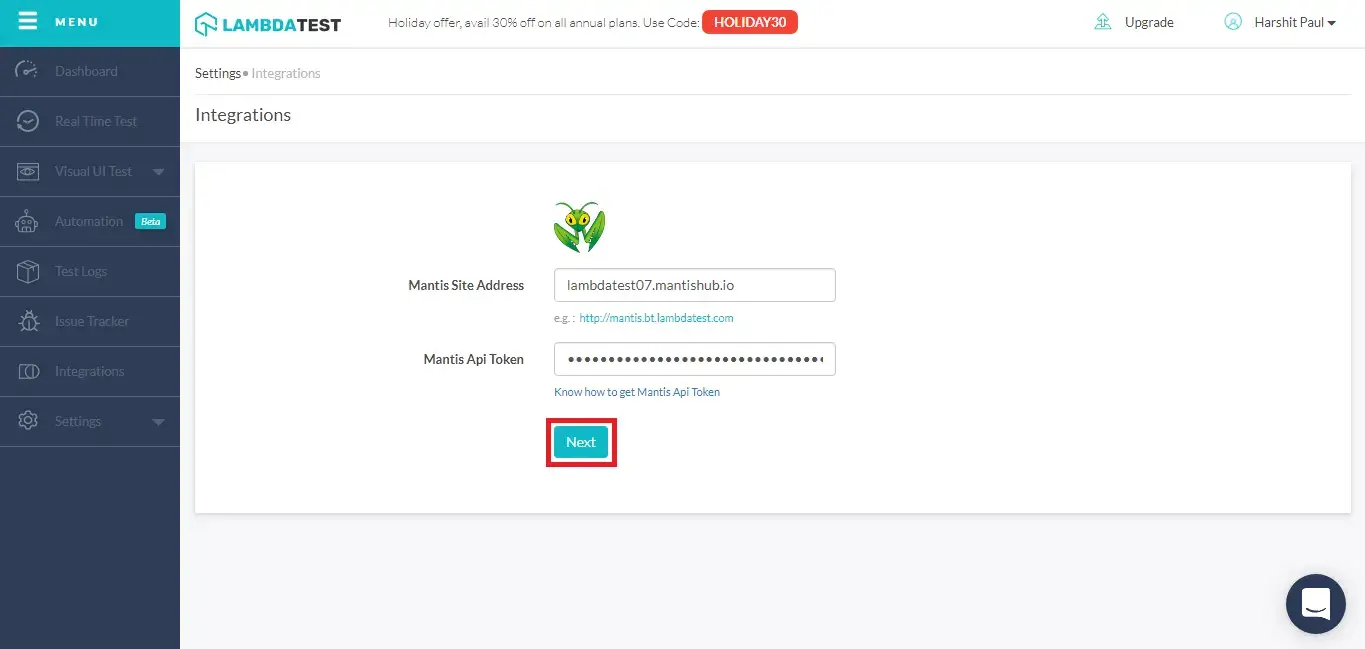
Step 4: Once you click on install, you will be redirected to the below screen. You will be asked to provide your Mantis API Token & Mantis Site Address in the highlighted fields to establish TestMu AI Integration with Mantis.

What is an API token? When two different applications interact with each other, a server-to-server communication is established. API token is needed for authenticating user identity from one server to another, by fetching user-owned resources available on the server from where the communication is initiated. API token has been a necessity for maintaining security and data integrity of any application. They are just as vital to an end user as they are to an application. API tokens are relevant if an end user logs in an application through a 2-step verification process.
What is Mantis Site Address? Your "Mantis Site Address" would be the URL for the instance of your project on Mantishub. The part highlighted with blue in the below image will be your Mantis Site Address.
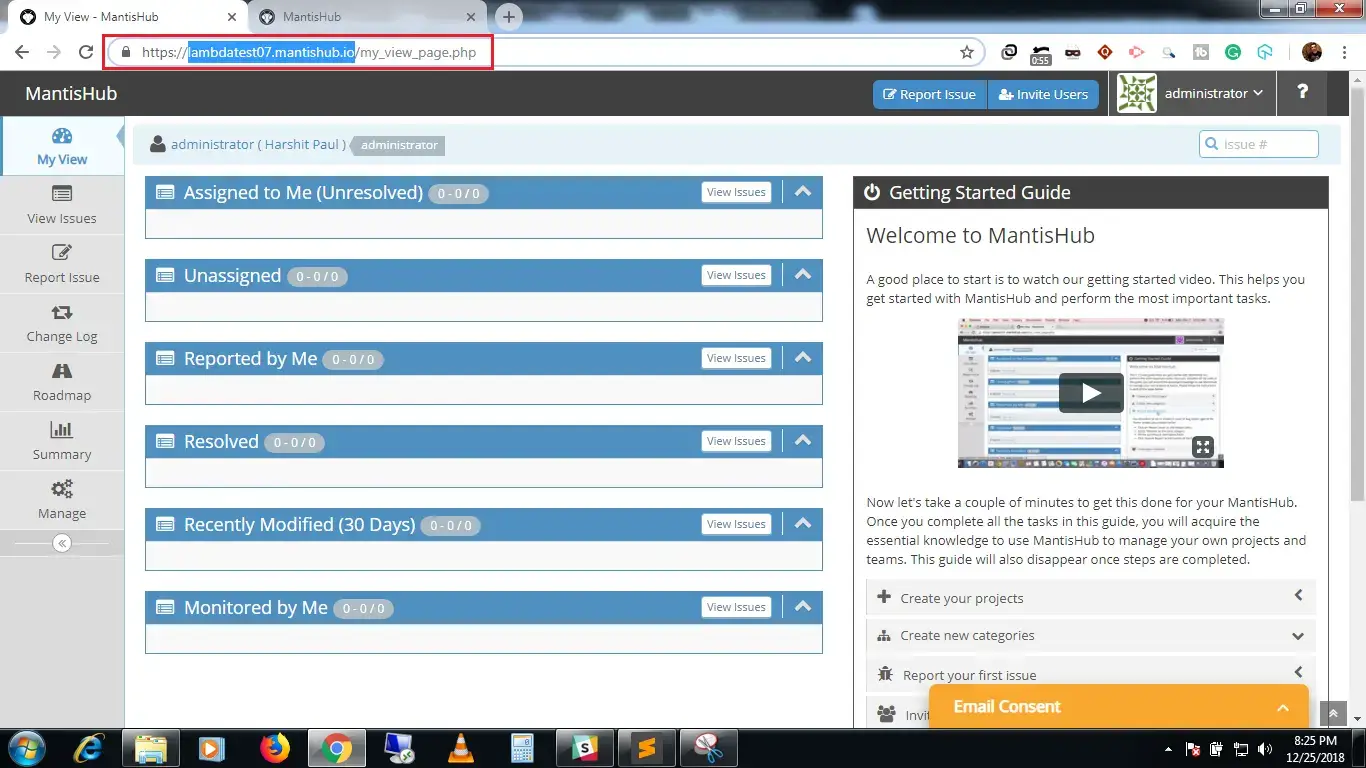
Step 5: To find the API token, login to your MantisHub account. Go to the ‘administrator’ drop-down on the top-right corner and click on "My Account".

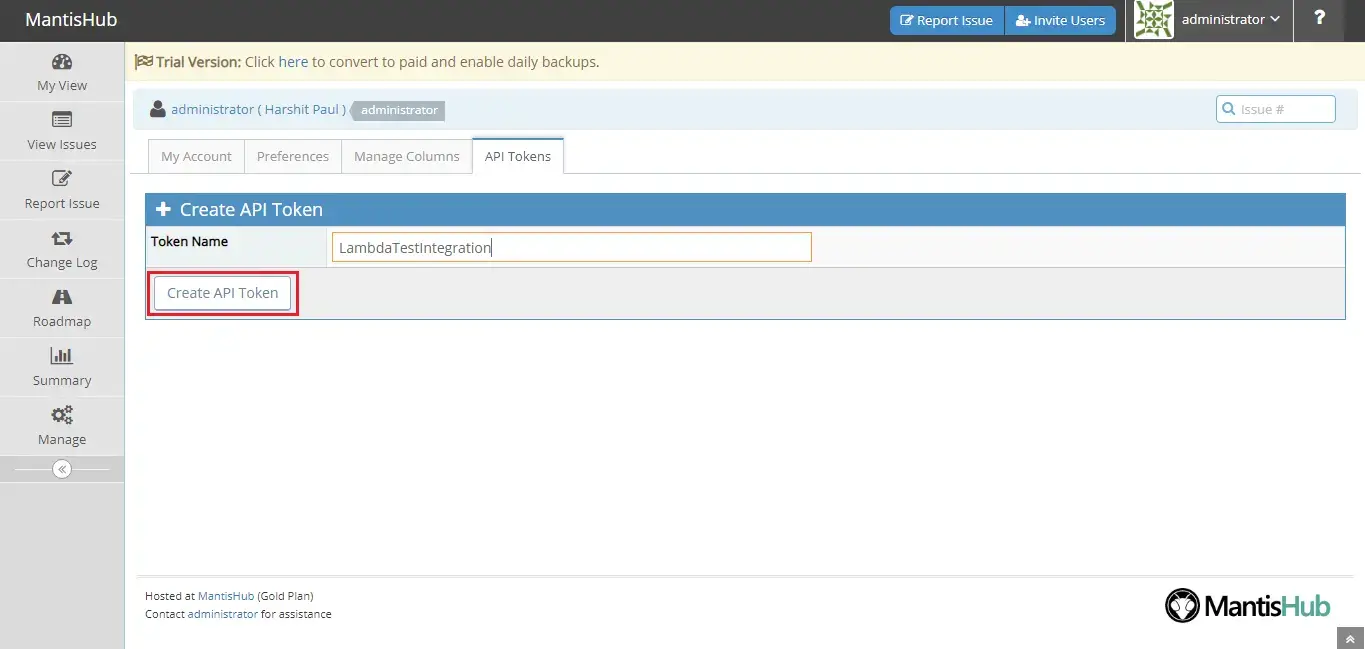
Step 6: As you click on "My Account", you will find a tab for "API Tokens". Enter a value in the provided field. It could be any value you like and then click on the button that says "Create API Token".

Step 7: As you click on "Create API Token", an API token would be generated. Keep the API token stored with you safely as you won’t be able to see it again.

Note: These API tokens should be treated as safely as you treat your own passwords, as they are responsible for successful authentication between one application to another. However, in case your API token gets misplaced or is shared with someone whom you don’t trust, then you can always revoke access through that API token through your MantisHub instance. You can also generate multiple API tokens.

Paste this API token into the field provided at TestMu AI & hit the ‘Next’ button. You are all set to experience one-click bug logging to share your issues directly from your TestMu AI account to your project on Mantis.
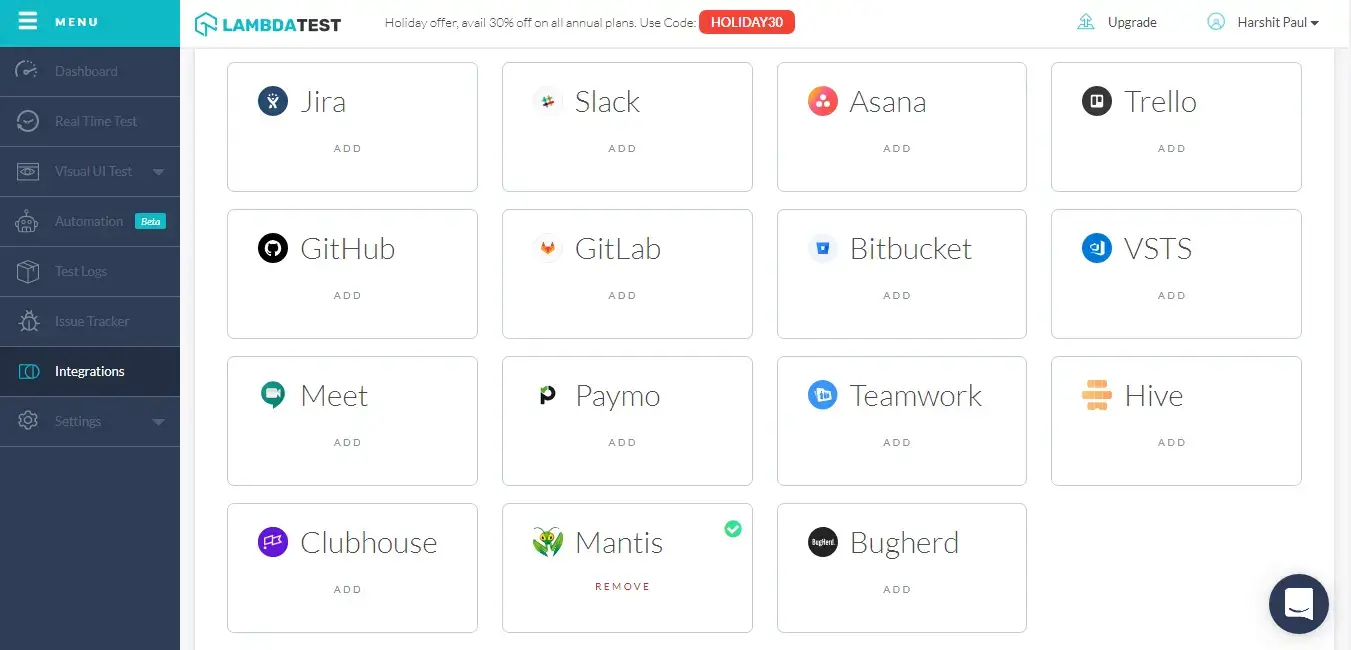
That’s it! Go to Integrations again and you will be able to notice a green tick indicating that Mantis is successfully installed.
How To Log Your First Bug Through Mantis Integration?
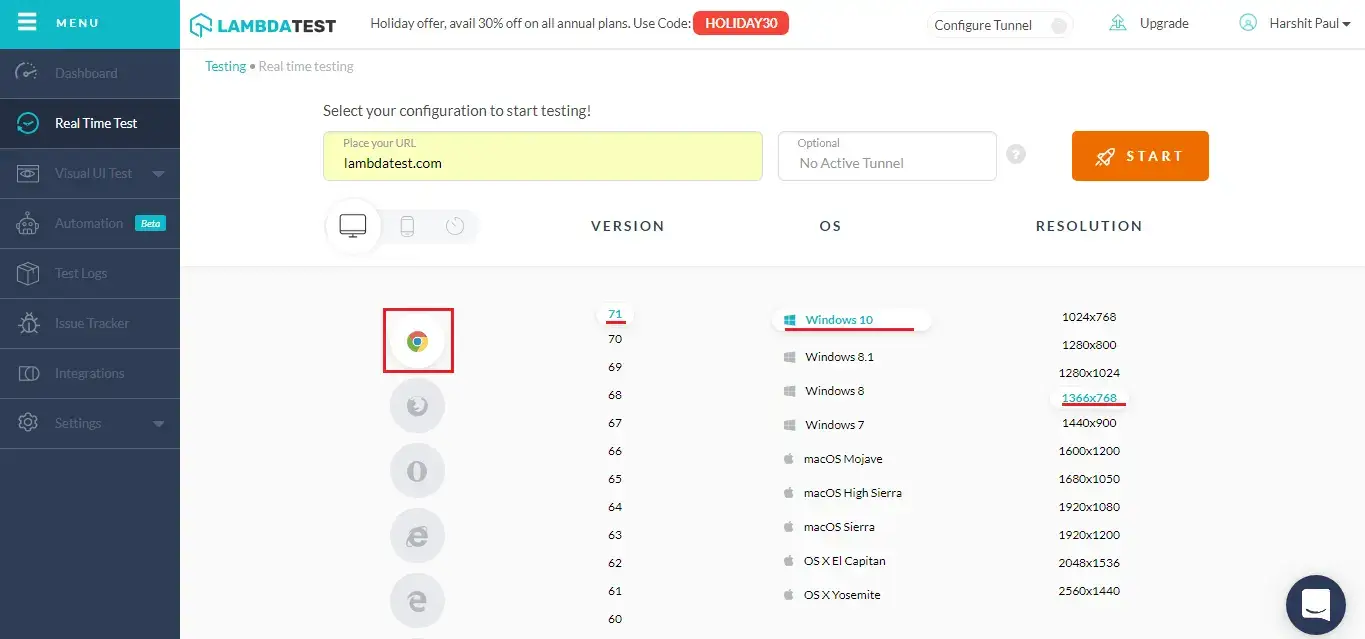
Step 1: Go for any of the test from the left navigation menu. For demo, we will be taking "Real Time Test" option.
Step 2: Present a URL of the web-app you need to test in the dialog box. After that, select any configuration for browser and operating system of your choice & hit ‘Start‘.
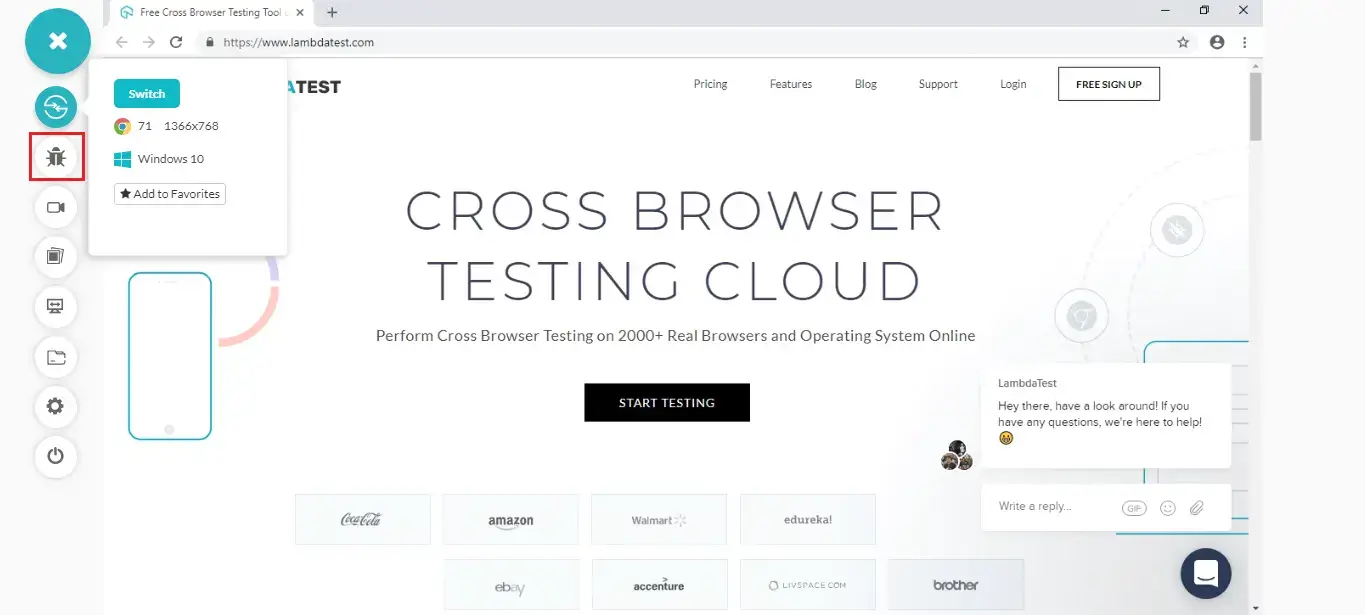
Step 3: After the VM is launched and operable. You can find bugs on you website by performing live, interactive testing. If a bug gets revealed, then you need to click on the bug icon from the left panel for capturing a screenshot of the same. We have highlighted that controller button in the below image.
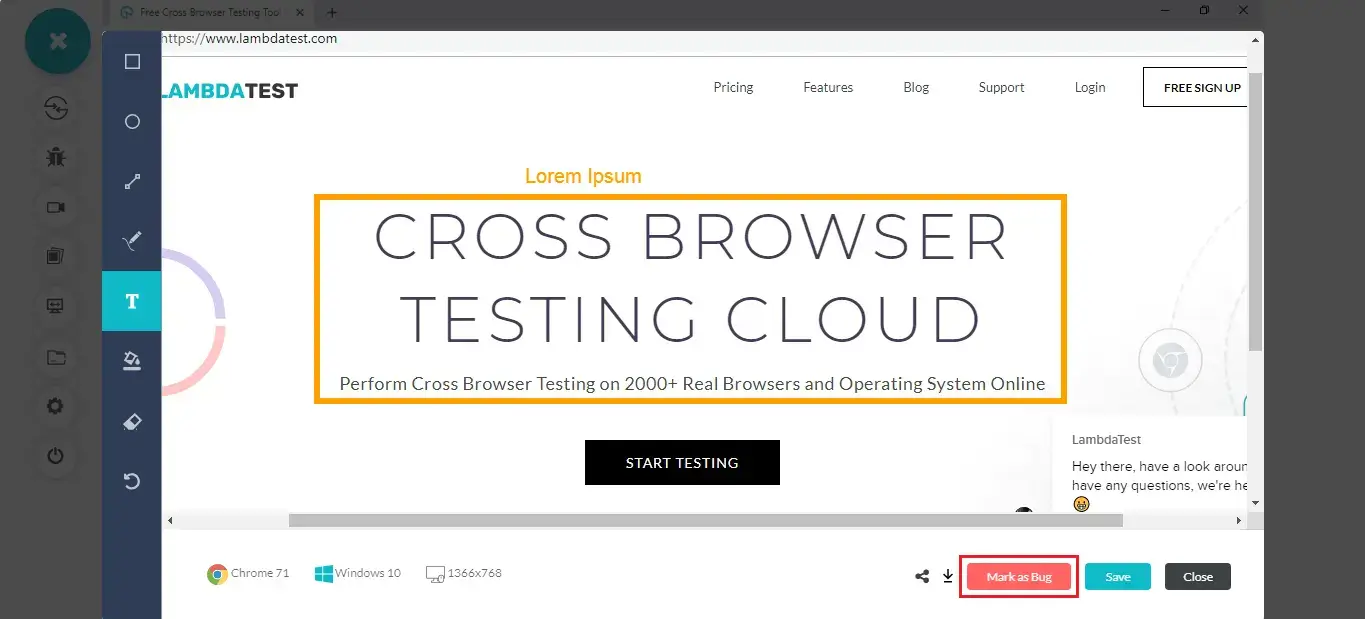
Step 4: After a screenshot is captured, you can annotate any issue or a task with an in-built image editor. Once you are done highlighting the bug, click on the button that says "Mark as Bug".
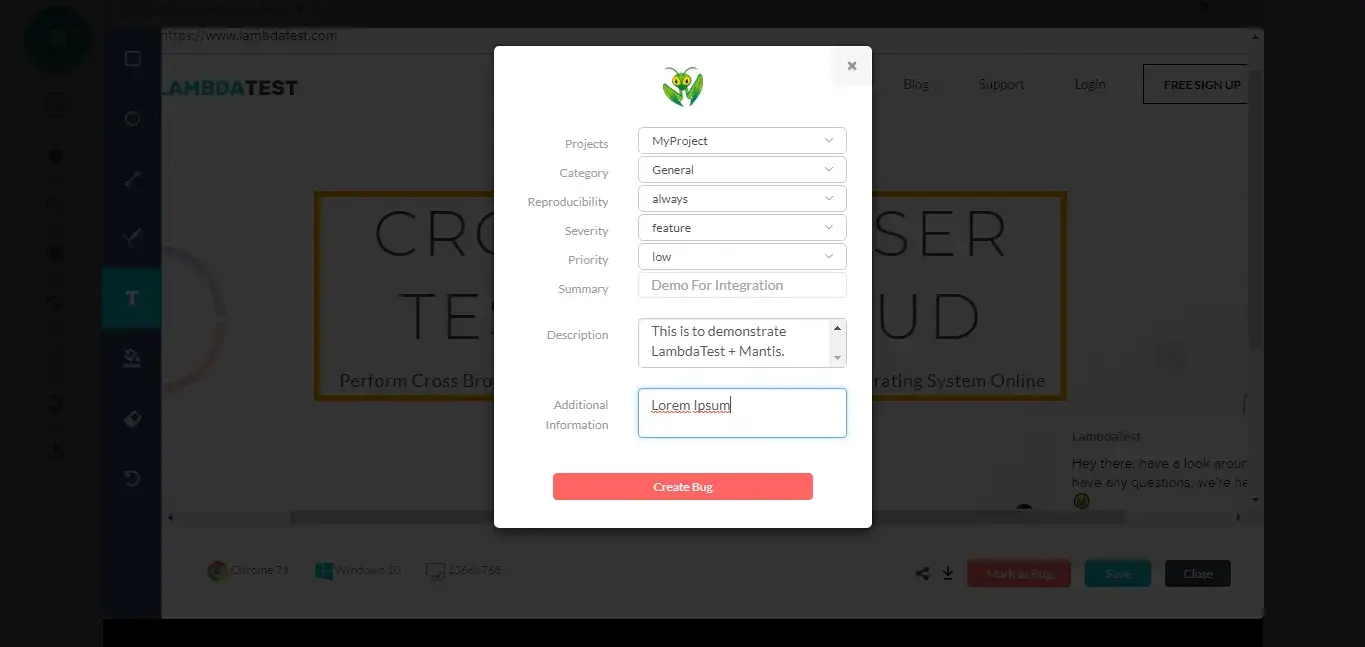
Step 5: As you click on "Mark as Bug" button, a Mantis specific form would open up. Fill the fields as per your requirement.
- You can select which project should the ticket go under.
- You can set the category for your UI observation.
- You can also select a value to signify the reproducibility.
- You can set the severity as well as the priority of the bug.
- You can mention the summary as well for better visibility on dashboard.
- You also get to post a description to help relate the cause of the issue or the task.
- If you have got a lot to convey then you can do so by populating the "Additional Information".
Step 6: Click on "Create Bug" & observe it being successfully marked through a single click effort. Once you hit the button, you will get prompt messages on top of your Virtual Machine indicating the progress of bug logging. You will get a prompt message in few seconds mentioning "Bug successfully marked" indicating that the issue has been successfully pushed to the respective workspace.

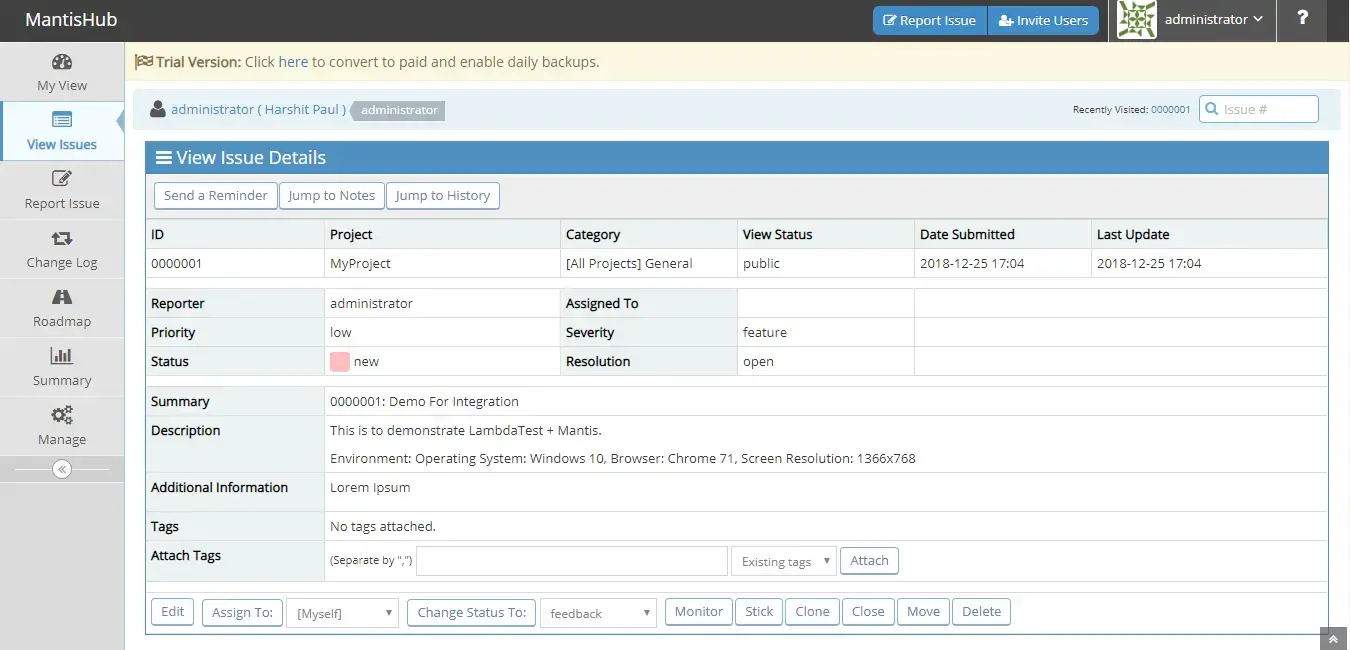
Step 7: Visit your Mantis dashboard view. You will be able to notice the logged issue right away!
Step 8: As you click on the task you will notice all the data you provided in TestMu AI already presented in the task under task details. TestMu AI automatically includes test environment details and related screenshots in the ticket as attachments.
How To Uninstall Mantis Integration?
You can work with one integration at a time. So if you would want to integrate to a similar 3rd party application, then you would have to
uninstallyour current integration. Here is how you can do that.
Step 1: Login to your TestMu AI account.
Step 2: Select ‘Integrations’ from the left navigation menu bar. This will guide you to a screen where you will find 3rd party applications, available to integrate with your TestMu AI account.
Step 3: Click on ‘REMOVE’. You can find the remove button right under the ‘Mantis’ block which would be highlighted with a green tick.
That was all you need to know for TestMu AI + Mantis Integration. Increase your productivity with our integrations. If you still have any questions for us, please feel free to let us know. Our experts are always available on chat to help you out with any roadblock regarding our product. Happy testing!
