ClickUp Integration
ClickUp offers a highly customizable cloud-based platform to boost your productivity for both professional and personal life by storing all of your tasks, docs, conversations, timelines, spreadsheets, and more in a single place. You can have different views of the project such as Gantt view, board view, and calendar view. You could also chat with your colleagues, and share documents with the team. ClickUp also offers numerous features for time management, task management, project management, along with effective collaboration, reporting, and integrations to third-party tools such as TestMu AI.
TestMu AI integration with ClickUp will help you report bugs and UI anomalies directly in your desired project on ClickUp while performing cross browser testing with TestMu AI. You can capture a screenshot of the bug, highlight the anomaly, annotate extra information, choose an assignee, provide a suitable title and description to help relay further actions. You can do all that directly from TestMu AI, in just a single click.
How To Integrate ClickUp With Your TestMu AI Account?
Step 1: Login to your TestMu AI account. You would need to have Admin or User level access to see and install integrations.
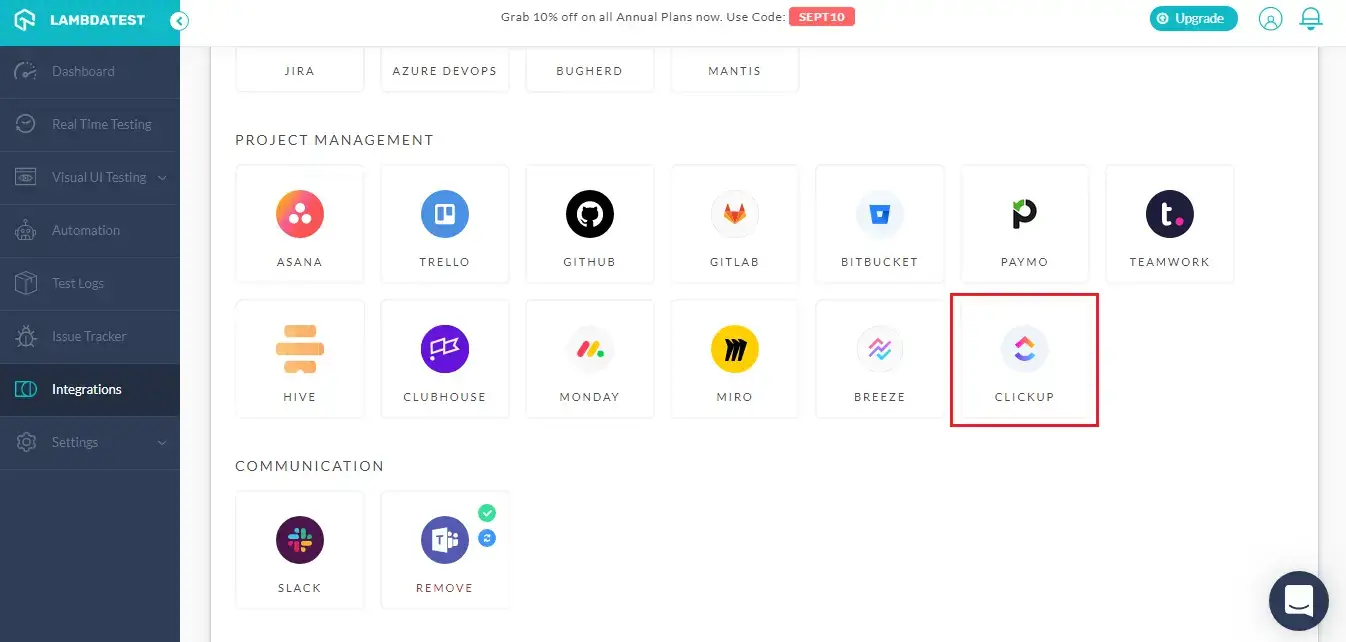
Step 2: Select ‘Integration’ from the left navigation menu bar. This will guide you to a screen where you will find a list of 3rd party applications, available to integrate with your TestMu AI account.
Step 3: Click on the block that says ‘ClickUp’.
Step 4: After you click on the ClickUp icon, you will need to authenticate TestMu AI API with your ClickUp account. If you are not logged into your ClickUp account, then you will be asked to do so for successfully authenticating you ClickUp account with TestMu AI.

Note: If you are already logged into your ClickUp account, you will be redirected to the ClickUp instance for authenticating the TestMu AI APIs to fetch necessary details from your ClickUp account.
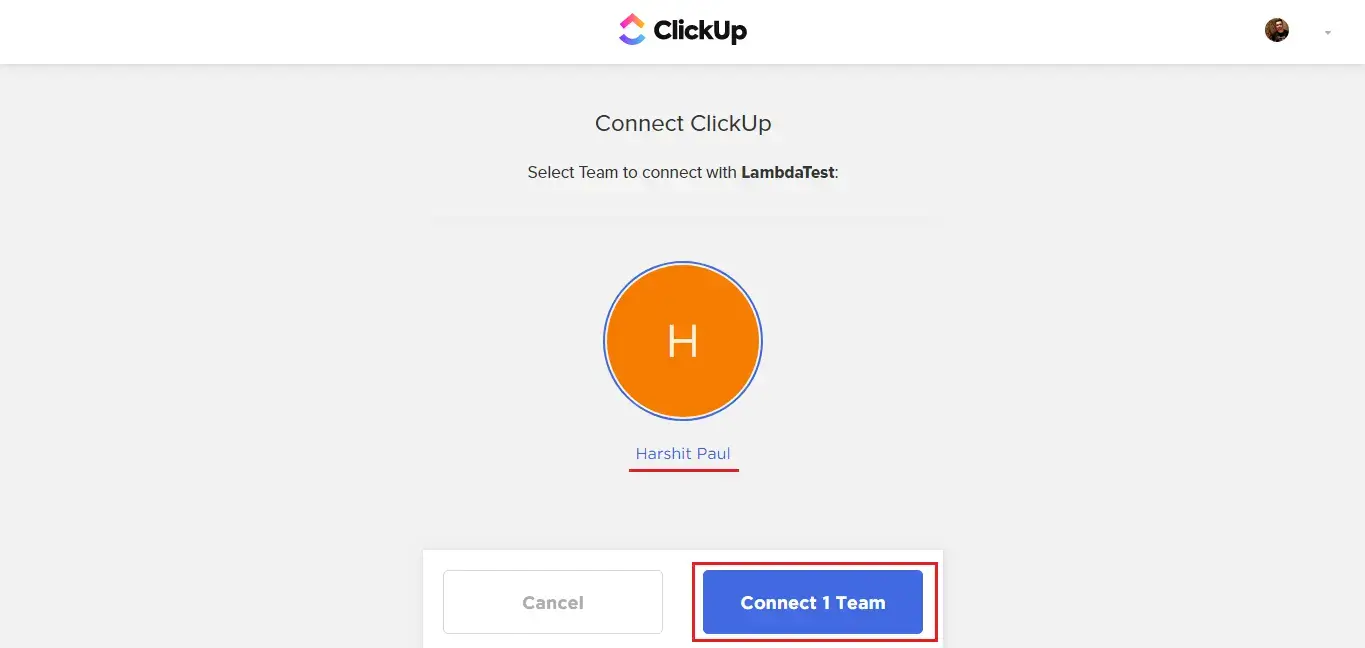
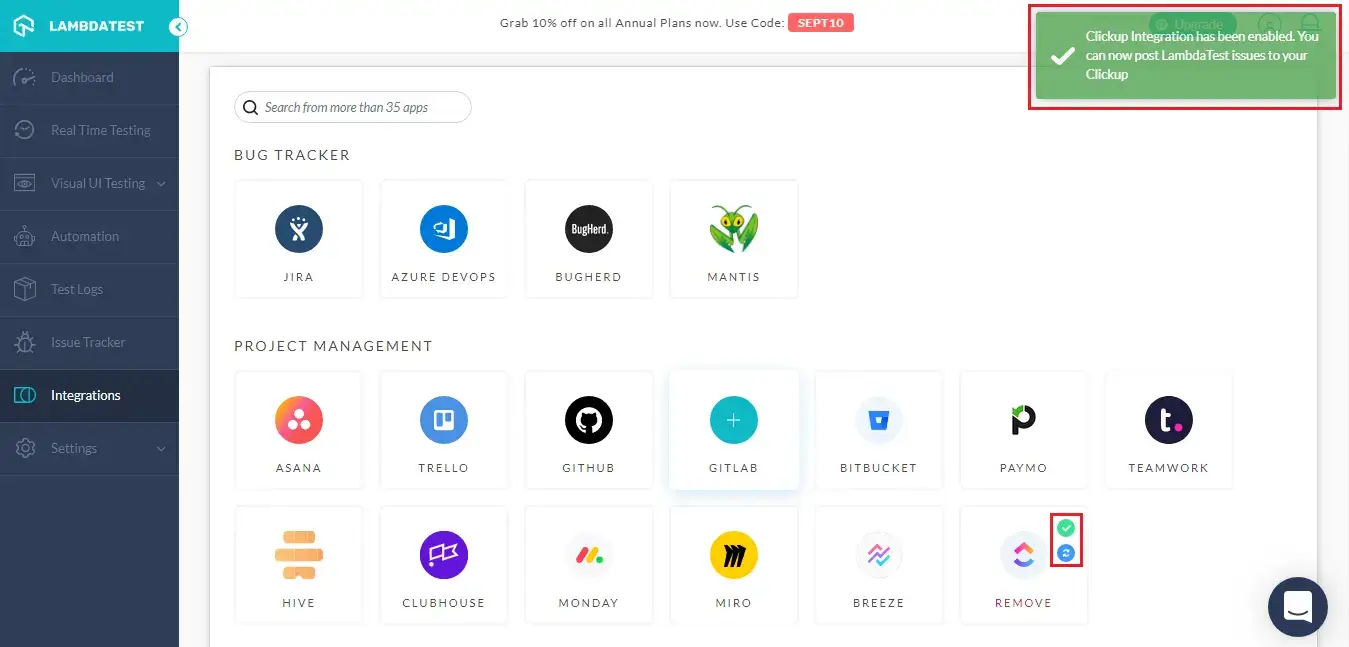
Step 5: After authentication of your ClickUp account, you will be redirected back into TestMu AI application where you will notice a prompt message indicating that you have successfully integrated your TestMu AI account with your ClickUp instance. You will also notice a green tick and a refresh icon. The refresh button will help you synchronize your ClickUp account with TestMu AI in just a single click.
Log Your First Bug Through TestMu AI Integration With ClickUp
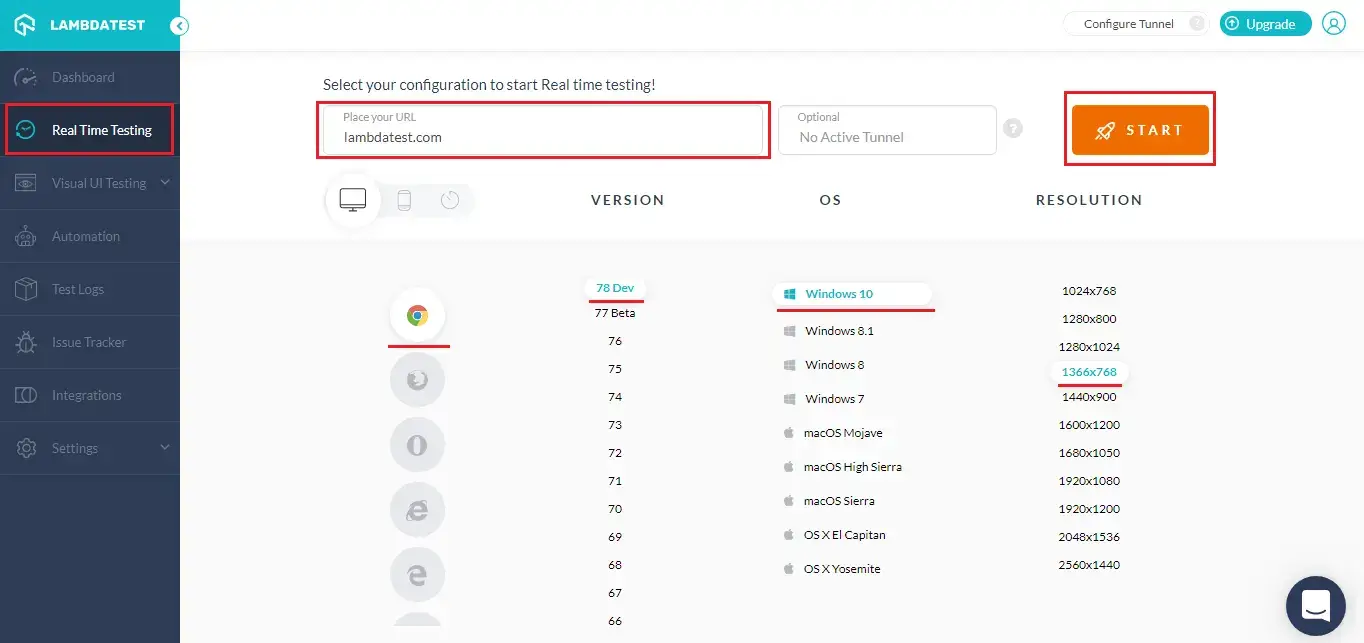
Step 1: Go for any of the test from the left navigation menu. For demo, we will be taking "Real Time Testing" option.
Step 2: Present a URL of the web-app you need to test in the dialog box. After that, select any configuration for browser and operating system of your choice & hit 'Start'.
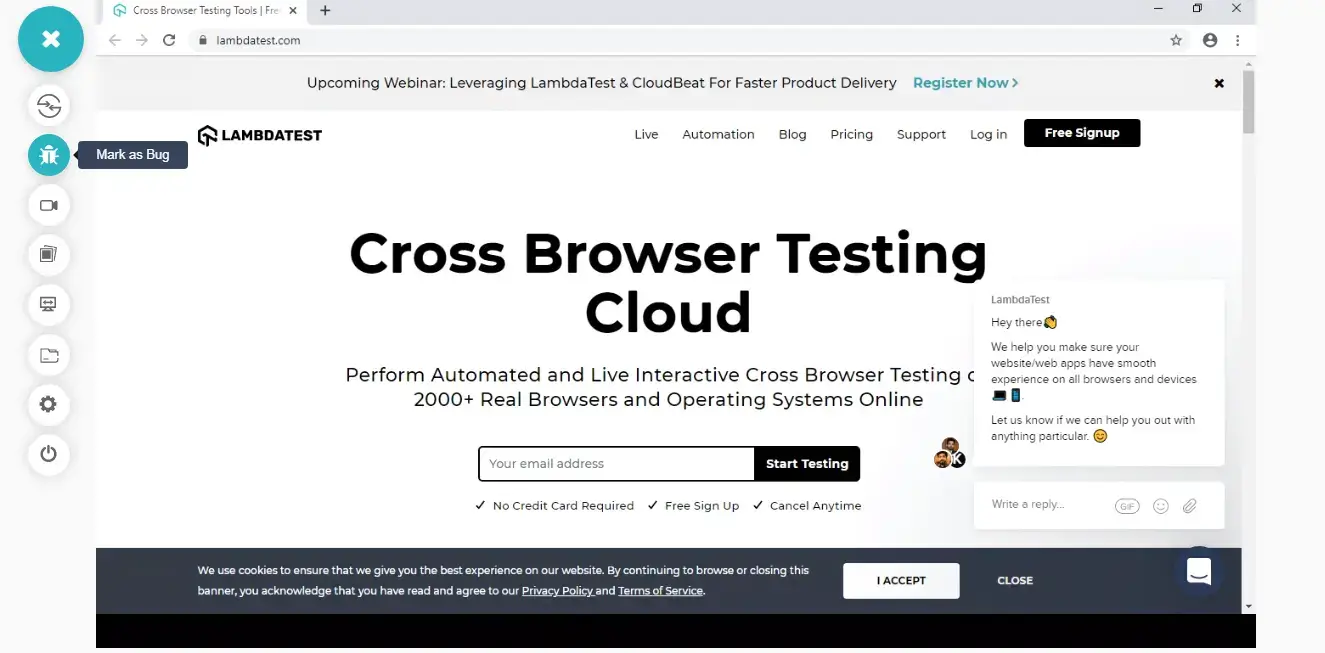
Step 3: After the VM is launched and operable. You can perform testing on your web-app for finding bugs. If a bug gets revealed, then you need to click on the Bug icon from the left panel for capturing a screenshot of the same. We have highlighted that option with yellow in the below image.
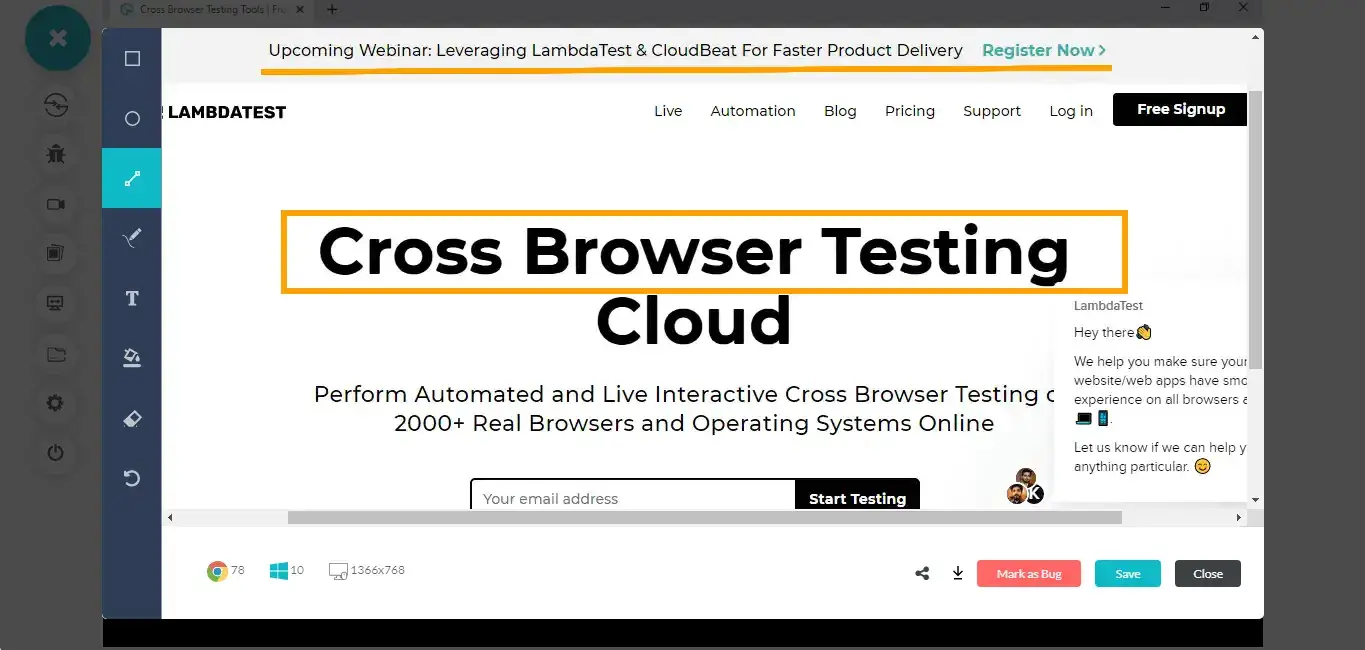
Step 4: After a screenshot is captured, you can annotate any issue or a task with an in-built image editor. Once you are done highlighting the bug, click on the button that says "Mark as Bug".
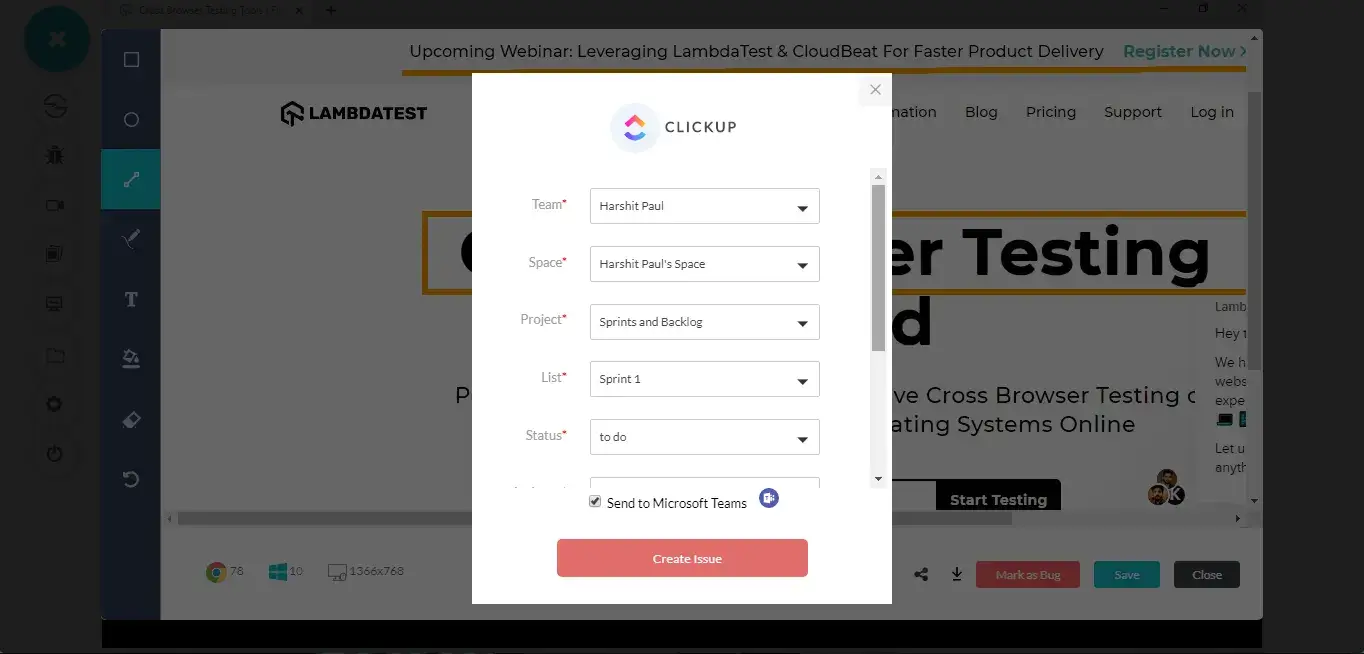
Step 5: After clicking on "Mark as Bug" button a form specific to ClickUp would open up. Fill the fields as per your requirement, and create the issue.
- You can select the Team you wish to assign the bug.
- Specify the Space on which you wish to log the bug.
- Choose a particular Project.
- nDetermine the List on which you wish to involve the UI bug/suggestion.
- Set a Status for the task.
- Assign it to a colleague.
- Provide a task name.
- A relevant Description about the UI observation.
Note: After you click on "Create Bug", you will be able to observe it being successfully marked through a single click effort. You will get prompt messages on top of your Virtual Machine indicating the progress of bug logging. After few seconds you will be notified with a prompt message "Bug successfully marked" indicating that the screenshot has been pushed to your ClickUp project.

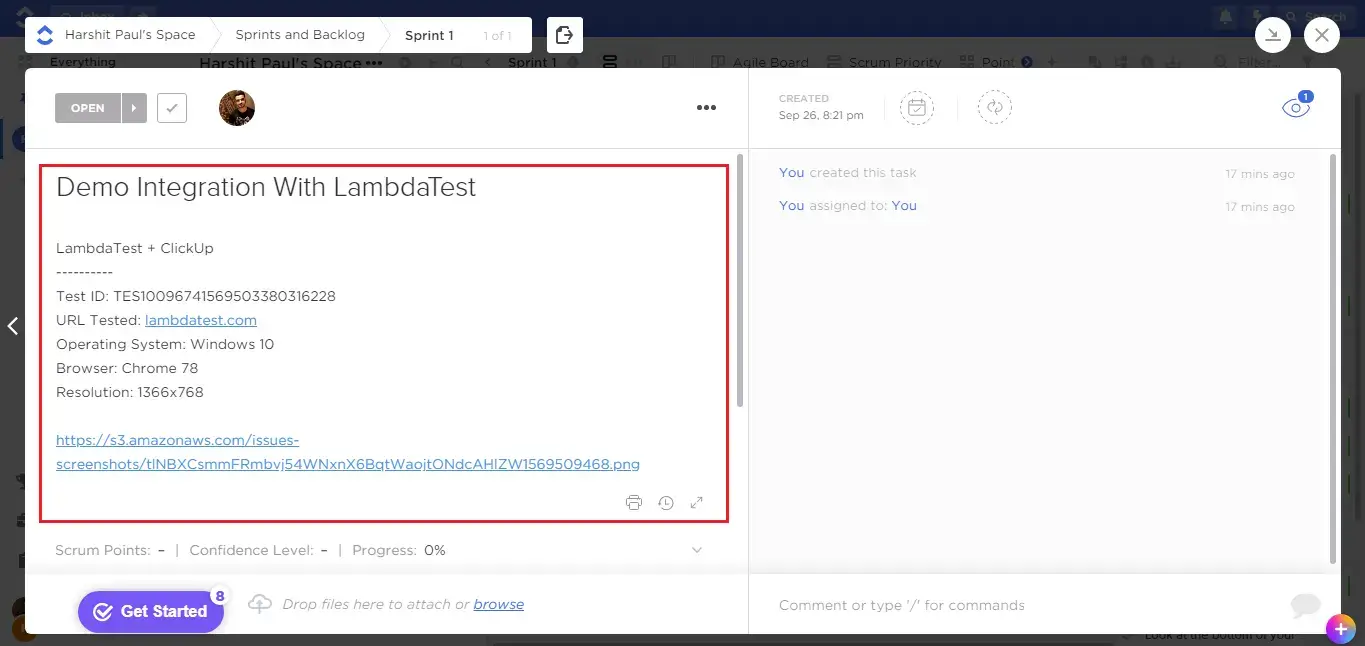
Step 6: Now, go to your ClickUp project and you will notice your logged task under the specific project that you assigned it through TestMu AI.
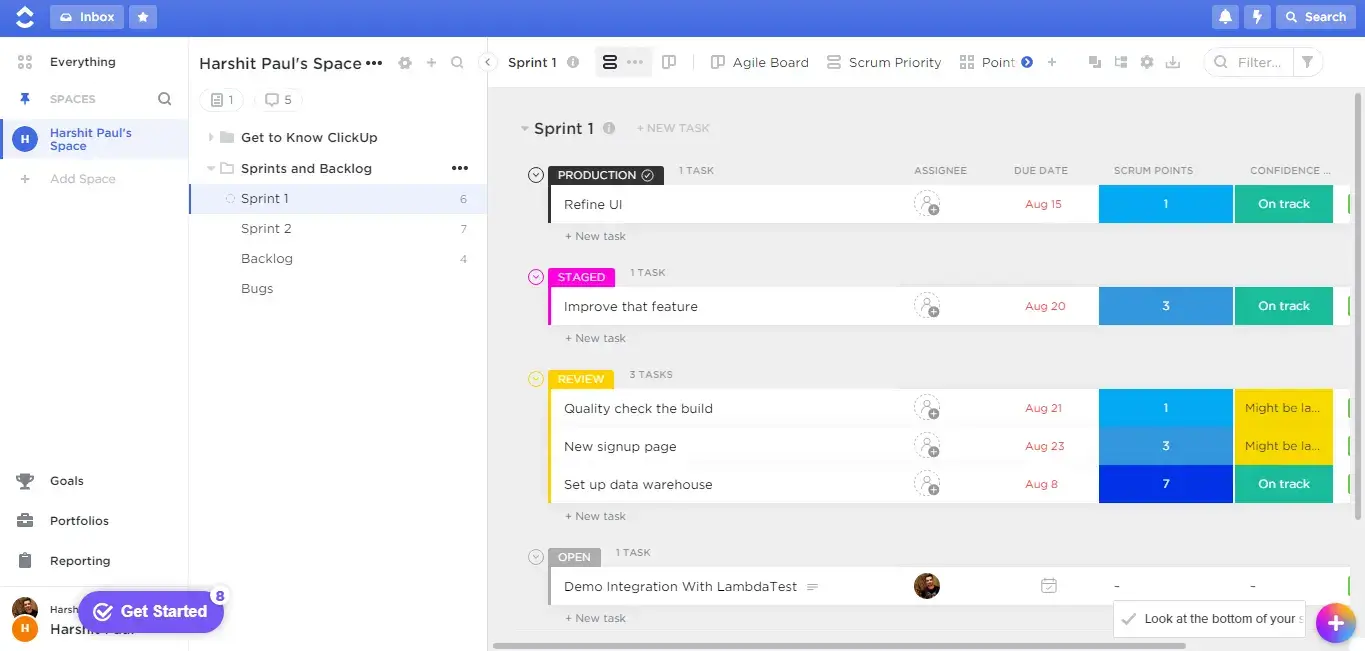
Step 7: Click on the logged task and you will find all the details about the bug that you stated while marking the bug from TestMu AI. You will also find a URL that would route you to the particular screenshot that was logged while creating the issue from TestMu AI.
Remove TestMu AI Integration With ClickUp
You can work with one integration at a time. So if you would want to integrate to a similar 3rd party application, then you would have to remove your current integration. Here is how you can do that.
Step 1: Login to your TestMu AI account.
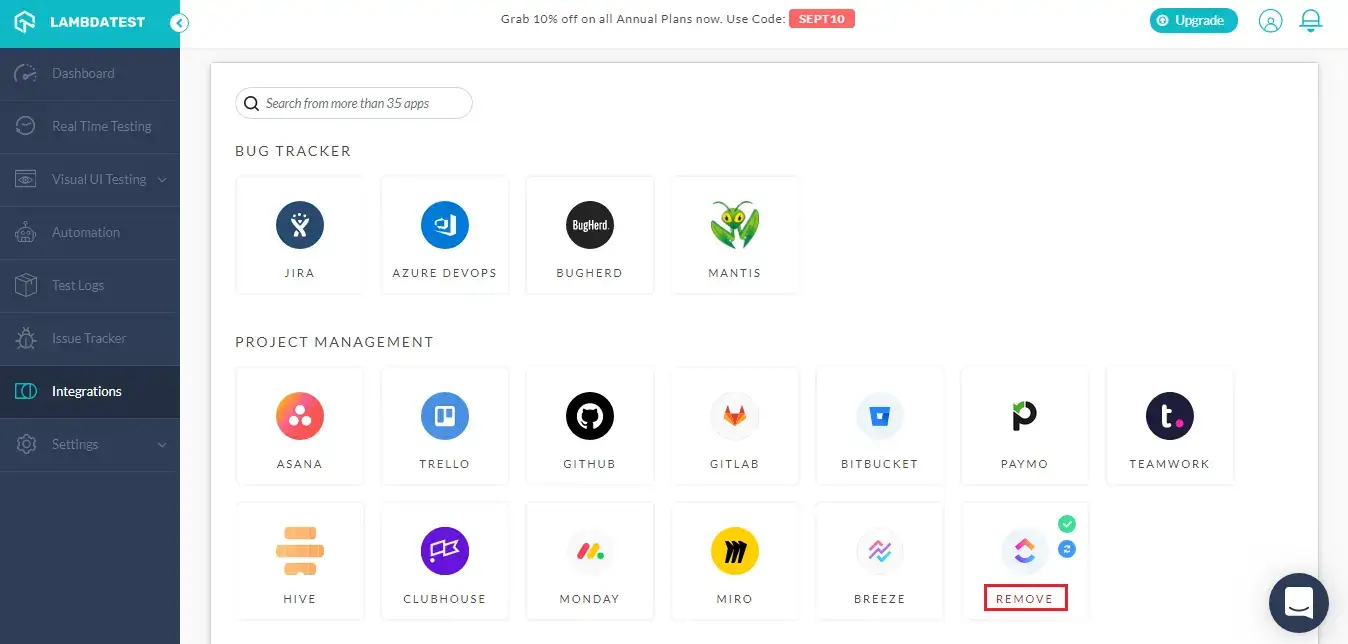
Step 2: Select ‘Integrations’ from the left-navigation menu. This will guide you to a screen where you will find 3rd party applications, available to integrate with your TestMu AI account.
Step 3: Click on ‘REMOVE’. You can find the remove button under the ‘ClickUp’ block which would be highlighted with a green tick.
That was all you need to know for TestMu AI + ClickUp Integration. Increase your productivity with our integrations. If you still have any questions for us, please feel free to let us know. Our experts are always available on chat to help you out with any roadblock regarding our product. Happy testing! 🙂
