Axosoft Integration
Axosoft is a versatile project management tool designed for Agile teams and organizations seeking to streamline their project planning, tracking, and collaboration. With features for Agile methodologies, collaborative workspaces, roadblock identification, risk management, sprint planning, and goal setting, it empowers teams to work efficiently, eliminate obstacles, and achieve project success across various industries and project management styles.
Axosoft Integration with TestMu AI streamlines the software development team's project management and testing processes. With a simple one-click integration, you can seamlessly create and manage issues during cross browser testing. This integration enables you to push annotated issues to specific projects, assign them to team members, set priorities, and attach relevant screenshots during test sessions. The created issues are automatically reflected in your Axosoft workspace, complete with test session details and annotated screenshots, facilitating efficient issue tracking and resolution within your project management environment.
Axosoft Integration with TestMu AI, like all of the integrations to 3rd party applications, is available for freemium and premium plans.
Integrate Axosoft With Your TestMu AI Account
Step 1: Log in to your TestMu AI account. You need to have Admin or User level access to see and install 3rd party integrations.
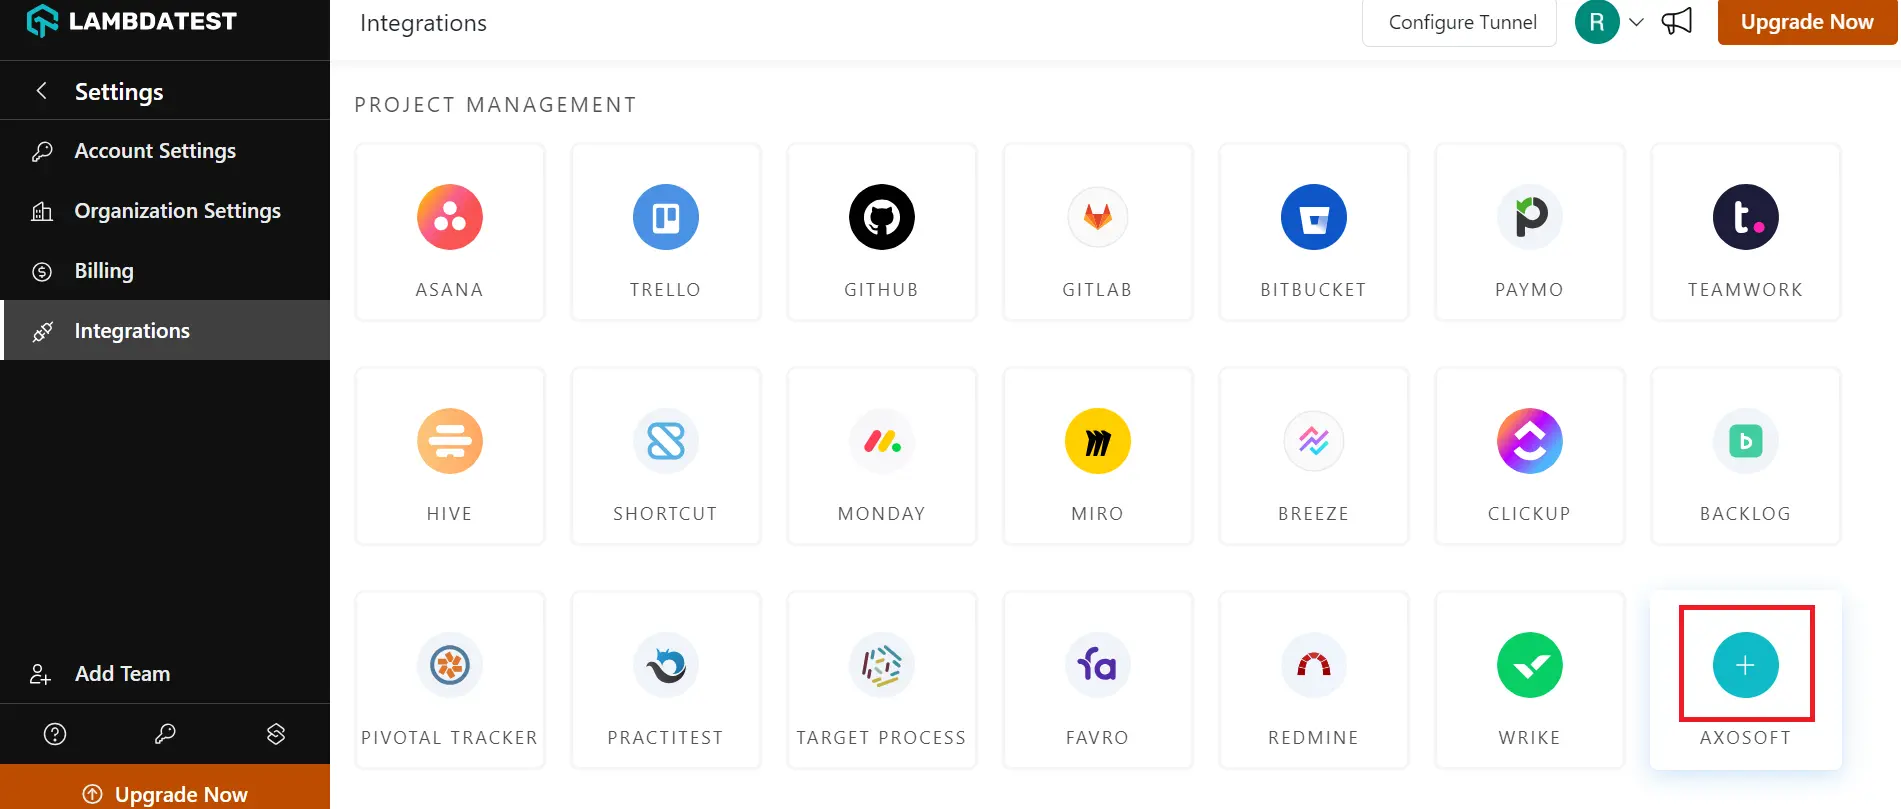
Step 2: Select the ‘Integrations’ tab from the left navigation menu bar under "Settings". This will guide you to a screen where you will find a list of 3rd party applications, that have already been integrated as well as that are available to integrate with your TestMu AI account.

Step 3: Hover to the 'Axosoft' block under the "Project Management" category, and click on the "plus" button that appears.
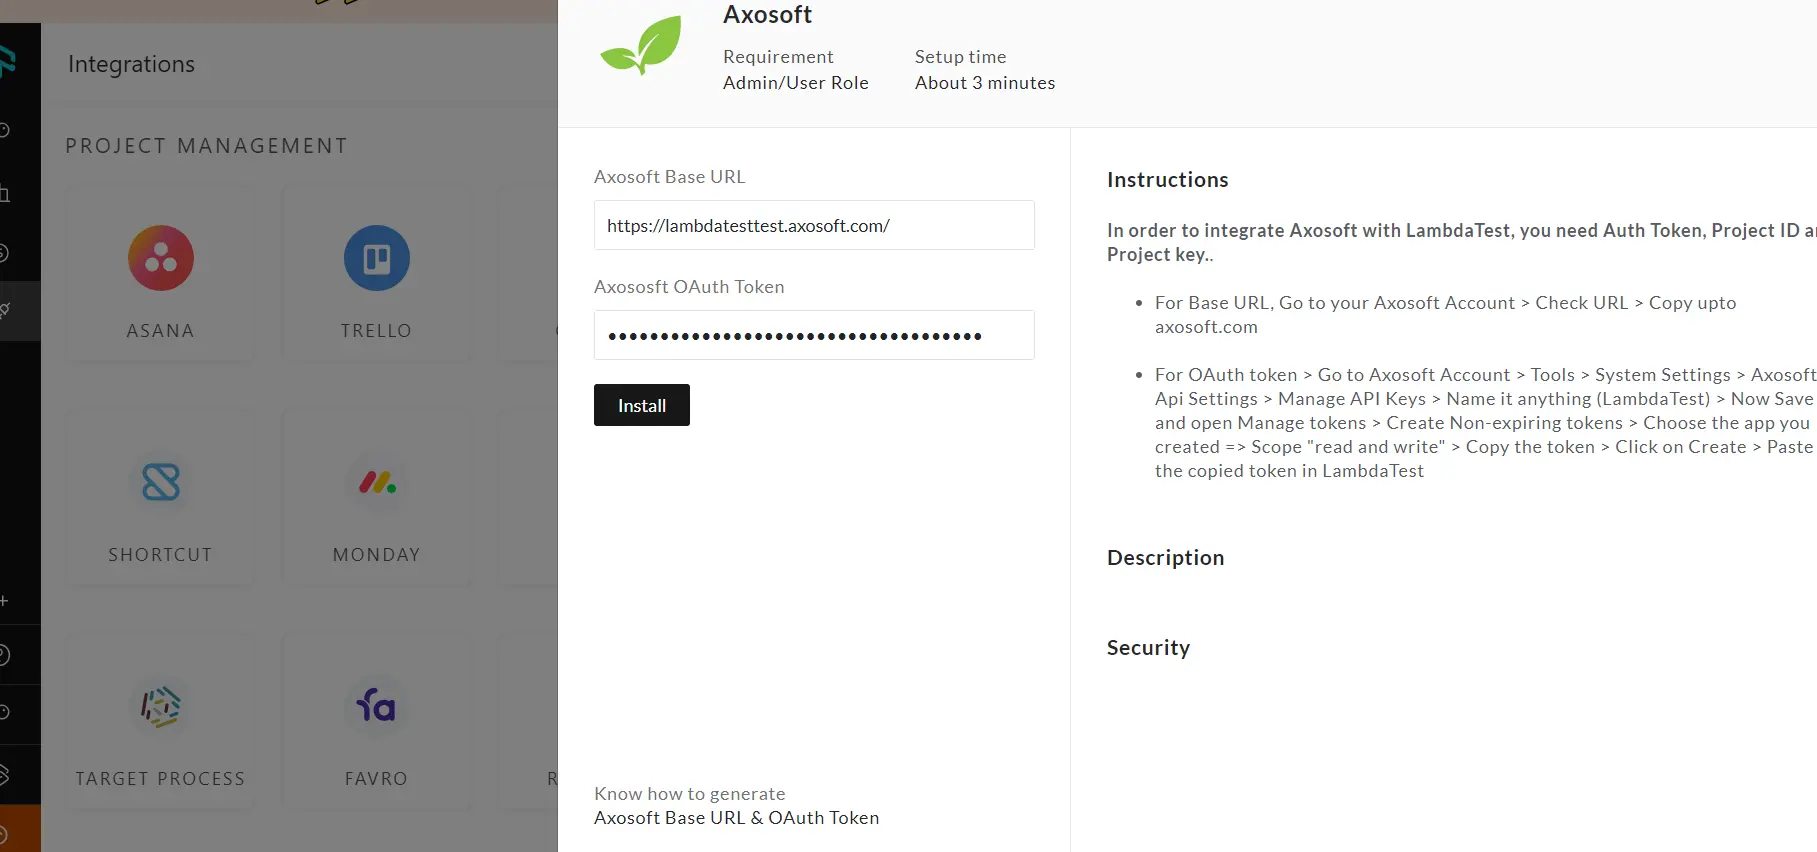
Step 4: You need to create an account on Axosoft to integrate your workspace with TestMu AI. If you don't have an account, you can create one. If you are already logged in, this step won't appear in the integration process. You will be required to enter the URL and OAuth token to enable integration. The Axosoft Base URL can be copied from the Axosoft website.

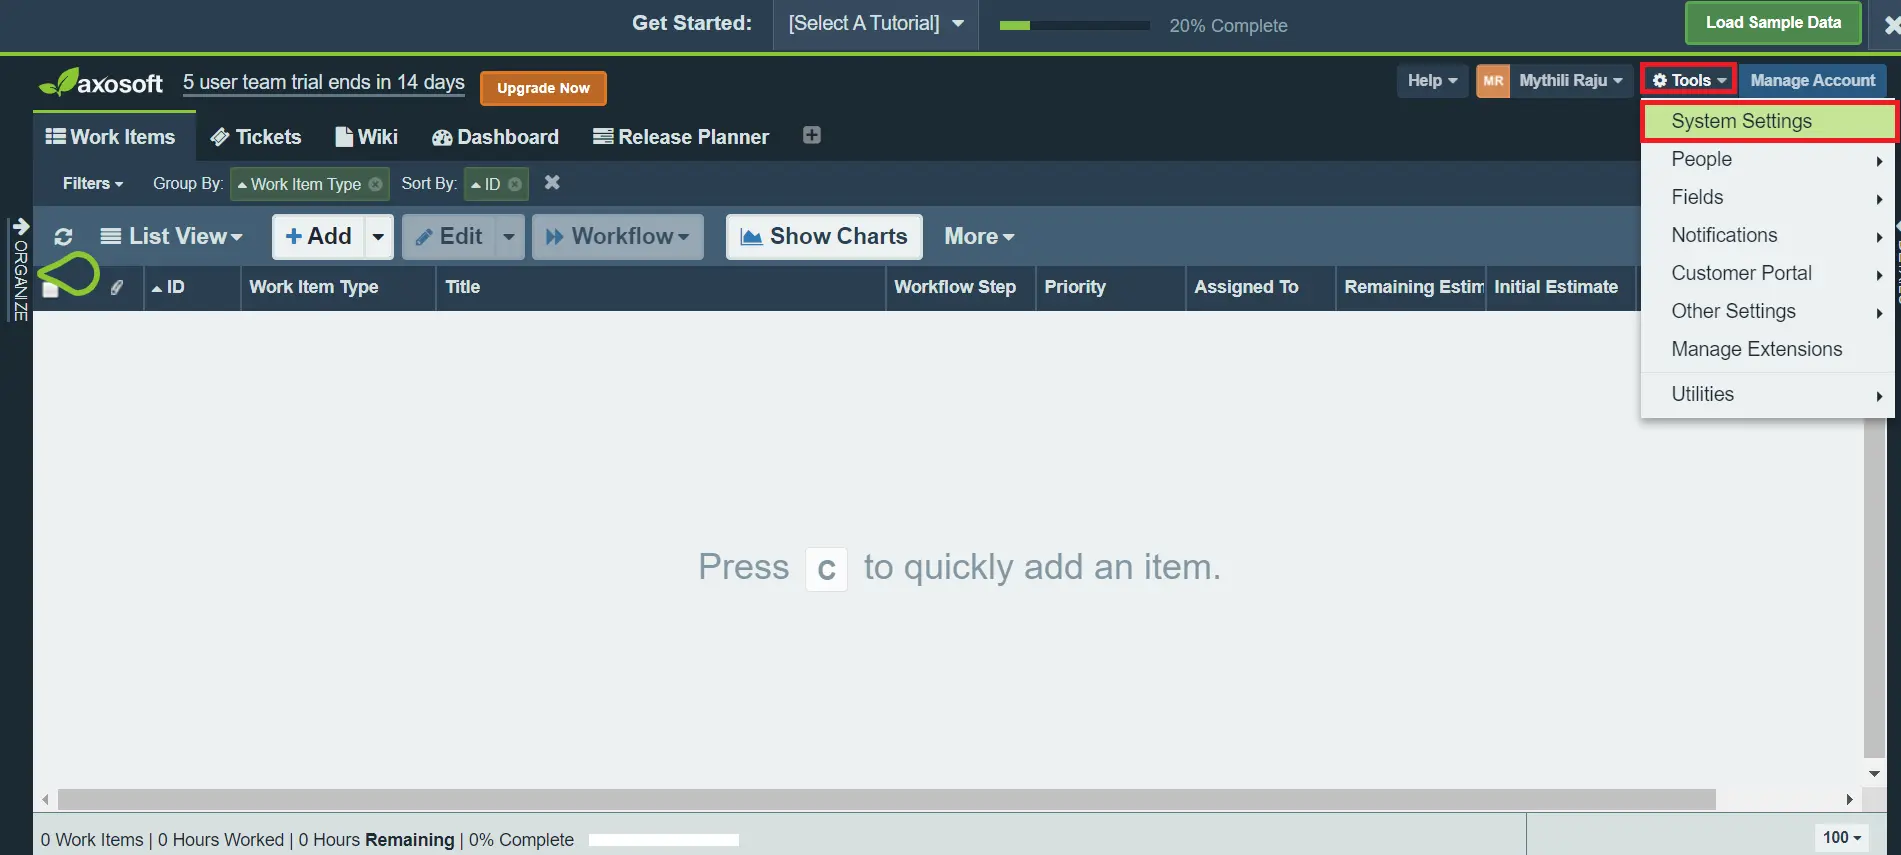
Step 5: To generate an OAuth token for integration, go to your Axosoft Account, click on Tools, then select System Settings.
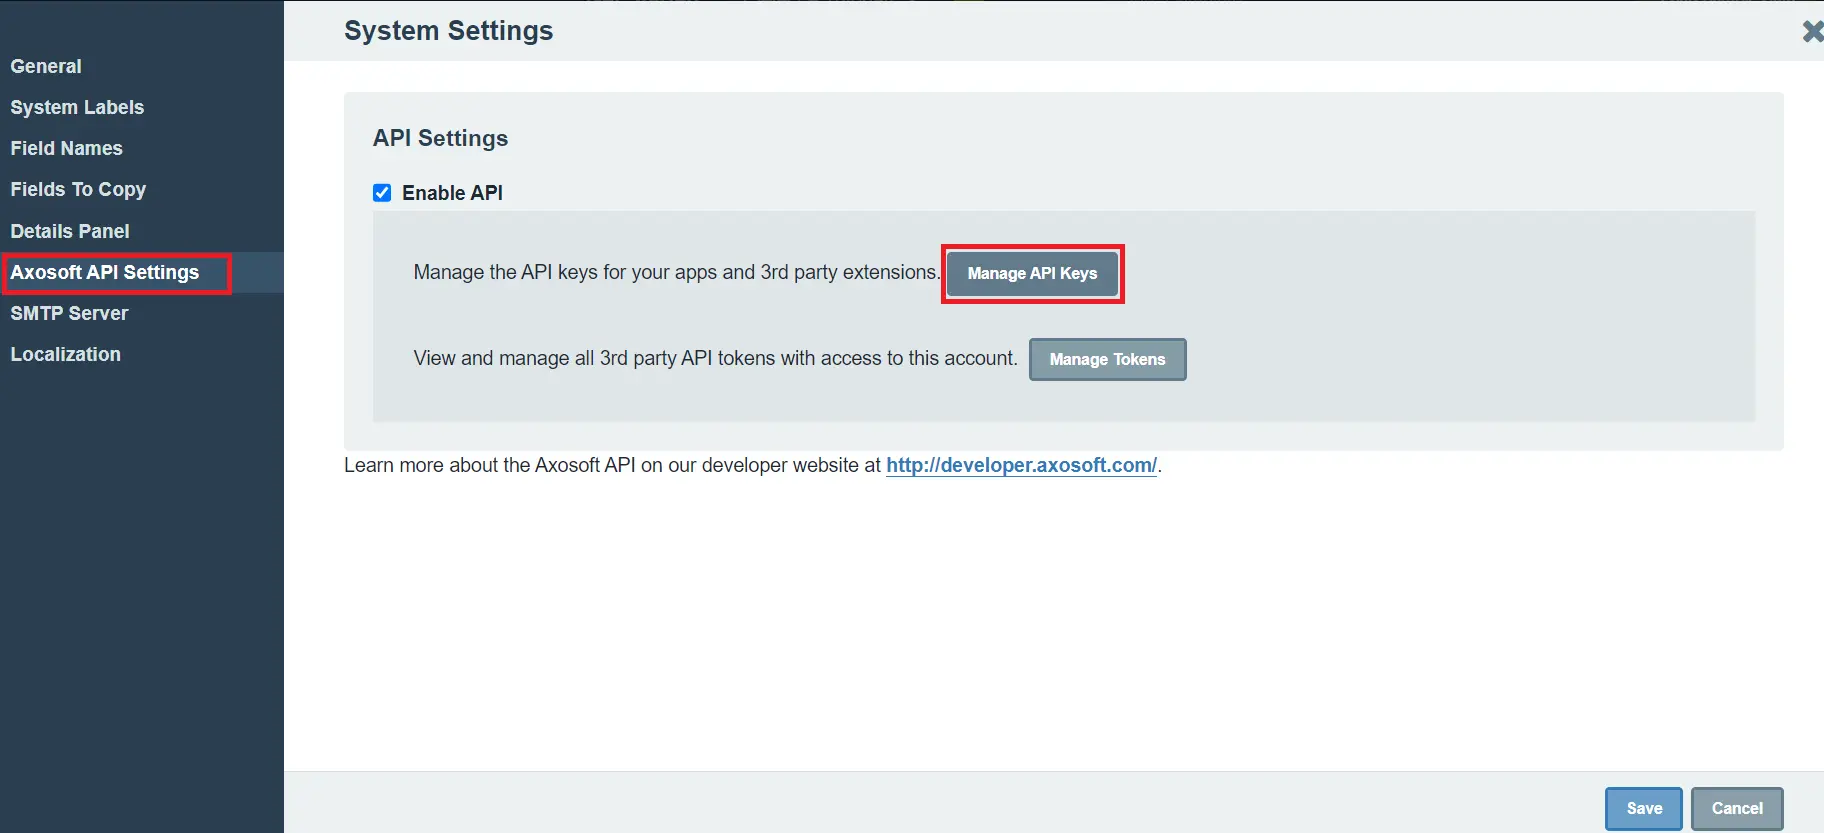
Step 6: Within Axosoft API Settings, click on Manage API Keys.
Step 7: Once you click on Manage API Keys, you will get an option to create a new key, for which you will need to enter a name (e.g., "TestMu AI") and save it.
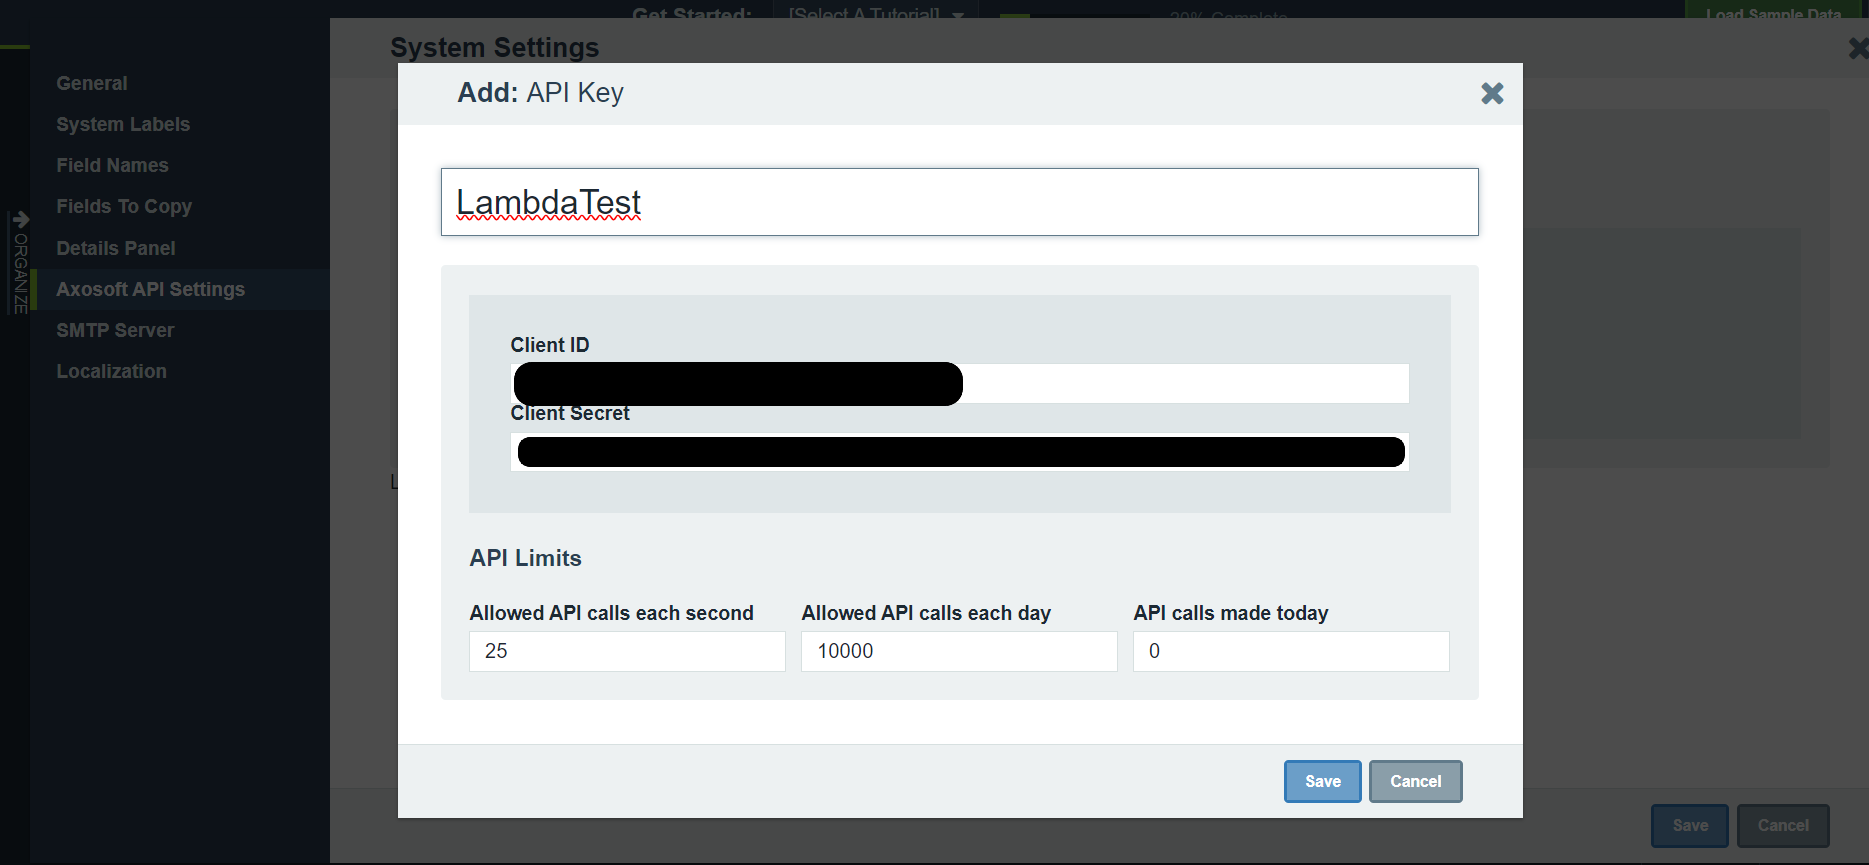
Step 8: Click on the Manage Tokens section, and create a non-expiring token for the app you've just created. Select "TestMu AI" under app, "read and write" under scope, and enter create.
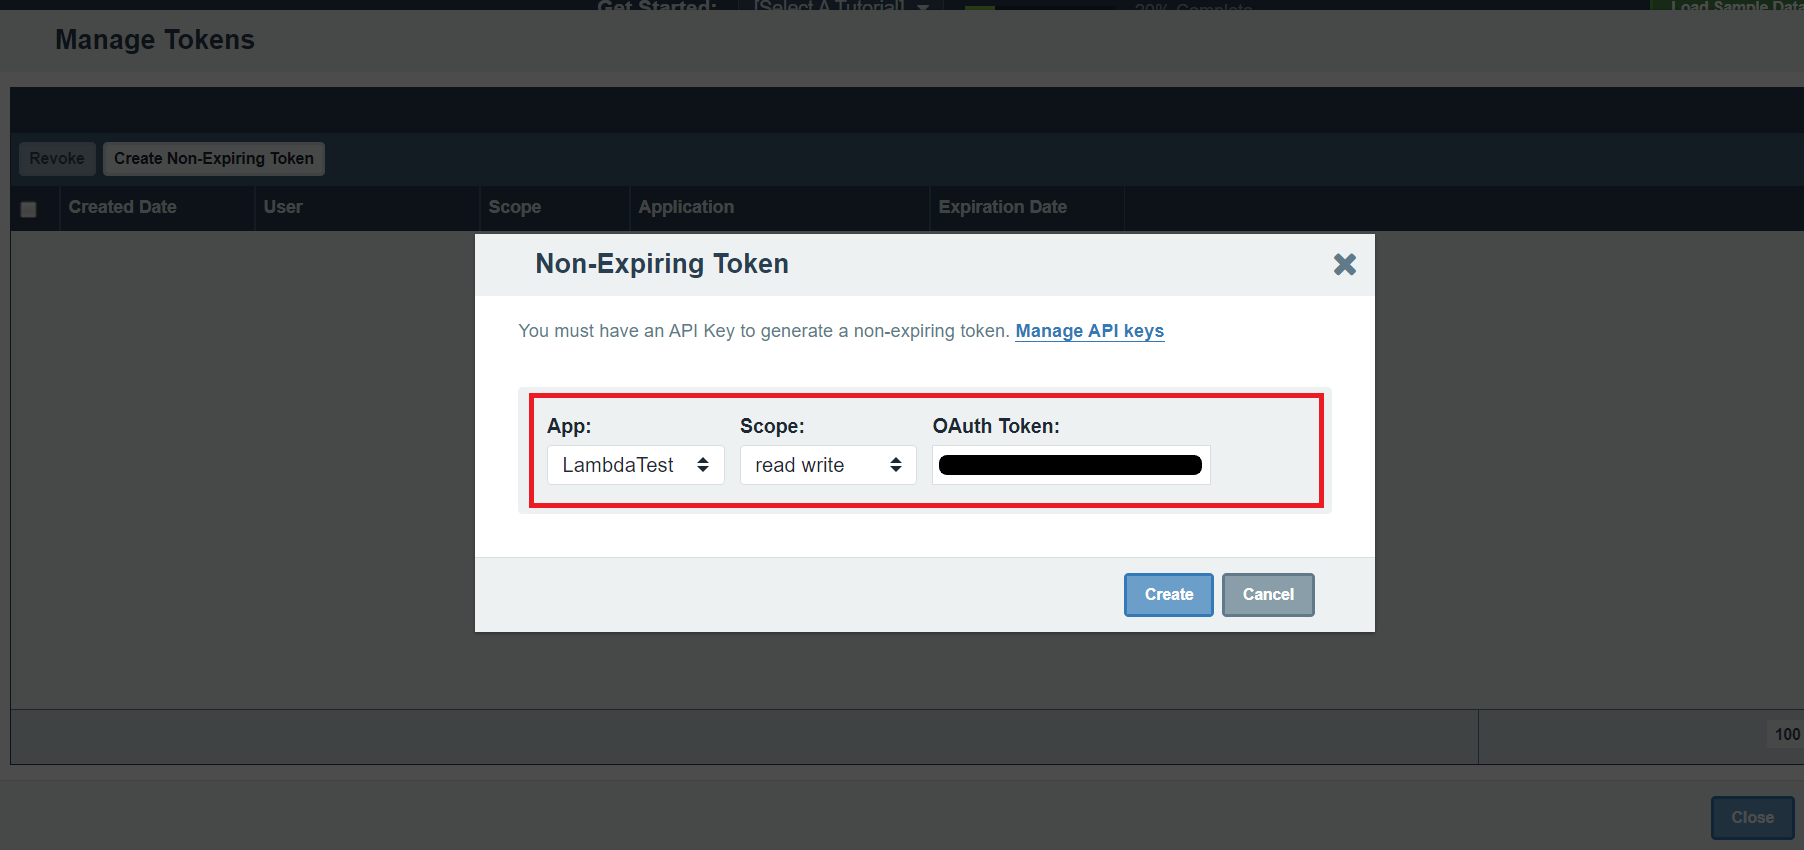
Step 9: Copy the generated token, click Create, and paste it into your TestMu AI integration settings for Axosoft.
Step 10: Once you enter "install" Axosoft will be integrated with TestMu AI, and an alert box will appear on the top right corner of the screen stating that the integration is in progress, you will be notified on your mail post successful integration.

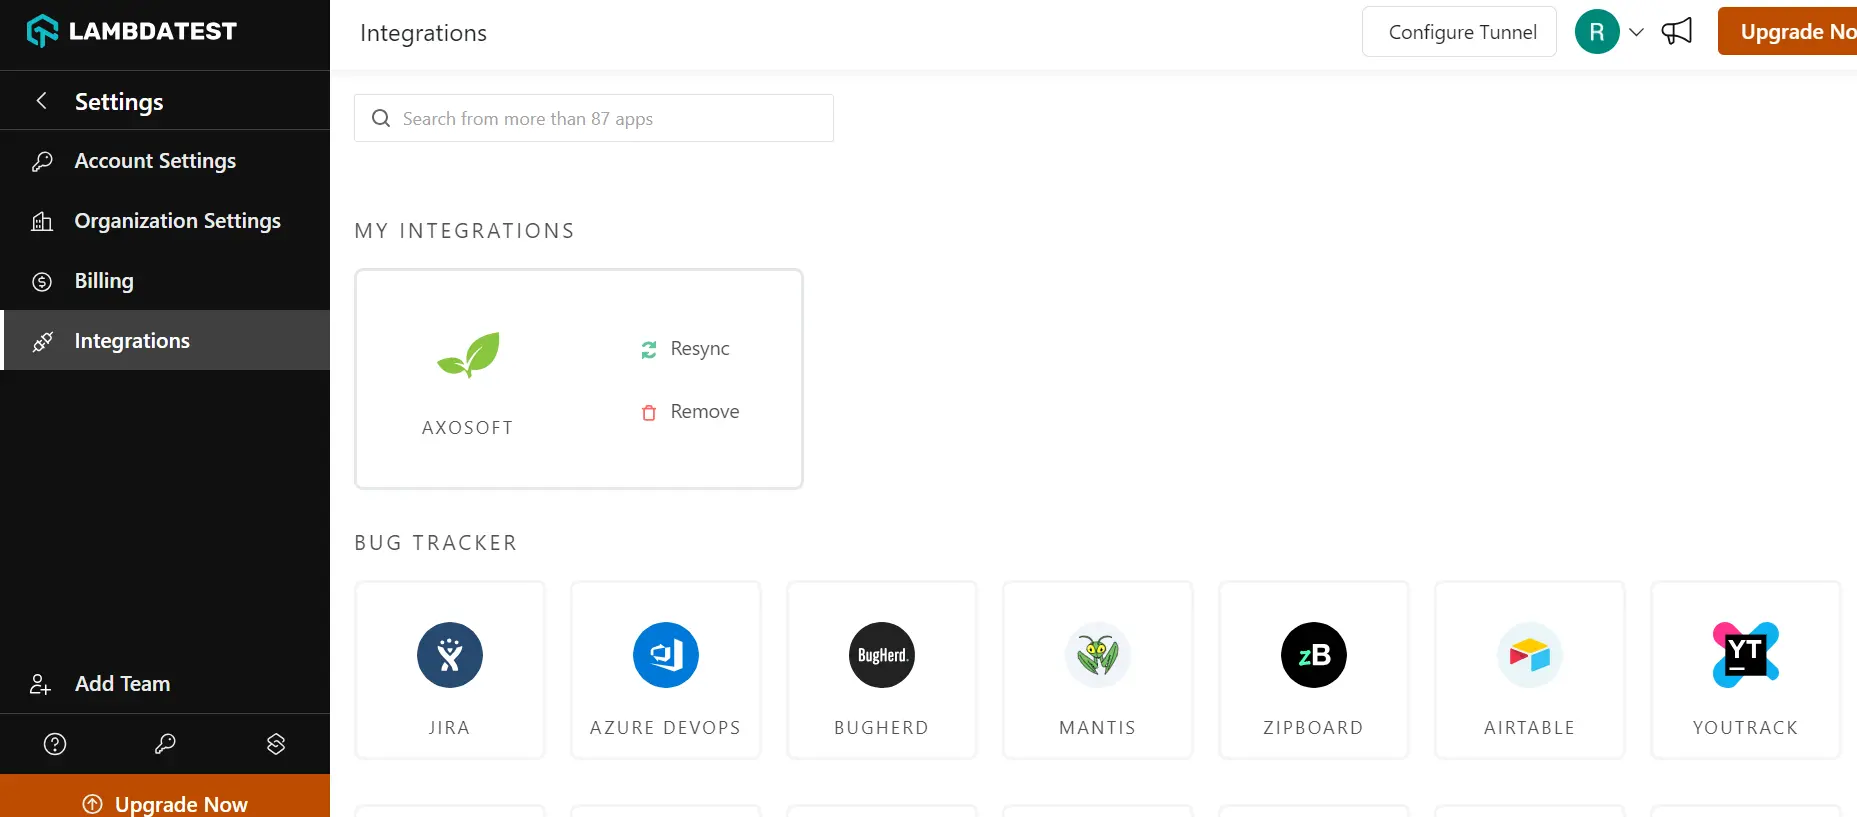
Step 11: Congrats! Axosoft has been successfully integrated. Go to the Integrations tab again and you will see Axosoft under the "My Integrations" tab.
How To Log Your First Bug Through Axosoft Integration?
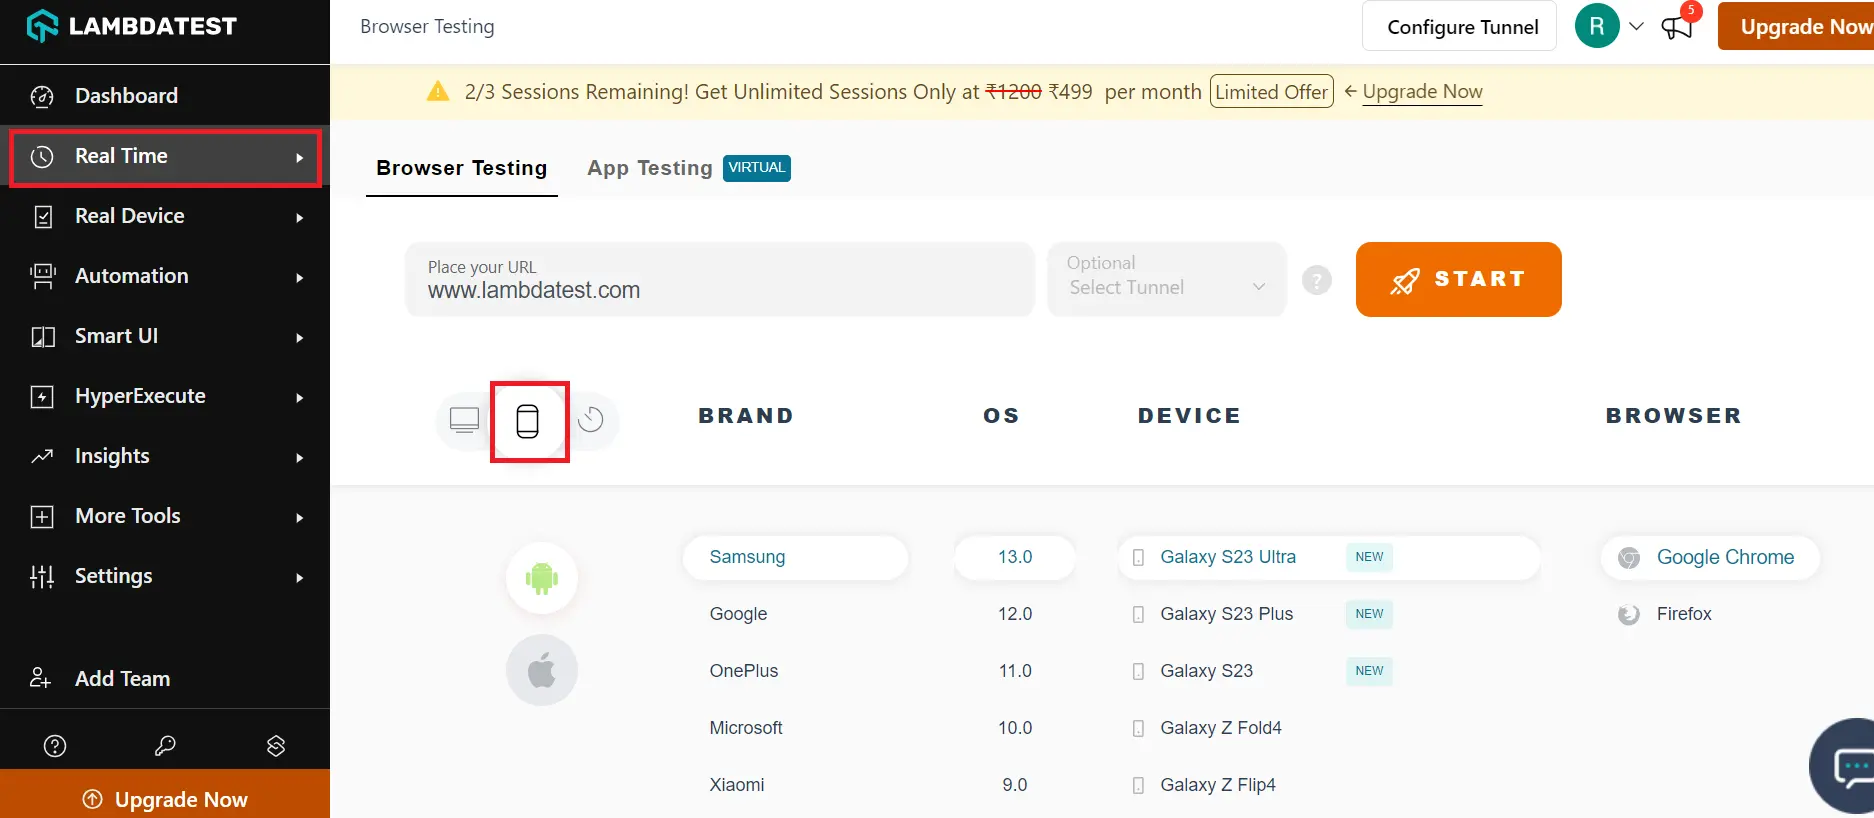
Step 1: Select any of the tests from the left navigation menu of TestMu AI. For this instance, we will be taking the "Real Time Testing" option.
Step 2: Enter the URL of the web app to be tested in the URL box, and select "mobile" device for testing. Press 'Start' after selecting the configuration of the browser and operating system as per your choice.
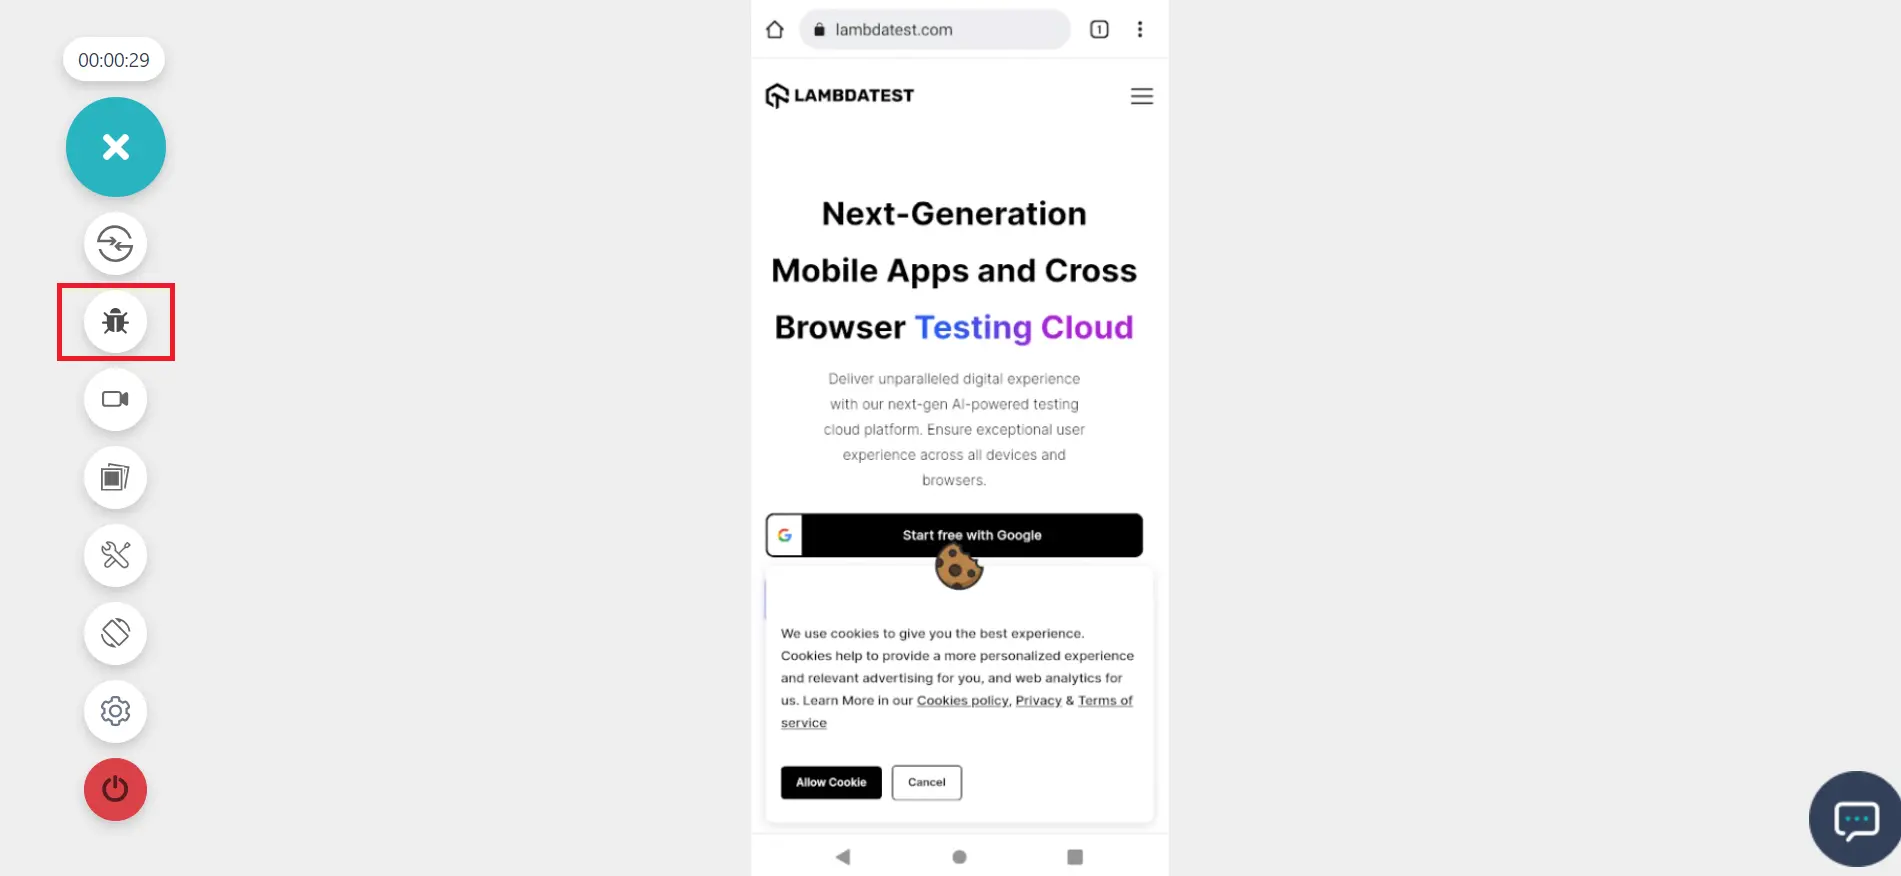
Step 3: After the VM is launched and operable, you can perform testing on your mobile app as per your choice, such as to find issues. Suppose you come across any bug, then you need to click on the Bug icon from the left panel, to capture a screenshot of the current VM instance.
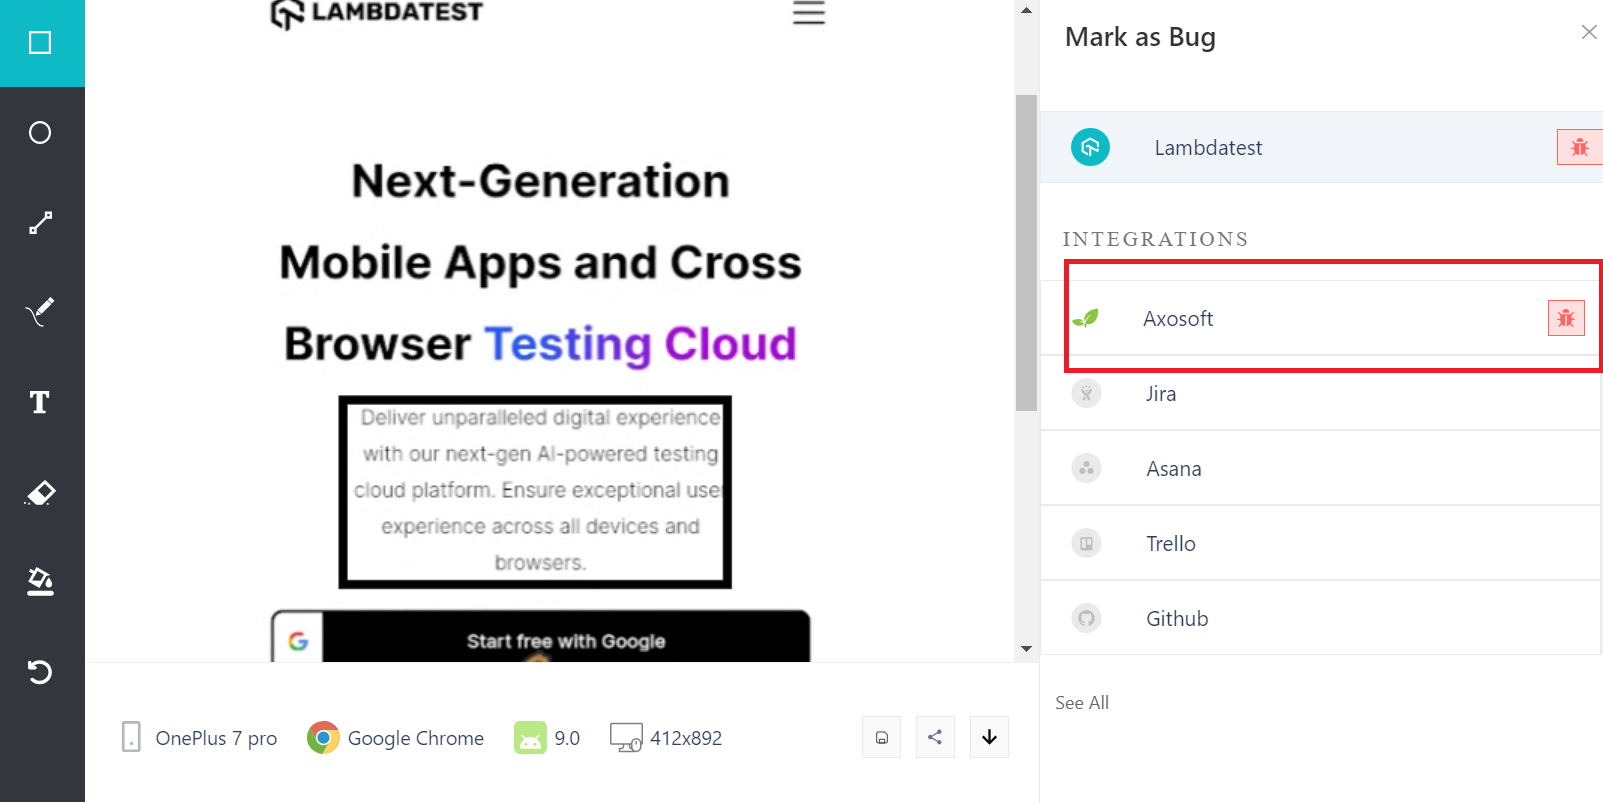
Step 4: A screenshot will be captured and appear on your screen in an in-built image editor. Annotate any issue as per your choice in this editor, and then press the "Mark as Bug" button under "Axosoft" integration.
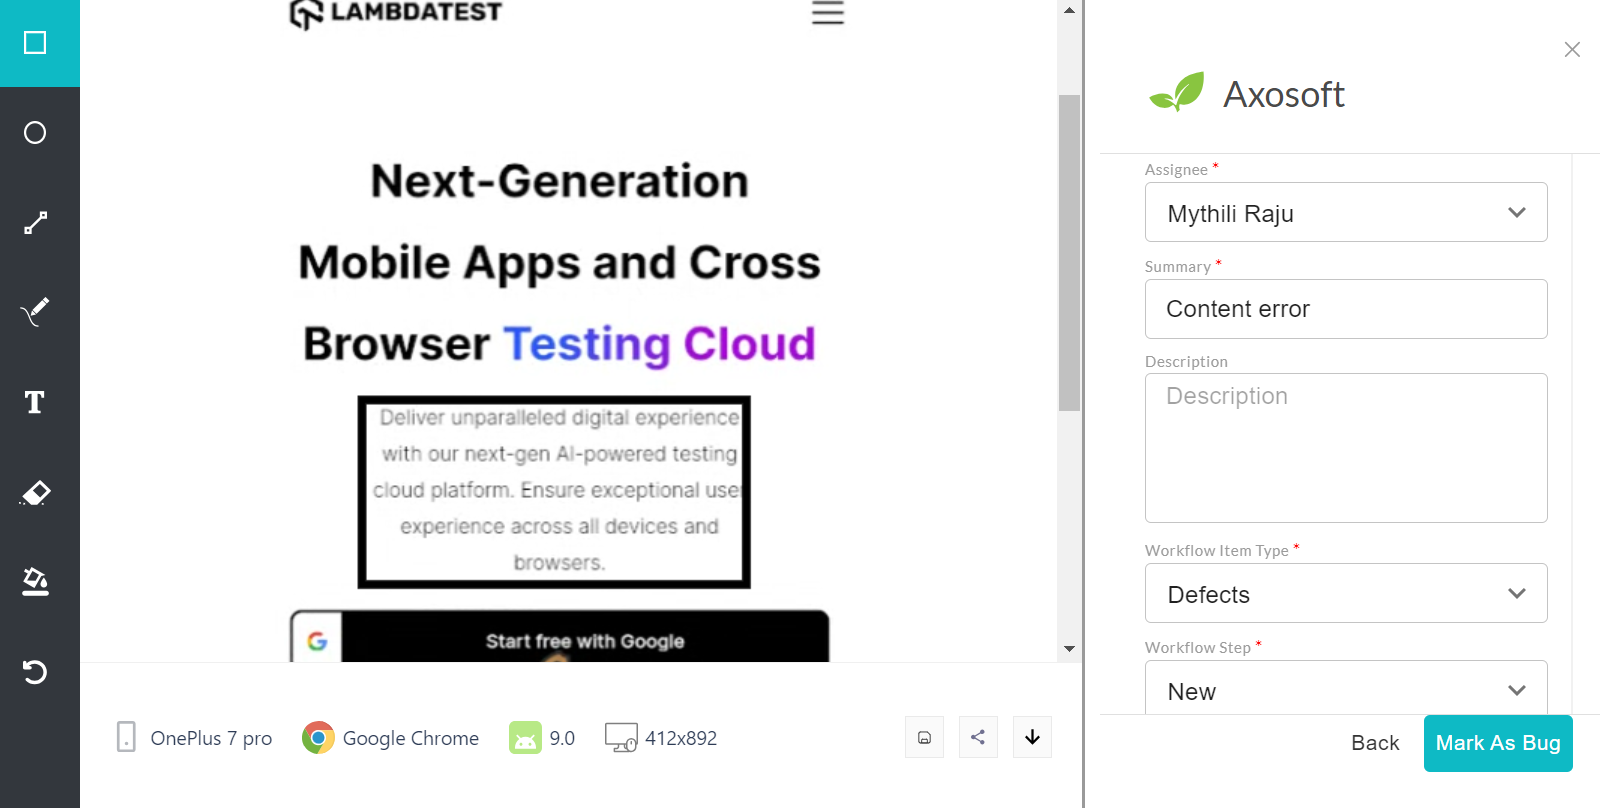
Step 5: Complete the Bug/Task/Issue Form that appears upon clicking the "Mark as Bug" button, as per your requirement, and click on the "Mark As Bug" option given below.
Step 6: You will now observe it being successfully marked through a single click effort. You will get prompt messages on top of your Virtual Machine indicating the progress of bug logging. After a few seconds, you will be notified with a prompt message "Bug successfully marked" indicating that the screenshot has been pushed to your workspace.

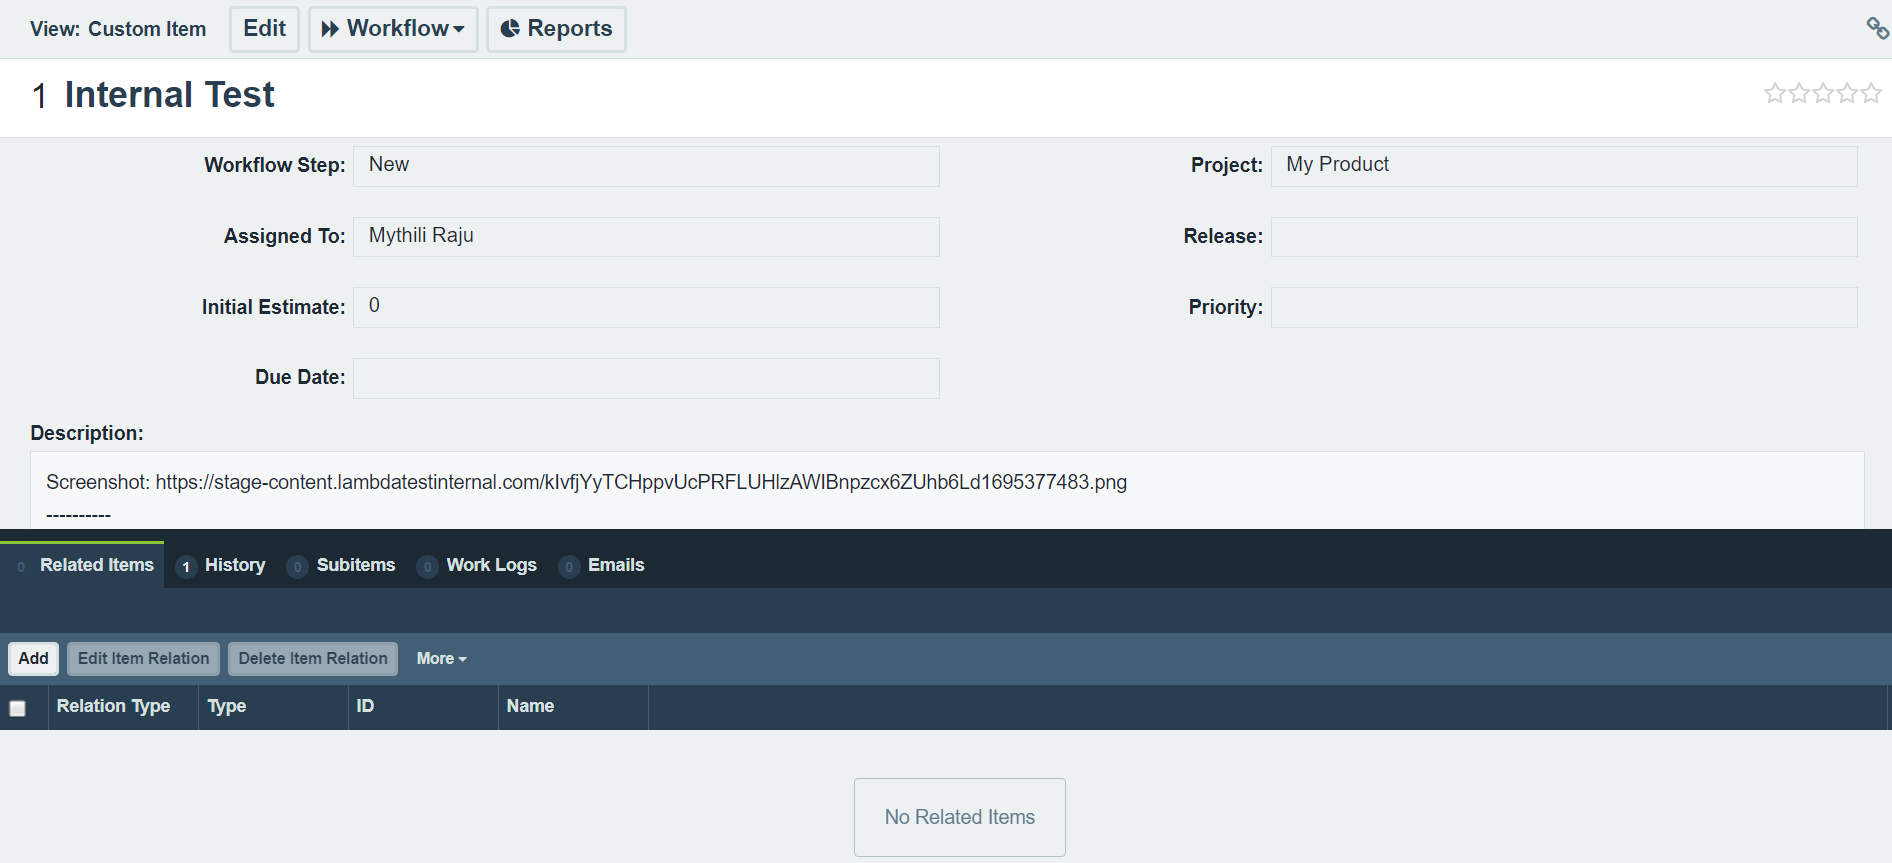
Step 7: Log in to your workspace on Axosoft and you will be able to notice the marked bug in the set channel assigned to the selected person. All the data you provided through the TestMu AI form would already be presented in it. TestMu AI automatically includes test environment details and related screenshots in the screenshot as attachments.
How To Remove Axosoft Integration?
You can work with one integration at a time. So if you want to integrate into a similar 3rd party application, then you would have to remove your current integration. Here is how you can do that.
Step 1: Log in to your TestMu AI account.
Step 2: Select ‘Integrations’ from the left navigation menu bar. This will guide you to a screen where you can remove the Axosoft integration under the tab that says "My Integrations".
Step 3: On the Axosoft block, a "REMOVE" button will appear. Click on ‘REMOVE’.
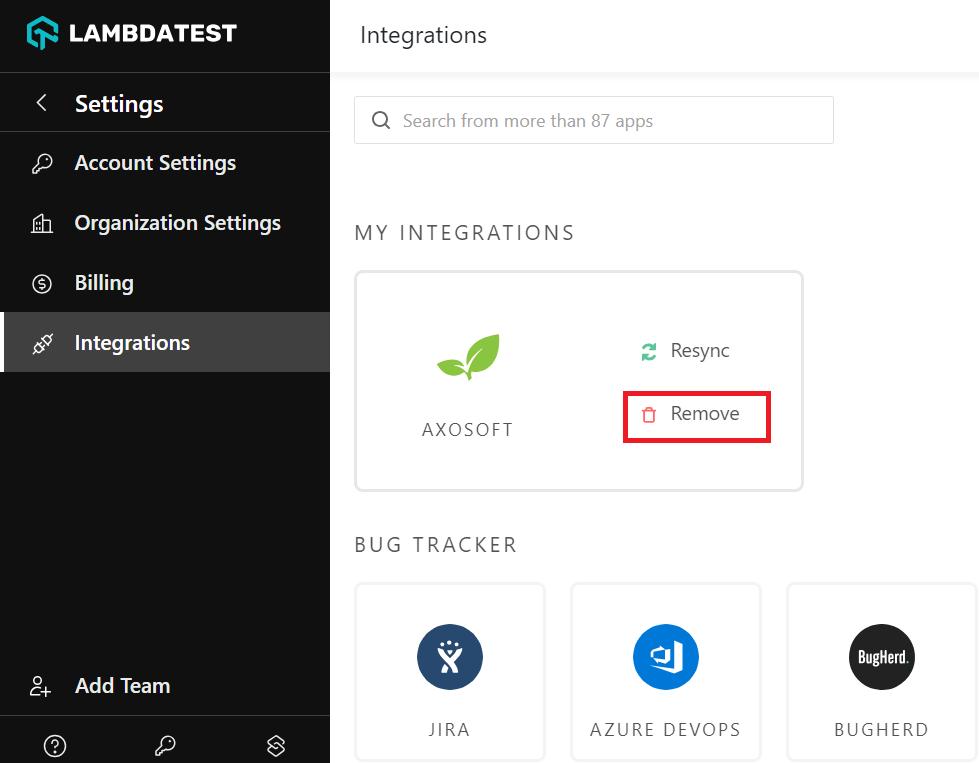
Step 4: Upon pressing 'REMOVE', a message will prompt on the top right corner of the app stating the same.

That was all you need to know for TestMu AI + axosoft Integration. Increase your productivity with our integrations. If you still have any questions for us, please feel free to let us know. Our experts are always available on chat to help you out with any roadblock regarding our product. Happy testing!
