Detox Testing on HyperExecute
Detox is a popular end-to-end testing framework for React Native applications. This documentation will help you run your Detox tests on TestMu AI HyperExecute using your local system setup.
Detox testing on TestMu AI is supported via HyperExecute on Android real devices and iOS simulators.
Prerequisites
Before you begin, ensure you have the following:
- A TestMu AI account. You can get your Username and Access Key from your Account Settings.
- Node.js and npm installed on your local system.
- A React Native application with Detox tests configured, or use the sample repository referenced in this guide.
Run a Sample Project
Step 1: Clone Sample Repository
Download or Clone the Detox sample from TestMu AI’s GitHub Repository
 View on GitHub
Step 2: Download the CLI in your Project
Download the HyperExecute CLI and copy it into the root folder of the downloaded sample repository.
Step 3: Execute your Test Suite
From the project root directory, execute the below CLI command in your terminal:
./hyperexecute --user undefined --key undefined --config RELATIVE_PATH_OF_YOUR_YAML_FILE
NOTE : In case of macOS, if you get a permission denied warning while executing CLI, simply run
chmod u+x ./hyperexecuteto allow permission. In case you get a security popup, allow it from your System Preferences → Security & Privacy → General tab.

You've successfully triggered the Detox tests on HyperExecute. Visit the HyperExecute Dashboard and check your Job status.
Configure your own Project
Step 1: Download the CLI in your Project
Download the HyperExecute CLI and copy it into the root folder.
Step 2: Configure YAML in your Test Suite
Use the sample YAML below to configure your execution:
loading...
📘 To explore more configuration options and tailor settings to your project needs, check out the YAML documentation.
Step 3: Monitor the Test Execution
Visit the HyperExecute Dashboard and check your Job status.
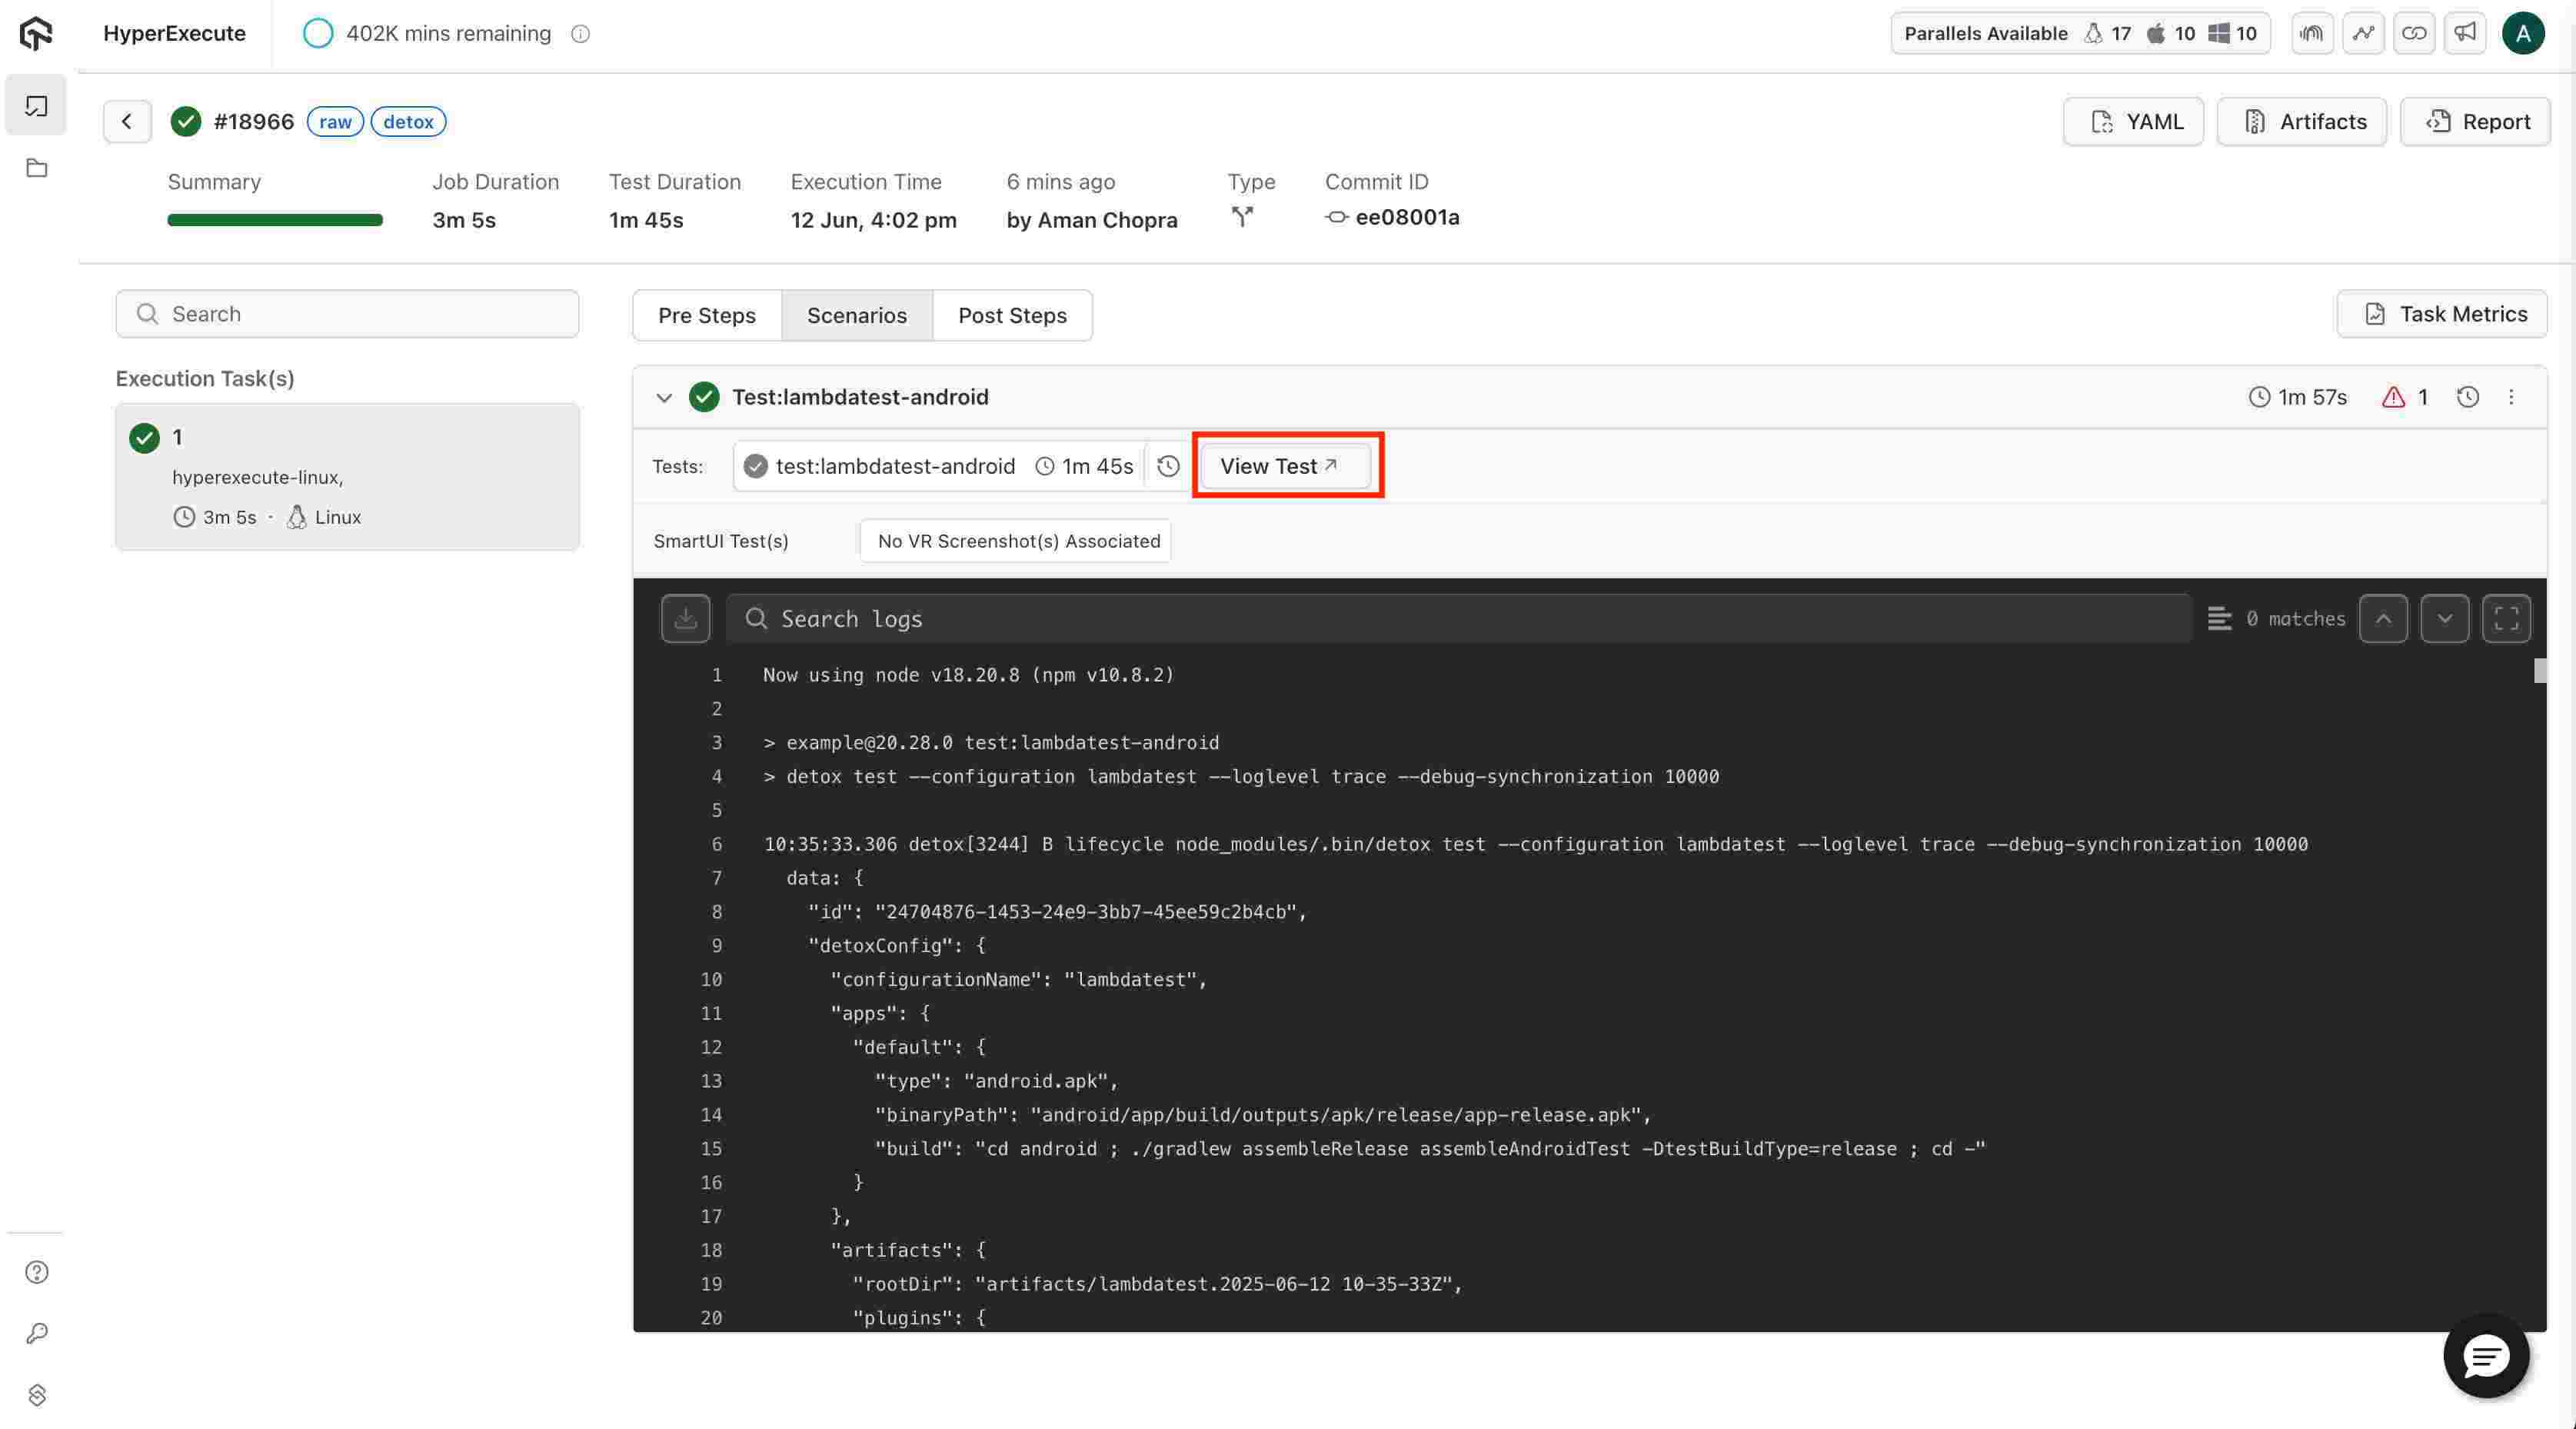
You can click on View Test from the HyperExecute logs, which will take you to the App Automation dashboard. There, you can access detailed device logs, crash logs, and Metadata for your test. You’ll also be able to watch a video recording of the Test sessions for better debugging and analysis.
Advanced Configuration
HyperExecute supports the following capabilities for your Detox test runs. Add the relevant keys to your hyperexecute.yaml file.
Tunnel
Test applications hosted on your local or private network by routing traffic through a secure TestMu AI Tunnel. Enable it by setting the top-level tunnel flag in your YAML:
tunnel: true
You can further customize the tunnel behavior (arguments, scope, and more) using tunnelOpts. Learn more in the Tunnel Configuration guide.
Dedicated Proxy
Route your test traffic through a dedicated proxy server with a fixed IP that your network administrators can whitelist, giving controlled access to network-restricted resources. This feature is enabled for your account by the TestMu AI support team. Learn more in the Dedicated Proxy guide.
IP Geolocation
Run your tests as if from a specific geographic location by passing a supported two-letter country code, letting you validate region-based content and geo-restricted features. Learn more in the IP Geolocation on Real Devices guide, and refer to the supported country codes.
For any query or doubt, please feel free to contact us via 24×7 chat support or you can also drop a mail to support@testmuai.com.
Using the Detox Agent Skill with TestMu AI
The detox-skill is a part of TestMu AI Skills that guide AI coding assistants in generating production-ready test automation.
The detox-skill package includes:
detox-skill/
├── SKILL.md
└── reference/
    ├── playbook.md
    └── advanced-patterns.md
It provides structured guidance for:
- Project structure and setup
- Dependency configuration
- Local execution
- TestMu AI cloud execution
- Debugging patterns
- CI/CD integration
Installing Detox Agent Skill
Install a Detox Agent Skill using the command below:
# Clone the repo and copy the skill you need
git clone https://github.com/LambdaTest/agent-skills.git
cp -r agent-skills/detox-skill .claude/skills/

# Or for Cursor / Copilot
cp -r agent-skills/detox-skill .cursor/skills/
Note: If you prefer installing all available framework skills instead of only detox-skill, clone the repository directly into your tool's skills directory (for example, .claude/skills/, .cursor/skills/, .gemini/skills/, or .agent/skills/).
 Chat with Us