Integrate Zephyr Scale with HyperExecute
Zephyr Scale is a test management platform that helps you plan, manage, and measure your tests inside Jira. It's designed from the ground up to support large test libraries and scaling teams
This document details the seamless integration between HyperExecute and qTest, enabling you to run your automated tests on a variety of devices and real devices provided by TestMu AI.
Prerequisites
- Install the Zephyr Scale - Test Management for Jira application from the Atlassian Marketplace.
- TestMu AI account. You can sign up for free.
- TestMu AI Username and Access Key
- A Jira Project key.
- A Zephyr Scale Access token. You can get this from the
profiles and settingsoption of your Jira Board.
Step 1: Setup Your Test Suite
You can use your own project to configure and test it. For demo purposes, we are using the sample repository.
Download or Clone the code sample for the Maestro framework from the TestMu AI GitHub repository to run the tests on the HyperExecute.
 View on GitHub
Step 2: Setup the CLI in your Test Suite
After cloning / downloading the sample repo, you need to setup the CLI and the environment variables.
Download the HyperExecute CLI
The CLI is used for triggering the tests on HyperExecute. It is recommend to download the CLI binary on the host system and keep it in the root directory of the suite to perform the tests on HyperExecute.
You can download the CLI for your desired platform from the below mentioned links:
Setup Environment Variable
Now, you need to export your environment variables LT_USERNAME and LT_ACCESS_KEY that are available in the TestMu AI Profile page.
Run the below mentioned commands in your terminal to setup the CLI and the environment variables.
- Linux / MacOS
- Windows
export LT_USERNAME="undefined"
export LT_ACCESS_KEY="undefined"
set LT_USERNAME="undefined"
set LT_ACCESS_KEY="undefined"
Step 3: Configure the Test Script
In the PostTestResults.java script, add the following String parameters.
- File name of your test results.
- File path of the test result file.
- Jira Project key.
- Zephyr Scale Access token.
public class PostTestResults {

    public void callApi() {

        String fileName = "TEST-com.lambdatest.JUnitTodo.xml" ; //provide the file name of the test results
        String filePath = "target/surefire-reports/TEST-com.lambdatest.JUnitTodo.xml"; //provide the file path of the test result file
        String projectKey = "ZD"; //provide the Jira project key
        String token = "abcdefghijklmnop123456"; // provide Zephyr Scale access token
Step 4: Configure YAML in your Test Suite
---
version: 0.1
globalTimeout: 150
testSuiteTimeout: 150
testSuiteStep: 150

runson: linux

autosplit: true
retryOnFailure: true

maxRetries: 1
concurrency: 3

env:
  # PAT: ${{ .secrets.testKey }}
  CACHE_DIR: m2_cache_dir
  TARGET_OS: linux

cacheKey: '{{ checksum "pom.xml" }}'
cacheDirectories:
  - ${CACHE_DIR}

shell: bash

pre:
  # Download and install packages in the CACHE_DIR.
  # Skip execution of the tests in the pre step
  - mvn -Dmaven.repo.local=${CACHE_DIR} -Dmaven.test.skip=true clean install

post:
  - cat hyperexecute-zephyr-scale.yaml

testDiscovery:
  type: raw
  mode: remote
  command: grep 'public class' src/test/java/com/lambdatest/*.java | awk '{print$3}'

testRunnerCommand: mvn -Dplatname=linux -Dmaven.repo.local=m2_cache_dir -Dtest=$test -P single
# test site
jobLabel: ['hyperexecute', 'zephyr']
Step 5: Execute your Test Suite
NOTE : In case of MacOS, if you get a permission denied warning while executing CLI, simply run
chmod u+x ./hyperexecuteto allow permission. In case you get a security popup, allow it from your System Preferences → Security & Privacy → General tab.
Run the below command in your terminal at the root folder of the project:
./hyperexecute --config RELATIVE_PATH_OF_YOUR_YAML_FILE
OR use this command if you have not exported your username and access key in the step 2.
./hyperexecute --user undefined --key undefined --config RELATIVE_PATH_OF_YOUR_YAML_FILE
Step 6: Monitor the Test Execution
Visit the HyperExecute Dashboard and check your Job status.
Viewing the Test Results in Zephyr Scale
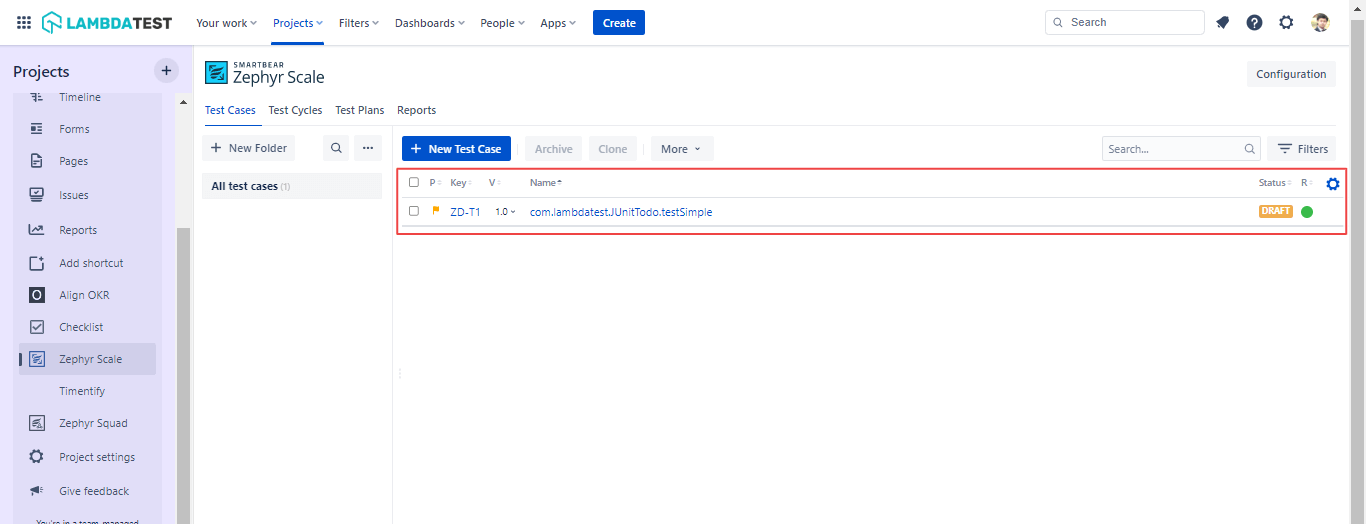
To view test results in Zephyr Scale, head over to your Zephyr Scale project. The below screenshot shows the Test Case in Zephyr Scale that you executed on TestMu AI.
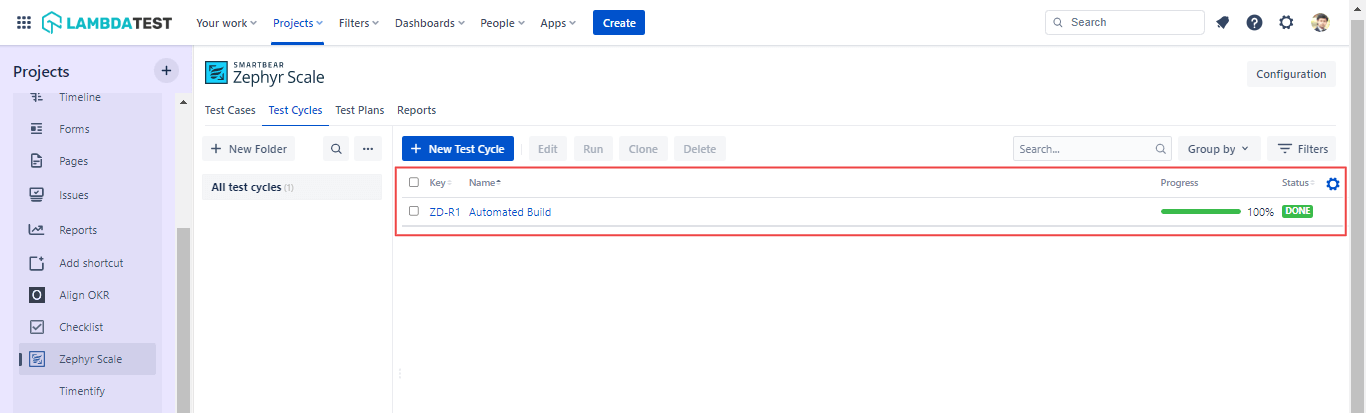
You can also view the executed build by navigating to Test Cycles.
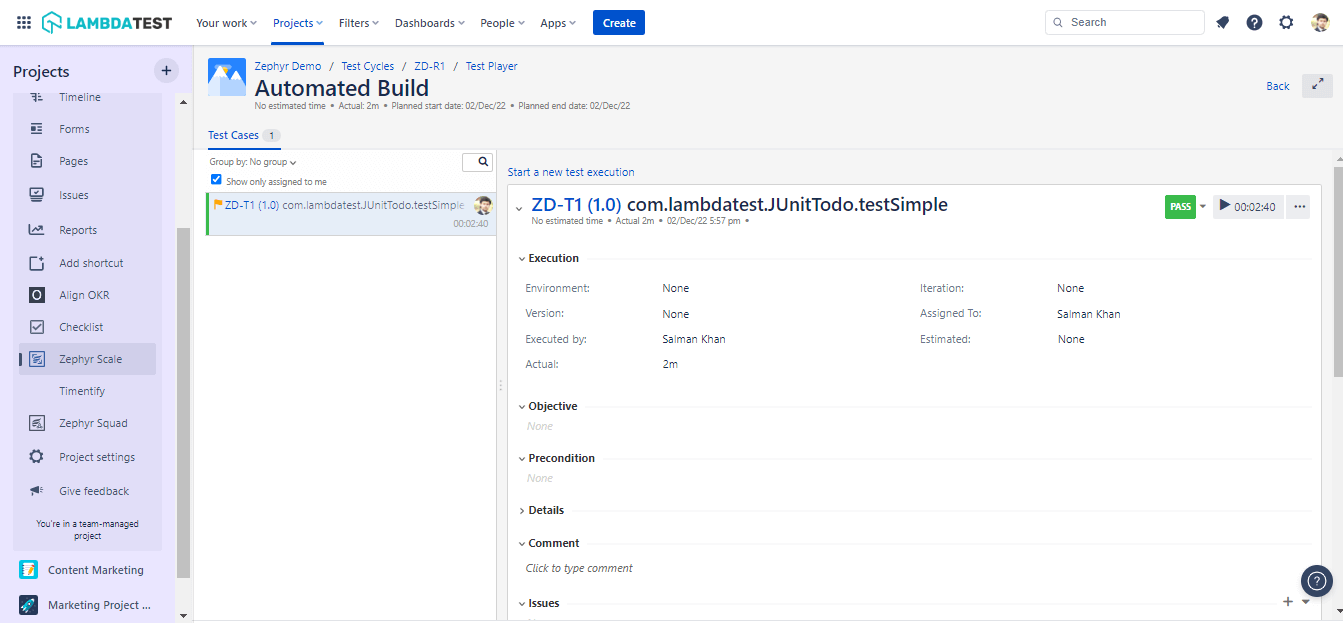
To view the build details, click on the Zephyr project Key or Name.


 Chat with Us