Integrate algoQA with HyperExecute
algoQA is an AI-powered software testing platform that automates end-to-end tests across web, mobile, desktop, and API applications. It generates optimal test cases, datasets, and executable scripts, reducing manual effort and improving test coverage.
This document will guide you how to integrate your algoQA project with HyperExecute
Prerequisites
To run the Tests on HyperExecute from your Local System, you are required:
- Your LambdaTest Username and Access key
- HyperExecute CLI in order to initiate a test execution Job.
- Setup the Environment Variable
- HyperExecute YAML file which contains all the necessary instructions.
Step 1: Setup Your Test Suite
You can use your own project to configure and test it. For demo purposes, we are using the sample repository.
Download or Clone the code sample for the algoQA from the LambdaTest GitHub repository to run the tests on the HyperExecute.
Step 2: Setup the CLI in your Test Suite
After cloning / downloading the sample repo, you need to setup the CLI and the environment variables.
Download the HyperExecute CLI
The CLI is used for triggering the tests on HyperExecute. It is recommend to download the CLI binary on the host system and keep it in the root directory of the suite to perform the tests on HyperExecute.
You can download the CLI for your desired platform from the below mentioned links:
Setup Environment Variable
Now, you need to export your environment variables LT_USERNAME and LT_ACCESS_KEY that are available in the LambdaTest Profile page.
Run the below mentioned commands in your terminal to setup the CLI and the environment variables.
- Linux / MacOS
- Windows
export LT_USERNAME="undefined"
export LT_ACCESS_KEY="undefined"
set LT_USERNAME="undefined"
set LT_ACCESS_KEY="undefined"
Step 3: Configure YAML in your Test Suite
---
version: 0.1
globalTimeout: 150
testSuiteTimeout: 150
testSuiteStep: 150

runson: win

autosplit: true

retryOnFailure: true
maxRetries: 1

concurrency: 2

cacheKey: '{{ checksum "pom.xml" }}'
cacheDirectories:
  - .m2

pre:
  - mvn -Dmaven.repo.local=./.m2 dependency:resolve

report: true
partialReports:
    type: json
    location: target/
    frameworkName: extent-native

uploadArtifacts:
  - name: FinalReport
    path:
    - ExtentReports/**

testDiscovery:
  type: automatic
  mode: static
  args:
    featureFilePaths: src/test/java/features/
    frameWork: java

testRunnerCommand: mvn test `-Dplatname=win `-Dmaven.repo.local=./.m2 `-Dcucumber.features="$test"

jobLabel: ['HYP', 'algoQA']
Step 4: Amend in your ApplicationSettings.xml file
In your ApplicationSettings.xml file, update the following capabilities:
- BrowserType : It should be Lambda.
- LambdaTestBuild : Provide your build name.
- LambdaTestURL : Provide your HUB URL. For e.g.
https://username:access-key@hub.lambdatest.com/wd/hub
Step 5: Execute your Test Suite
NOTE : In case of MacOS, if you get a permission denied warning while executing CLI, simply run
chmod u+x ./hyperexecuteto allow permission. In case you get a security popup, allow it from your System Preferences → Security & Privacy → General tab.
Run the below command in your terminal at the root folder of the project:
./hyperexecute --config <path_of_yaml_file>
OR use this command if you have not exported your username and access key in the step 2.
./hyperexecute --user <your_username> --key <your_access_key> --config <path_of_yaml_file>
Step 6: Monitor the Test Execution
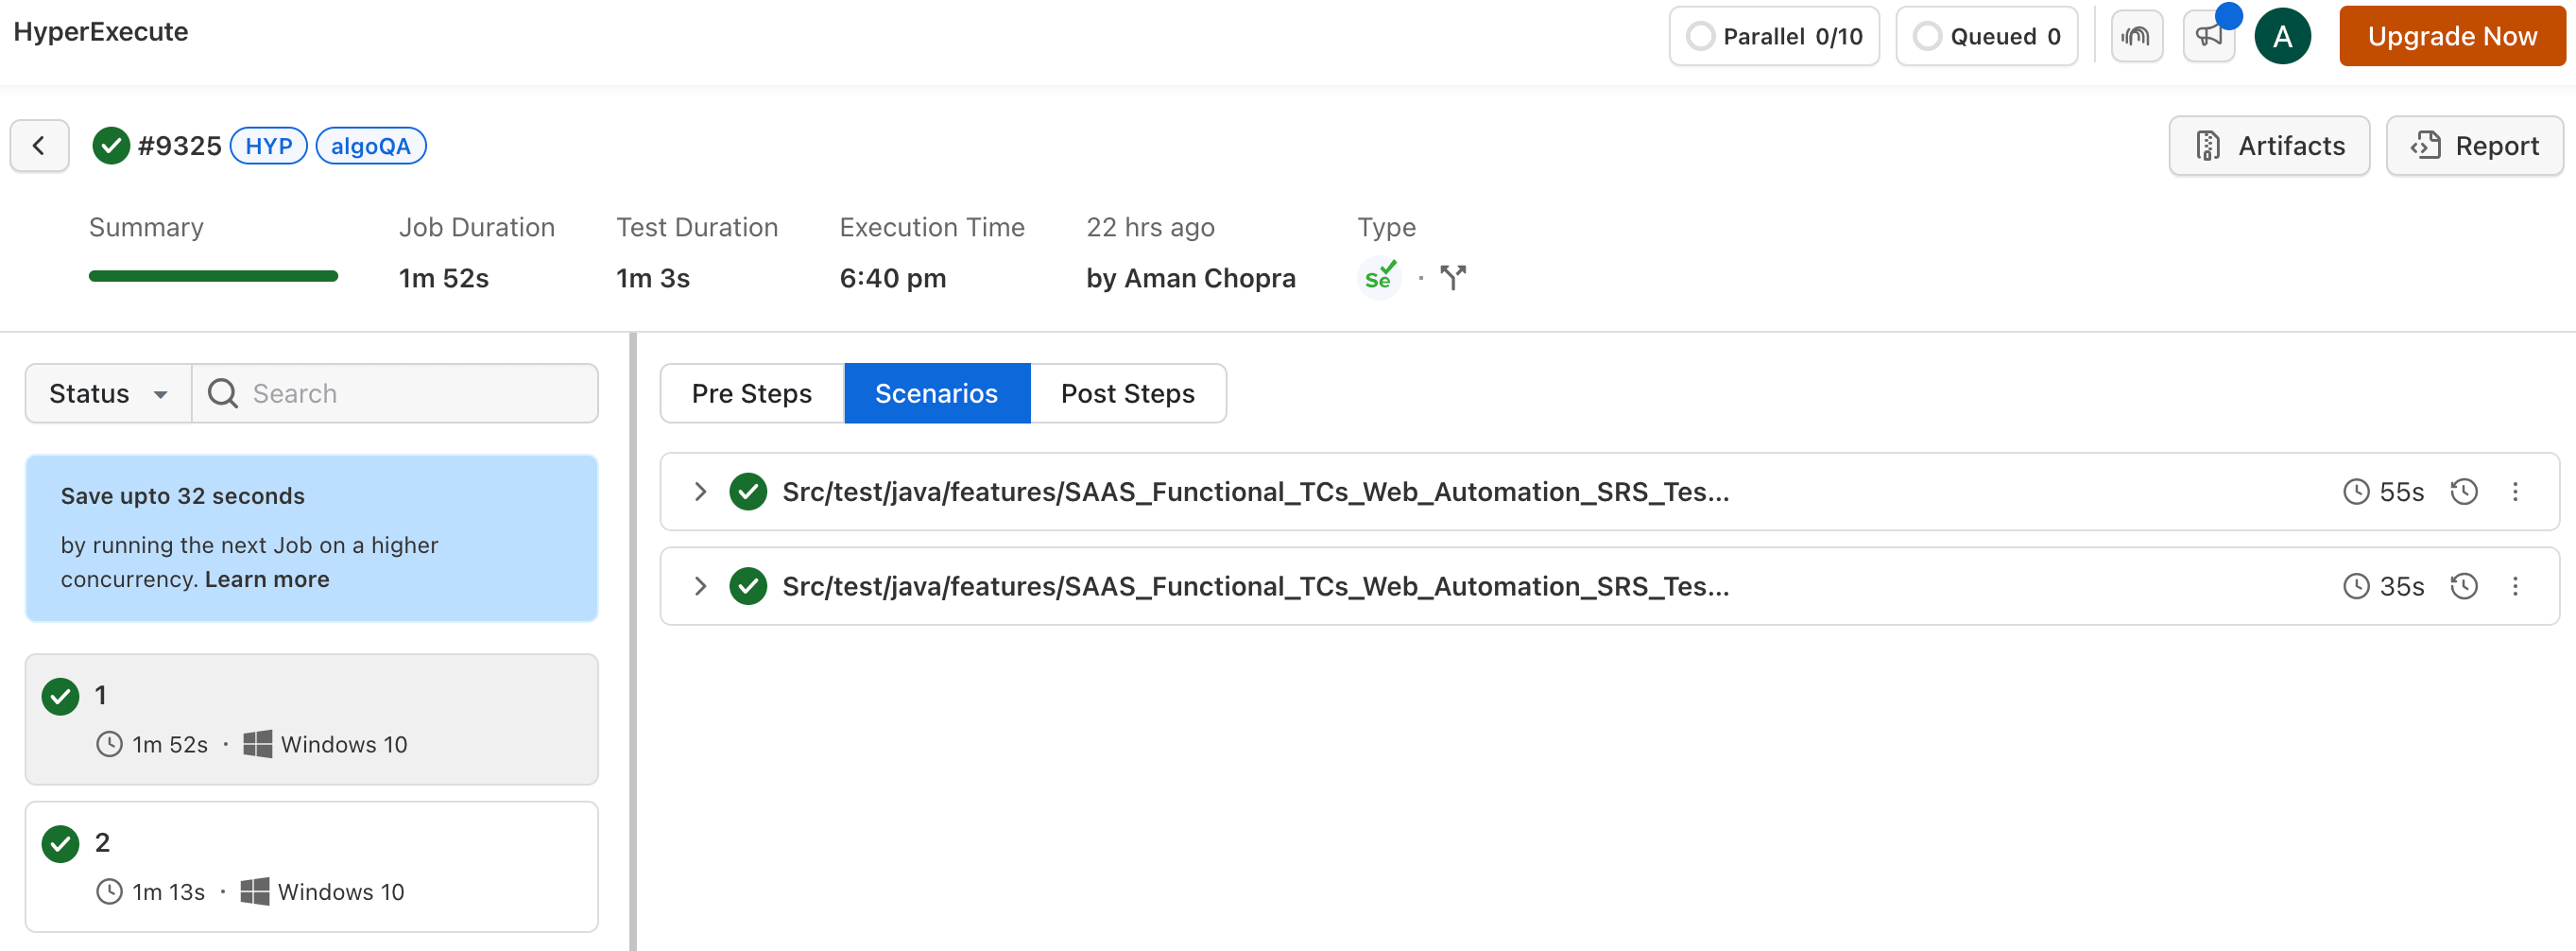
Visit the HyperExecute Dashboard and check your Job status.
