How to Integrate TestMu AI With LEAPWORK
If you build codeless test automation in LEAPWORK, you can run those same visual flows on real browsers and devices by connecting LEAPWORK to TestMu AI. The integration gives your LEAPWORK agent access to 3,000+ browsers, devices, and OS combinations. You configure TestMu AI once inside LEAPWORK Studio, then run automation flows against the TestMu AI cloud without managing any local machines.
This integration covers two connection types. Use a web agent to run flows on the cross browser cloud, and a TestMu AI Server connection to automate native Android and iOS apps on real devices.
Prerequisites for Connecting LEAPWORK to TestMu AI
Before you start, make sure you have the following in place.
- A TestMu AI account. If you do not have one, sign up for a free TestMu AI account.
- Your TestMu AI Username and Access Key, available from the Account Settings page after you log in.
- A working LEAPWORK Studio installation. Admin access is required to add a TestMu AI Server connection for mobile testing.
How to Connect LEAPWORK to TestMu AI for Cross Browser Testing
LEAPWORK assigns Agents, the available machines that execute your automation flows. To run flows on the TestMu AI cross browser cloud, create an agent with web capabilities that points at TestMu AI. The steps below walk through that setup end to end.
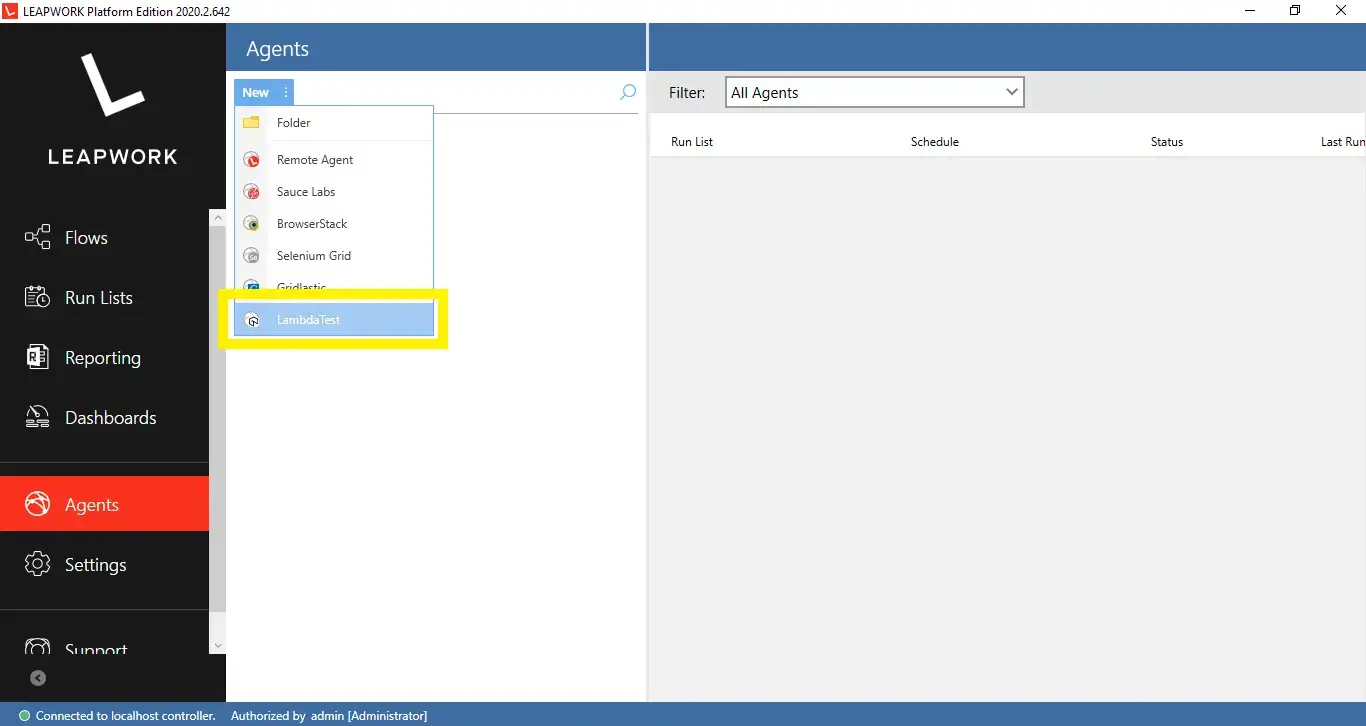
Step 1: In LEAPWORK Studio, open the Agents section and click New.
Step 2: Open the Agent type drop-down and select TestMu AI. A settings window opens for the new agent.
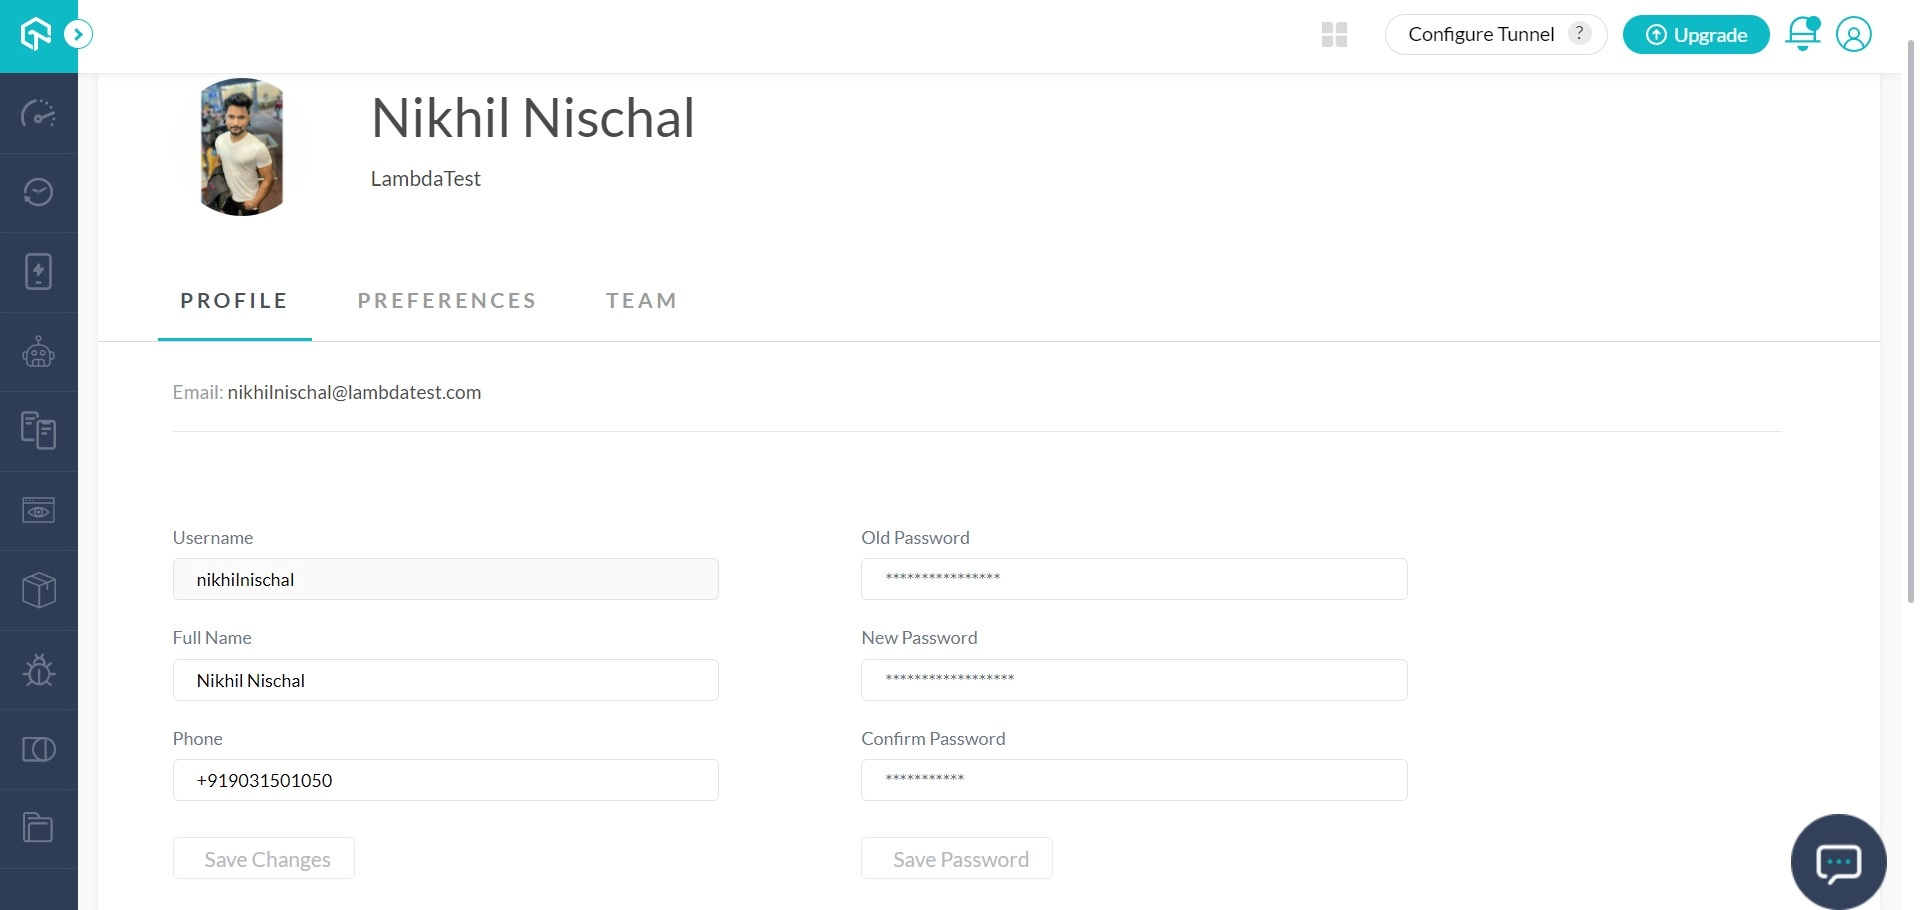
Step 3: Log in to your TestMu AI account in a browser so you can copy your credentials in the next step.
Step 4: Open Account Settings from your profile menu in the top-right corner. Copy the Username and Access Key shown there. You need both values to authenticate the agent.

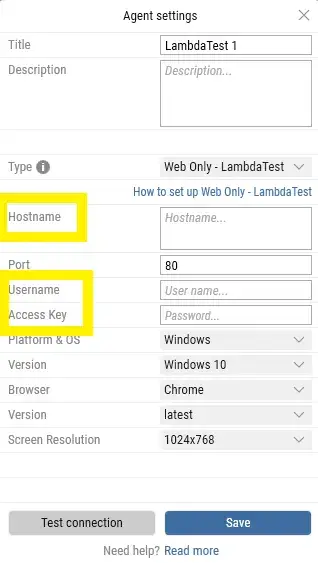
Step 5: Return to the TestMu AI agent settings window in LEAPWORK Studio. This window is where you define how the agent connects to the cloud and which environment it runs on.

Fill in the agent settings as follows. TestMu AI supports both manual and automated browser testing across 3,000+ browser, device, and OS combinations, so the platform, browser, and version you pick here determine the environment your flows run on.
- Title: a name for the agent, for example
TestMu AI. - Hostname: the IP address, machine name, or DNS name of the TestMu AI hub (see Step 6 for the exact value).
- Port: the connection port. The default is
80. - Username and Access Key: the credentials you copied in Step 4.
- Platform & OS: select the operating system to run on from the drop-down.
- Platform version: select the OS version for the selected platform.
- Browser: select the browser to run the flow on.
- Browser version: pick a specific version, or select latest to always use the newest available version.
- Resolution: set the screen resolution the TestMu AI machine uses while running flows.
- Description: optional free text to help you identify the agent later.
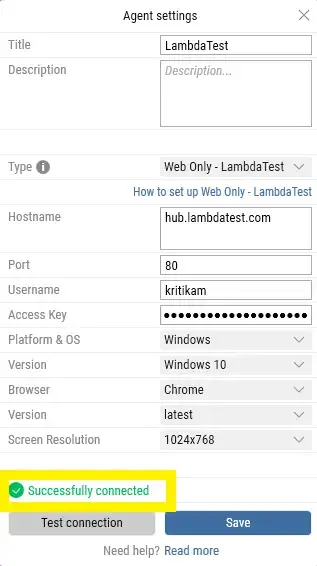
Step 6: Enter your Hostname, Username, and Access Key in the highlighted fields. These three values are what authenticate the agent, so confirm them carefully. In the Hostname field, enter the TestMu AI web hub:
hub.lambdatest.com
Step 7: Click Test connection. When the credentials and hostname are correct, Studio shows Successfully connected in green.
Click Save to store the TestMu AI environment in Studio. You can now select this agent whenever you schedule or run automation flows.
How to Set Up a TestMu AI Server Connection for Mobile App Testing
A TestMu AI Server connection points your LEAPWORK flows at the TestMu AI mobile cloud. Use it to automate native Android and iOS app flows on real devices without maintaining a physical device lab. This connection is separate from the web agent above and is added on the Connections screen.
Adding a server connection is restricted to LEAPWORK Admin users. If you do not see the option, ask your workspace administrator to grant admin access or to create the connection for you.
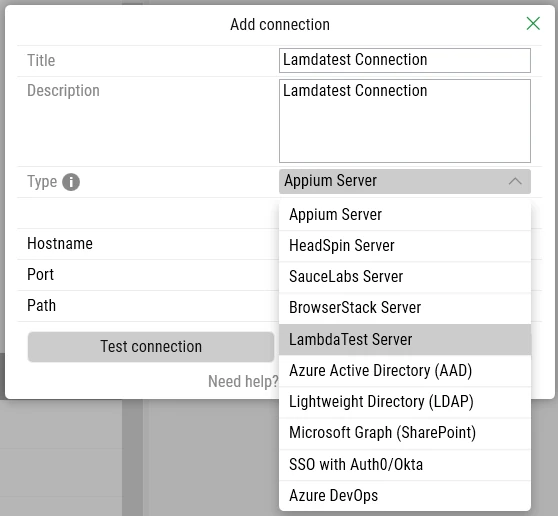
Step 1: In LEAPWORK Studio, open the Connections screen and click Add. The Add Connection dialog opens.

Step 2: Enter a unique Title and an optional Description so your team can identify the connection. Open the Type drop-down and select TestMu AI Server. Selecting it reveals the connection fields.
Step 3: Fill in the connection fields:
- Hostname: the TestMu AI mobile endpoint. Use
https://mobile-hub.lambdatest.com/wd/hubunless you are on a dedicated or region-specific hub. - Username: your TestMu AI account username (the same value from Step 4 of the web setup above).
- Access Key: your TestMu AI access key from the same Account Settings page.
- Custom Capabilities (optional): a JSON block defining the device, OS version, and other run settings, for example
{"deviceName": "Galaxy S23", "platformVersion": "14", "platformName": "android"}.
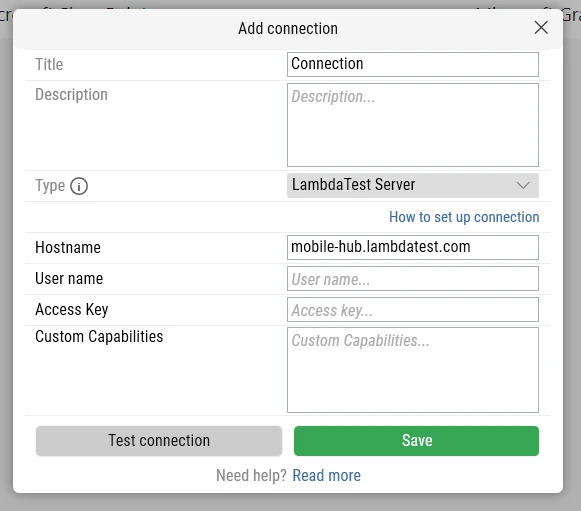
Step 4: Click Test connection to validate the credentials. When the values are correct, Studio shows a success message. Click Save to store the connection.
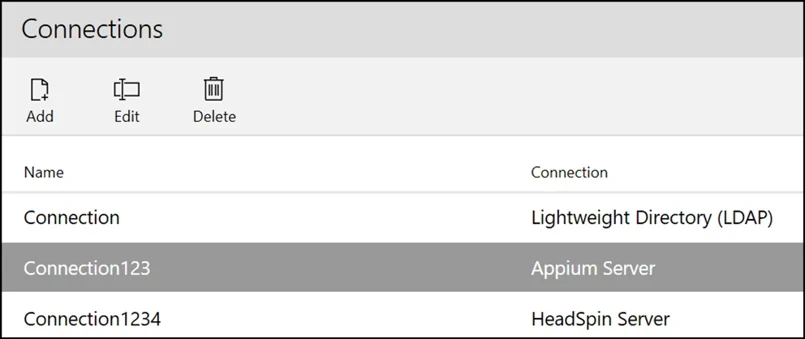
The saved connection appears in the Connections list and can be reused across mobile automation flows. To change credentials or remove it, use the Edit or Delete buttons next to Add.
Related TestMu AI Codeless Integration Guides
Use these guides to set up other codeless tools or to compare connection options.
- How to choose a codeless automation integration covers the full set of TestMu AI codeless tool integrations.
- How to run ACCELQ tests on TestMu AI connects ACCELQ as an external device provider.
- How to run Testsigma tests on TestMu AI runs Testsigma automation flows on the TestMu AI cloud.
