Run Selenium IDE Tests with TestMu AI Selenium Grid
Selenium IDE is one of the most popular record and playback tool for testing which is widely used for automated browser testing. The Selenium IDE is a very easy-to-use solution for getting started with automation testing. It also provides instant feedback and has cross-browser and operating system compatibility, with the help of Selenium IDE (SIDE) Runner.
In this document, we will see how to run Selenium IDE tests on TestMu AI cloud Selenium Grid.
Prerequisites
- Node.js programming language (version 8 or 10).
- NPM or Node.js Package Manager.
- Selenium IDE Plugin, for either Google Chrome and Mozilla Firefox.
- Selenium IDE (SIDE) Runner. You can download SIDE runner using below code:
npm install -g selenium-side-runner
- You also need your TestMu AI authentication credentials, which includes your TestMu AI username, and access key. These will be set up as the Secrets for configuring the pipeline. To get your Username and Access Key, go to your TestMu AI automation dashboard and click on the "key" icon left to the help button, on the top right corner.

For the demonstration of executing Selenium IDE tests on the TestMu AI grid, we’ll create a test suite that comprises of four test cases- two to perform a search for ‘TestMu AI’ on Google & DuckDuckGo, and the other two to perform a search for ‘TestMu AI Blog’ on Google & DuckDuckGo.
Enabling Parallel Testing for Selenium IDE
The parallel testing on the Cloud Selenium Grid works only when the tests are executed using the SIDE Runner, and not the Selenium IDE. So we will enable the Parallel testing for Selenium IDE.
- Right click on the test suite and go to Settings.
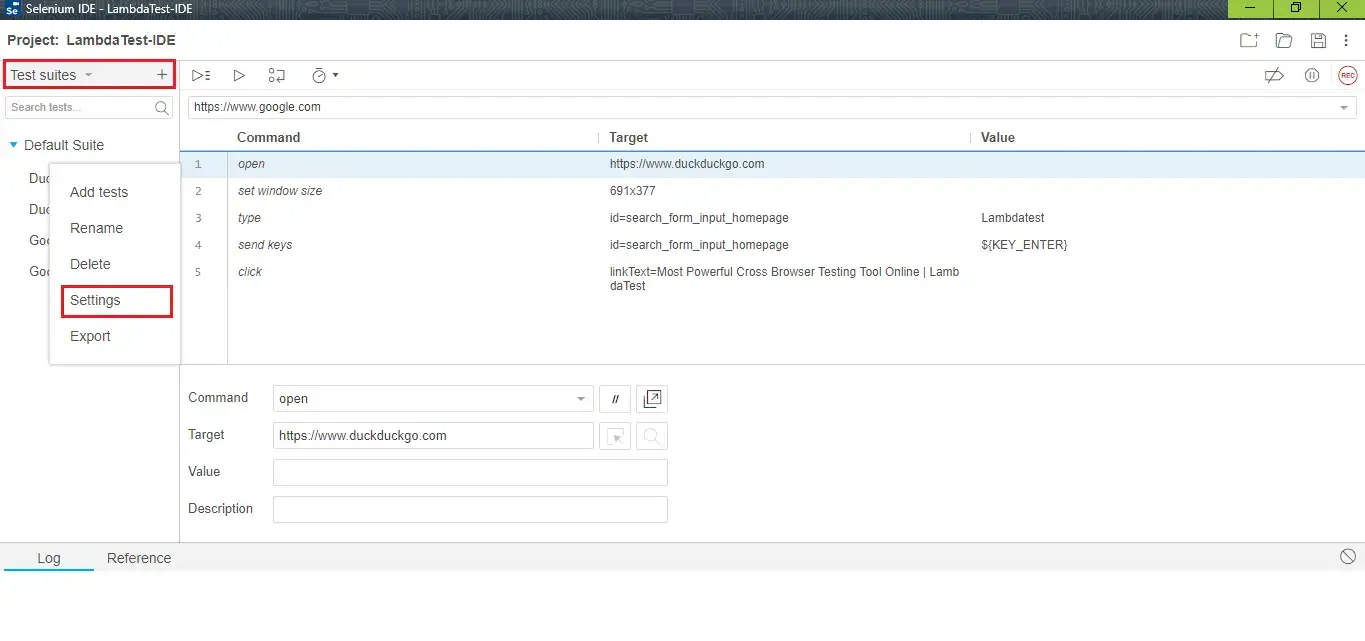
- In the Settings window, tick the Run in Parallel checkbox.

- Save the SIDE project.
We have successfully activated Parallel Testing in Selenium IDE. Now we can execute tests Selenium IDE tests in parallel on TestMu AI Selenium Cloud Grid.
Executing Selenium IDE Tests on TestMu AI Selenium Cloud Grid
-
Set the Desired Capabilities in Selenium. For this article, we have set the Chrome browser (version 72.0) for Windows 10, to run our Selenium IDE tests.
The TestMu AI Selenium Desired Capabilities Generator is used to generate the capabilities. Below are the desired capabilities used in this article for the required test combination, provided in Python Language.
        capabilities = {
                "platform" : "Windows 10",
                "browserName" : "Chrome",
                "version" : "72.0"
        }
In the string format, it will be represented as: **"browserName='chrome' version='72.0' platform='Windows 10'"**
-
Get the Grid URL for executing tests on TestMu AI. Get your username and access key from your TestMu AI's Profile section (as shown in the prerequisites), and replace it in the below URL.
https://user-name:access-key@hub.lambdatest.com/wd/hub -
Specify the desired capabilities along with the Grid URL. Replace the desired capabilities and the Grid URL from the above steps in the below code:
selenium-side-runner --server <lambdatest grid="" url=""> --capabilities </lambdatest>
- Mention the number of parallel processes to be executed at a time. You can use any of the below syntax to specify the count of parallel processes to be executed at the above mentioned Grid URL:
selenium-side-runner --w <num of="" parallel="" processes="">--server https://user-name:access-key@hub.lambdatest.com/wd/hub</num>
OR
selenium-side-runner --max-workers <num of="" parallel="" processes="">--server https://user-name:access-key@hub.lambdatest.com/wd/hub</num>
For this article, we have set the number of parallel processes as '4'
- Now we have all the components of the SIDE Runner command to execute the tests. So we will run the Selenium IDE tests on TestMu AI Selenium Cloud Grid. Navigate to the directory where the .SIDE file is located (here it is located at "TestMu AI-IDE.side") and execute the below command in the terminal, after replacing the GRID URL:
selenium-side-runner -w 4 "LambdaTest-IDE.side" --server https://user-name:acces-key@hub.lambdatest.com/wd/hub -c "browserName='chrome' version='72.0' platform='Windows 10'"
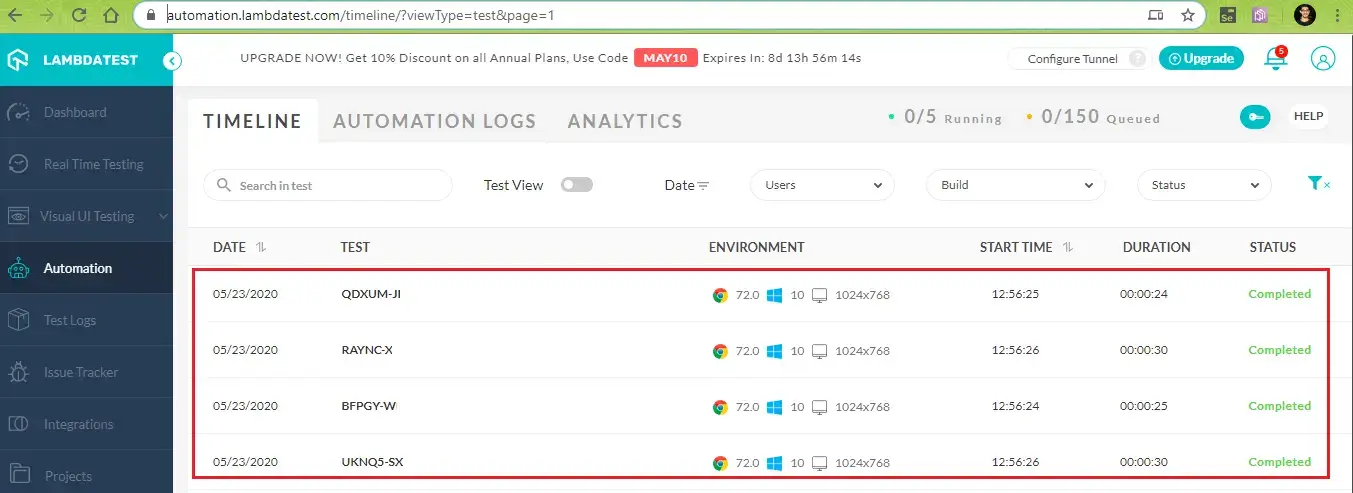
We have successfully executed all the steps to run Selenium IDE tests on TestMu AI Selenium Cloud Grid. Now you can see our tests being executed along with their status in the Automation Timeline of your TestMu AI profile.
Below are the execution snapshots of the SIDE Runner and the automation timeline instance, that shows the successful execution of the desired tests: 
How To Run Multiple Test Cases Within Same Test Suite?
You might have lots of individual tests in a single test suite to test all features of a site. When you run these tests normally, you might experience that the test suites get broken into individual tests, thereby requiring a new session and the variables being passed again each time.
Selenium IDE provides the feature to overcome this as well. In order to run multiple test cases within the same test suite with a single instance of a browser, the Persist session option in the Selenium IDE can be used. Below are the steps for how to do so:
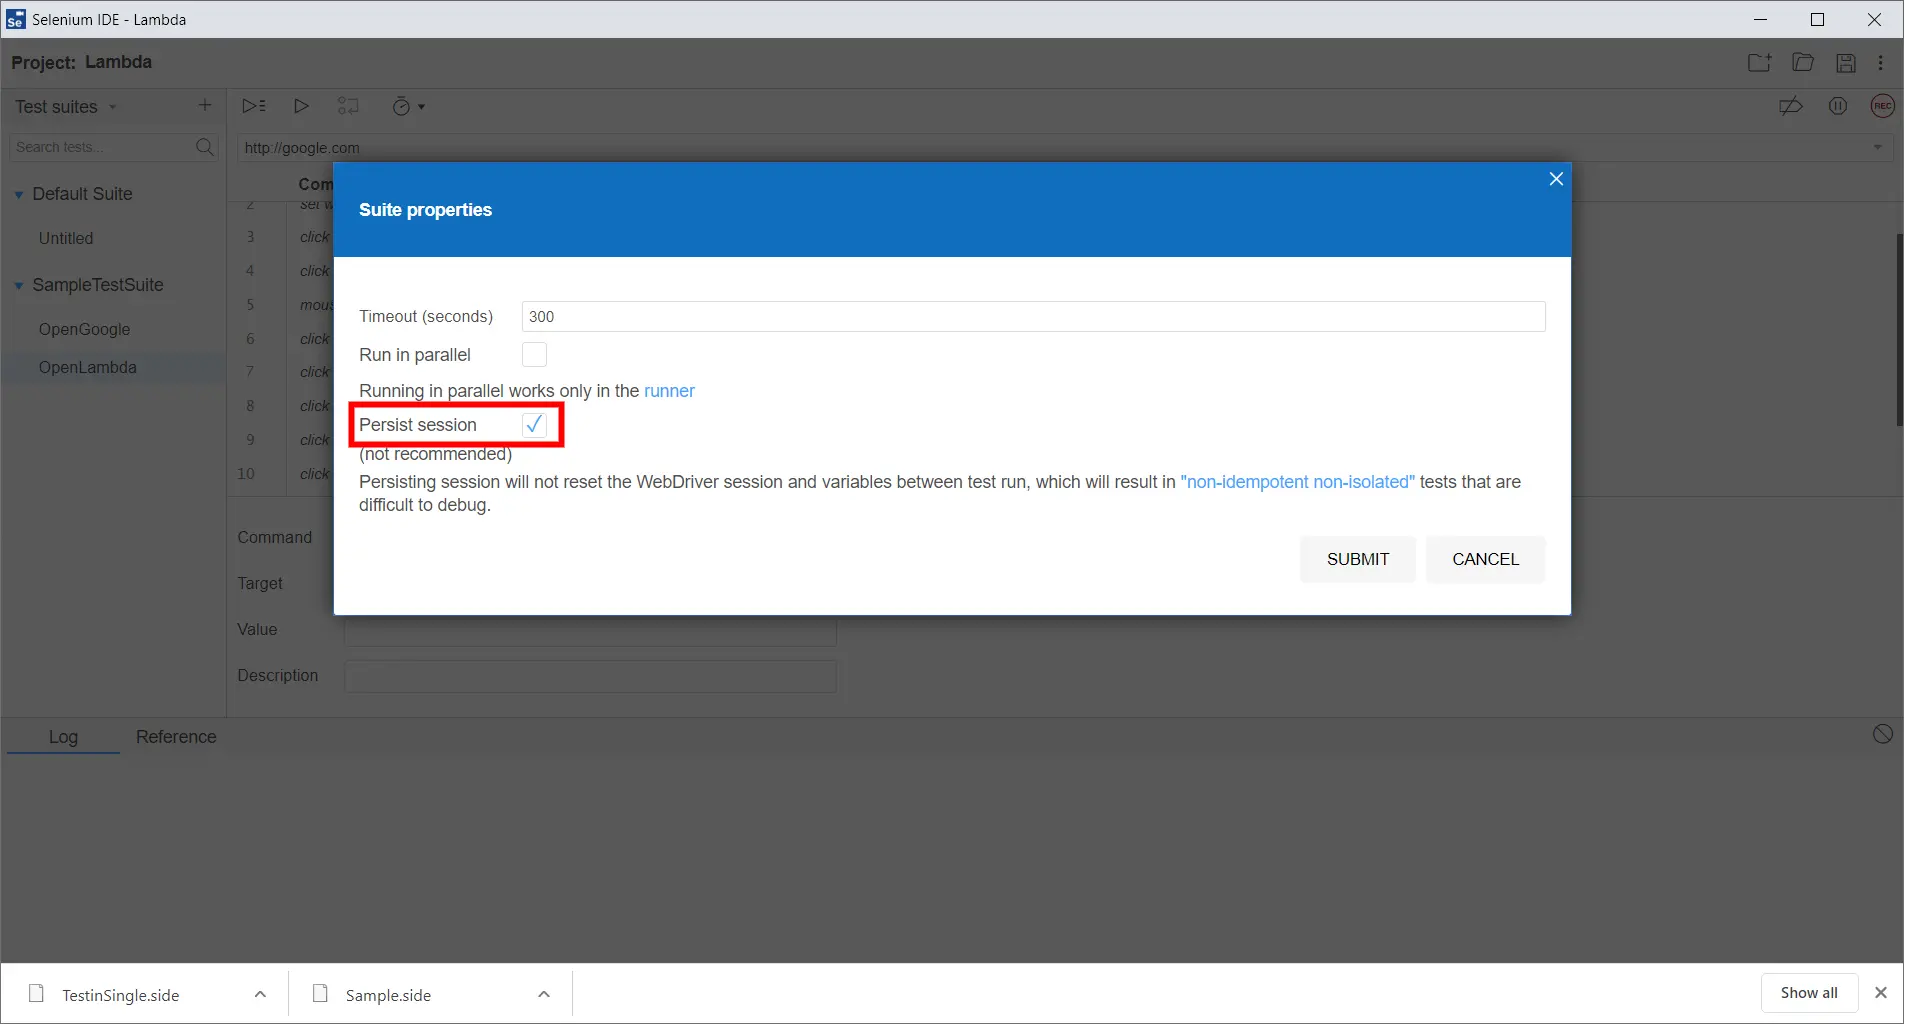
- Click over the three dot option of the test suite. Choose the setting option.
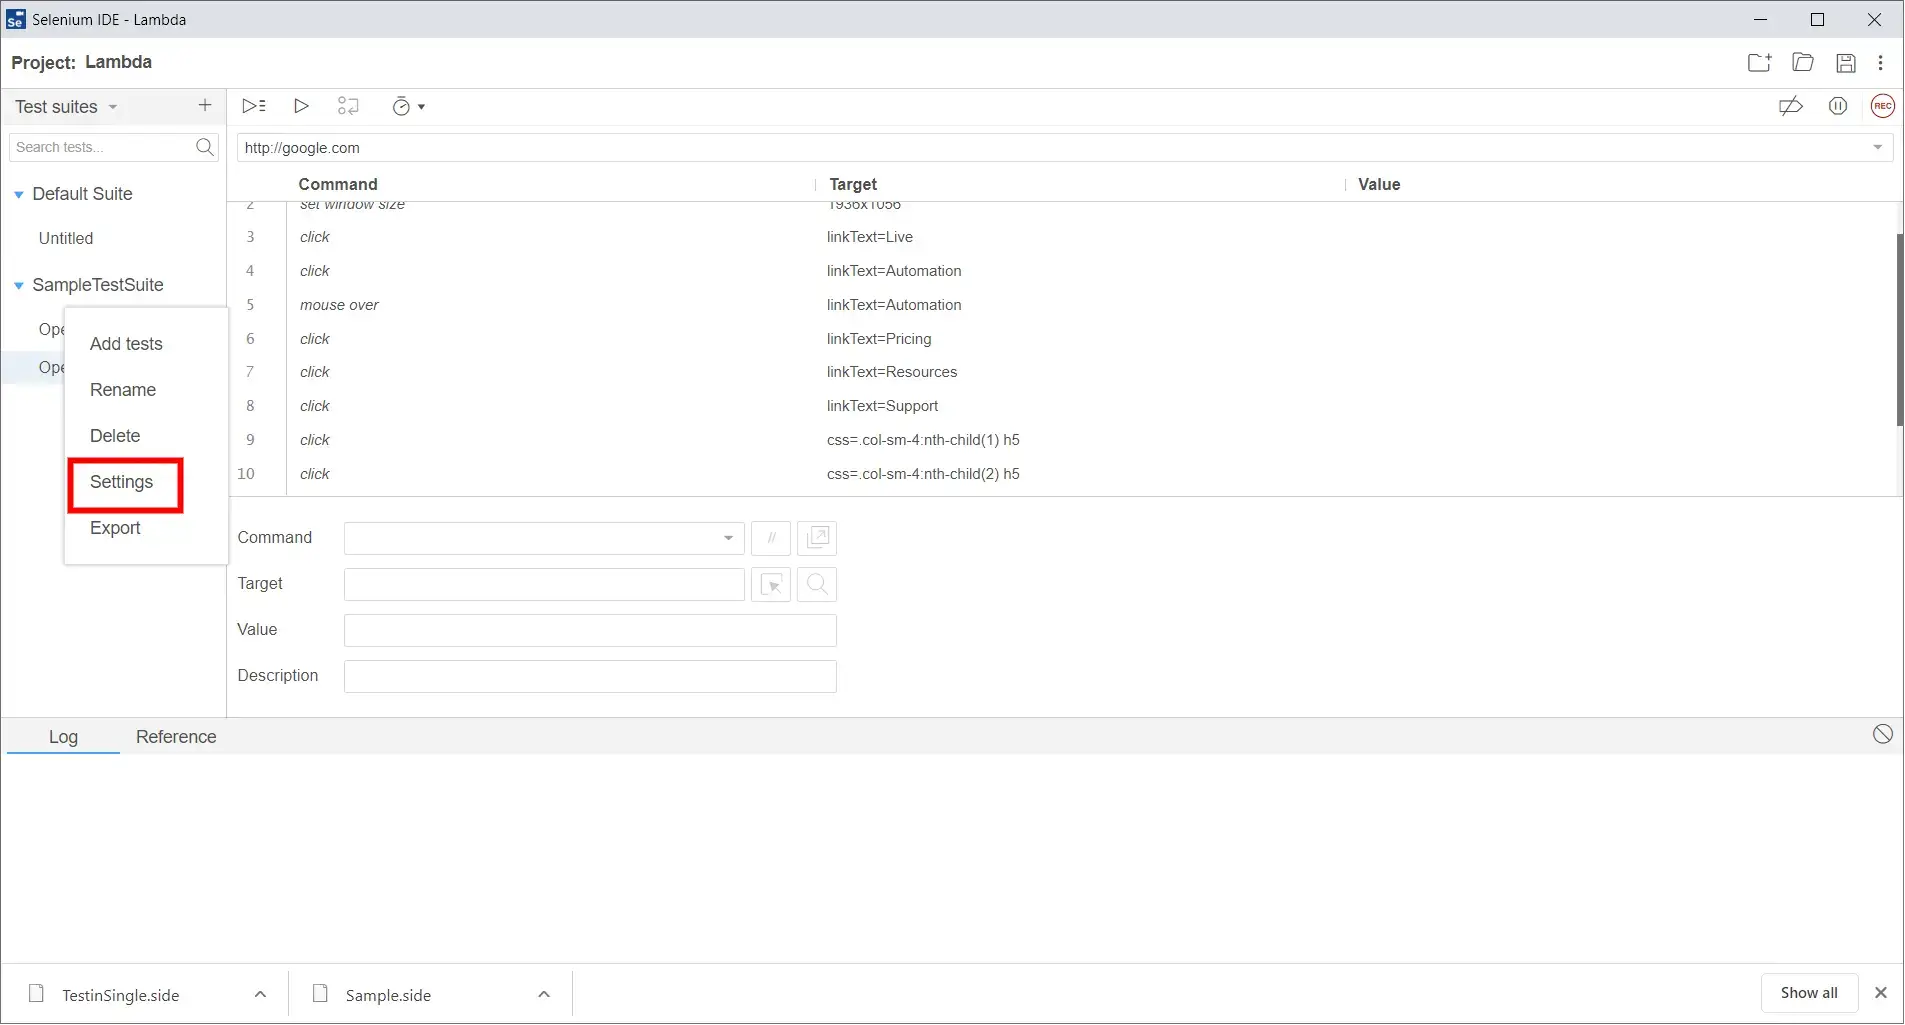
- Then choose persist session option and submit.
- For the second query, you pass the variable value through the SIDE Runner using command line. You can use the SIDE Runner's "param" flag to pass the values. For example:
selenium-side-runner --params "a='example-value' a.b='another example-value' a.b.c=[1,2,3]"
Congrats! We have successfully executed our Selenium IDE tests on TestMu AI Selenium Cloud Grid, which allows you to perform live interactive and automated cross browser testing on 3000+ real browsers and operating systems online.
