LEAPWORK Integration with LambdaTest
LEAPWORK is a test automation platform that provides easy and completely visual codeless automation. With LEAPWORK, you can build test automation cases without writing a single line of code, transform those test cases into an automation flow for faster and greater coverage. It also provides seamless integration to various CI/CD and DevOps tools.
LambdaTest has integrated with LEAPWORK to make your test automation more seamless than before. Now, you will be able to perform cross browser testing for over 3000+ browsers, devices, and operating systems at the click of a few buttons. Test automation was never so easy!
How To Integrate LambdaTest With LEAPWORK?
LEAPWORK assigns ‘Agents’, or available machines, for you to execute automation flows. These ‘agents’ can then be used to set up ‘Schedules’ or run automation flows. In order to integrate LEAPWORK with LambdaTest, you will need to create an agent with web-only capabilities for LambdaTest.
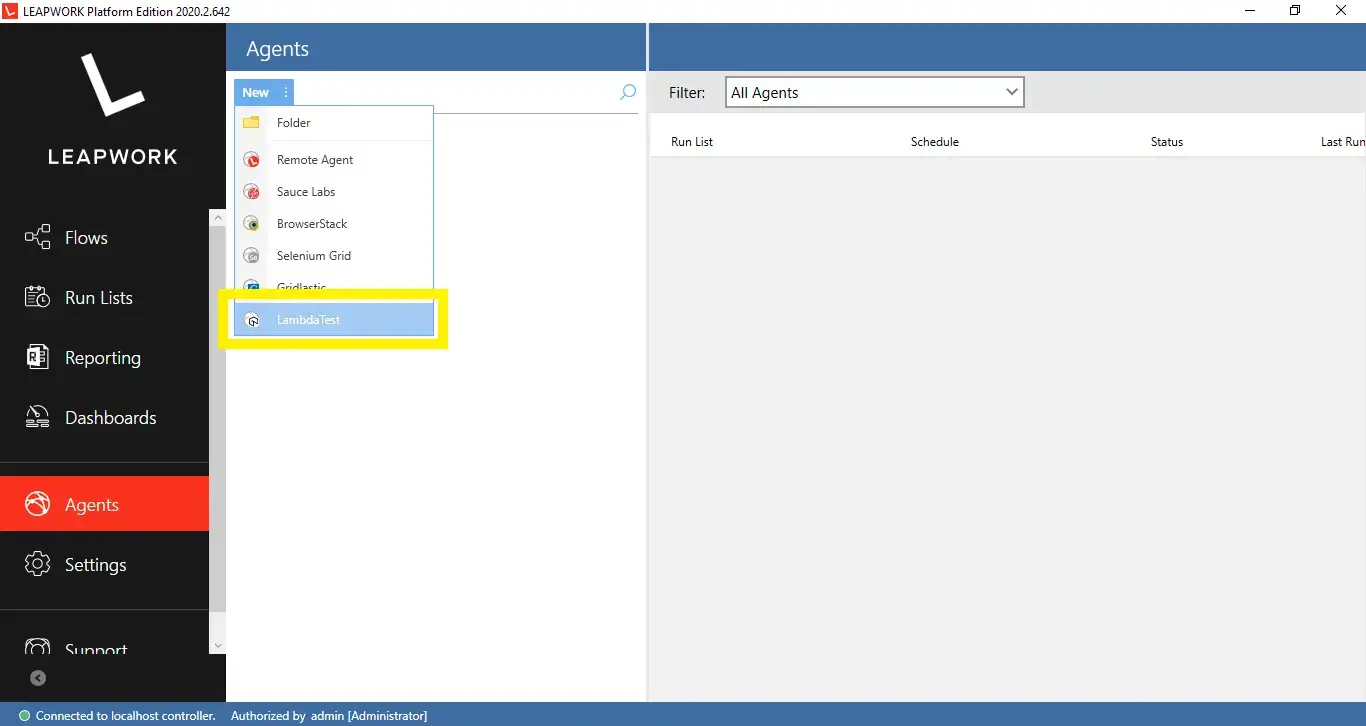
Step 1: In LEAPWORK Studio, go to the ‘Agents’ section and select 'New'.
Step 2: Choose Agent type 'LambdaTest' from the drop-down menu.
Step 3: Log in to your 'LambdaTest' profile. If you haven’t done that already, sign up right here.
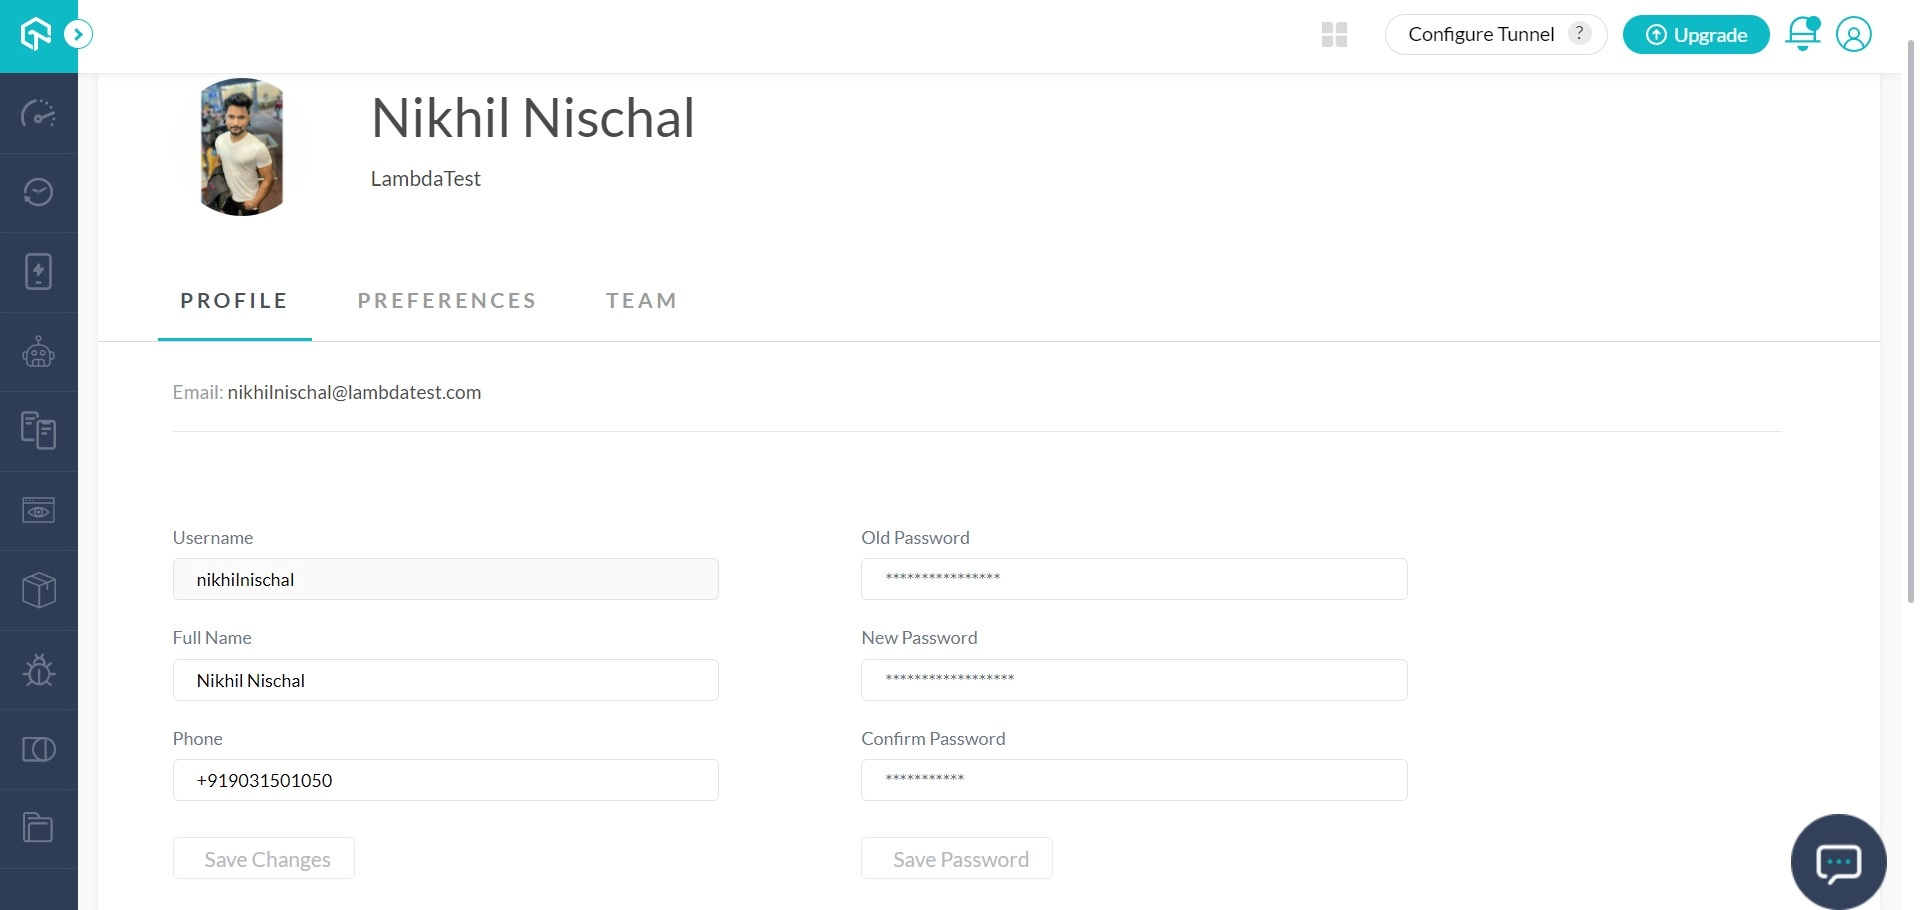
Step 4: Go to your profile in the top-right corner. Fetch the username and access token key for the next step.

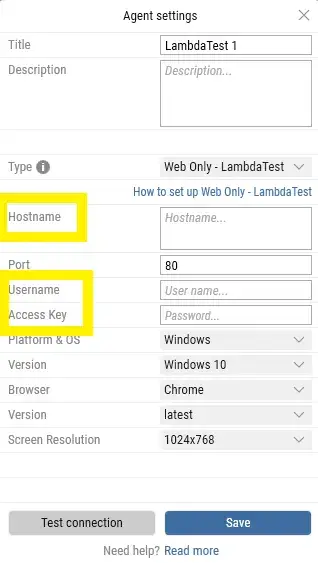
Step 5: Go back to LEAPWORK Studio, where we selected LambdaTest in Step 2, and this window popped up.

As you already know, LambdaTest provides cross browser testing on more than 2000 devices, browsers, and operating systems. You can choose to perform manual as well as automated browser testing on our cloud-based platform.
This is where you-
- Provide a title for the Agent, e.g., 'LambdaTest' or anything that you like.
- Provide the IP address, machine name, or DNS name for the LambdaTest’s Hub
- Specify LambdaTest Port – the default is 80.
- Enter your LambdaTest username and access (refer- Step 4.)
- Specify the desired “Platform & OS.” A drop-down will appear once you navigate to that section.
- For the selected platform, specify the platform version from the drop-down list on which you would like to execute the test.
- Specify the browser from the drop-down list on which you would like to execute the test.
- You can specify the browser version if the test has to be executed on a specific version. Otherwise, you can select ‘latest,’ which will automatically run the test case on the latest available browser version.
- Specify the desired screen resolution to be used while executing automation flows on LambdaTest’s machine.
- Lastly, the description is completely optional. You can add some text here to keep the created Agent in mind.
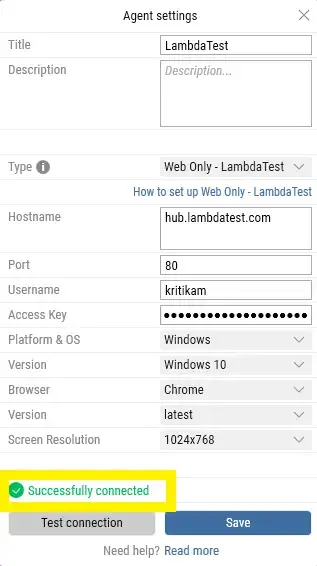
Step 6: Enter your Hostname (hub), Username, and Access Key in the highlighted sections. This is the most important part, you can enter the rest of the options according to your requirements. Under the Hostname, you just need to enter the following address-
Hub.lambdatest.com
Step 7: After entering all the desired specifications, navigate to 'Test connection', and click it. If the environment was set up properly, Studio would display 'Successfully connected' in green.
Now you can go ahead and save the LambdaTest environment in the studio, which can be used anytime for scheduling your automation flows.
In case you face any problems during the integration, or have any other questions, reach out to us on our 24/7 chat support.
Happy testing! 🙂