SmartUI Tests in HyperExecute using Cypress
This documentation will guide you step-by-step to execute the SmartUI tests on the HyperExecute platform using Cypress
Prerequisites
- Your lambdatest Username and Access key
- HyperExecute CLI in order to initiate a test execution Job .
- Setup the Environment Variable
- HyperExecute YAML file which contains all the necessary instructions.
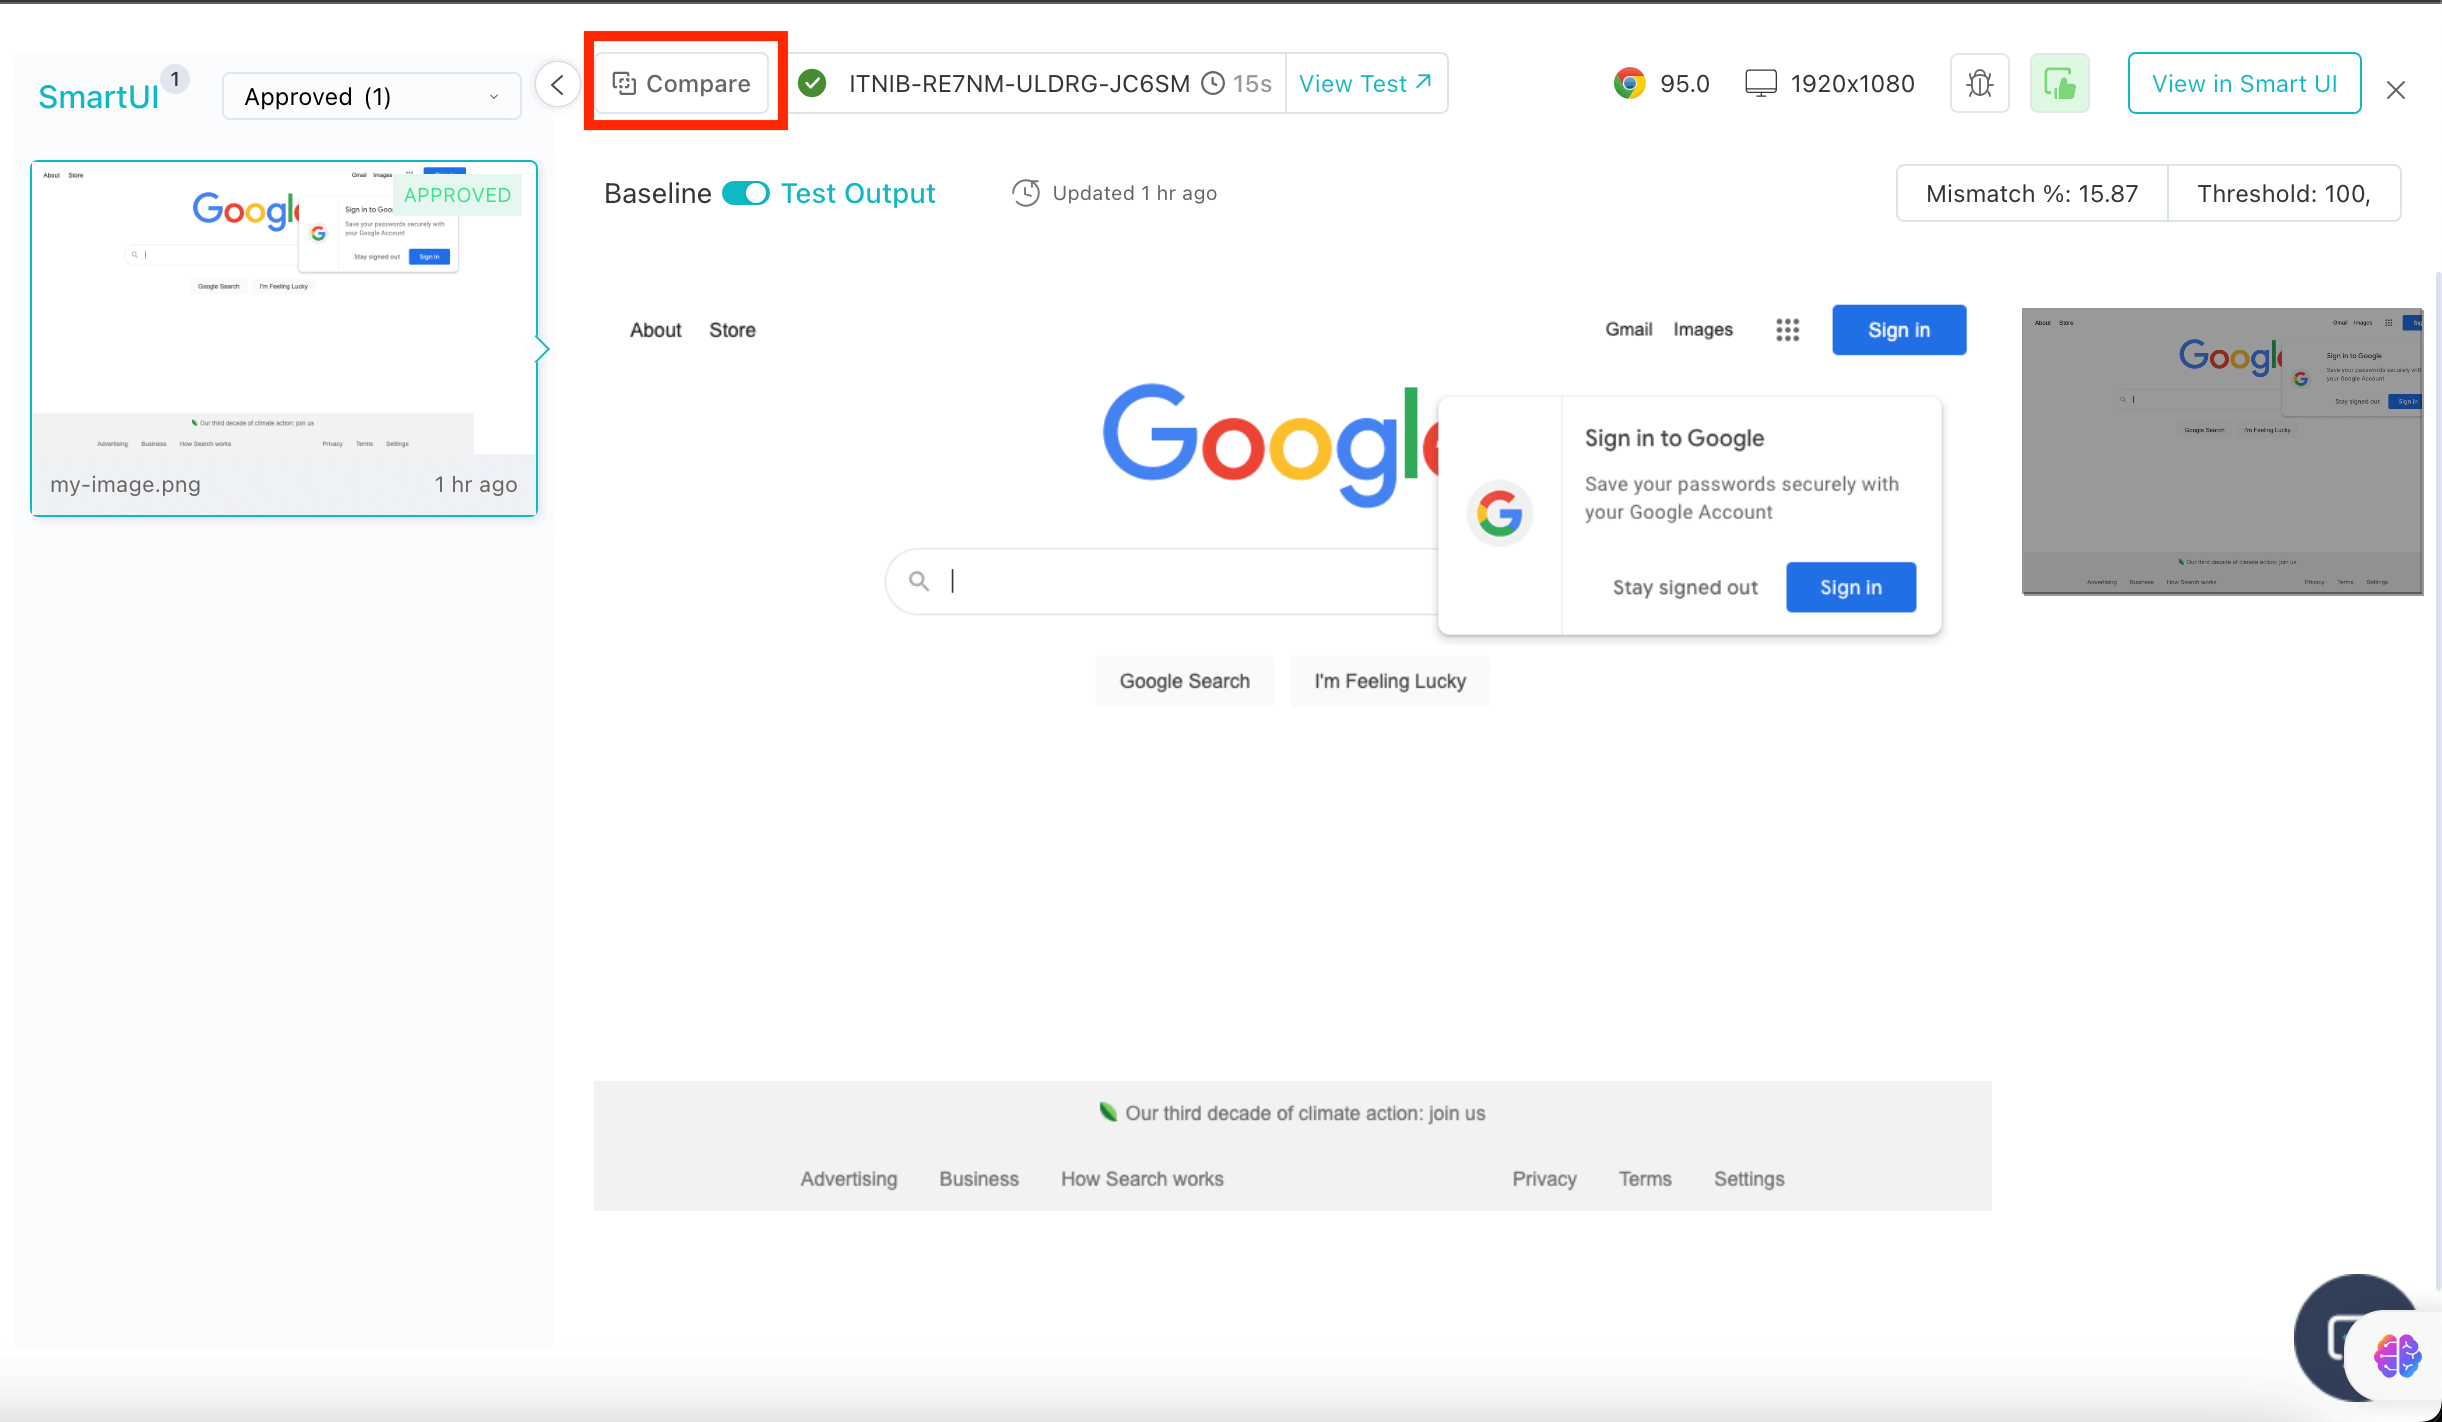
- To run SmartUI tests, you need to have a Baseline Image and a Comparison image. A baseline image is the reference image with which you want to compare. You can either upload this image from your computer or take a screenshot from your browser.
Step 1: Setup your Project
Download HyperExecute CLI
The HyperExecute CLI is used for triggering tests on HyperExecute. It is recommend to download the HyperExecute CLI binary on the host system to perform the tests on HyperExecute. The CLI download site for various platforms is displayed below:
| Platform | HyperExecute CLI download location |
|---|---|
| Windows | https://downloads.lambdatest.com/hyperexecute/windows/hyperexecute.exe |
| macOS | https://downloads.lambdatest.com/hyperexecute/darwin/hyperexecute |
| Linux | https://downloads.lambdatest.com/hyperexecute/linux/hyperexecute |
Setup Environment Variable
Export the environment variables LT_USERNAME and LT_ACCESS_KEY that are available in the TestMu AI Profile page. Run the below mentioned commands in the terminal to setup the CLI and the environment variables.
For macOS / Linux:
export LT_USERNAME=YOUR_LT_USERNAME
export LT_ACCESS_KEY=YOUR_LT_ACCESS_KEY
For Windows:
set LT_USERNAME=YOUR_LT_USERNAME
set LT_ACCESS_KEY=YOUR_LT_ACCESS_KEY
Step 2: Configure your Cypress Project
-
Go to your project YAML file.
-
Your test files must have this code snippet in order for them to take screenshots.
cy.screenshot('my-image')
Here 'my-image' is the name of the image which will be rendered on the Dashboard.
Refer to the Cypress Documentation to understand the different methods for taking screenshots.
- Paste the below mentioned code in your YAML file.
cypressOps:
    Build: "test_01"
    Tags: ["smart-ui", "hyperexecute", "cypress"]
    BuildTags: ["t1"]
    smartUICaps:
        smartUIProjectName: <Enter your Project Name>
        smartUIOptions:
            output:
                errorColor:
                    red: 0
                    green: 200
                    blue: 0
                errorType: flat,
                transparency: 1,
                largeImageThreshold: 100,
                useCrossOrigin: false,
                outputDiff: true
            scaleToSameSize: true,
            ignore: antialiasing
        SmartUIBaseline: true
Step 3: Execute your Project and Compare the Results
To execute the project run the below command in your terminal at the root folder.
./hyperexecute --config <yaml-file-path> --download-artifacts --force-clean-artifacts
-
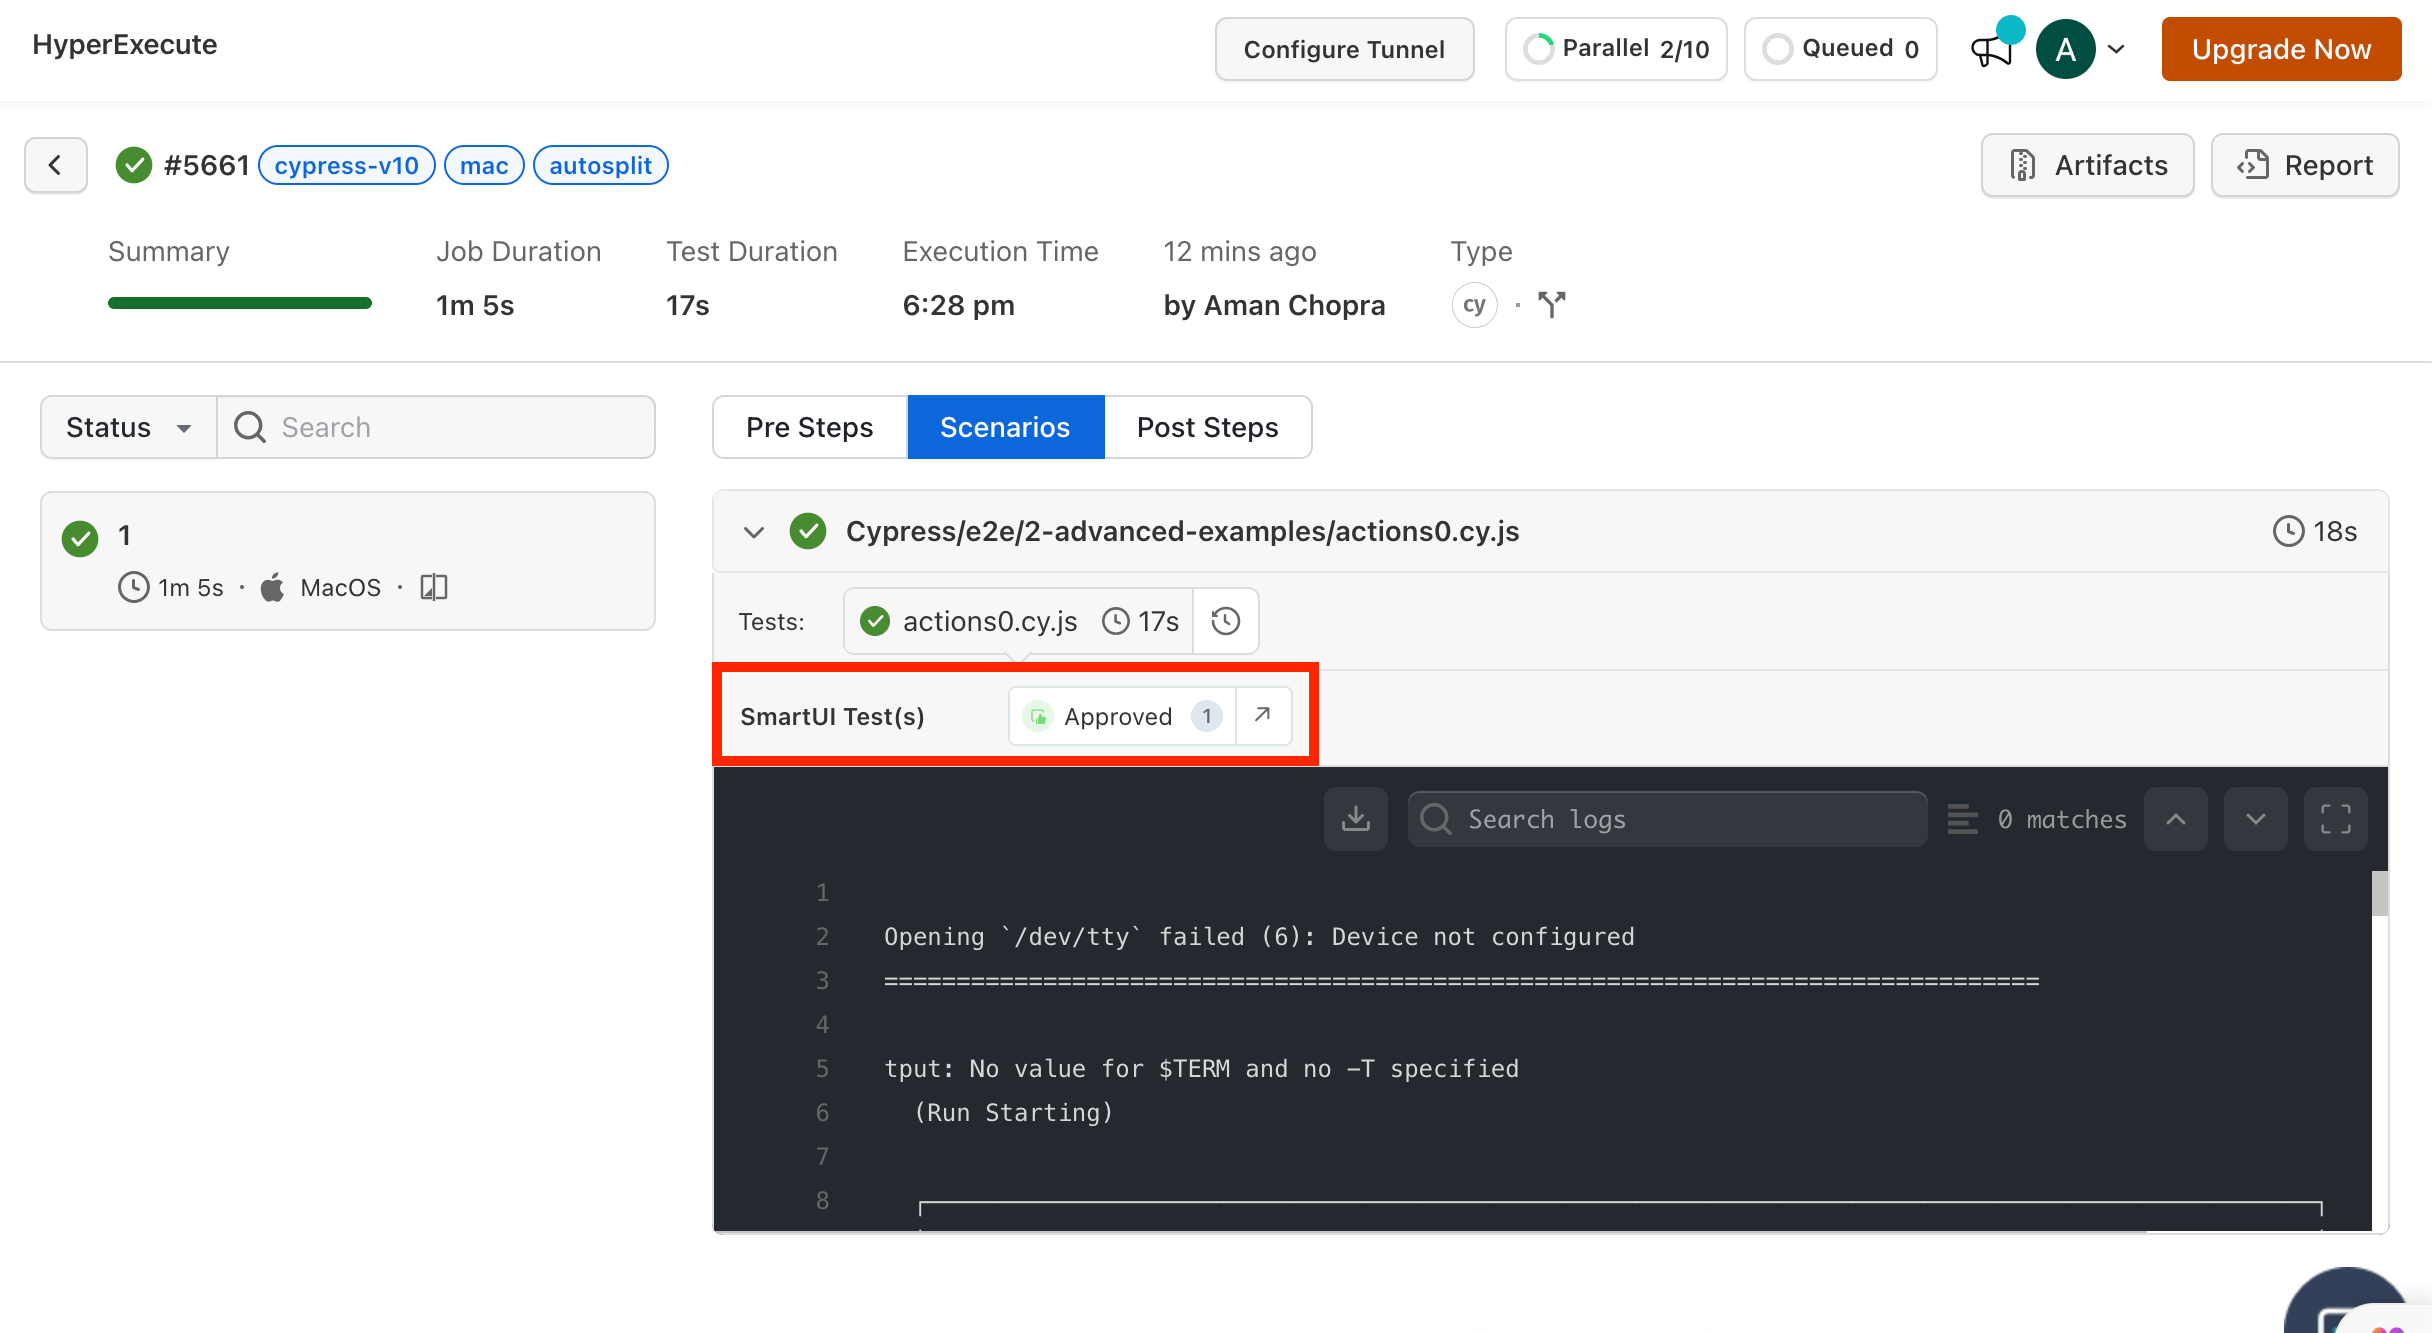
Now, visit to the HyperExecute Dashboard to check the status of your project.
-
Click on the SmartUI Tests button.
- Click on Compare button to compare the changes made.