AWS CodePipeline Integration With HyperExecute
AWS CodePipeline is a cloud-based continuous delivery platform for fully automating your release pipelines. Provides an intuitive interface for configuring & modeling different stages of release cycles, so you can envision how your code changes would look when pushed across these different changes. You can also track your pipeline in real-time, and look into the pipeline history to understand the timestamps involved in the execution of various pipelines.
This document will show you how to integrate AWS CodePipeline with HyperExecute to greatly shorten your test cycles.
How to Integrate AWS CodePipeline with HyperExecute
To integrate AWS CodePipeline with HyperExecute, follow the below mentioned steps:
You can use your own project to configure and test it. For demo purposes, we are using the sample repository.
Download or Clone the code sample from the TestMu AI GitHub repository to run the tests on the HyperExecute.
 View on GitHub
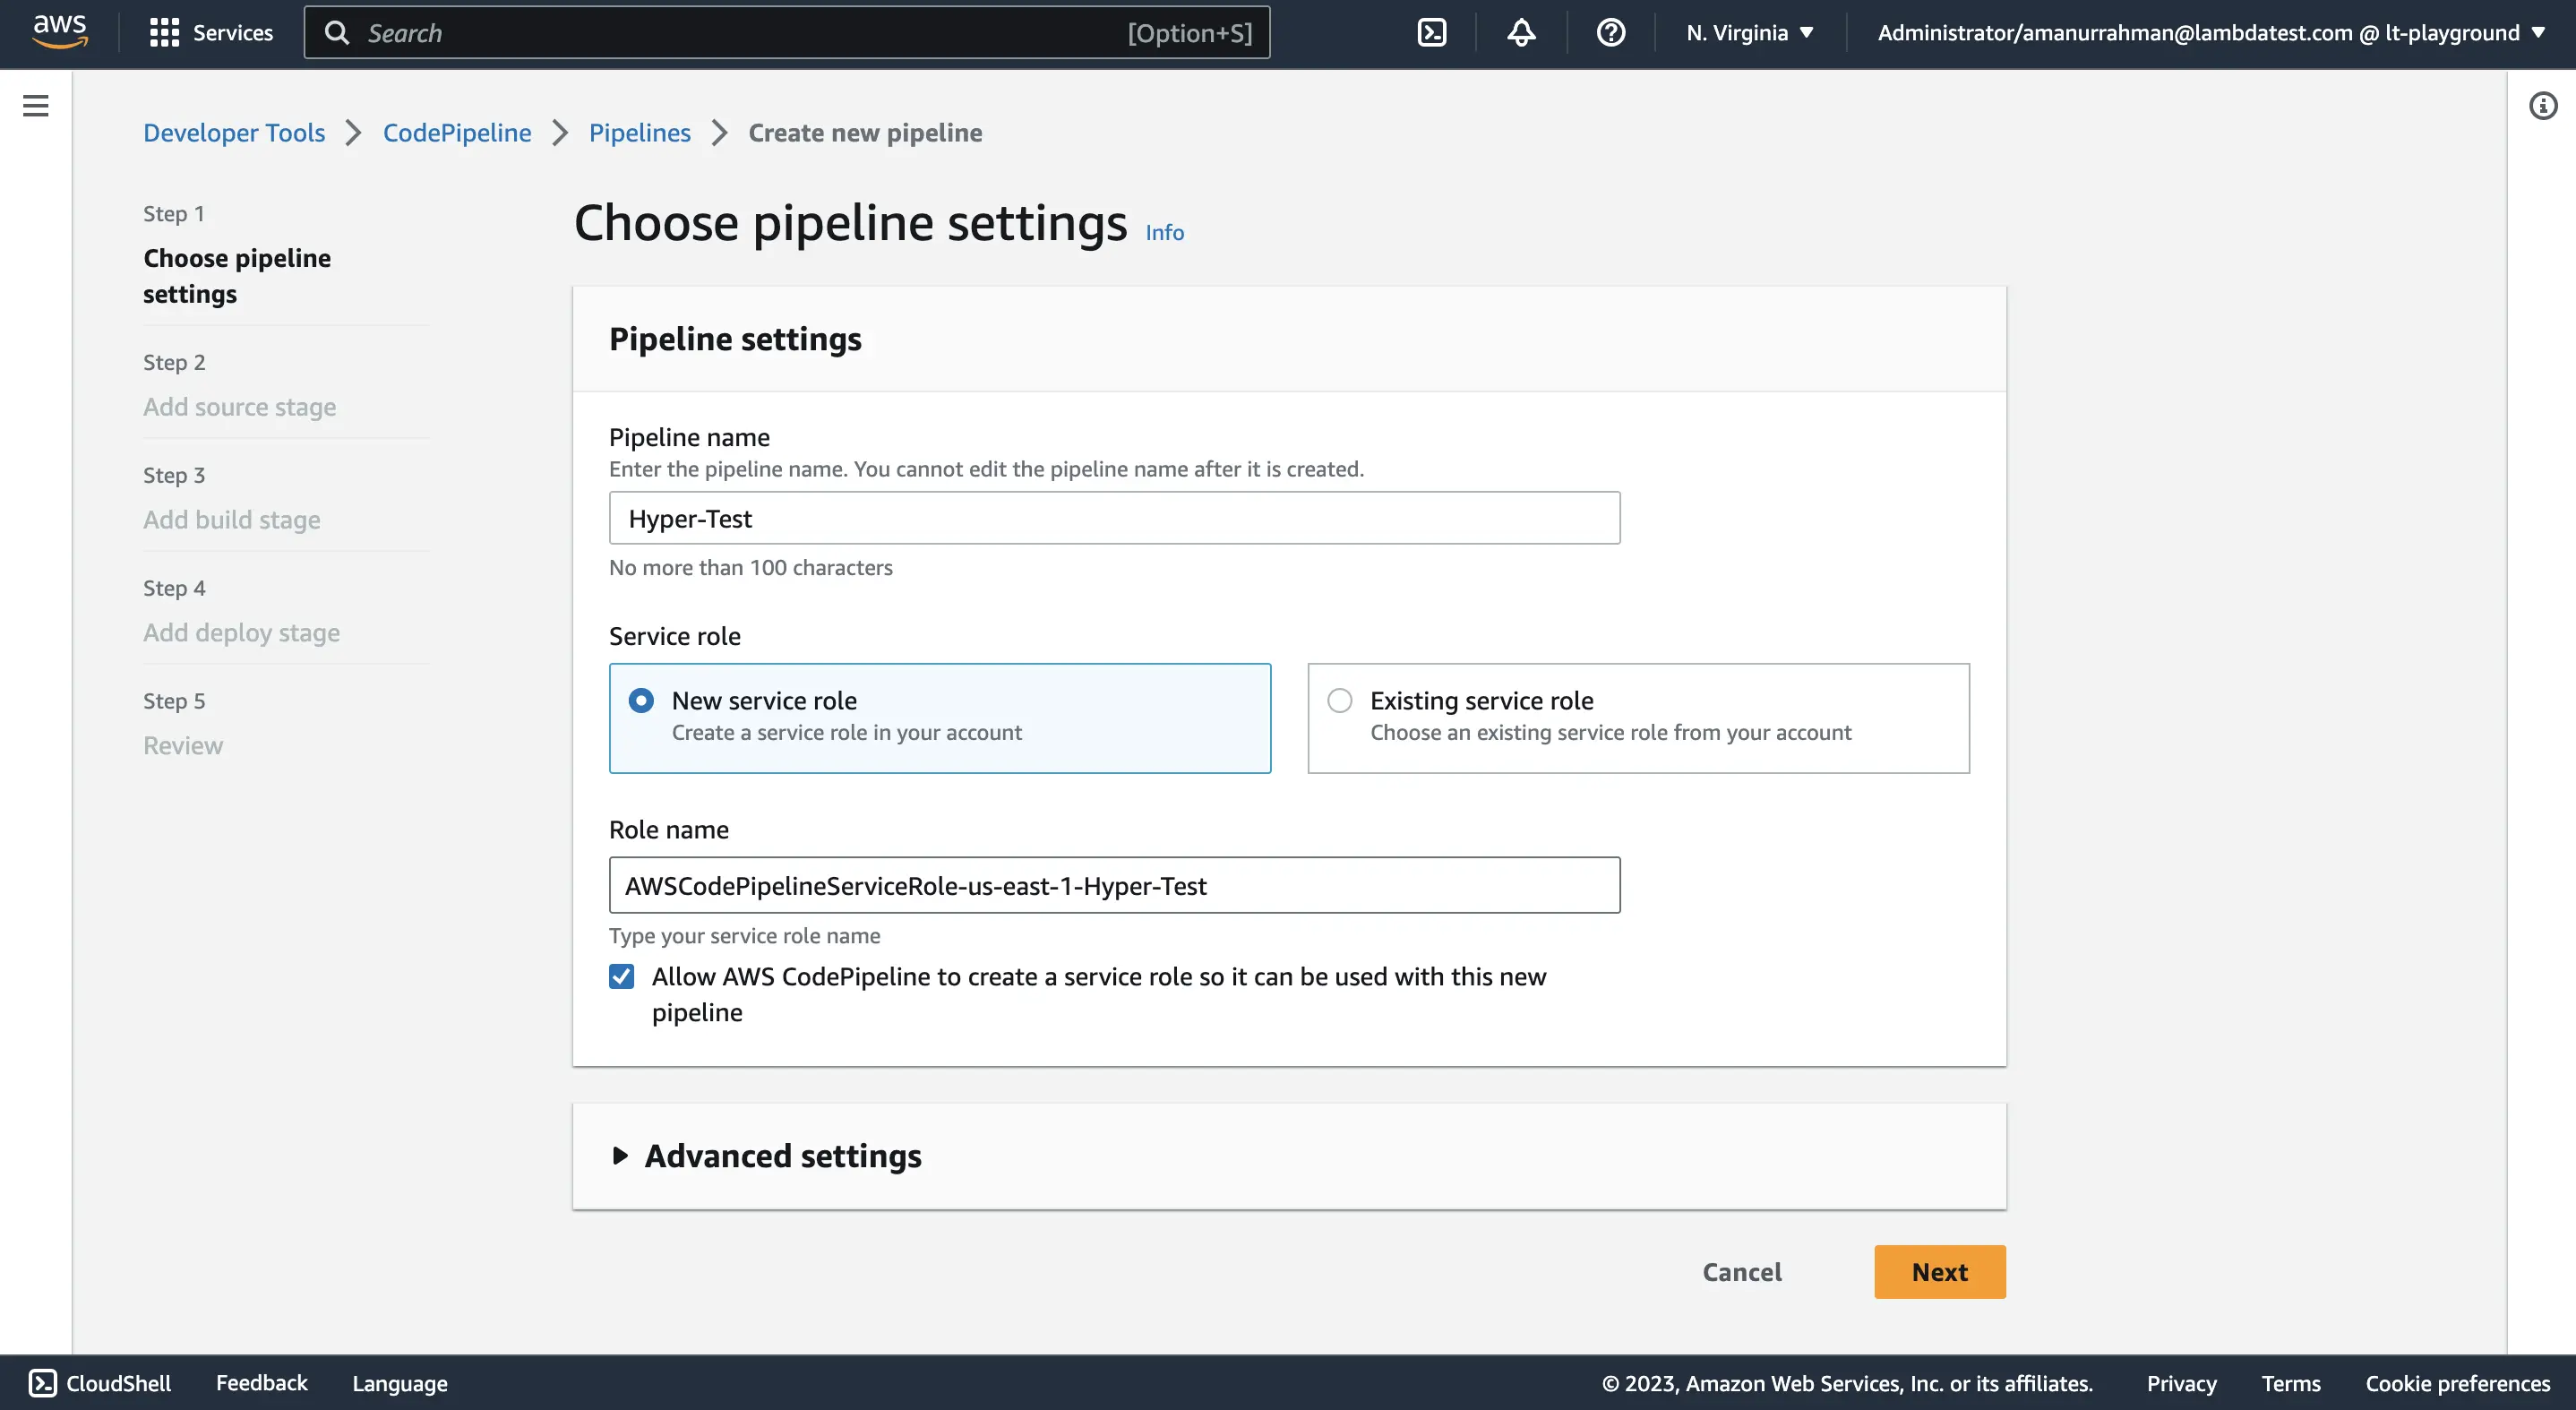
Step 1: Create a new AWS CodePipeline pipeline.
- Enter the Pipeline Name.
- Under Service role, select New service role. Click Next.
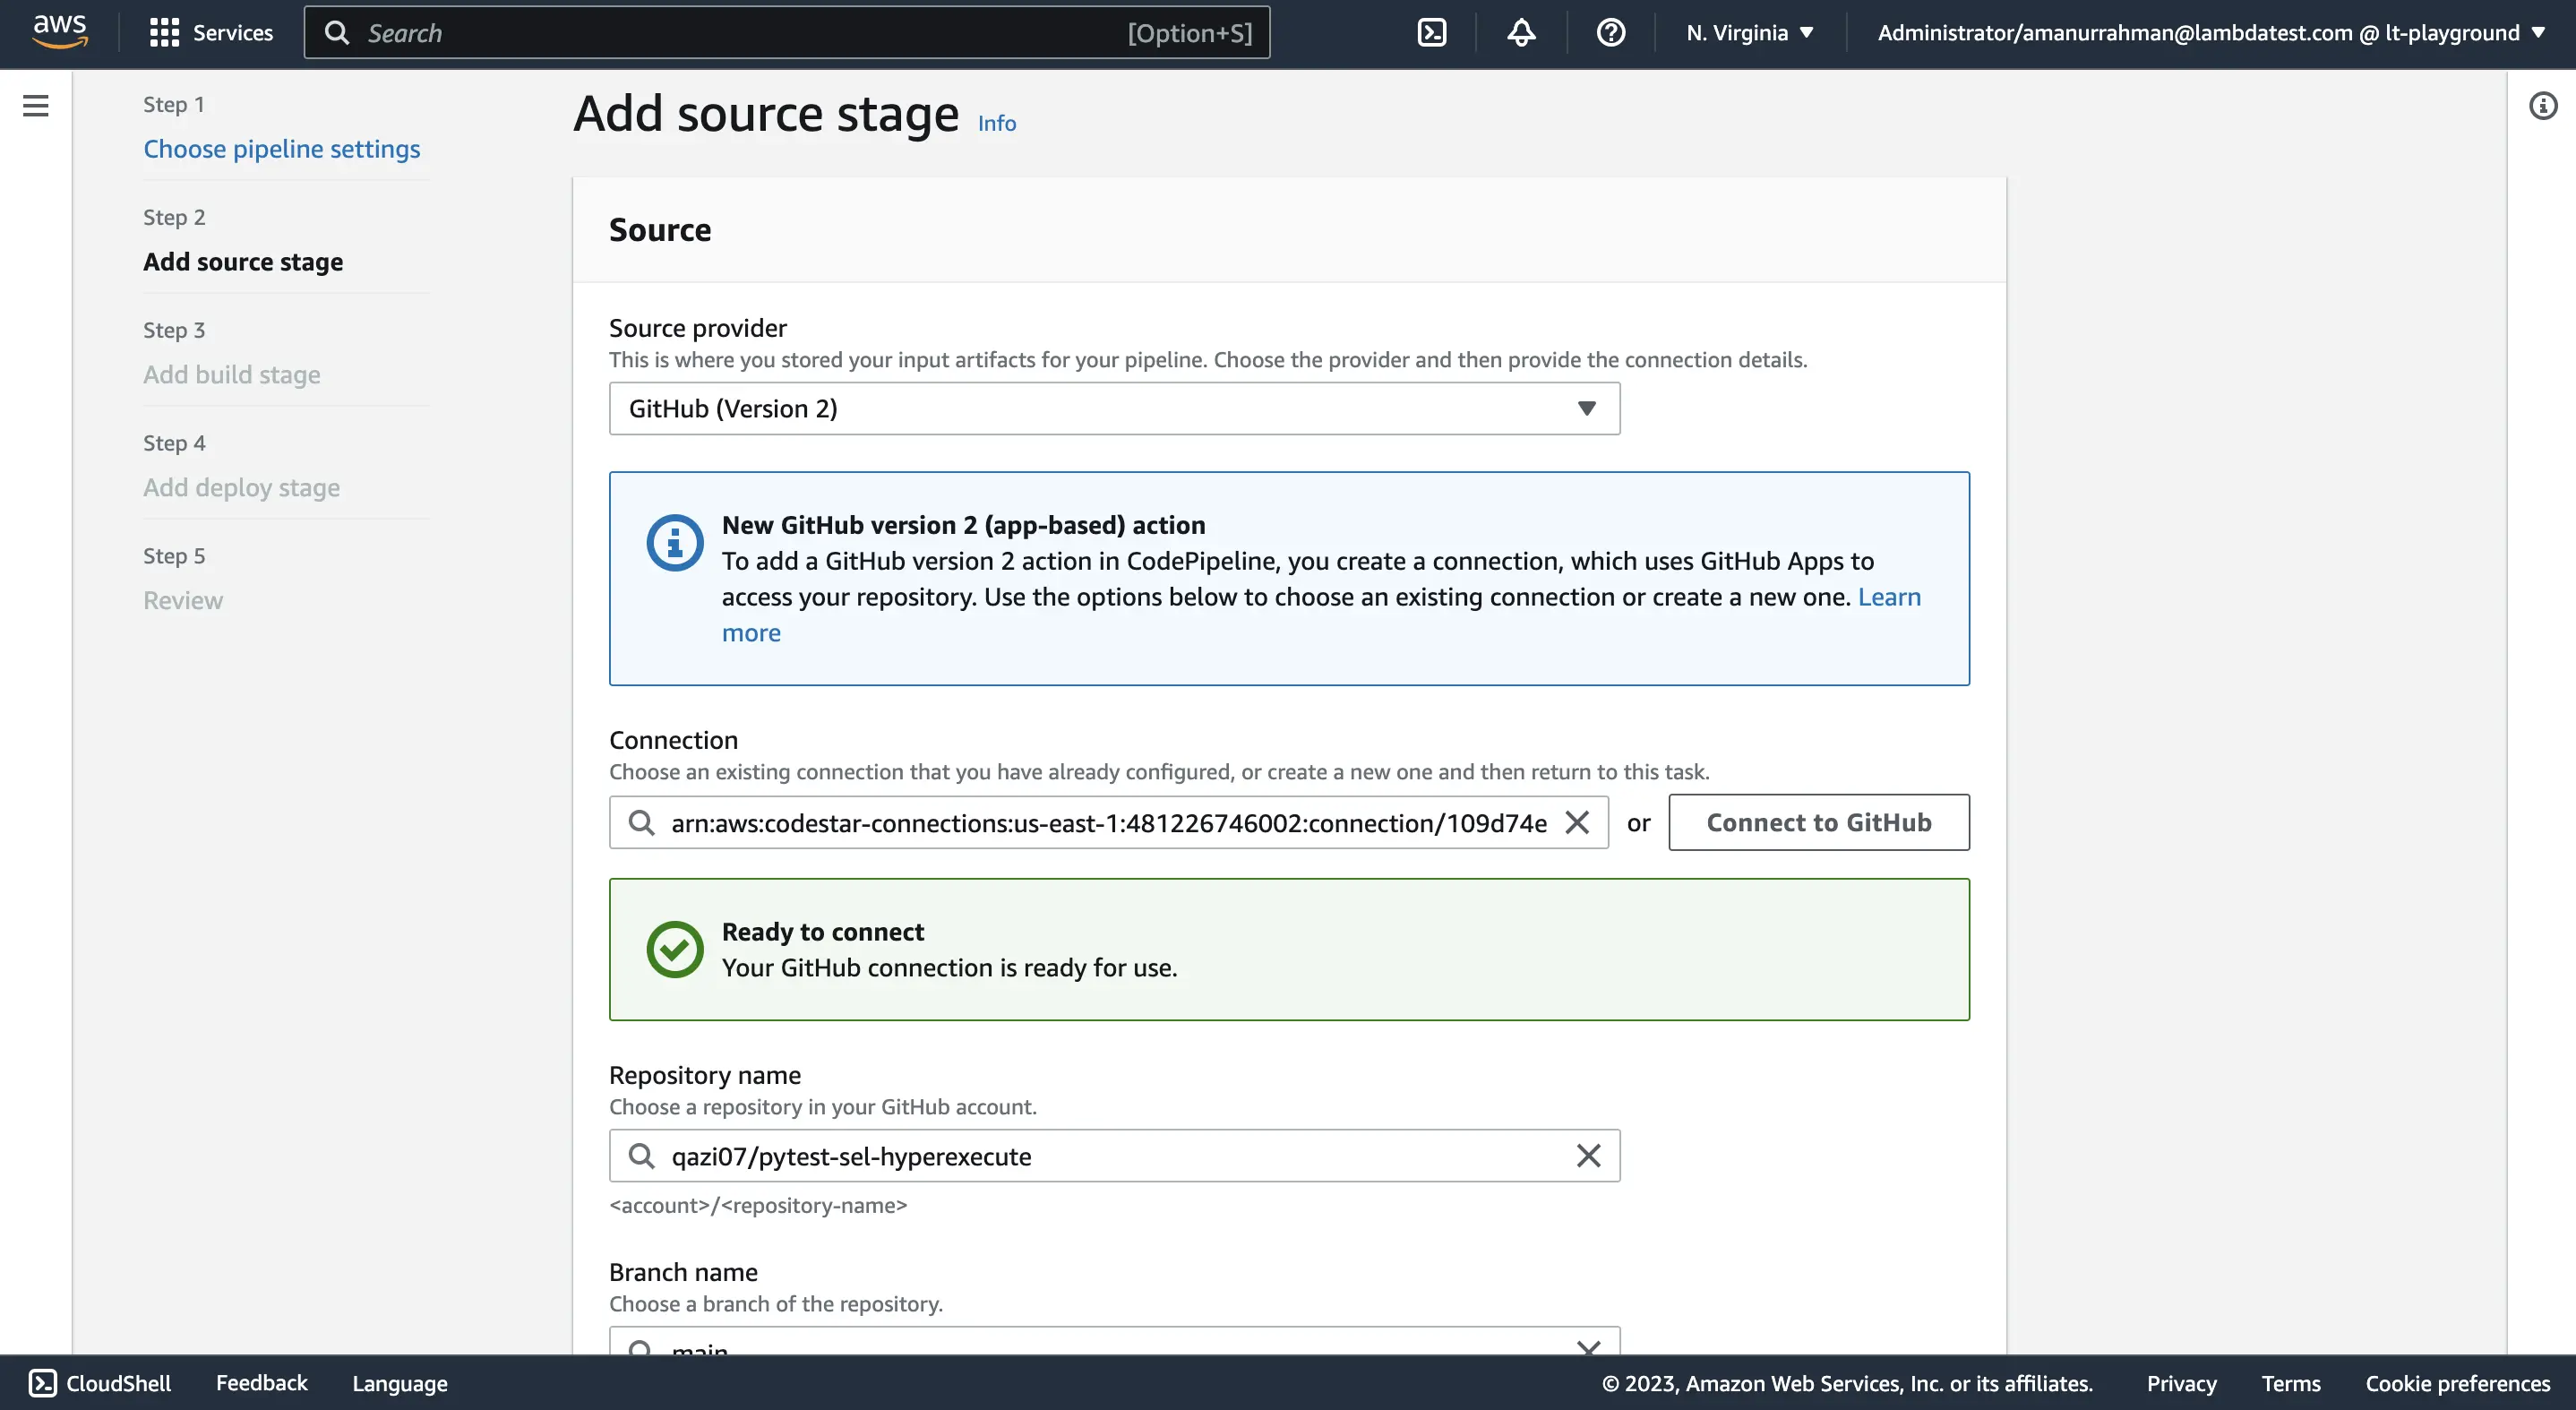
Step 2: Add a Source Provider
- In the Source Provider, select the GitHub (Version 2) option.
- Connect your GitHub account.
- Select the desired Repository.
- Select the specified branch name, for which you want to establish the pipeline.
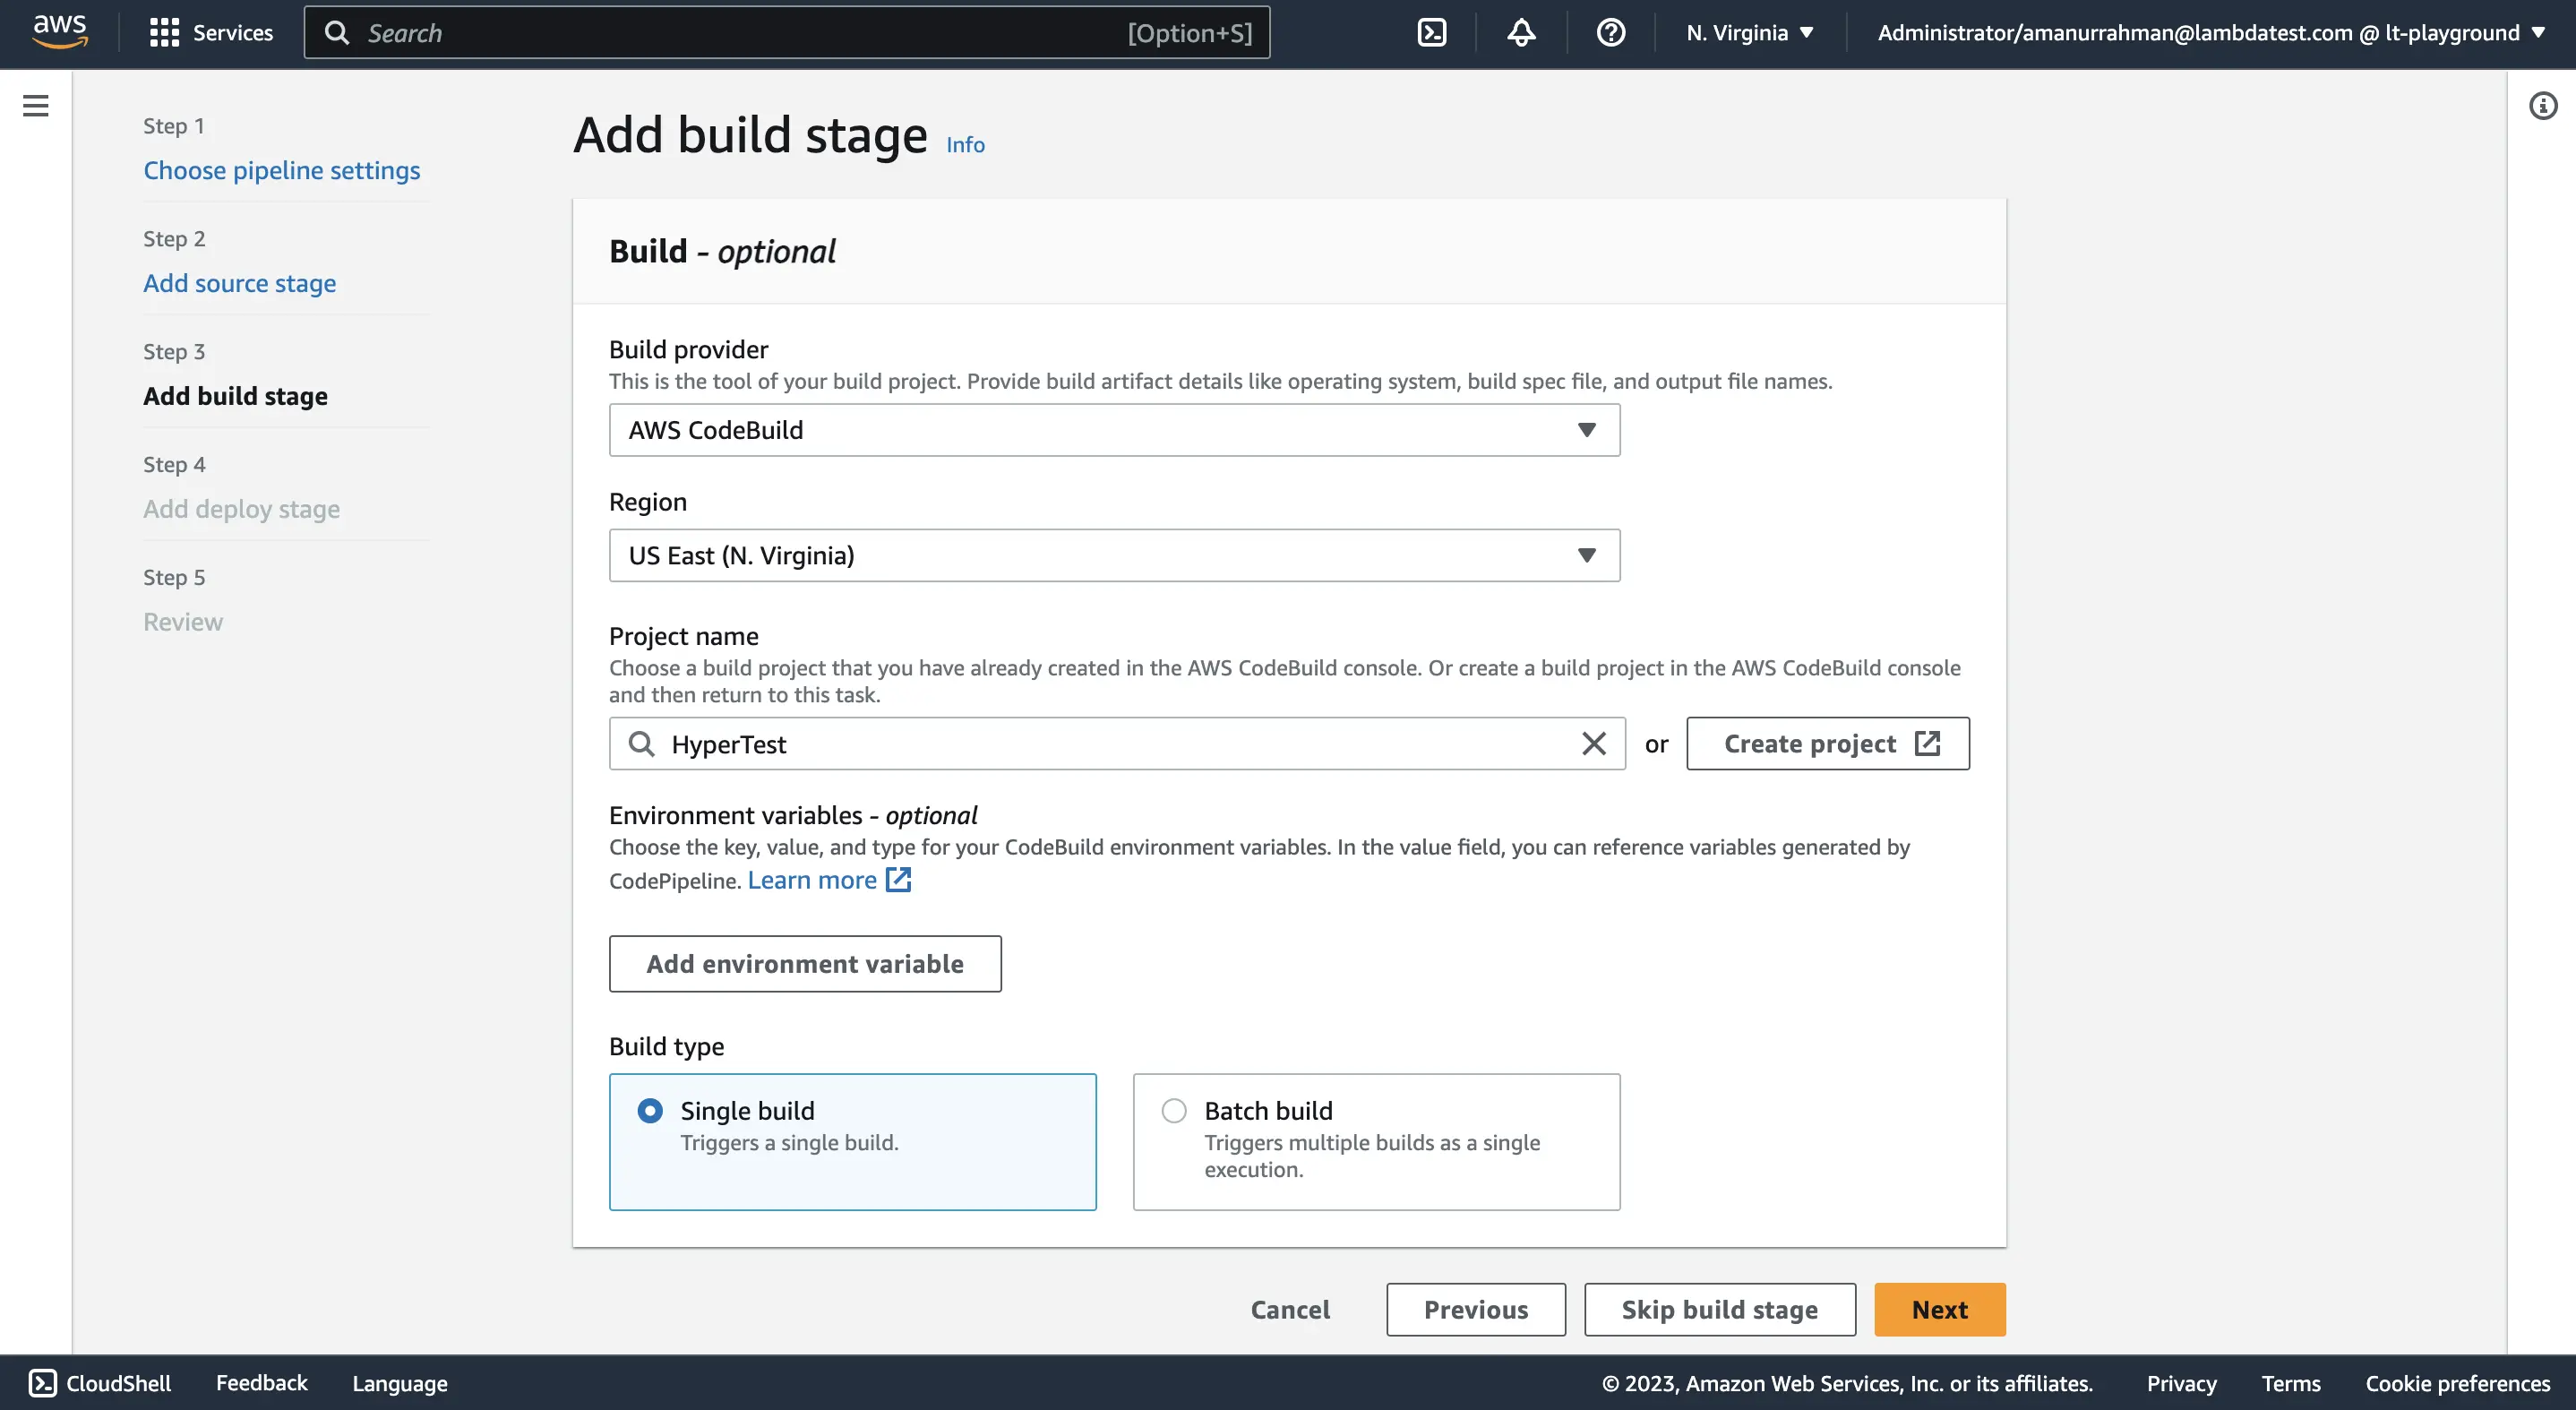
Step 3: Select the Build Provider
- Add a Build action to the pipeline. Select the CodeBuild as the build provider.
- Click on Create a Project button.
- For the demo we are selecting OS as Amazon Linux 2, Runtime as standard, Image - amazonlinux2-x86_64_standard:4.0, and Runtime Environment as Linux.
Step 4: Create a buildspec.yml file
-
Create a
buildspec.ymlfile in the root directory of the repository where the tests are written. -
Sample
buildspec.ymlfile
version: 0.2

phases:
  install:
    commands:
      # Download Hyperexecute CLI for macOS (adjust for other OS)
      - name: Download Hyperexecute CLI
        command: wget https://downloads.lambdatest.com/hyperexecute/darwin/hyperexecute
      # Grant execute permission to the downloaded binary
      - name: Make HyperExecute executable
        command: chmod u+x hyperexecute
  build:
    commands:
      # Run Hyperexecute with user credentials and configuration file
      - name: Trigger HyperExecute tests
        command: ./hyperexecute --user <your_user_name> --key <your_access_key> --config <your_yaml_file>
-
In the buildspec specification, choose the first option - "Use a buildspec file".
-
Now Click the "continue to code pipeline" button and then click on Next.
-
You can "Skip deploy stage" and finally click "Create Pipeline" button.
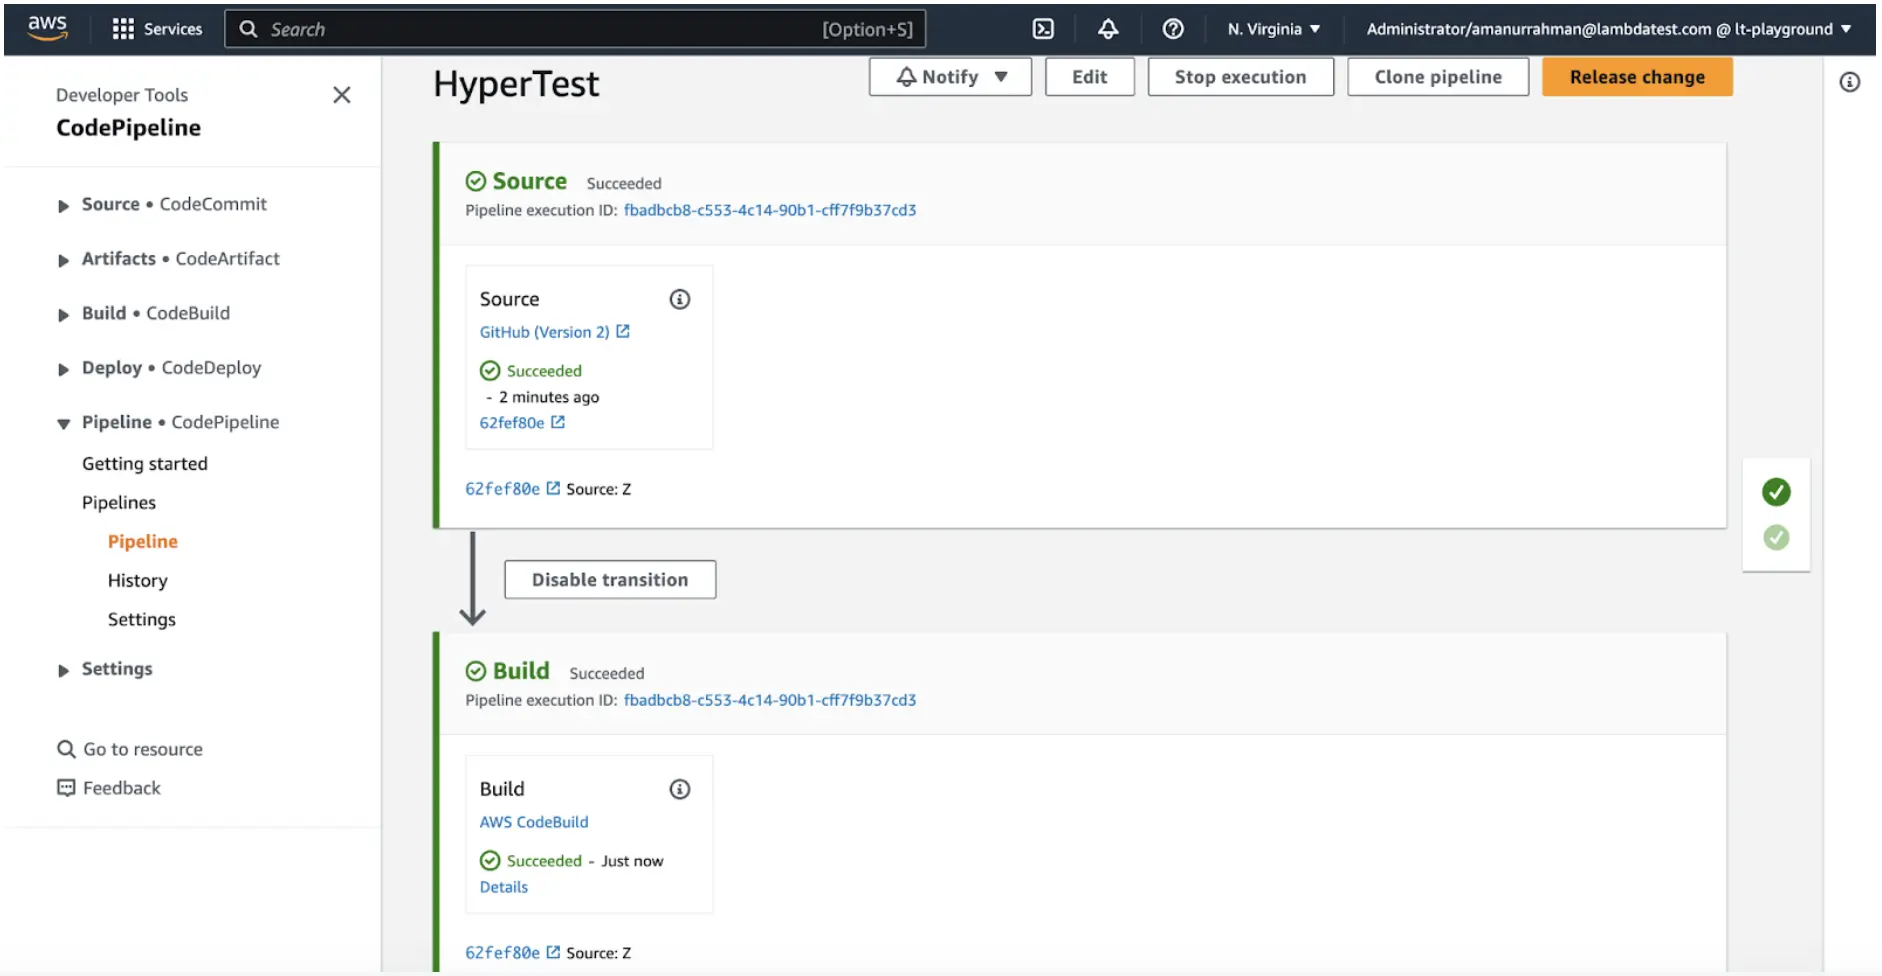
Save the pipeline.
Once the pipeline is created, it will start automatically. The first time the pipeline runs, it will fetch the latest code from your GitHub repository and build your project. The built project will then be deployed to HyperExecute.
Output

