Bamboo CI Integration with HyperExecute
Bamboo is a continuous integration (CI) and continuous delivery (CD) server from Atlassian. It helps teams automate the software development and delivery process, from code commit to production deployment. Bamboo can be used to build, test, and deploy software on a variety of platforms, including cloud, on-premises, and hybrid environments.
This document will show you how to integrate Bamboo CI Pipeline with HyperExecute to greatly shorten your test cycles.
How To Integrate Bamboo CI Pipeline with Hyperexecute
To integrate CircleCI Pipeline with HyperExecute, follow the below steps:
Pre-requisite:
You can refer to different supported versions from here as per your requirements.
Below are the mentioned softwares used for this documentation:
- Java 11
- DataBase - PostgreSQL 14.9
- Operating System - Linux Ubuntu 22.04 LTS
Step 1: Setup Bamboo CI in your local device
-
Download the Bamboo CI in your device.
-
Extract the file in your desired location. Let's say it as ROOT_FOLDER
-
Before you run Bamboo for the first time, specify your Bamboo Home Directory, where your Bamboo data is stored.
-
Create your Bamboo Home Directory (without spaces in the name).
NOTE: You should not create your Bamboo Home Directory inside the ROOT_FOLDER. They should be entirely separate locations. If you do put the Home Directory in the ROOT_FOLDER, it will be overwritten and lost when Bamboo is upgraded.
- Go to the following file location
ROOT_FOLDER/atlassian-bamboo/WEB-INF/classes/bamboo-init.properties- You have to uncomment the bamboo.home line and provide the absolute path to your Home Directory.
-
Step 2: Start the Bamboo Server
- Change to the ROOT_FOLDER from the command-line and start the server
cd ROOT_FOLDER

./bin/start-bamboo.sh
- Now type
http://localhost:8085/in your browser to open the Bamboo GUI.
NOTE: If you are running Bamboo for the very first time, then you need to configure the Setup Wizard as well. Follow the instructions here to configure it.
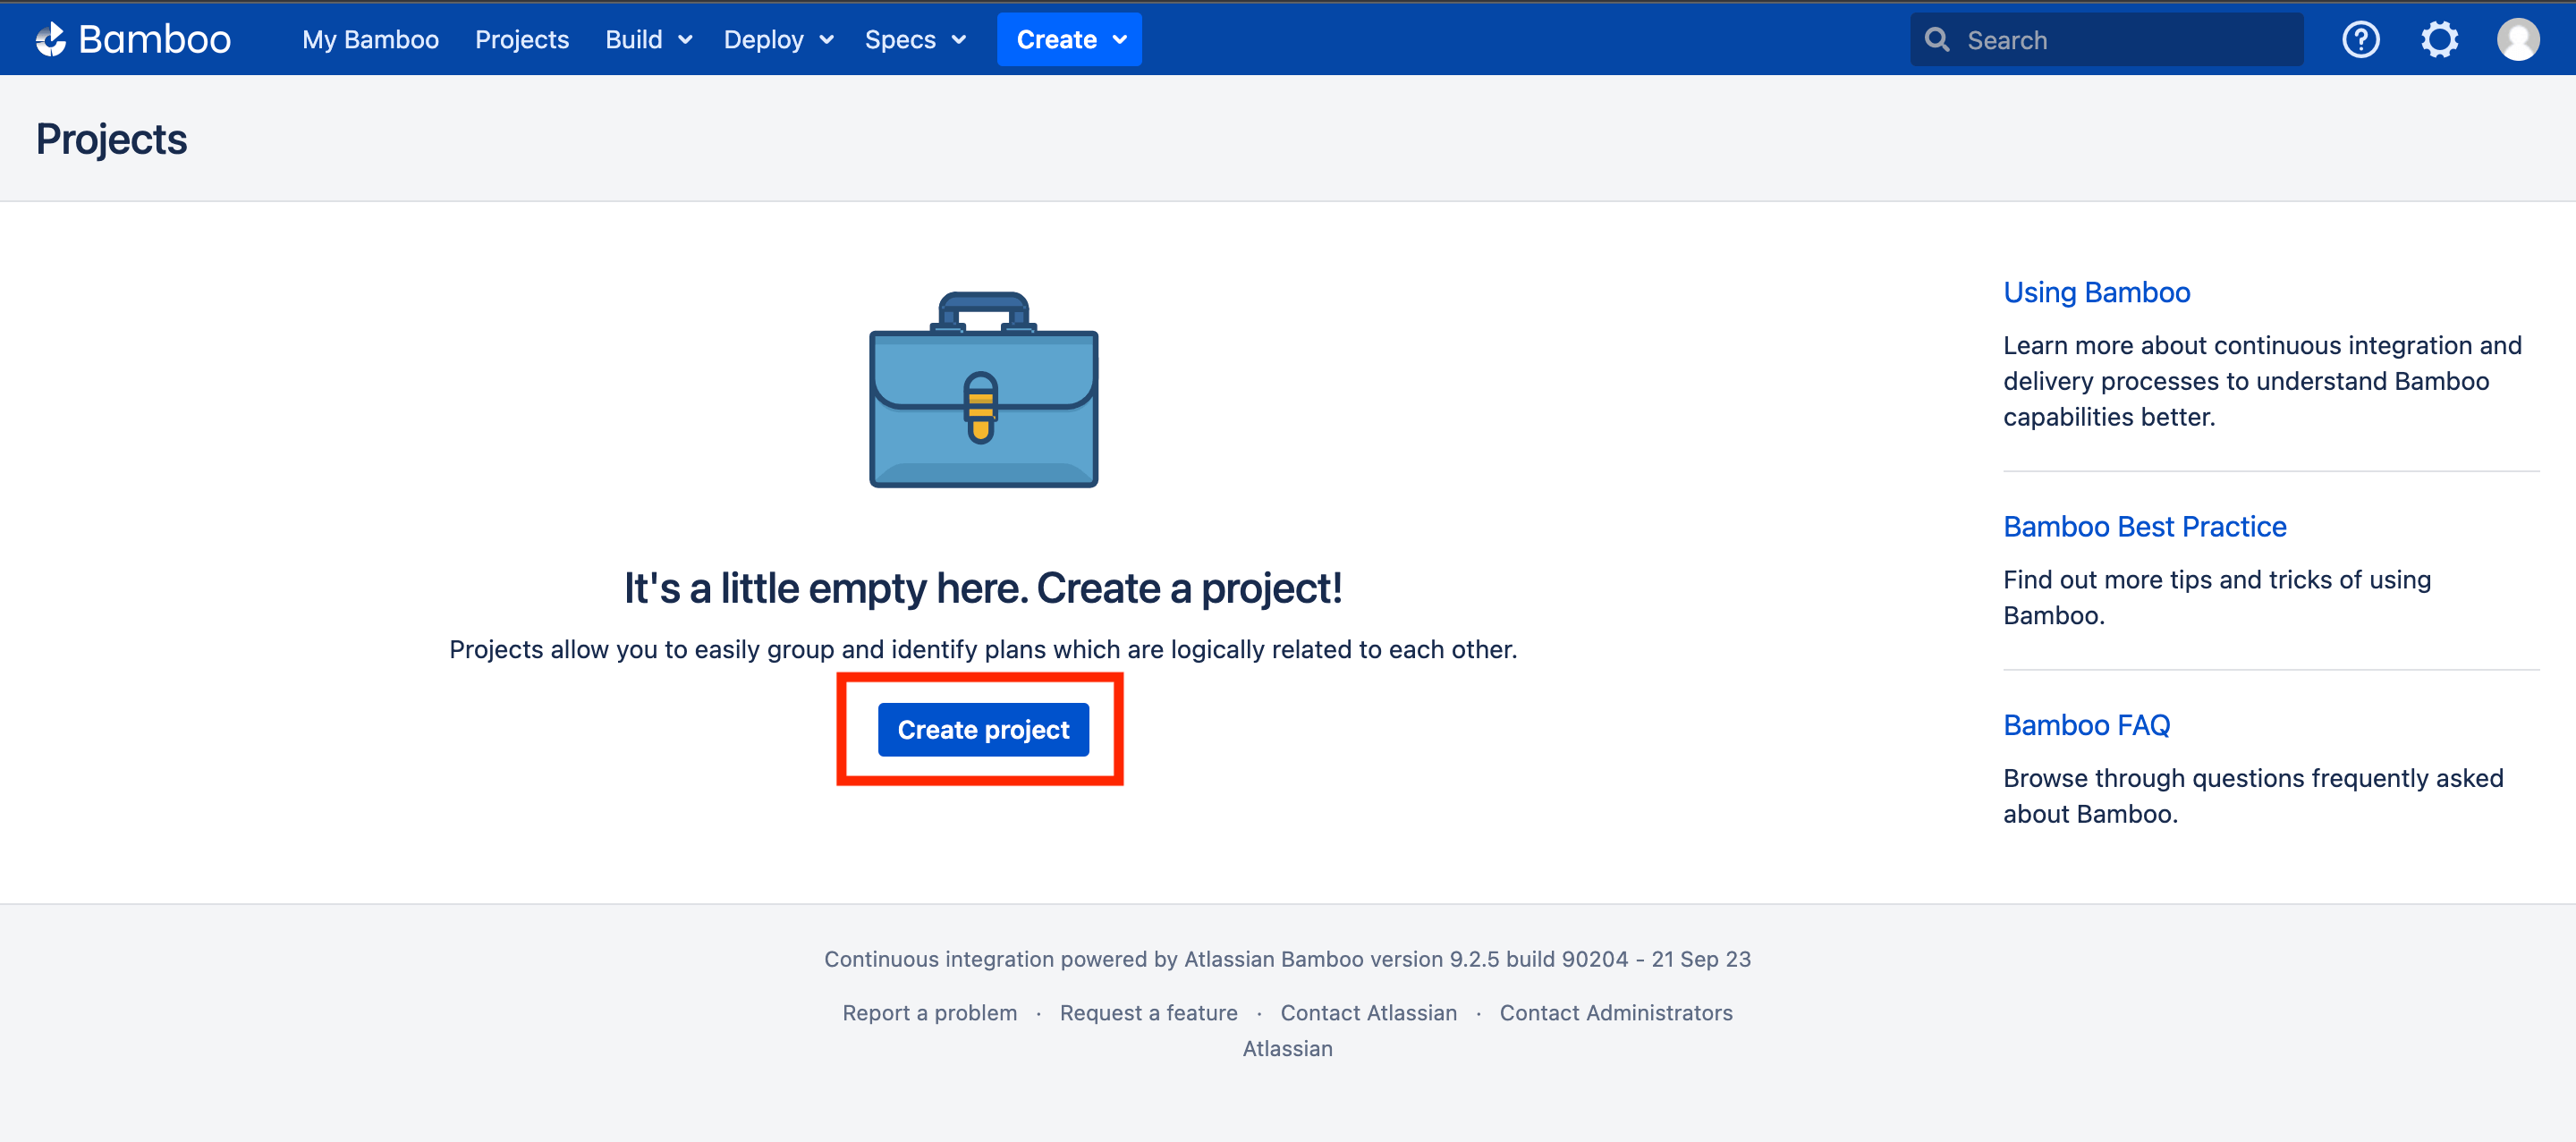
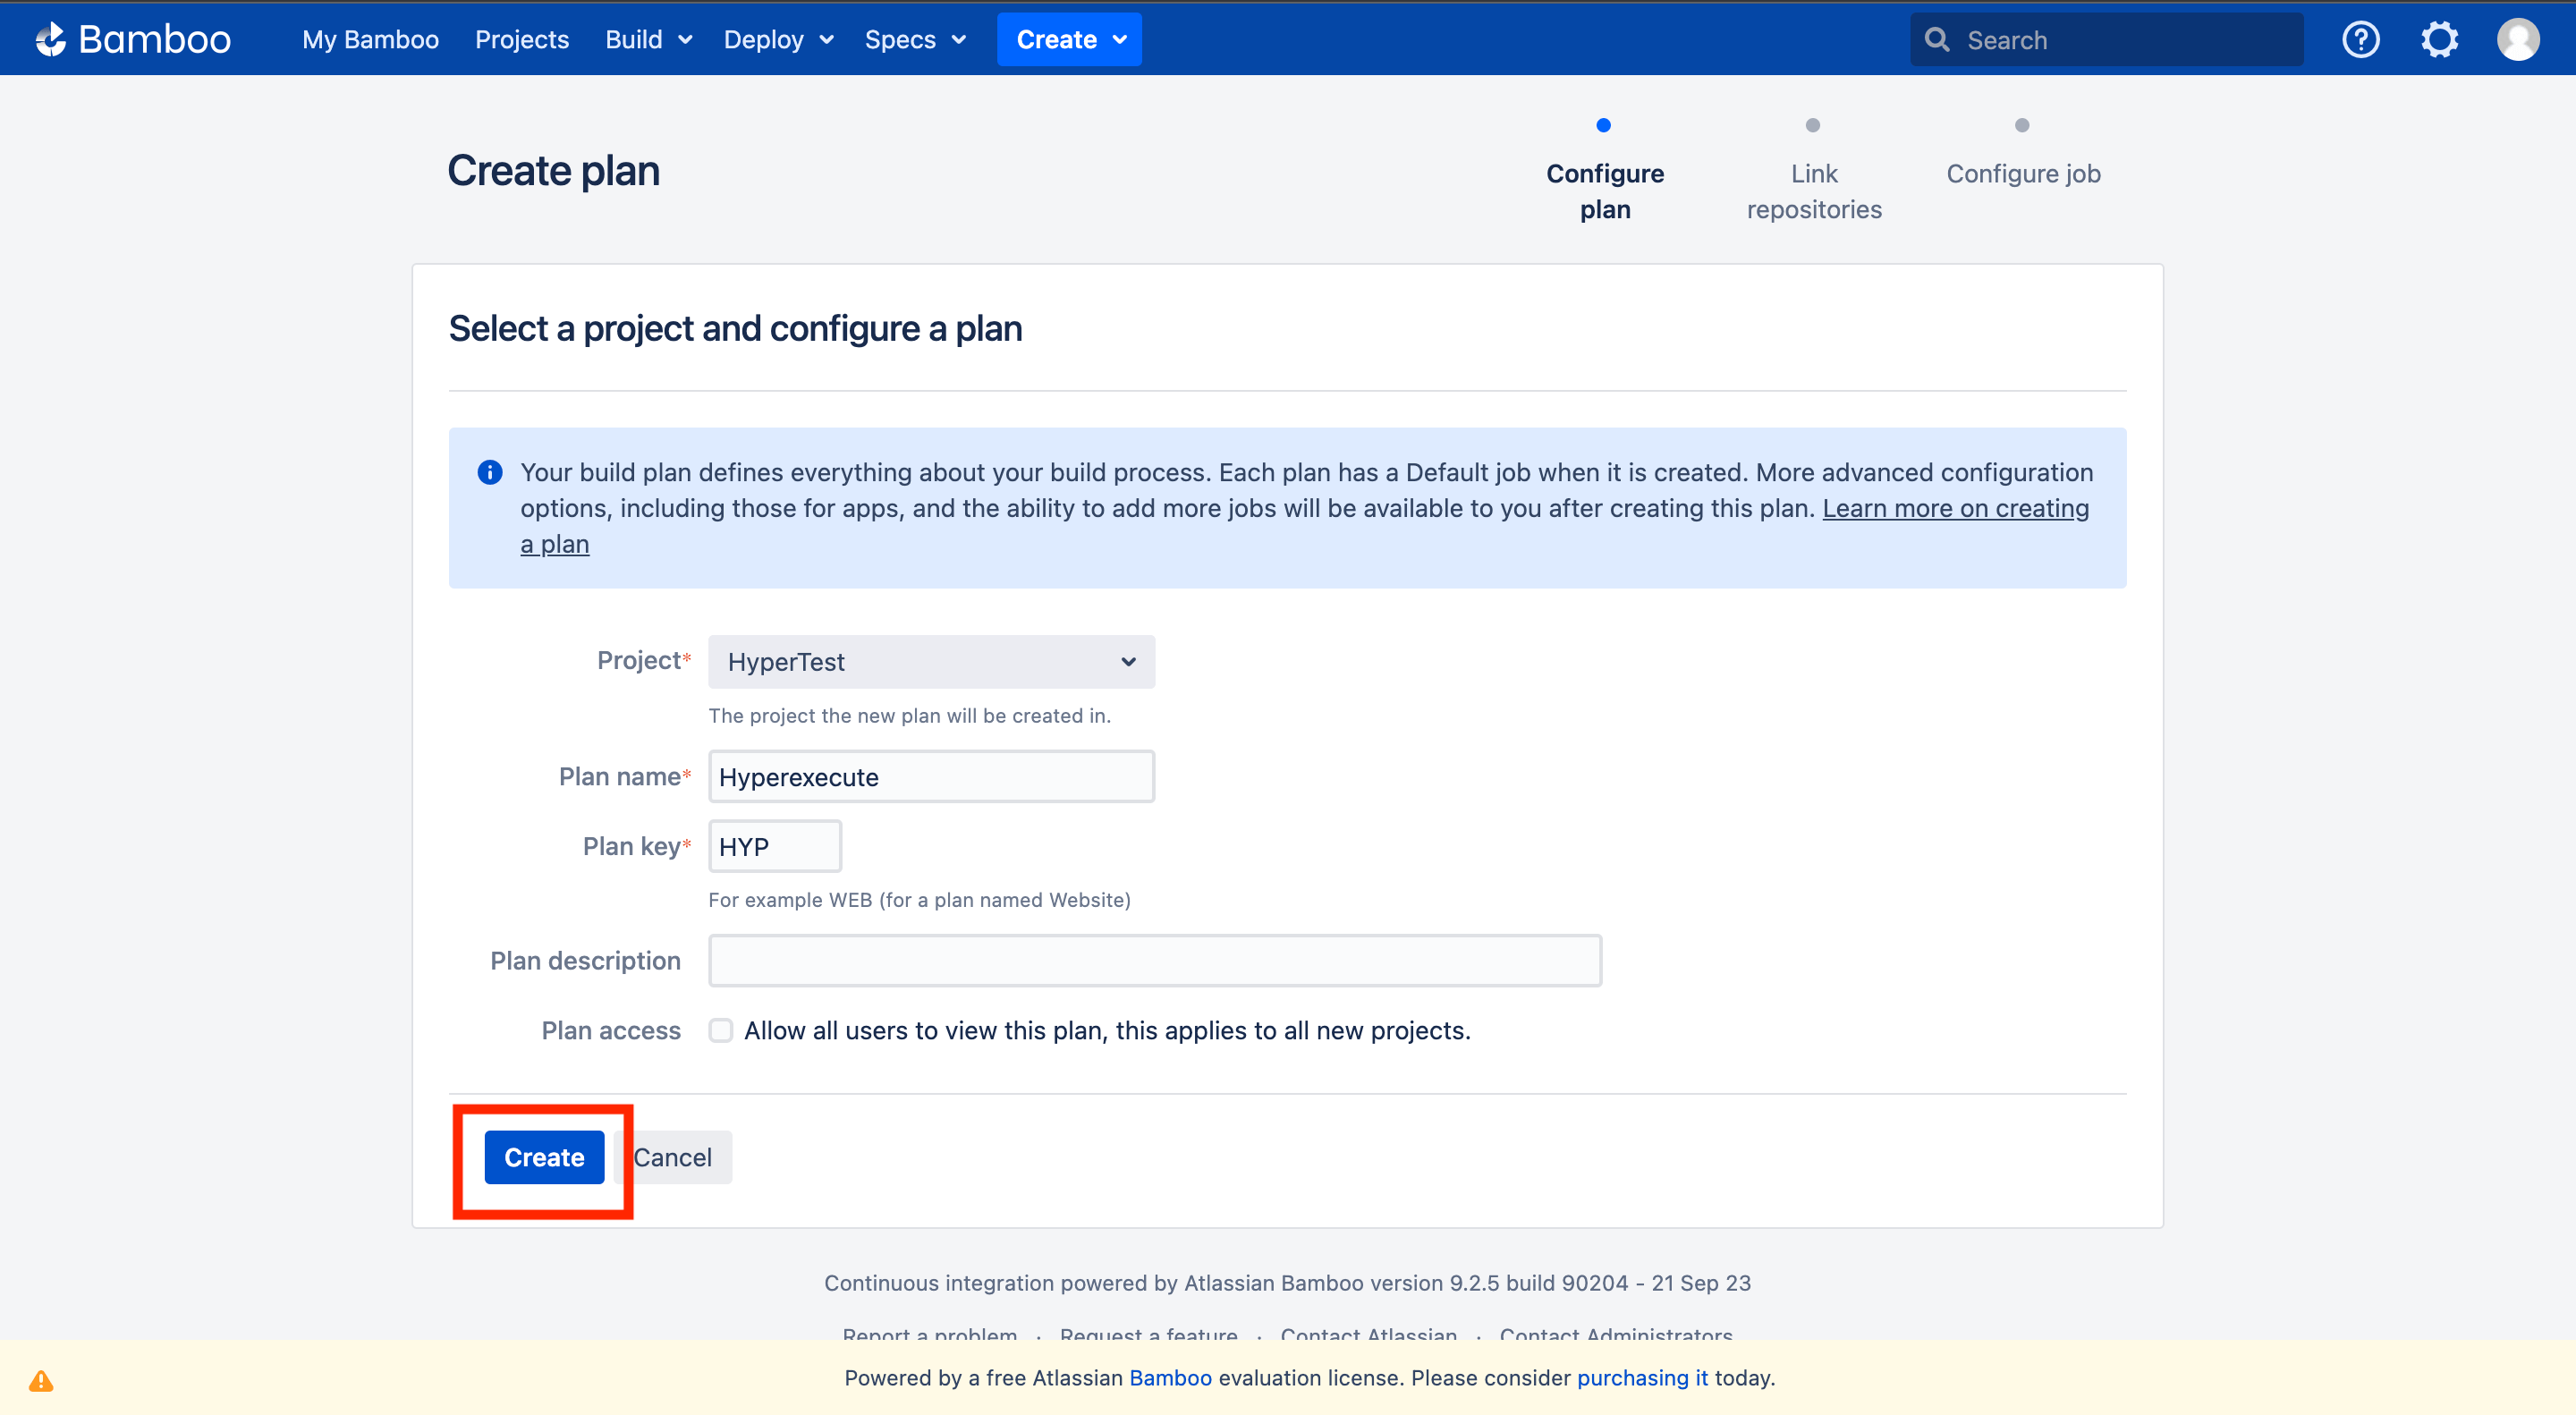
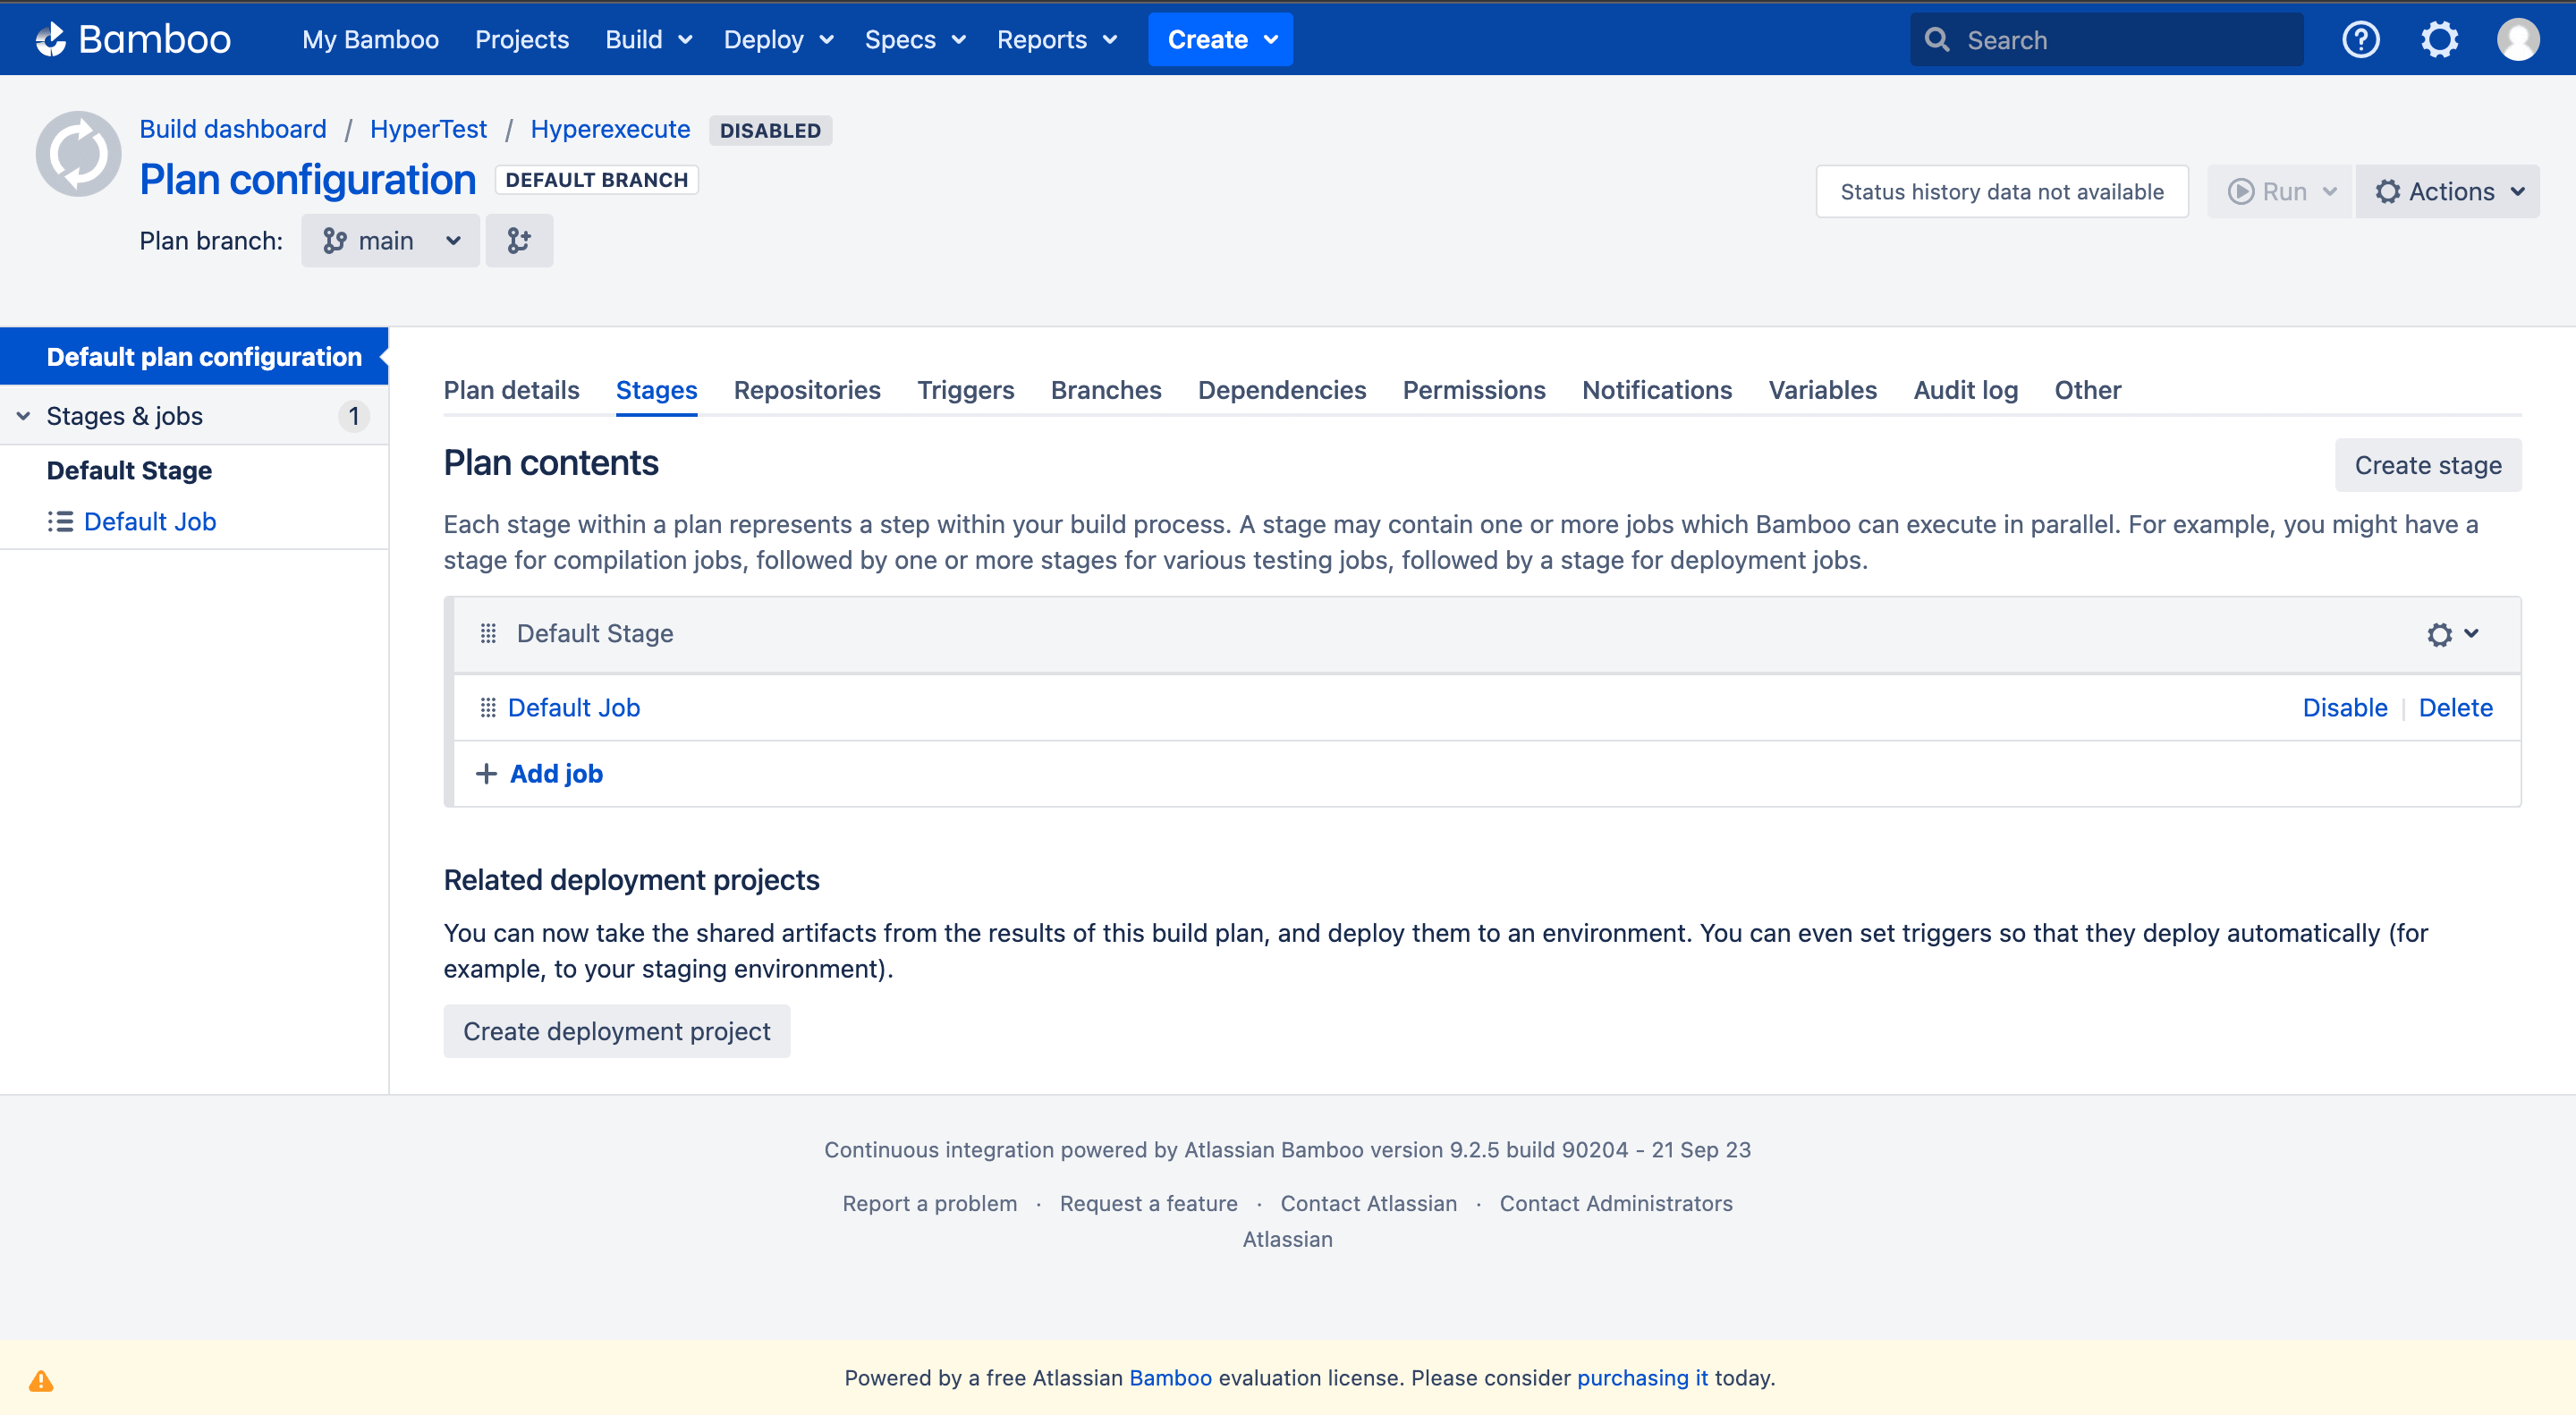
Step 3: Create a Project and a Plan
- Click on Create Project button.
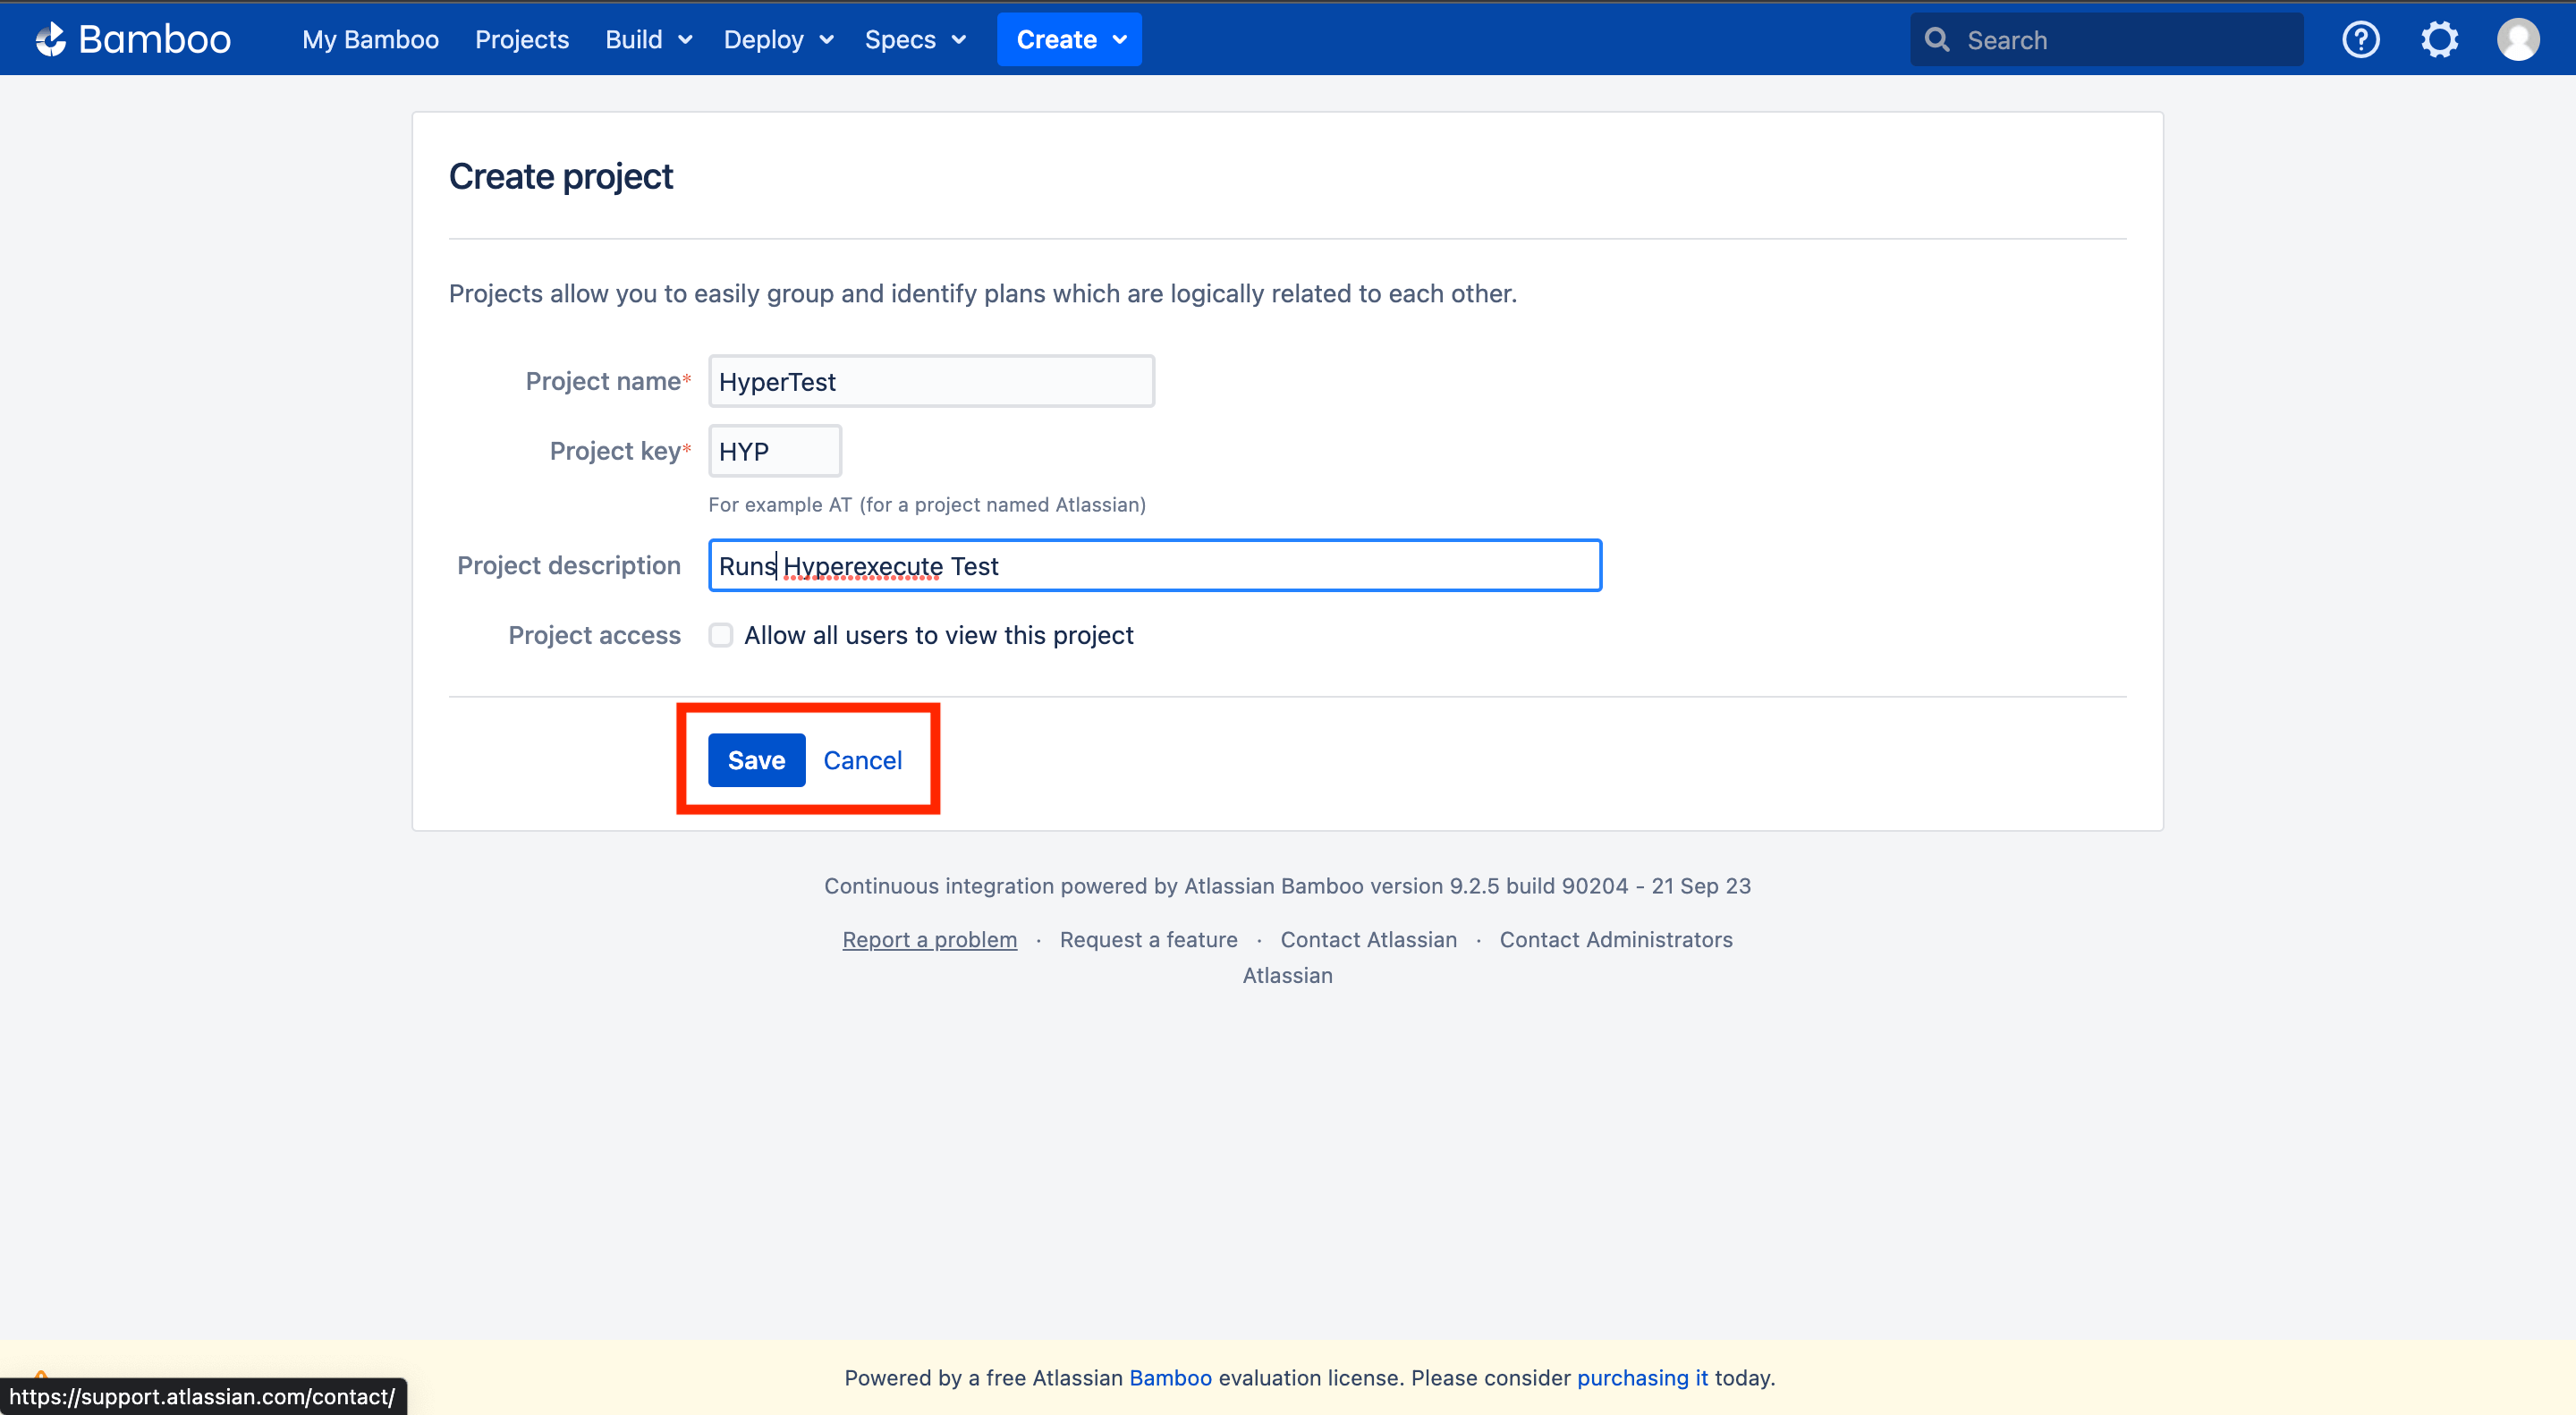
-
Enter the required details for your project:
- Enter your Project Name
- Provide a Project Key
- Give a brief description of your project.
- You can choose whether to provide access to this project to everyone or not.
- Click on Save button.
- Now click on Create Plan button.
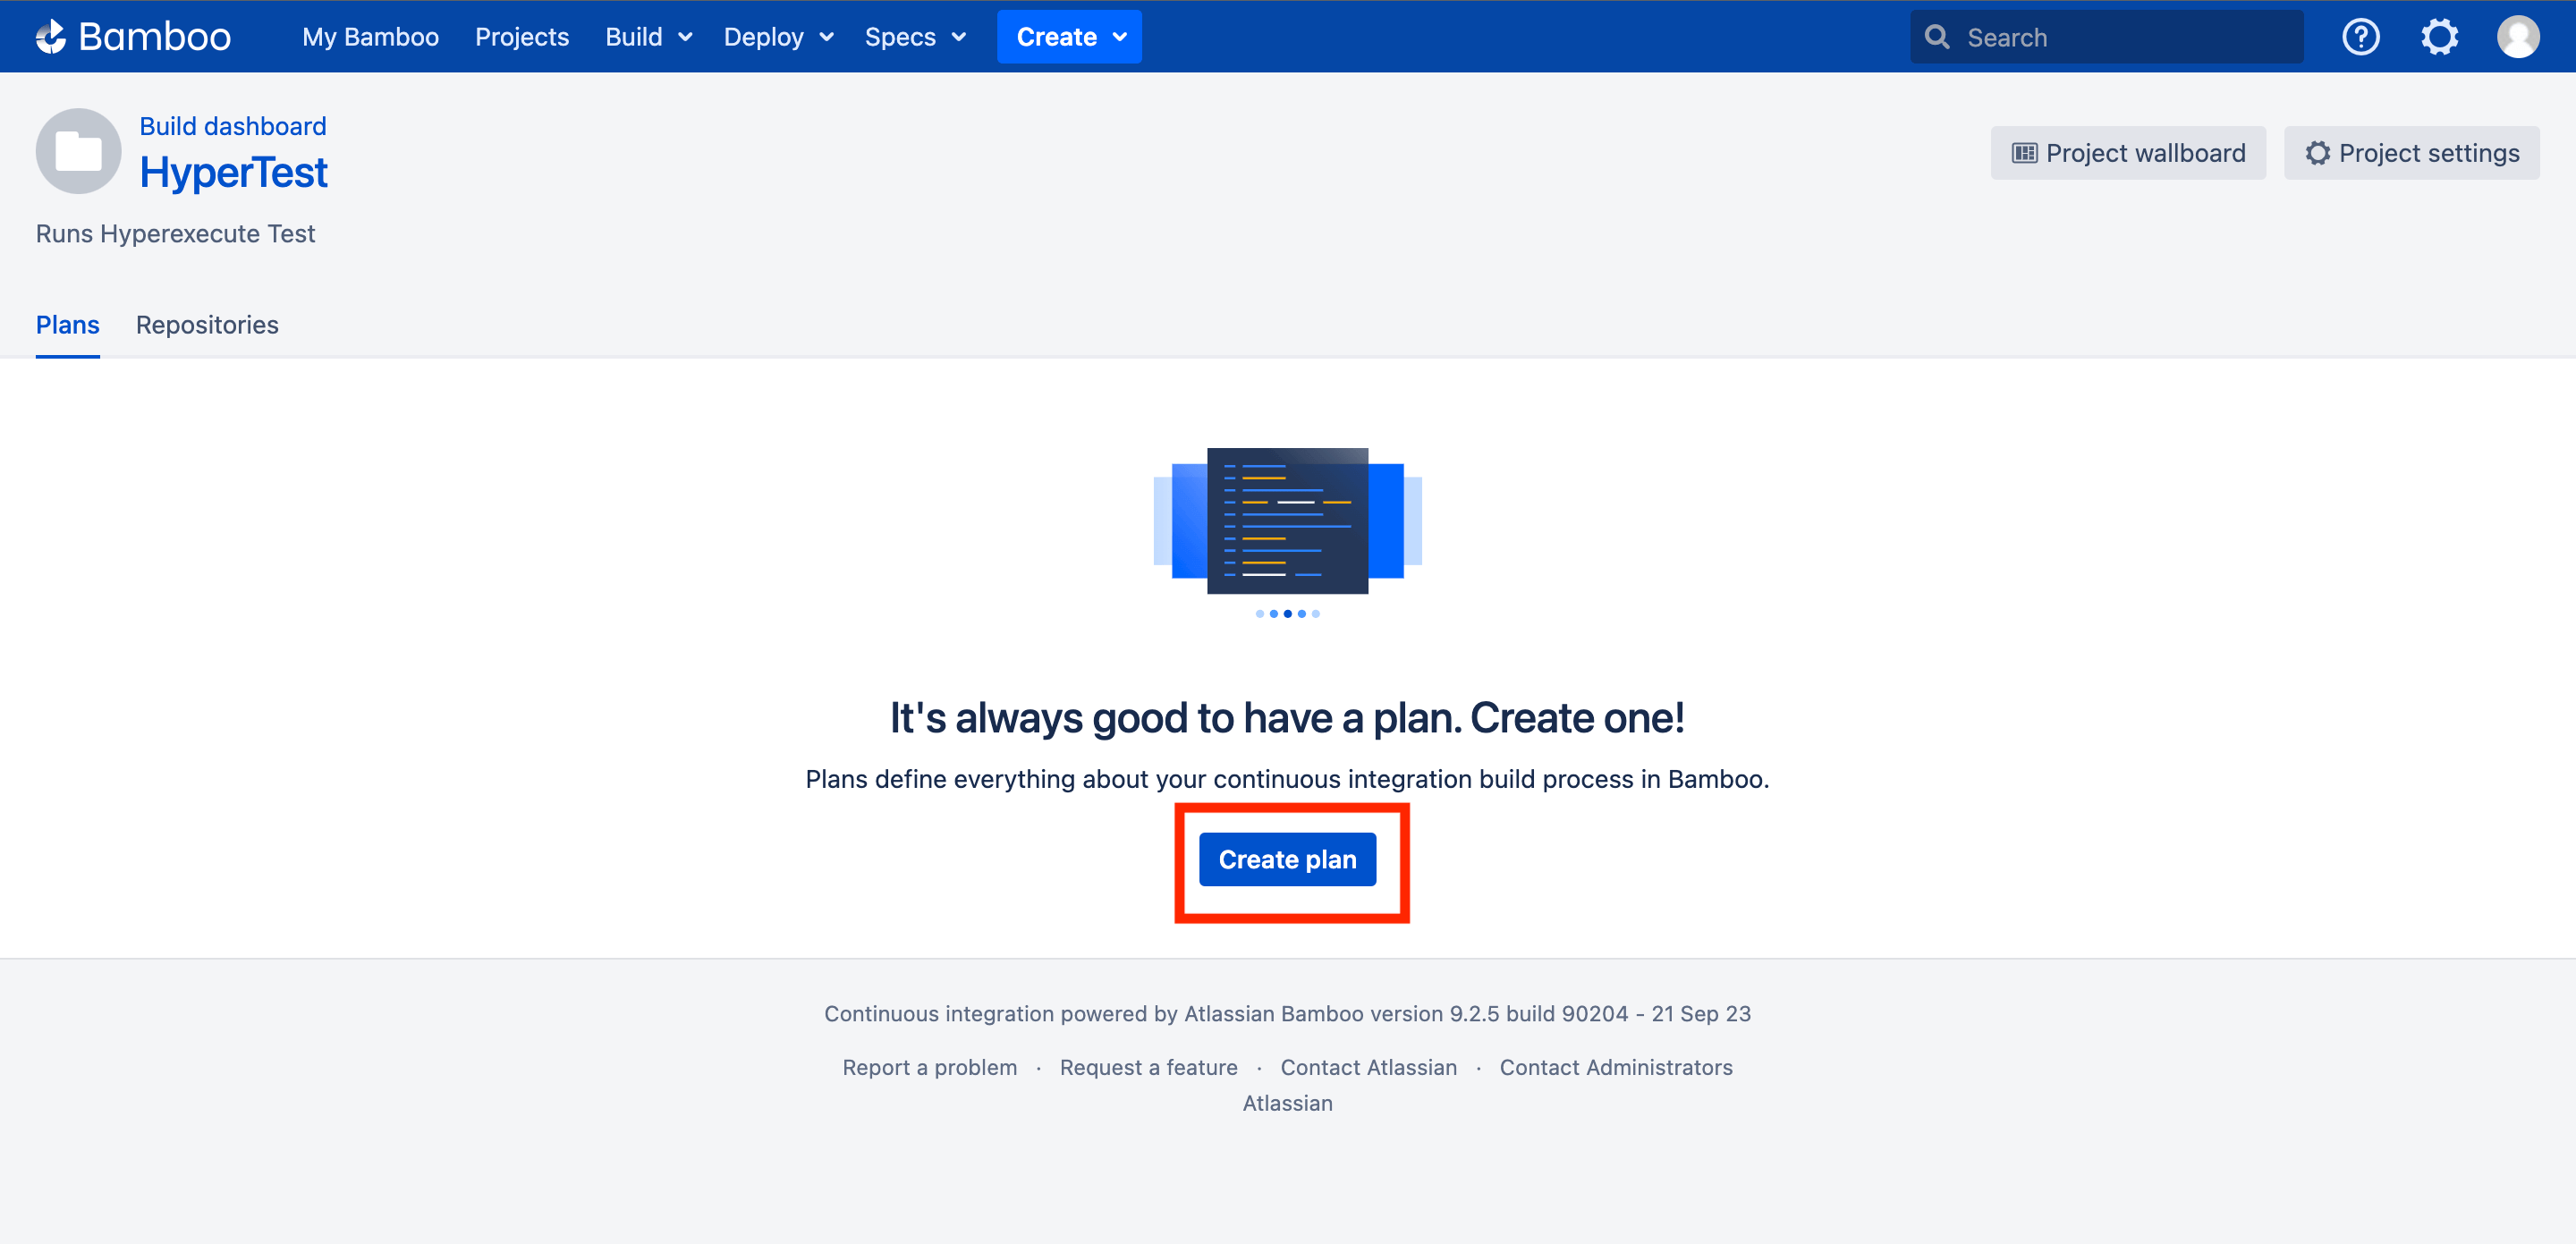
- Select your required Project.
- Enter a Plan Name
- Enter your Project Key (it should be same as the one you entered in the above step).
- Click on Create button.
Step 4: Configure the Source Code
- Select the Repository Host. In this case, we are using Git to manage the source code.
- Enter the Display Name.
- Provide the Repository URL.
- Select the Authentication Type of your choice. We are selecting "Username and Password"
- Enter the Username and Password.
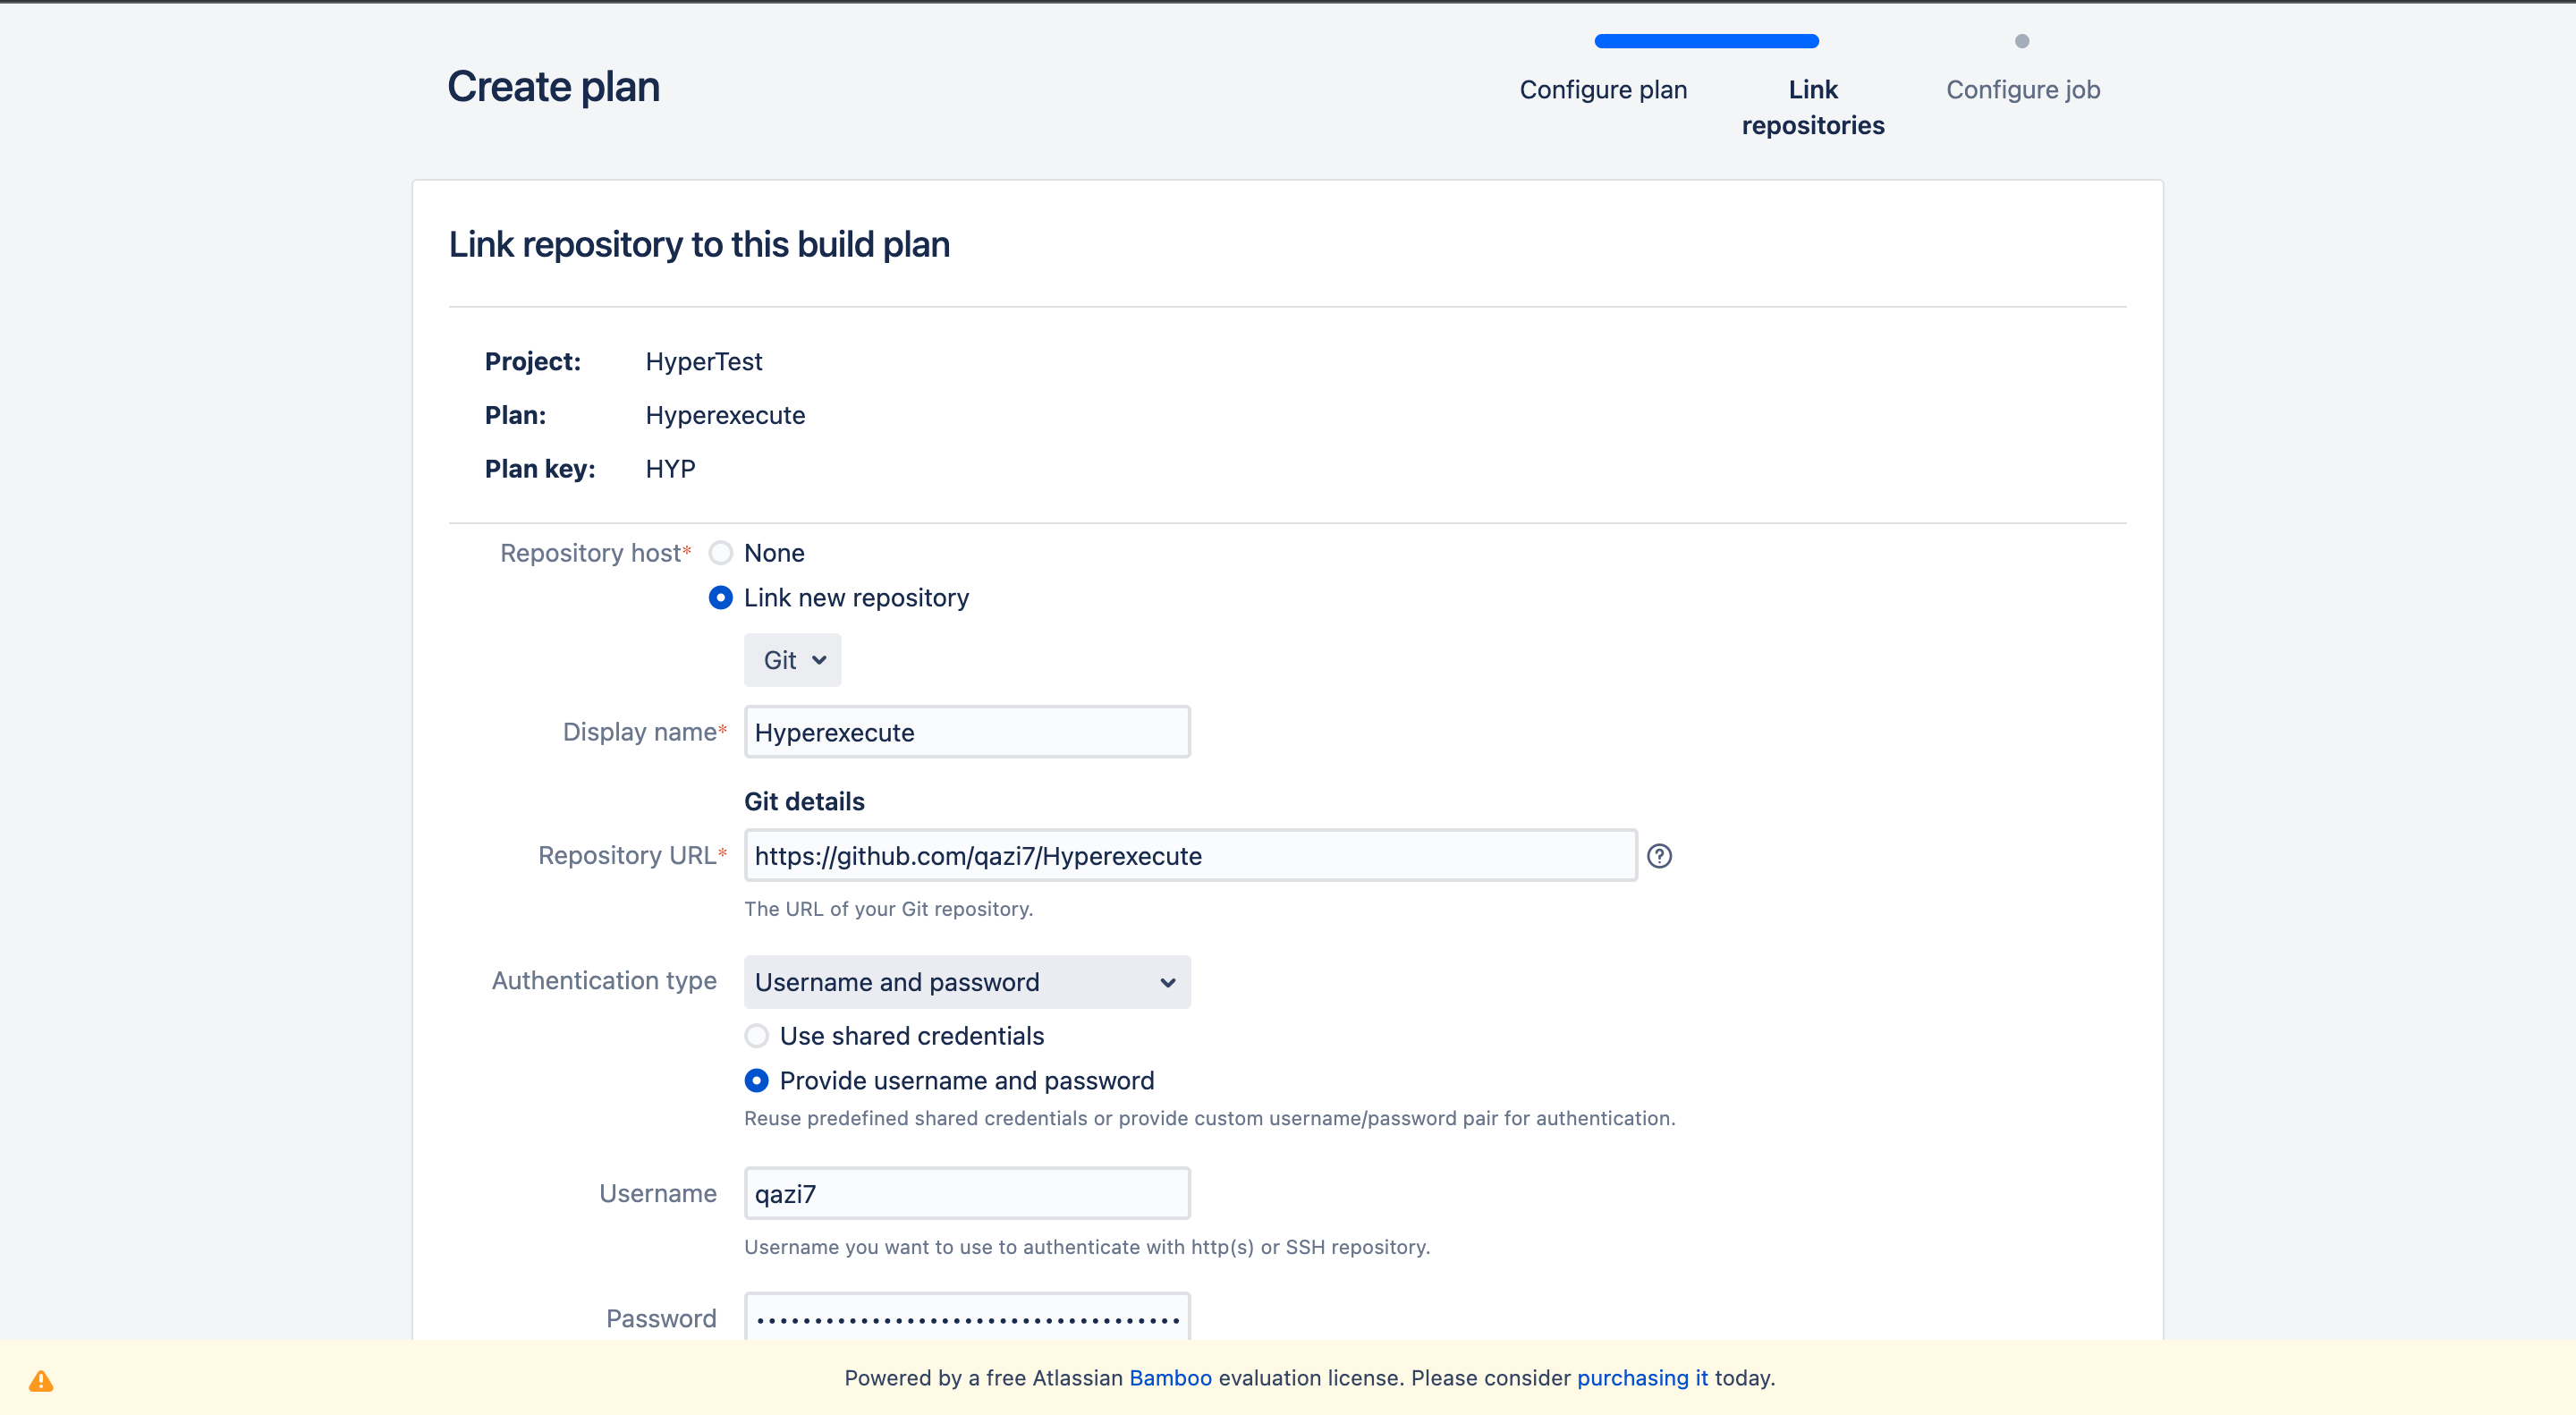
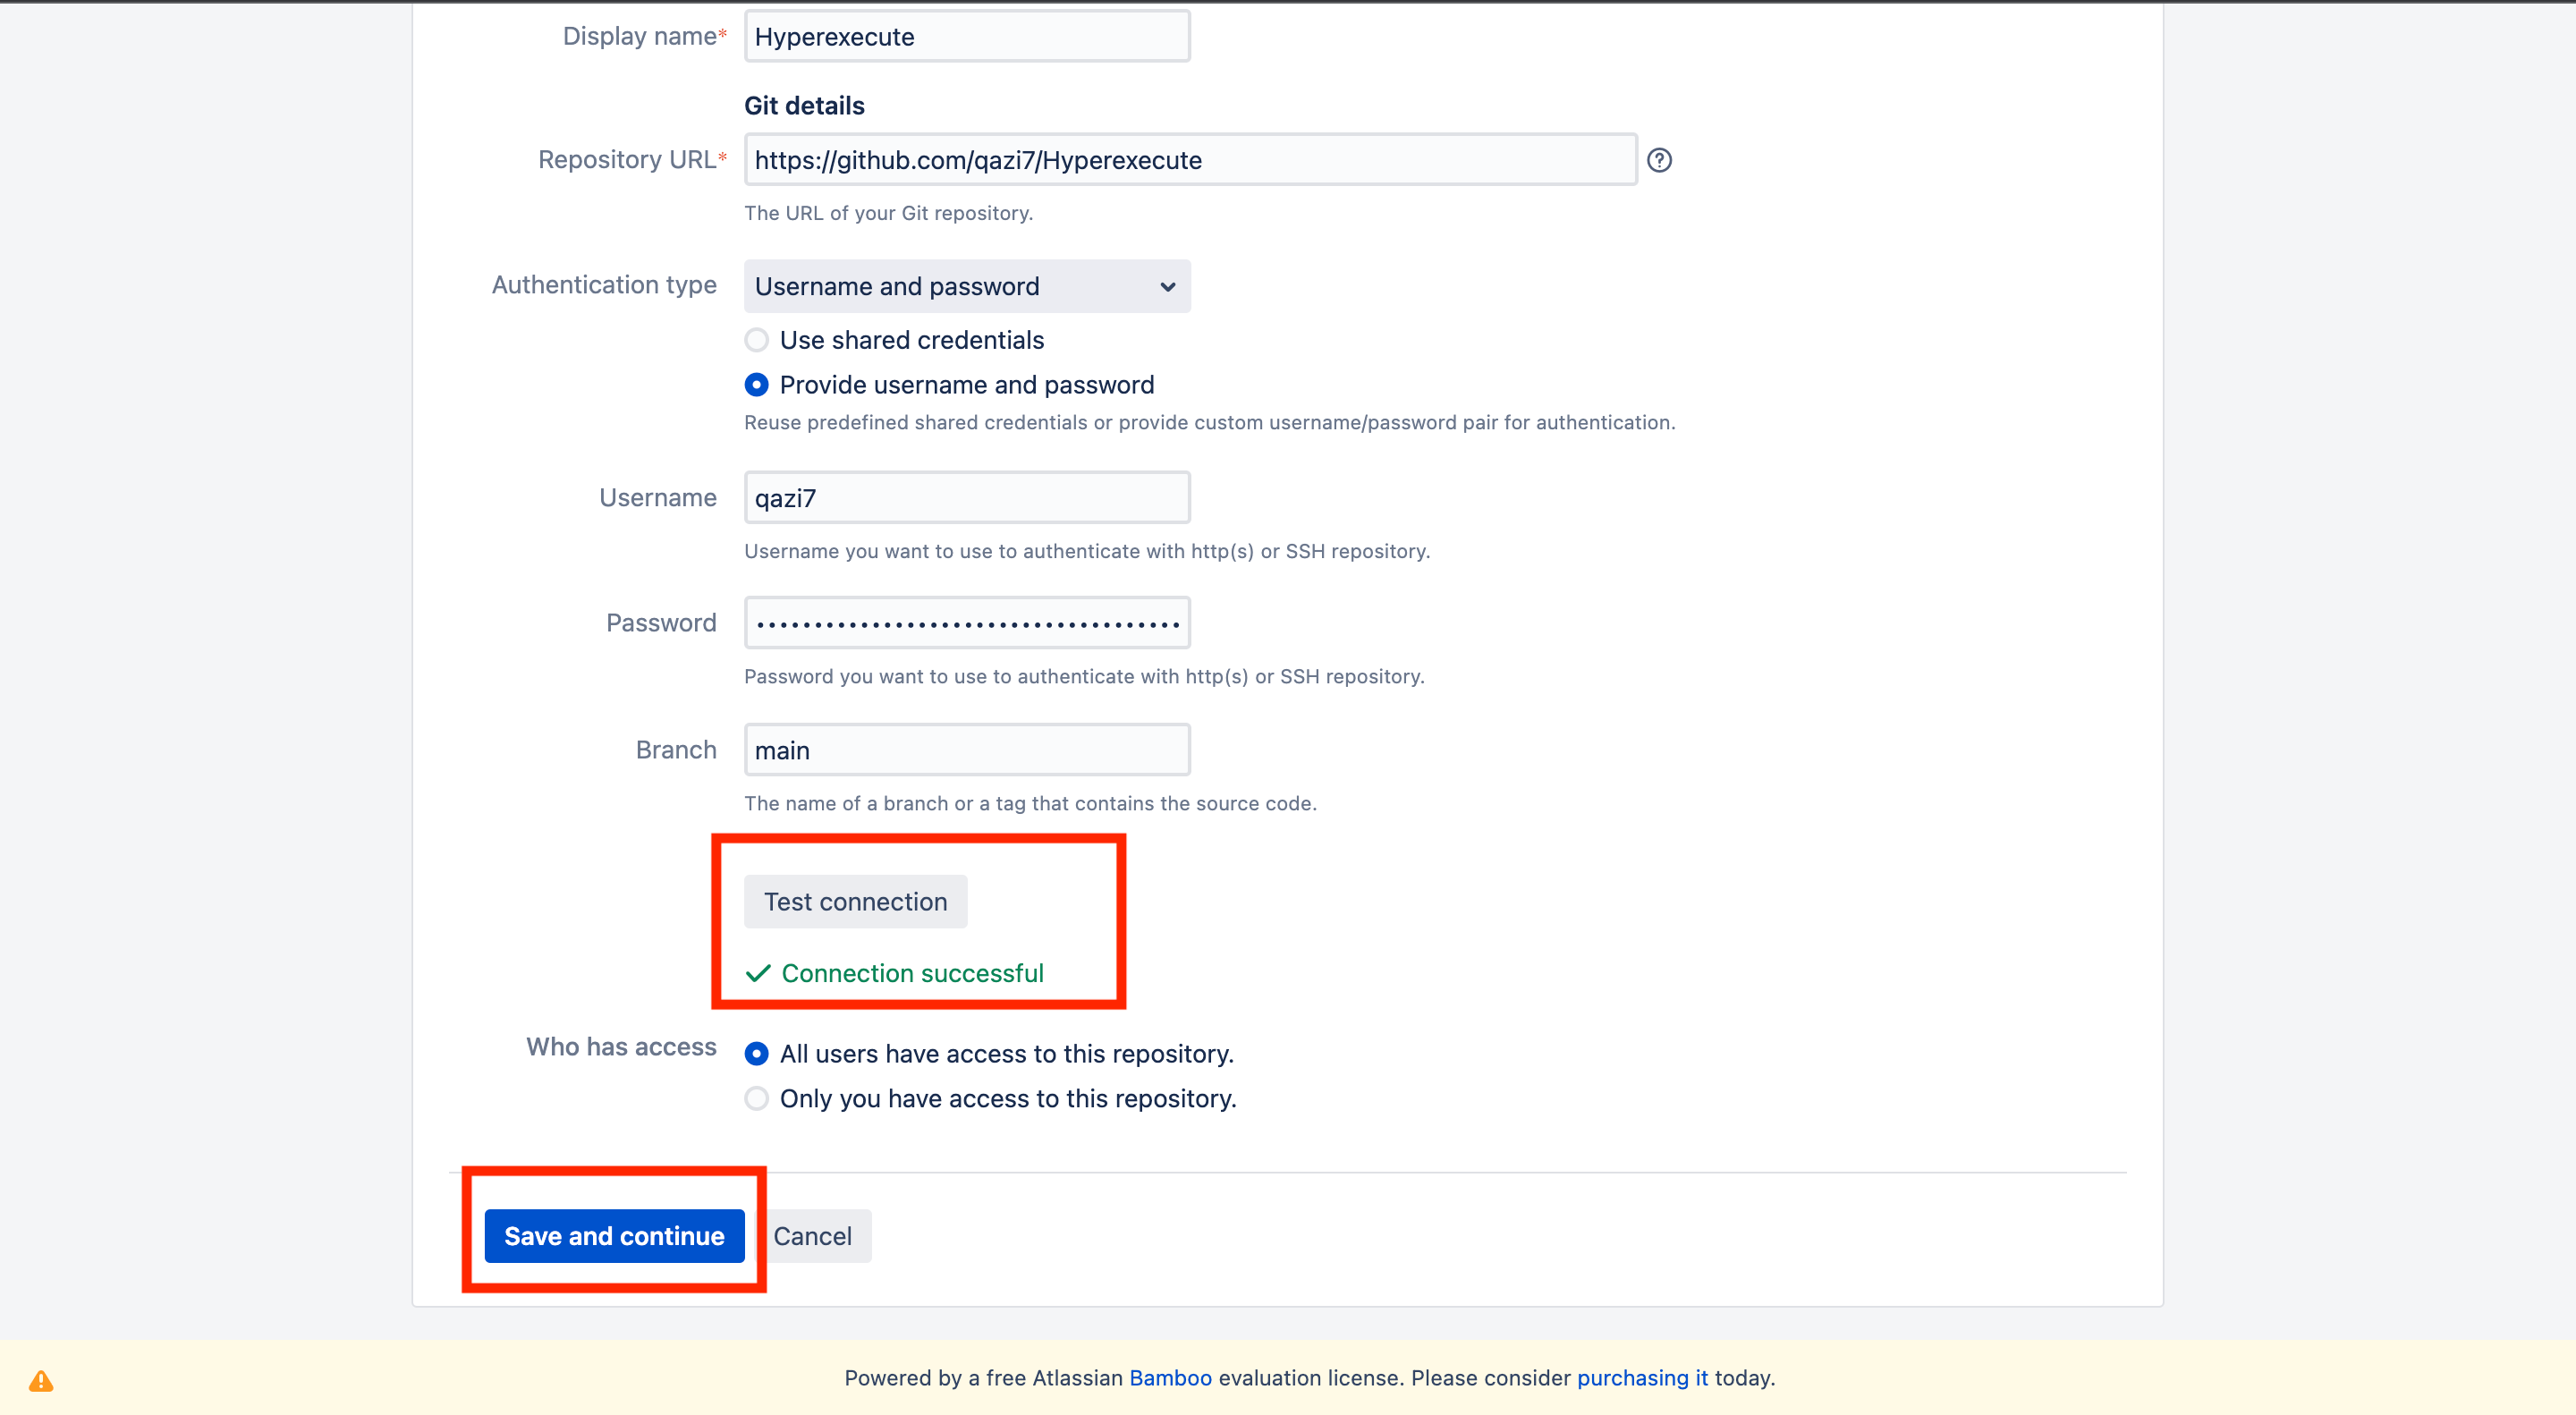
- Enter the desired Branch name.
- Click on Test Connection button to check whether the connection is successfully established or not.
- Define who can access to this repository.
- Click on Save and Continue button.
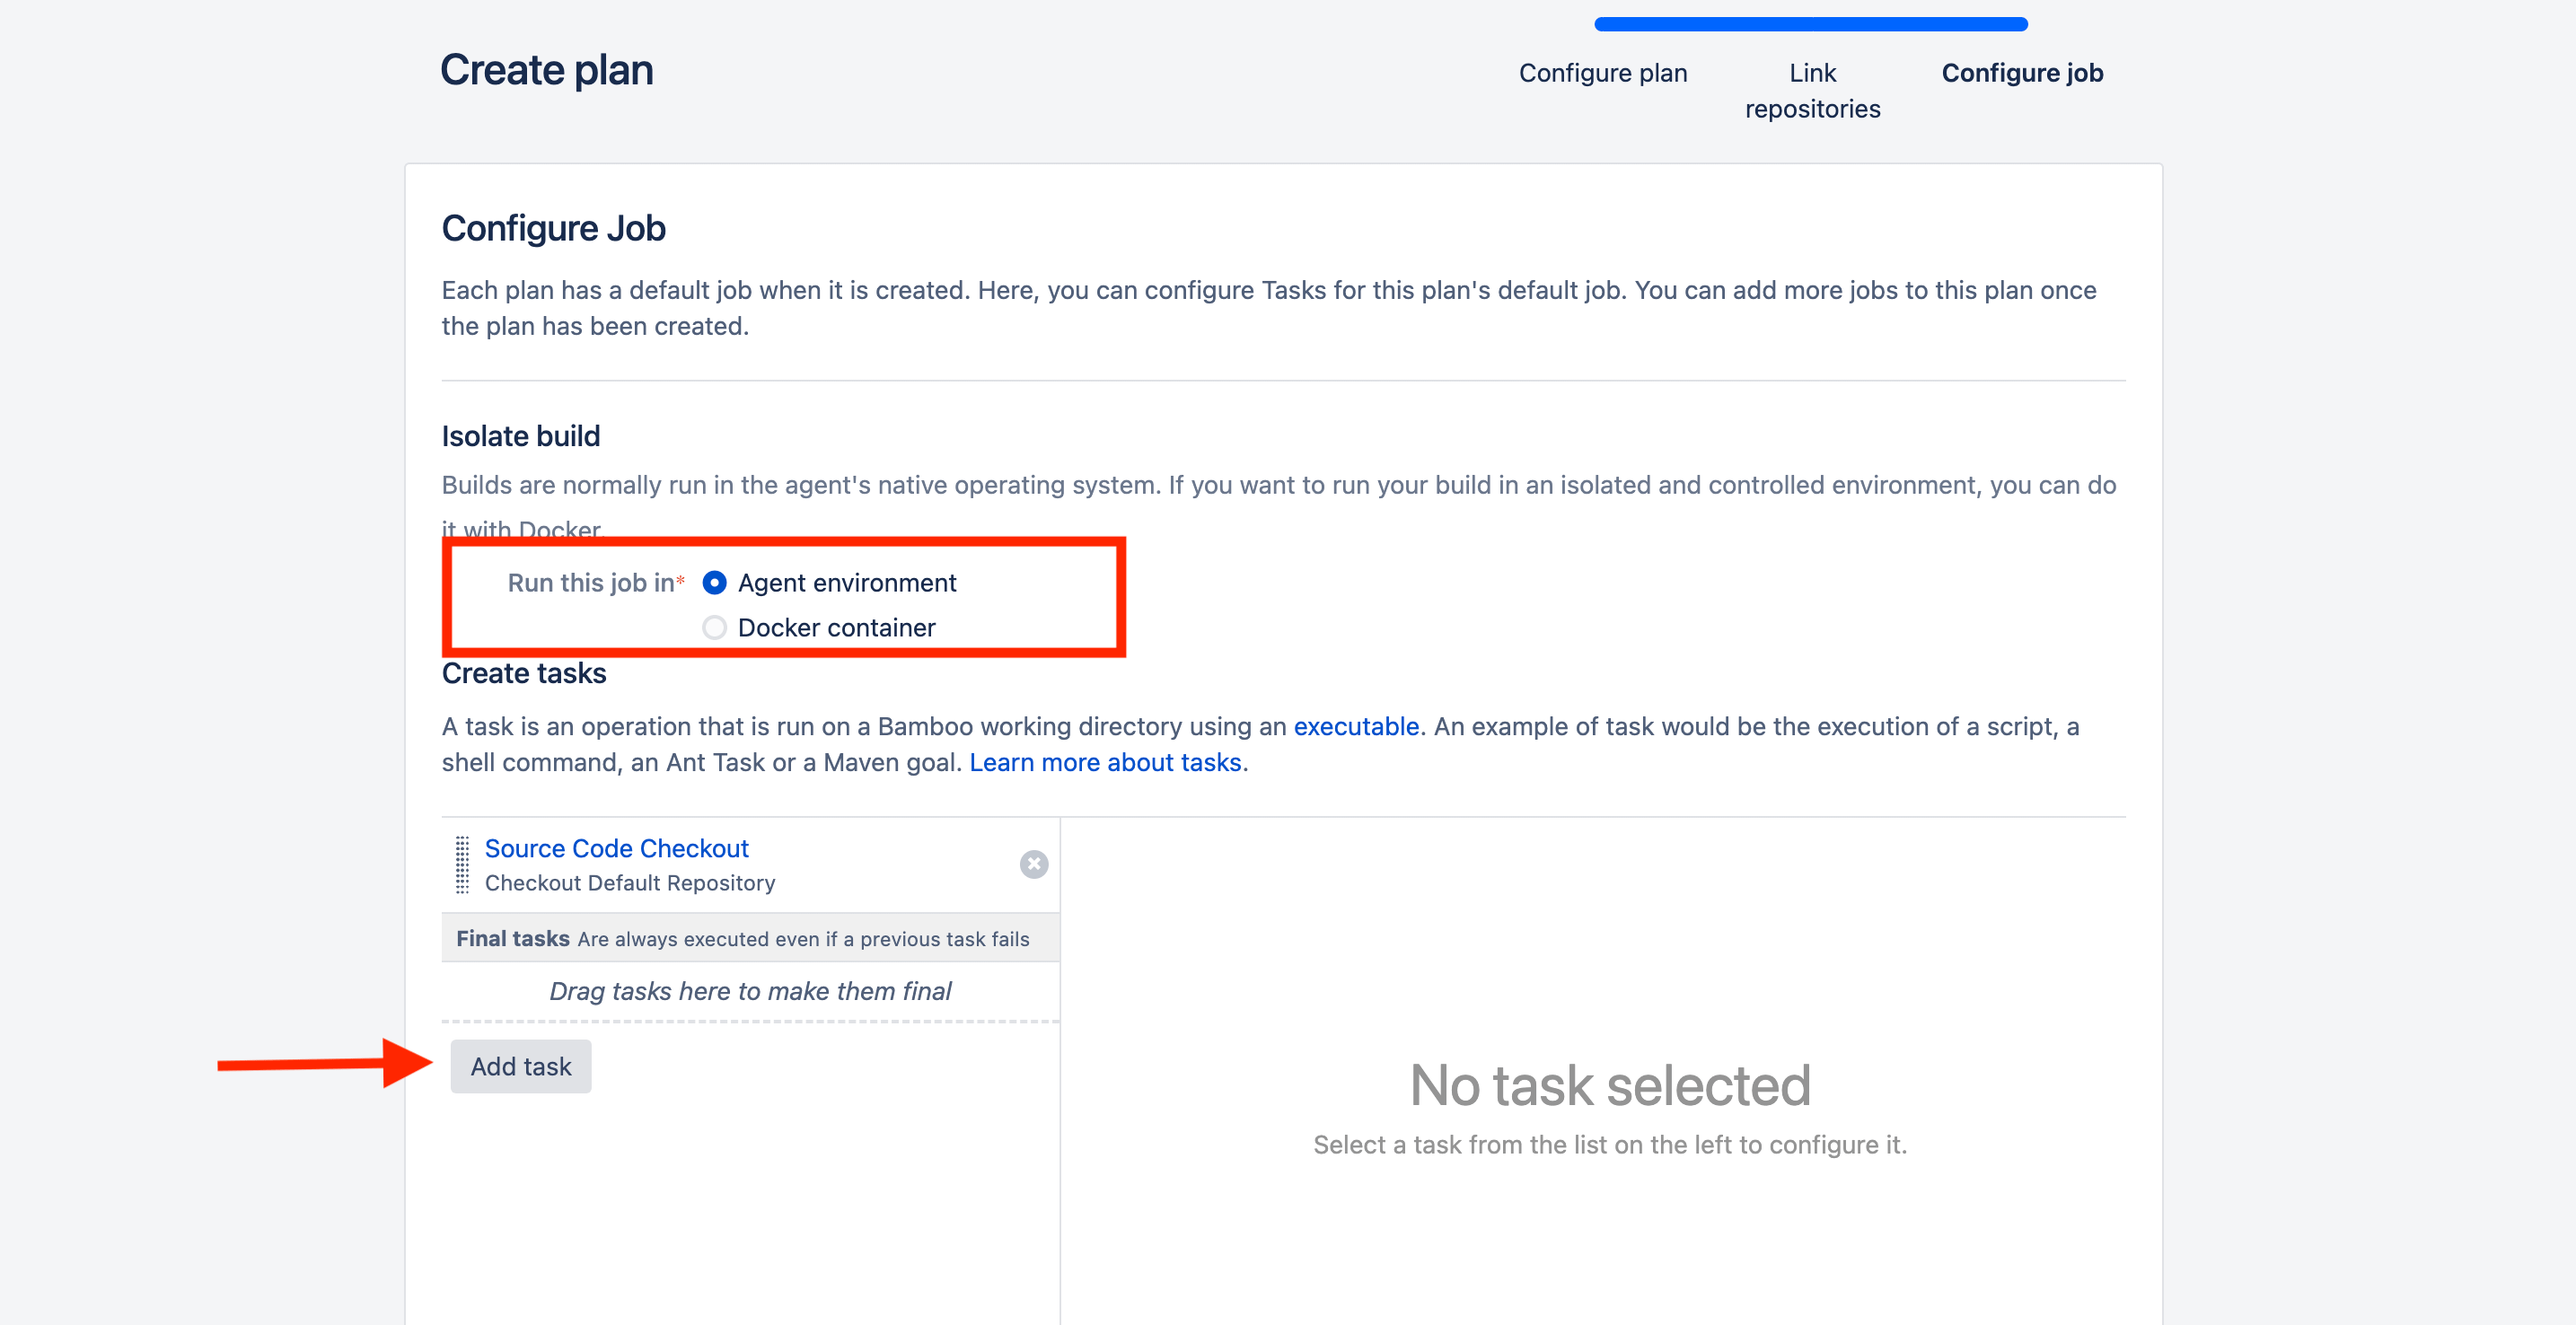
Step 5: Configure Job
- Select the environment where do you want to execute this job. For the demo purpose, we are using Agent Environment.
- Click on Add Task button
- Select the Script option from the provided Task Types.
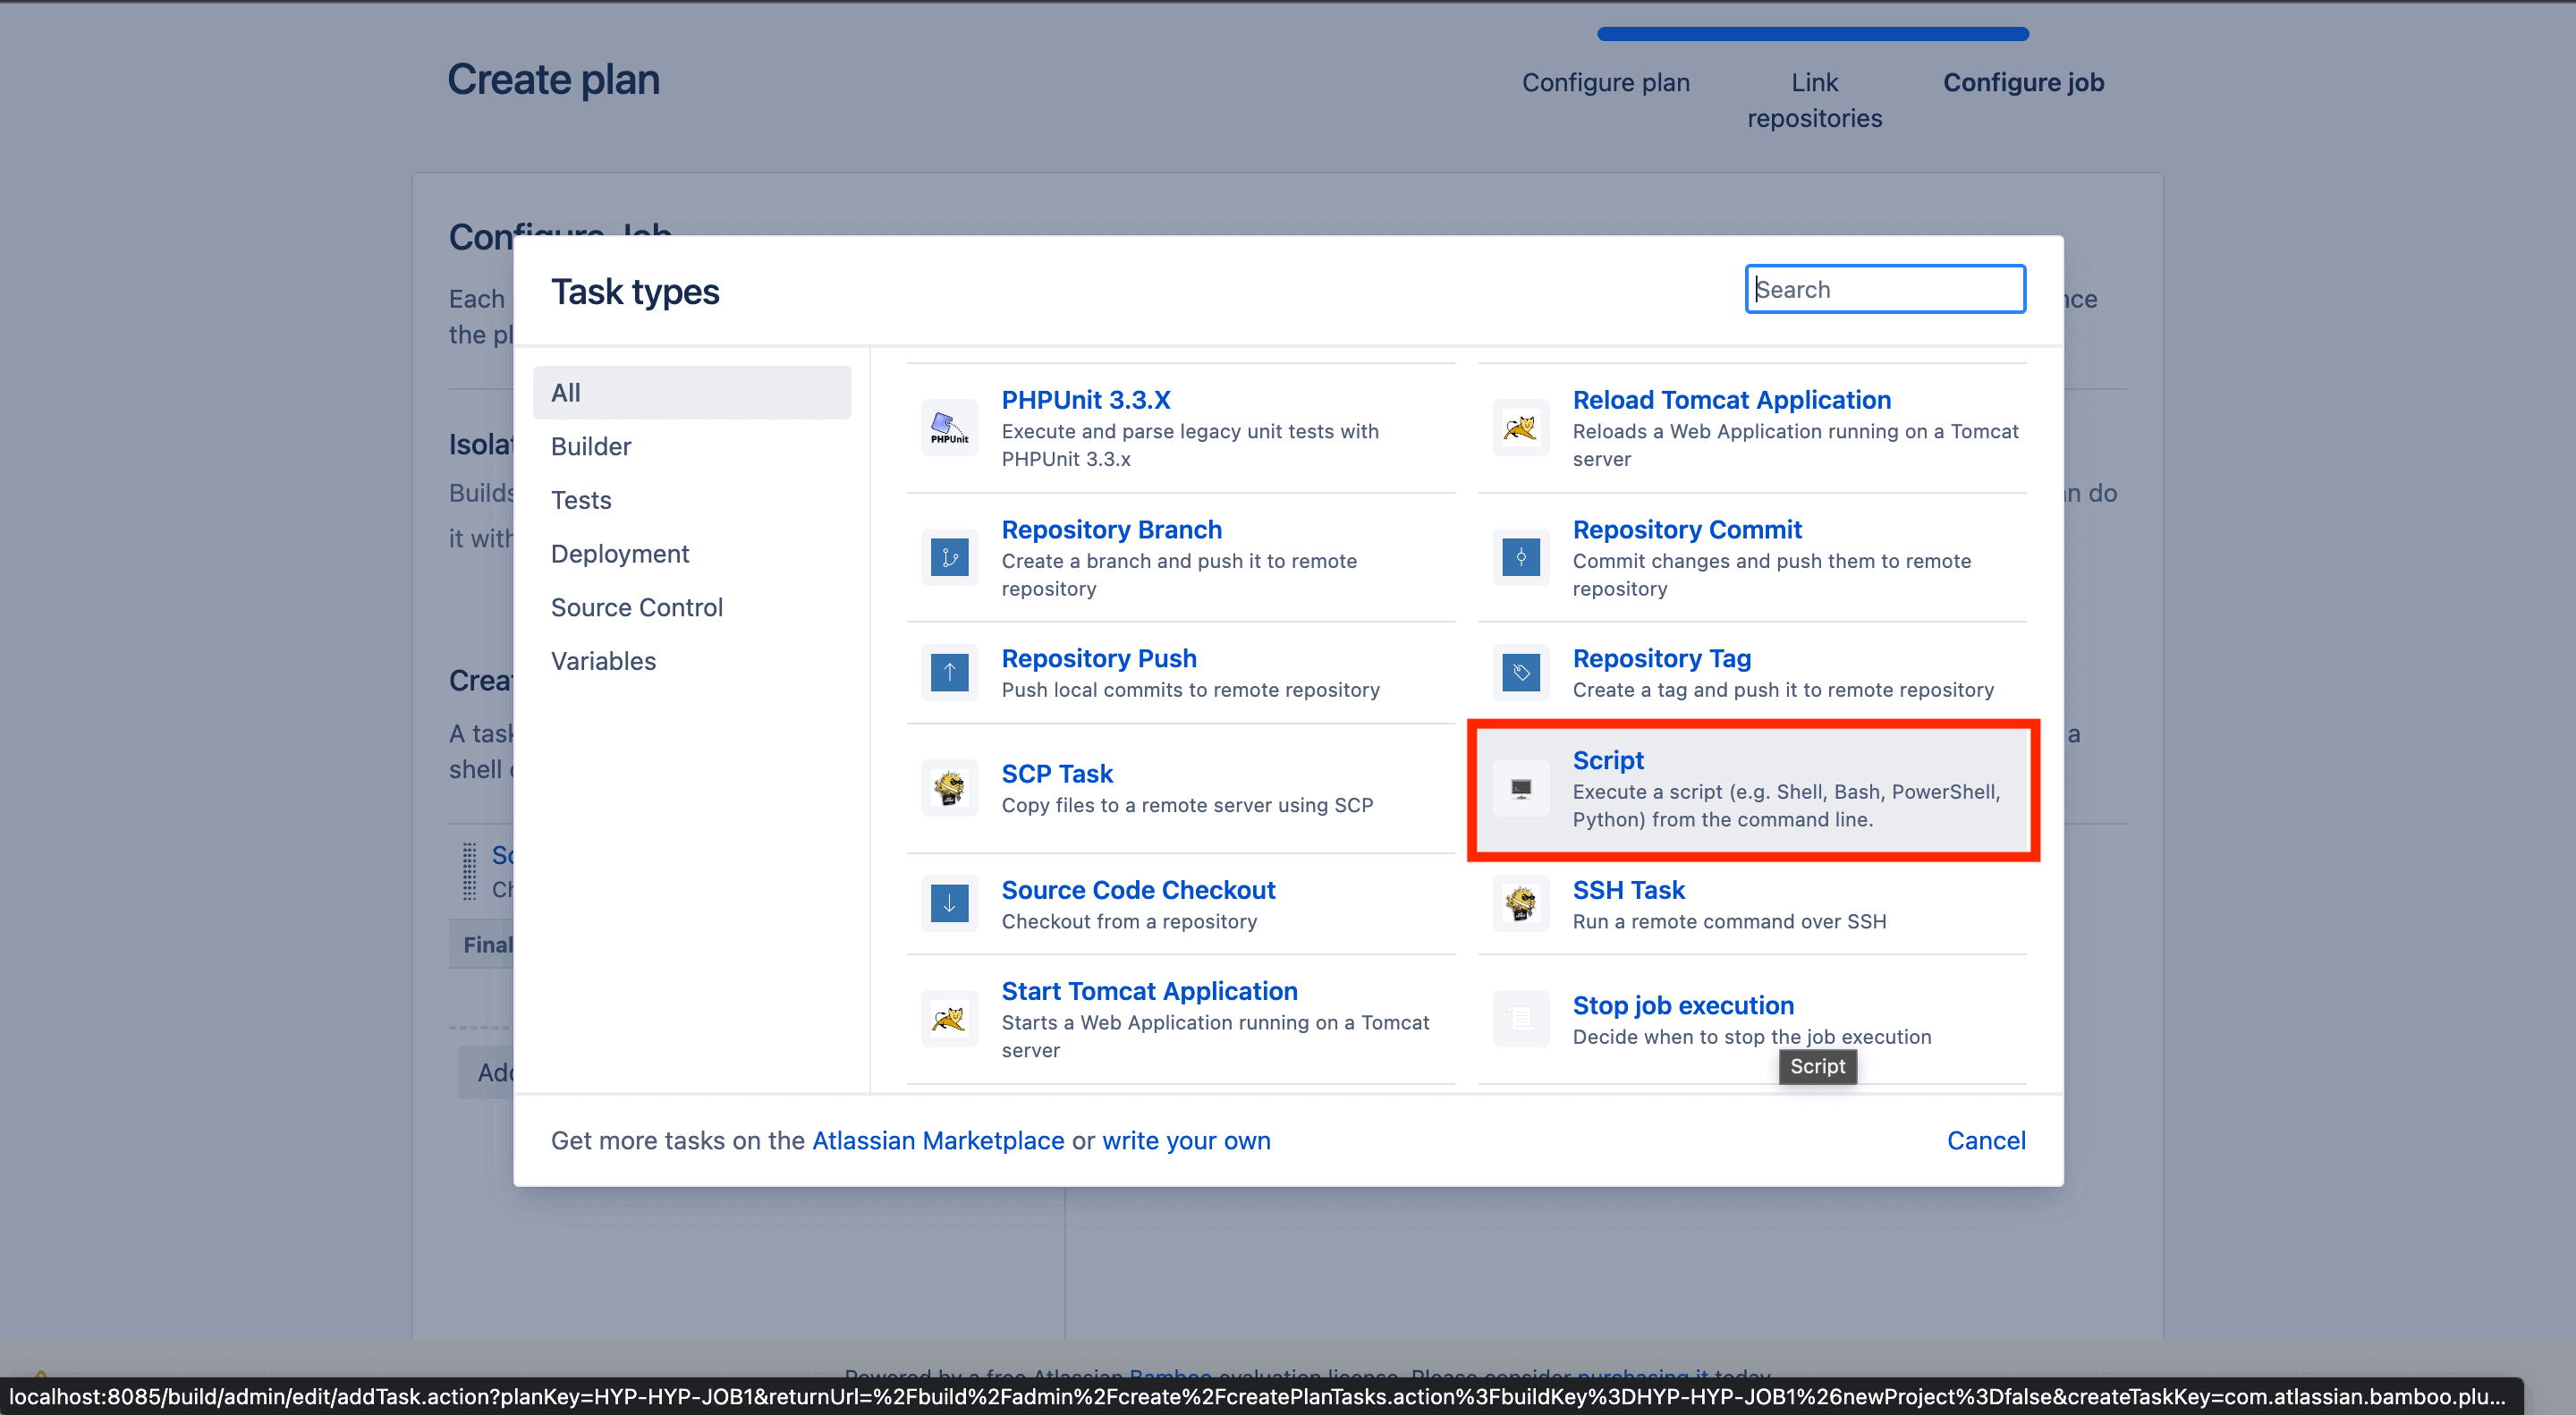
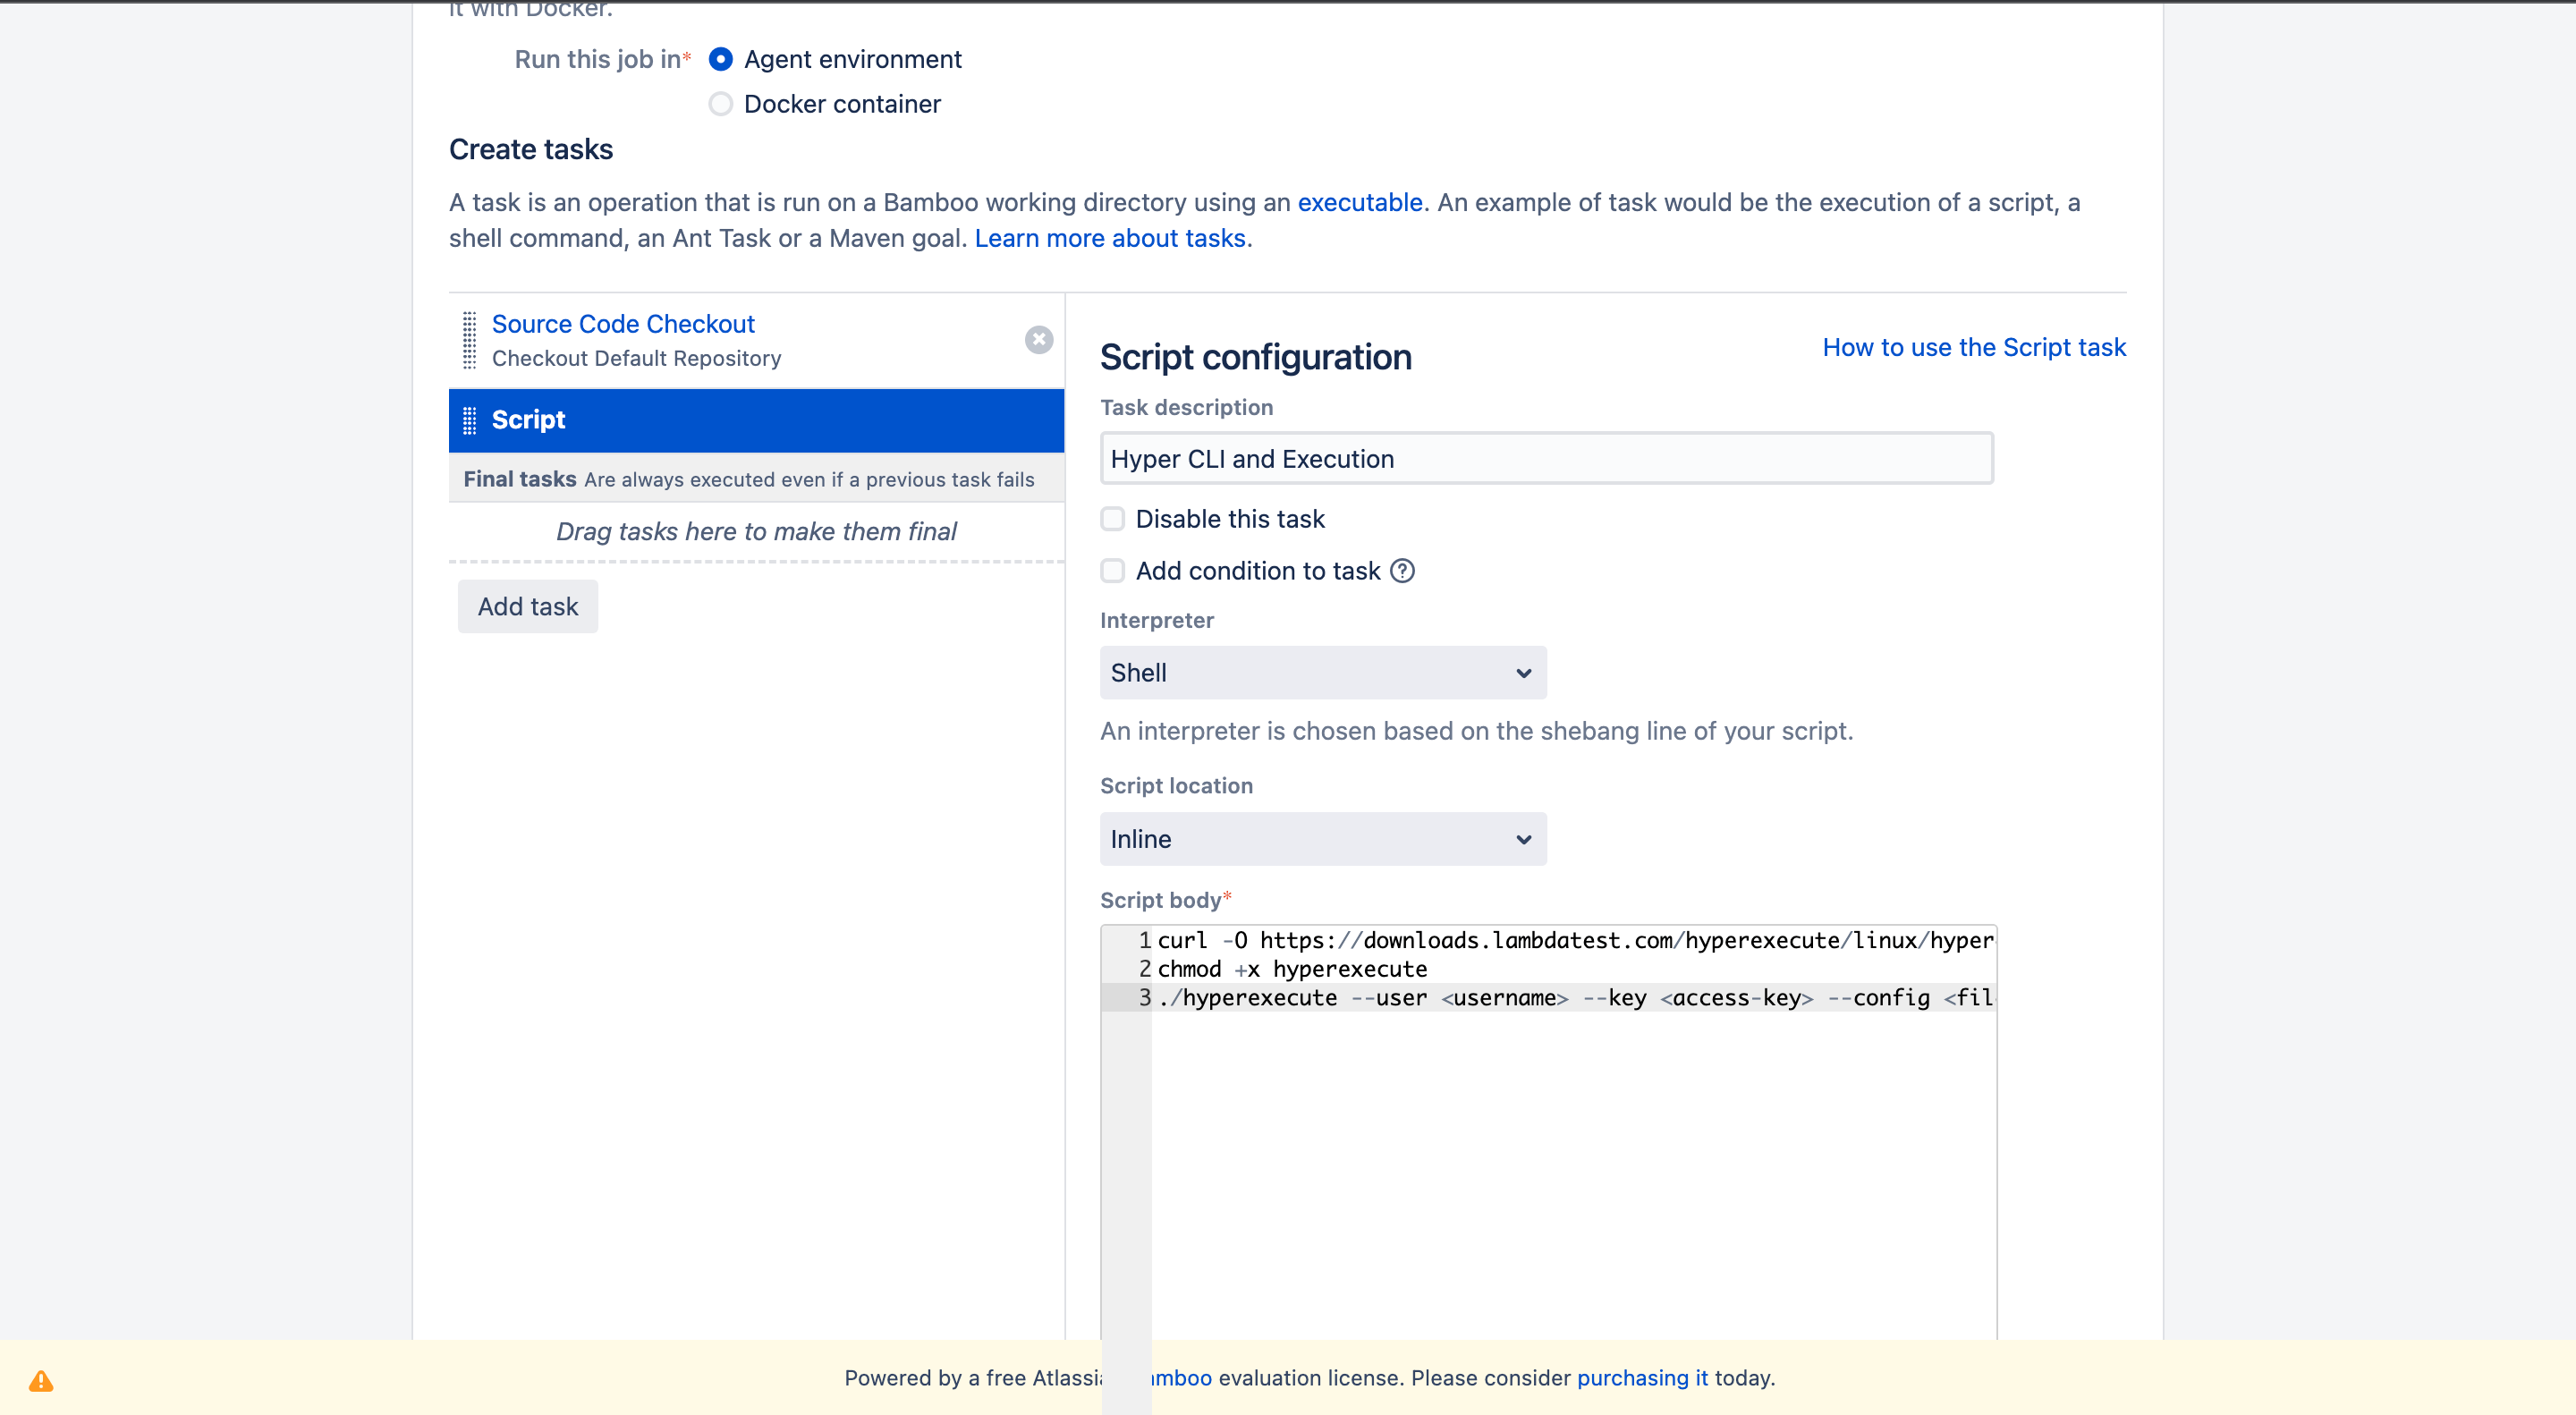
- Enter your Task Description.
- Select the Interpreter as Shell.
- Choose the Script Location as Inline.
- Add the following code in the Script Body
curl -O https://downloads.lambdatest.com/hyperexecute/linux/hyperexecute
chmod +x hyperexecute
./hyperexecute --user <username>--key <key> --config <file>
- Add the Task and click on Create button.
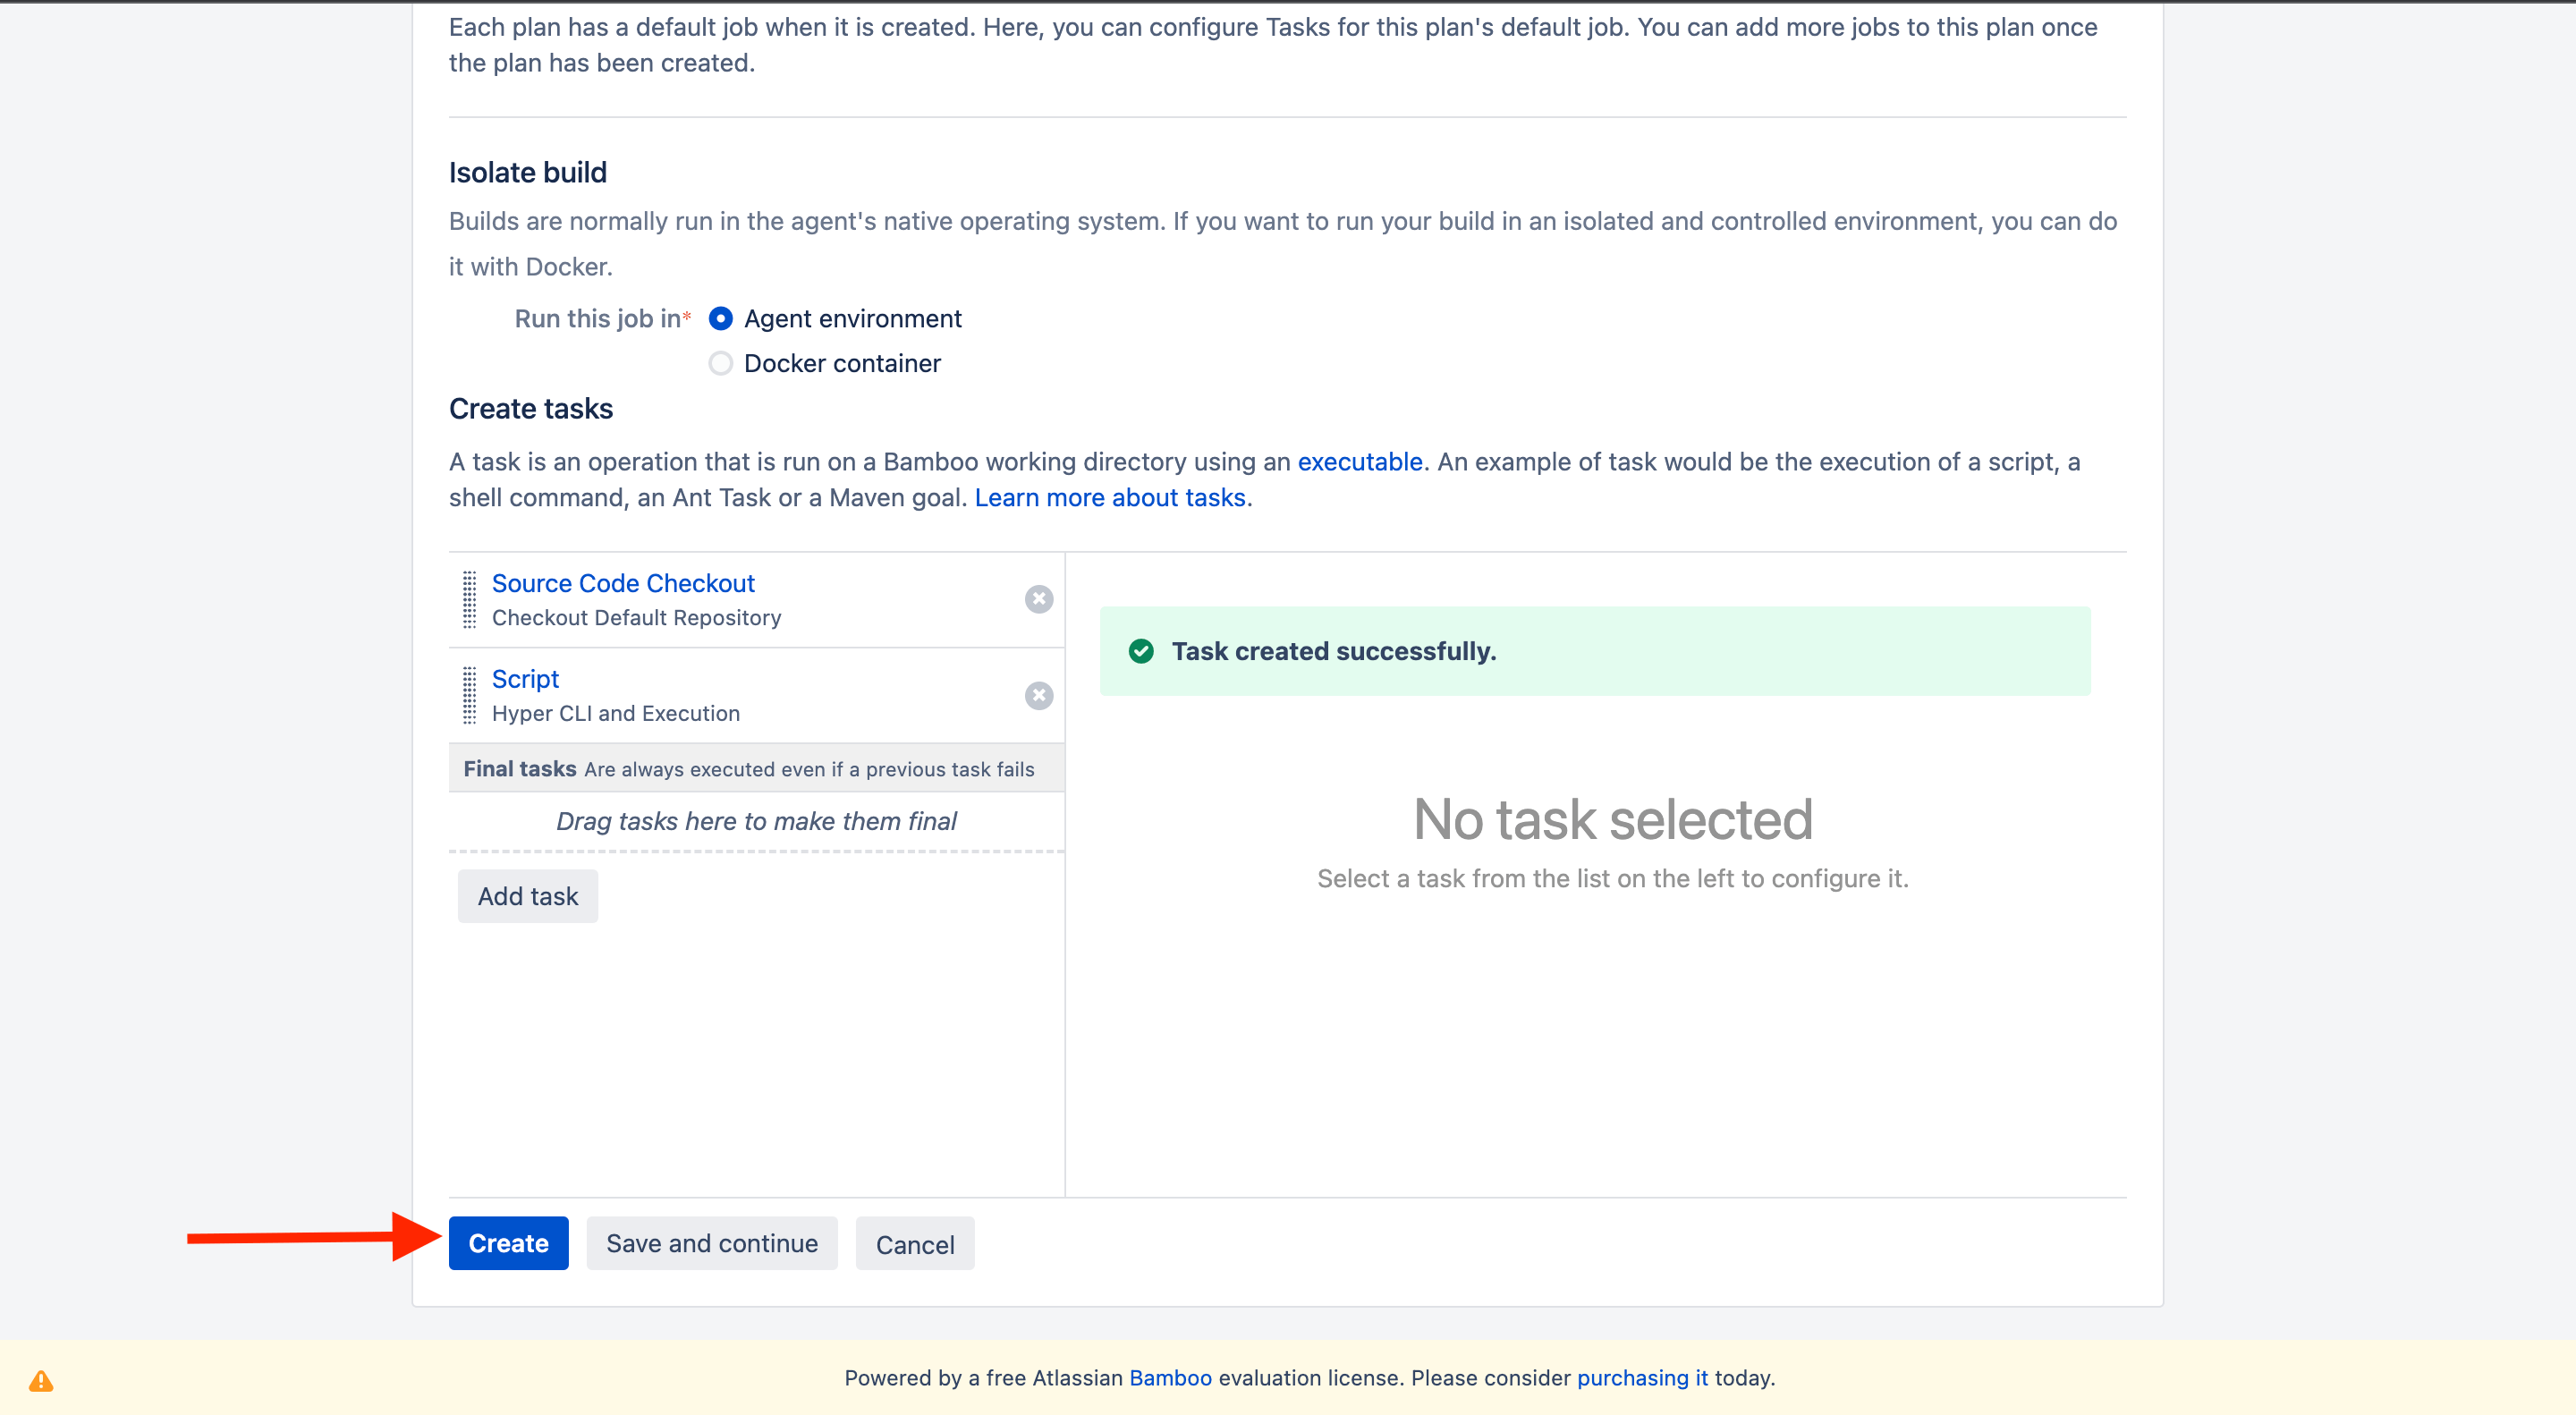
- Configure the pipeline as per your need in the Trigger tab or leave it to Default
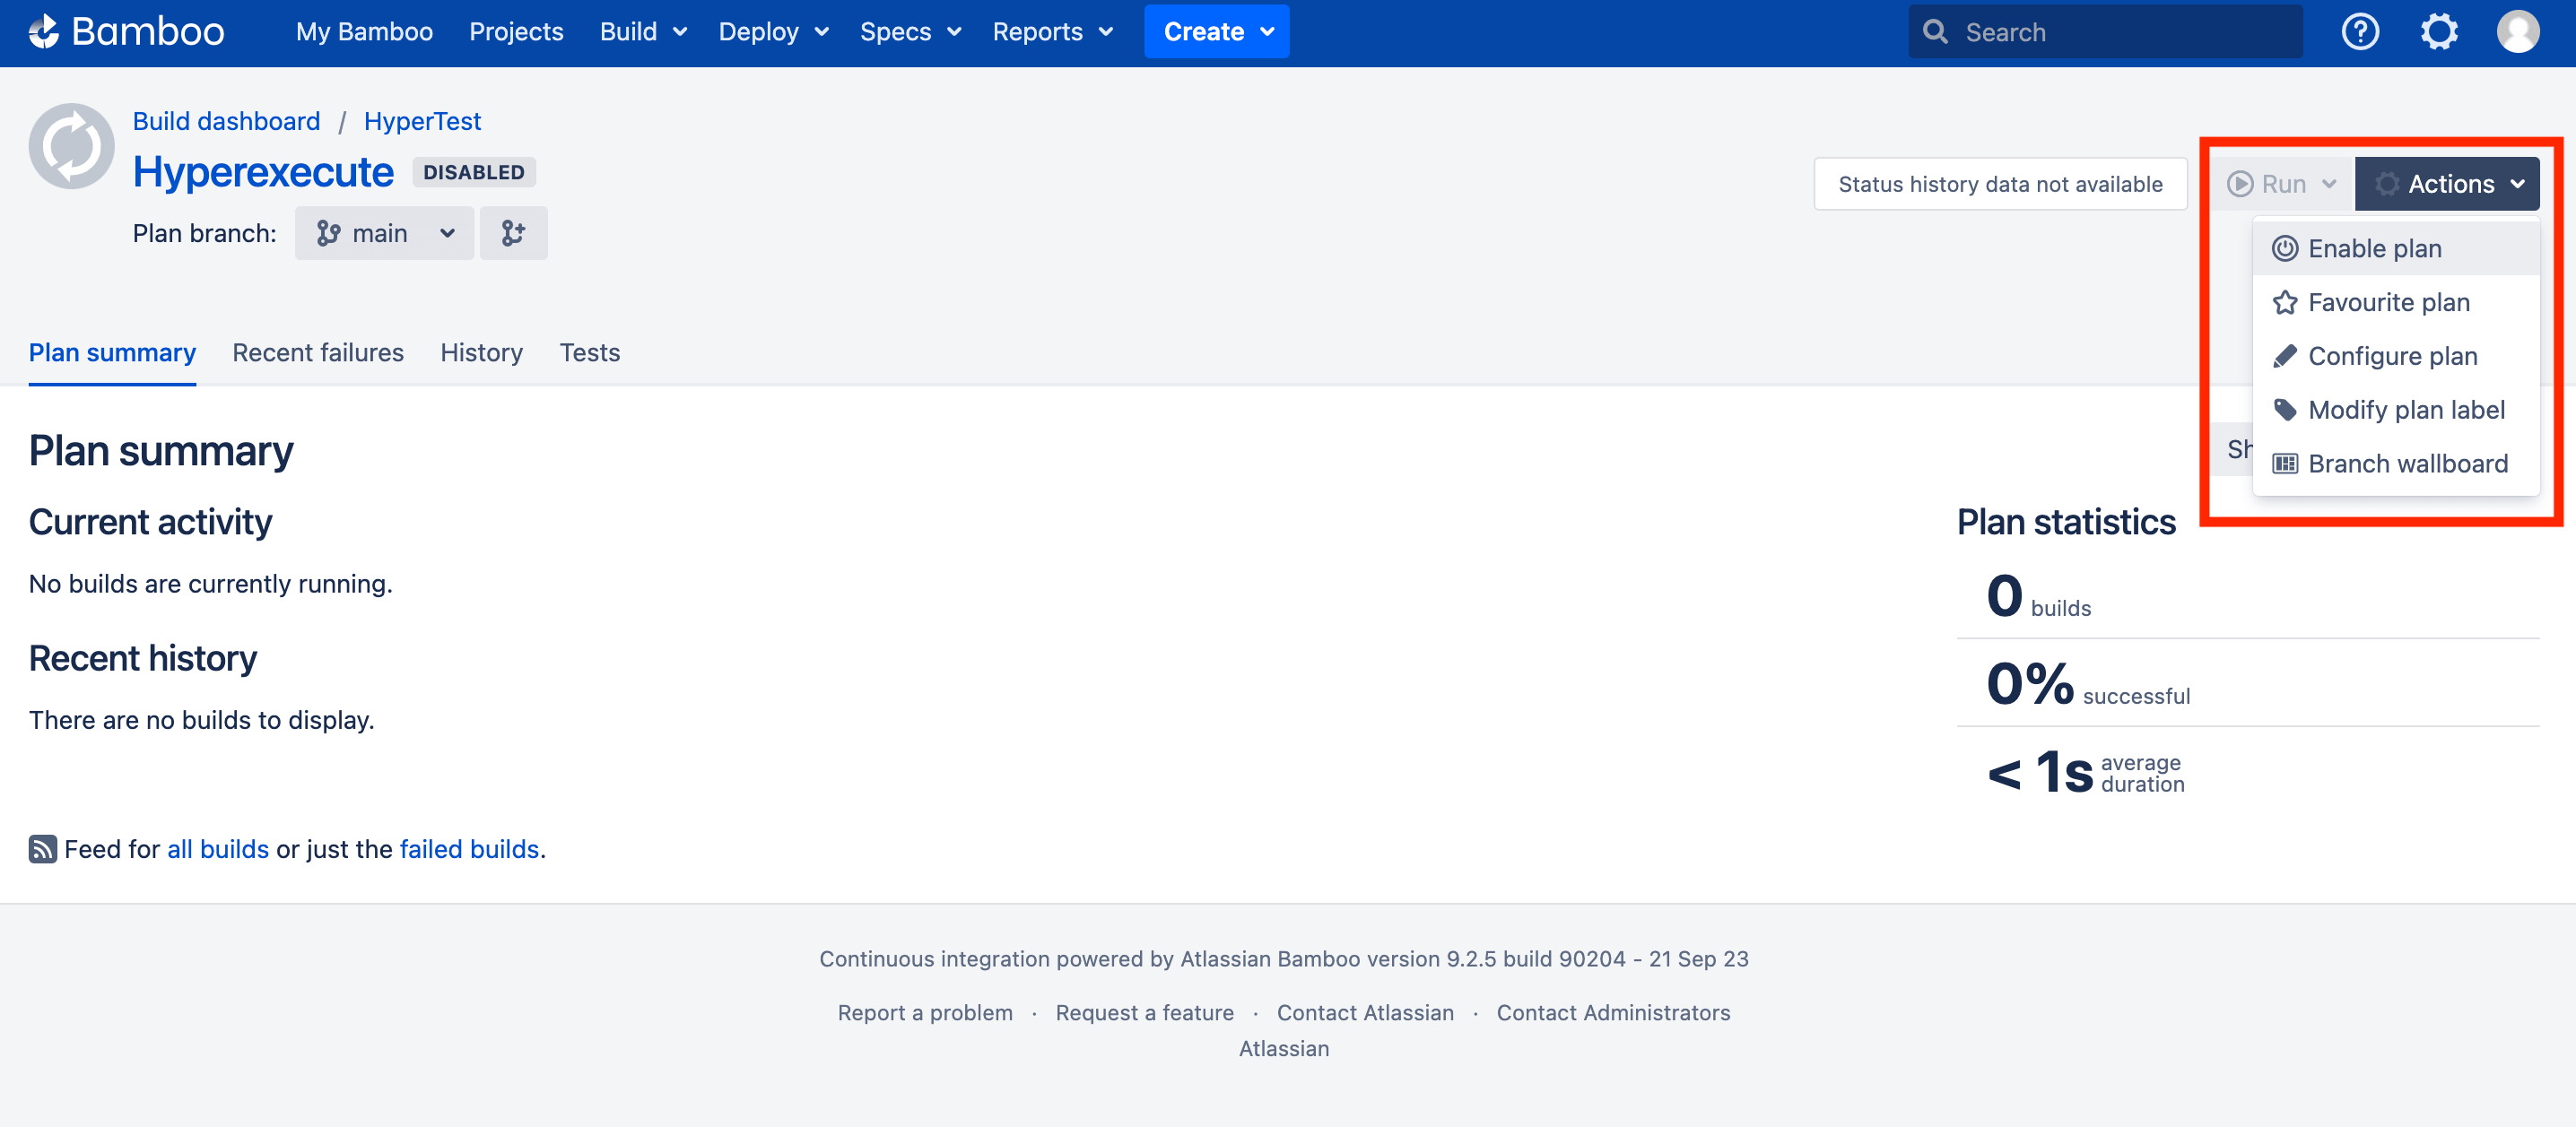
- Click on Actions -> Enable Plan button.
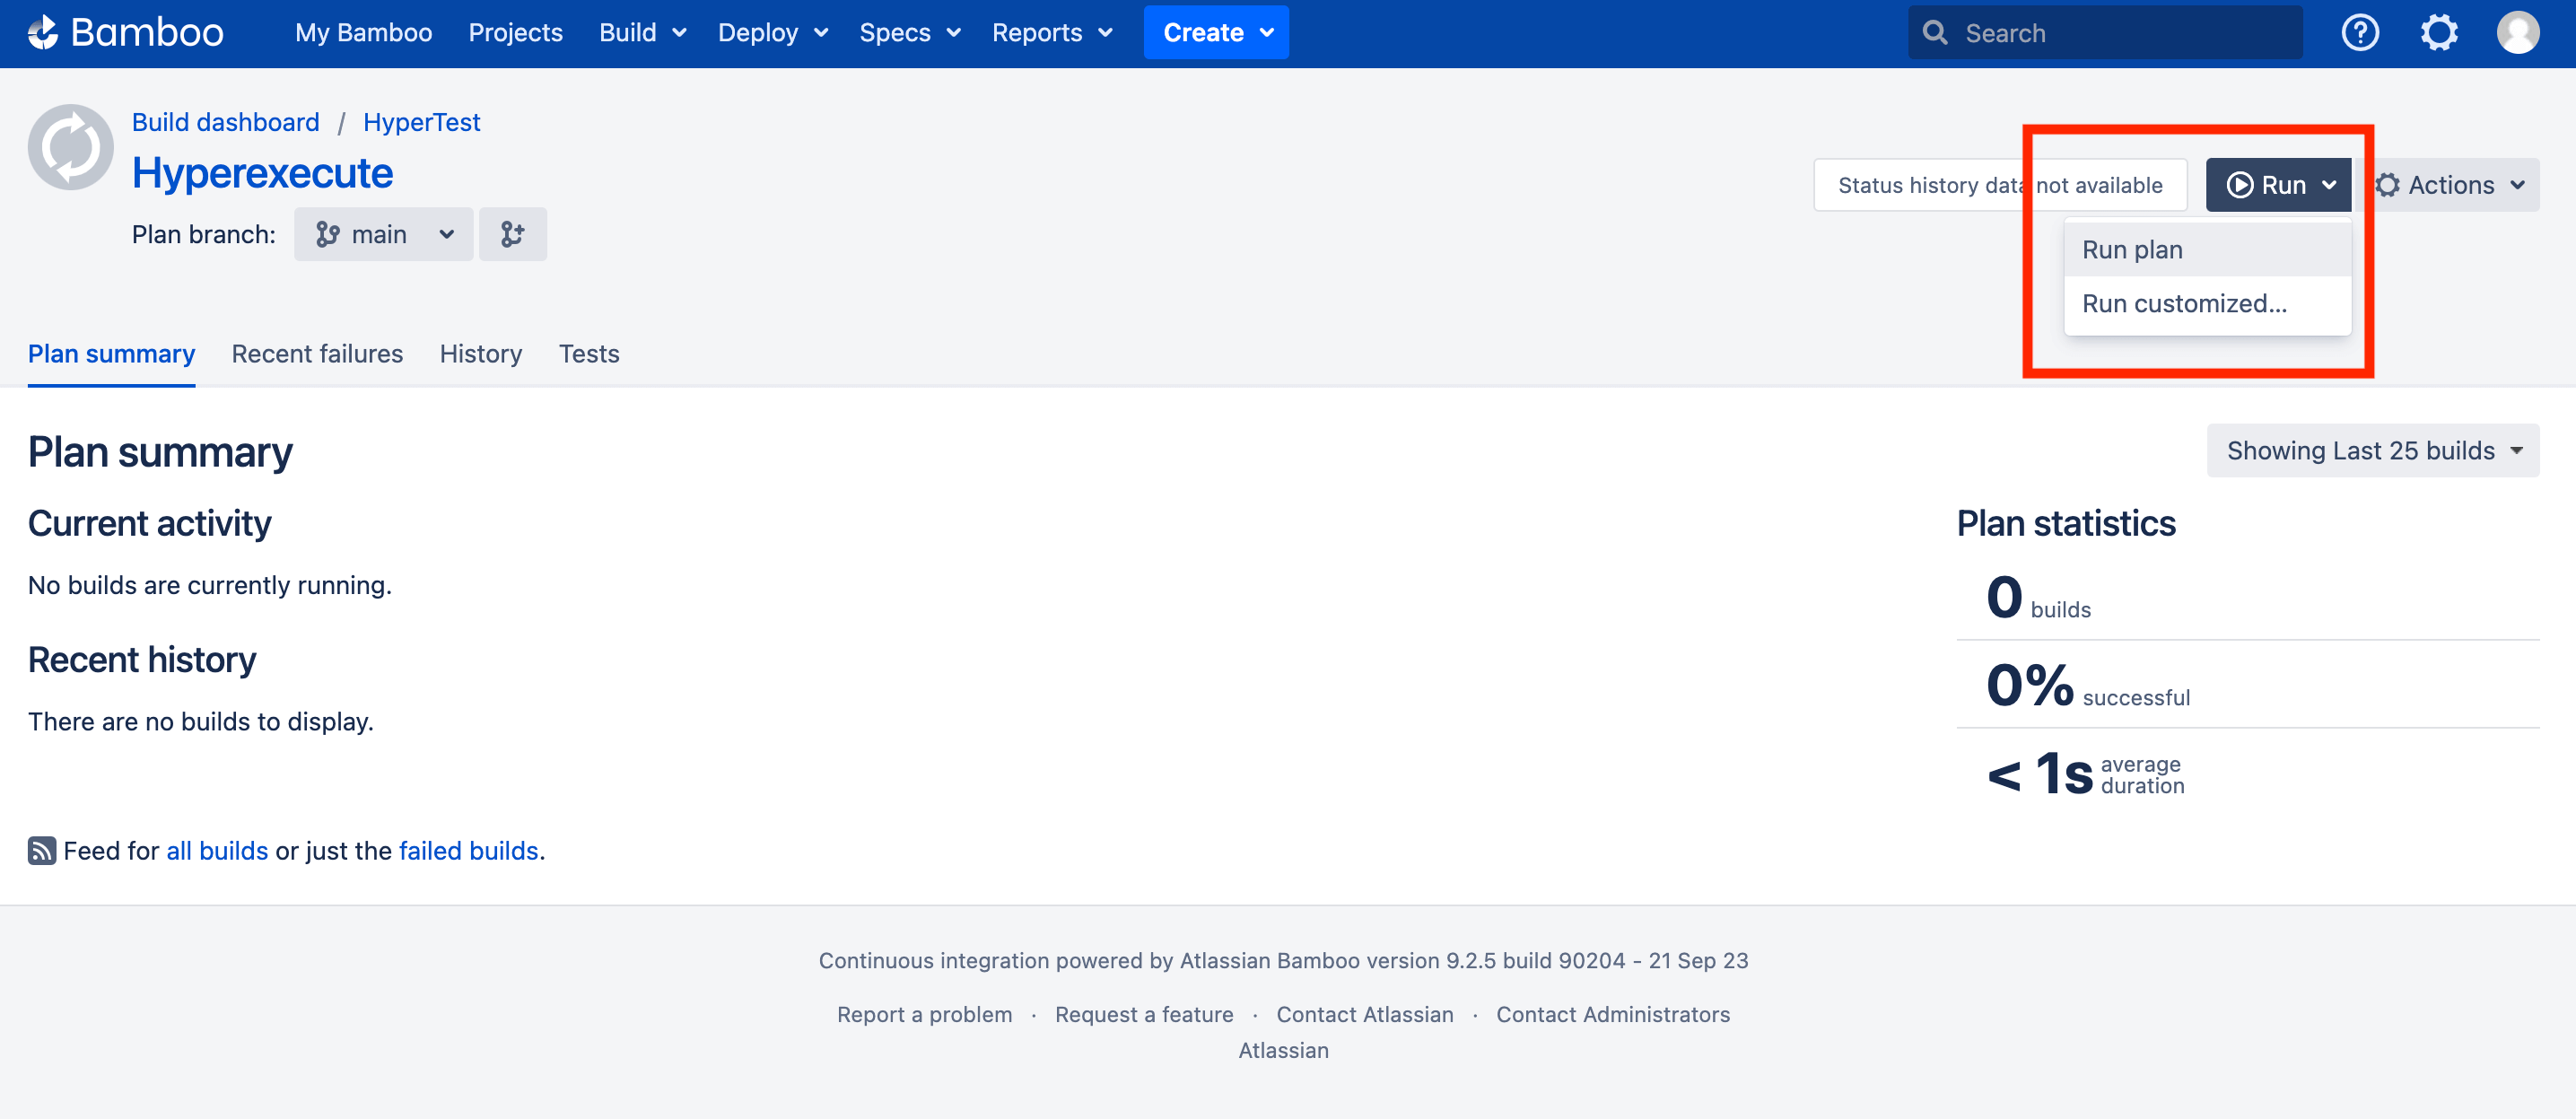
- Click on Run -> Run plan button.
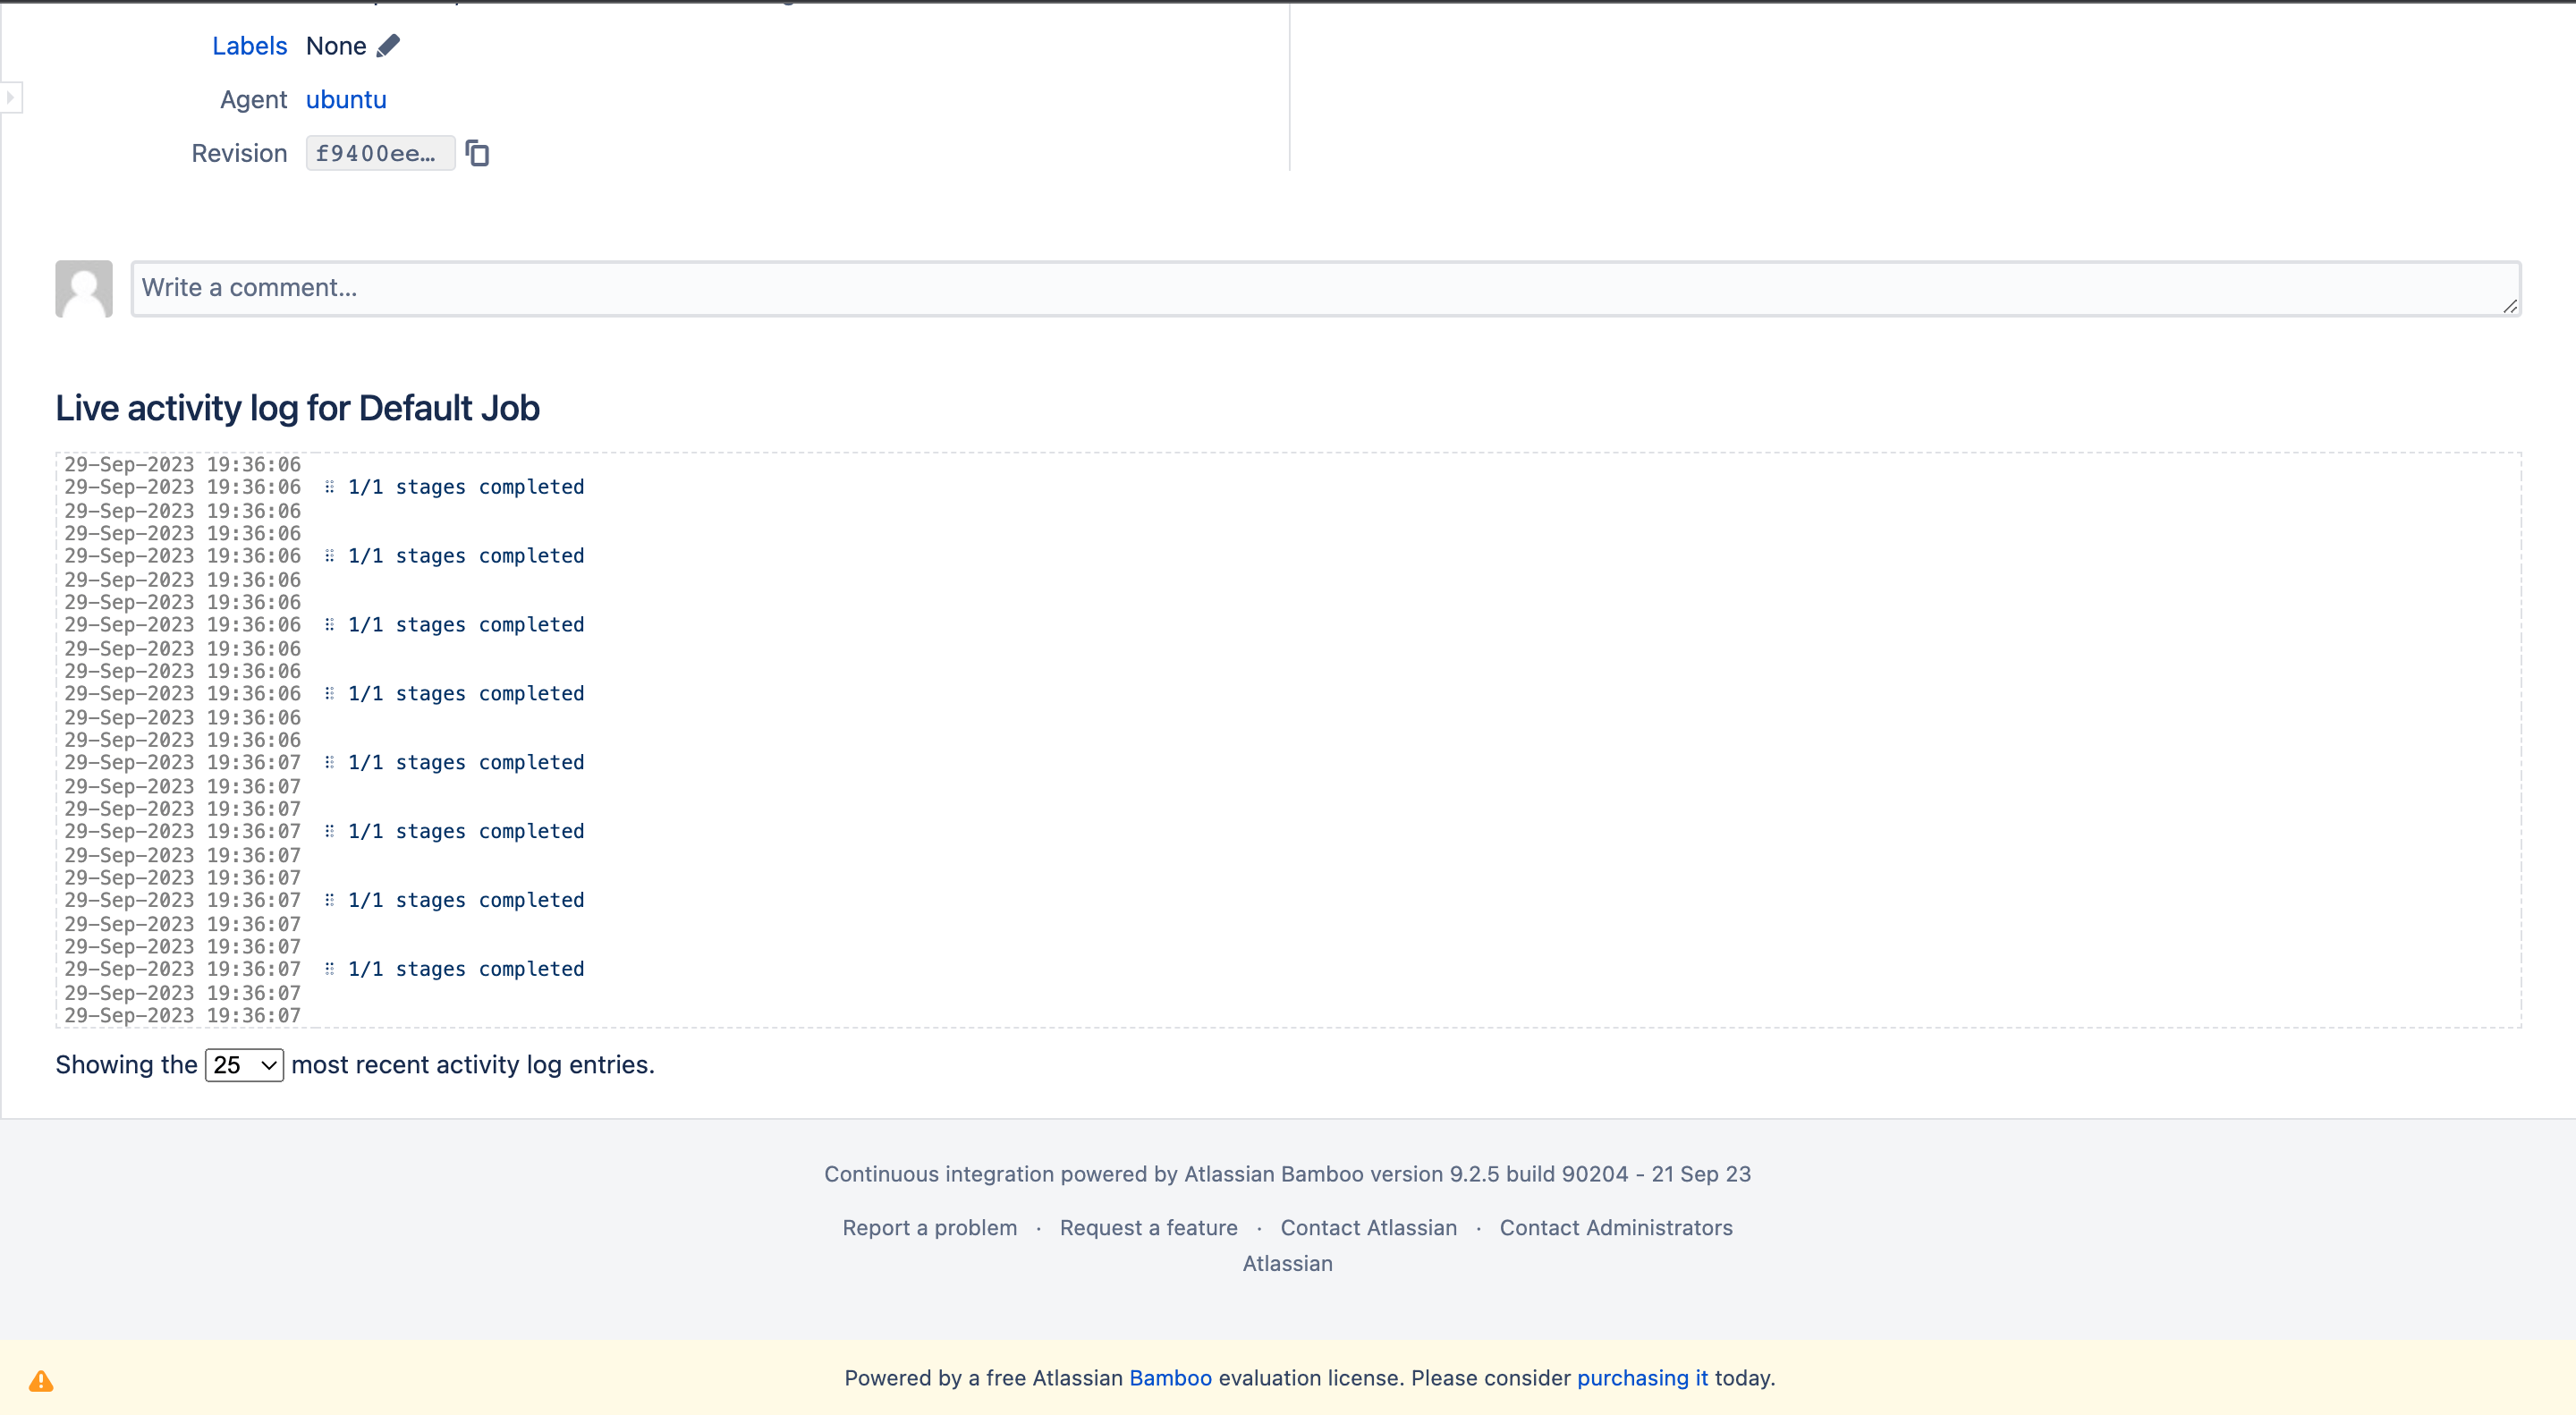
- Test will get triggered and start executing. You can check the activity status of your Job here.
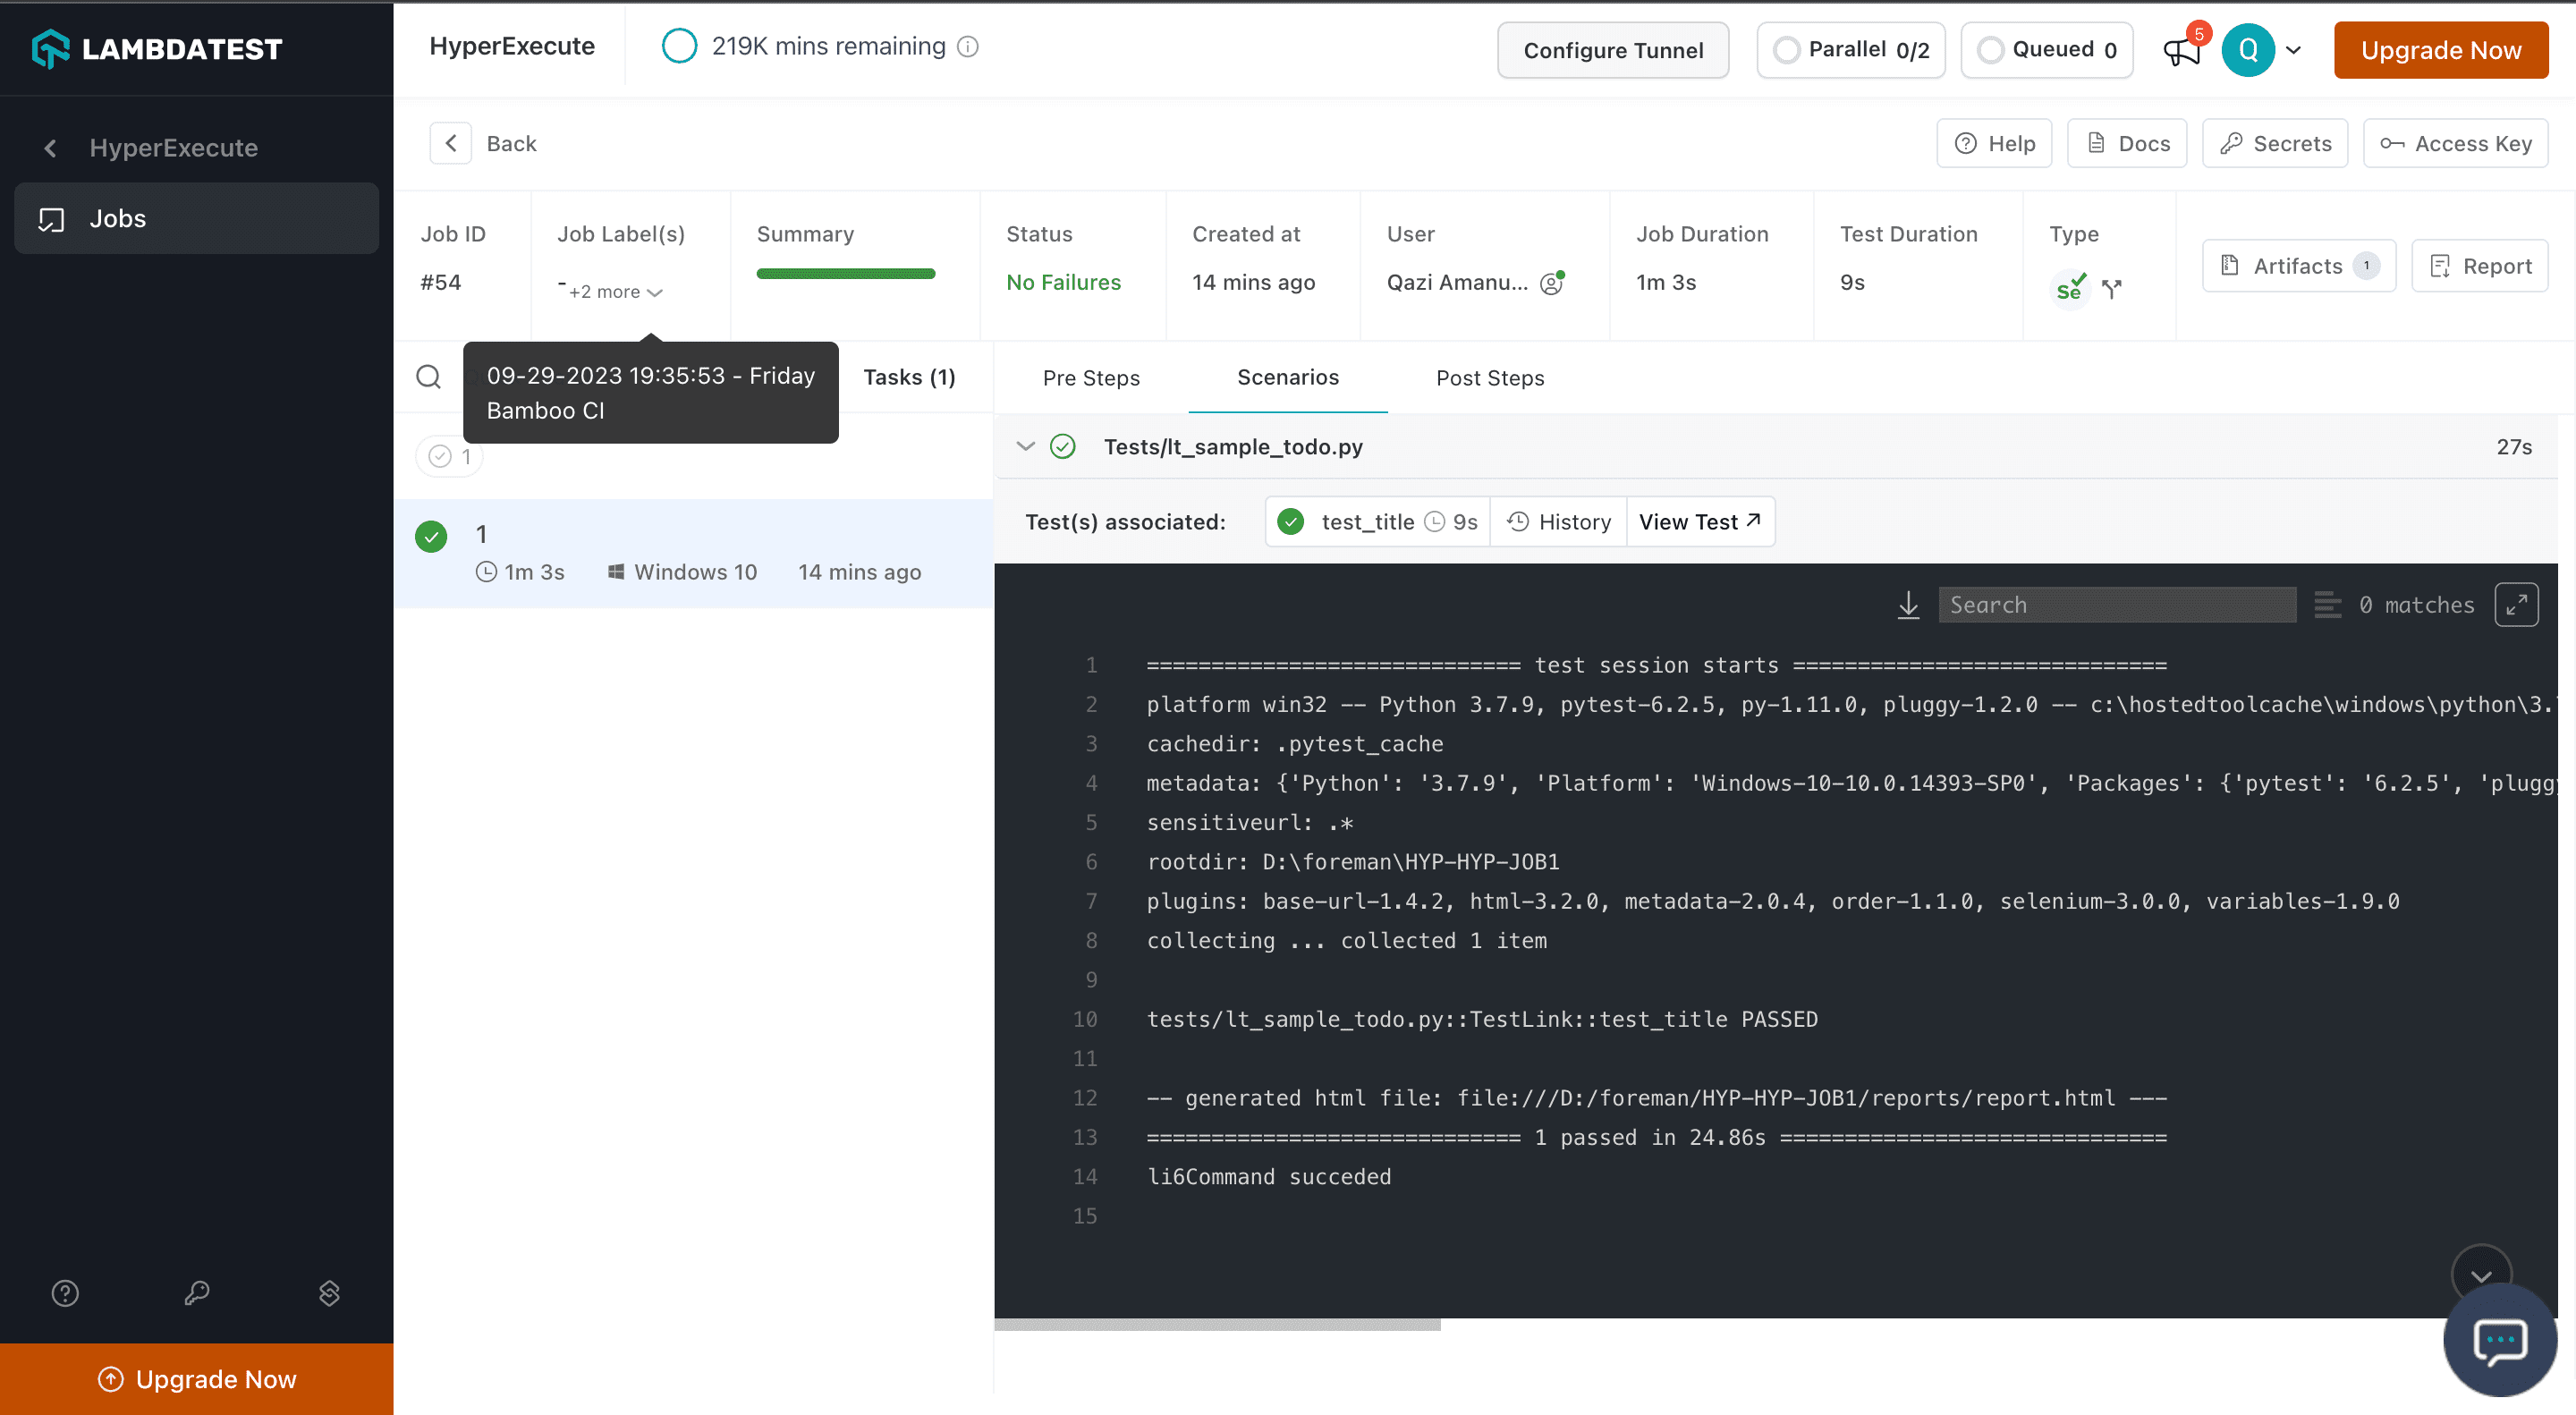
Step 6: Check the Output
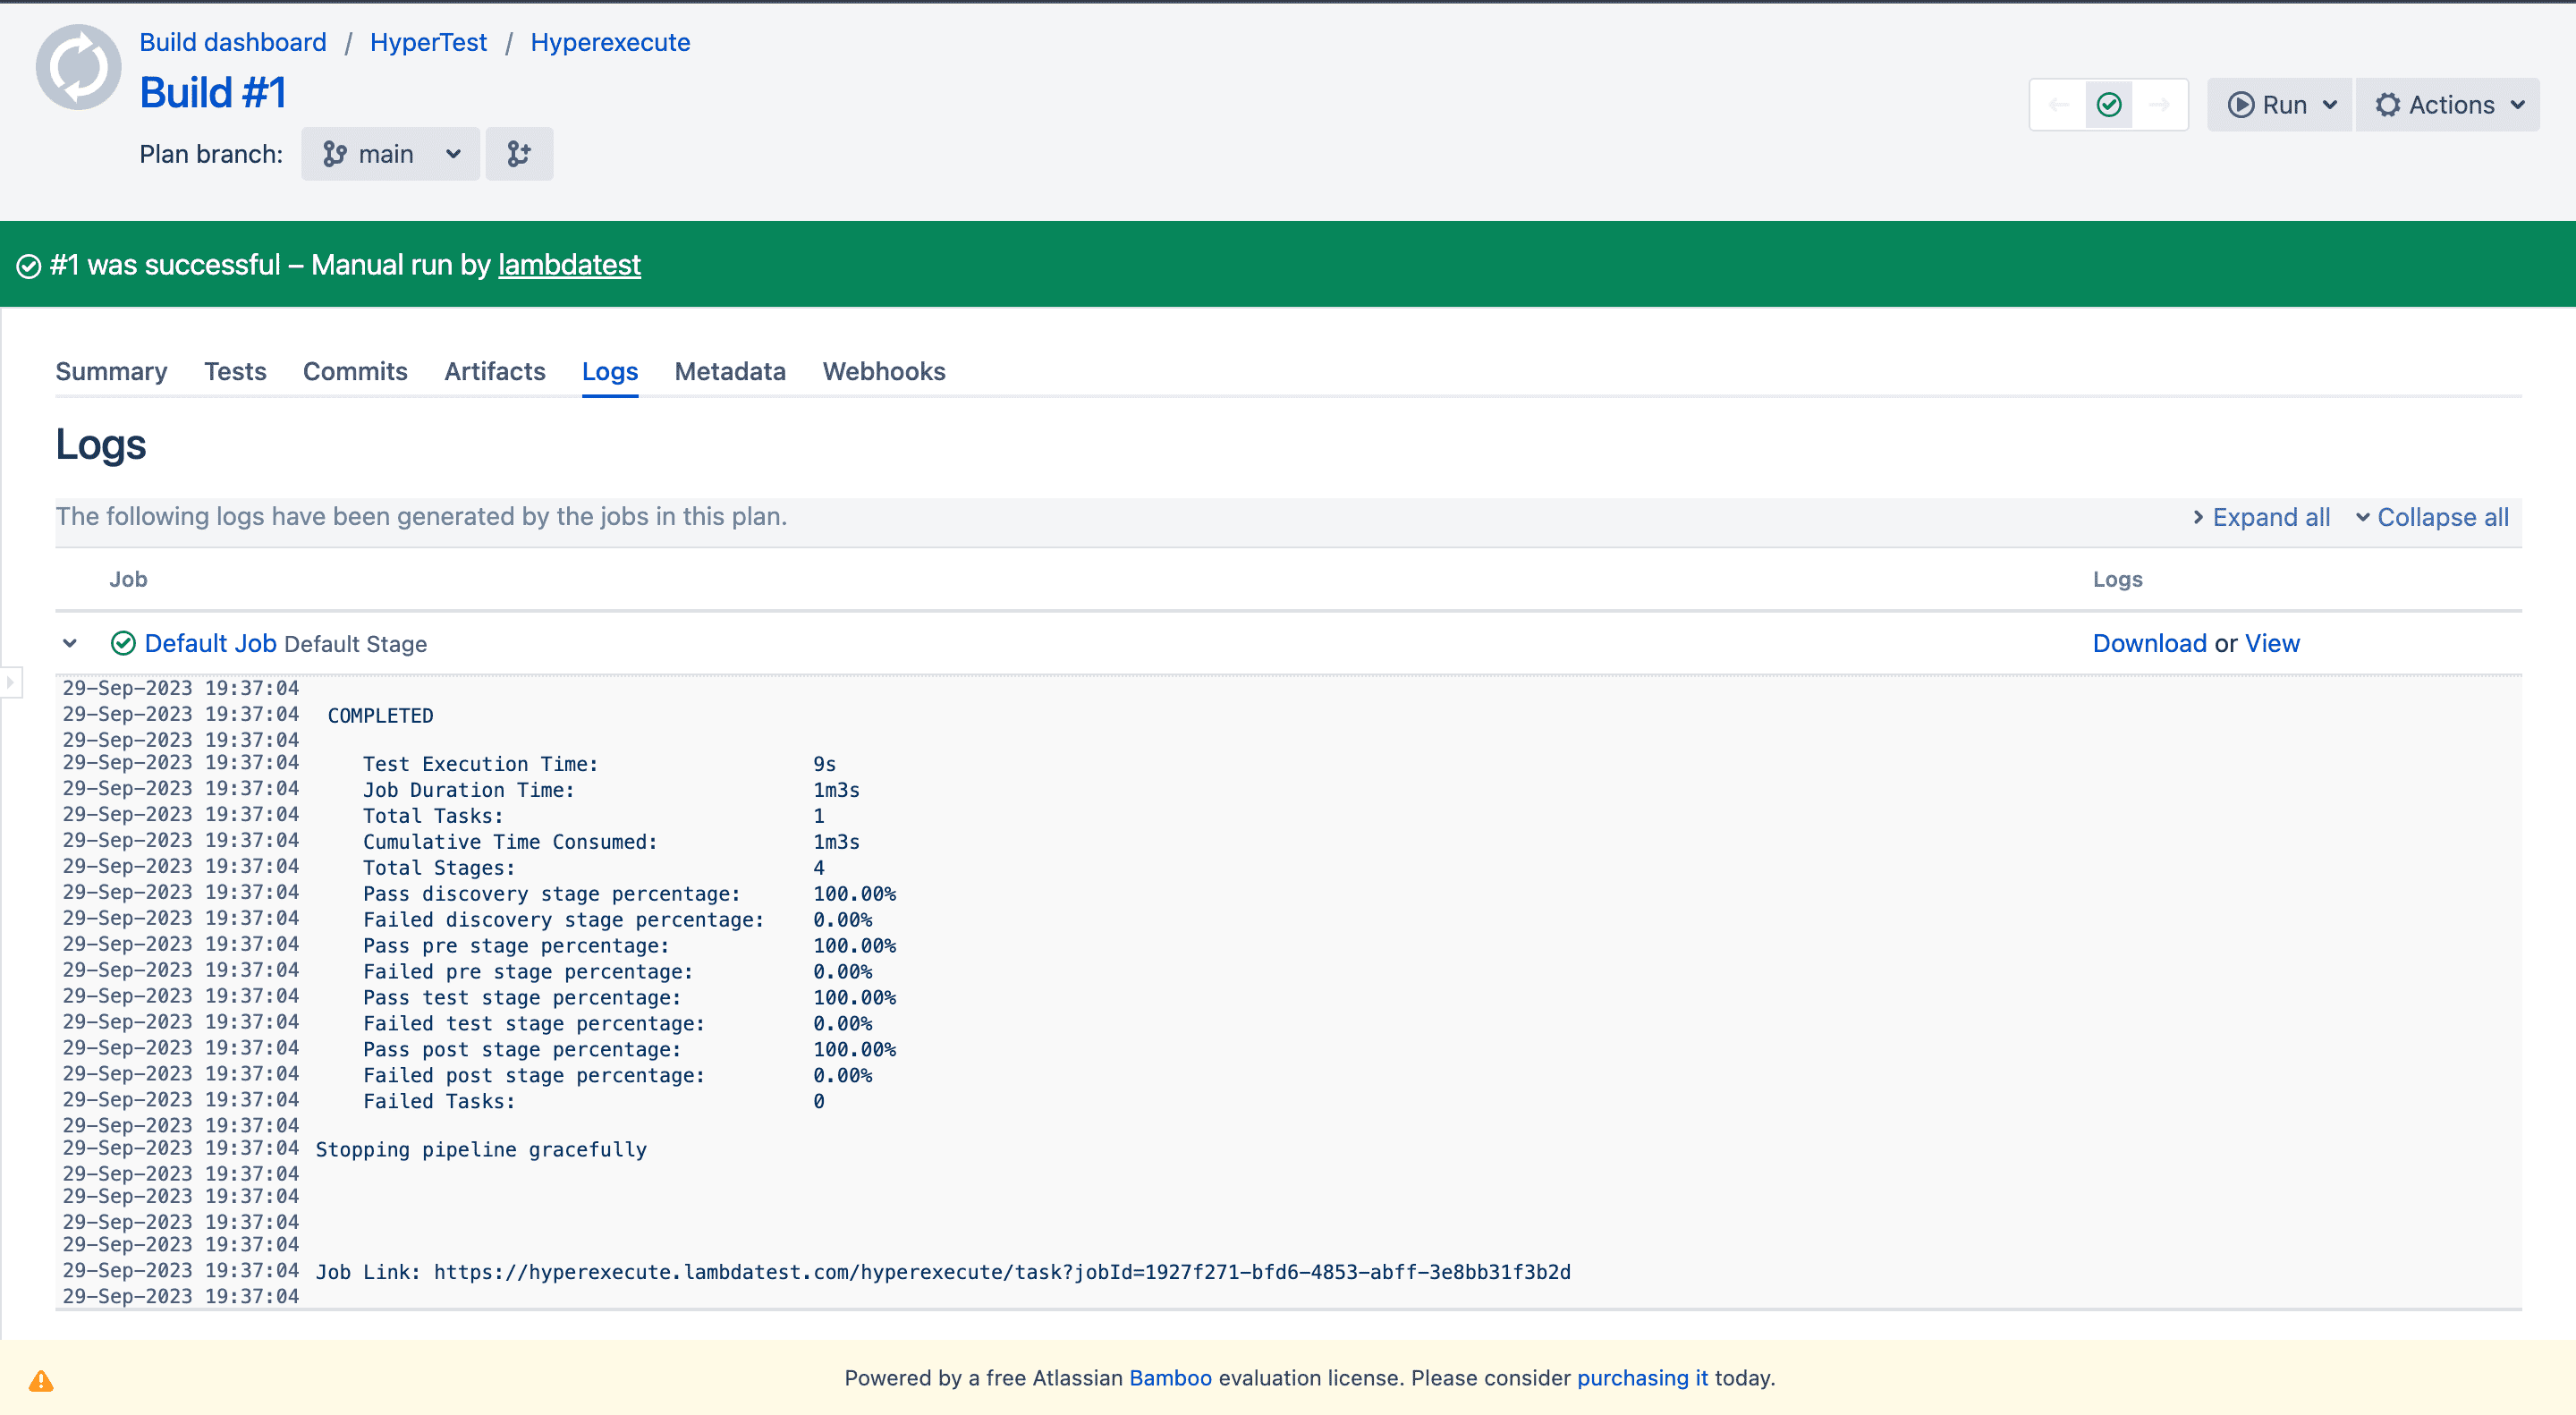
- Logs of the Job Build
- Result on HyperExecute Dashboard