TeamCity Integration With HyperExecute
TeamCity is a build management and continuous integration server developed by JetBrains. It is used to automate the process of building, testing, and deploying software. It supports a wide range of programming languages and technologies, including Java, .NET, Ruby, and Python.
This document will show you how to integrate TeamCity with HyperExecute to greatly shorten your test cycles.
How to Integrate TeamCity with HyperExecute
To integrate TeamCity with HyperExecute, follow the below mentioned steps:
Pre-requisite:
Step 1: Start the TeamCity GUI
- Go to the teamcity/bin folder and run the command ./runAll.sh start to start the TeamCity Server in your system.
- Now type
http://localhost:8111/in your browser to open the TeamCity GUI. - Click on Create Project button.
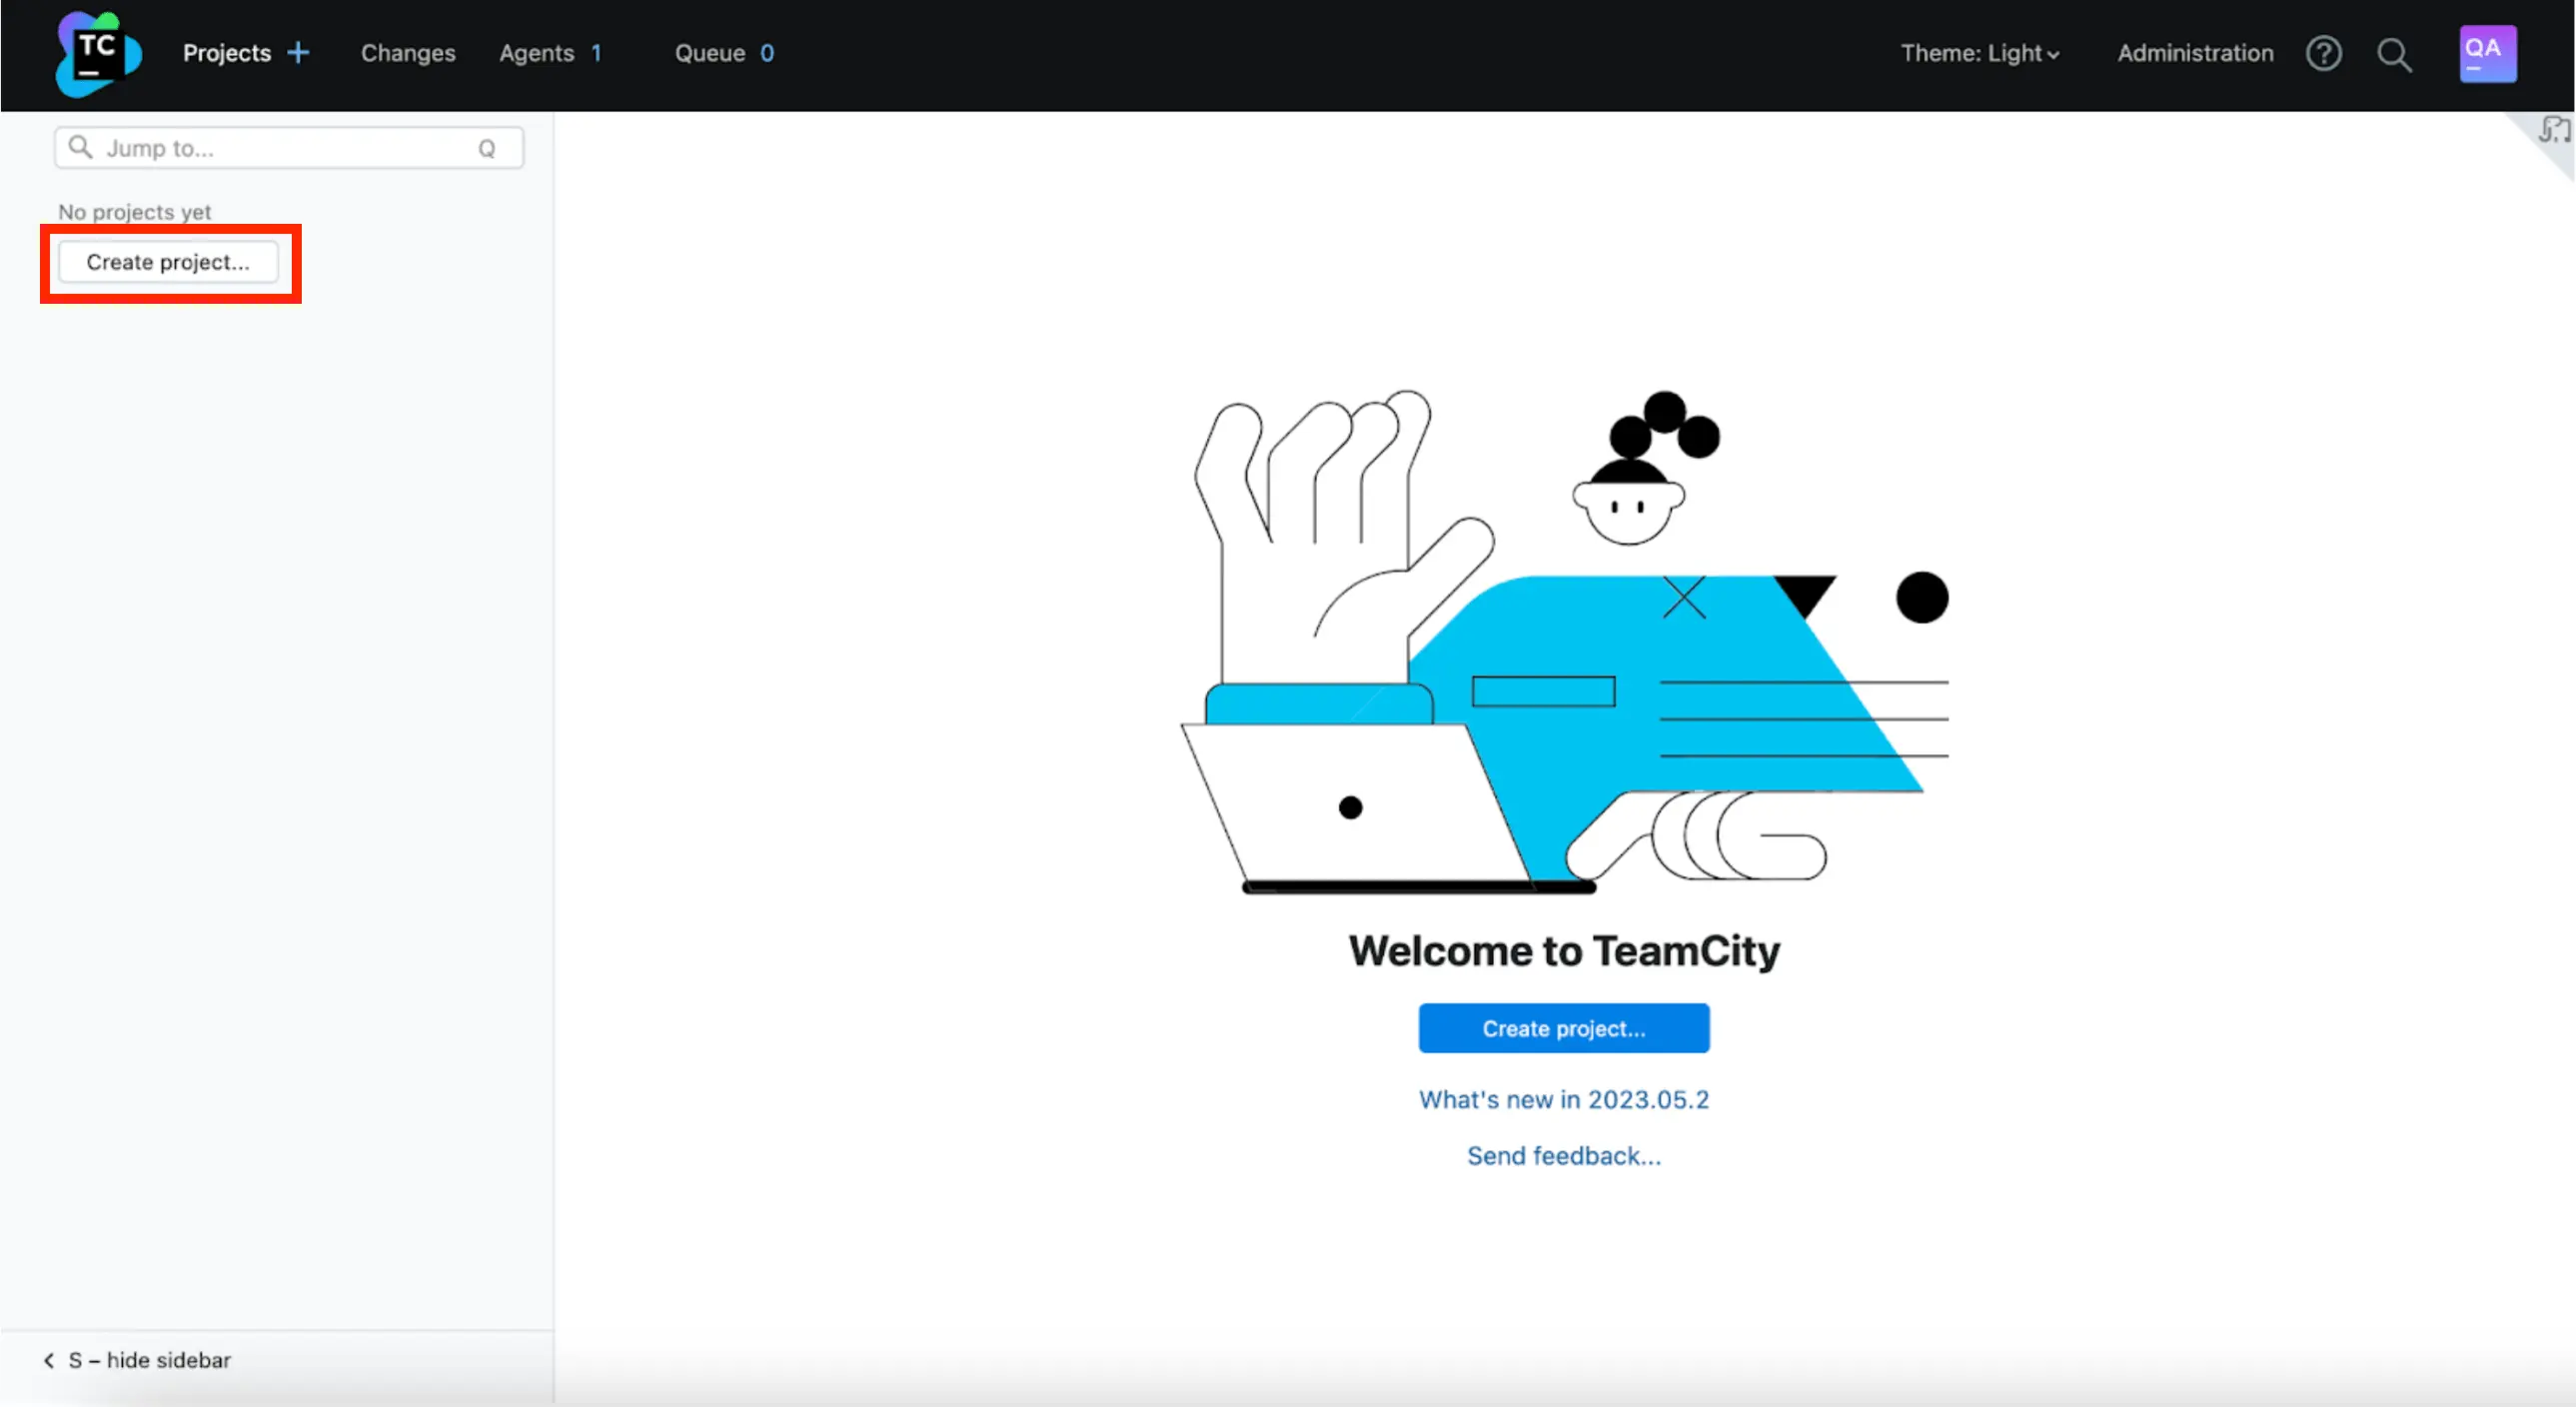
Step 2: Create the Project
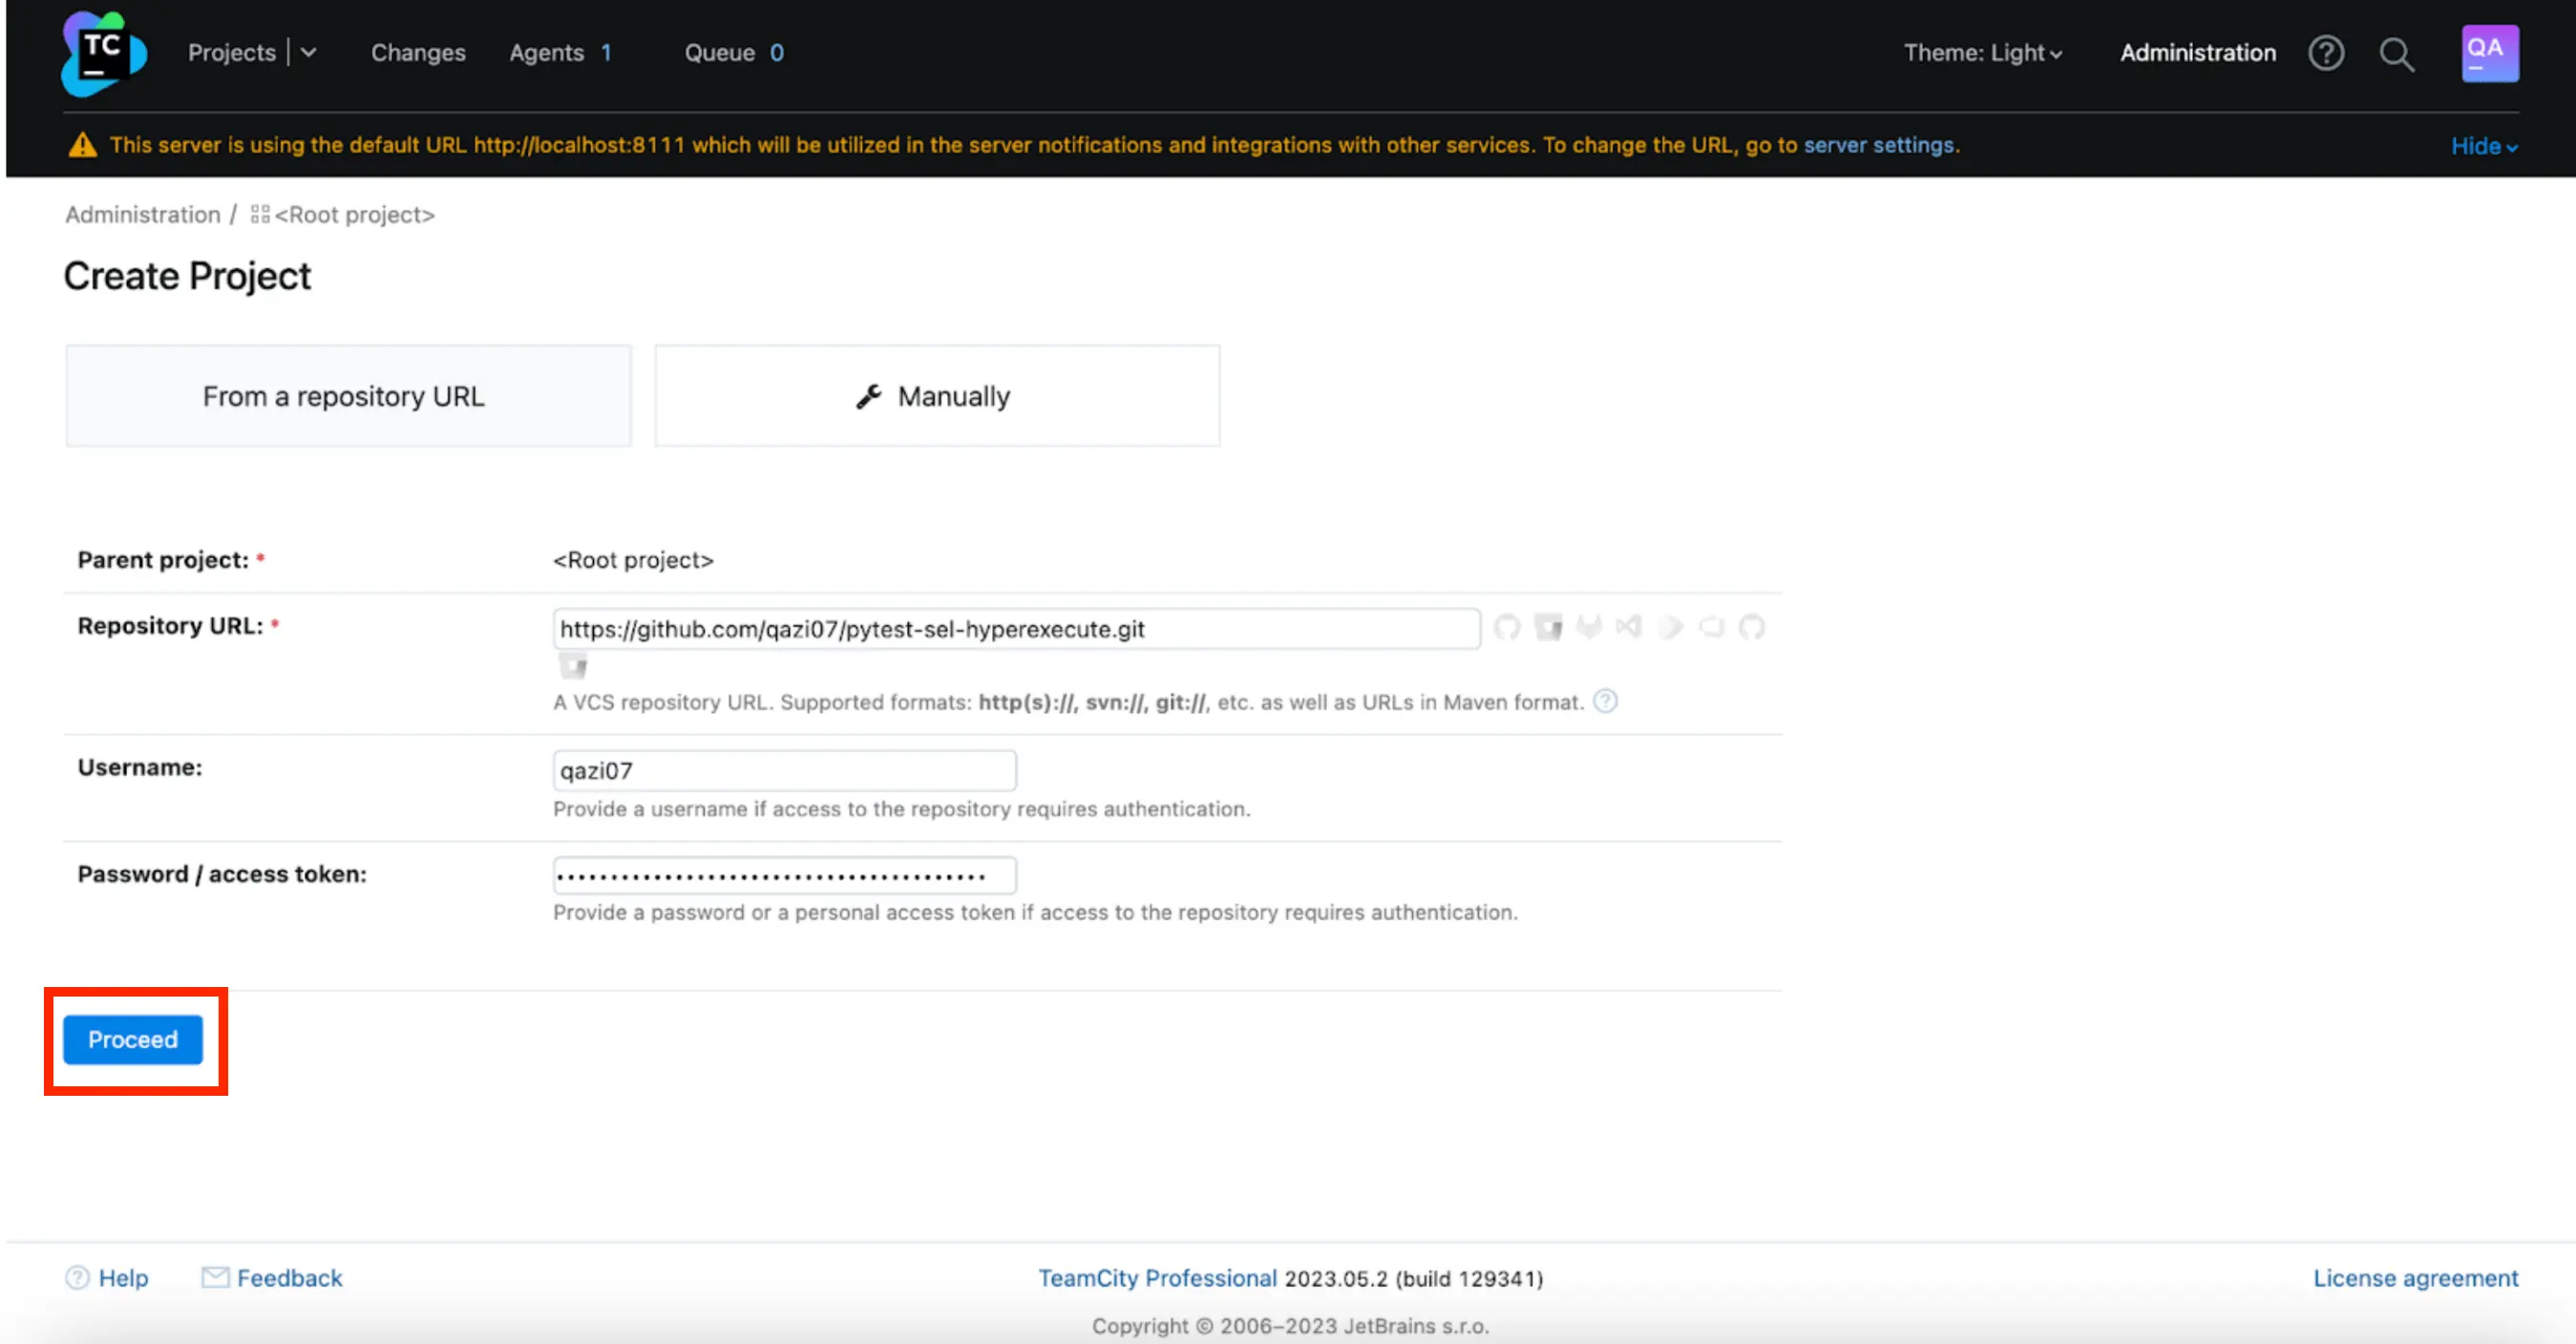
- For the demo purposes, we will be using the GitHub repository to create the project. Thus, select From a repository URL section.
- Enter the Repository URL from which you want to set up the project.
- Enter the Username and Password of your GitHub. (It is required in case the access to the repo needed authentication).
- Click on Proceed button.
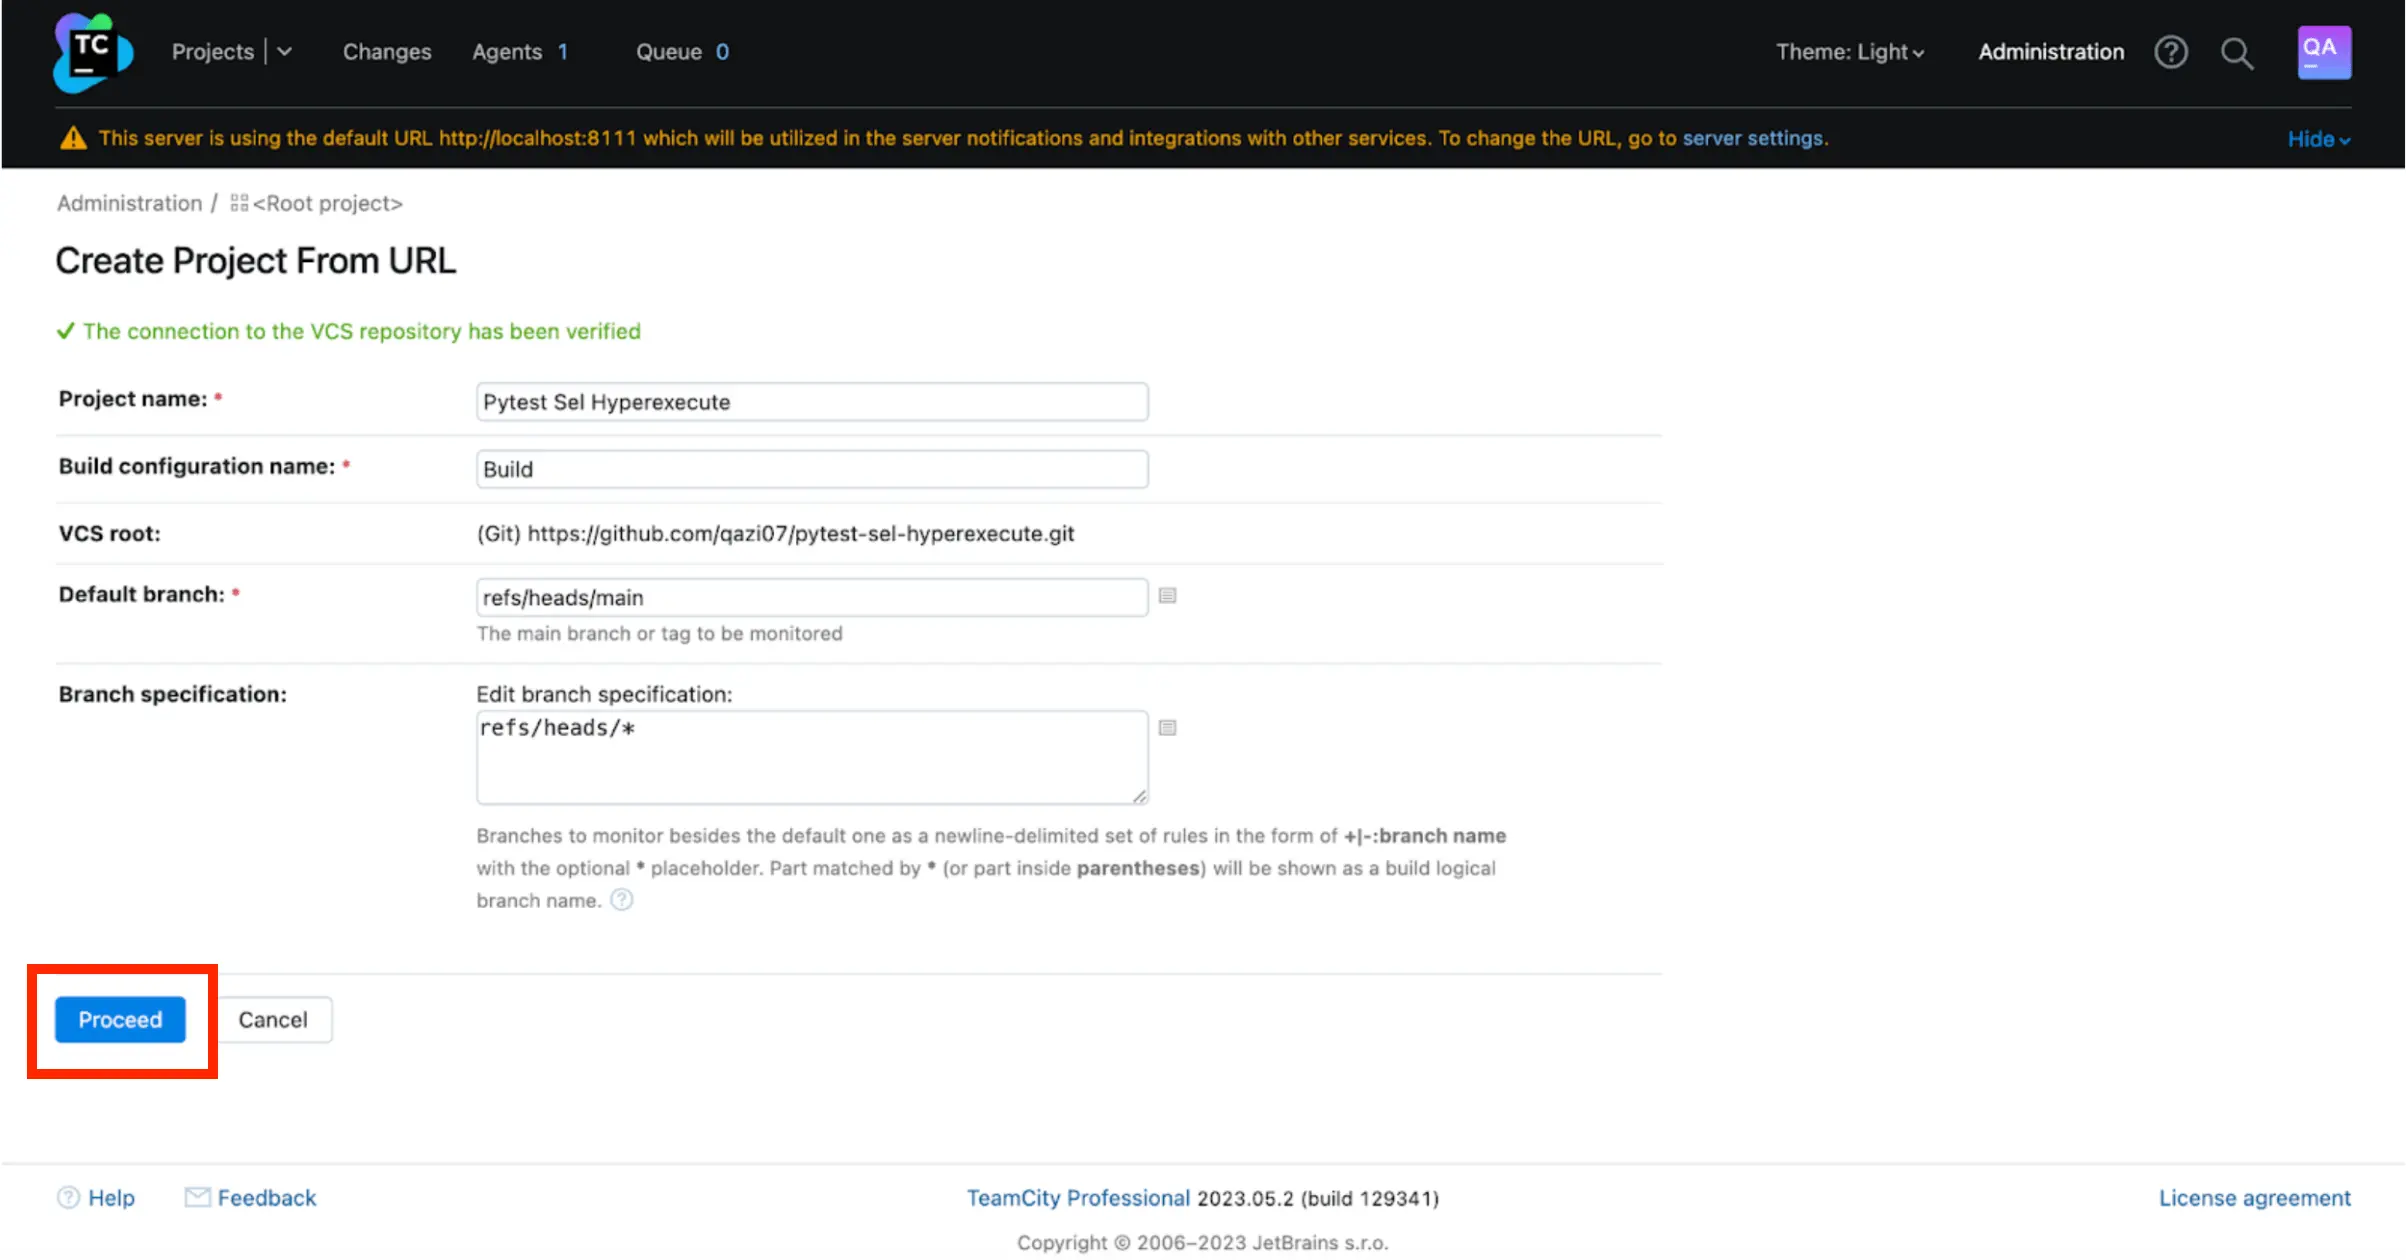
Step 3: Connect your Version Control System.
- Connect your GitHub / GitLab wherever you have stored your tests.
- Enter your Project name.
- Enter your Build config name.
- Mention your Default branch which needs to be monitored.
- If you want that besides your default branch, TeamCity should monitor other branches too, define it in the Branch specification section.
- Click on Proceed button.
Step 4: Start the build process
- Configure your build setup either automatically (fetched by your VCS) or manually. For the demo purpose, we will configure the build process manually.
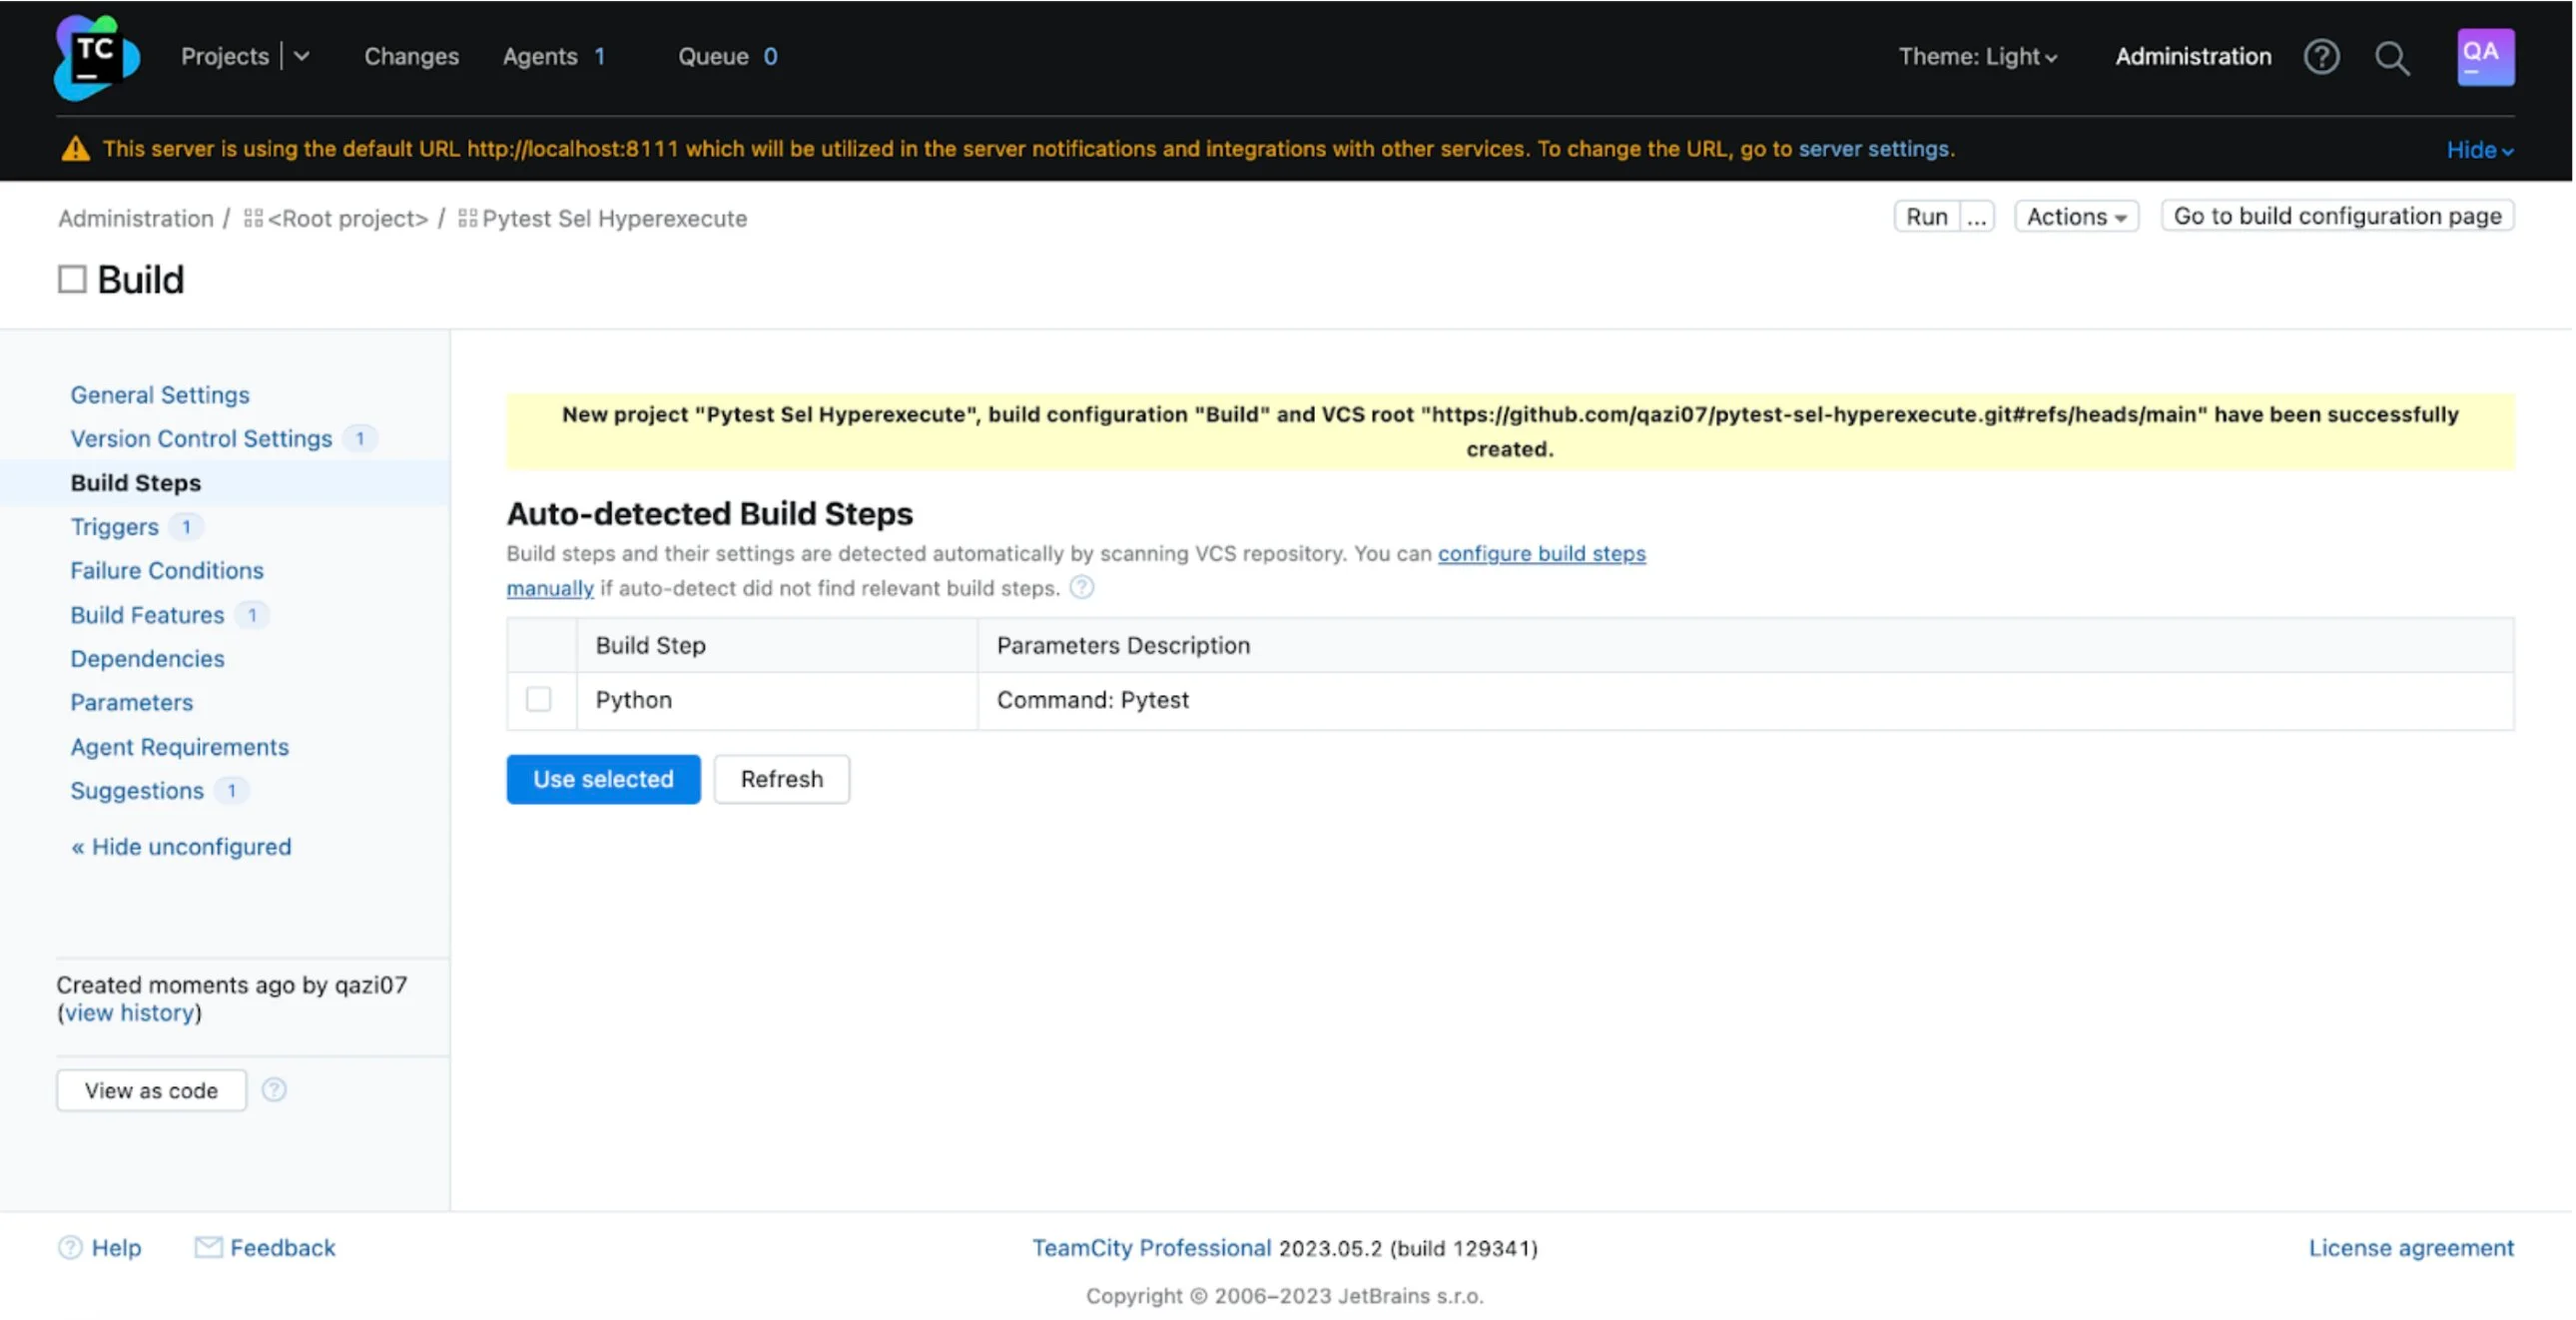
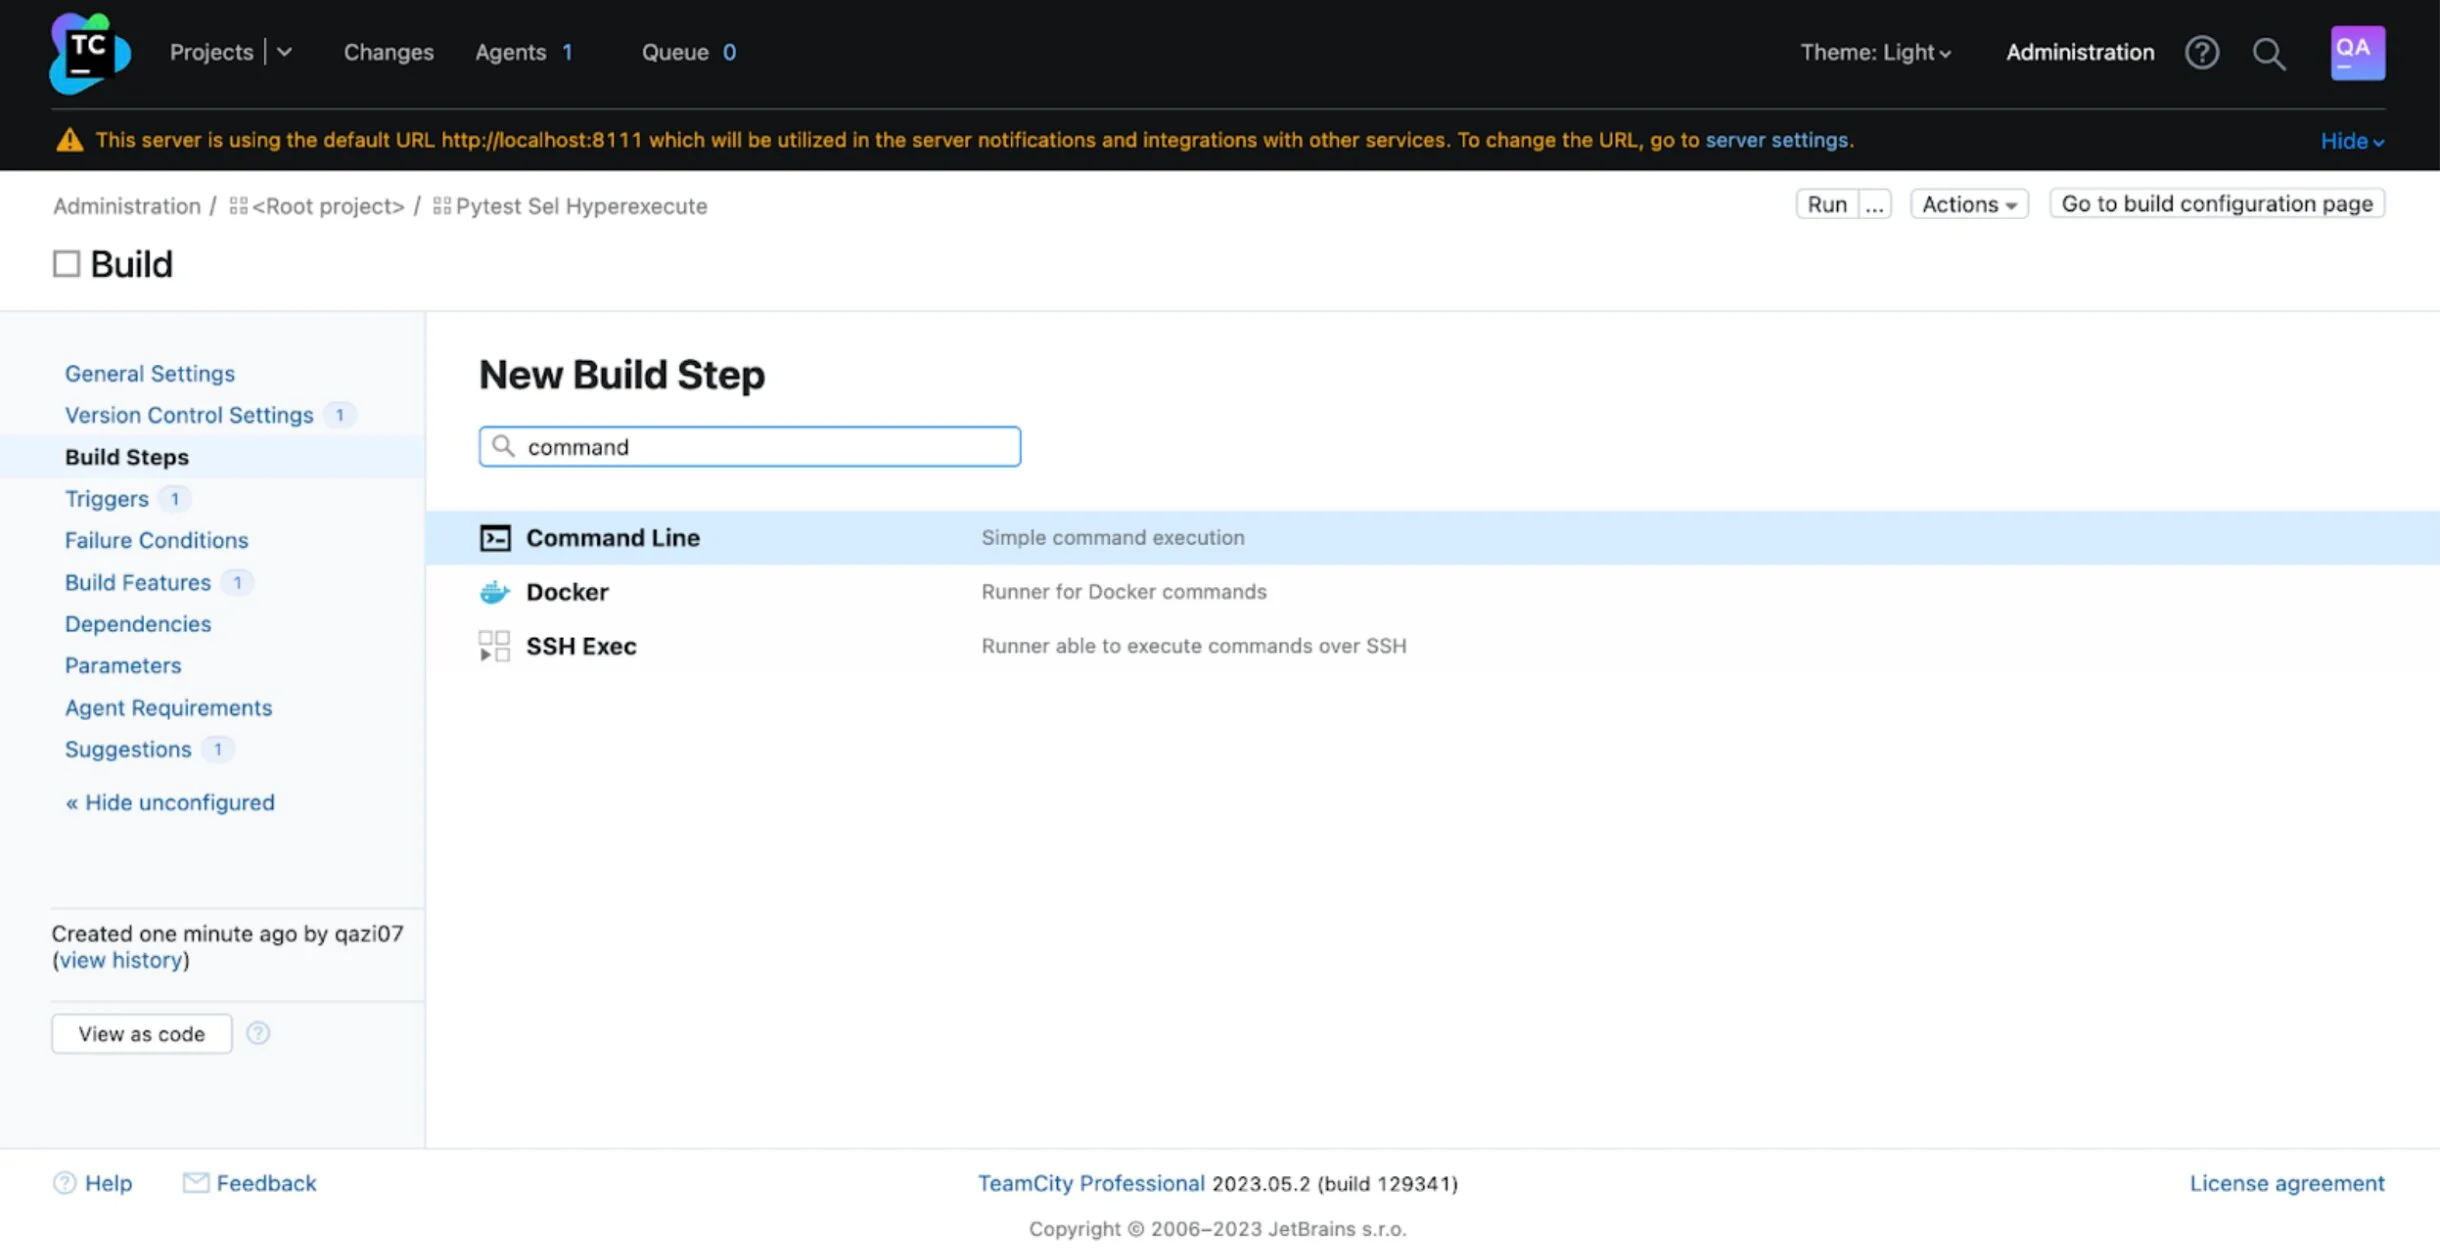
- Select the Command Line for the build setup
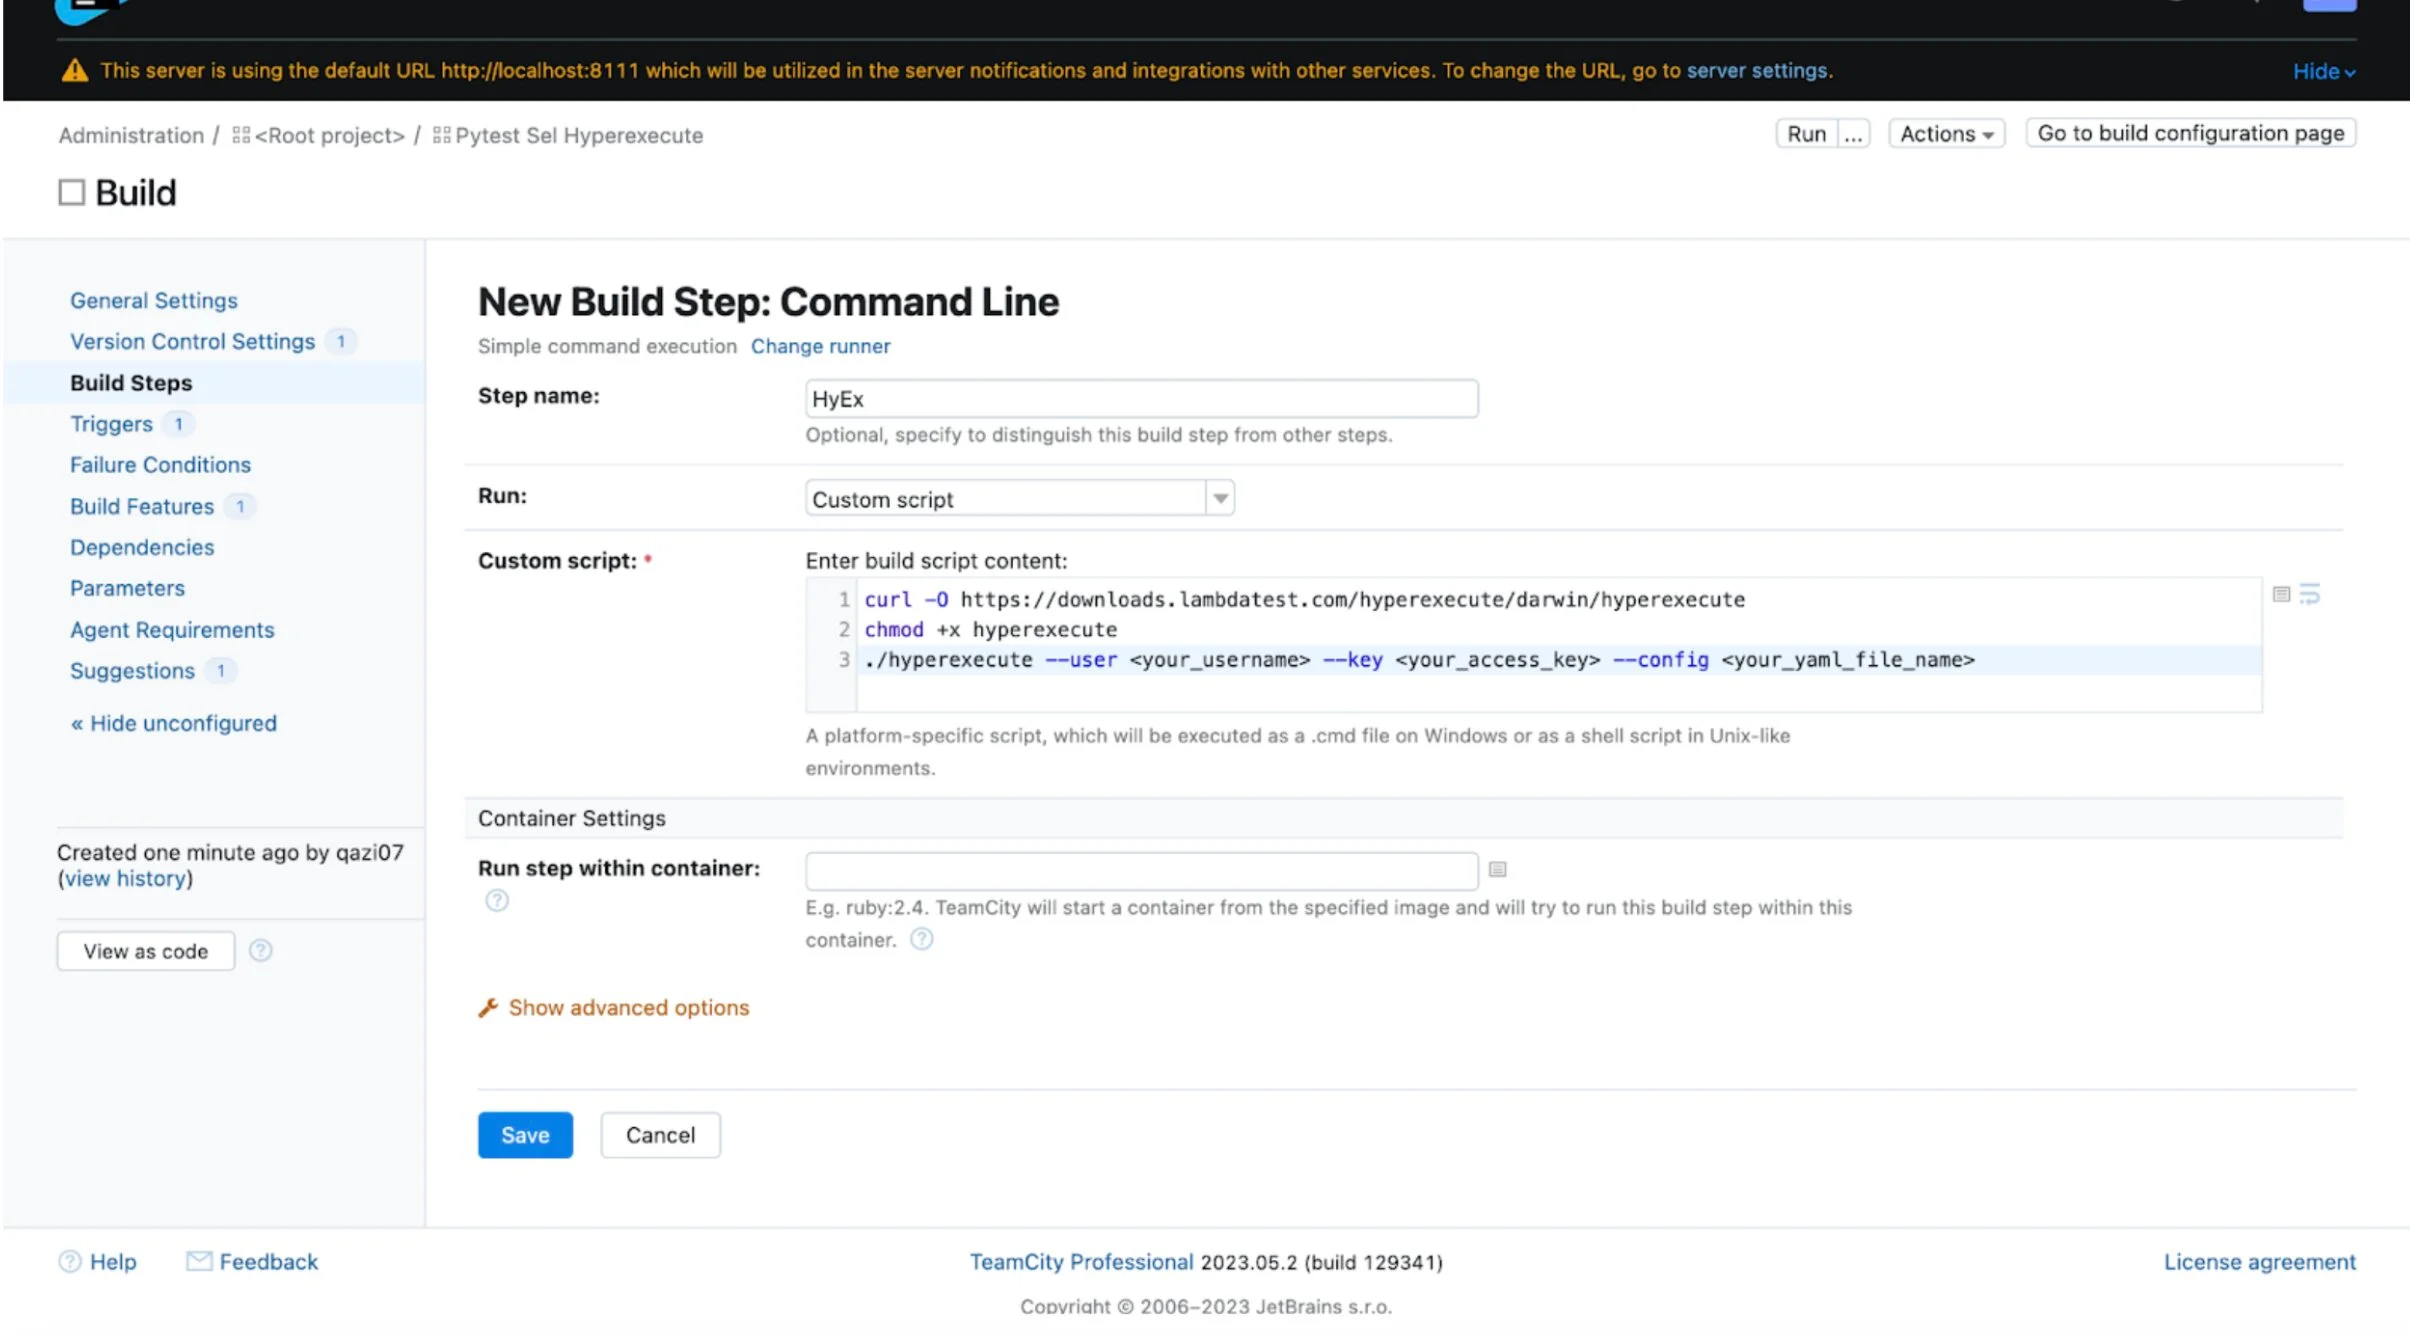
- Enter the Step name (optional).
- Select the Custom Script in the Run field.
- Enter the below mentioned script in the space provided.
curl -O https://downloads.lambdatest.com/hyperexecute/darwin/hyperexecute
chmod +x hyperexecute
./hyperexecute --user <your_username> --key <your_access_key> --config <RELATIVE_PATH_OF_YOUR_YAML_FILE_name>
Since my default agent is mac I am using darwin CLI in the cURL command. Kindly change it according to your system default agent.
- Mac -> darwin
- Linux -> linux
- Windows-> windows
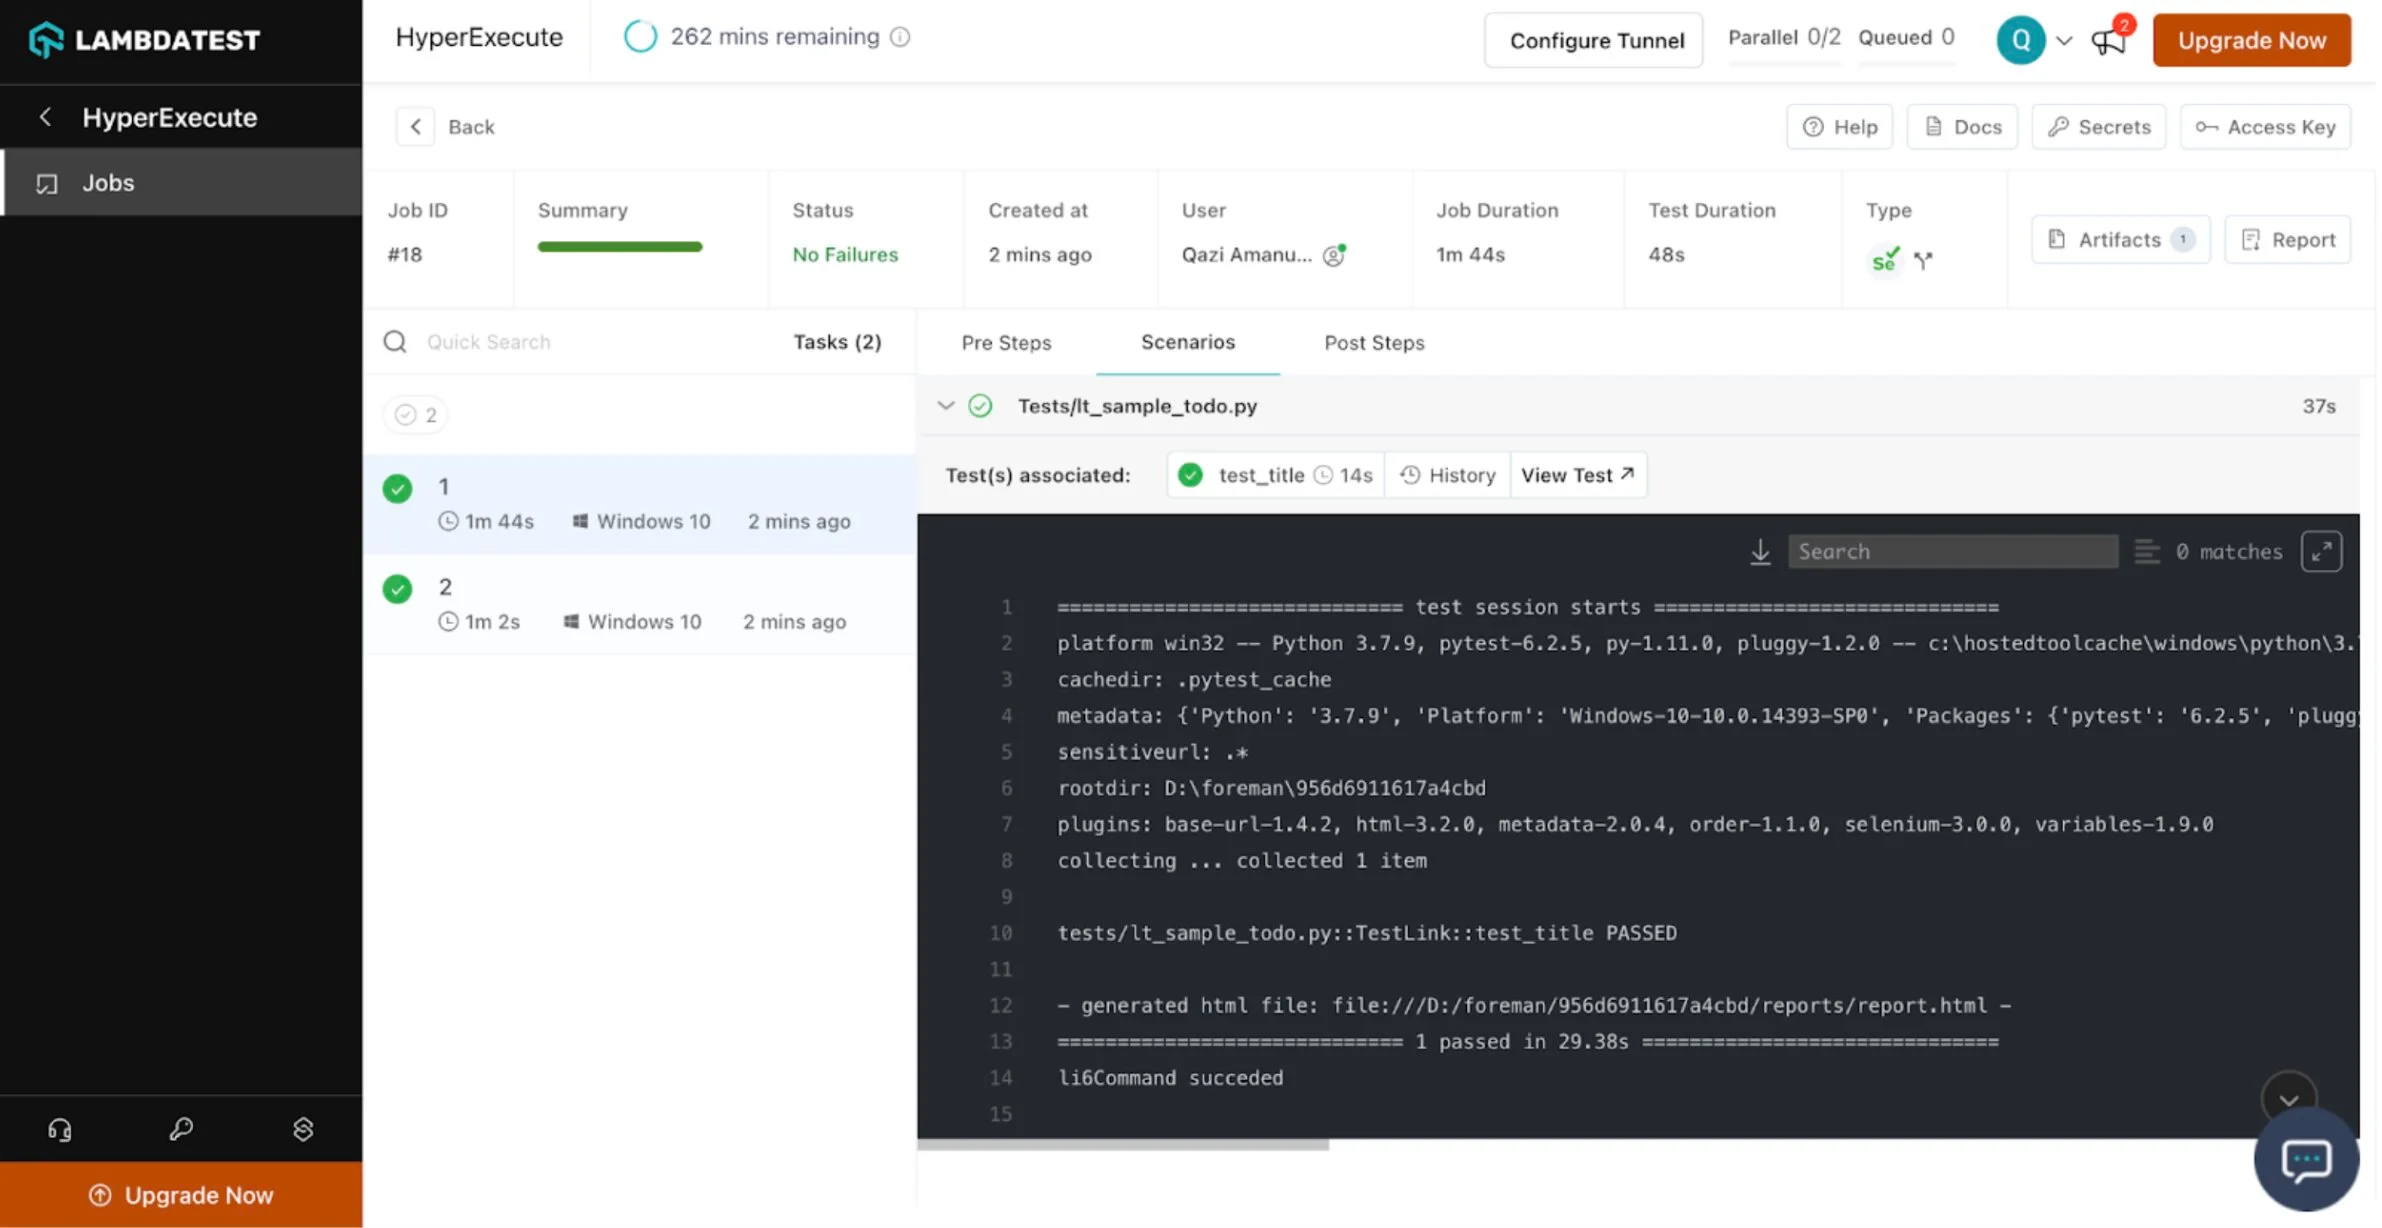
Step 5: Build process is complete
- Now your build process is completed. This will take a couple of minutes to completely execute all the stages.
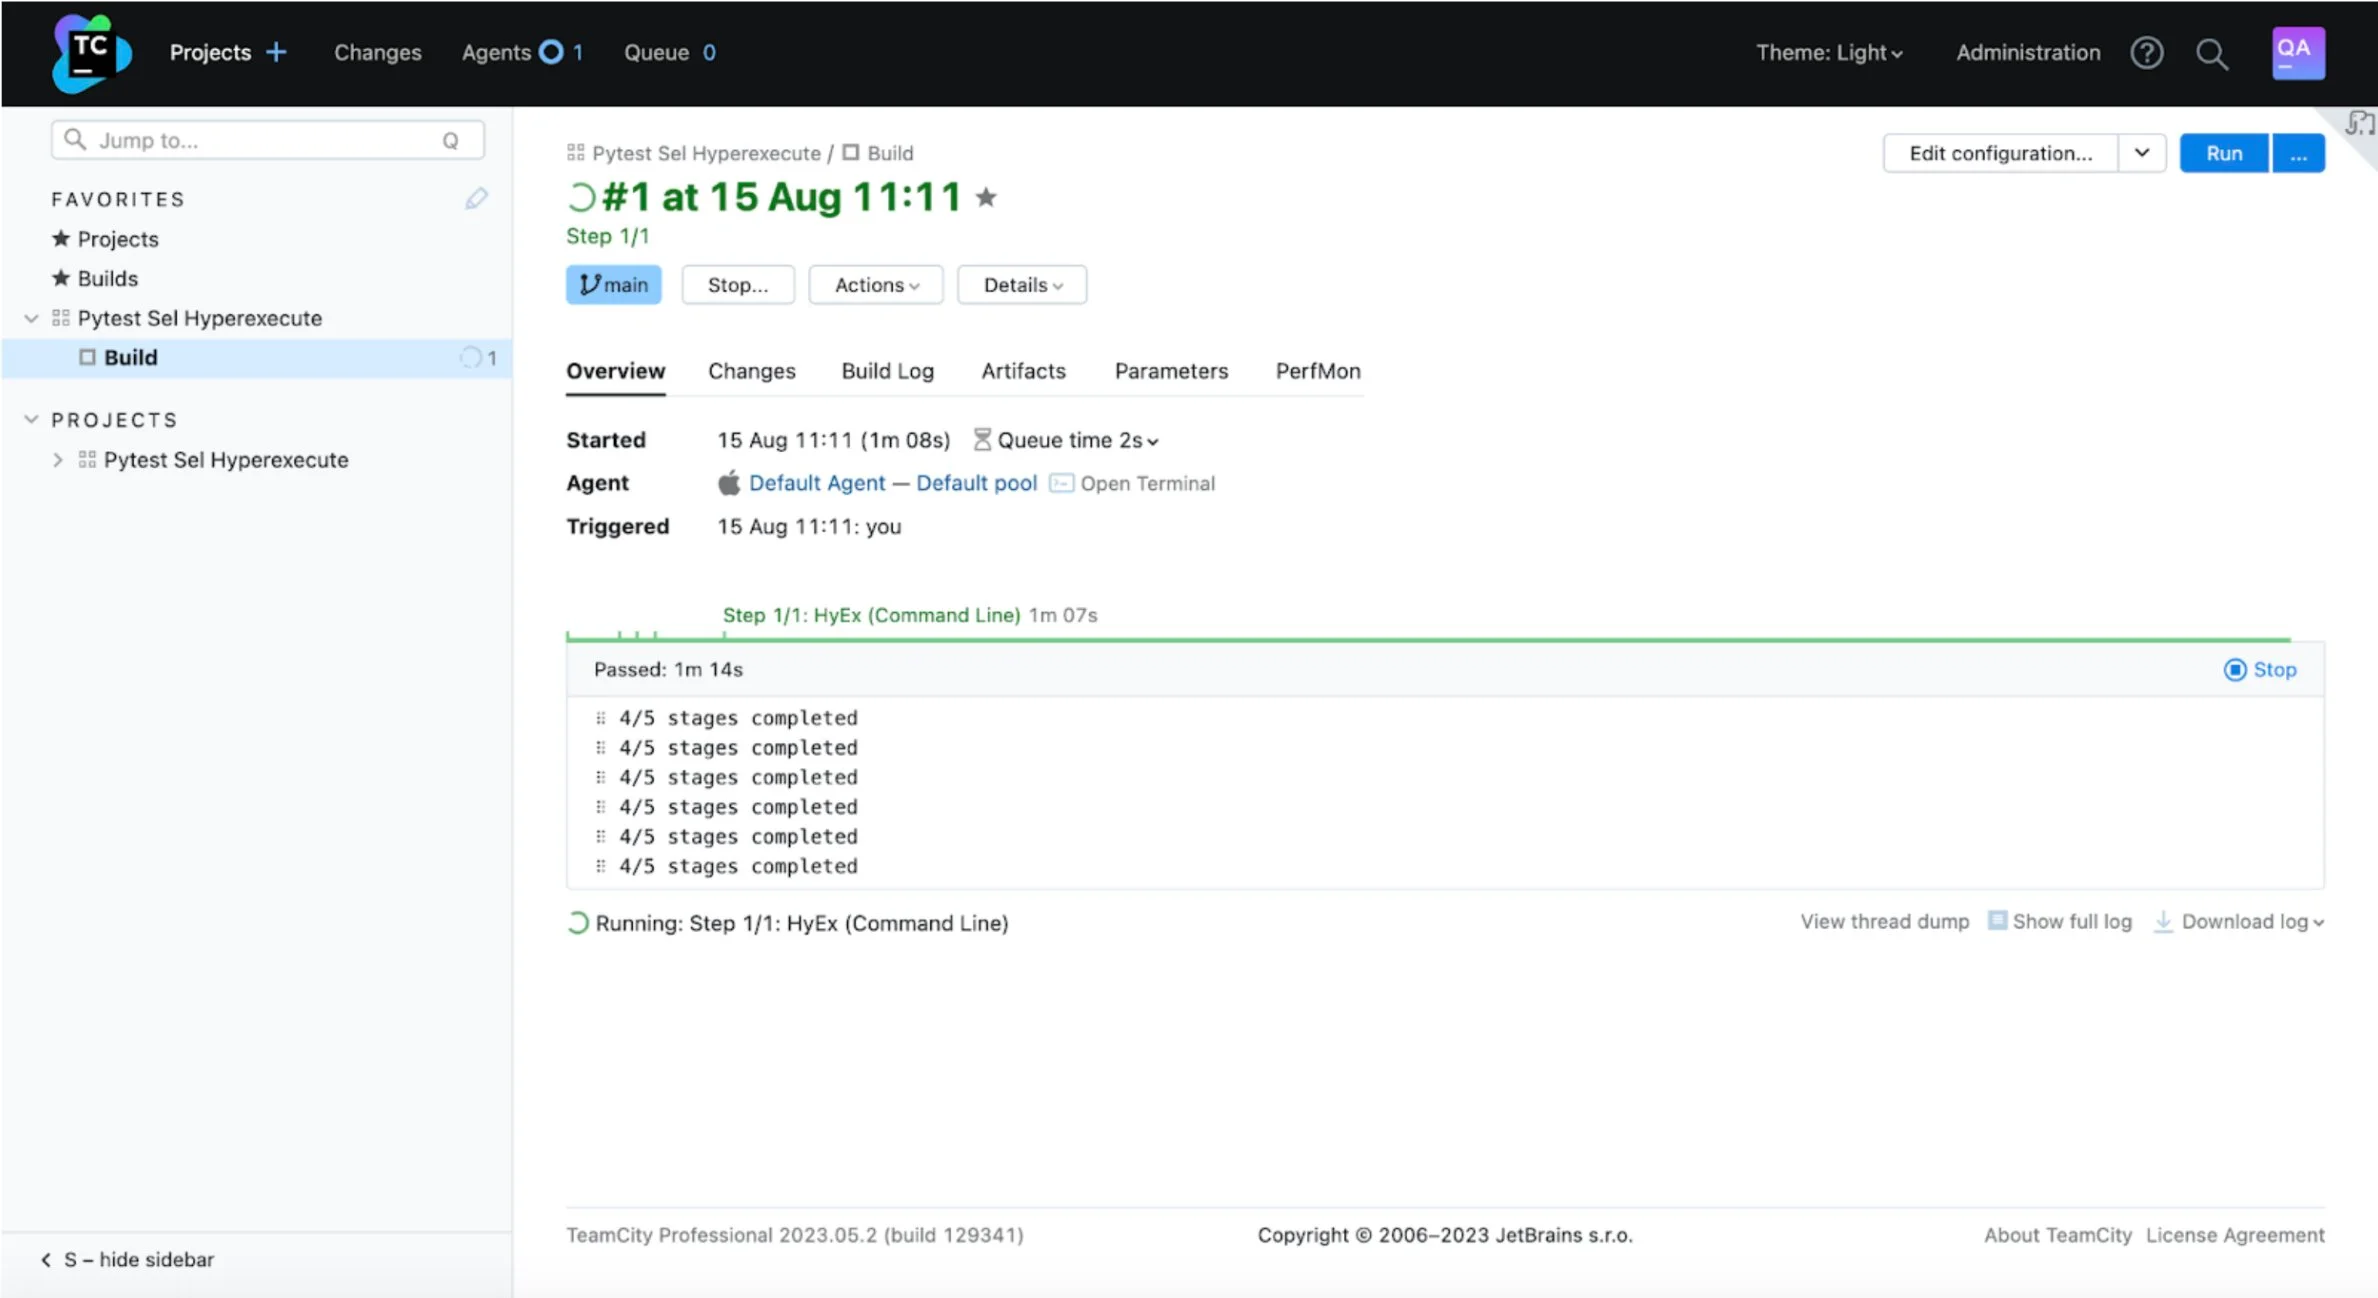
- After the build is successful, go to your TestMu AI Dashboard and check the output of the triggered Job.