Triggering tests from Buildkite CI/CD to TestMu AI
Buildkite is a continuous integration (CI) and continuous deployment (CD) platform that integrates with version control systems to automate the testing and release of software. Unlike traditional CI/CD solutions, Buildkite allows developers to run builds on their own infrastructure, offering a hybrid model that combines the flexibility of self-hosted runners with the convenience of a cloud-based UI. This ensures faster build times, high levels of security, and scalability to meet the demands of projects of any size.
TestMu AI now integrates with Buildkite to boost your go-to-market delivery. Perform automated cross browser testing with TestMu AI to ensure your development code renders seamlessly through an online Selenium grid providing 3000+ real browsers running through machines on the cloud. Perform automation testing in parallel with TestMu AI’s Selenium grid to trim down your test cycles drastically.
Prerequisites
- Buildkite account
- A GitHub repository. Here is our sample GitHub repository for Buildkite.
Integrating Buildkite with TestMu AI via UI
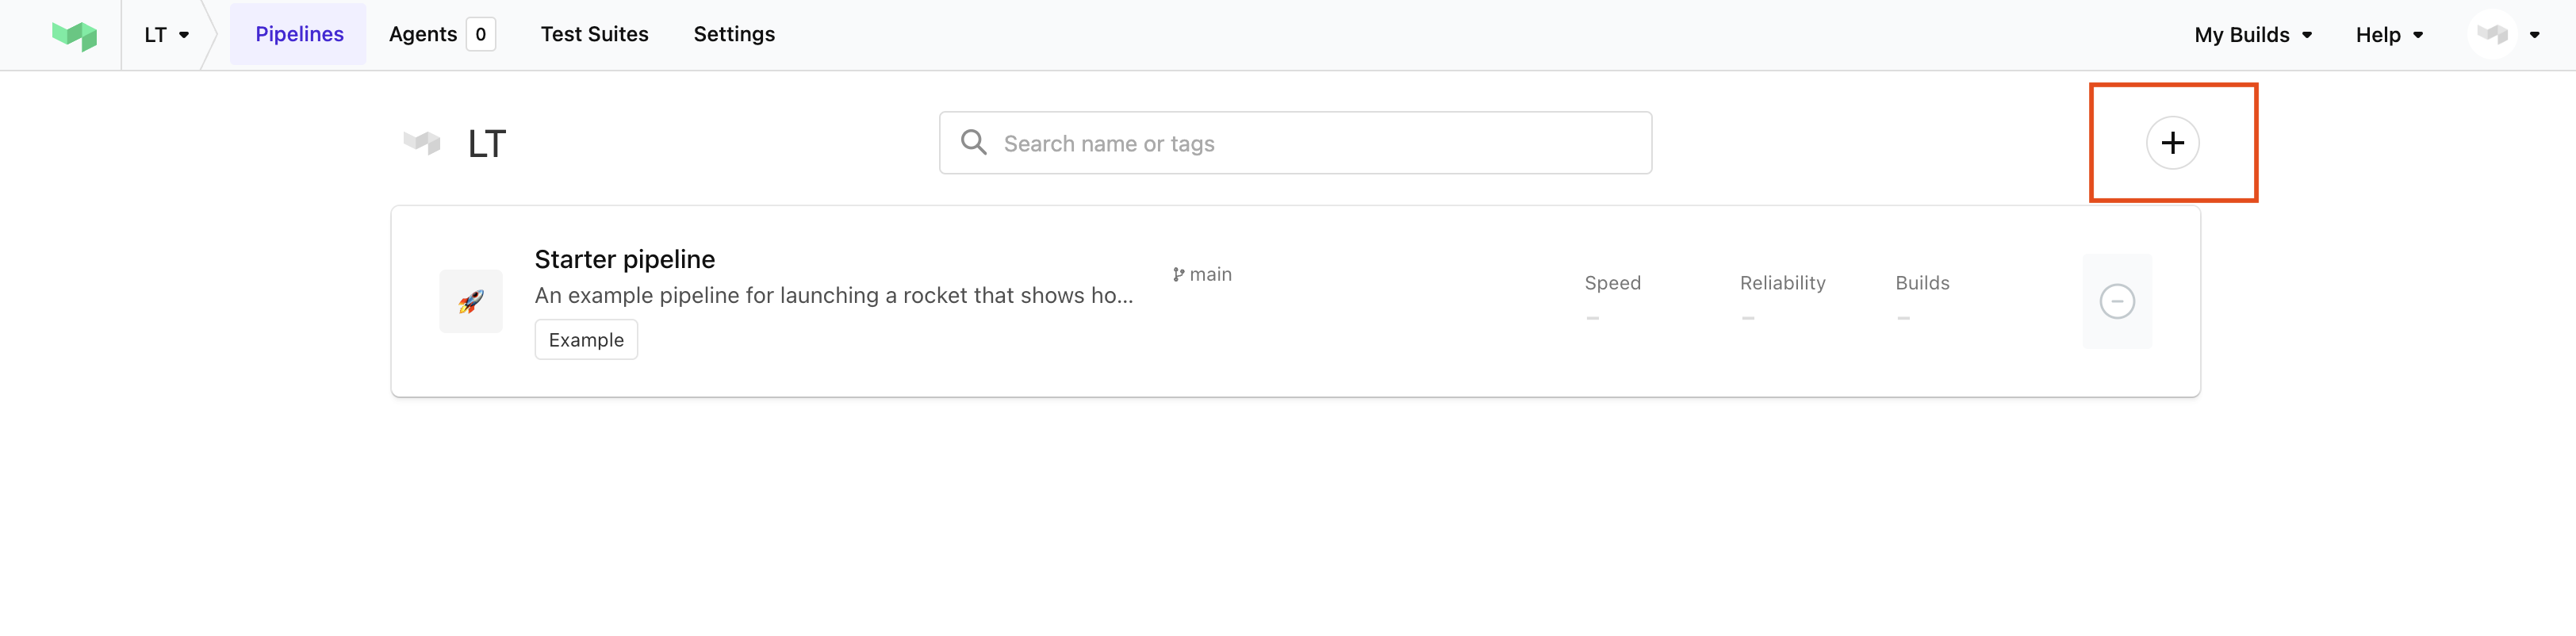
Step 1: Login to Buildkite and click the + icon to create a new pipeline
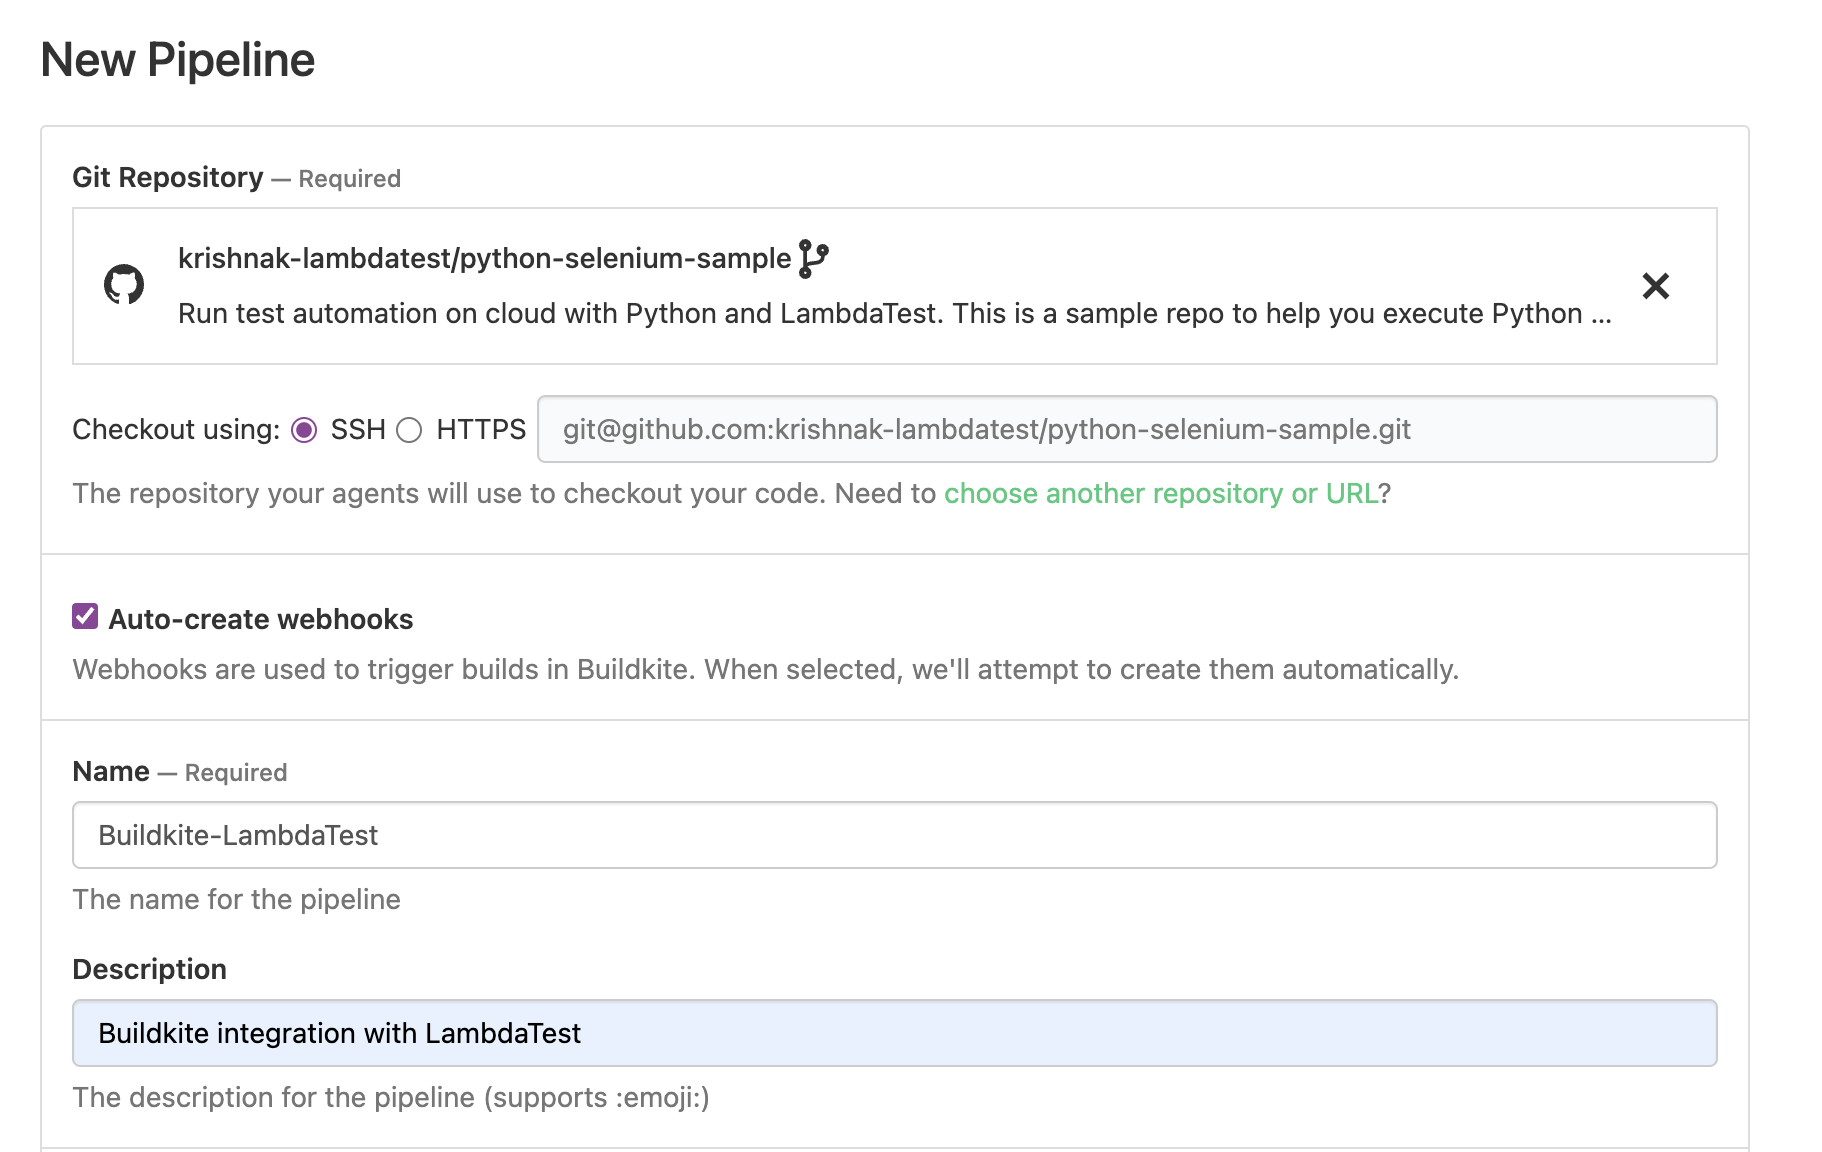
Step 2: Connect your GitHub repository. Fill the name and description fields.
You can select the GitHub account where your repository is and add the repository to setup the pipeline for it. Provide an appropriate name and description for this pipeline.
Step 3: Add TestMu AI Credentials to Environment Variables
You need to set your TestMu AI username and accesskey as your environment variables. You can retrieve them from your TestMu AI automation dashboard by clicking on the key icon near the help button or the key icon in the side navbar. The format should be as following:
LT_USERNAME=YOUR_LAMBDATEST_USERNAME
LT_ACCESS_KEY=YOUR_LAMBDATEST_ACCESS_KEY

Step 4: Add steps to add lambdatest-buildkite plugin
To add a plugin to a command step, use the plugins attribute. The plugins attribute accepts an array, so you can add multiple plugins to the same step.
steps:
  - command: 'yarn && yarn LT test'
    plugins:
      - lambdatest/lambdatest~
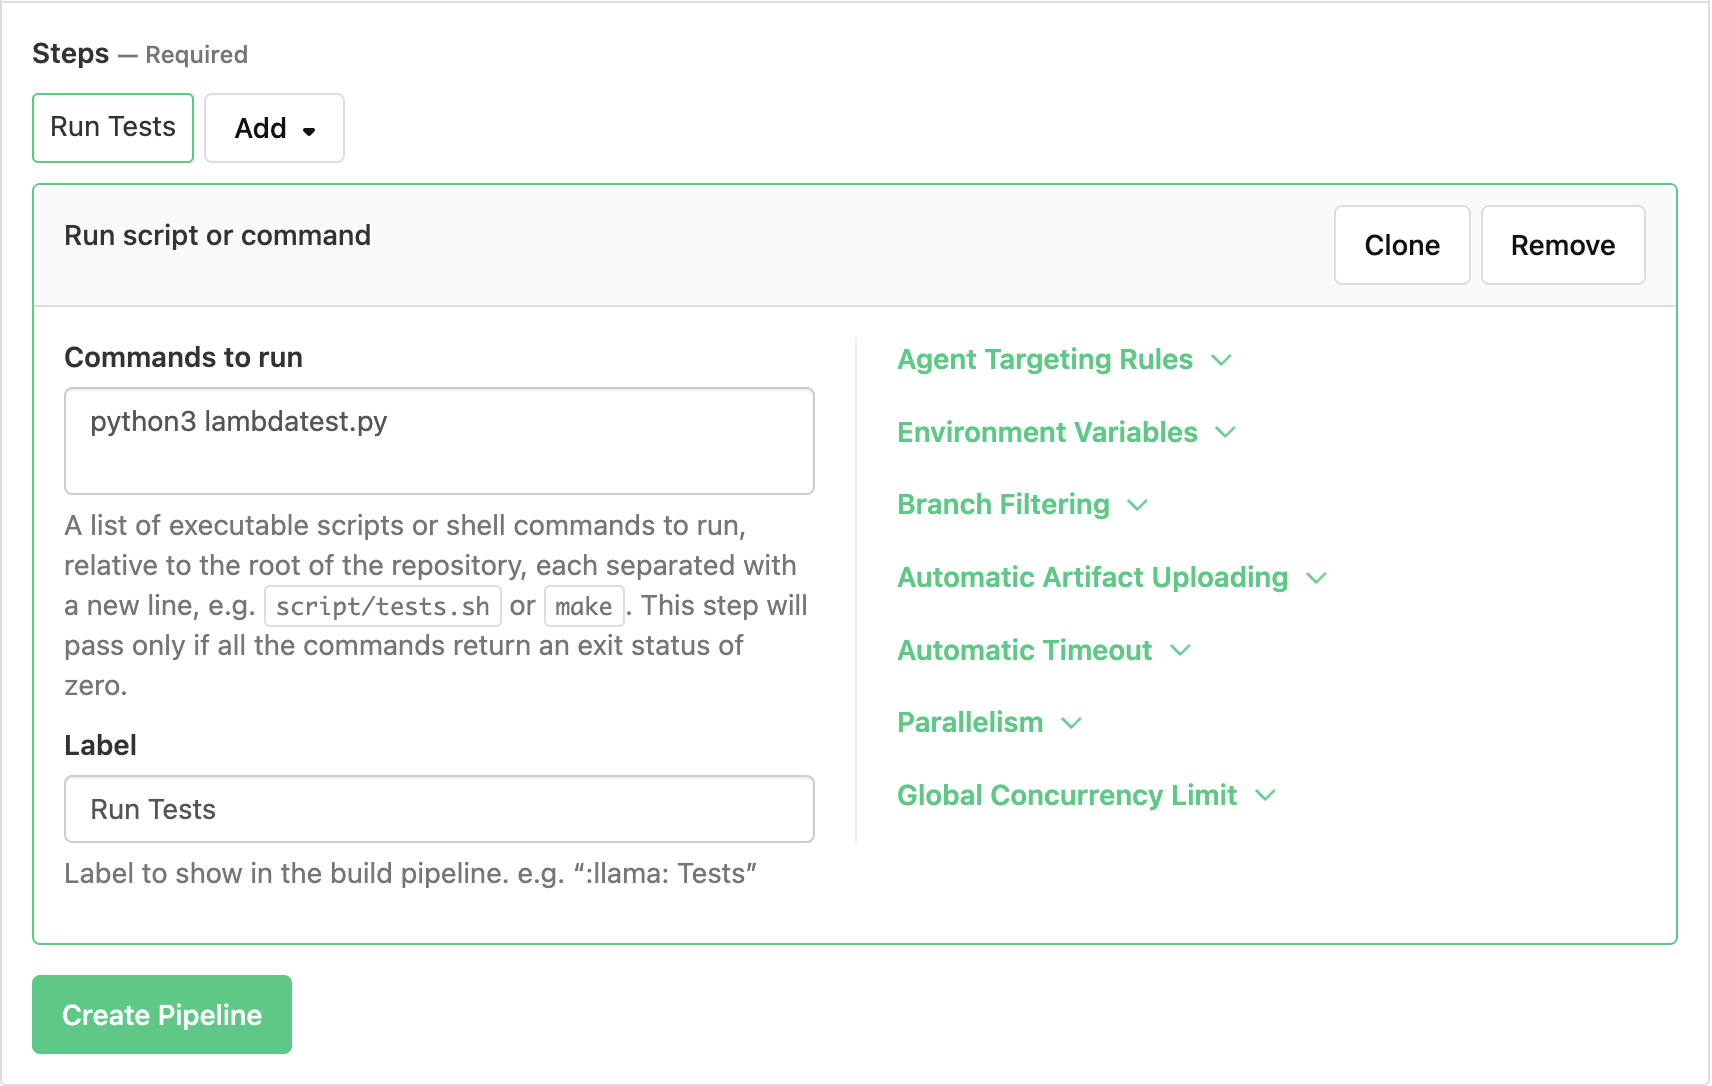
Step 5: Add steps for execution
The commands to run for test execution are to be mentioned as steps here. For example, the steps can be prerequisite package installs, executing the testing code etc.
In the example repository, there is only a single step - executing the lambdatest.py file. That can be done with the following code:
python3 lambdatest.py
You can add additional steps by clicking on the Add button. Once all the steps are added, you can click Create Pipeline.
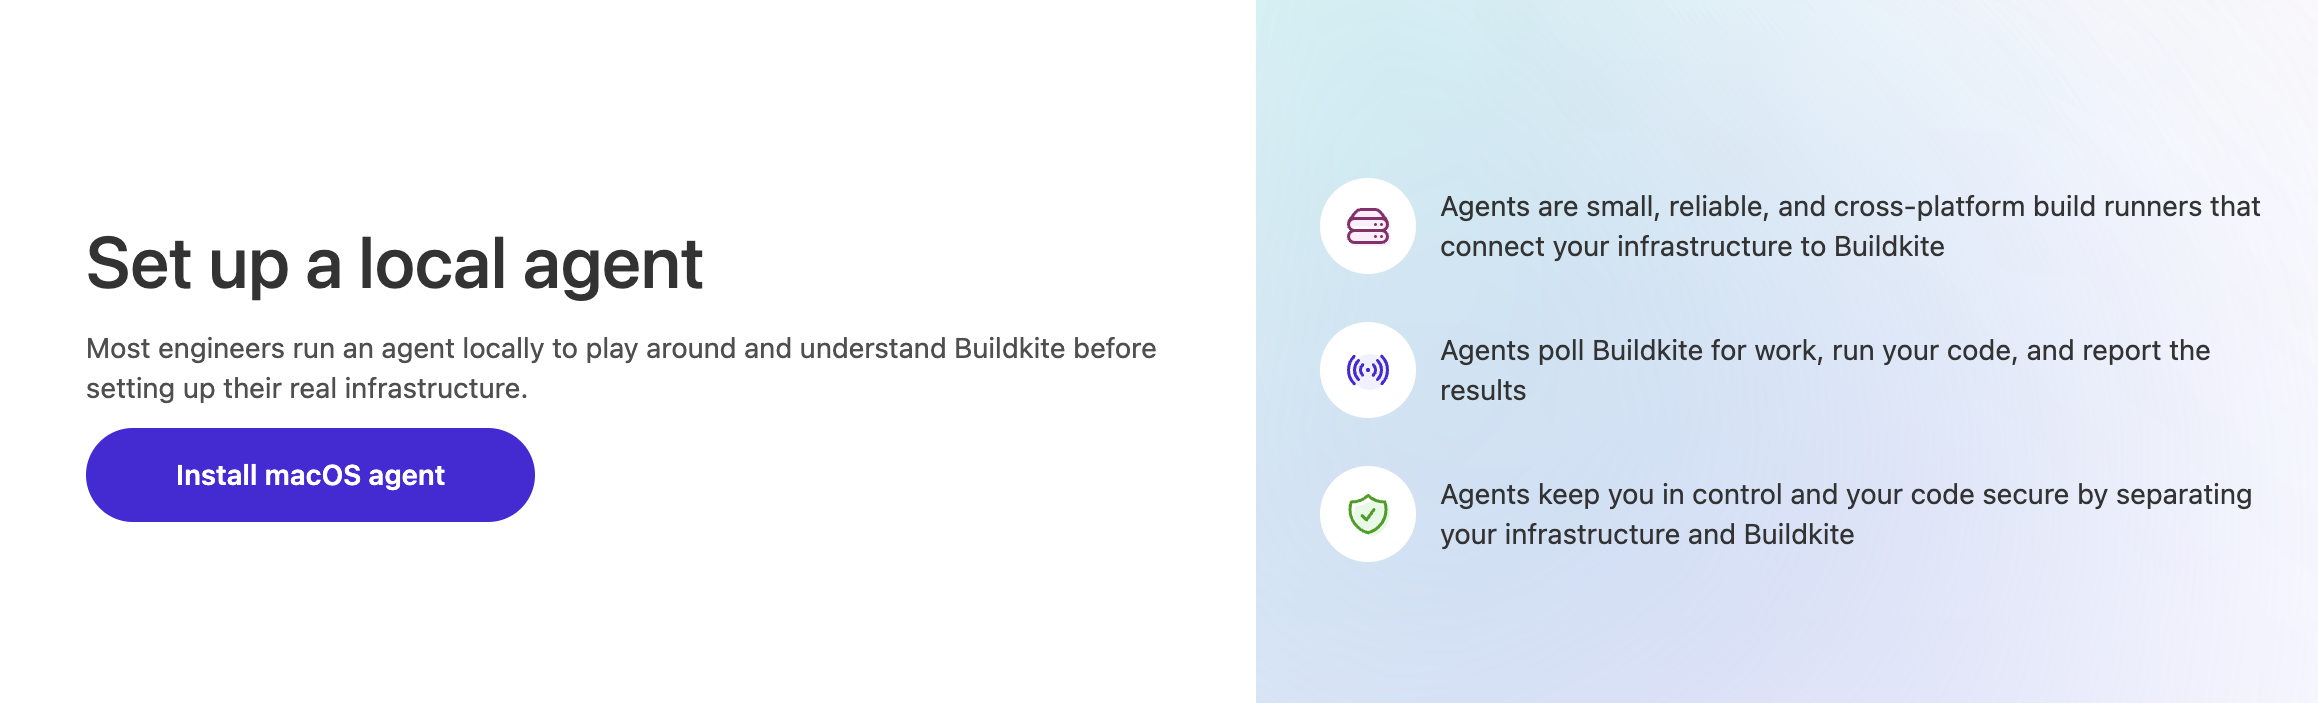
Step 6: Adding an agent
The next step is adding an agent. In this example, a local MacOS agent is used. If you have a custom agent already setup, this step is skipped.
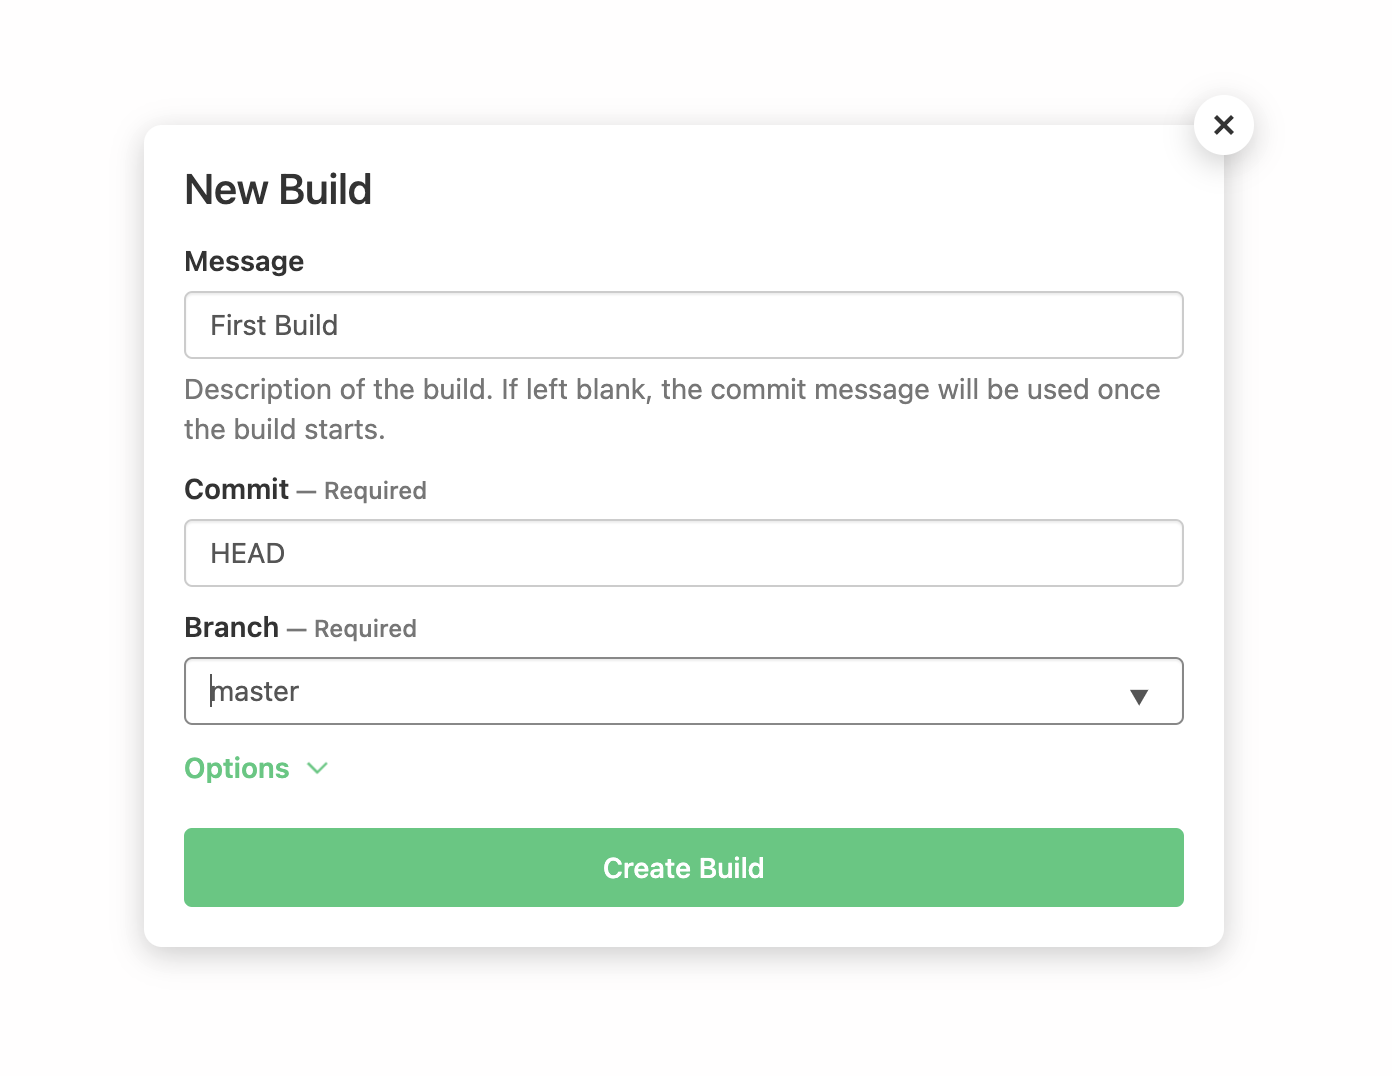
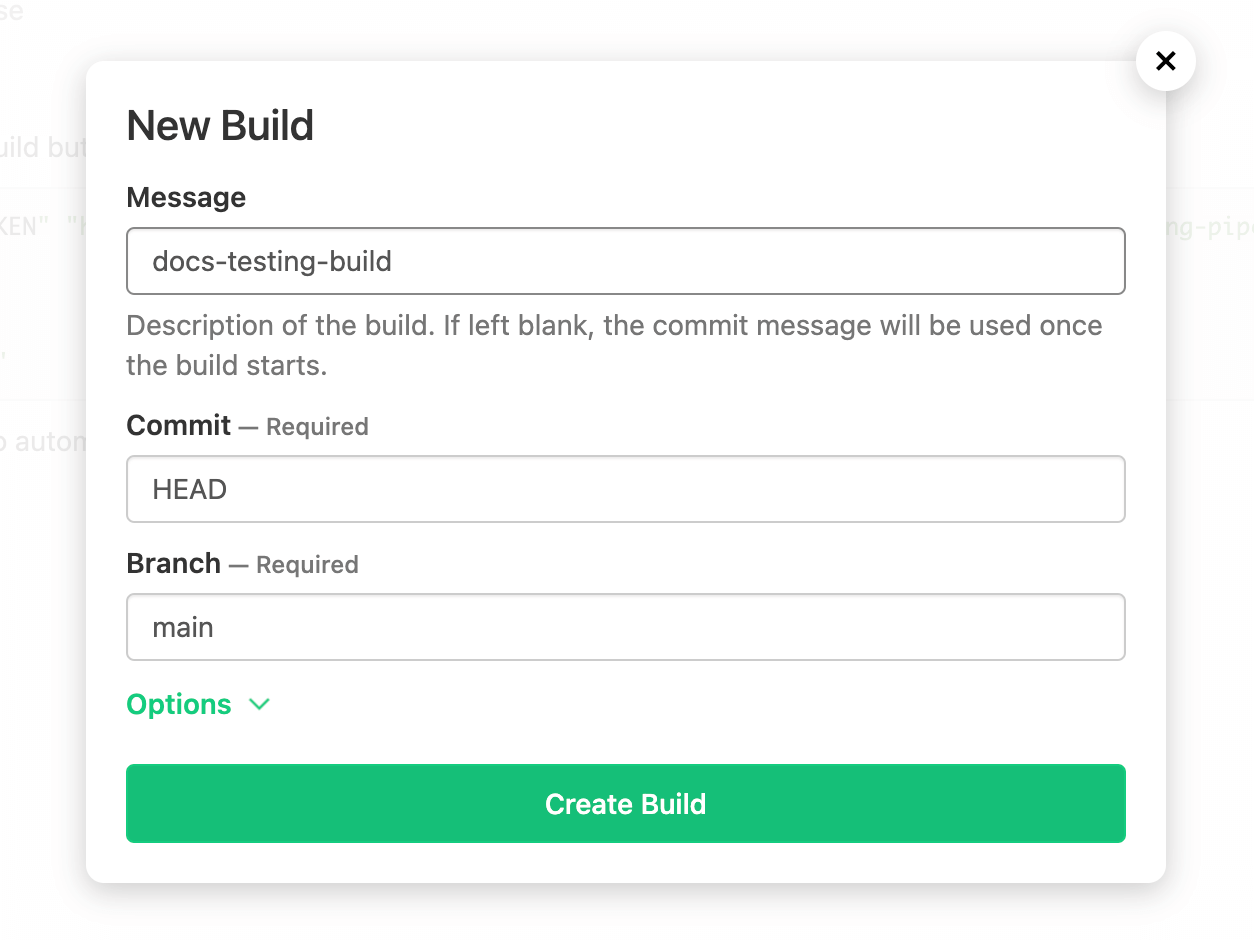
Step 7: Create and run a build
After the pipeline is created, we can create a build. To create a build, click the New Build button. In the popup, add the name of the build and the branch to build. Click Create Build.
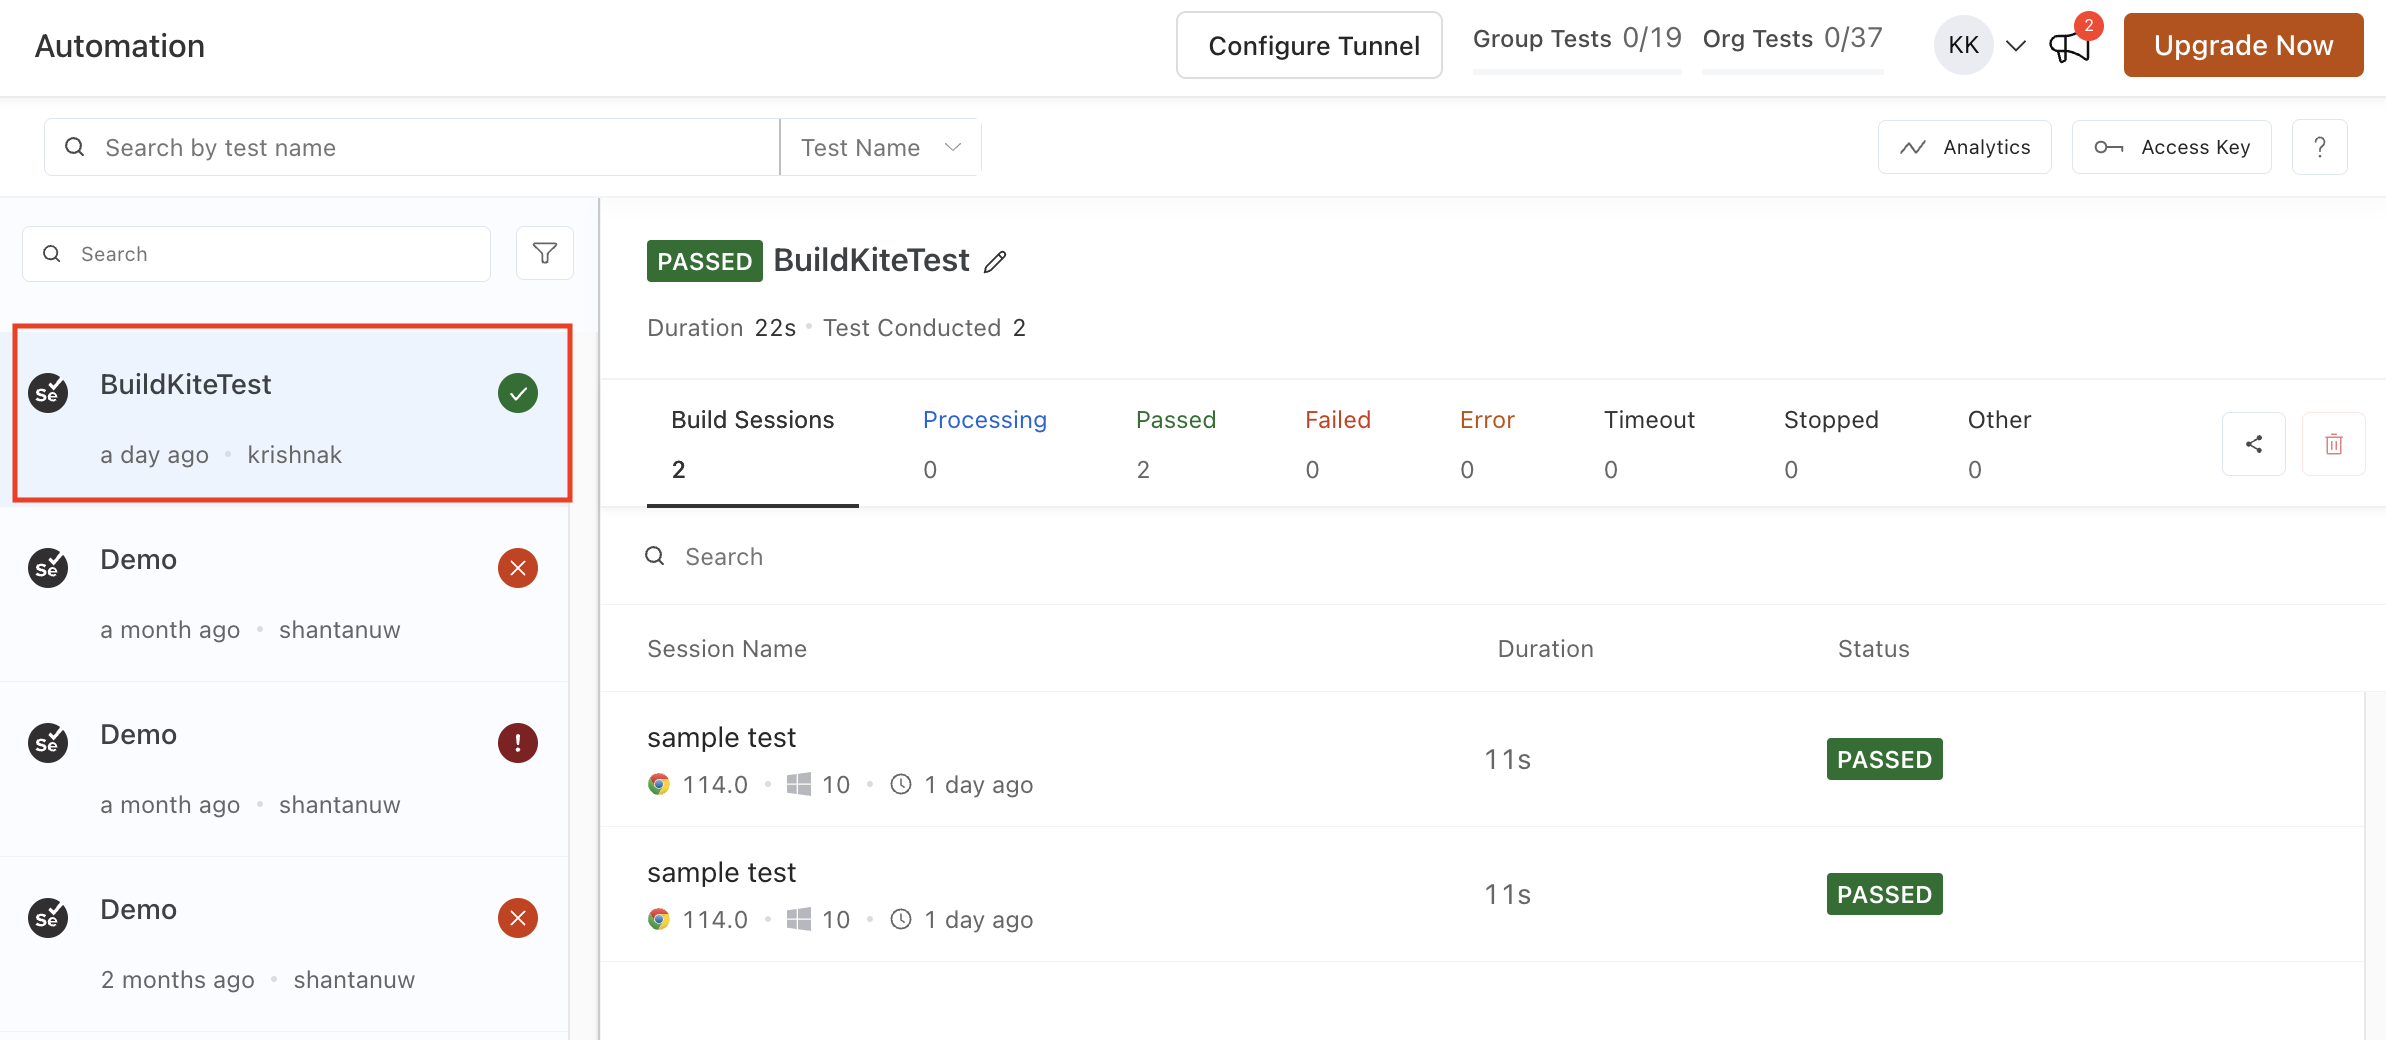
Now the build should be created and run. After the build runs successfully, you should be able to see your builds on TestMu AI Automation Dashboard.
That is it! You can also add a webhook to your repository to trigger the build whenever a change is done in the repository.
Monitor and analyze your test result on the TestMu AI automation dashboard.
Integrating Buildkite with TestMu AI via YAML
Step 1: Login to Buildkite.
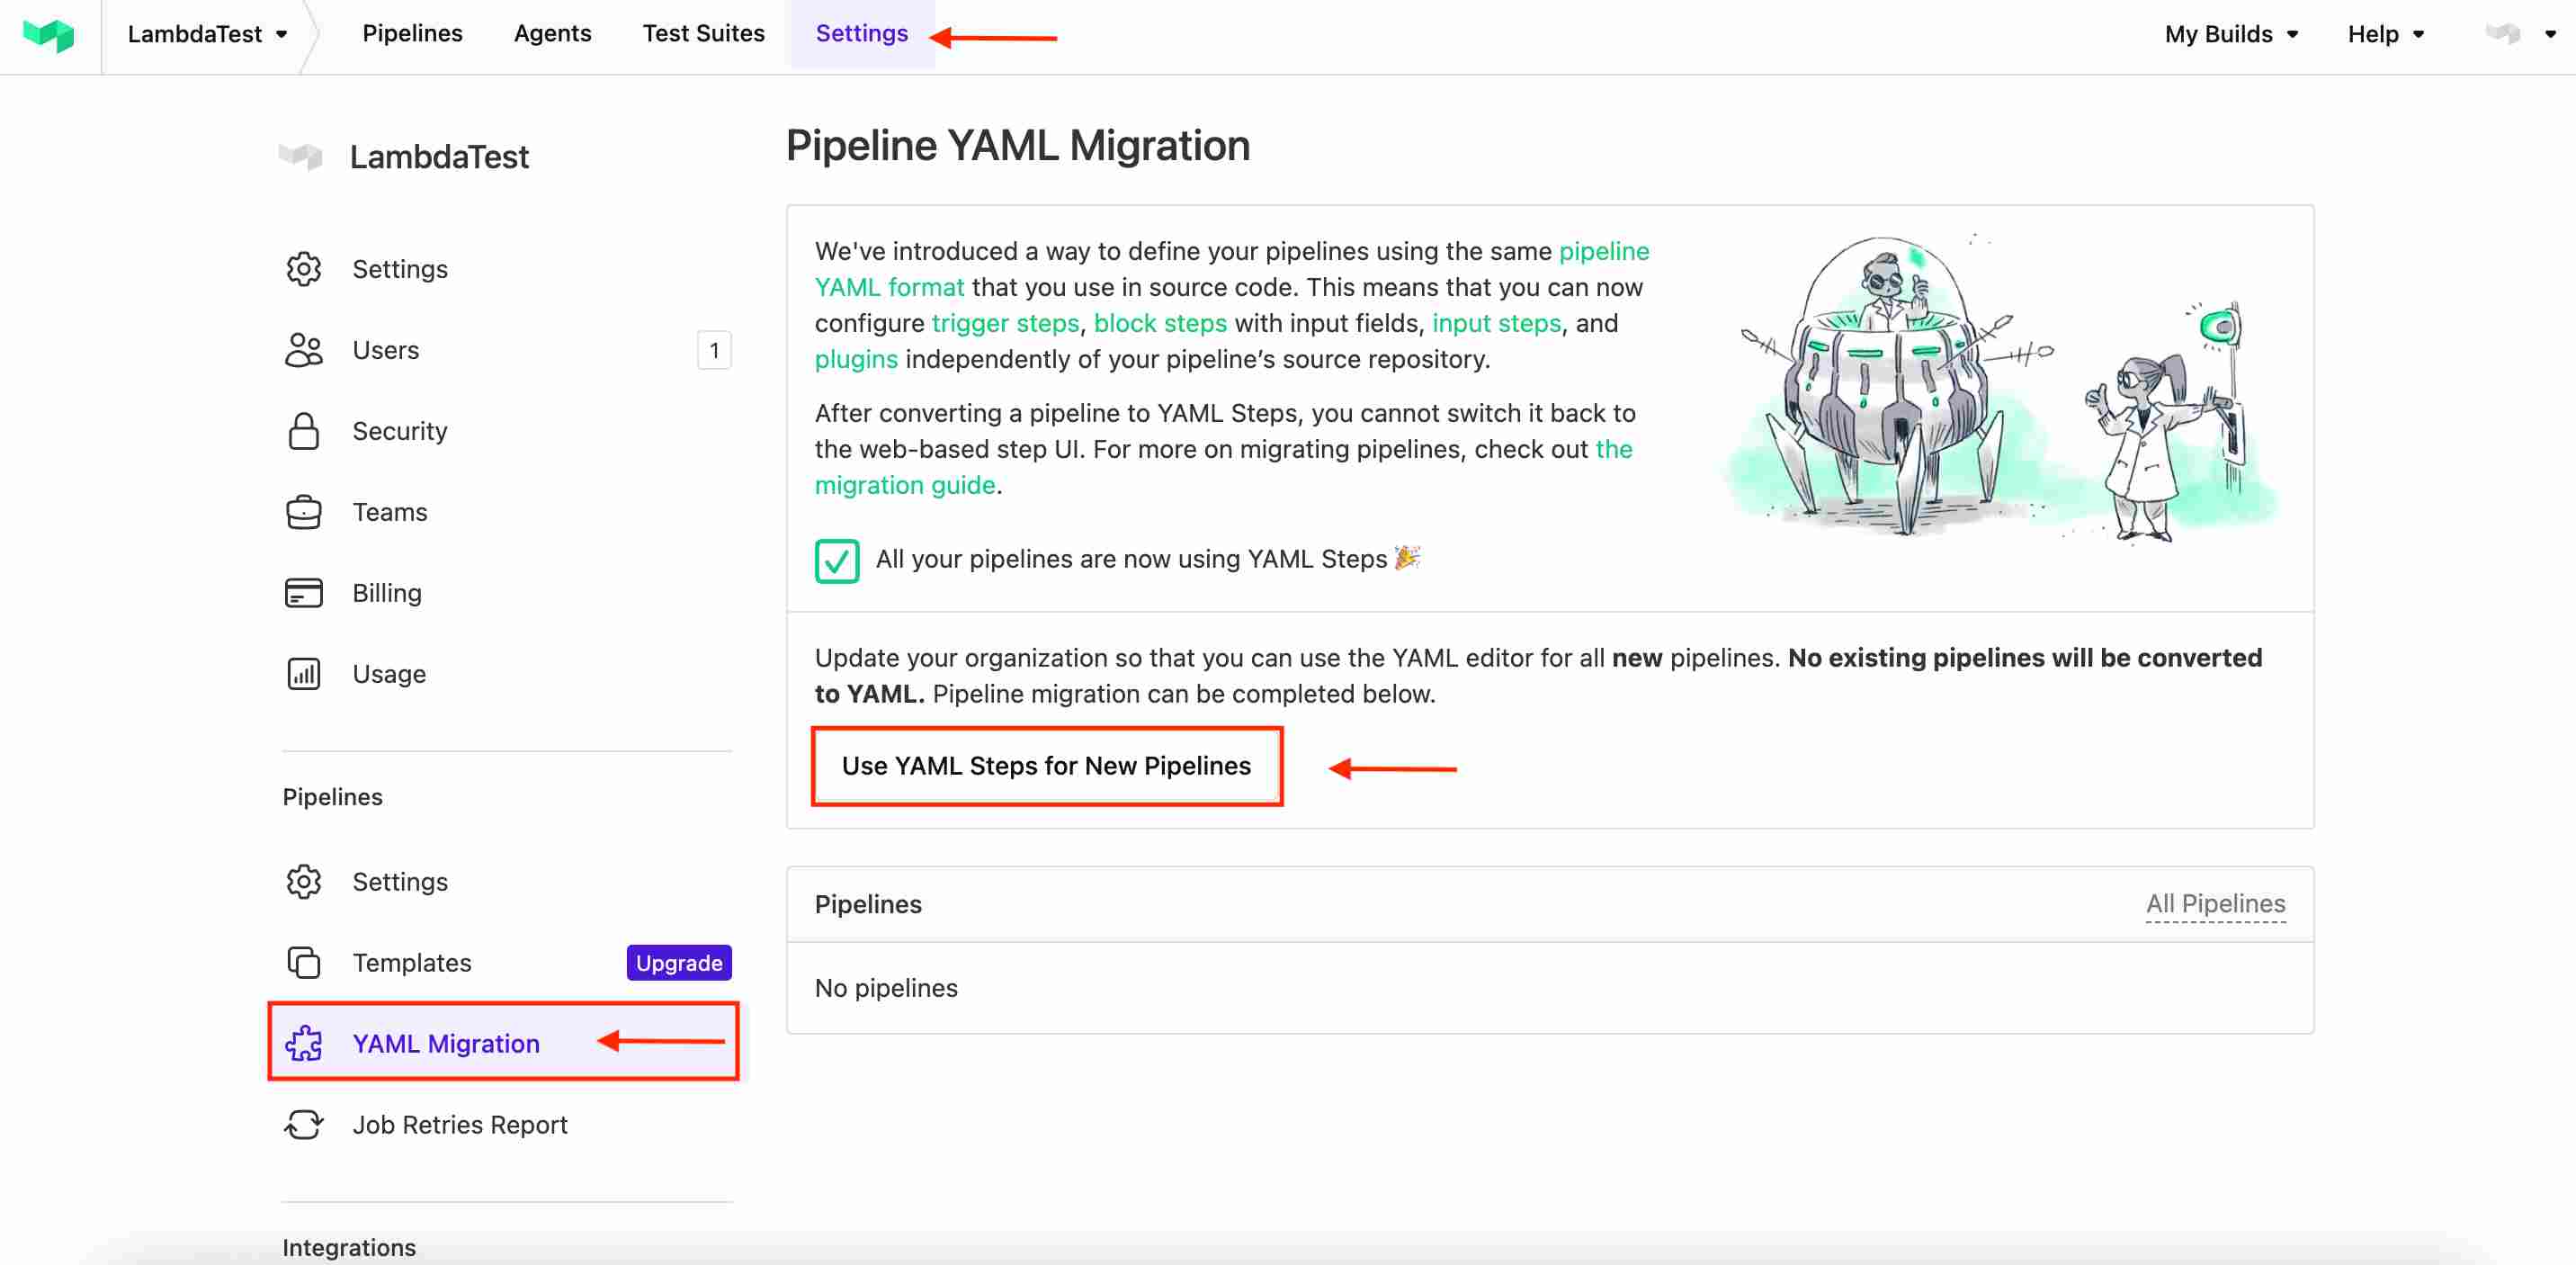
Step 2: Select Settings > YAML Migration to open the YAML migration settings. Select Use YAML Steps for New Pipelines, then confirm the action in the modal.
Step 3: Go to your desired GitHub repository for which you want to build the pipeline.
Step 4: In the root of your repository, create a file named pipeline.yml in a .buildkite directory. In pipeline.yml, define your pipeline steps.
steps:
  - label: ":docs-testing:"
    commands:
      - python3 lambdatest.py
Step 5: Now go to your Buildkite dashboard and click on the Pipelines > select New pipeline.
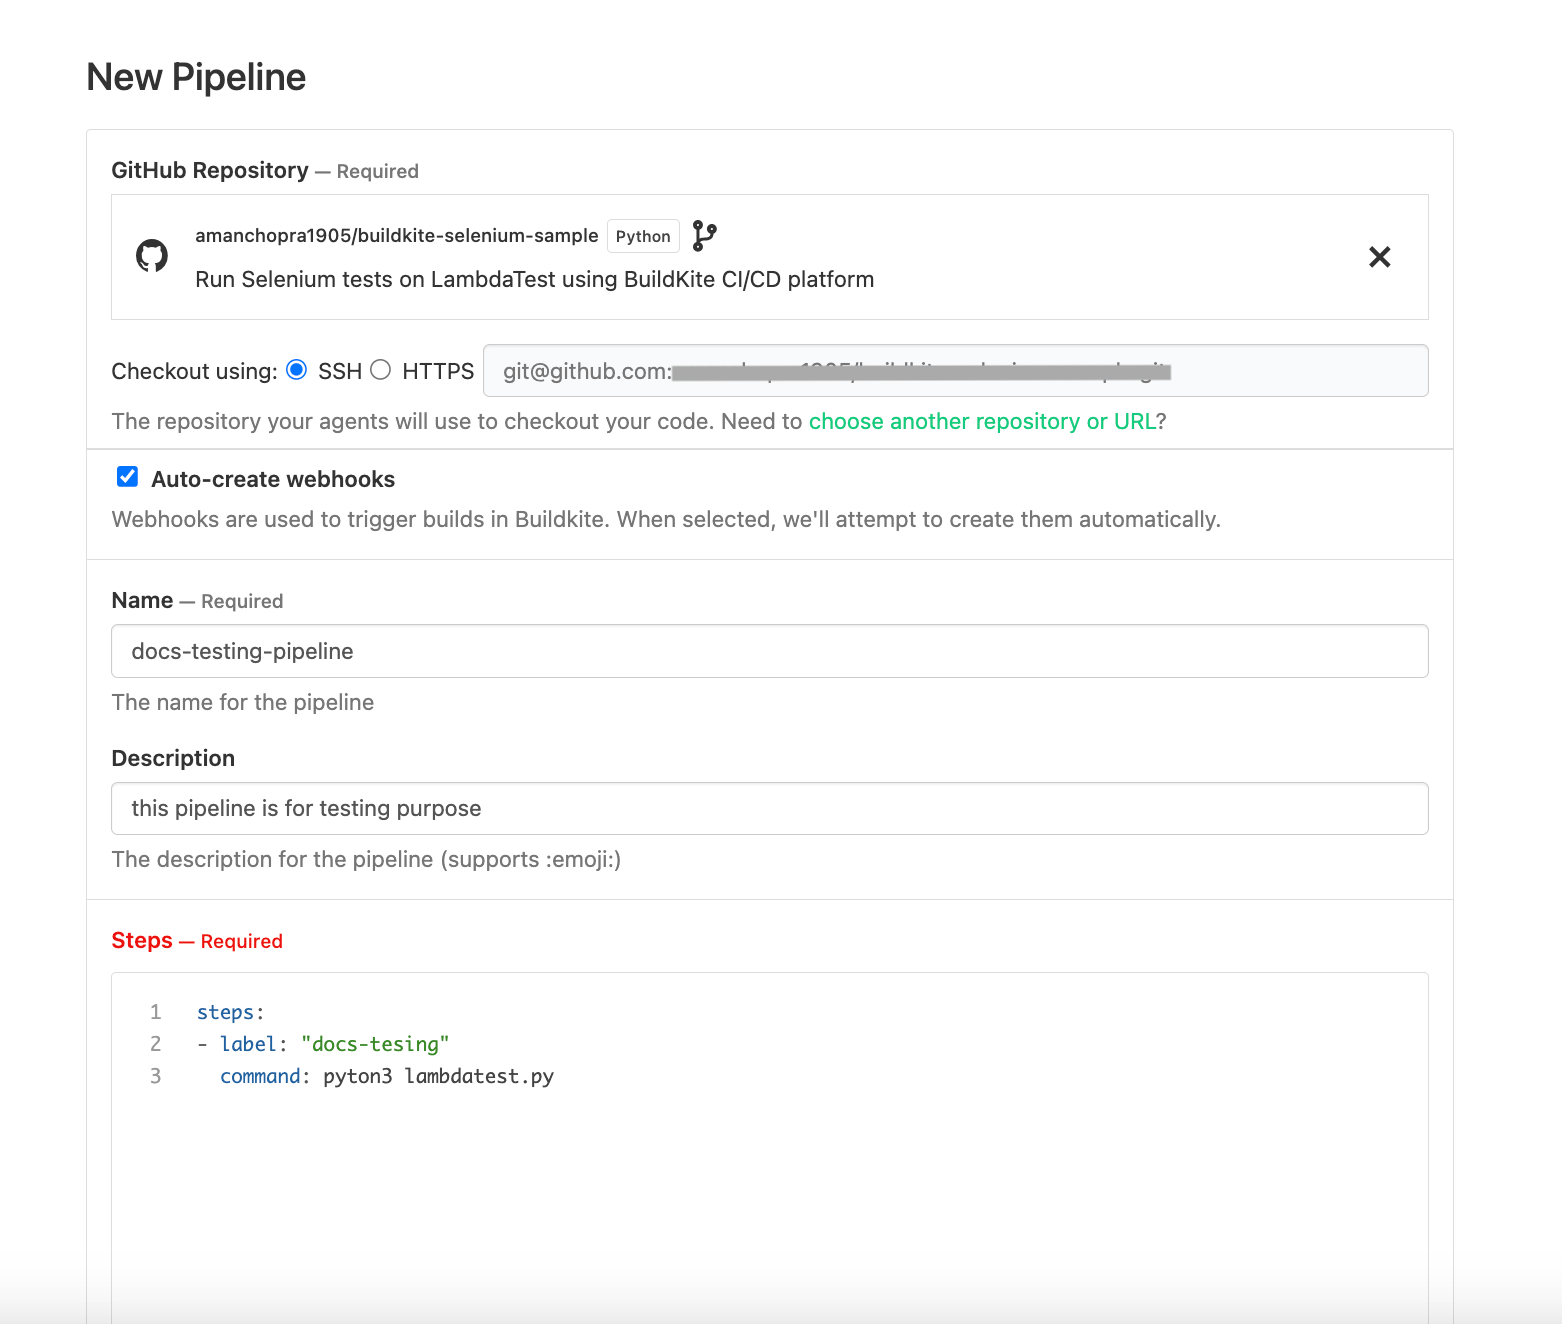
Step 6: Select the appropriate repository from the list of existing ones in your account.
Step 7: Enter your pipeline's details in the respective Name and Description fields. You can always change these details later from your pipeline's settings.
Step 8: In the Steps editor, ensure there's a step to upload the definition from your repository.
Step 9: Click on the Create Pipeline button.
Step 10: On the next page showing your pipeline name, click New Build. In the modal that opens, create a build using the pre-filled details. Select Create Build.
-
Run the pipeline whenever you make changes you want to verify. If you want to add more functionality, go back to editing your steps and repeat.
-
If you've configured webhooks, your pipeline will trigger when you push updates to the repository. Otherwise, select New Build in the Buildkite dashboard to trigger the pipeline.
Monitor and analyze your test result on the TestMu AI automation dashboard.
Reliably deploy your code at scale using Buildkite integration with TestMu AI, and ensure it looks robust across every browser to provide a seamless user experience to all your visitors. Happy Testing!
