Step 2: How to Associate the Test Cases
Test Plan works in Association with specific Visual Studio subscriptions.
After setting up a Test Plan, now you need to associate your test cases as well with the Test Plan. To perform the same, we must have a Visual Studio IDE installed in our local machine. Login with same credentials for Visual Studio as in Test Plan.
Follow the steps below to compelete the test case association:
Step 1: In your Visual Studio Code IDE, click on a sln file in a C# project.
NOTE : Login with the same credentials for Visual Studio as in the Test Plan.

Step 2: Navigate to the Team Explorer view.
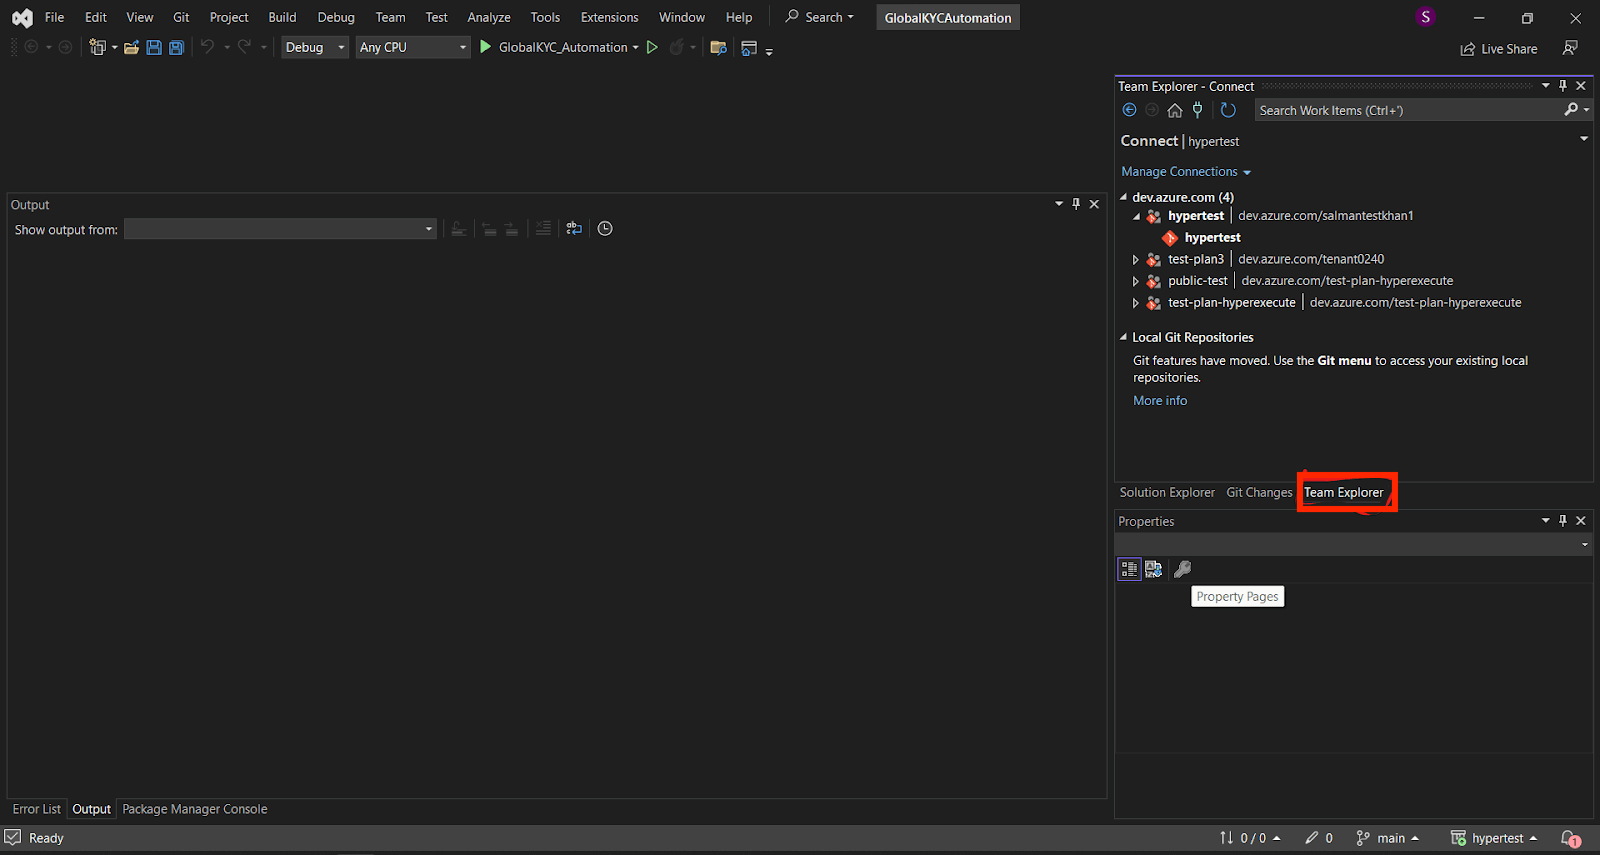
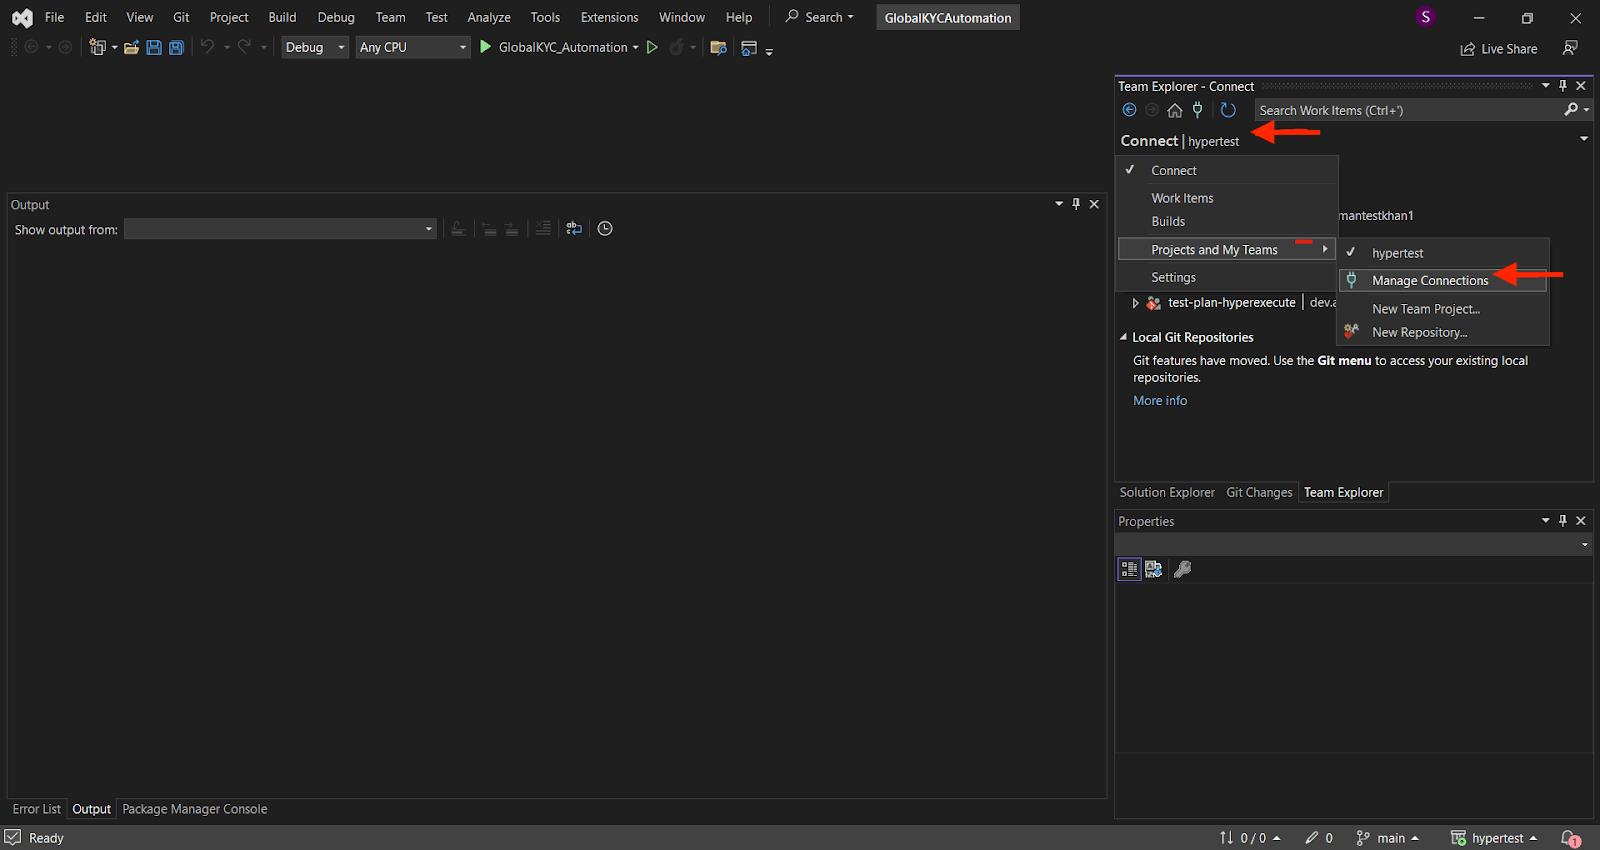
Step 3: Click the Home icon and pull down the list to the right of Home icon.
-
Select the Projects and My Teams >> Manage Connections.
-
Click on Manage Connections >> Connect to a Project.
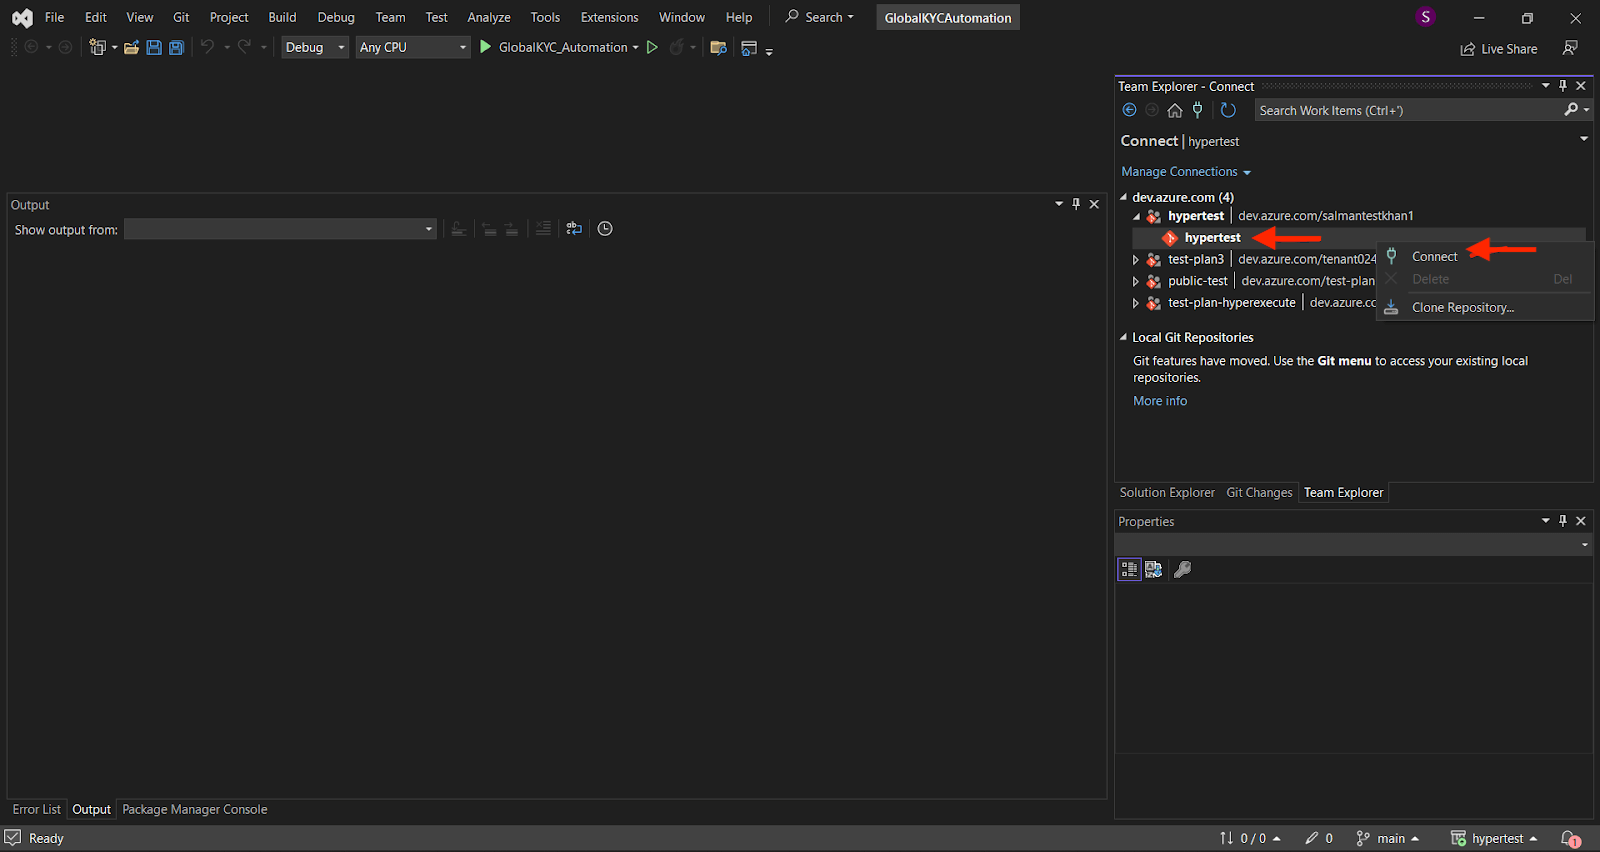
Step 4: Select your repository, click the right button of your mouse, and then click the Connect button.
NOTE : The connection might ask you to connect with GitHub; please provide access to GitHub as well.
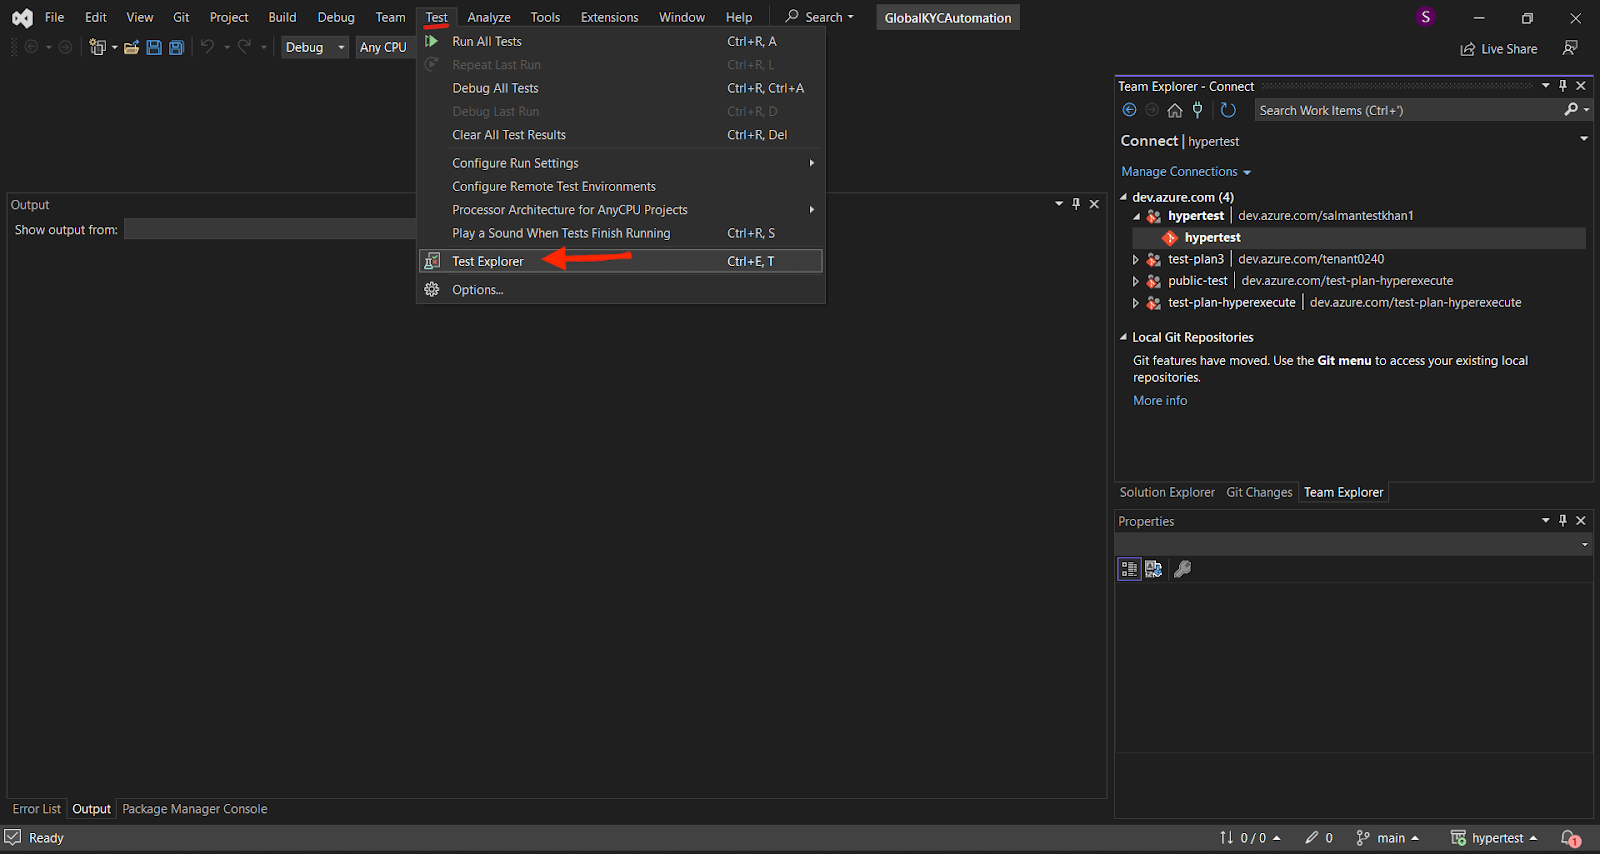
Step 5: Once connected, click on the Test menu, then Test Explorer.
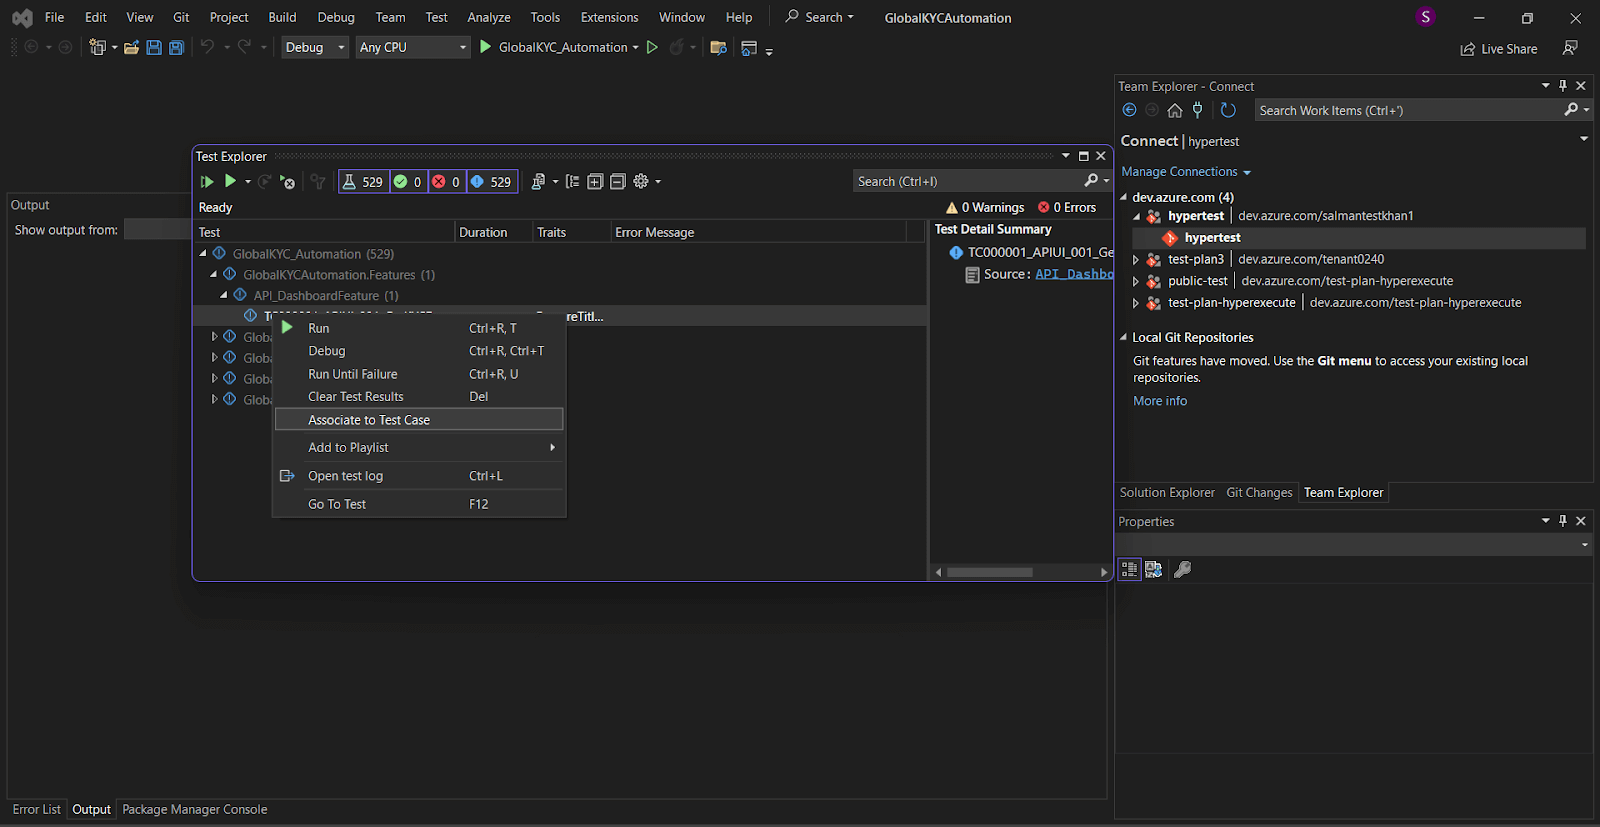
Step 6: Inside the Test Explorer, select any test, right click and select Associate to Test Case.
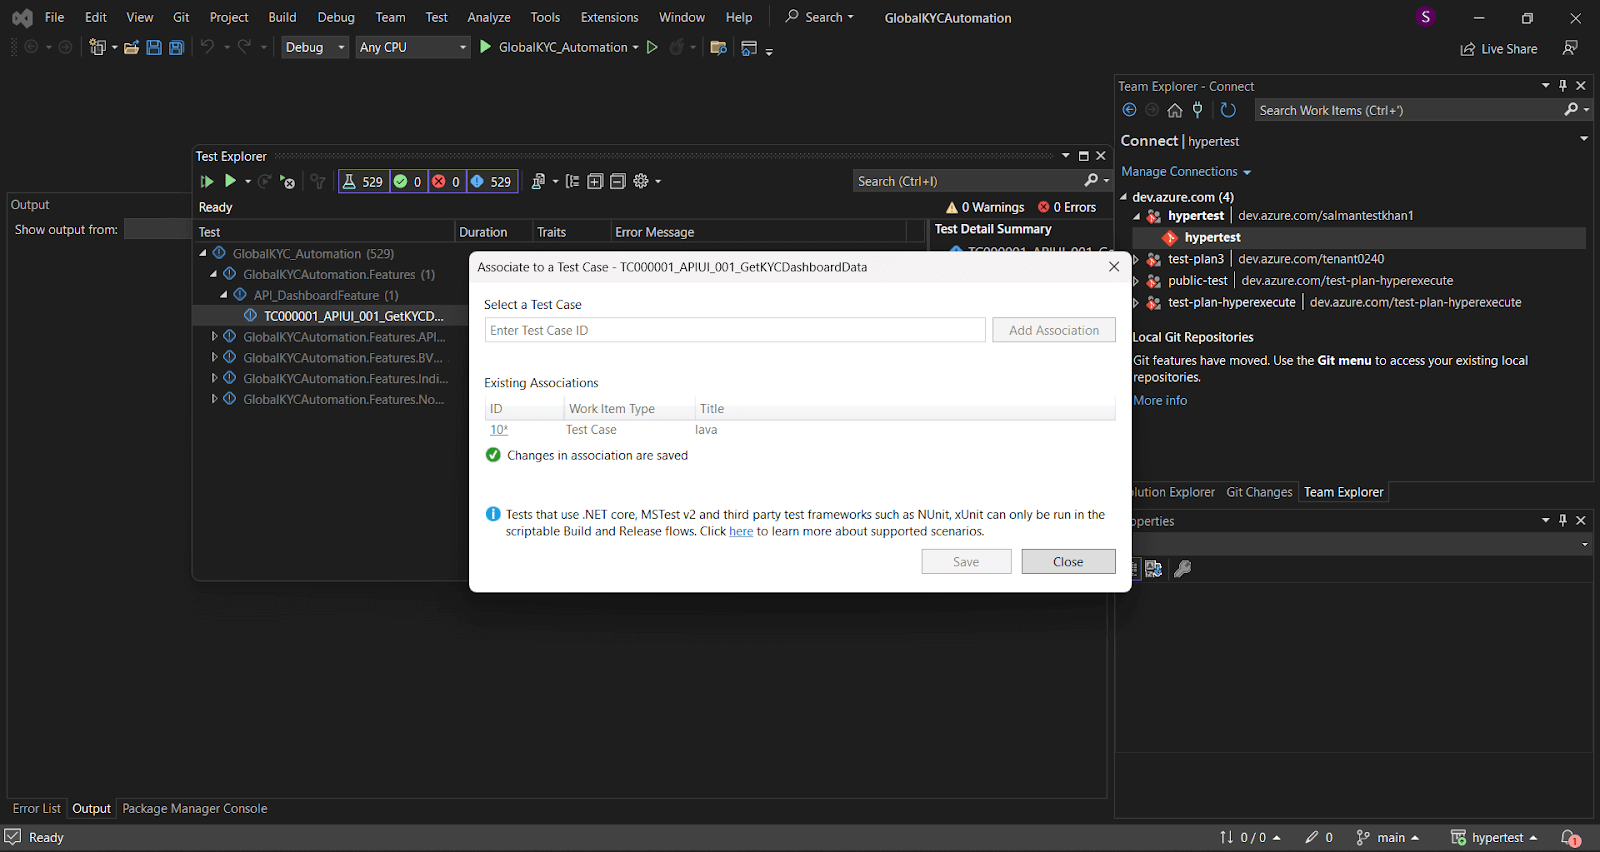
Step 7: Enter the Test Case ID, click on Add Association, and then click the Save button. This will associate the test with the Test Case ID in the Test Plan.
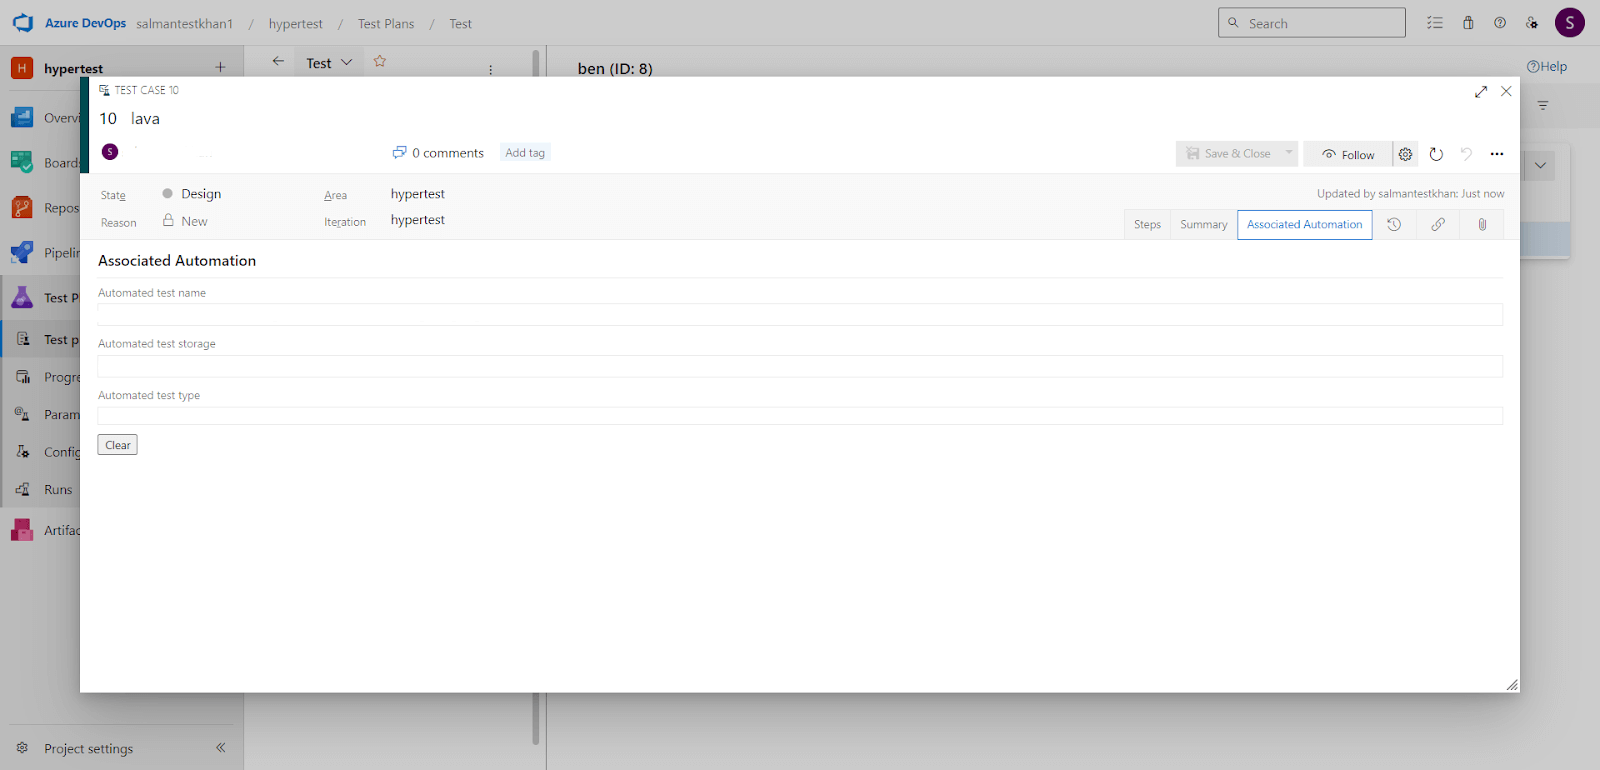
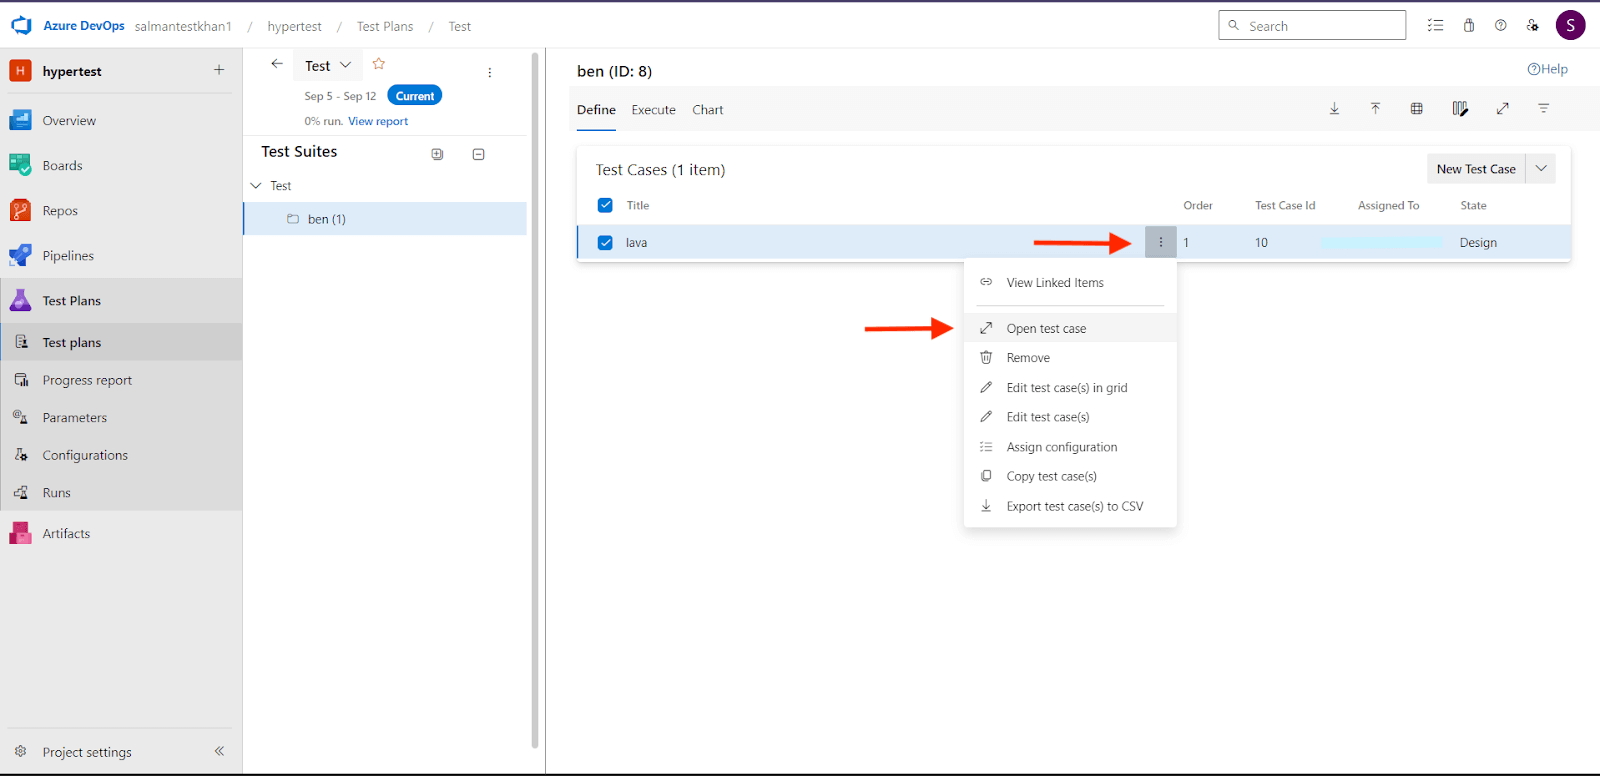
Step 8: You can check the associated test in test plan by hovering on three dots beside test case name and click on Open Test Case.
Associated test cases will look like this: